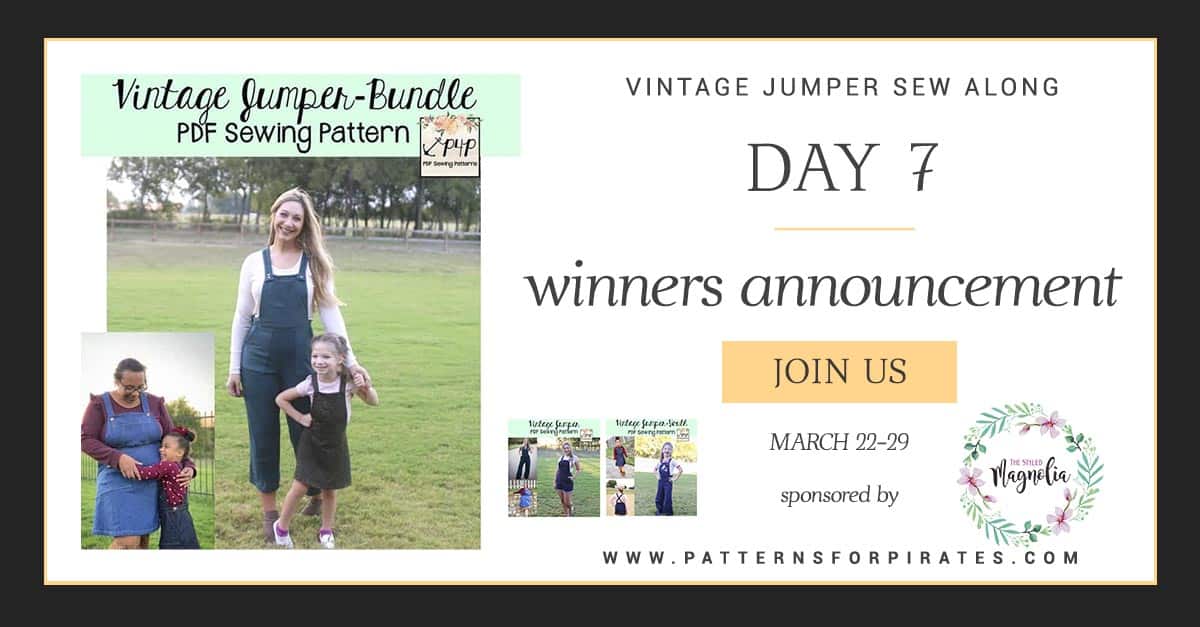
Vintage Jumper Sew Along – day 7
Thank you all for joining me last week for the Vintage Jumper Sew Along. I loved seeing all the beautiful jumpers being created. I know you have been waiting for this post so I won’t keep you in suspense any longer.
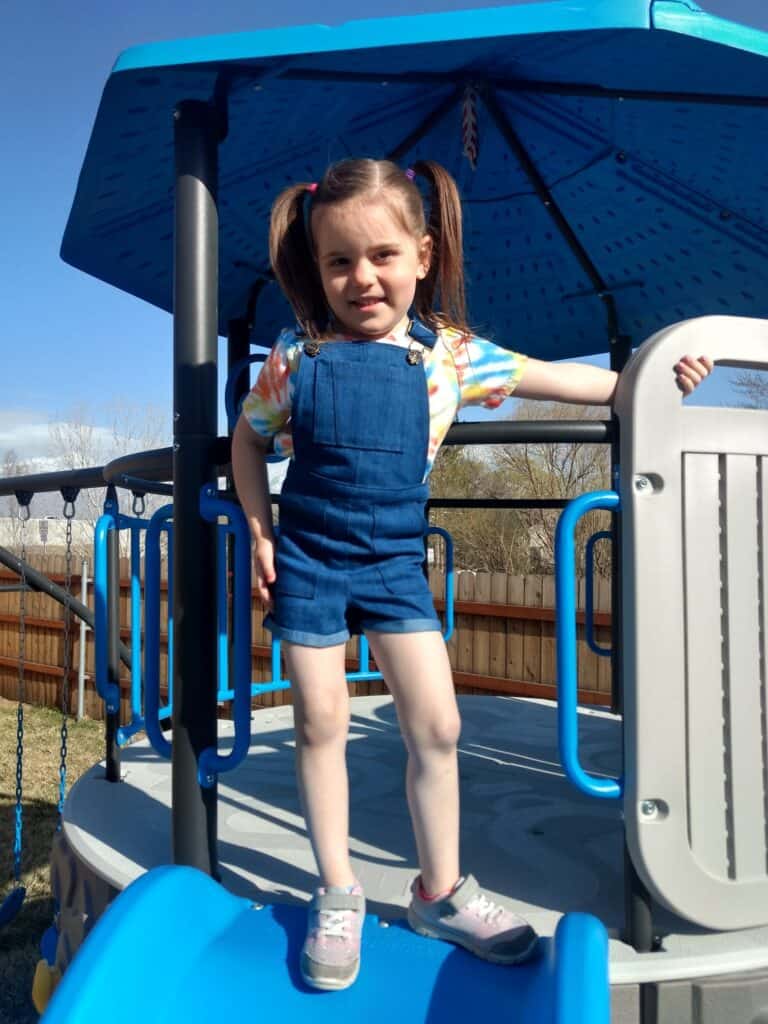
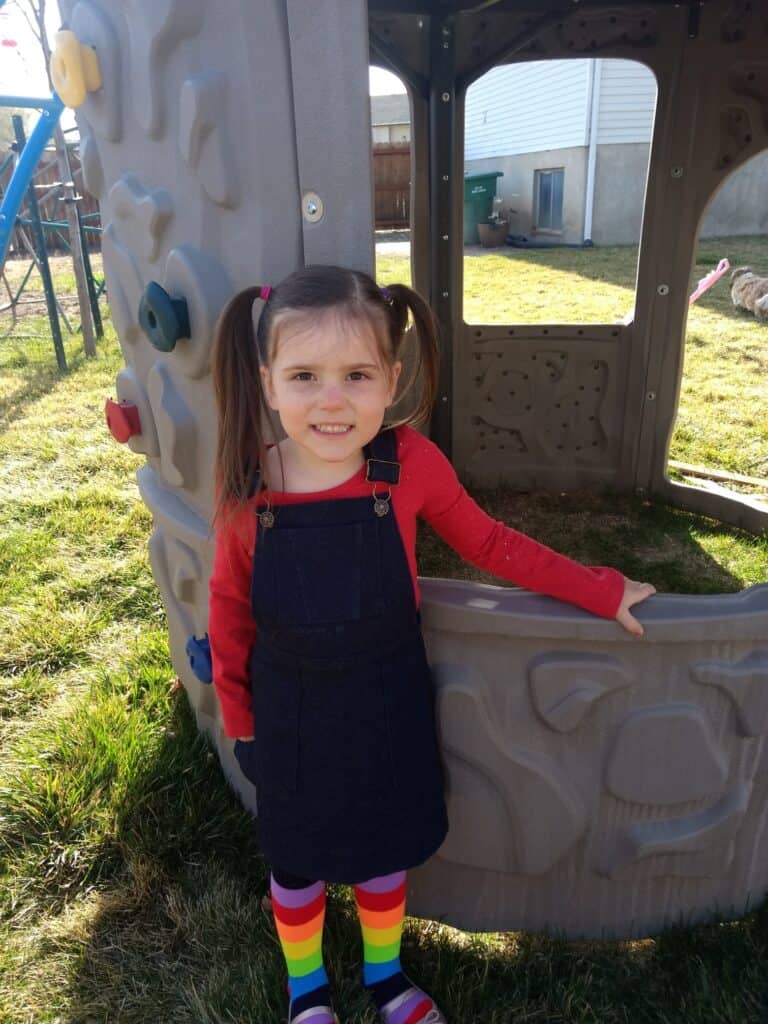
Our sew along winner is: Brianna Lynn! Brianna sewed not one, not two but THREE Vintage jumpers for her beautiful little one. What an outstanding job! Brianna won a $20 gift certificate to Patterns for Pirates and a $50 gift card to The Styled Magnolia Custom Fabrics.

We have a runner up winner to announce too. Congratulations, Darci Friberg! Darci will receive a $20 gift card from Made for Mermaids.

Huge THANK YOU to our Sew Along sponsor for not only providing the prize but also the fabric I used for my own Vintage Jumper.

As I pass the baton to Colleen from M4M, I wanted to remind you about the Spring Sale and Capsule Contest going on right now on both the P4P and the M4M sites. See you back for our next sew along in May!
Vintage Jumper SAL | DAY 1 (cut fabric)
Vintage Jumper SAL | DAY 2 (Back darts, front & back pockets, crotch & in seam)
Vintage Jumper SAL | DAY 3 (out seam)
Vintage Jumper SAL | DAY 4 (straps, front bib)
Vintage Jumper SAL | DAY 5 (waistband)
Vintage Jumper SAL | DAY 6 (button holes, buttons and hem)
Vintage Jumper SAL | DAY 7 (winners announcement)

Spring Sale and Capsule Contest
We’re teaming up with my sister over at Made for Mermaids for another Capsule Contest!
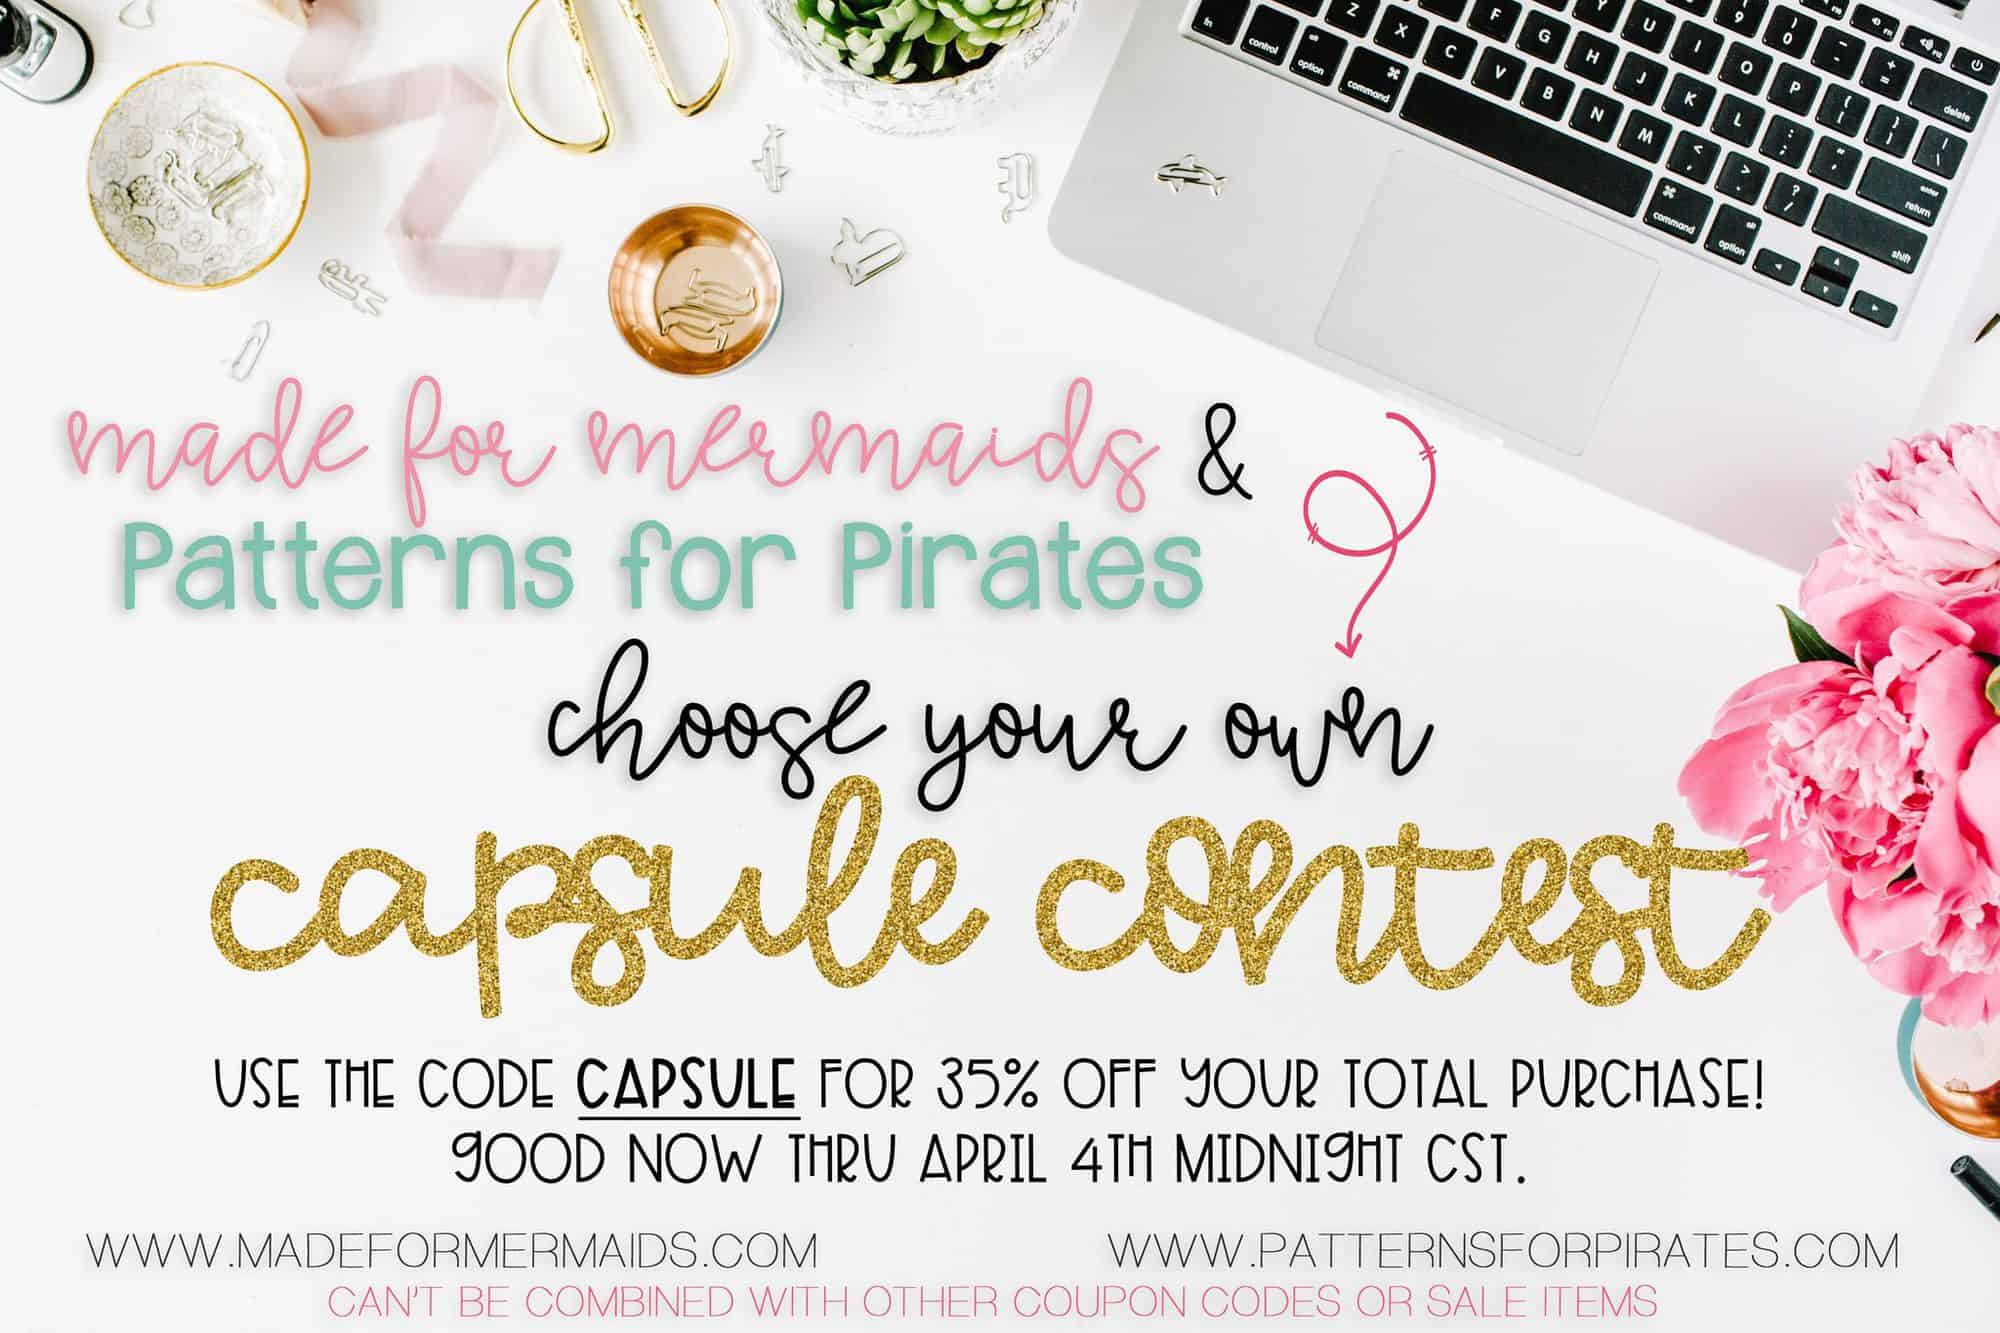
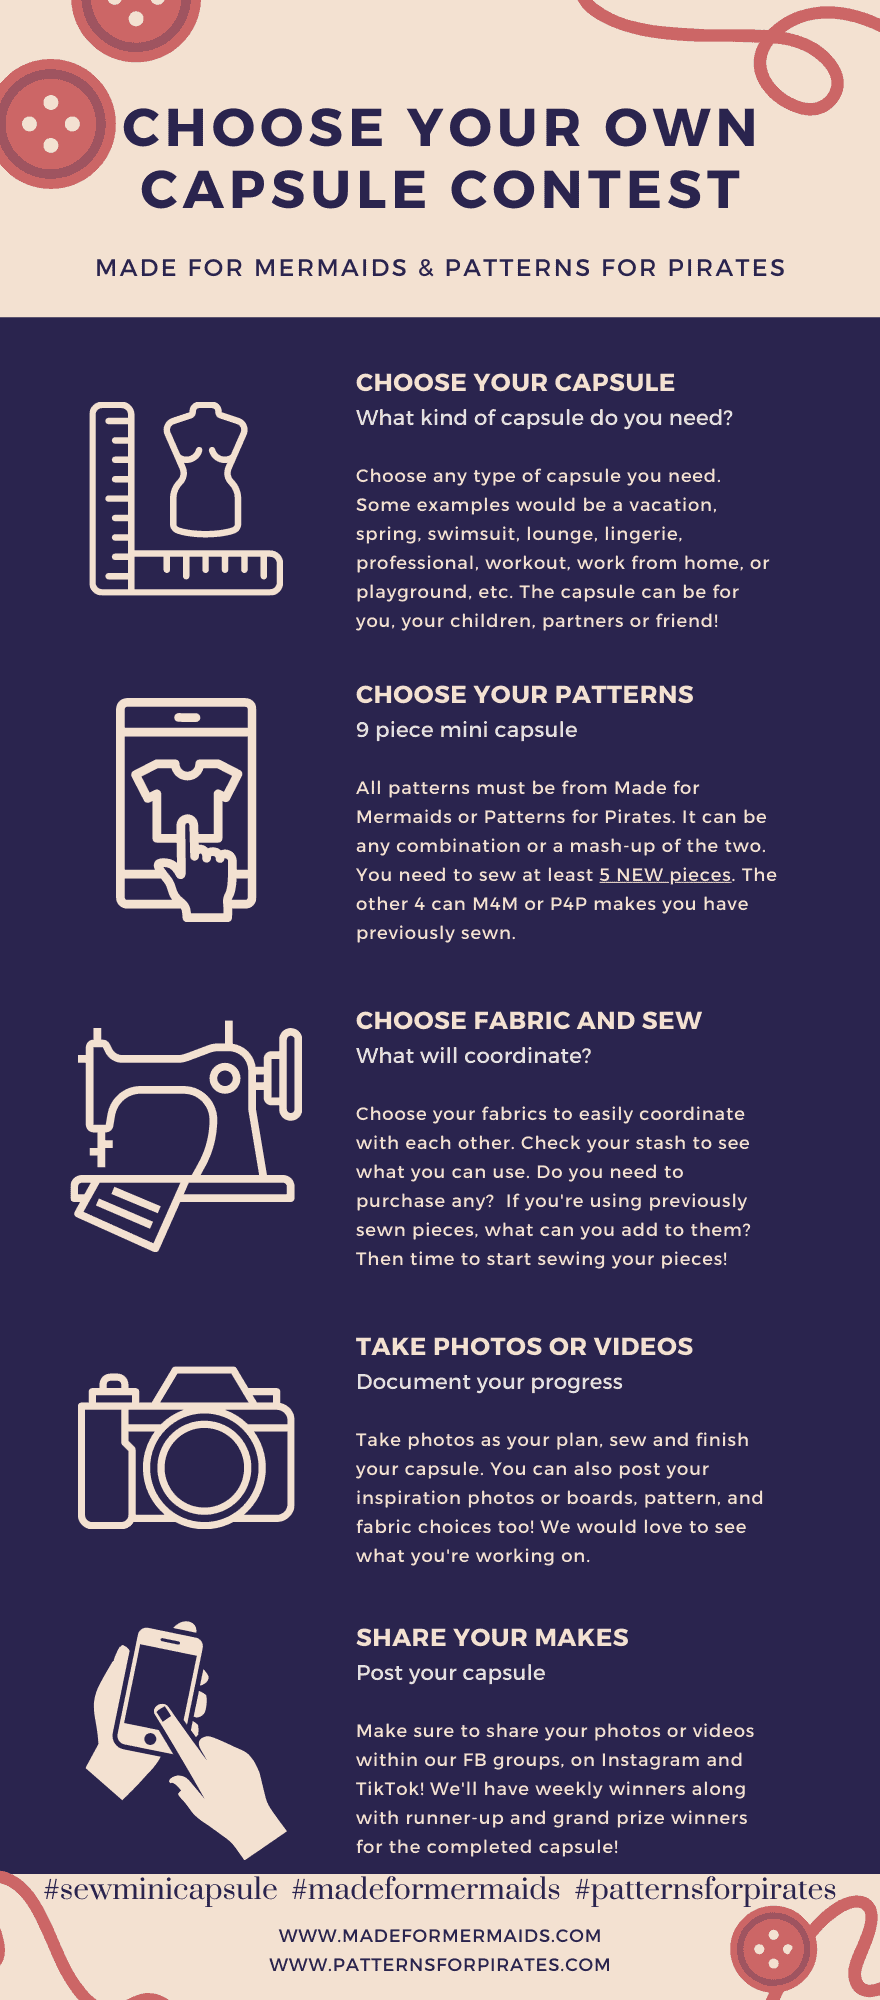
We’ve done a few in the past and they’re a great motivator to create a small capsule that really fills out your or a loved one’s closet with purposeful makes! You can use any M4M or P4P patterns to create a 9 piece capsule. We know creating 9 pieces is a lot, so feel free to use a couple old makes (still must be a M4M or P4P pattern) to work off of. We’re asking for at least 5 NEW makes in the contest entry though. To help out if you need more patterns to make the perfect capsule both of us are putting a SITE WIDE SALE up!

Here is how to enter the contest: Must post with the hashtag #sewminicapsule to be eligible for the weekly and final giveaways. #madeformermaids #patternsforpirates is a plus on other platforms ![]() You can post in both our FB groups, on Instagram or tag M4M on TikTok (I haven’t been convinced to hop on that train yet ;)) .
You can post in both our FB groups, on Instagram or tag M4M on TikTok (I haven’t been convinced to hop on that train yet ;)) .
The more places you post, the higher chance to win of course! You can start sewing anytime.
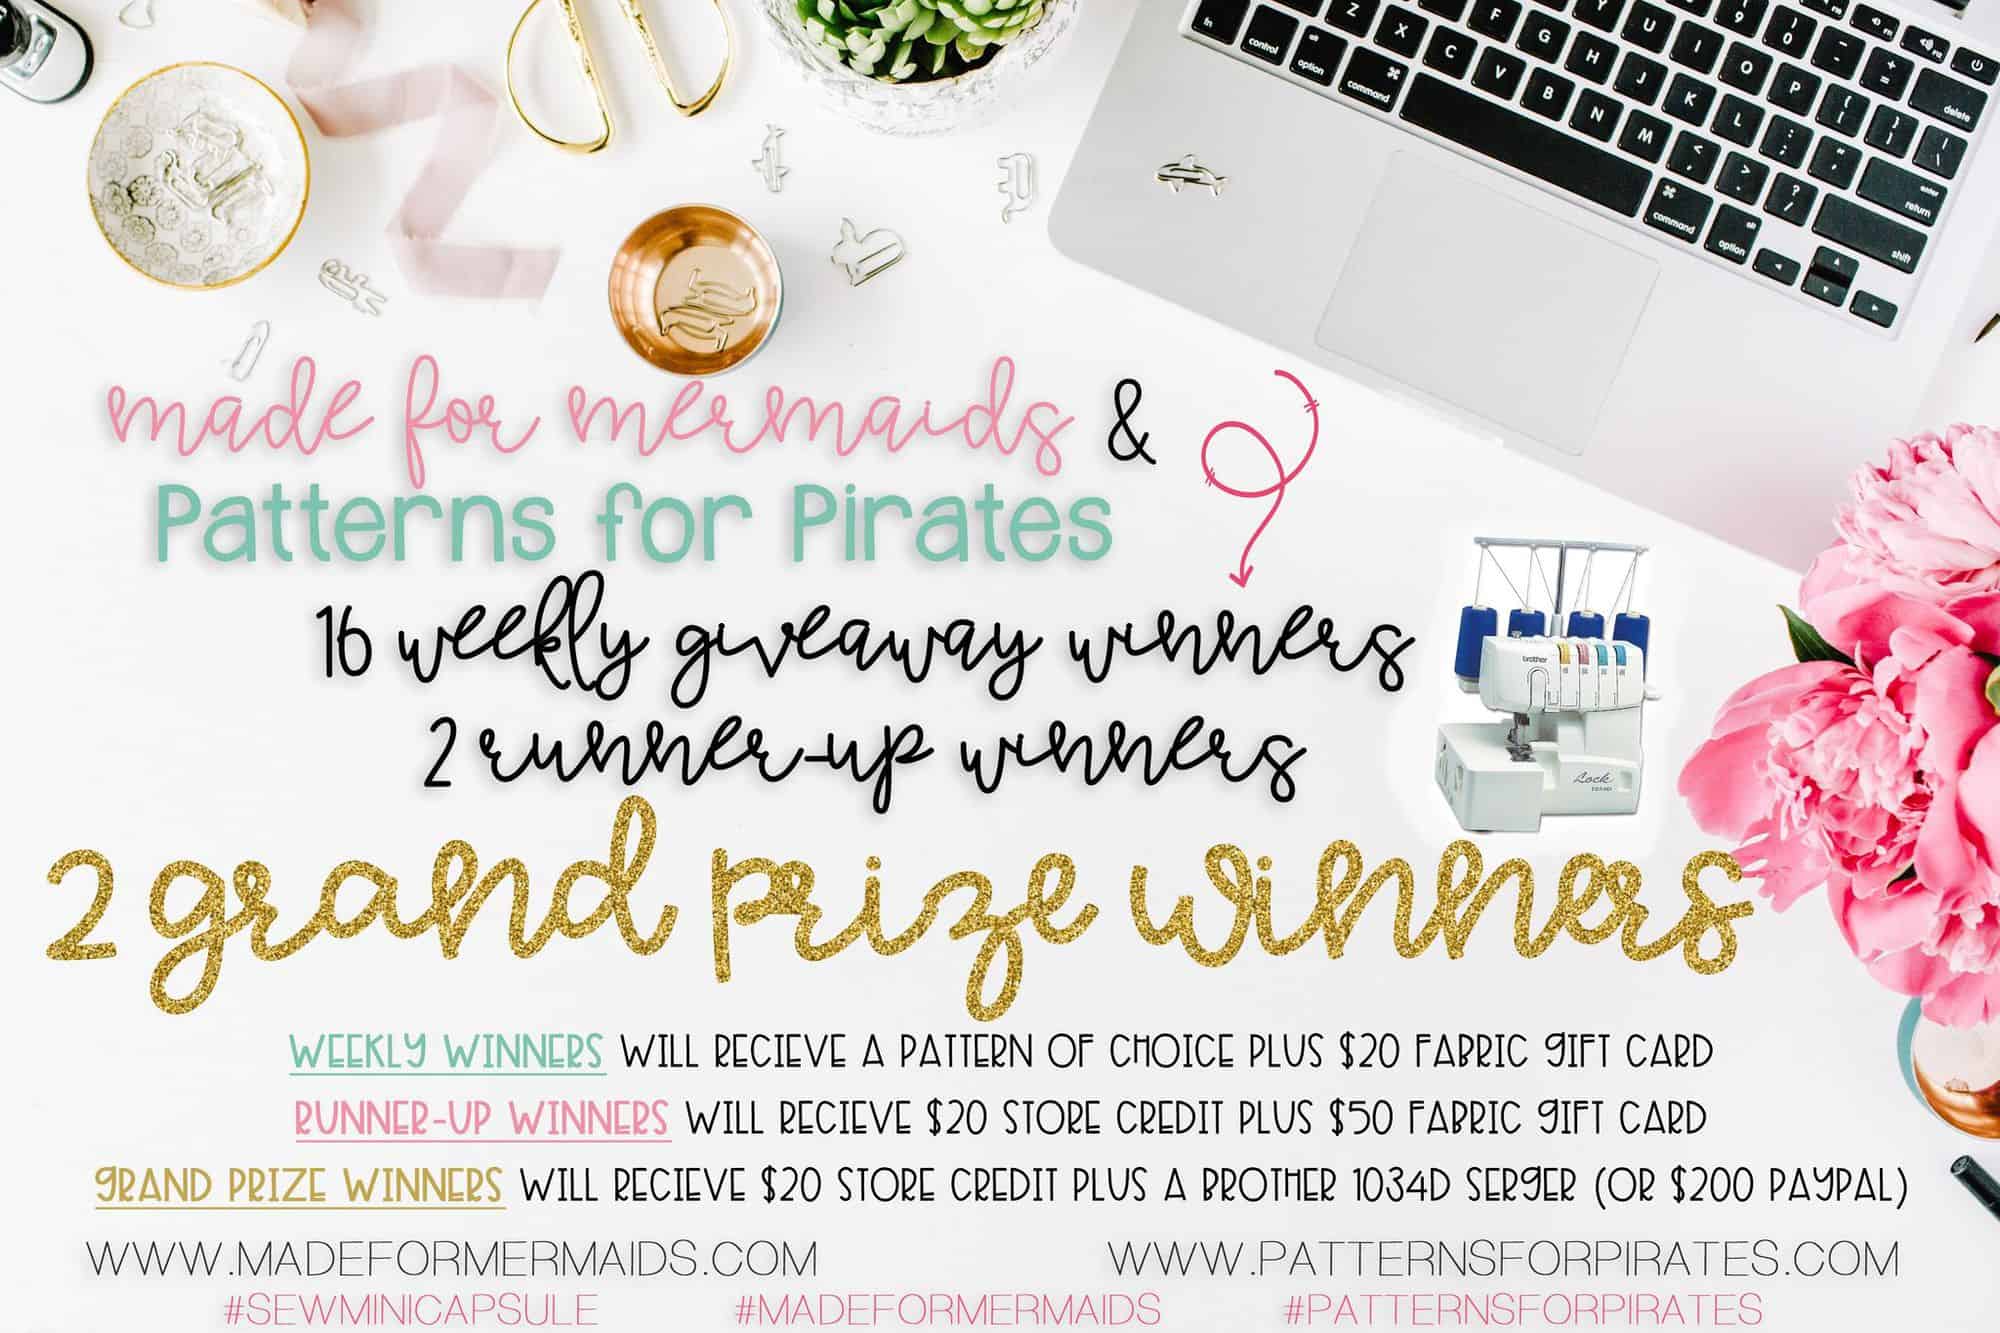
*We’ll choose 4 weekly winners on each Friday, April 2nd, 9th, 16th, and 23rd (16 total weekly chances to win).
- Weekly winners will receive a pattern of choice from each M4M and P4P plus a $20 fabric gift card (or $20 PayPal).
*Final capsules must be posted by April 30th midnight cst for runner-up and grand prizes.
- 2 runner ups will receive a $20 store credit to both M4M and P4P plus $50 fabric gift card (or $50 PayPal)
- 2 grand prize winners will receive $20 store credit to both M4M and P4P plus a Brother 1034D serger OR $200 PayPal (they can choose if they already have a serger/want the PayPal)
And if you’ve never created a capsule before Megan created these amazing idea boards to help inspire you and just give a few great examples 🙂
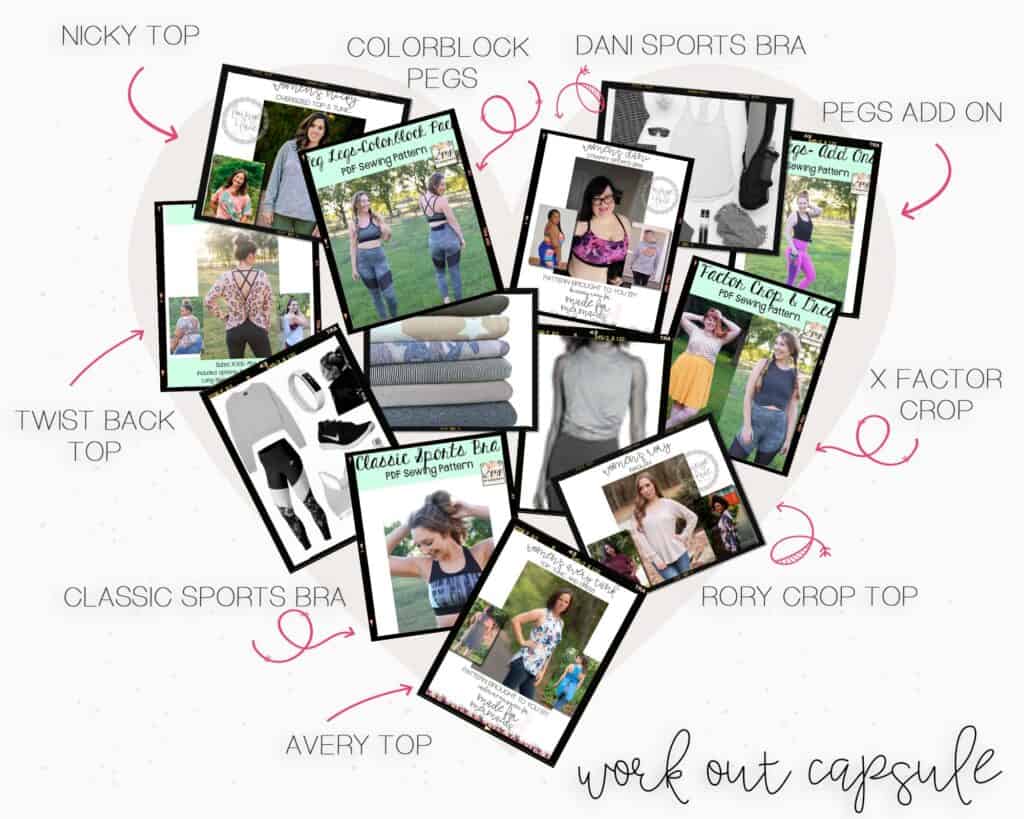
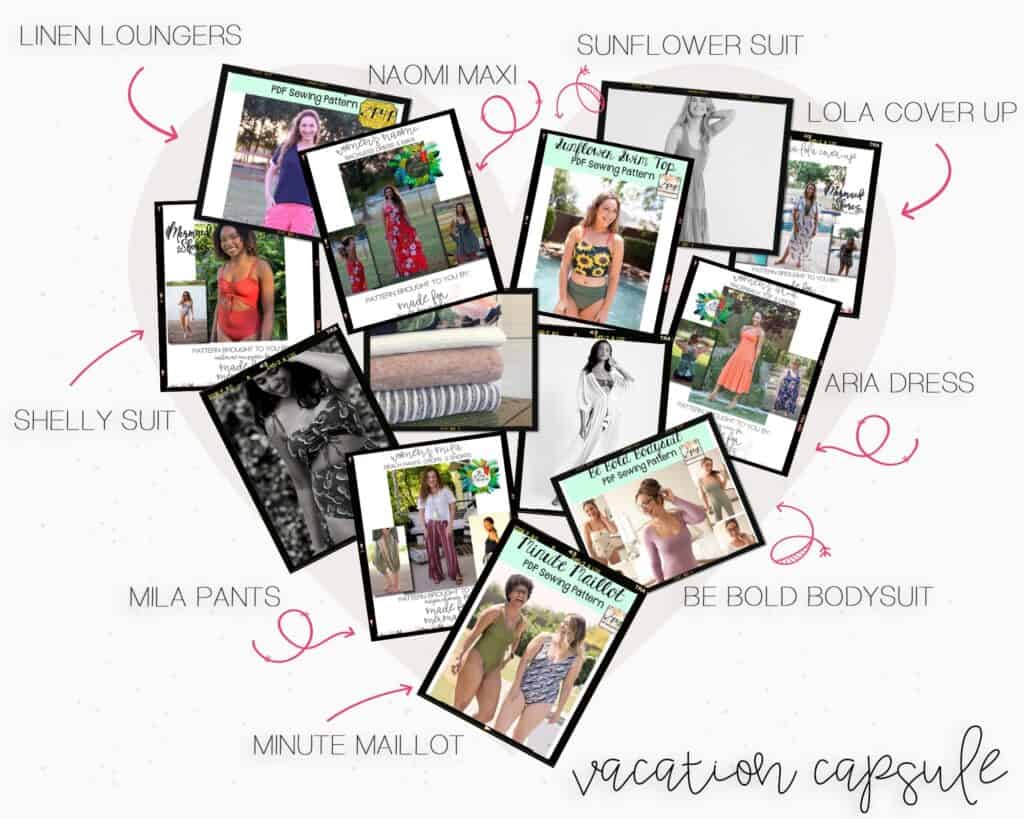
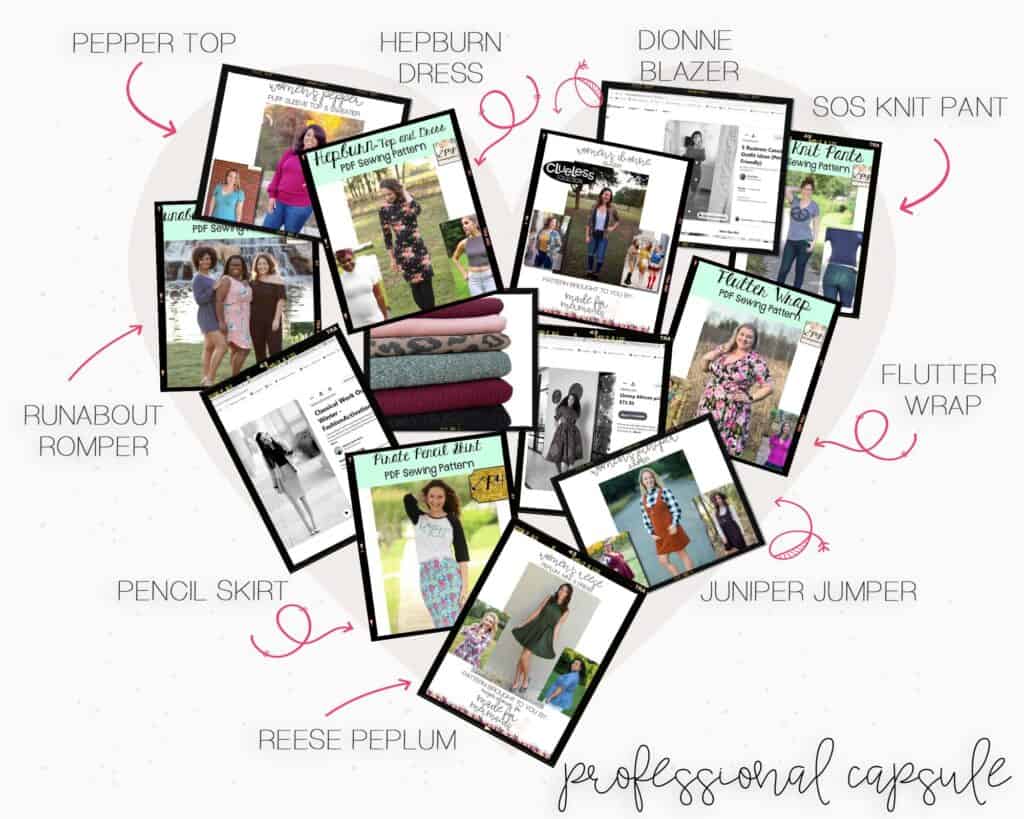
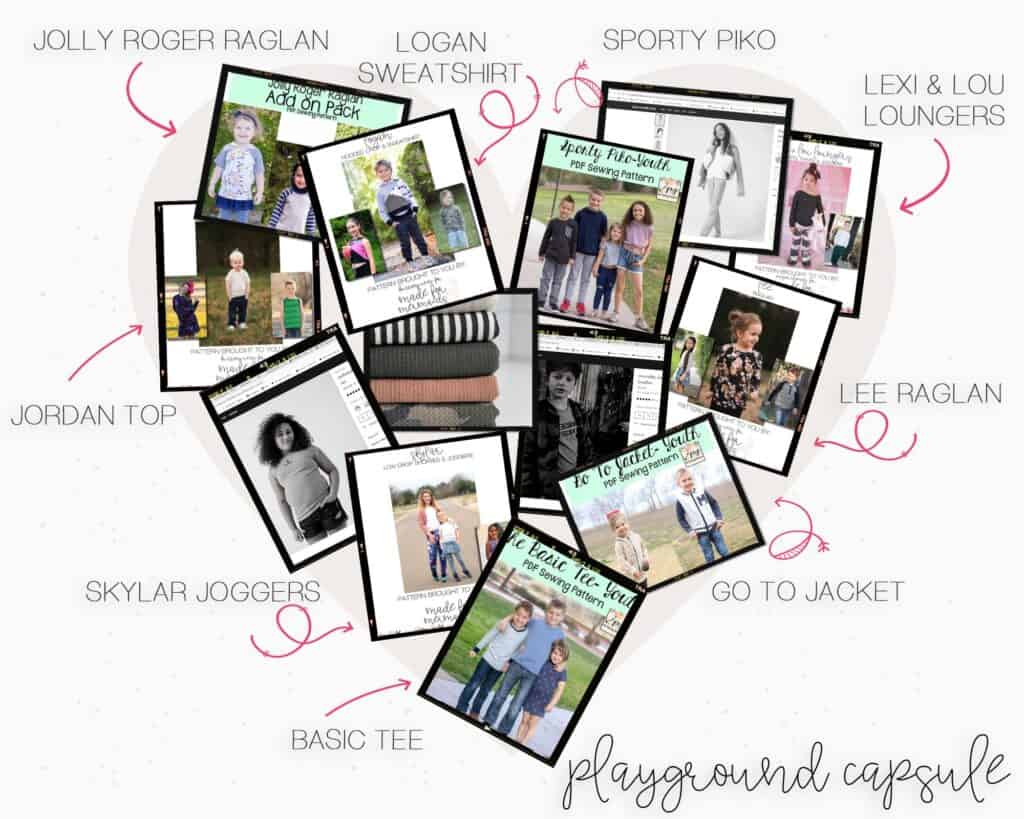

We hope you have fun planning, making, sharing and wearing your new capsules! We can’t wait to see them!
-Judy and Megan
P4P-M4M
Vintage Jumper Sew Along – day 6
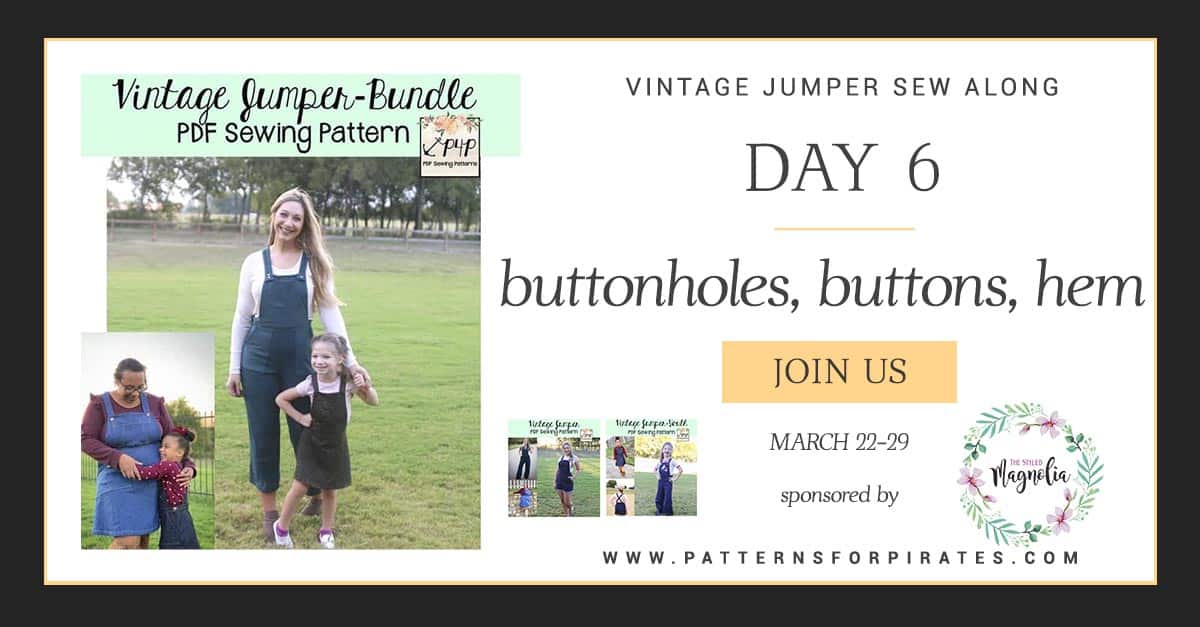
Good morning, pirates! We made it to the last day of our Vintage Jumper sew along. Today we put the finishing touches on the jumper by adding the 3 buttons and buttonholes as well as hemming the skirt/pants.
I start with the side button. If your machine came with the buttonhole foot attachment, grab it now. If not, you can manually make the buttonhole by marking the location and stitching a rectangle (the size of your button) with a tight zig zag stitch (also known as satin stitch). If you’re new to sewing buttons, check out our P4P University Buttons and Buttonholes blog, where I show you various techniques.
If you did not try on the jumper yesterday, do that now and mark where you would like the straps to be for best fit. Check out the Vintage Jumper Hacks blog where you will find a great alternative to the bib buttons. Rachel shows you (with a video too!!) how to add overall buckles instead!
Last step of the day is to hem the skirt or the pants. Ohh, and remember to give your finish garment a good press!
Check out today’s video below! Once you complete your project, add a picture of your jumper to the comments of day 6 photo of the sew along album. This is where the P4P team will look to select the winners for the sew along. I do encourage you to share your Vintage Jumper in the main group too so we can all admire it.
Vintage Jumper SAL | DAY 1 (cut fabric)
Vintage Jumper SAL | DAY 2 (Back darts, front & back pockets, crotch & in seam)
Vintage Jumper SAL | DAY 3 (out seam)
Vintage Jumper SAL | DAY 4 (straps, front bib)
Vintage Jumper SAL | DAY 5 (waistband)
Vintage Jumper SAL | DAY 6 (button holes, buttons and hem)
Vintage Jumper SAL | DAY 7 (winners announcement)
Vintage Jumper Sew Along – day 5
Hurray! Day 5 is here! By the end of today you will have a jumper, albeit without buttons and hems but a jumper nonetheless. Today we add the waistband that will be attached to the skirt/pants and bib/straps.
Start by interfacing the waistband main and lining with knit interfacing. If you did not add the notches when you cut the fabric, do your markings now! Don’t skip these steps, the markings will be very helpful when you sew up the waistband. Below you can see how Judy creates the youth one. Check it out!
In today’s video I show you how I add the adult waistband to my skirt jumper. My favorite part is that the band has no exposed edges! Everything is enclosed so it makes for more sensory friendly garment. When attaching the straps to the back waistband, make sure that the “pointy” side faces out. This will ensure that the straps will lay flat on the back.
After you finish today’s steps, try the jumper on. Check if you like the back pocket placement and where you will want the buttons on the straps. That’s the beauty of sewing for yourself! You get to customize it to your figure. Don’t forget to check in with your progress photo in the comments of day 5 thread in the Sew Along group on Facebook. See you back here tomorrow to finish up the Vintage Jumper!
Vintage Jumper SAL | DAY 1 (cut fabric)
Vintage Jumper SAL | DAY 2 (Back darts, front & back pockets, crotch & in seam)
Vintage Jumper SAL | DAY 3 (out seam)
Vintage Jumper SAL | DAY 4 (straps, front bib)
Vintage Jumper SAL | DAY 5 (waistband)
Vintage Jumper SAL | DAY 6 (button holes, buttons and hem)
Vintage Jumper SAL | DAY 7 (winners announcement)
Vintage Jumper Sew Along – day 4
Good morning, pirates! Today we start working on the top part of the jumper. It features a cute bib and straps that attach to the waistband and bib.
The bib is lined and it has a fun color-blocked pocket. While the pocket is optional, I wouldn’t skip it. If you are making the youth Jumper you can add a cute embroidery, a monogram a heat transfer vinyl graphic, you name it! Another way to add a little something extra to the pocket is to do some decorative top stitching. So much opportunity for embellishments!
The pocket itself is not lined, however, I did decide to line mine because the fabric was thin enough. If you are using a heavier, thicker woven, don’t line it or use a thin fabric for the back. You can see how I did it in the video below.
When creating the two long straps, don’t forget to as some tricot interfacing to both the main and the lining. Sew each strap lining and main, right sides together along the 3 straight edges, not the slanted one with the notch. Using your favorite turning tool, turn your straps right side out, press and top stitch. That’s it! You have completed the steps for day 4. All you have to do now is add your check in photo to the sew along album on Facebook.
See you tomorrow!
Vintage Jumper SAL | DAY 1 (cut fabric)
Vintage Jumper SAL | DAY 2 (Back darts, front & back pockets, crotch & in seam)
Vintage Jumper SAL | DAY 3 (out seam)
Vintage Jumper SAL | DAY 4 (straps, front bib)
Vintage Jumper SAL | DAY 5 (waistband)
Vintage Jumper SAL | DAY 6 (button holes, buttons and hem)
Vintage Jumper SAL | DAY 7 (winners announcement)
Vintage Jumper Sew Along – day 3
Ahoy, pirates! Day 3 is reserved for sewing the side seams. Once side will be sewn “normally”, on the other we will add a zipper. When sewing the side with no zipper, remember to place your fabrics right sides together and stitch with your sewing machine. You can finish the raw edge after with a serger stitch, a zig zag or an overlock stitch.
I know a lot of sewists may be “scared” of zippers but trust me, they are not as frightening as they seam. Judy is showing you in the videos below, her two favorite methods for adding the little side zipper. Think about it this way, it’s just 7 inches of zipper…how scary can that be? 😉
Day 3 video is posted below. Once you finish today’s steps, grab a picture of your “almost” finished pants or skirt and add it to the Day 3 photo comments in the Vintage Jumper Sew Along album. You can find the album in the Facebook SAL group.
Vintage Jumper SAL | DAY 1 (cut fabric)
Vintage Jumper SAL | DAY 2 (Back darts, front & back pockets, crotch & in seam)
Vintage Jumper SAL | DAY 3 (out seam)
Vintage Jumper SAL | DAY 4 (straps, front bib)
Vintage Jumper SAL | DAY 5 (waistband)
Vintage Jumper SAL | DAY 6 (button holes, buttons and hem)
Vintage Jumper SAL | DAY 7 (winners announcement)
Vintage Jumper Sew Along – day 2
 \
\Welcome to day 2 of our Vintage Jumper Sew Along! Today we sew the darts for the shorts, capris and pants. We also add the front and back pockets as well as the pants crotch and in seam.
When sewing the darts, remember to not back backstitch. Simply pull both threads on the wrong side of the fabric and tie them in a knot. This will reduce the bulk in the dart stitches. While I am not showing the darts in my day two video (I am making the skirt) I do recommend reading our P4P University Darts 101 if you are new to sewing this step.
Both the pants and skirt options include a front pocket style. I recommend not skipping them, they are so adorable! I went “off the script” 😉 and added even the back pockets to my skirt. The pattern only has you adding the back pockets to the shorts, capri and long pants style. Remember to just baste your back pockets in place, try the jumper on after day 5 steps and only then sew them in place. You want to make sure you love the placement! It can make or break the look of your pants.
If you are making the skirt option, you have completed the steps for today. If you are sewing the pants style, you still need to sew the crotch and in seam. Today’s video is below. Don’t forget to snap a picture of your completed steps and add it to the day to photo comments in the Vintage Jumper Sew Along album.
Vintage Jumper SAL | DAY 1 (cut fabric)
Vintage Jumper SAL | DAY 2 (Back darts, front & back pockets, crotch & in seam)
Vintage Jumper SAL | DAY 3 (out seam)
Vintage Jumper SAL | DAY 4 (straps, front bib)
Vintage Jumper SAL | DAY 5 (waistband)
Vintage Jumper SAL | DAY 6 (button holes, buttons and hem)
Vintage Jumper SAL | DAY 7 (winners announcement)
Vintage Jumper Sew Along – day 1
Welcome to the Vintage Jumper Sew Along!
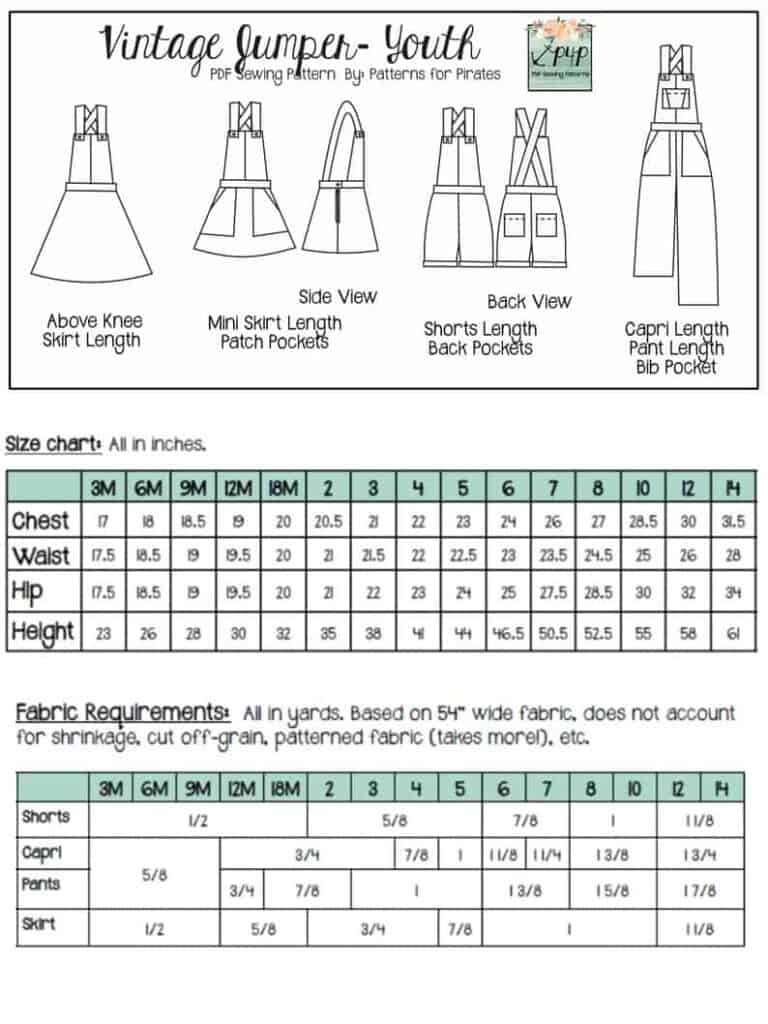
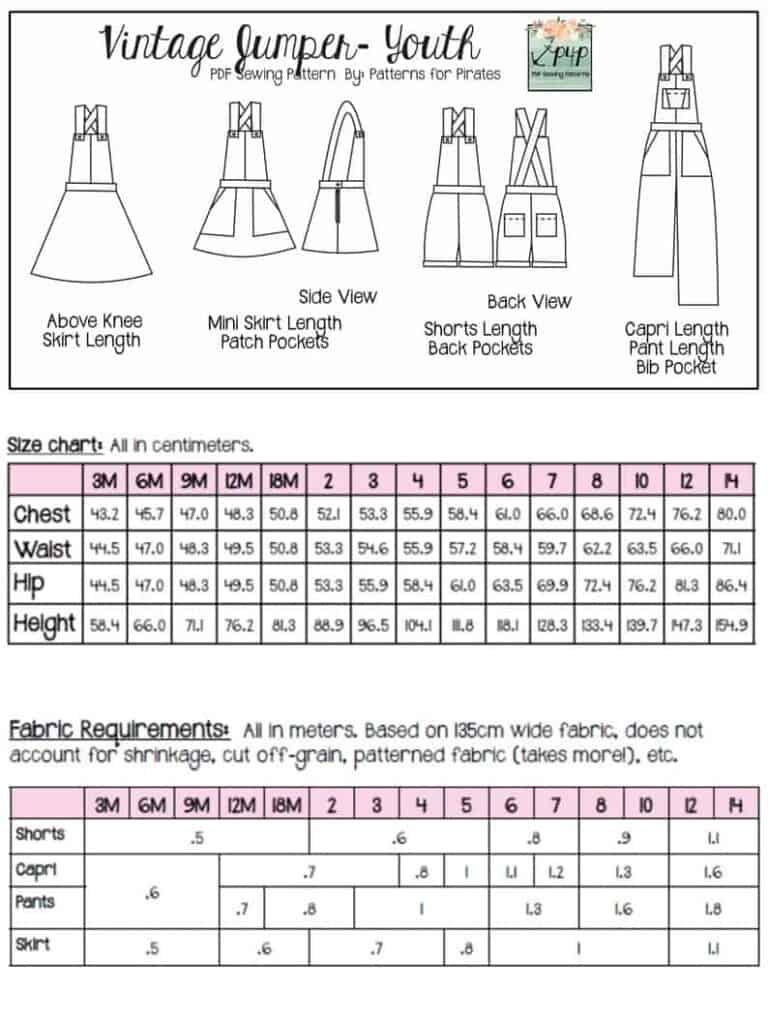
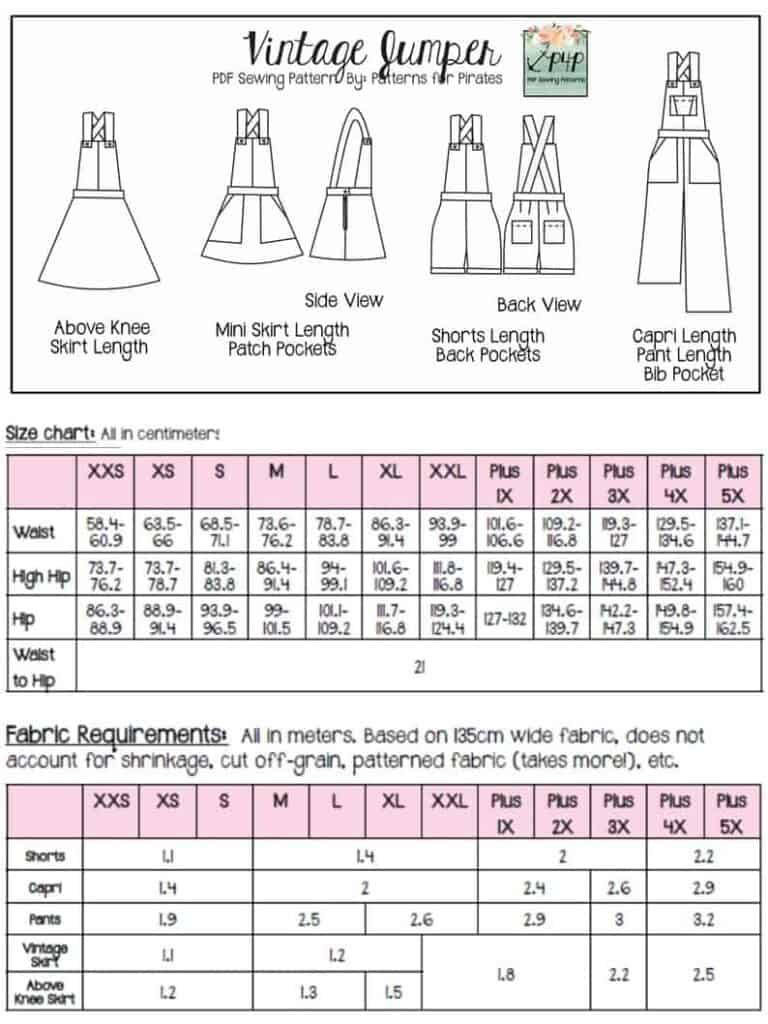
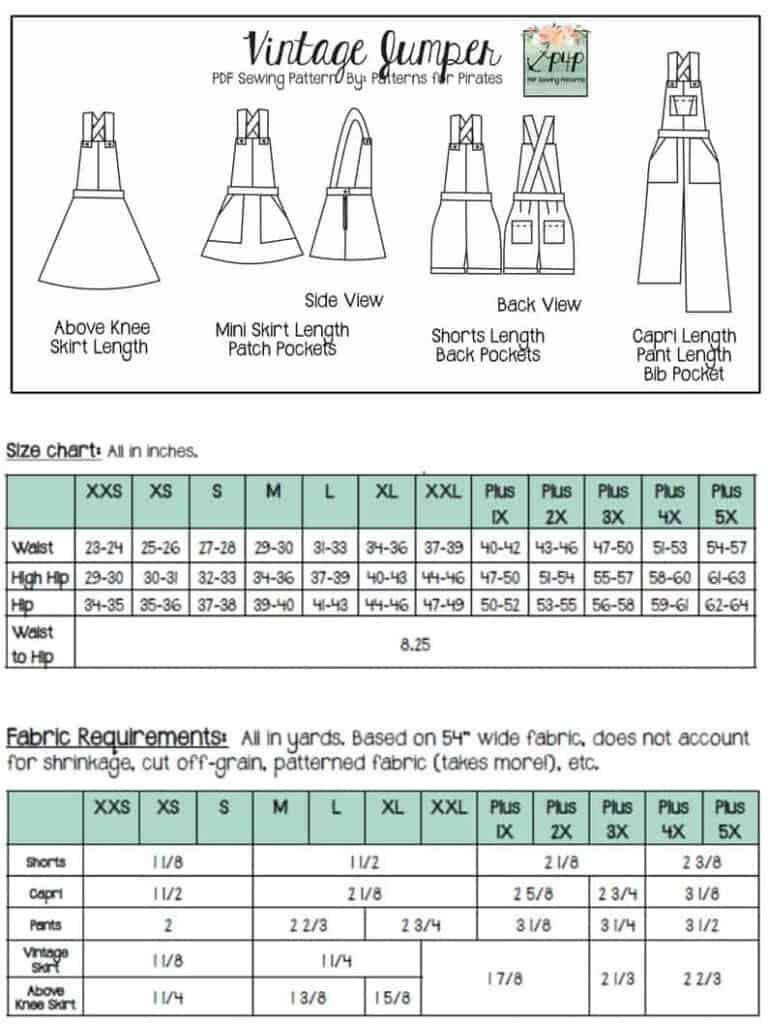
Day One of the sew along is for purchasing the pattern and cutting the fabric. If you did not buy the patterns yet, stop by the Sew Along Facebook Group to grab an exclusive coupon code. You can grab the adult Vintage Jumper here. If you plan to sew for a little one, be sure to snag the Youth Vintage jumper or the Bundle. If you are still undecided which style to make, our Round Up blog will give you an overview of all options included, from skirts to pants lengths. You can also use the Easy Hacks blog for added options.
Now that we have the patterns it’s time to select which method of using them you would like to do. Both the Youth and the Adult come in A4 and Letter format to print at home, A0 format to print with a plotter or at a copy shop AND a projector file. If you use the projector file you will not have to print anything!! That’s definitely my favorite way! You can see in today’s video how I use the file to cut the fabric.
Let’s start by taking the measurements needed for the best fit. P4P has an amazing blog that gives you tips for accurately taking your measurements. You can read all about it here. If your measurements put you in a different size for chest/waist/hips be sure to check out our P4P University blog and grade to achieve the perfect fit. Our most recent patterns include videos as well so be sure to check them out!
Still debating which knit type will work best for your desired look? Take a look over our P4P University Knit Types blog. We also included a cheat sheet that you can print. If you are like me and sometime are just keen on using a specific print for a specific pattern, read our Different fabric, different fit blog post before you cut your fabric. This pattern is drafted for stretch woven such a stretch suede, stretch velvet or stretch denim.
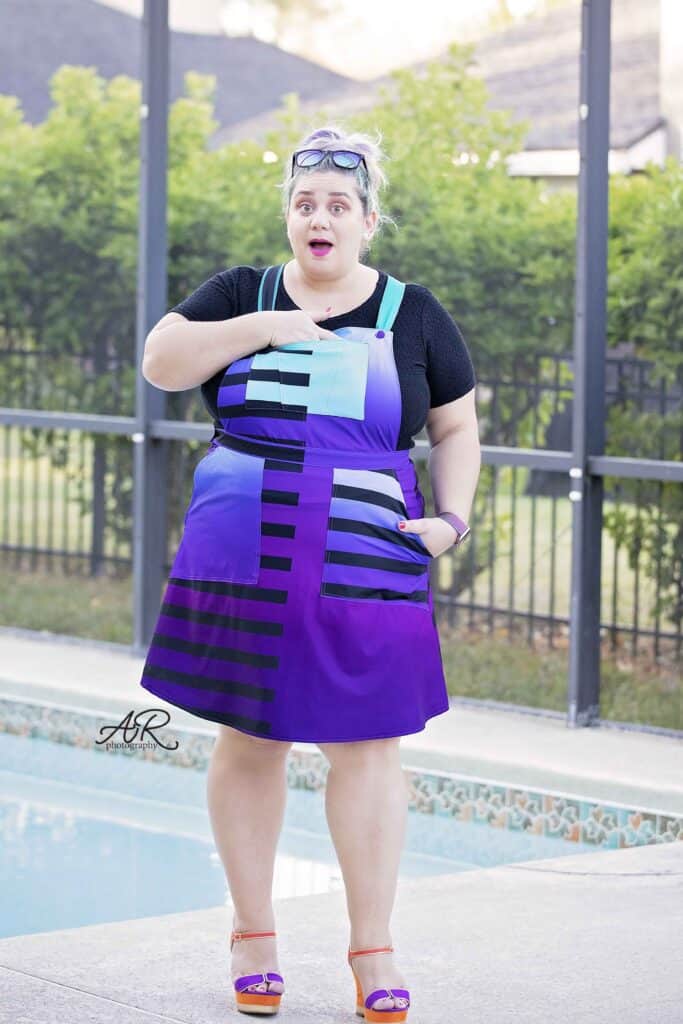
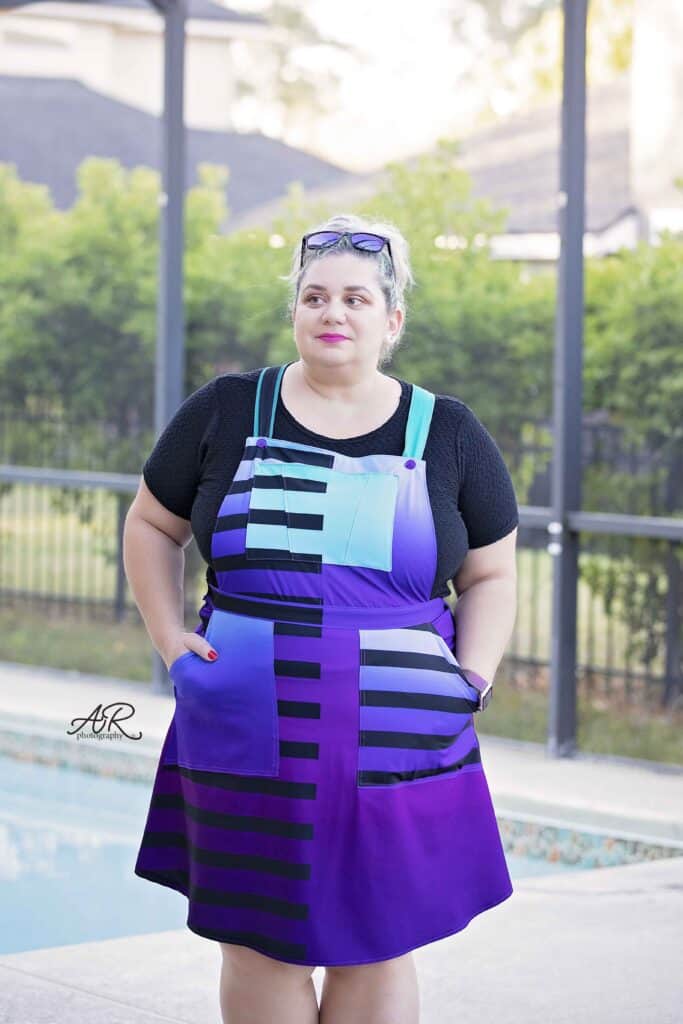
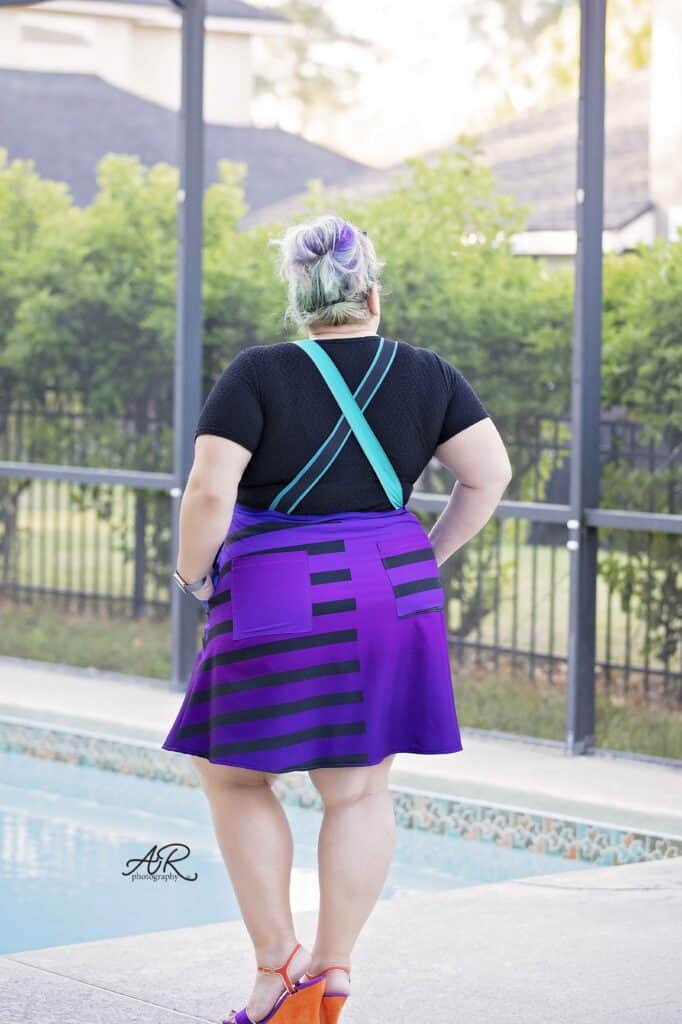
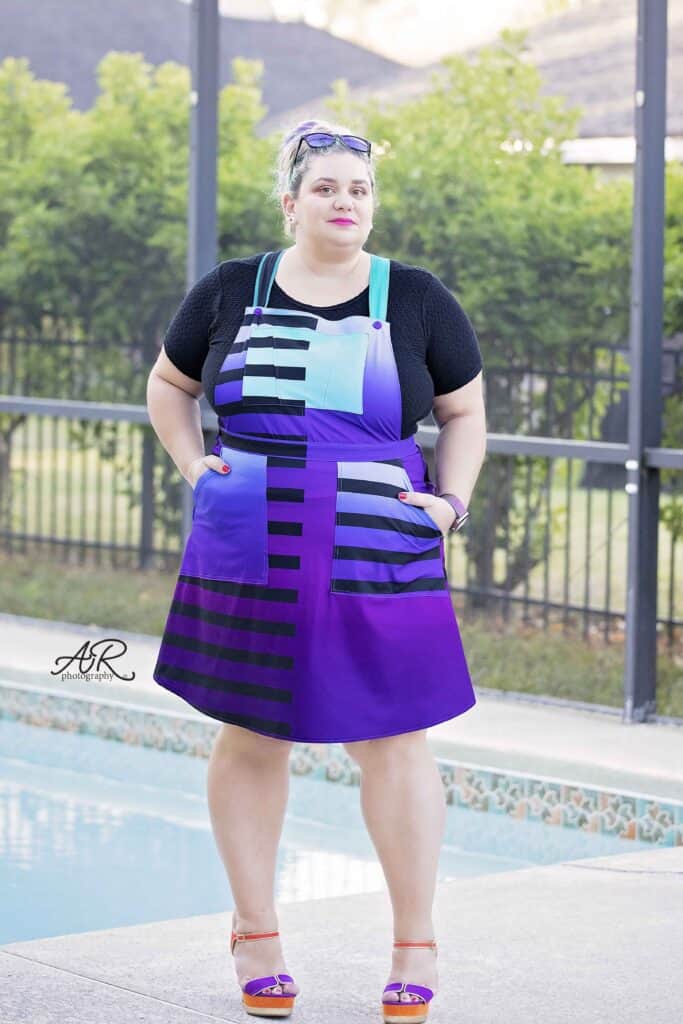
I have opted for a fun Half Black Stripes Tropical Ombre stretch woven from The Styled Magnolia. TSM is this sew along’s sponsor so our winner will get to try some of their goodies too.
You can see day 1 video below. Once you complete you pretty pile of cut fabric, take a picture and post it in the comments of day 1 photo. This sew along album will be in the M4M & P4P Sew Along Facebook group.
Vintage Jumper SAL | DAY 1 (cut fabric)
Vintage Jumper SAL | DAY 2 (Back darts, front & back pockets, crotch & in seam)
Vintage Jumper SAL | DAY 3 (out seam)
Vintage Jumper SAL | DAY 4 (straps, front bib)
Vintage Jumper SAL | DAY 5 (waistband)
Vintage Jumper SAL | DAY 6 (button holes, buttons and hem)
Vintage Jumper SAL | DAY 7 (winners announcement)
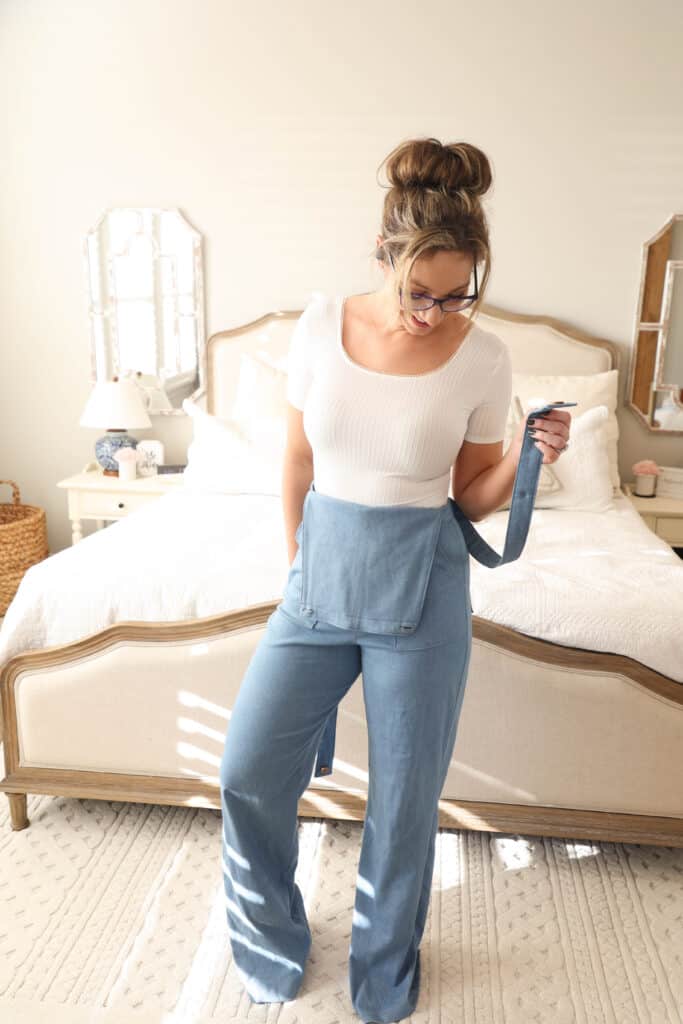
New Pattern Releases :: Be Bold Bodysuit!
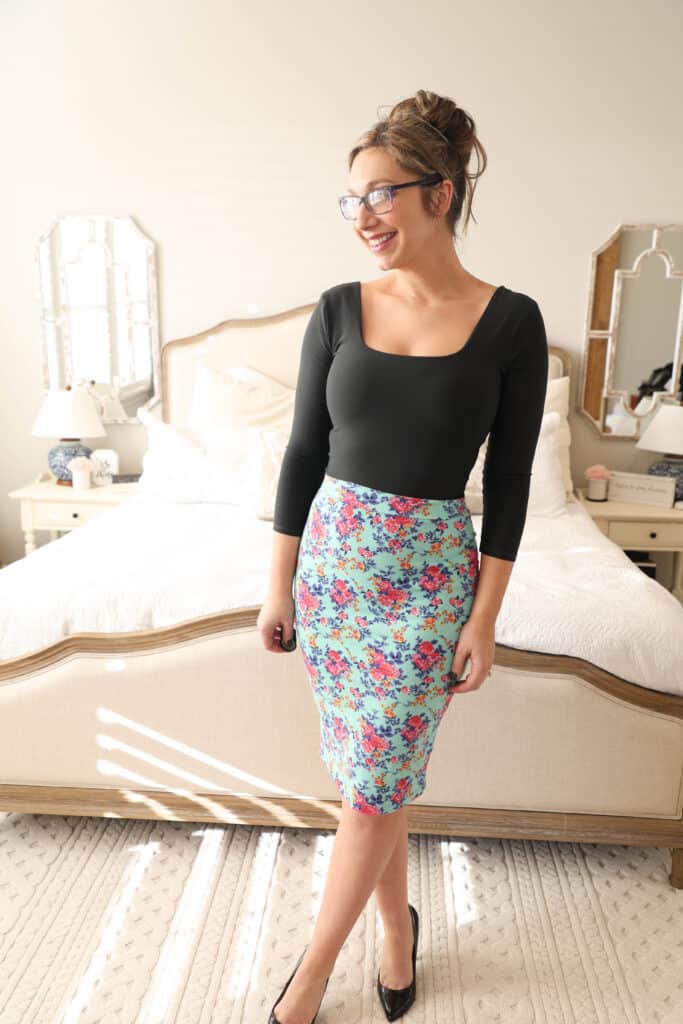
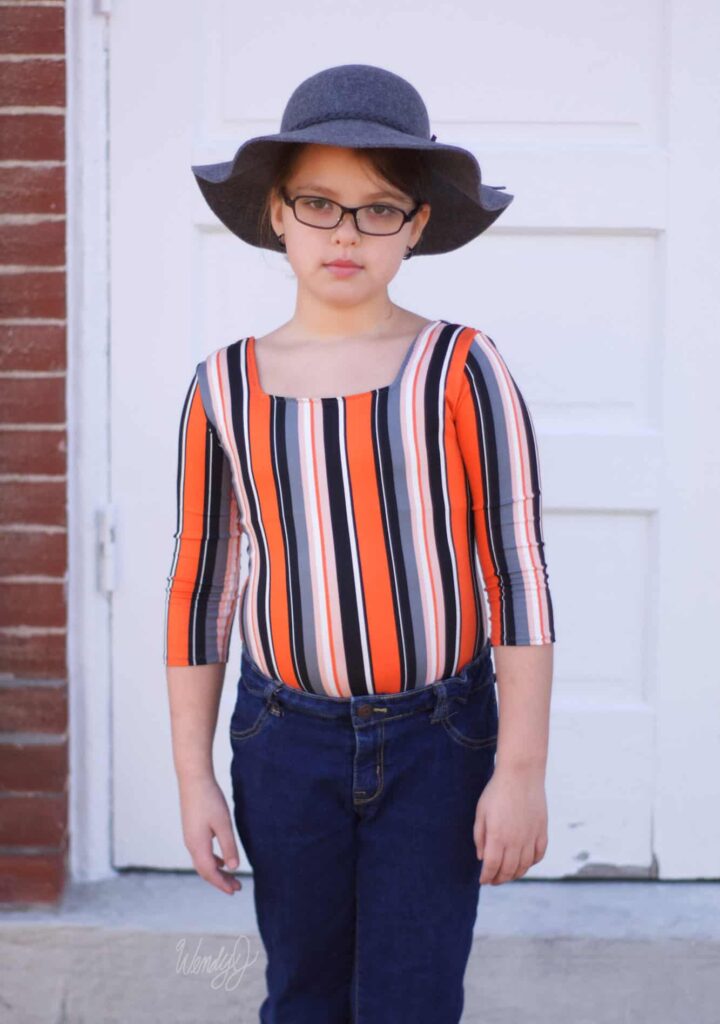
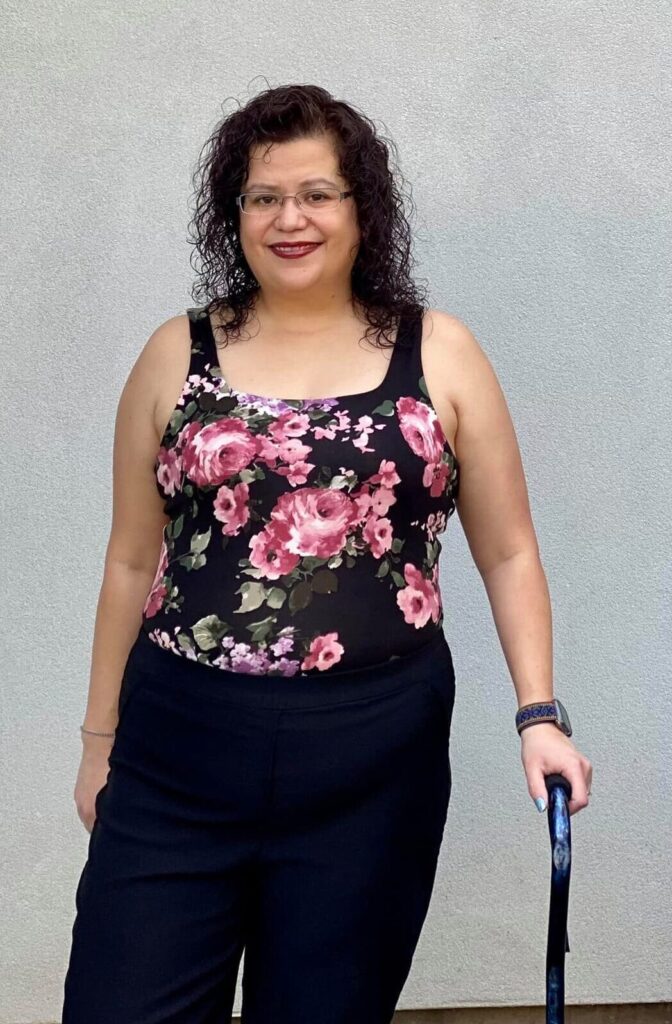
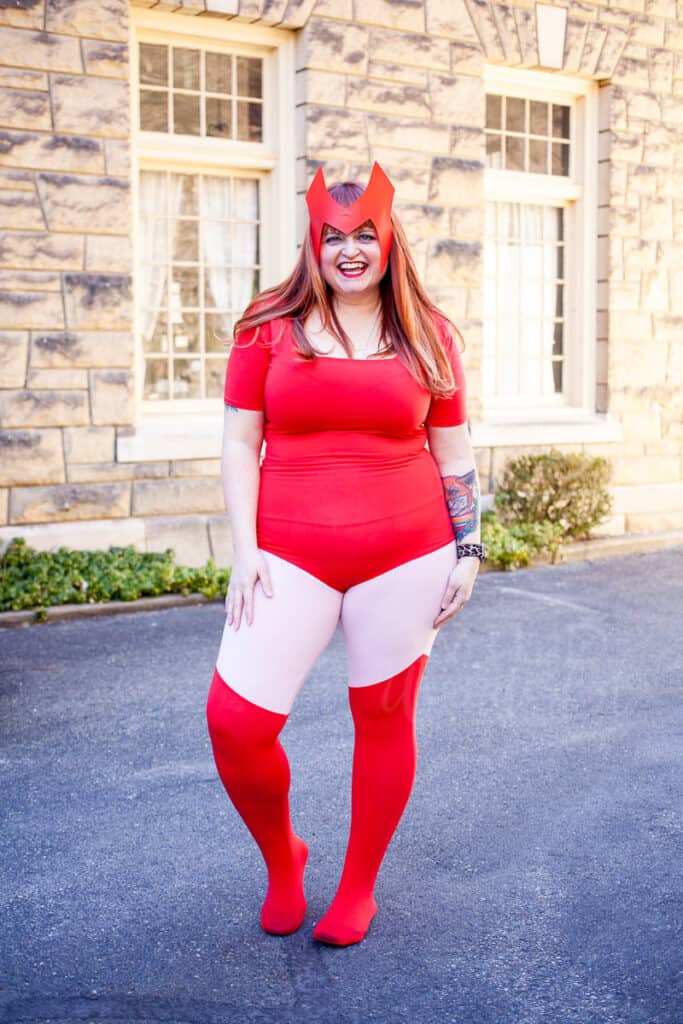
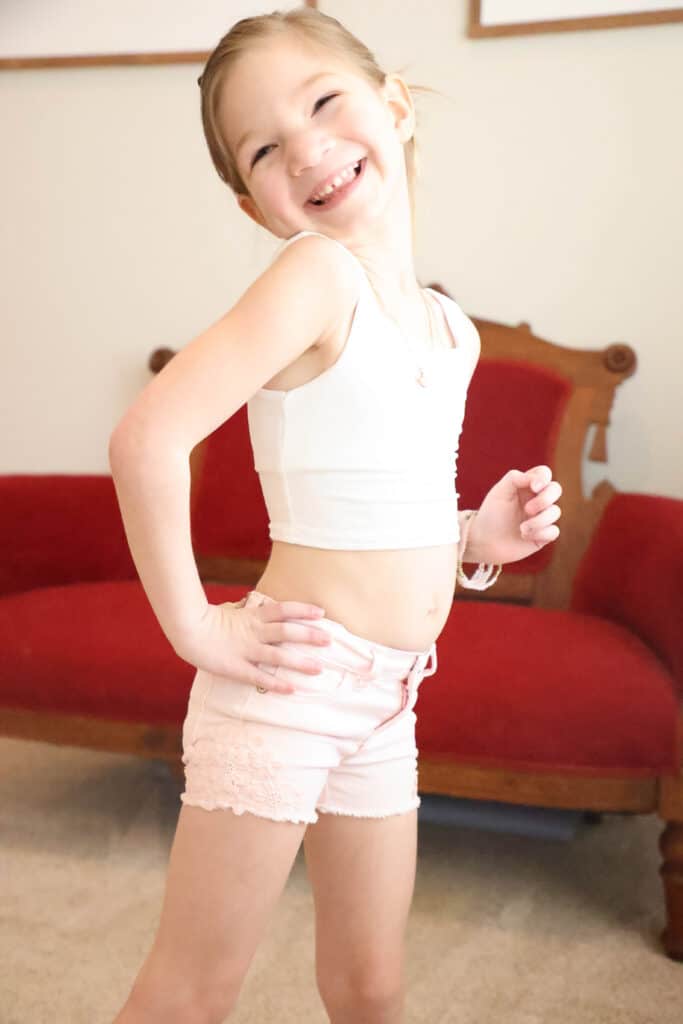
We are so excited to be celebrating another release day with our favorite Pirate Crew! We’ve been wanting to put out a bodysuit for forever now, and the day is finally here. Let’s learn all about the Be Bold Bodysuits, available in both Adult and Youth sizes!
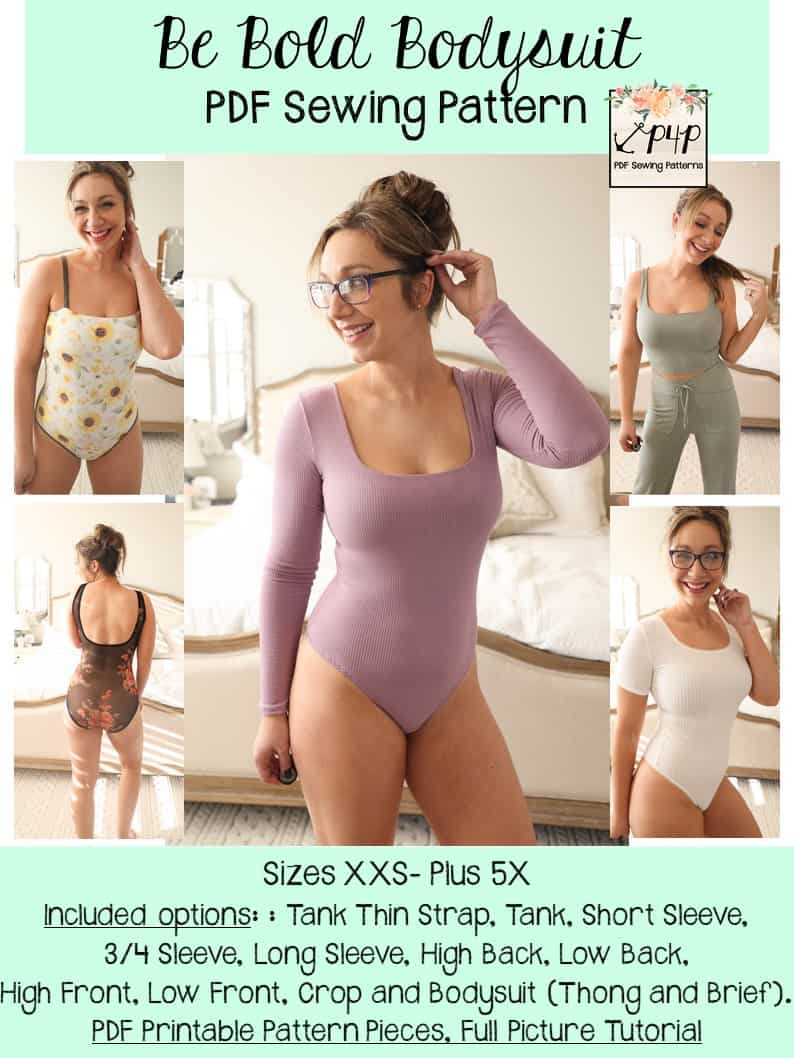
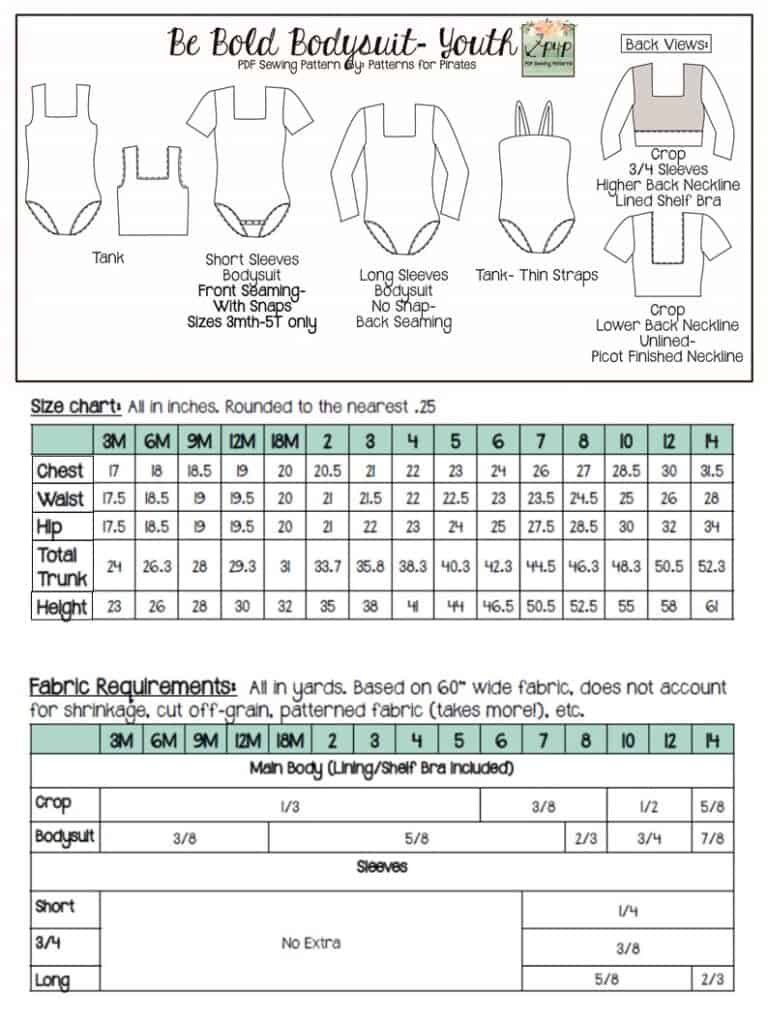
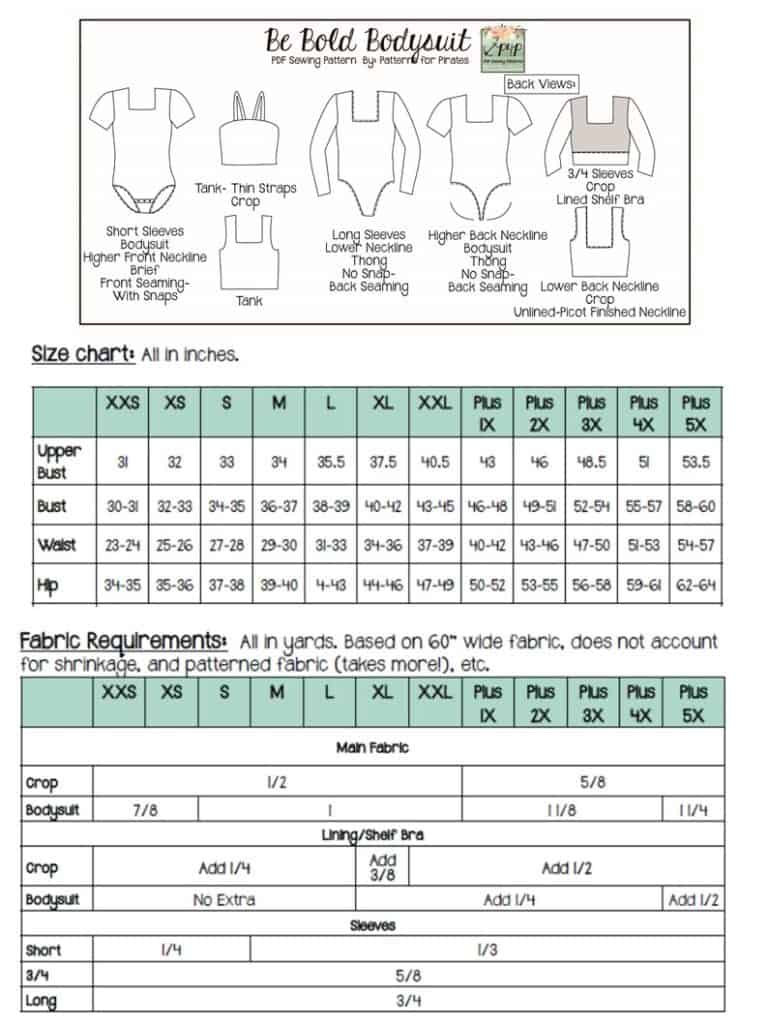
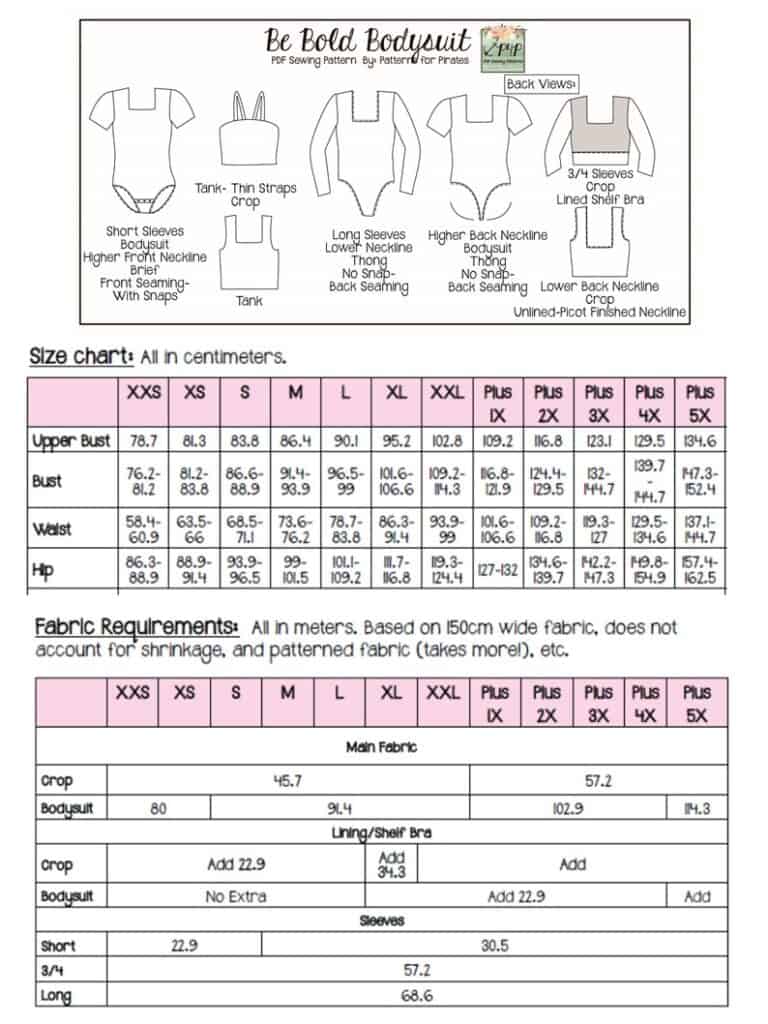
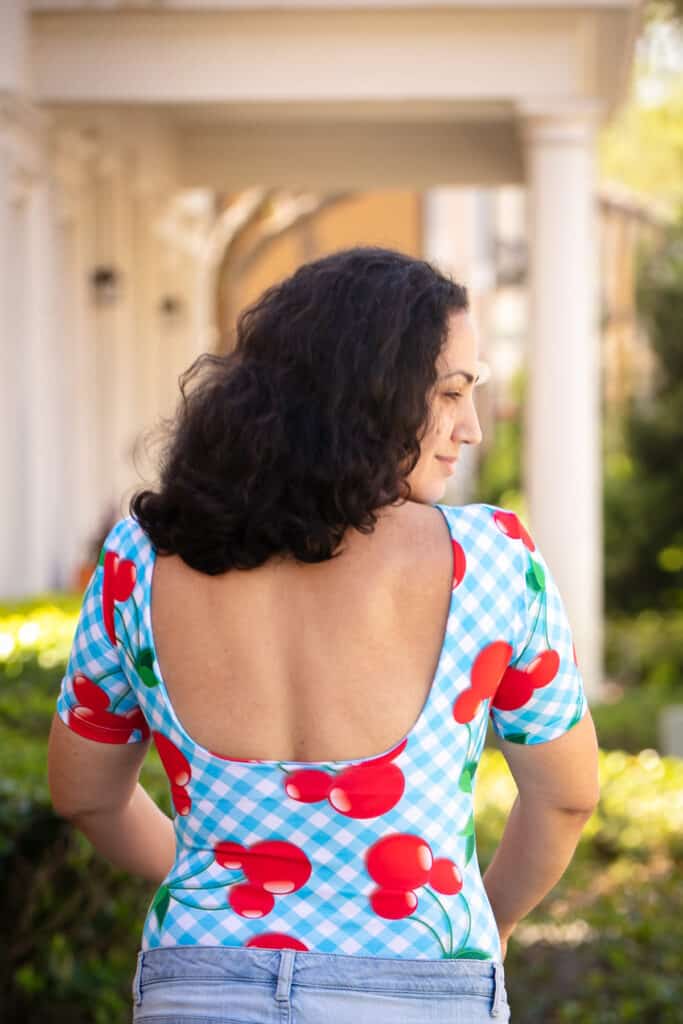
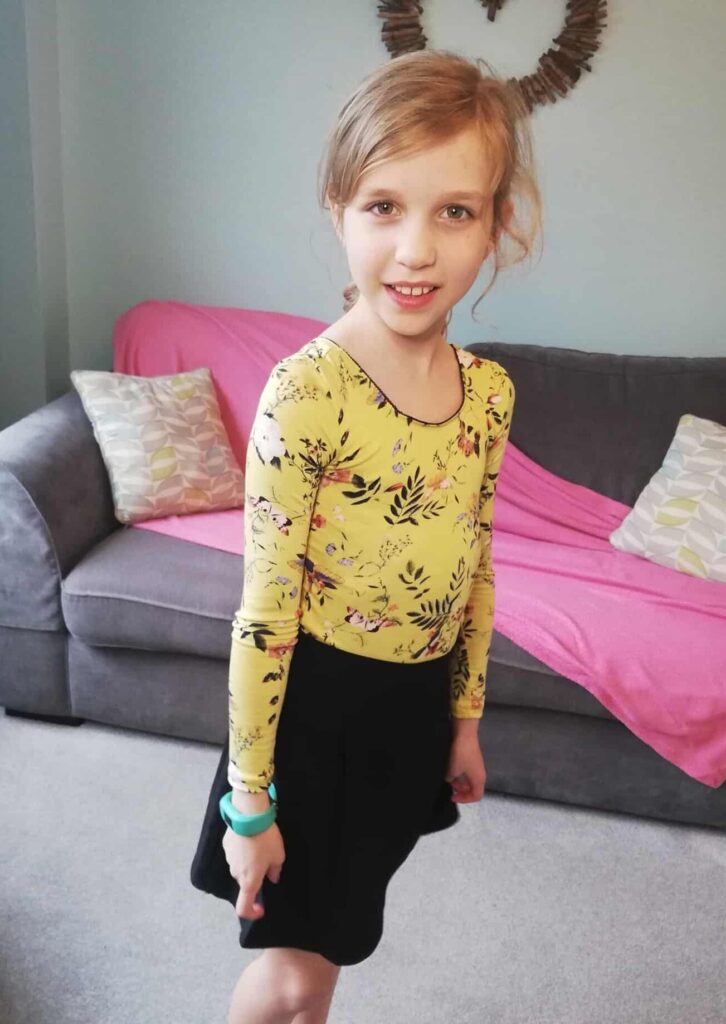
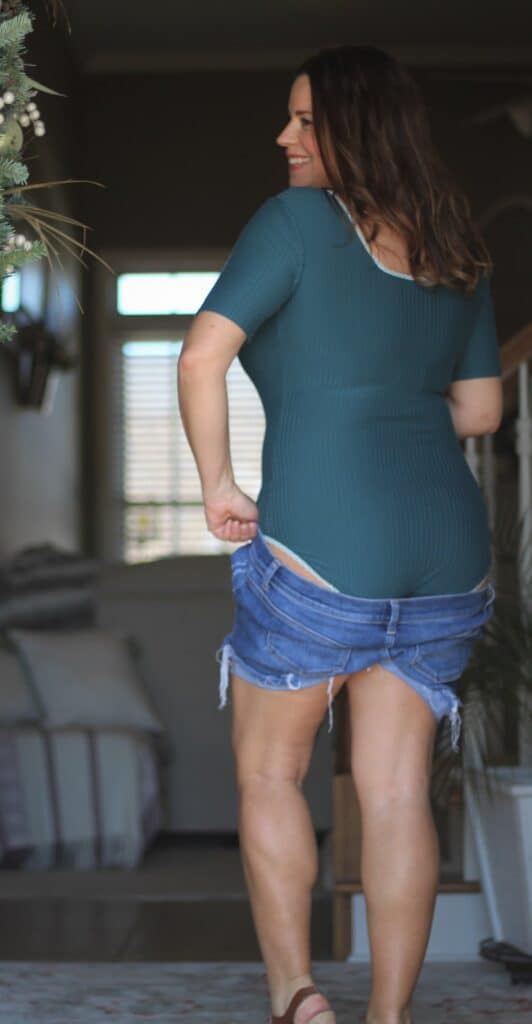
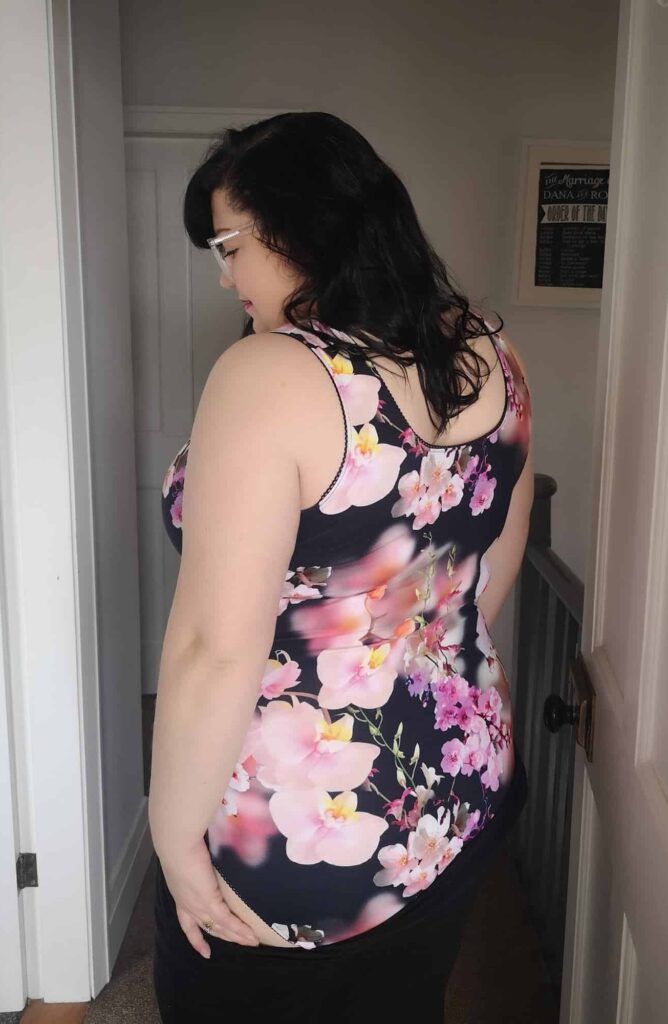
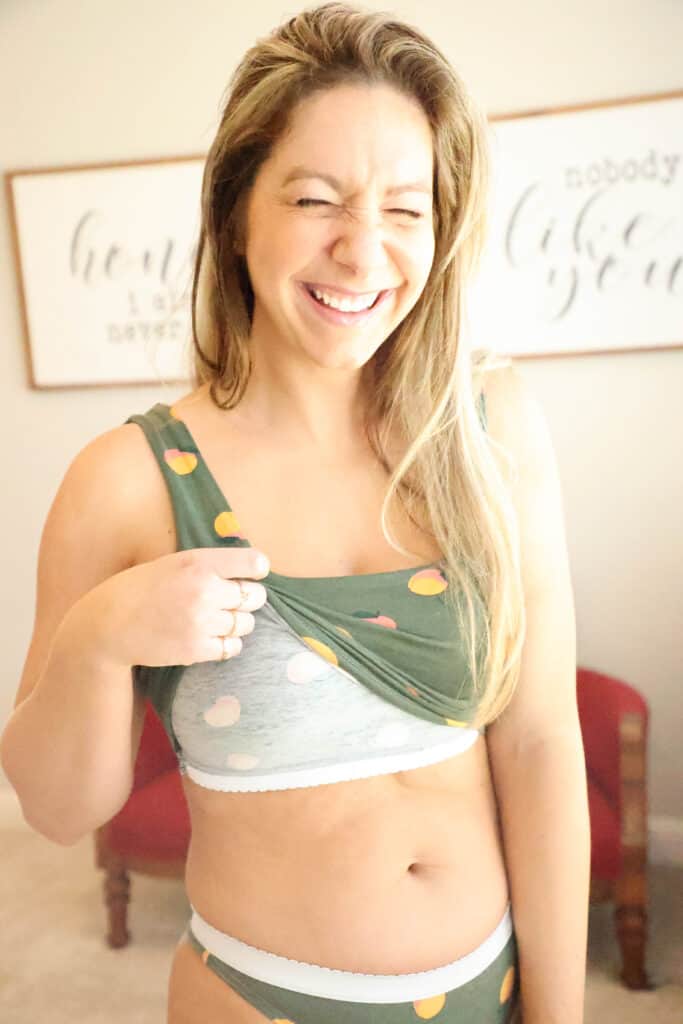
The Be Bold Bodysuit will have you feeling fierce in any option. This classic tight fit bodysuit is meant to feel snug and act as the perfect tucked in top without worrying about anything coming un-tucked. With all the options we’ve packed into this single pattern, you’ll be able to make a perfect bodysuit or crop to pair with any bottoms – skirts, pants, overalls, casual or dressy. You can pick from a higher or lower neckline on both the back and front for the adult pattern, and a higher or lower back neckline for the youth version. You can also take this pattern from the hot summer with the multiple tank options to the cooler weather with longer sleeve options. You can finish the neckline with a simple picot elastic or with a lining and shelf bra.
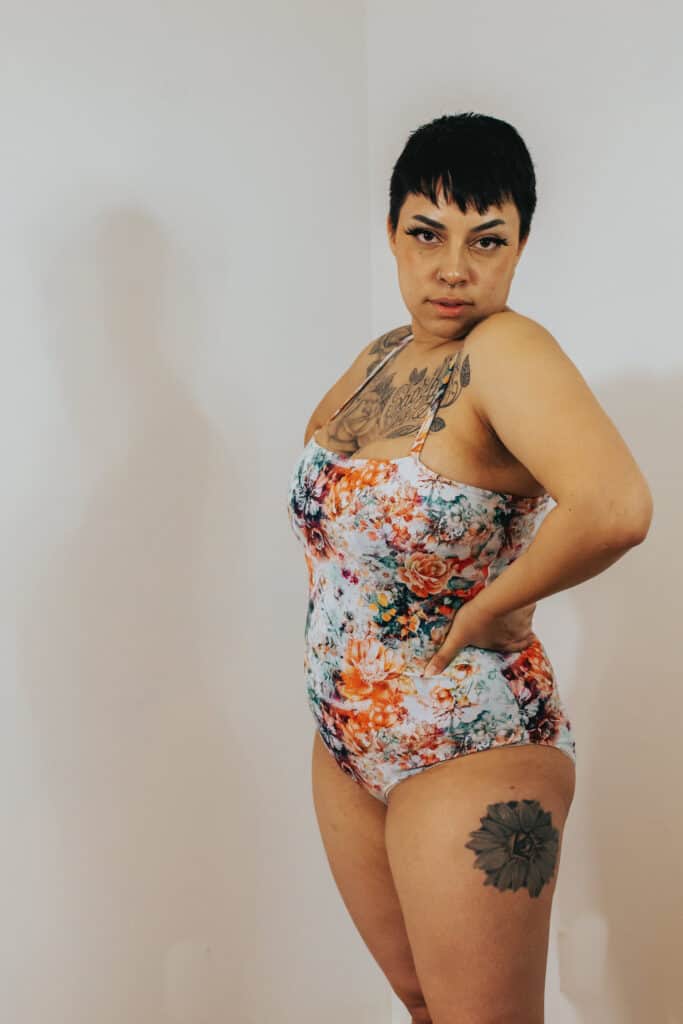
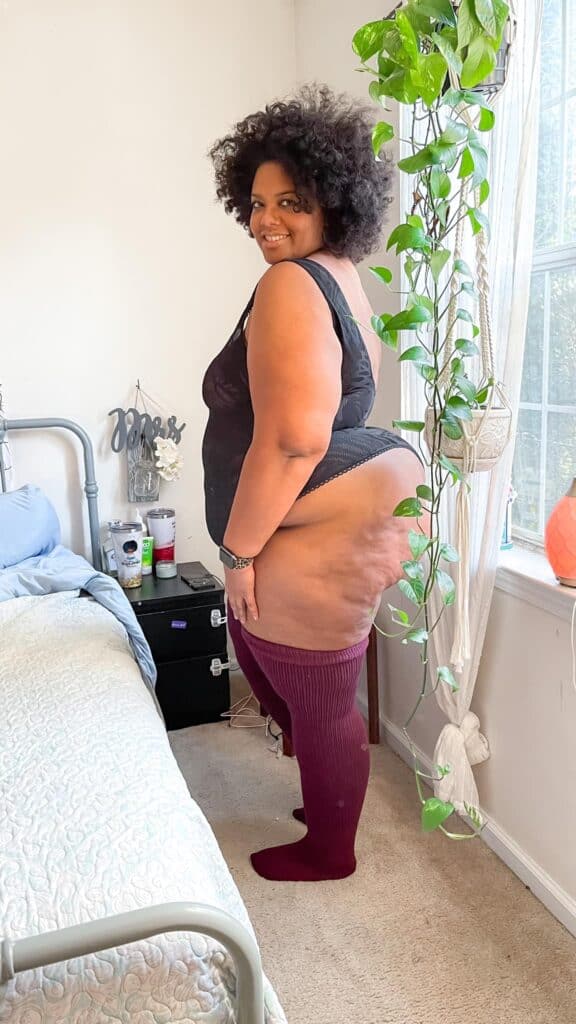
Moving down for the adult pattern, you can have multiple bottom options as well! You can do a thong or brief plus pick if you’d like the seam in the traditional back spot or add snaps with a front seam for ease of snapping. The bodysuit is partially lined so you can use the bodysuit as your undergarment.
Drafted for high stretch (4 way stretch) knit fabrics like cotton spandex, double brushed poly, ribbed knits, athletic knits, or swim knits. Options include: crop length, bodysuit with thong (snaps or back seam), bodysuit with brief (snaps or back seam), lined neckline with shelf bra, unlined with picot finished neckline, thin strap tank, tank, short sleeve, 3/4 sleeve or long sleeve.
Enjoy several videos throughout the tutorial like fabric suggestions, options and cutlines video, how to add/remove length to pieces, sewing the picot on the shelf bra, neckline and leg lines, and lining the tank option.
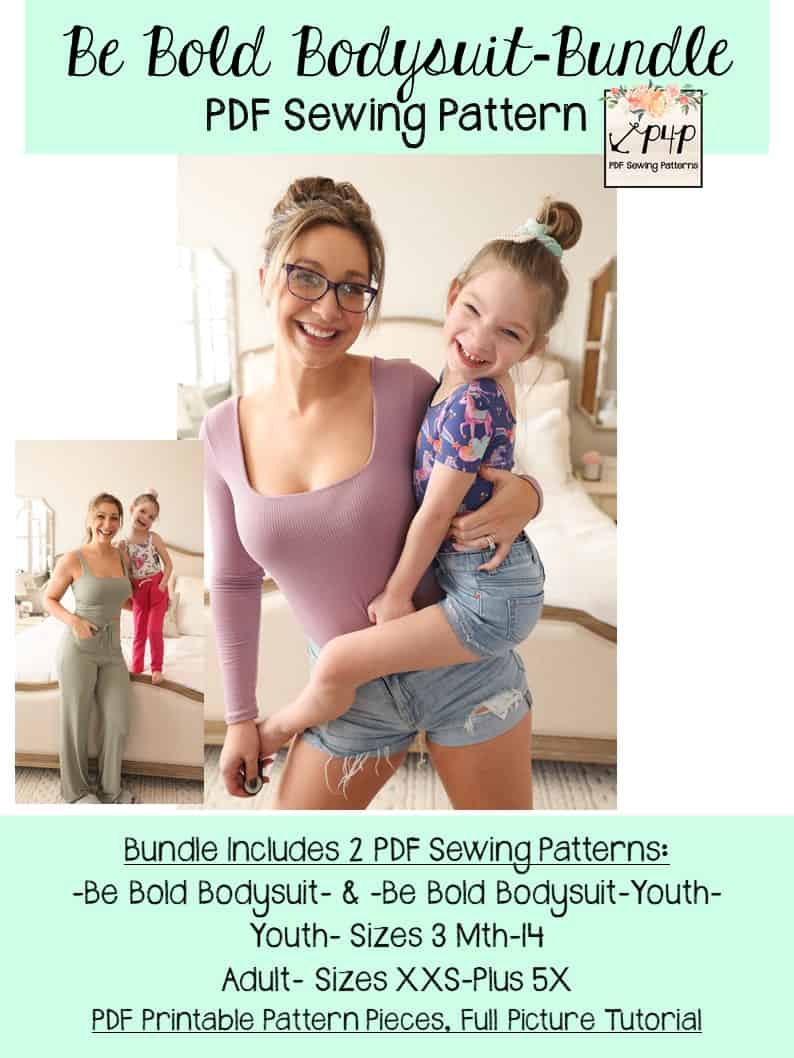
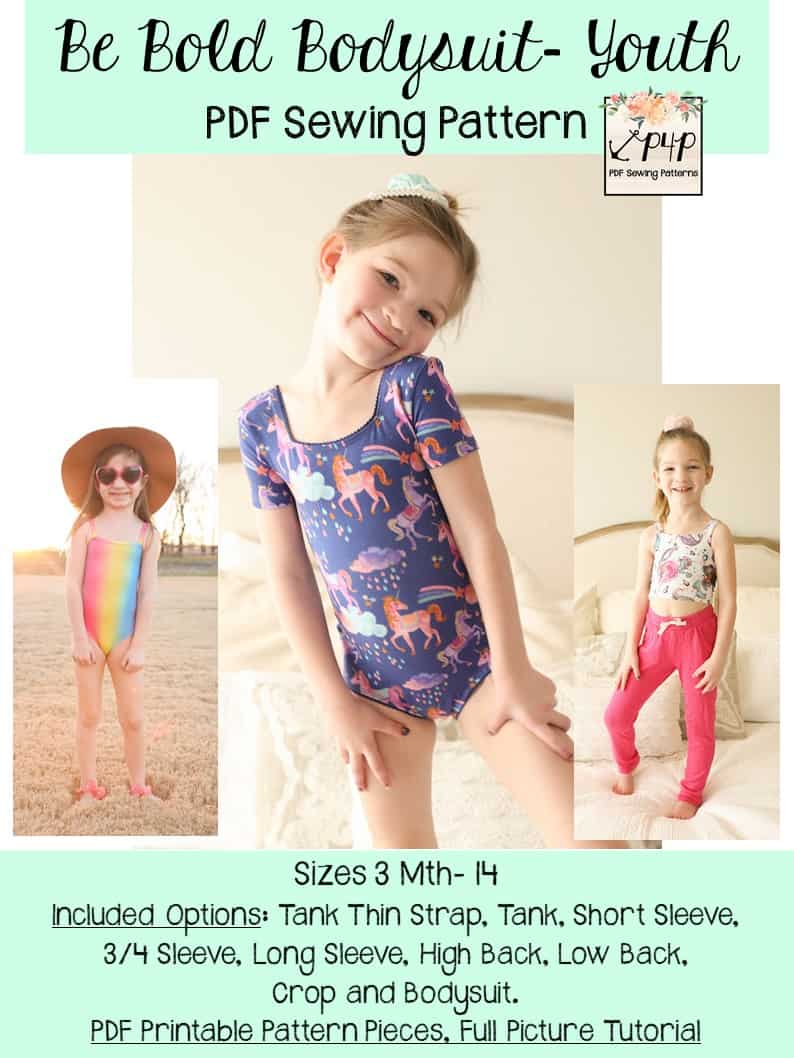
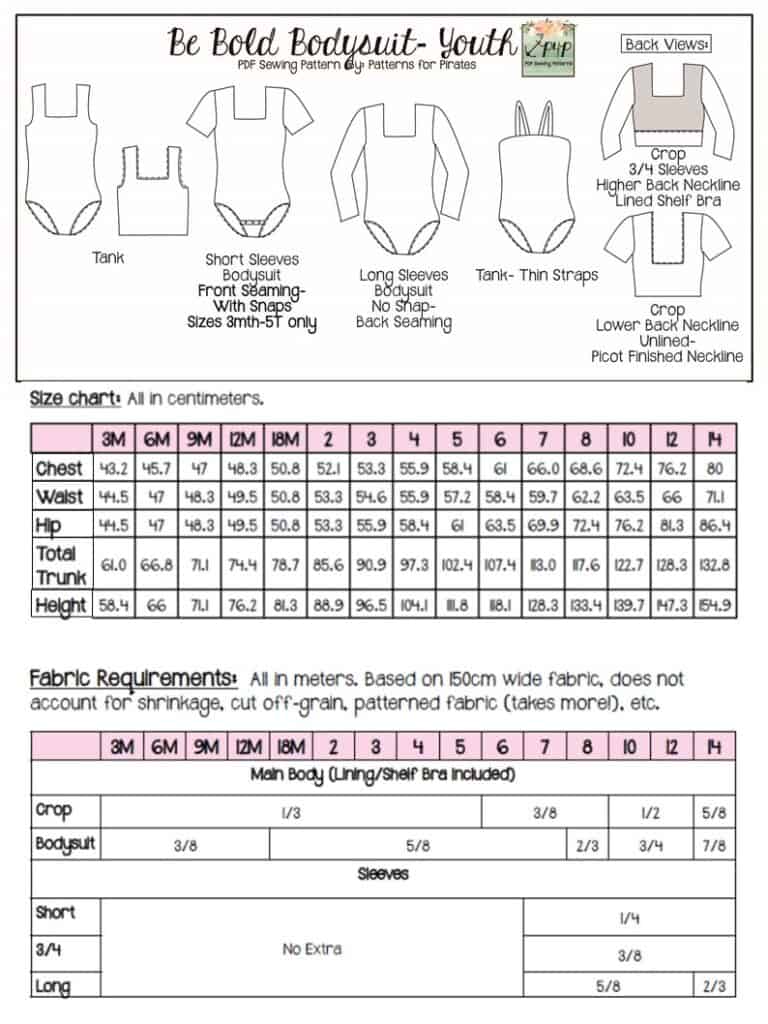
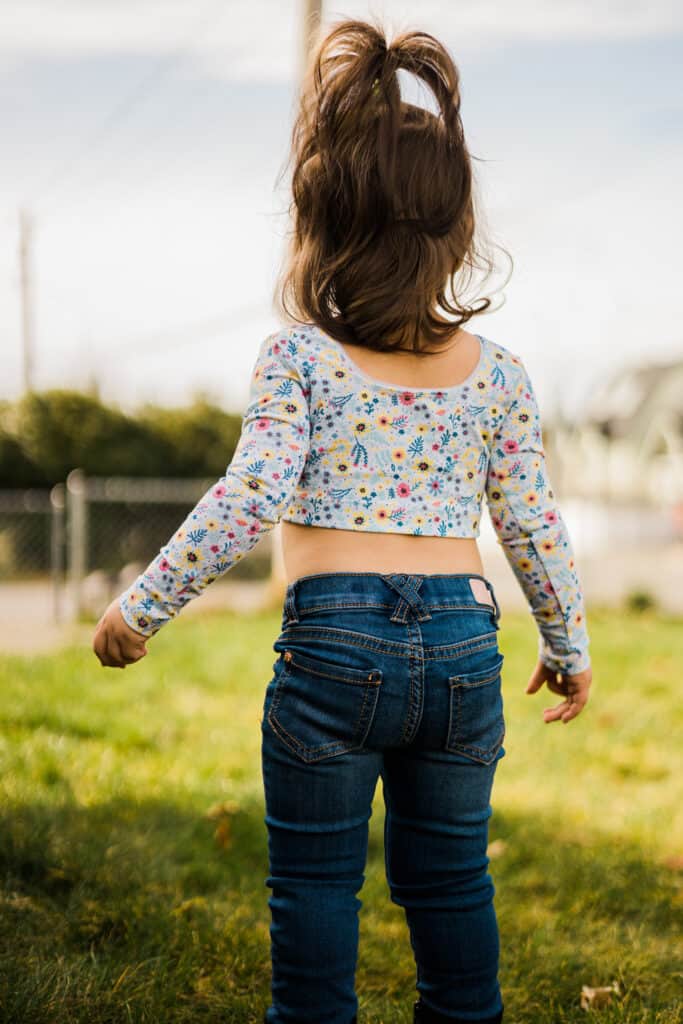
The youth sizes range from 3m – 14 and the adult sizes are for the full, newer size chart, extending from XXS – Plus 5X! If you haven’t sewn with us in a while, please make sure to check the size charts, as there were slight adjustments made to accommodate the new size range for adults.
*Want to learn more about how to measure yourself for these pattern? We’ve got you covered with an in-depth blog HERE. And in case you’re new to Patterns for Pirates and PDF patterns in general, we have a great blog full of new-user tips HERE to help you get started! As with all of our current releases and updates, the pdfs now include our layers feature and can be found in Letter, A4, A0 and projector sizes. And for even more helpful fun, we have a free* printable that you can use to help record your measurements as you take them.
Let’s take a quick look at all of the options!
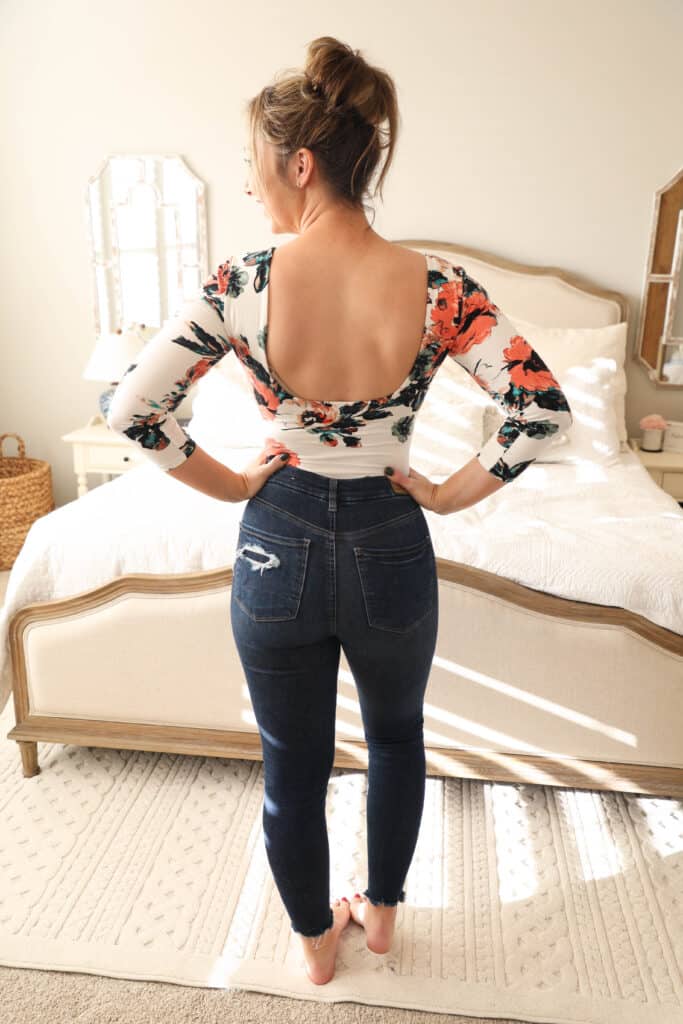
There are three options available for the sleeves- short, 3/4, and long. If sleeves are quite the look you’re going for, check out the sleeveless options, including a classic tank strap as well as a thin strap tank. For the necklines, not only is it a fun squared design, there are several options that can be mixed and matched. If you’re feeling a bit daring, there is a low option available for both front and back bodices. If you’d like a little more coverage, there are also higher cutlines. You can use these options together to create your perfect look. To help finish the necklines, use either a simple picot elastic or finish with a lining and shelf bra. To round out the Be Bold Bodysuit, you have multiple leg options (available on the adult version). This includes either a thong or brief plus you can choose if you’d like the seam in the traditional back spot or add snaps with a front seam for ease of snapping. The bodysuit is partially lined so you can use the bodysuit as your undergarment.
SLEEVED OPTIONS


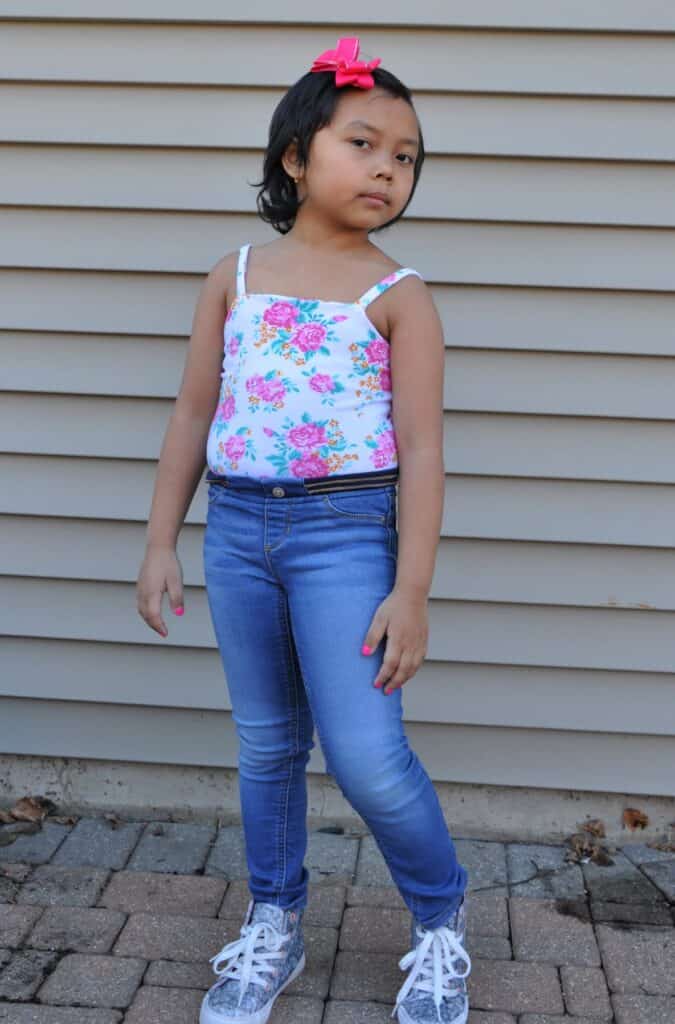
SLEEVELESS OPTIONS
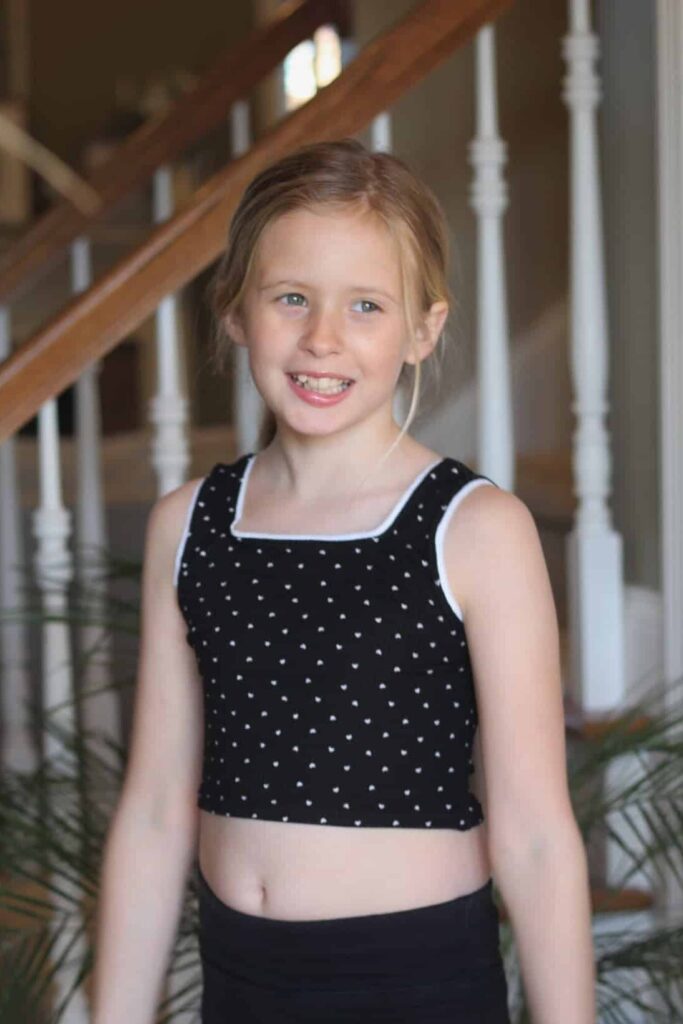
NECKLINES

ADULT LEGLINE OPTIONS
PICOT FINISHING
LINED w/SHELF BRA
What are you waiting for? Head on over and grab yourself a copy of the perfect Be Bold patterns! They are available on sale (no code needed) through 11:59pm CST, March 19, 2021.
BE BOLD BODYSUIT | BE BOLD BODYSUIT – YOUTH | BE BOLD BODYSUIT – BUNDLE
Maybe hoping for a little more inspiration before you make the purchase? Head over to our Facebook group where you can see tester albums full of amazing images!
Be Bold Bodysuit | Be Bold Bodysuit – Youth
If you’re looking for even more options, we show you a few more ways you can use this pattern in our Be Bold Easy Hacks post.

- « Previous Page
- 1
- …
- 17
- 18
- 19
- 20
- 21
- …
- 67
- Next Page »