Cozy Wrap Sew Along – day 7
The wait is over! I’m here to announce the two winners of our Cozy Wrap Sew Along so let’s get to it.
Congratulations Celeste Wright! You are our first winner! Celeste won a $20 gift certificate to Patterns For Pirates and a January Fabric For Pirates Box (fabric and swag).
Our second winner is Debra Moyer! Congratulations! Debra won a $20 gift card to Made for Mermaids and a January Fabric for Pirates box (fabric and swag).
Thank you so much for joining me last week! I throughly enjoyed sewing the Cozy Wrap along side you. Big thank you to Judy for providing the Fabric 4 Pirates prizes too. If you haven’t checked out the subscription, do that here! It’s so fun!
Up next, the Mermaids are taking over the SAL group. See you back here in March!
Cozy Wrap SAL day 1 | Cut fabric
Cozy Wrap SAL day 2 | Sew shoulder and side seams
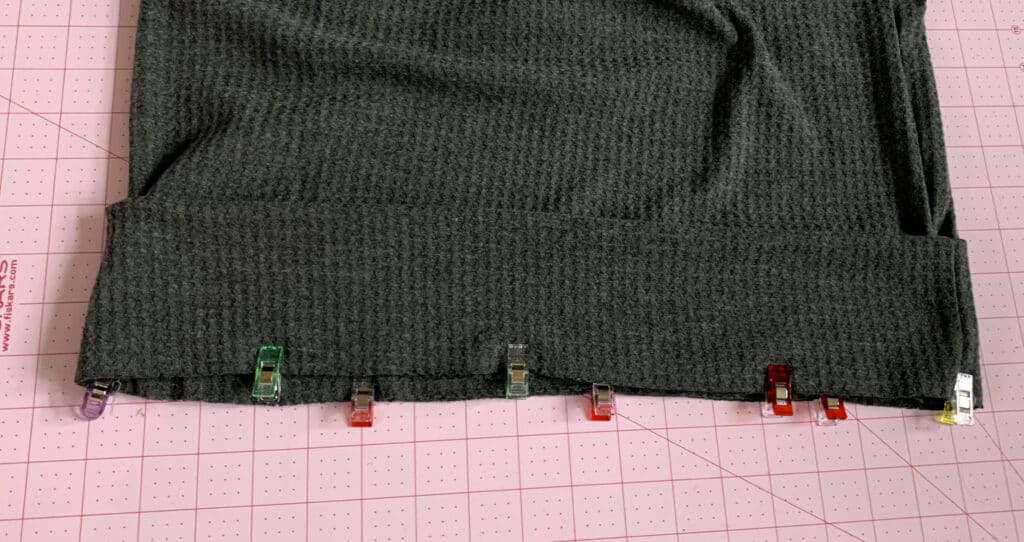
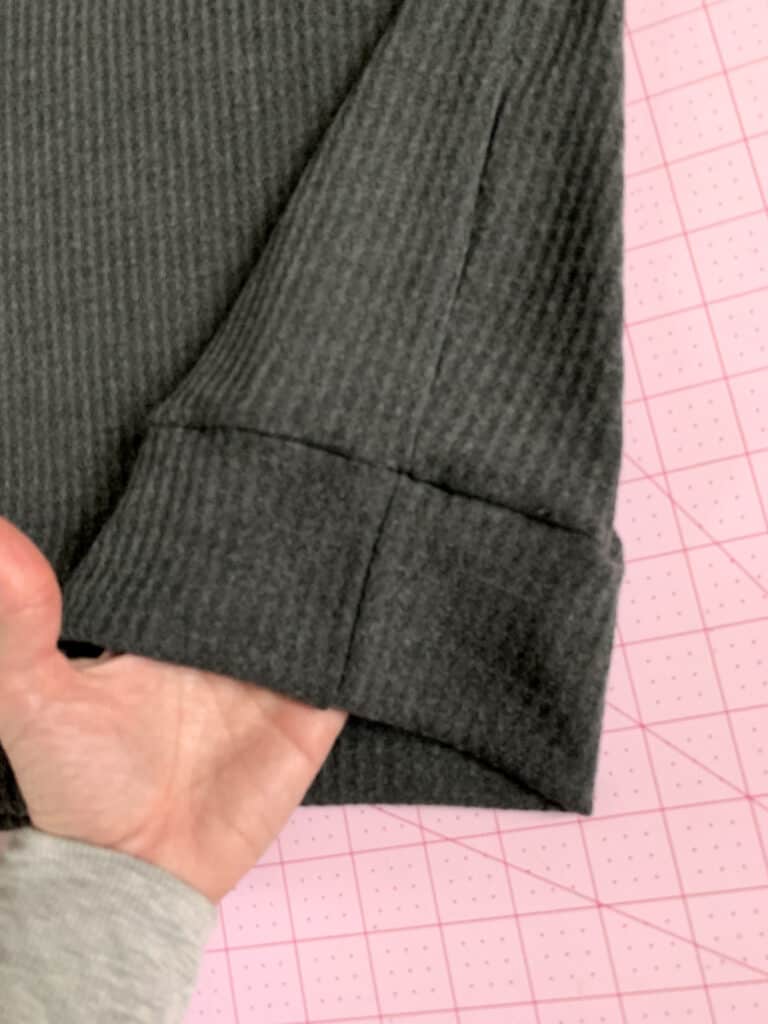
Cozy Wrap SAL day 3 | Add bottom bands
Cozy Wrap SAL day 4 | Add neckband
Cozy Wrap SAL day 5 | Add sleeves
Cozy Wrap SAL day 6 | Add waist tie
Cozy Wrap SAL day 7 | Winners announcement
P4P University Color Blocking Tips and Tricks
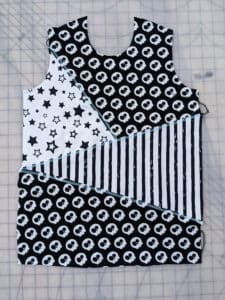
Hello, fellow sewing friends! I’m super excited to talk to you today about color blocking. As long as I’ve been in the sewing world color blocking has always been really popular. A lot of patterns even include it! But what if your favorite p4p pattern doesn’t have any color blocking options? Well, today I’m going to teach how to easily do it yourself! If you aren’t familiar with color blocking, it’s basically just adding interesting unique blocks of different fabrics to your pattern without altering the fit. It’s a great way to spice up a regular t-shirt, use up some scraps, and make for some fun visual art. You can color block anything from sleeves, front bodice, back bodice, legs, hoods, if it has a pattern piece- you can color block it. Now, let’s get started!
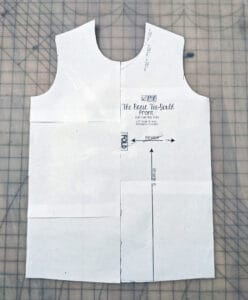
First, you’ll want to pick your pattern and print out your chosen size. (If you are using a projector you can do it but I highly recommend printing whatever piece you want to color block. For my example, I color-blocked just the front bodice so I printed that and then used my projector to cut the rest of my pieces. ) Now if you plan on doing any “angled” color blocks and your pattern piece is on a fold- I recommend tracing the mirror image and attaching it to your piece so you have the “full piece”. I used The Basic tee for my son and chose to only block the front of the shirt.
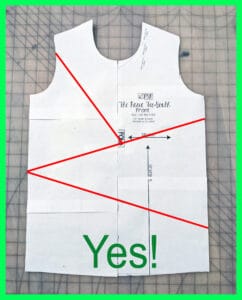
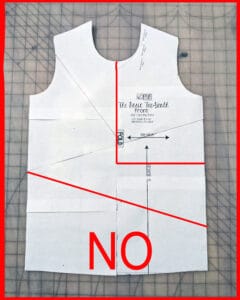
Now the fun part- Choosing your color block! Honestly, you can really do anything so just start drawing! I use a straight edge to make sure my lines are nice and tidy (easier to sew that way). The only thing I would avoid is really complicated shapes or anything like a floating “v-point” that doesn’t reach an end (you can see my example below in the red no box). If you are new to this technique I’d start simple to get the hang of it and then you can expand from there. This is what I drew out and what will be the final “look” of my shirt.
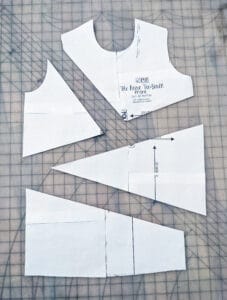
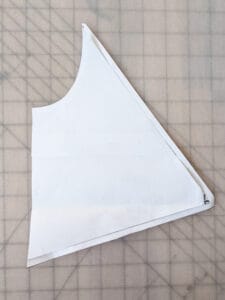
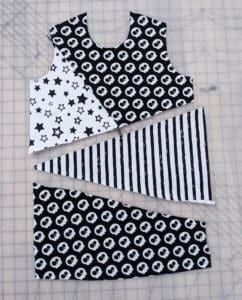
Once you’ve drawn your color-blocked lines you’ll want to cut them all out and these are your new pieces. Decide which fabric you want for what piece and it’s time to start cutting.
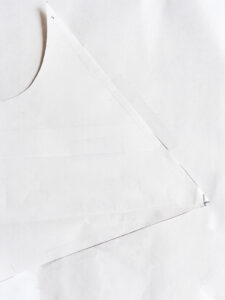
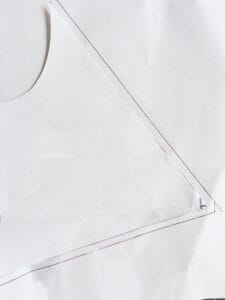
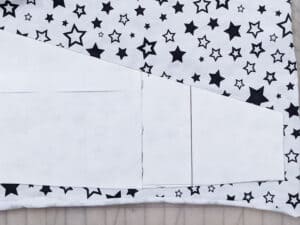
Now here’s the most important part- You’ll need to add seam allowance to those pieces. You can choose whatever amount but I usually go with 1/4 inch. Now you can either do this by laying your new pieces on a piece of paper and adding it to that piece so it becomes part of your pattern piece.
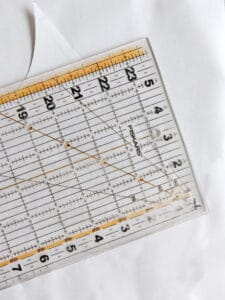
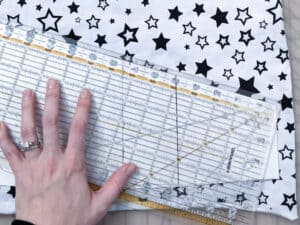
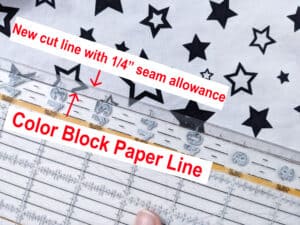
Or what I do is simply use my quilting ruler while cutting to add it to my piece. So for the cut part of my piece that needs seam allowance, I just line my quilting ruler 1/4 over my cut paper line and then use my rotary blade to cut that line instead of my paper line.
Make sure you add seam allowance to every place that you cut out a color block line on your pattern piece.
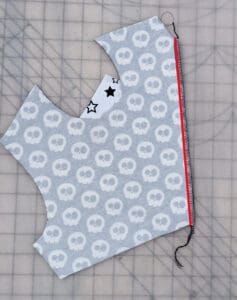
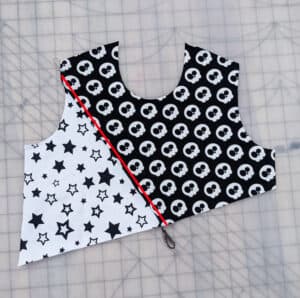
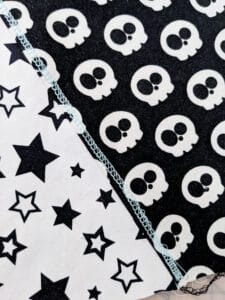
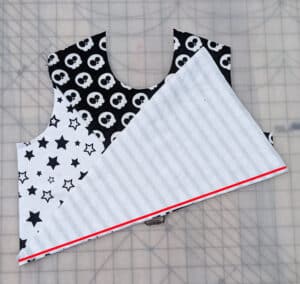
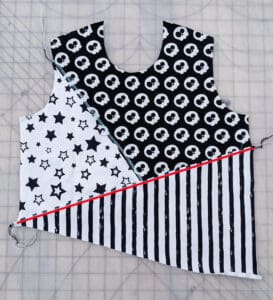
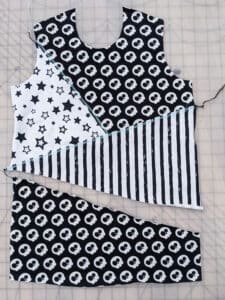
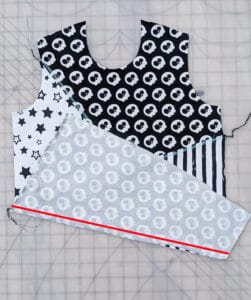
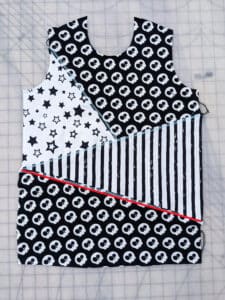
Now it’s time to sew! If you decided to do any intersecting lines like this one I did. You’ll want to sew those pieces together first. So line up your piece edges right sides together and sew with the seam allowance you chose. You’ll then want to topstitch your seam allowance down.
(Tip- if you are using a coverstitch I like to do a reverse coverstitch on the seam allowances with a fun color to add some extra “pop” to my color blocking).
Now repeat this with your other pieces until they all come back together. It should finish at the same size as your initial pattern piece before you added color blocking.
Finally, you can sew your garment together as recommended by the pattern. The only difference is you have a cool color-blocked piece instead of a plain piece!
Yay! All done!! Can’t wait to see what you all create!
Happy Sewing,
Michelle
Cozy Wrap Sew Along – day 6
We did it! We made it to the last day of the sew long. Today we create the waist tie and show off our Cozy Wraps.
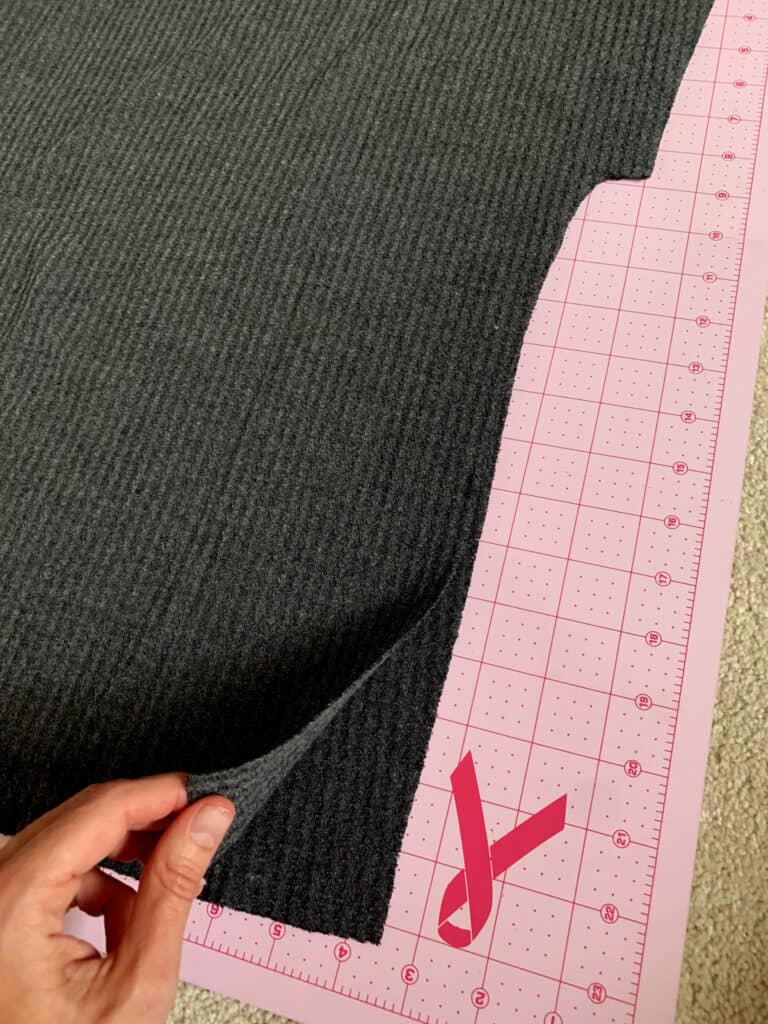
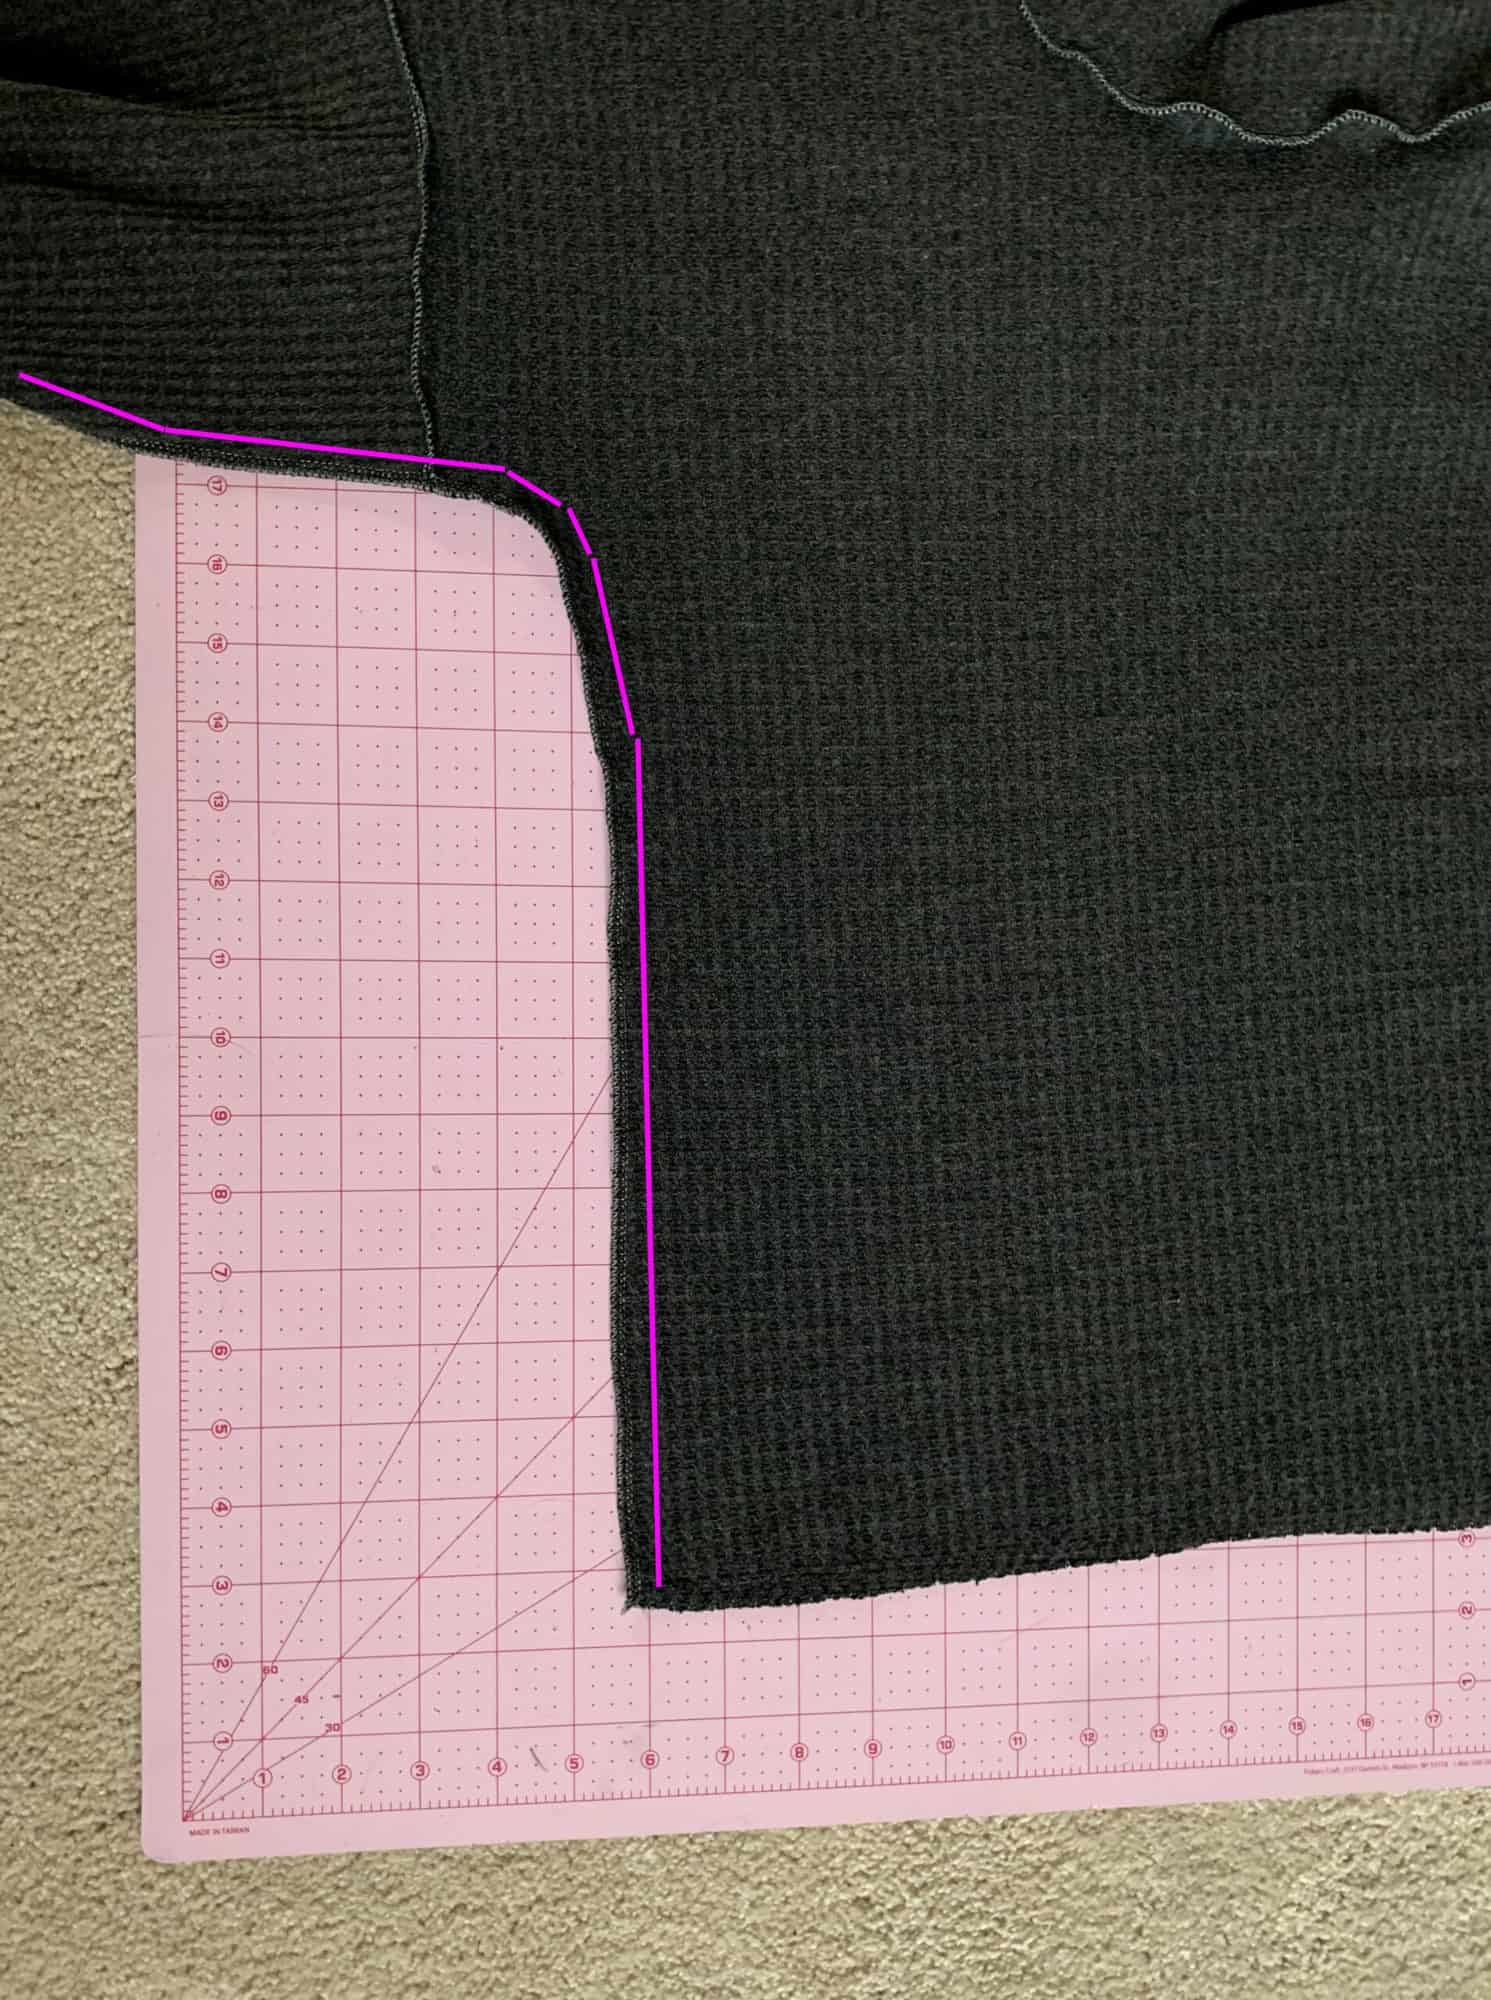
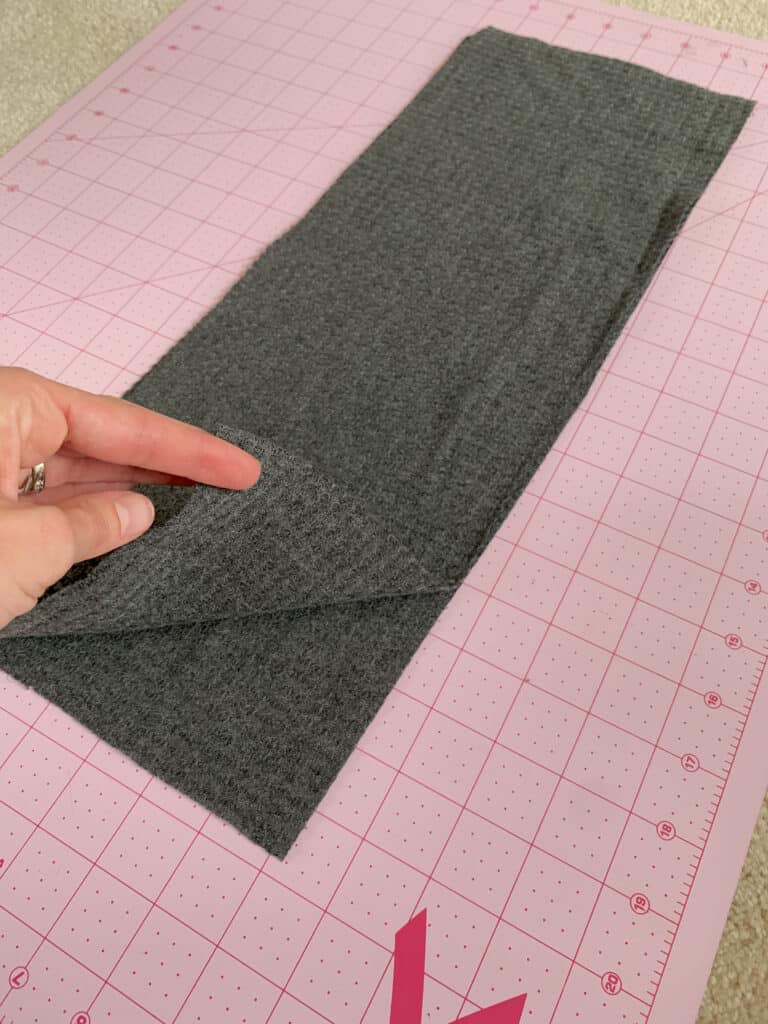
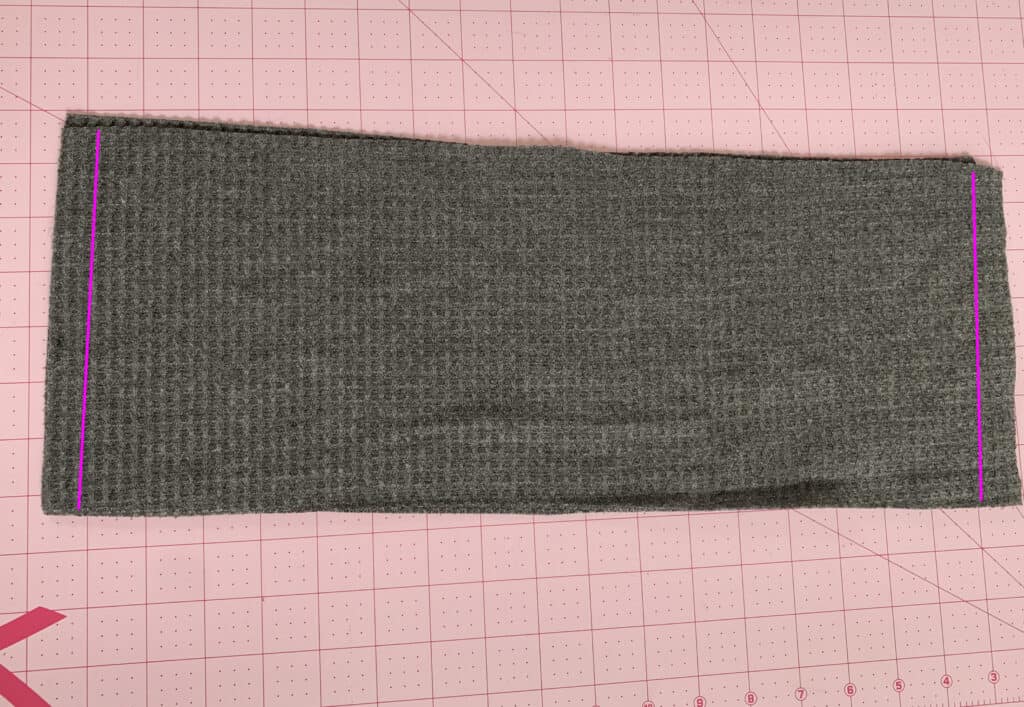
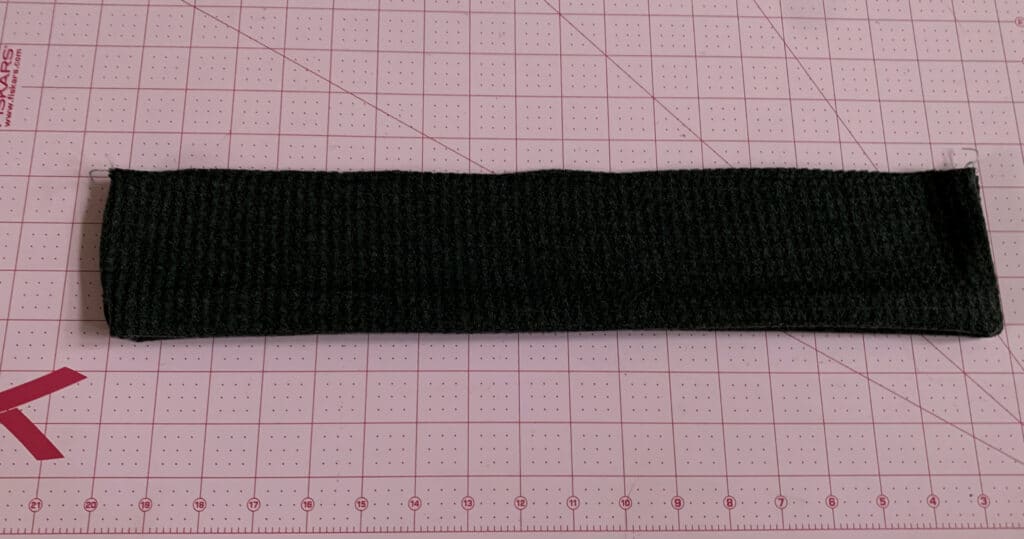
You should have 4 pieces left in your pile. You’ll be creating the “main” and “lining” of the waist tie by stitching two short ends right sides together. You only have two long pieces now that you are stitching wright sides together, along all 4 raw edges. Don’t forget to leave a 2-3 inch opening to be able to turn the tie right side out. Top stitch all around, or be lazy like me and just close the opening.
Give your tie a good steam press to reduce any waviness. Slide the ends of the tie through the tie openings of the side seams from the inside out. You can see this process in today’s video linked below.
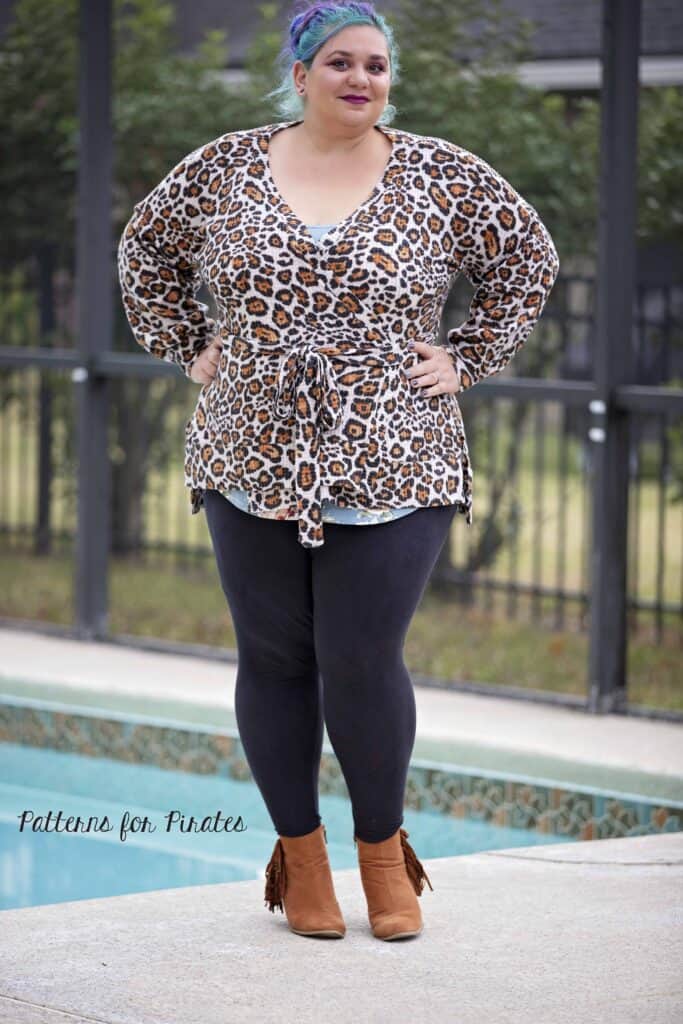
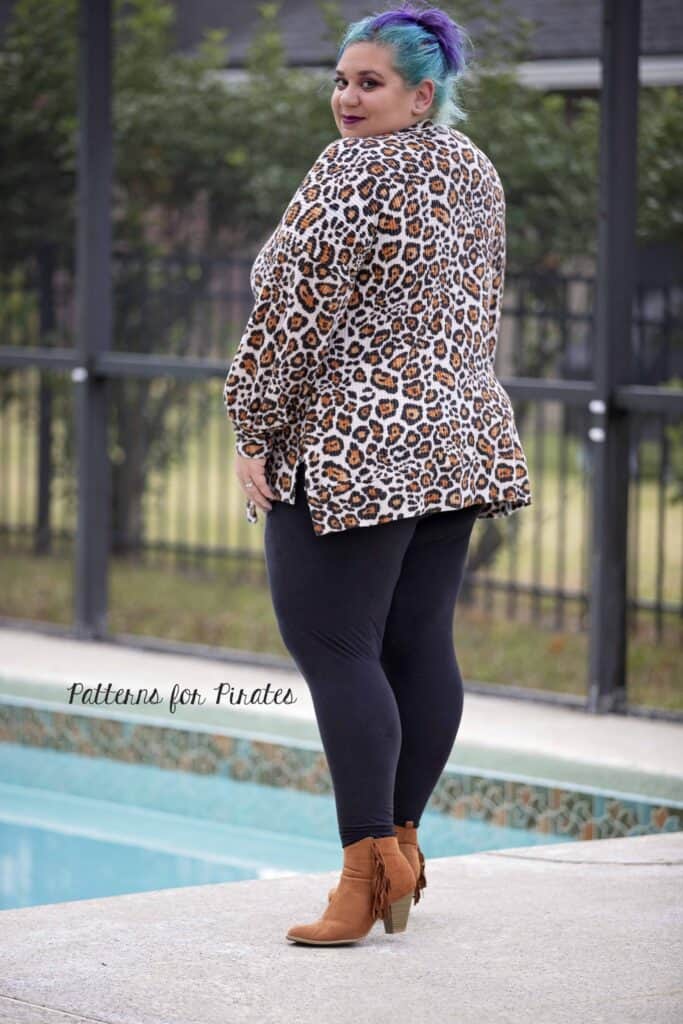
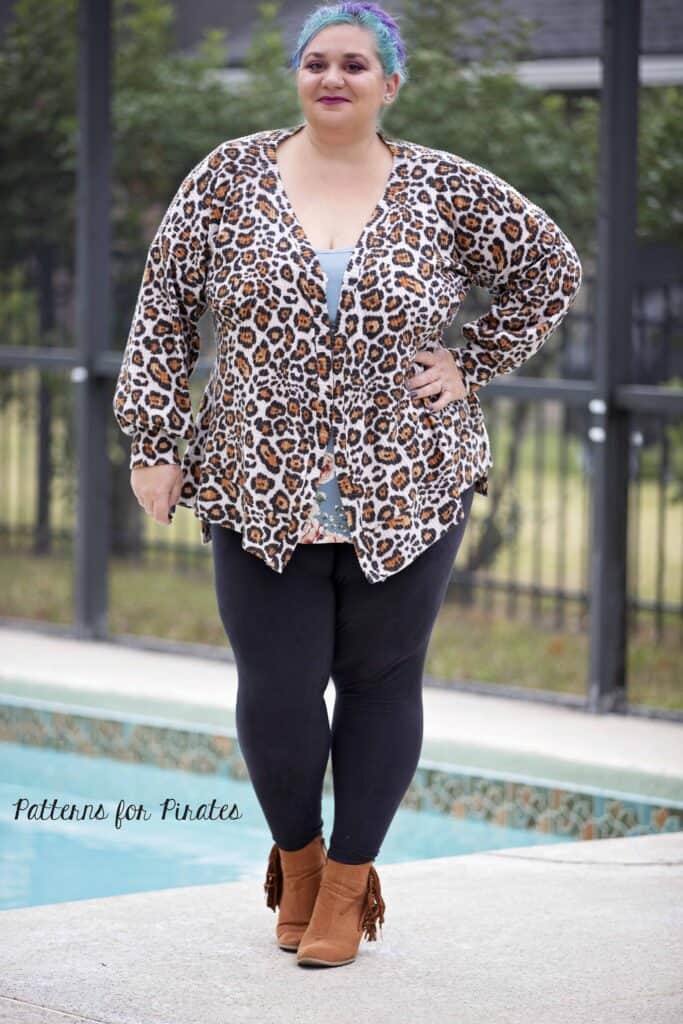
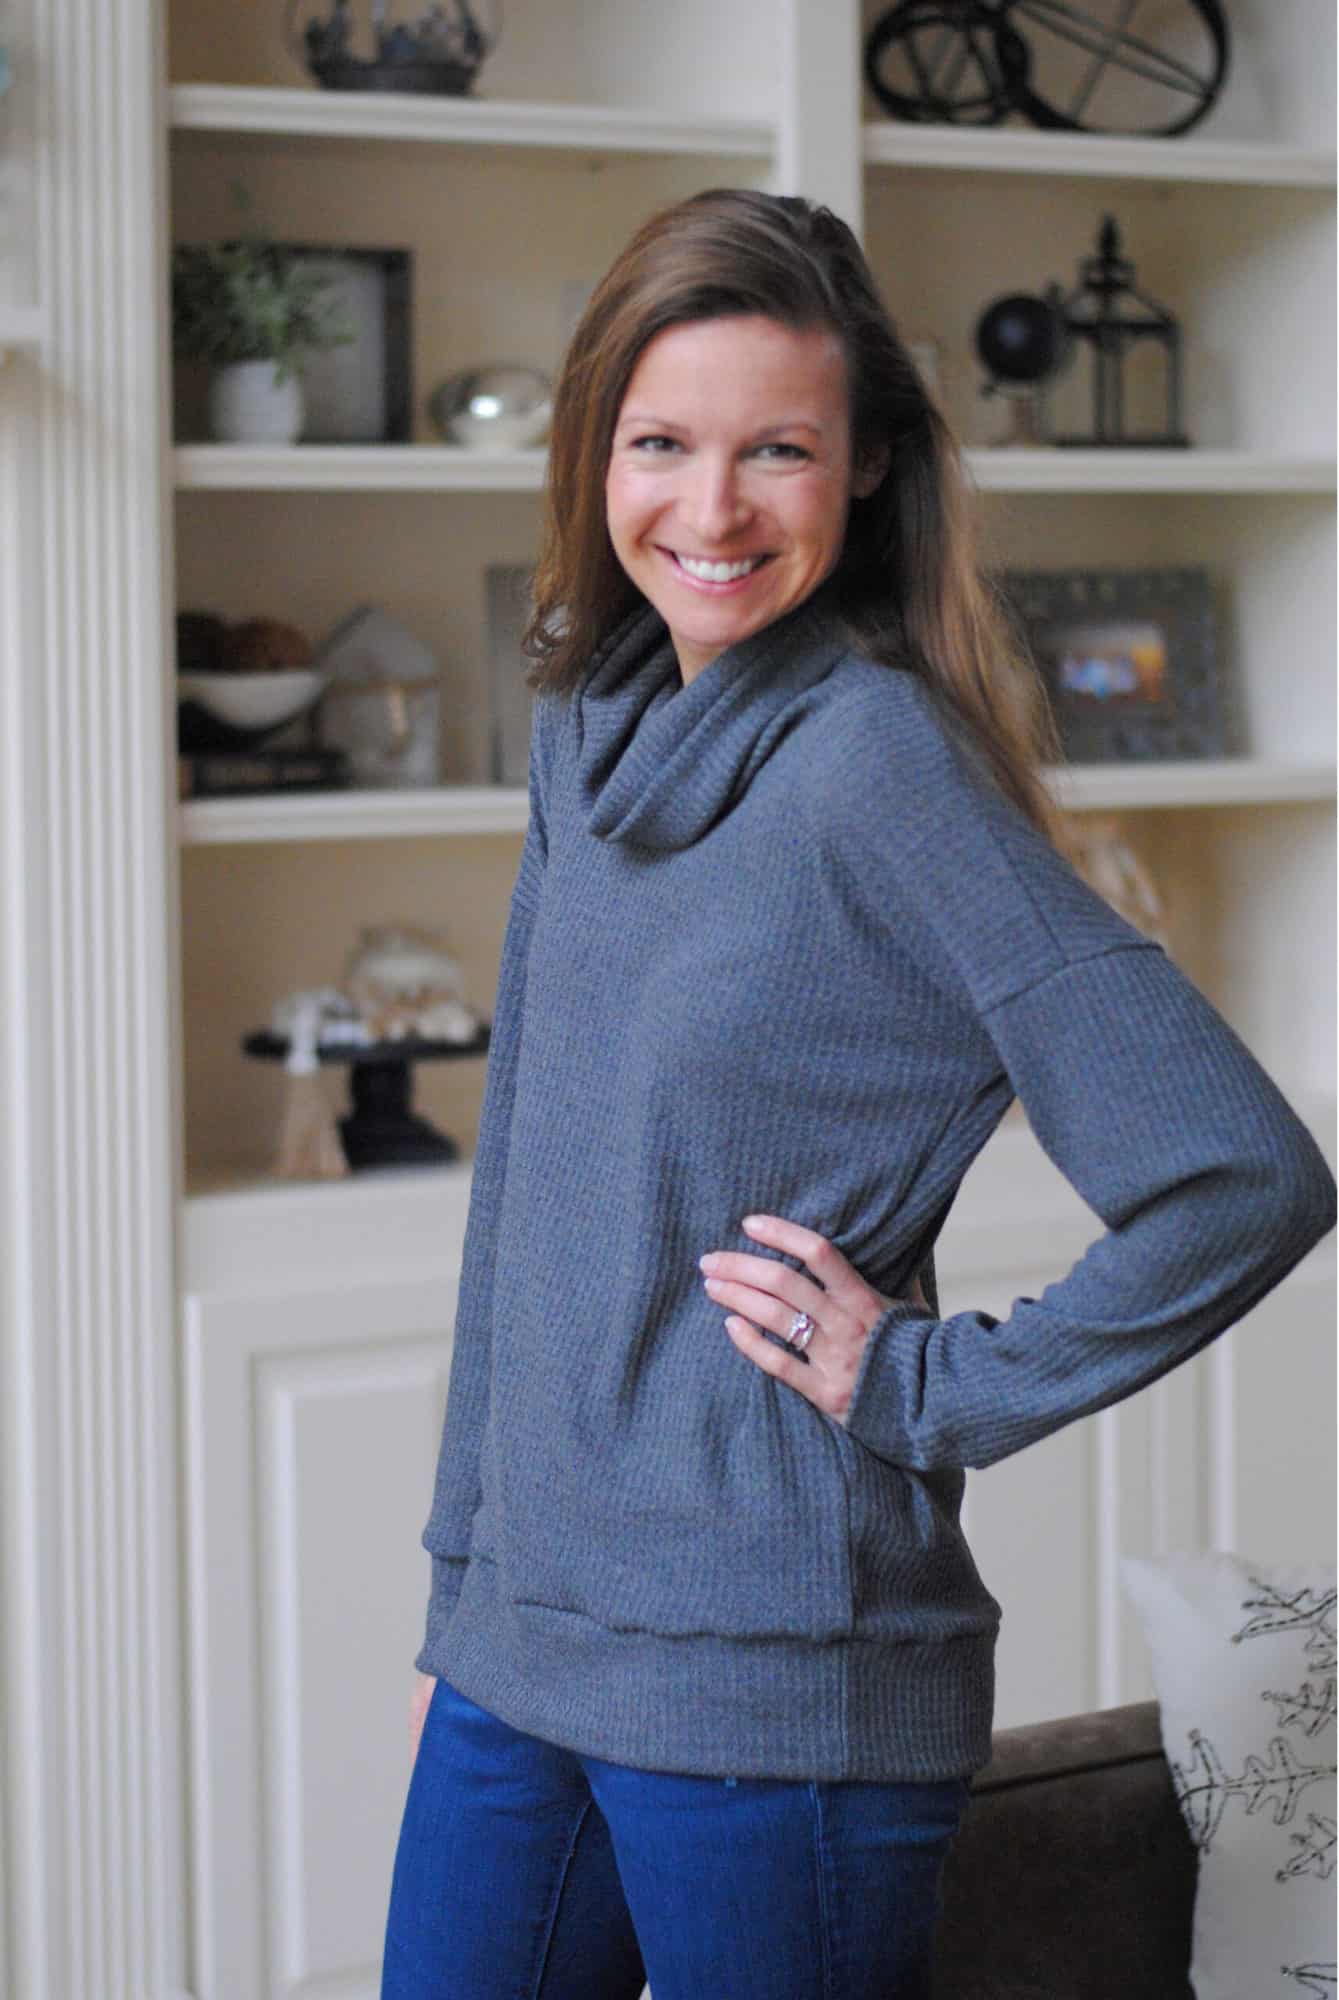
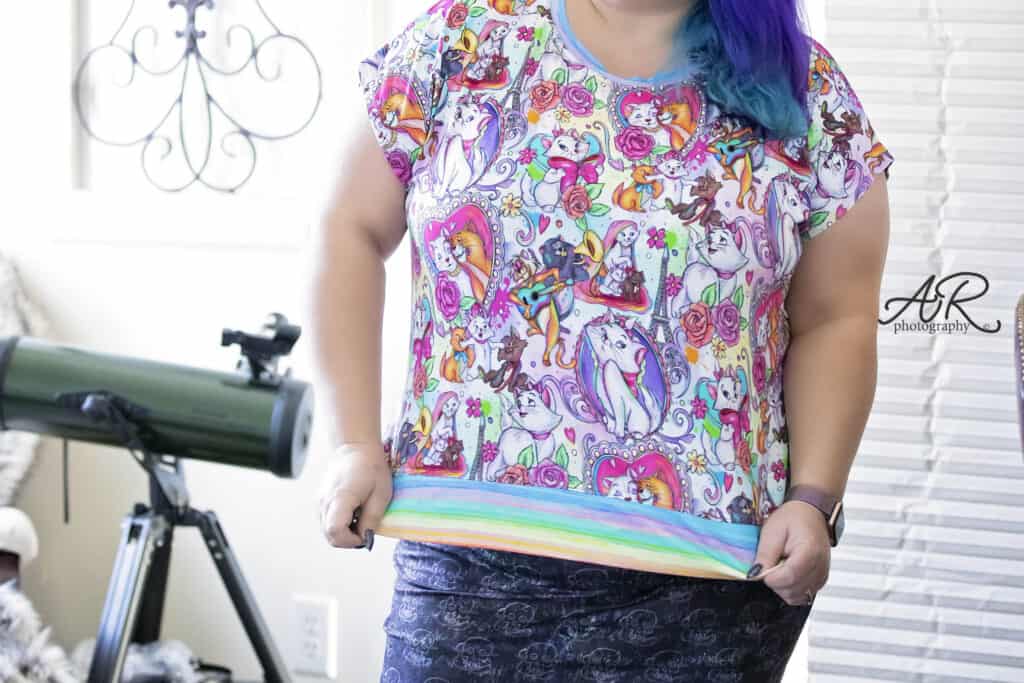
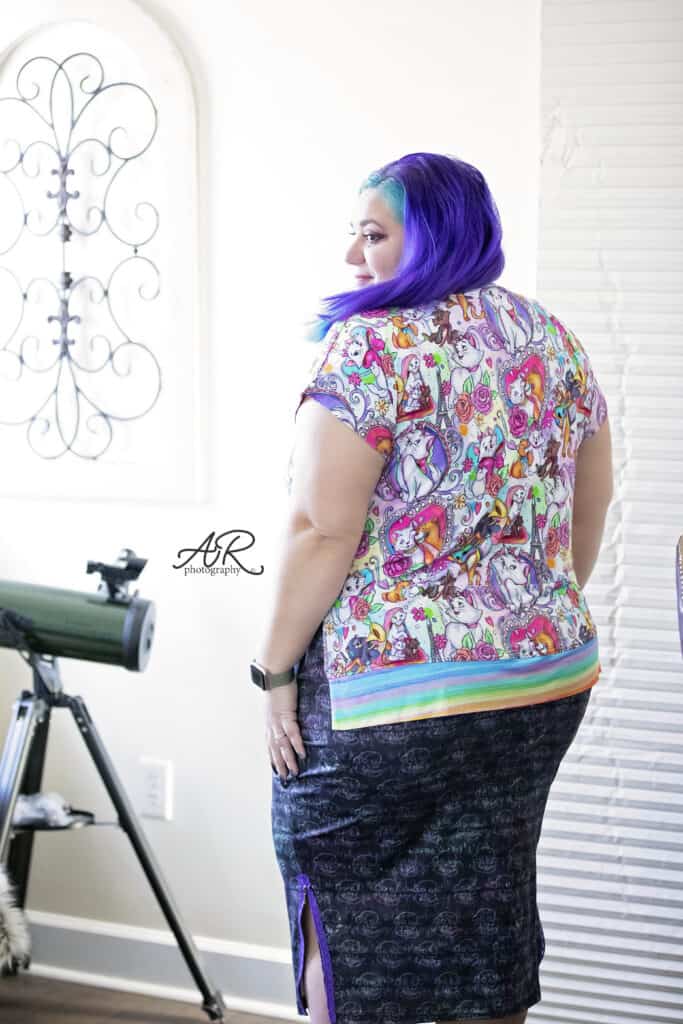
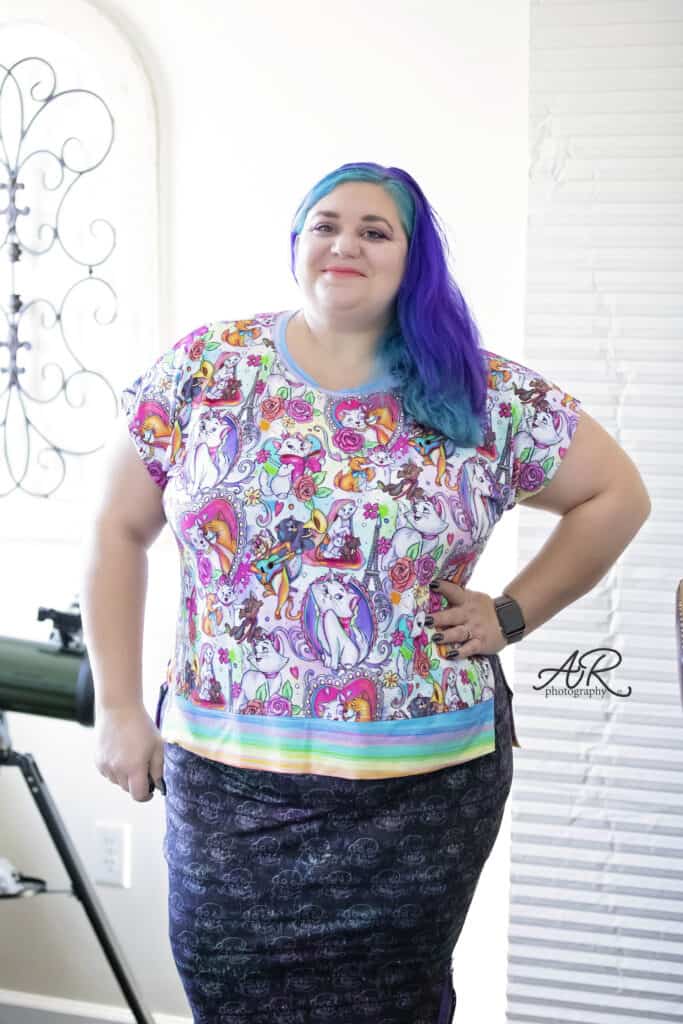
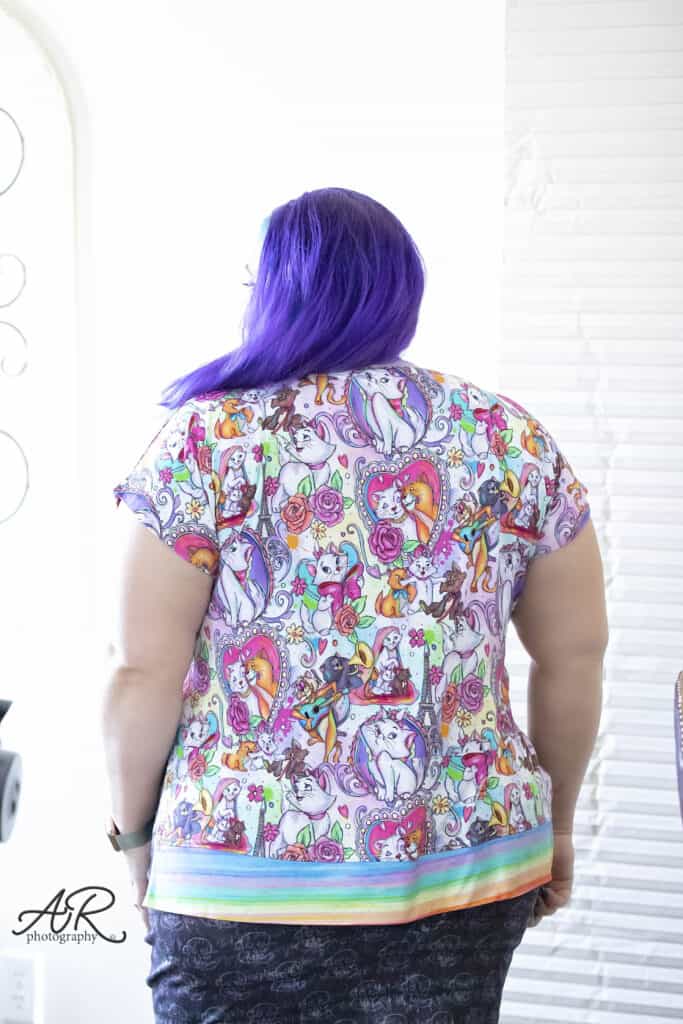
What an amazing job you did this past week! I’m so proud of you all! Here is my finished tunic Cozy Wrap, I absolutely love it! Don’t forget to post a picture of your finished project in the comments of day 6 photo of the Cozy Wrap SAL album. We will choose the winners from that thread!
Cozy Wrap SAL day 1 | Cut fabric
Cozy Wrap SAL day 2 | Sew shoulder and side seams
Cozy Wrap SAL day 3 | Add bottom bands
Cozy Wrap SAL day 4 | Add neckband
Cozy Wrap SAL day 5 | Add sleeves
Cozy Wrap SAL day 6 | Add waist tie
Sweater Weather – easy hacks
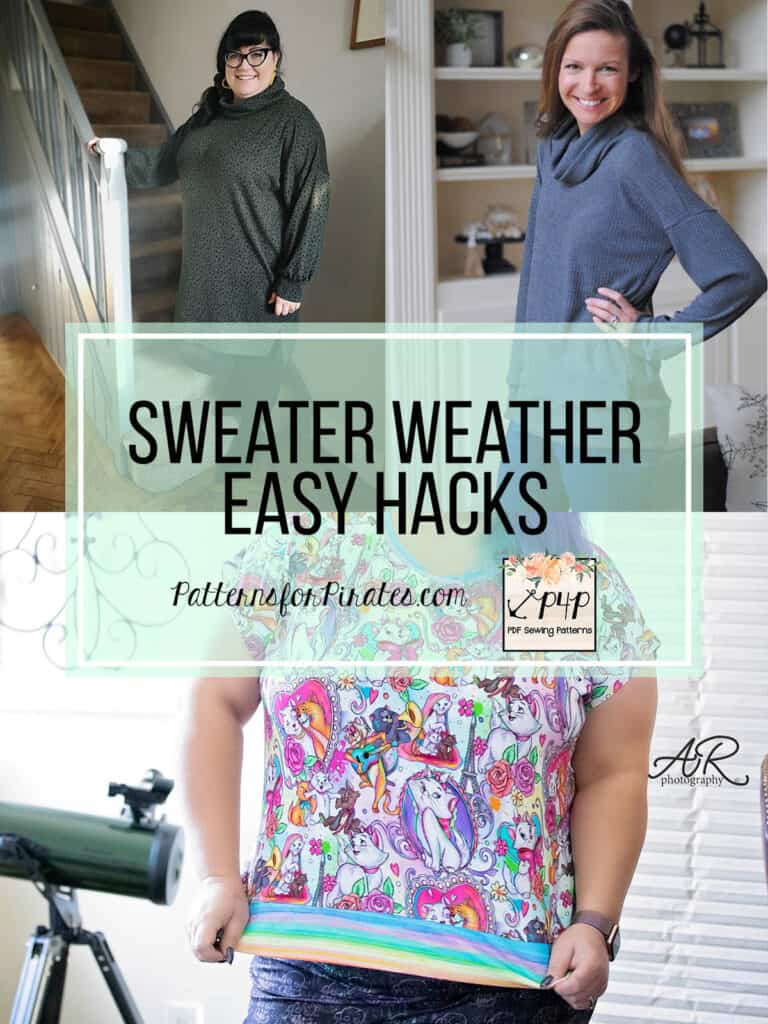
From brrrrrr to ummmm! This cold days, stay nice and warm with the newest P4P pattern, the Sweater Weather! Our blog contributors team has put together some quick and easy hacks to give you even more options to the pattern. Dana is showing you how to make a wonderful Sweater Weather dress, Jody ditches the side seams for a classic banded look and I took the sweater from winter to summer. Let’s get started!
…..
Dress
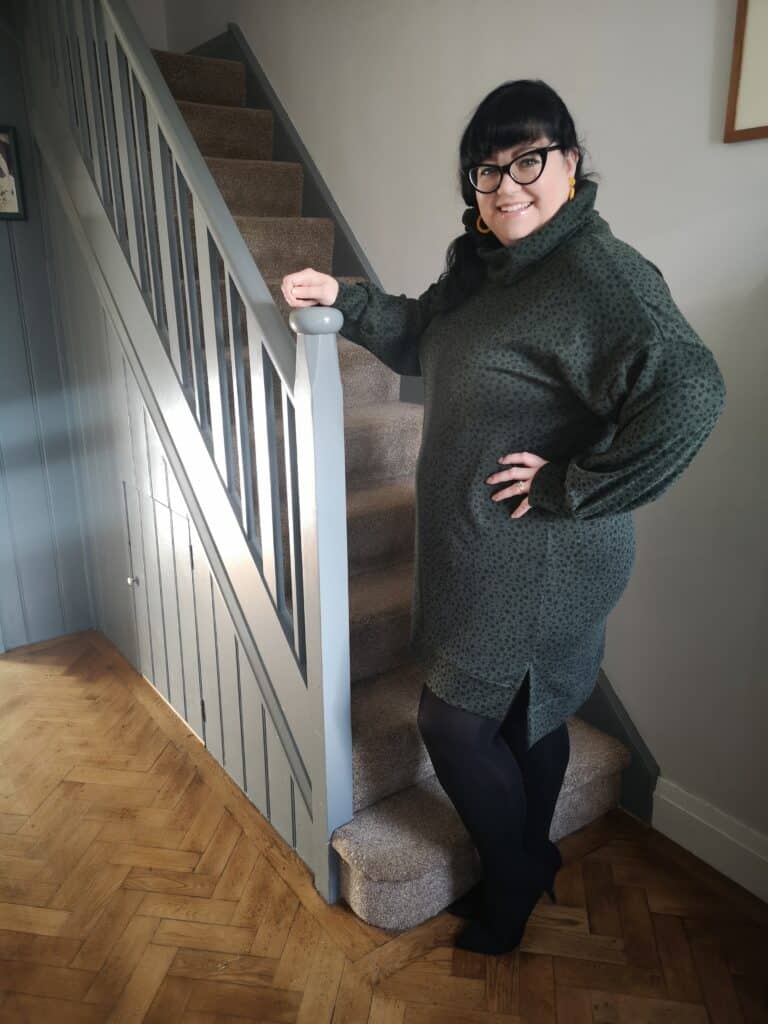
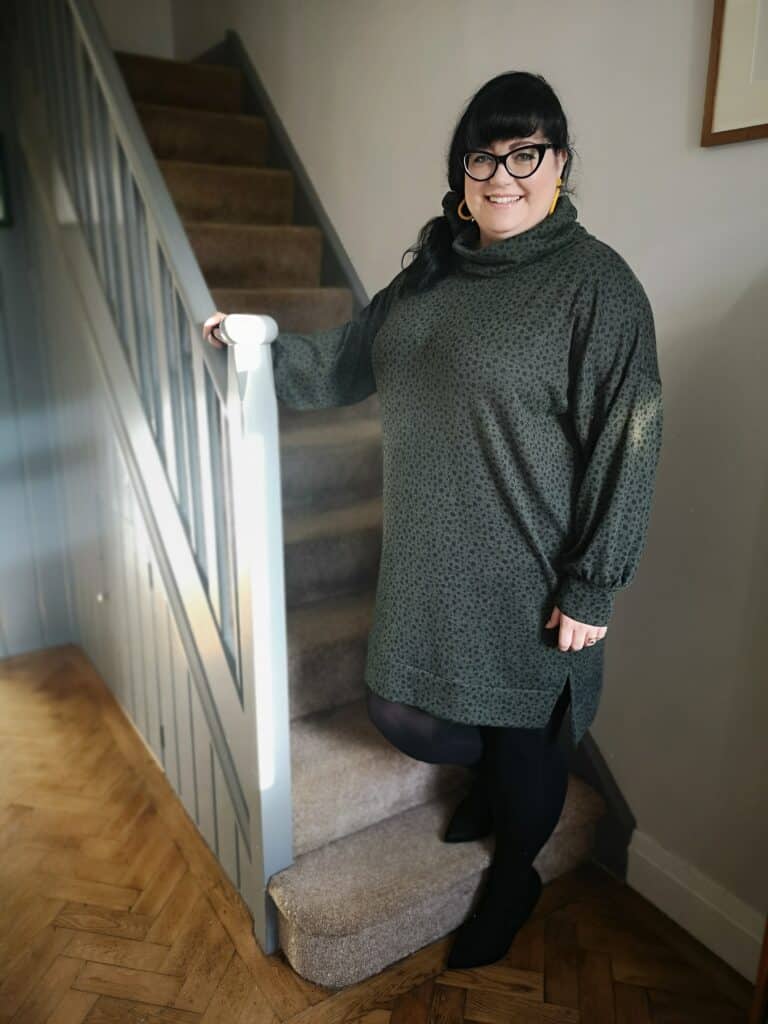
I live in sweater dresses in the winter months because it gets cold in the UK. I couldn’t resist doing a little hack to the new Sweater Weather length to recreate a Pinspiration I’ve had on my to-do list for a while.
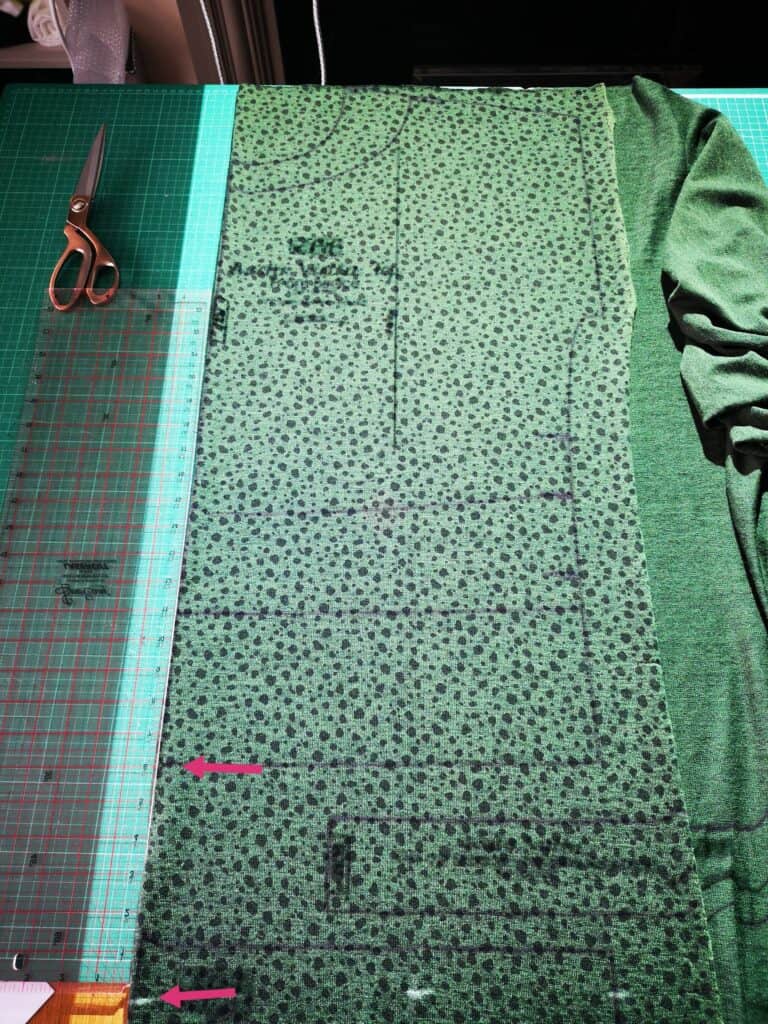
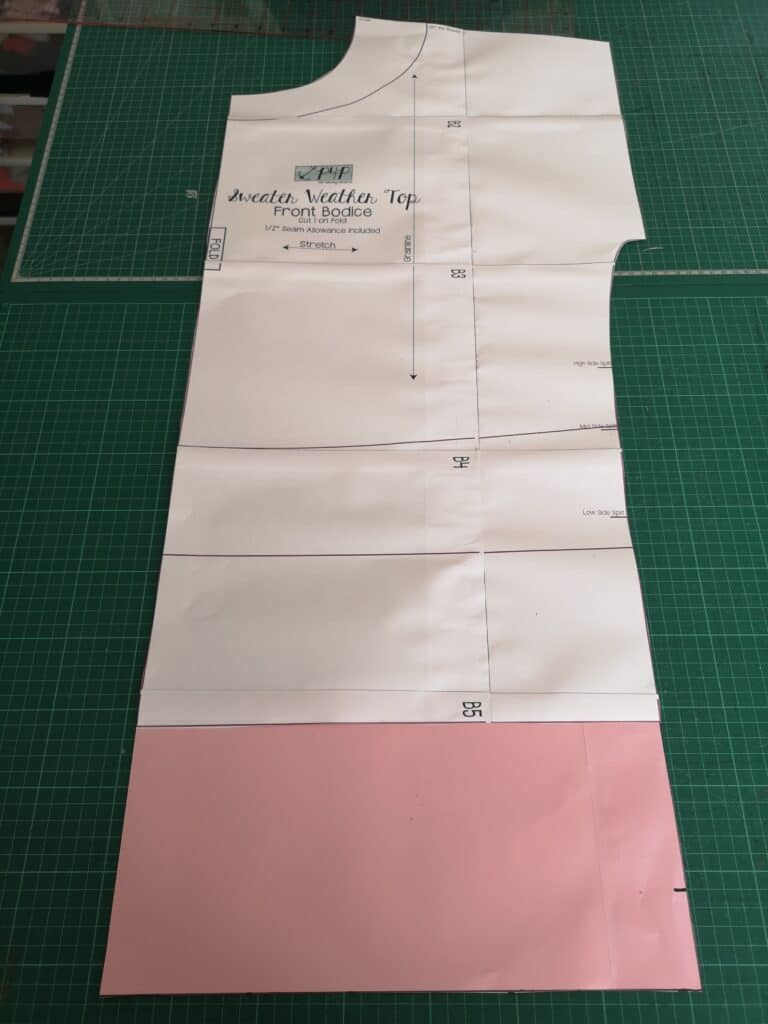
I measured the front pattern piece and then held the tape measure up to myself to decide how much length I wanted to add. I decided to go with 6 inches extra added to the tunic length, which is a little more that I would normally add but there is a hi-low cutline, and so I wanted to make sure the front would be long enough for decency.
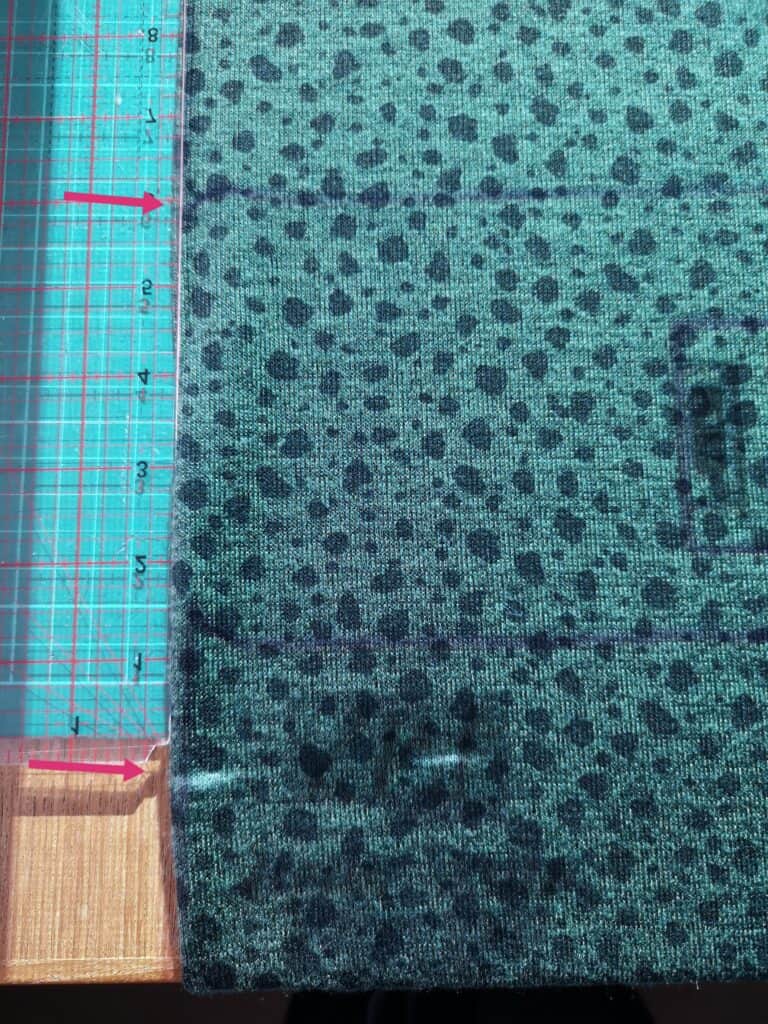
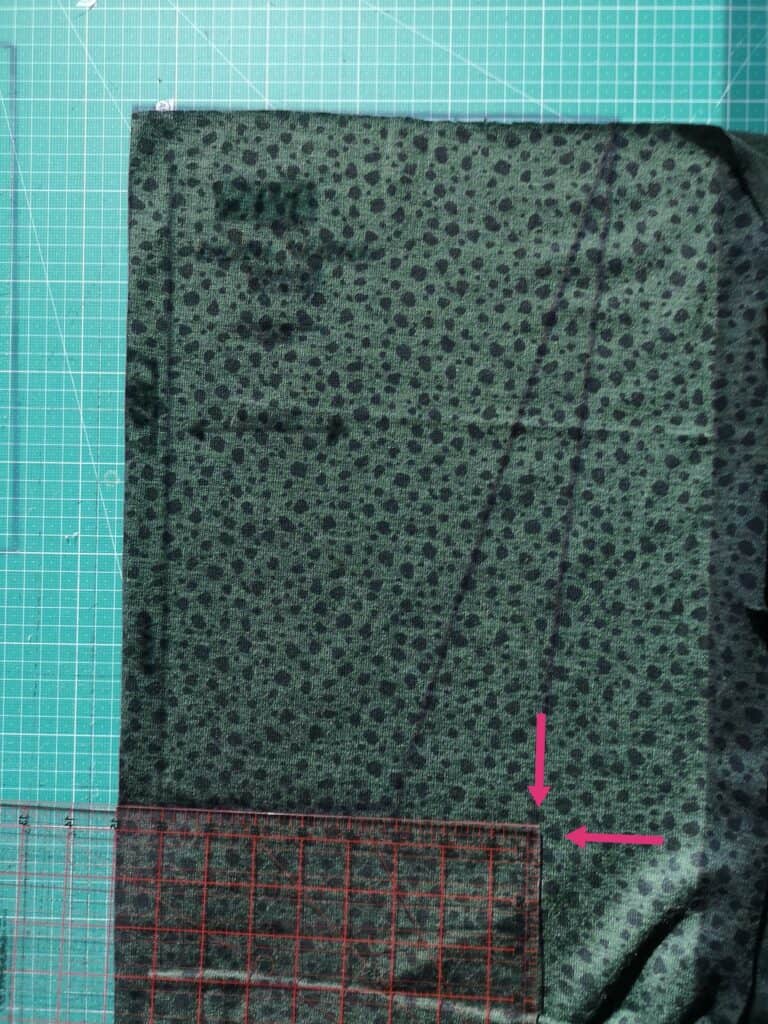
I use a projector these days and it was as simple as adding 6 inches extra length to the bottom of the front and back bodice pattern pieces, which I did on the fly with my perspex quilting ruler and rotary cutter.
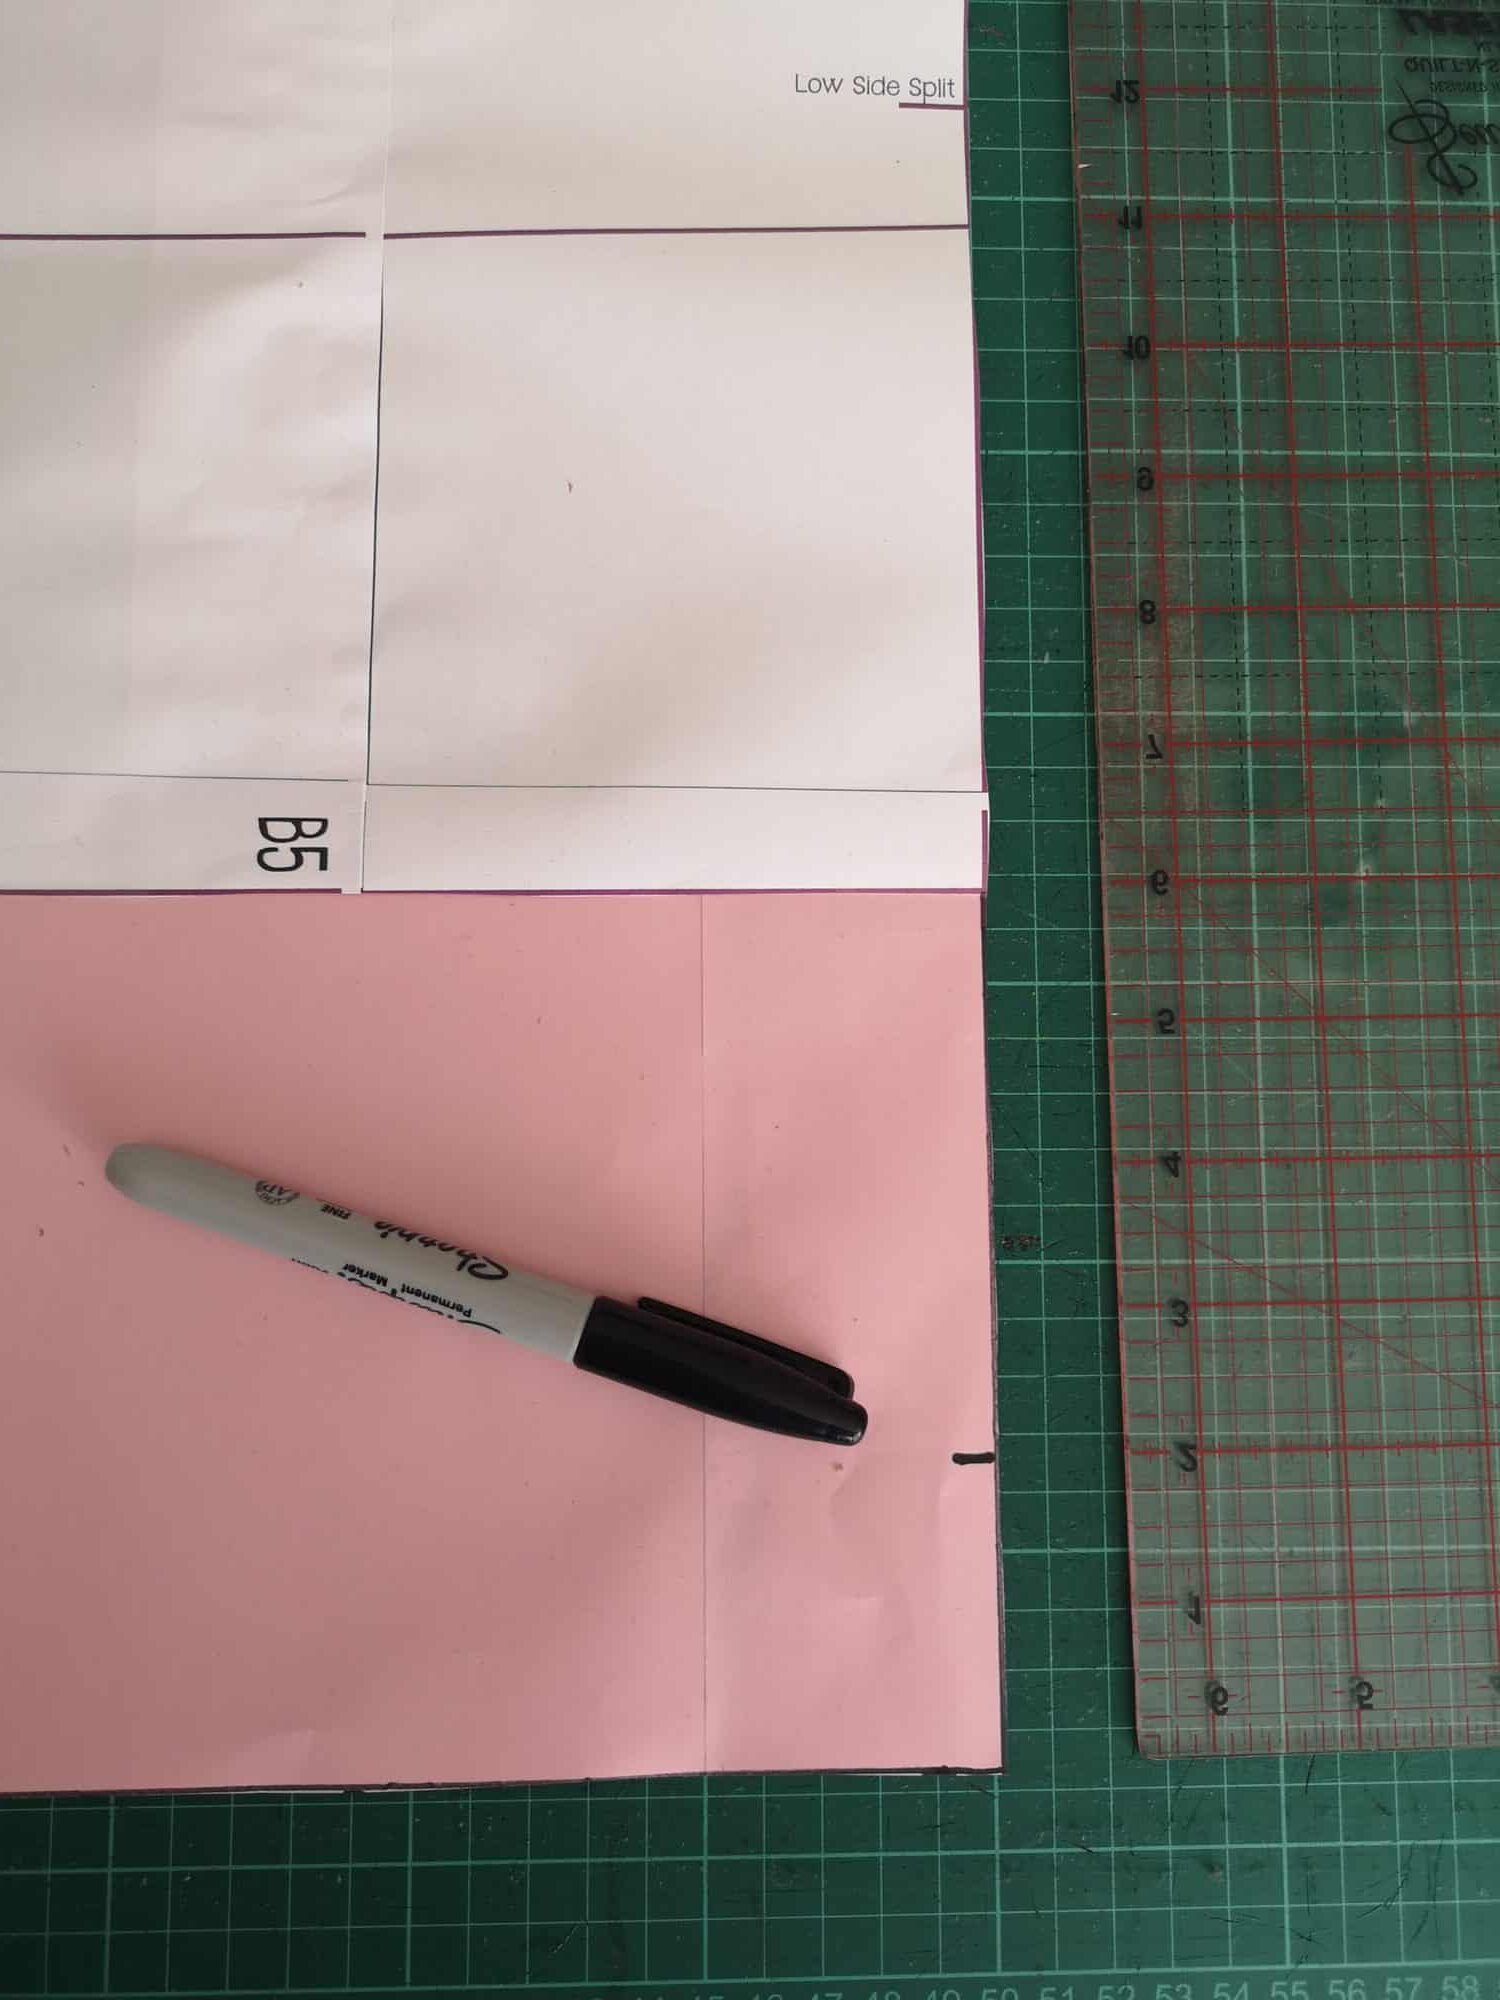
However I also printed out the pattern piece so you could see how it would work on paper too. The pink paper is the added section. I then decided to mark the notch for my side slit 2 inches up from the bottom edge of the pattern, but this would be up to you. I chase a 7 year old and a puppy around all day so I didn’t want that side split going too high, but you could go with whichever height you choose. Then repeat for your back piece.
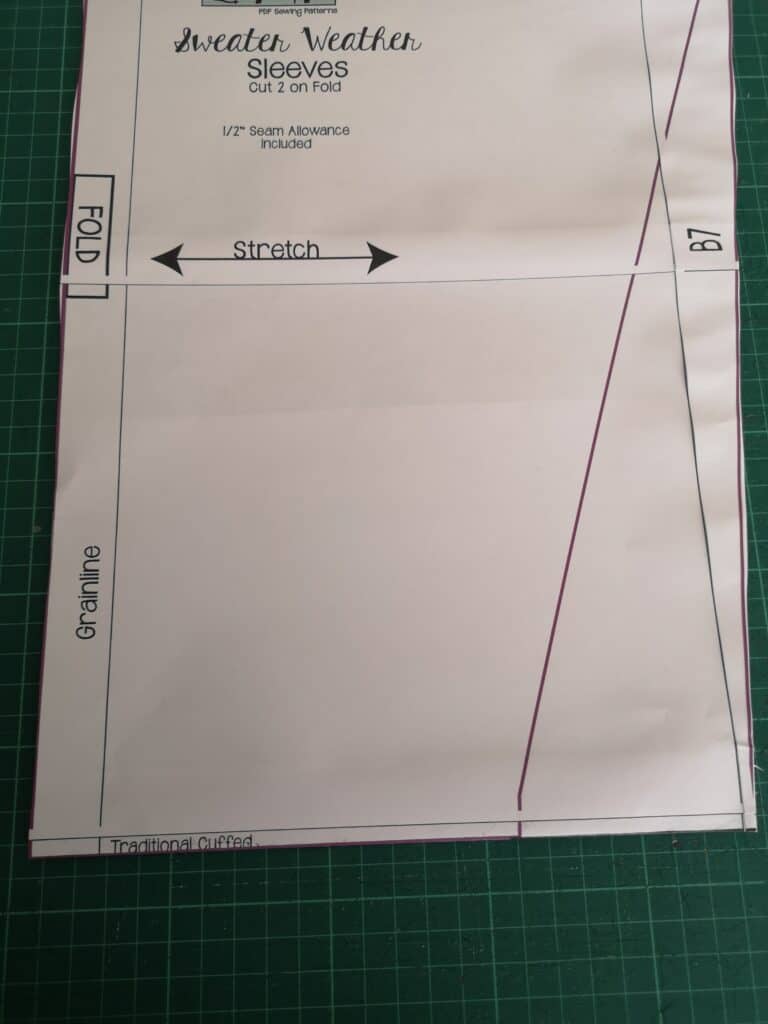
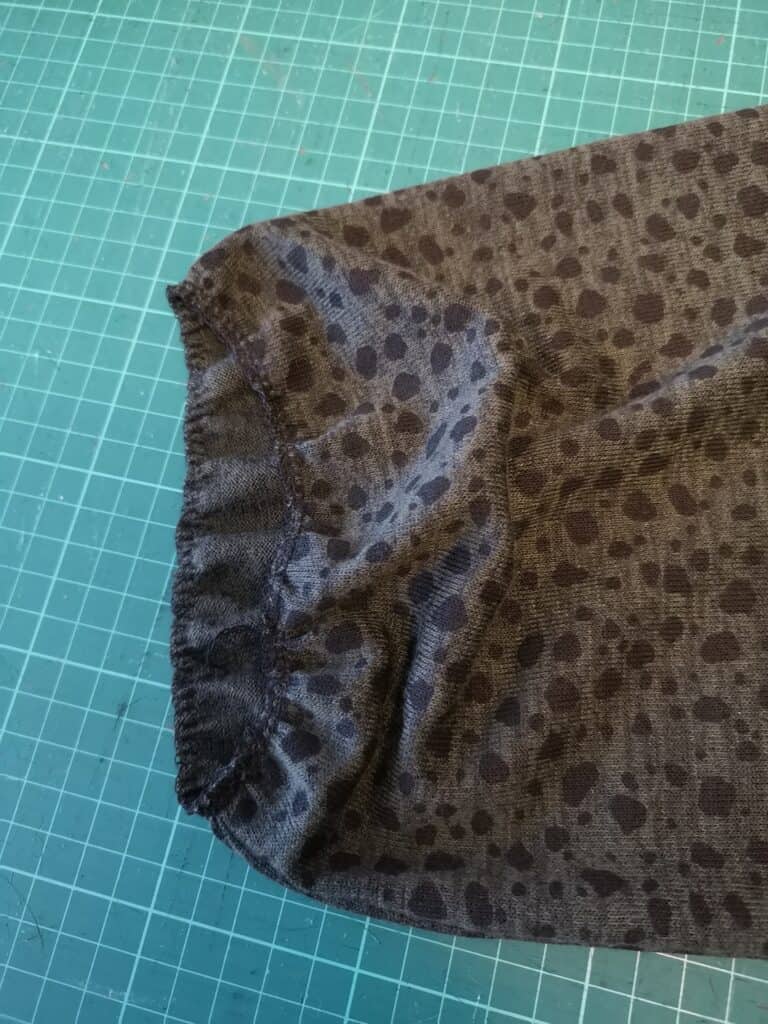
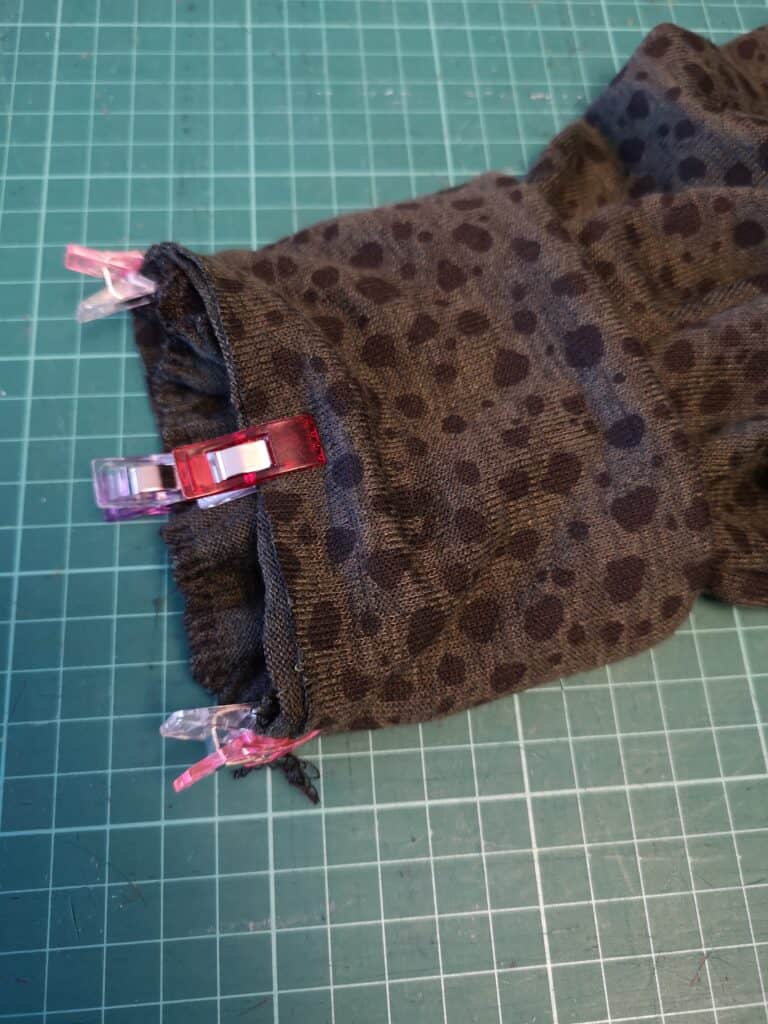
The only other change I made was to copy the bishop sleeve look from my inspiration pic, and I did that by just cutting the bell sleeve width to the slim cuffed sleeve length. Projector and paper pattern piece pictures below:
Then I cheekily used my overlocker/serger to gather the bottom of the sleeve by increasing my stitch length and differential feed to their highest setting and whipping round the bottom of the sleeve piece, which gathered it in just enough to fit the cuff. Perfect!
Finally just construct the rest of the garment as per the instructions in the tutorial, and you’re done!
Happy Sewing!
Dana x
…..
No side split
Hey everyone! I have another super quick hack for you. As fun as that side split is that comes in the pattern, I was wanting a most basic top, so I decided to do without the side split for this! It’s as simple as adding a bit of length to the front bodice piece, and sewing the two waistband pieces together in a circle! I’ll break it down for you below.
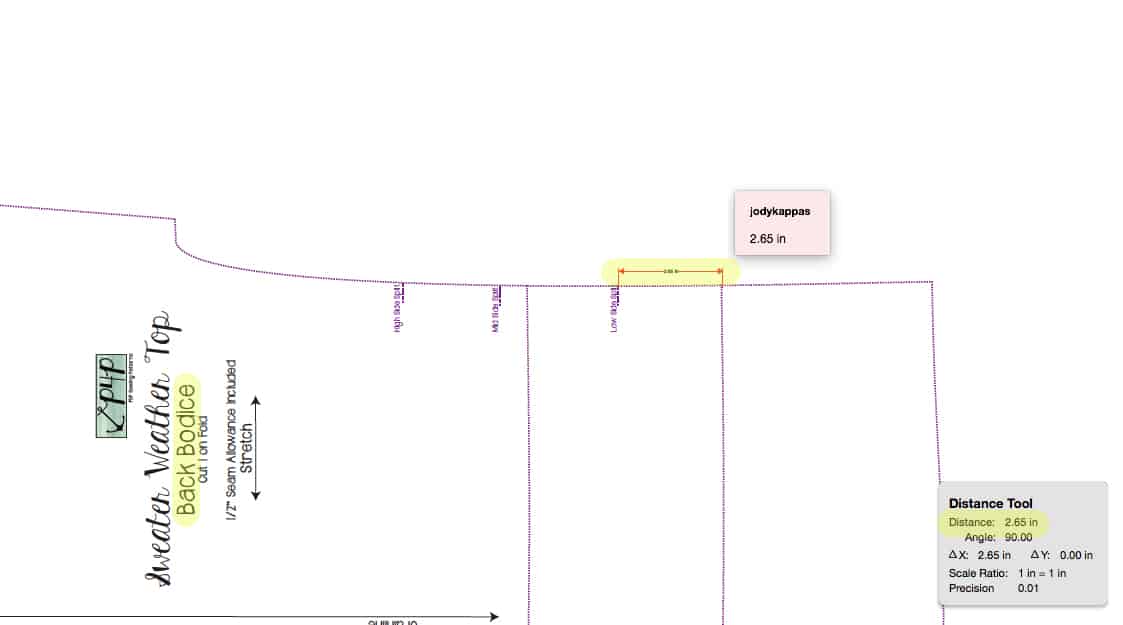
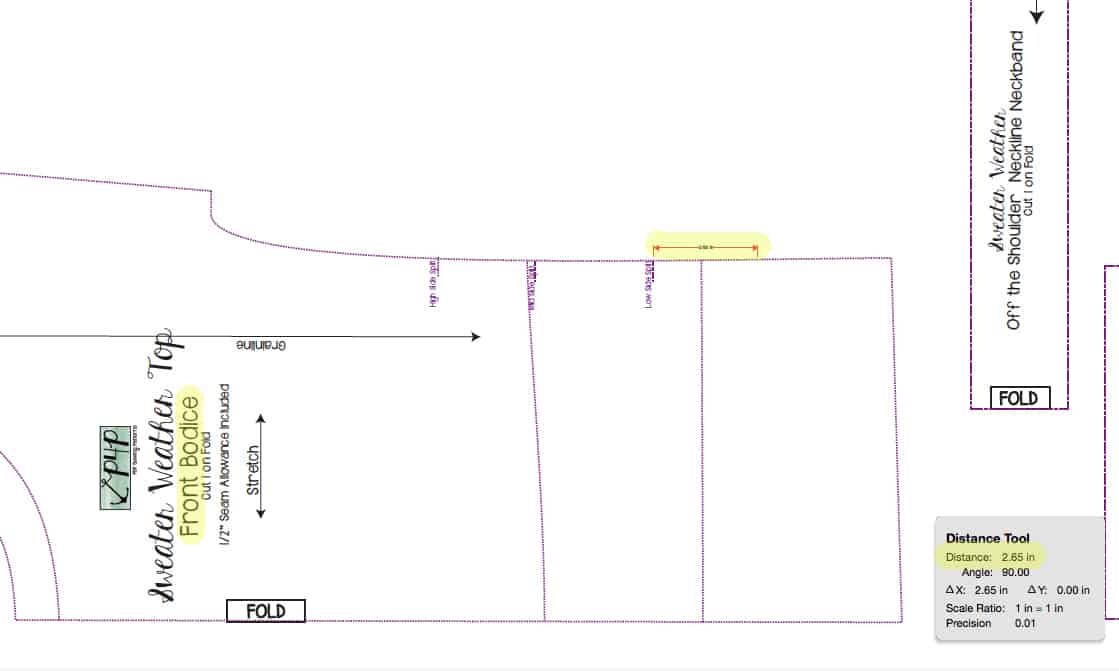
First, you’ll need to make your front and back bodice pieces the same length. I chose to do Top length for this one, and the front bodice piece was about a little over an inch shorter than the back. Since I also use my projector and don’t print out the pattern pieces, I marked the new Top cut line digitally on my PDF file on my computer. In order to figure out how much length to add, I measured from the Split Marking on the side seam down to the Top cut line on the BACK bodice piece. For my size, that distance measured 2.65 inches.
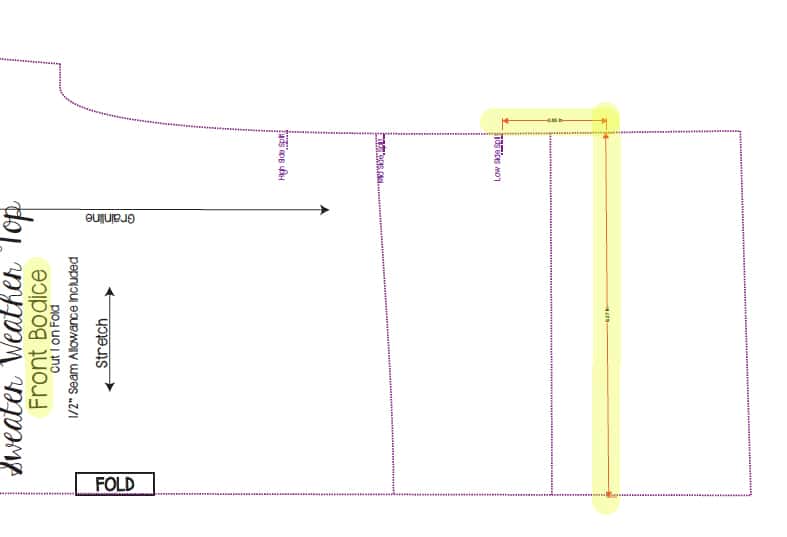
I then measured down from the Split Marking on the side seam of the FRONT bodice piece and marked where the new Top cut line should be. (Doing this with Paper pattern pieces, you would simply lay the back bodice piece over the front piece and see how much extra to add to the bottom of the front!)
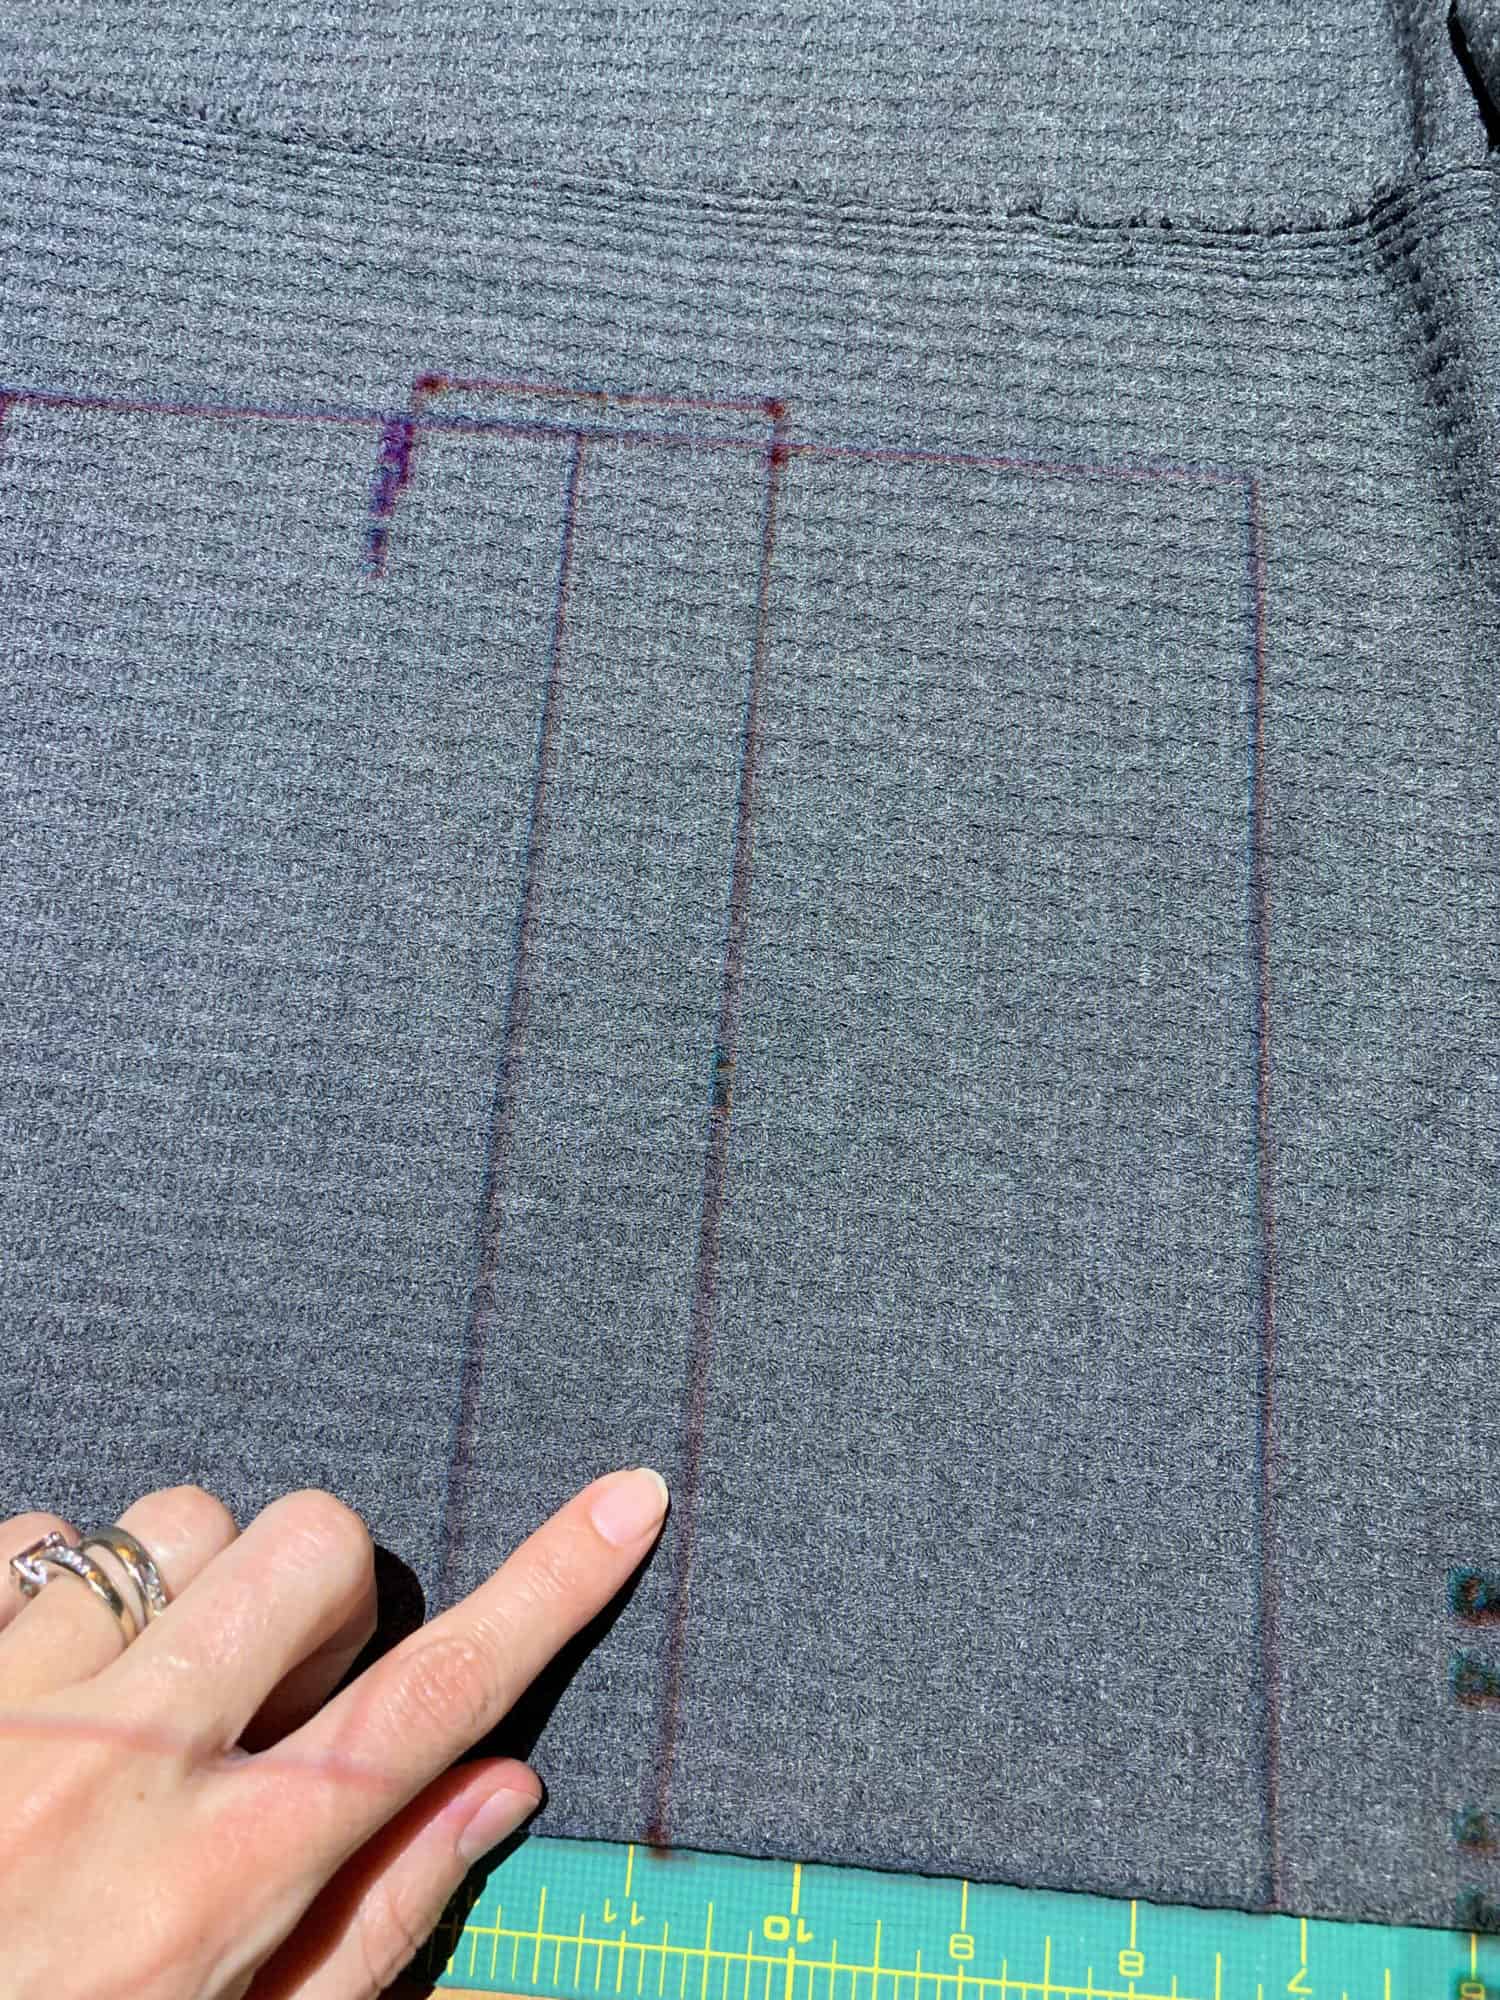
This is what the new digitally measured cut line looks like when projected.
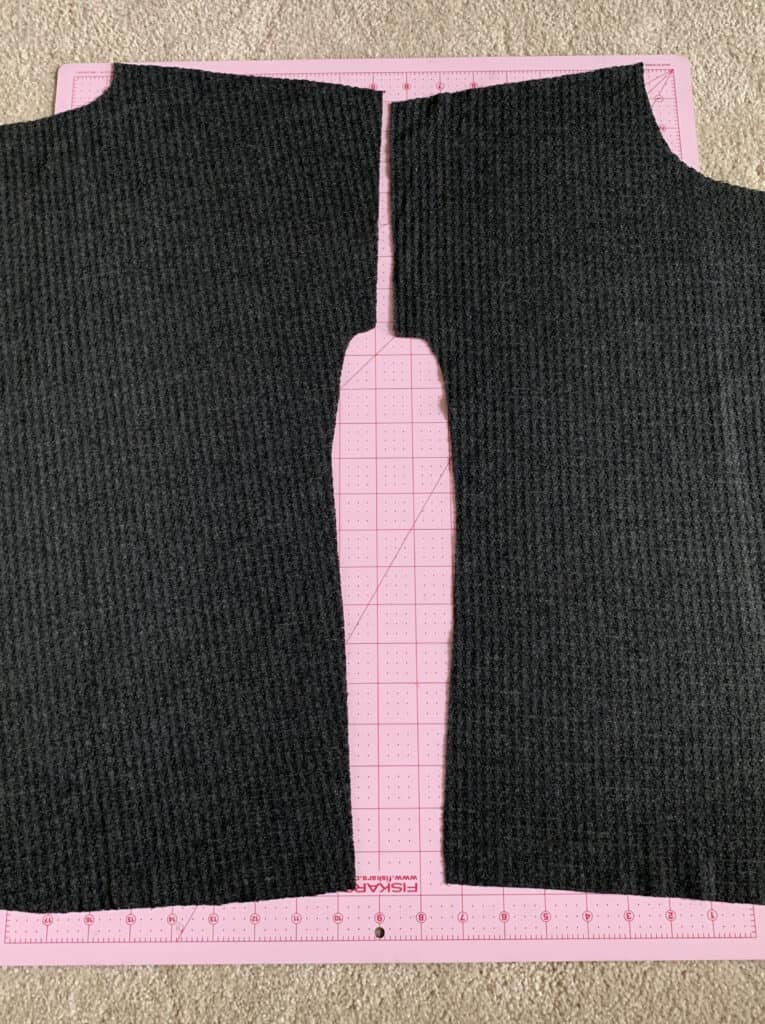
Once I cut my bodice pieces (following the newly marked cut line for the front bodice!) You can see that my front and back bodices are the same length now!
Next, you can sew up your shoulder seams, add the sleeves, and then sew your side seams. When sewing the side seams, instead of stopping your stitches at the split marking like you would have to do if you were making the side split, you can just keep on keeping on and sew right on down to the bottom! Like so:
Lastly, you’ll need to create and attach your waistband. Take your two waistband pieces and place them right sides together. Stitch them together along the short ends.
Now fold the waistband circle wrong sides together aligning the raw edges. You can now slip the waistband on the bottom of the sweater, aligning raw edges, and sew in place.
Now you have a comfy sweater without the extra side split!
Happy Sewing!
-Jody
….
Short sleeves
Last but certainly not least I wanted to show you how easy it is to take the Sweater Weather from chilly months to hot summer days. It’s as simple as using lighter fabric and making it short sleeves. For my example, I used custom bamboo spandex (my favorite fabric base!). There are not many modifications you need to do to get the look. Simply skip cutting the sleeves and sleeve cuffs when you gather your pieces.
Sew the shoulder seems and instructed. Press the sleeve opening 1/2″, wrong sides together as shown below. This will create a memory hem.
Sew the shirt side seams. Using your favorite stretch stitch (I used my coverstitch) hem the sleeves 1/2″. Press again for a crisp look.
Tadah! Easiest hack ever! Continue sewing your Sweater Weather top as per the tutorial.
ALTERNATIVE HACK: If you prefer a longer short sleeve, you can band it instead of hemming it. Before sewing the side seams, measure the opening. Cut two bands 4″ tall by the measurement you just did. Sew each band in a loop (at the short ends) using 1/2″ seam allowance. Press length wise, wrong sides together. Sew the shirt side seams. Attach the cuffs to the sleeve opening, matching the side seam. Press and optionally top stitch the seam allowance towards the sleeve. There you have it! A cuffed short sleeve.
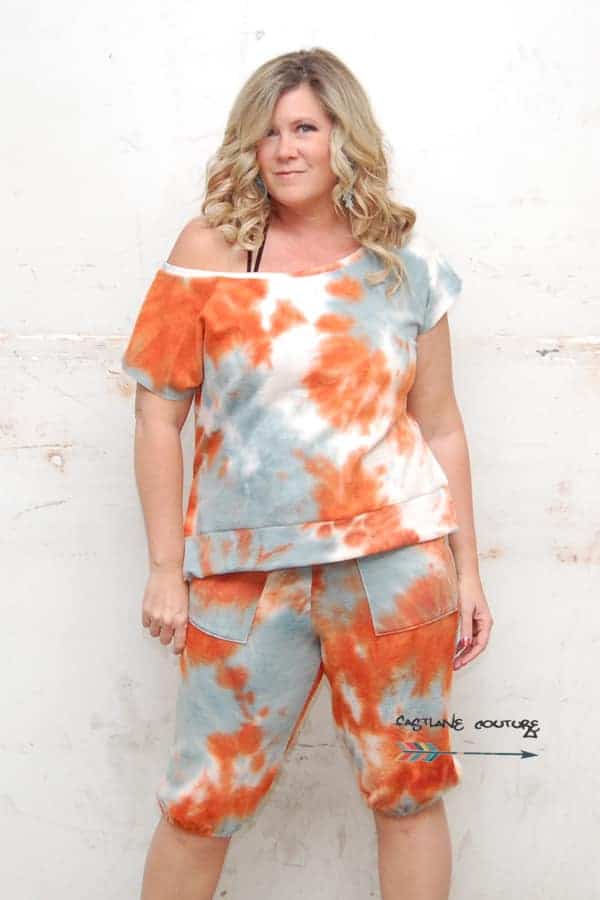
How adorable is Teri? She tested the Sweater Weather top and made herself a tie die short sleeve one too.
How fun and easy were these? We can’t wait to see your take on these hacks. Share your creations in the Patterns for Pirates FB group or on any social media platforms you use!
2nd Annual Holiday Charity Week – 2020
I began an annual tradition last year of giving a large portion of profits from the week of Christmas to a charity. It makes my heart full to be able to reach out a helping hand, with the assistance of the Patterns for Pirates community. I just hope that our donations will allow a little extra support for those who need it.
We’ve opted to support the same charities that were benefactors last year. They may change in the future but for this year at least, they will remain the same.
I will be donating to both Action Against Hunger and a local North Texas Food Bank. With the hardships that 2020 has brought upon everyone, so many more families need help getting enough food on the table and I hope this week will help get more food to more tables in need both here locally for area and across the world with Action Against Hunger.
You do not need to do anything special for your purchase to count toward the funds being donated during charity week. 40% of every single pattern purchase during this time frame will be donated automatically. *Note- the Fabric for Pirates Fabric Subscriptions transactions will not go through until the 1st of the month, which means even if you sign up during this week the transaction will not apply to this charity week.
If you’ve been eyeing any patterns for your stash, now is the perfect time to grab it and help make our donation amounts even bigger!
Thank you and Happy Holidays,
Judy
Protected: Fabric for Pirates :: December 2020 Reveal
2020 Holiday Freebies :: Bear Hug Rug Tutorial
Happy Holidays, Pirate Friends! We are excitedly back for another year and another round of holiday freebies to share with you! Over the years, we’ve compiled different tutorials and patterns that we think would make *perfect* gifts for your friends and family. Curious about what we’ve already released in the way of holiday freebies? Head right here to see all of them: Holiday Freebies Roundup.
Today, we are bringing you the: Bear Hug Rug!
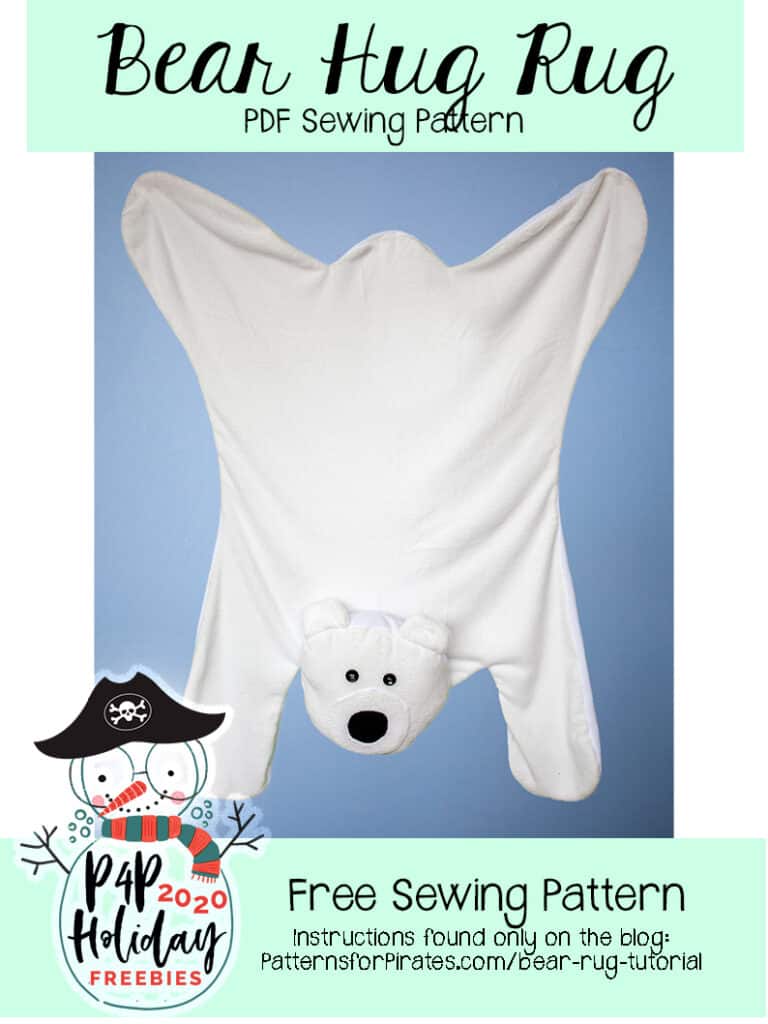
The Bear Hug Rug is pretty much a giant stuffed animal, with function. It can be used as a rug on the floor, while relaxing or reading a book. It can be used as a blanket with a big ole’ head for cuddling up with. Or it can be used as a giant stuffed animal, ready to be loved.
The pattern construction is super simple and the results are so fun. We hope you love it!
Supplies Needed:
- Bear Hug Rug pattern pieces
- Fabric Requirements: Fleece / Minky / Faux Fur, etc, 54″ wide
- 2 Yards Main
- 2 Yards Lining
- Fiberfill (for head)
- Scraps of fabric for facial features
- Buttons / Embroidery Thread for Eyes
TUTORIAL
Place 2 ear pieces, right sides together.
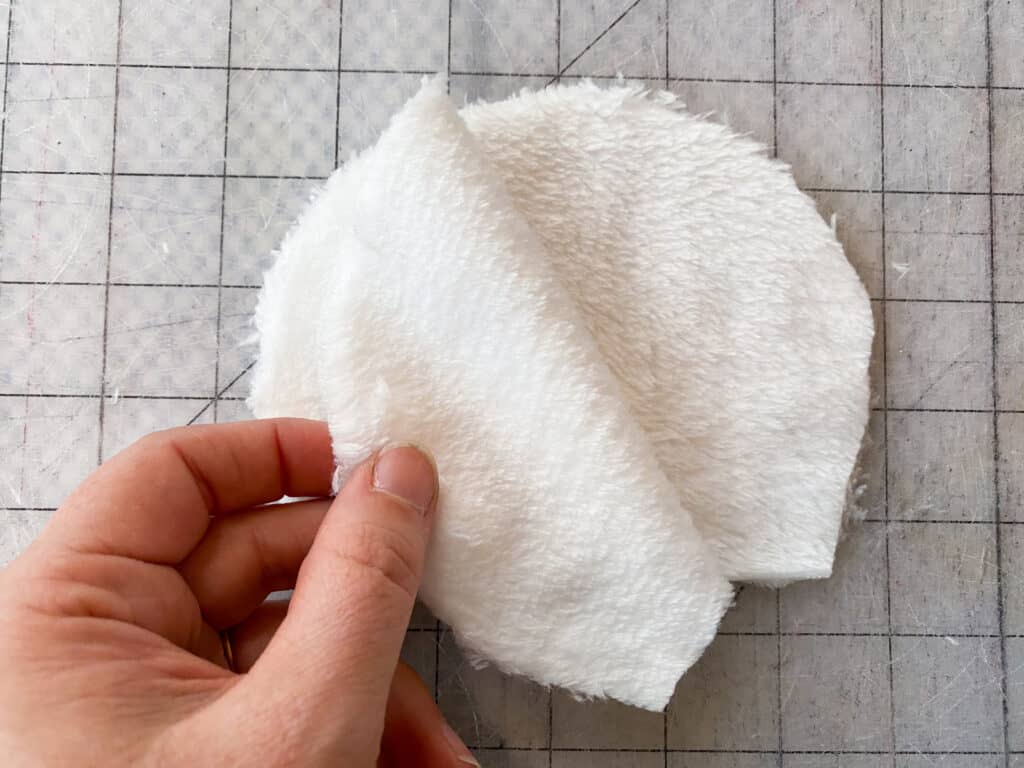
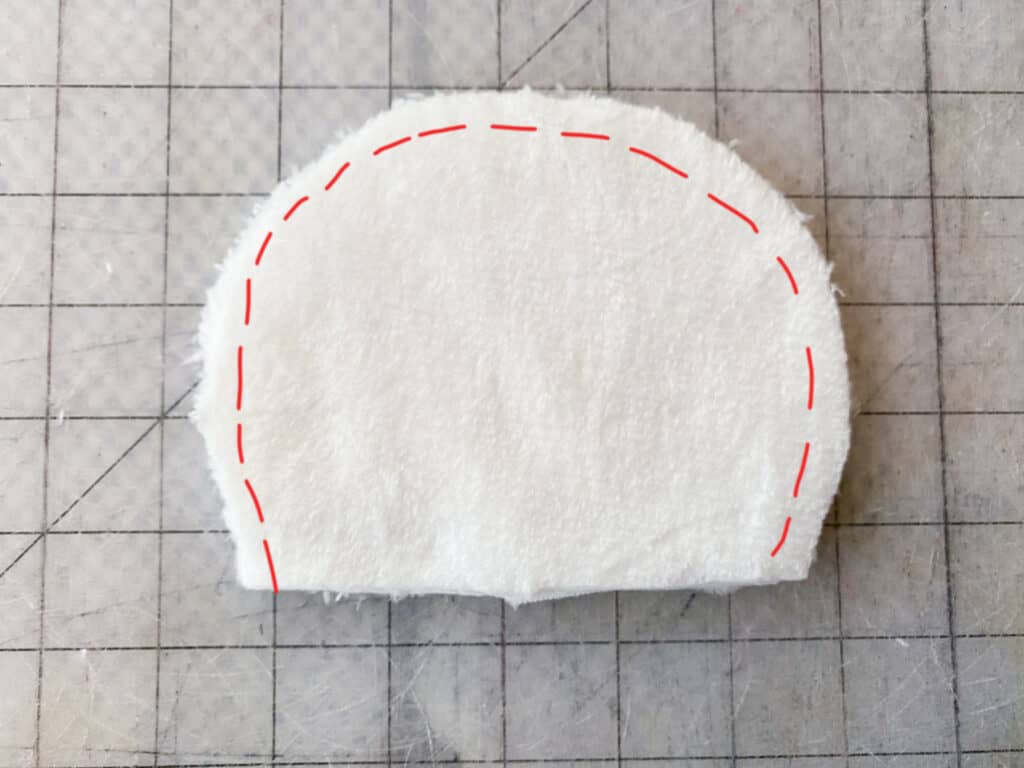
Using 1/2″ seam allowance, sew around entire round edge.
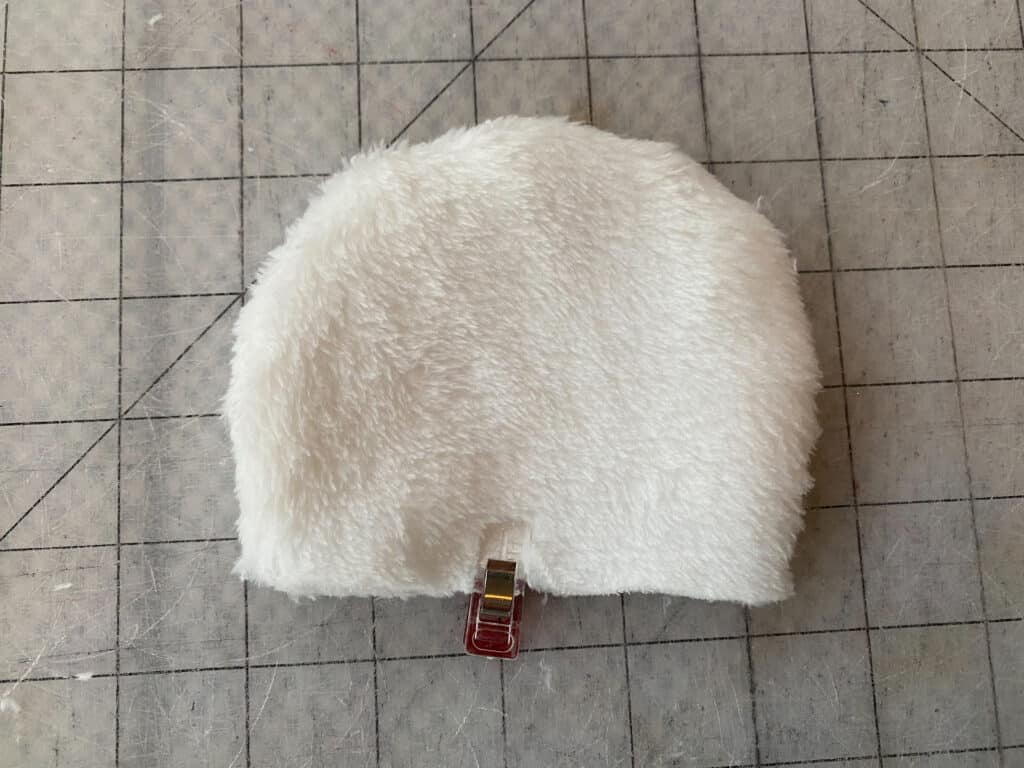
Turn right side out and place pin/clip at the middle, bottom edge. Repeat for second ear.
**Tip from our testers: if your ears are on the floppy side, you might want to add a little polyfil to them to help them stand up.
On head piece, use the pattern piece to place pin/clip for ear markings.
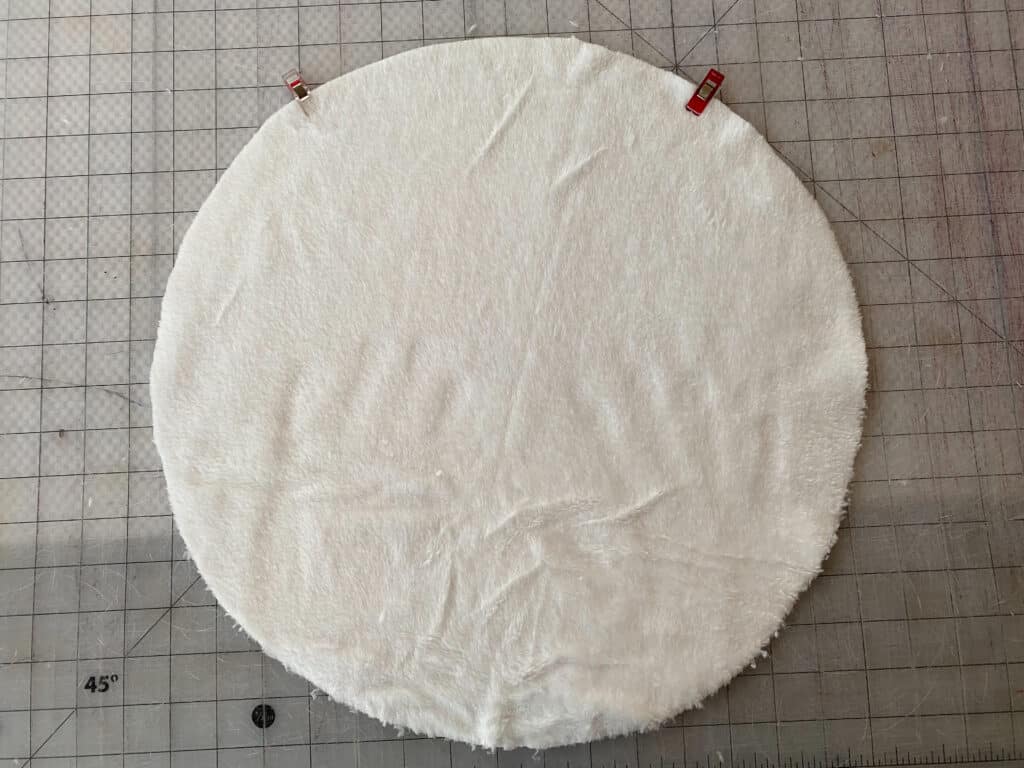
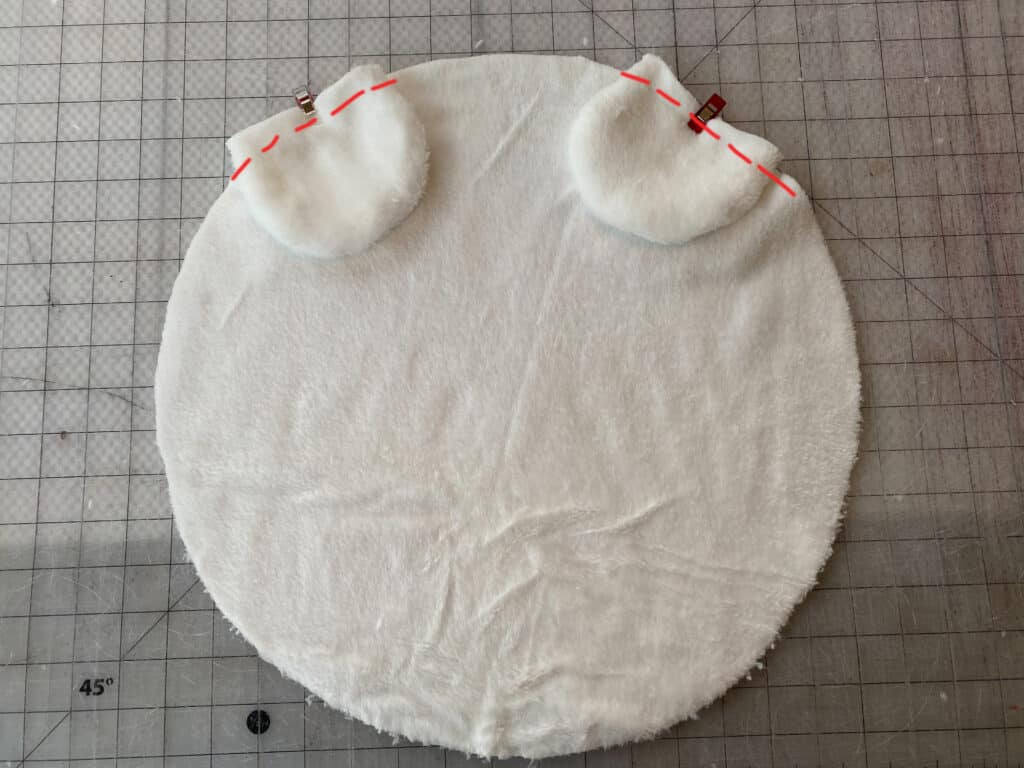
With right sides together, match ear pieces to markings on the main head piece. Baste ears in place.
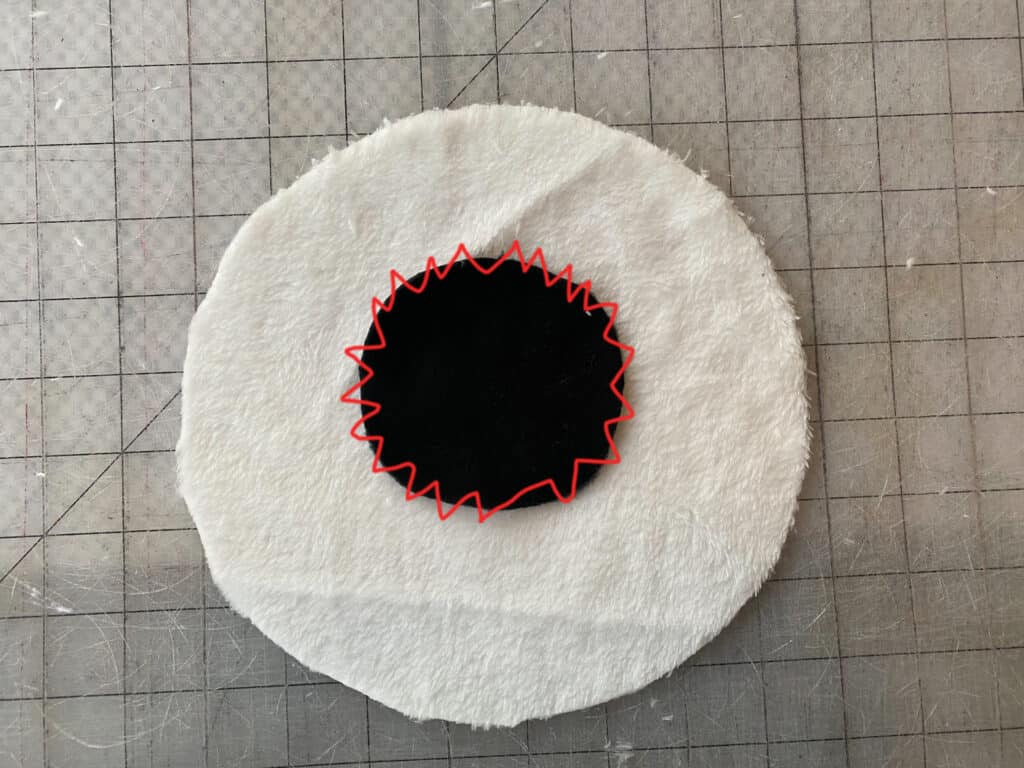
On main snout piece, center the nose piece and attach using your favorite applique stitch.
Note: If nose fabric is woven / can fray, be sure to use an interfacing before fixing it to the snout to avoid future issues with fraying.
With main snout facing up, place lining fabric on top, right sides together.
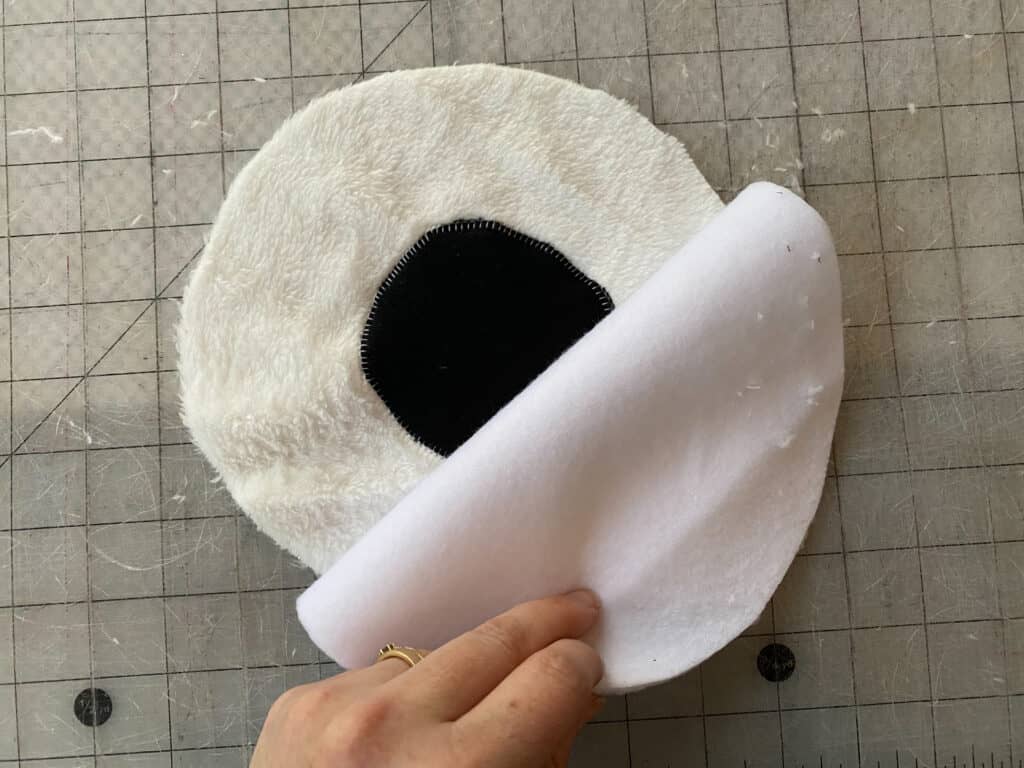
Sew around entire outer edge, using 1/2″ seam allowance.
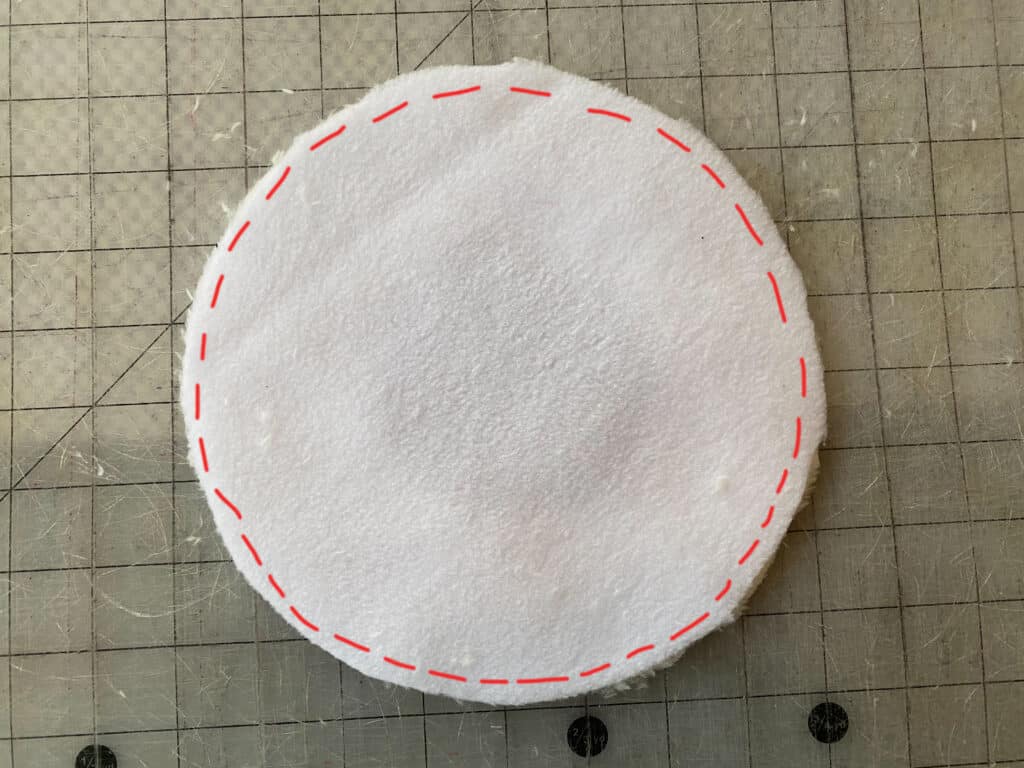
Clip curved edges, using pinking shears / “v” pattern to help with a smoother turned edge.
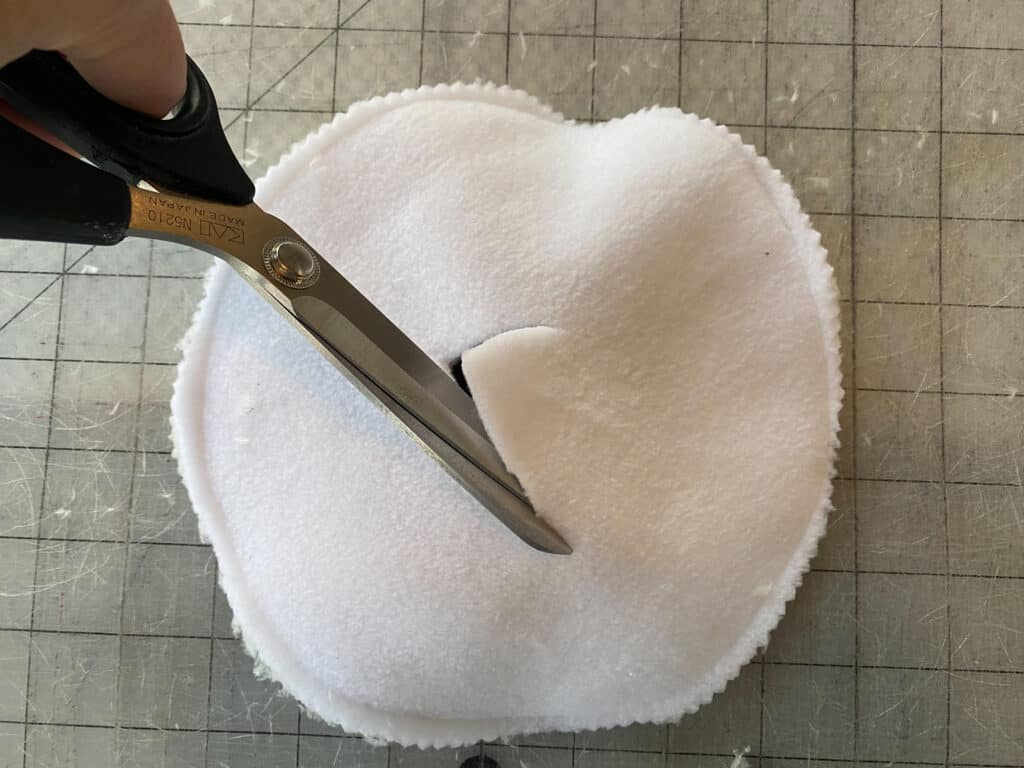
Careful not to cut through the main fabric, clip a hole through the middle of your lining fabric piece.
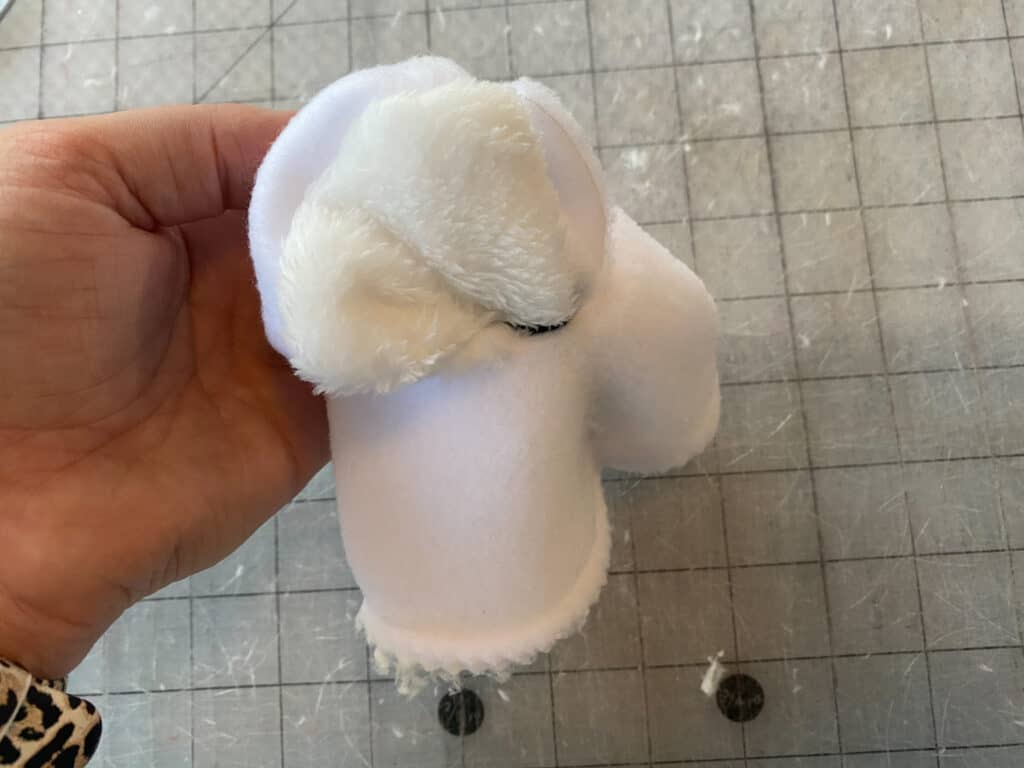
Turn the snout right sides out, through the hole you just cut.
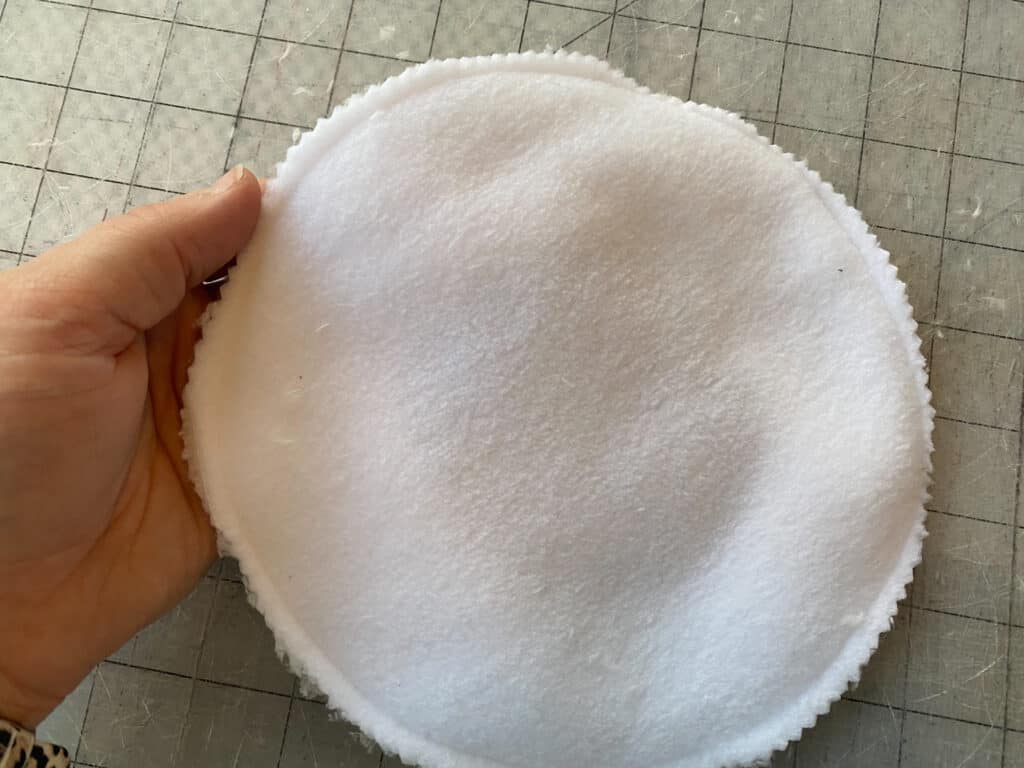
Press out all of your seams.
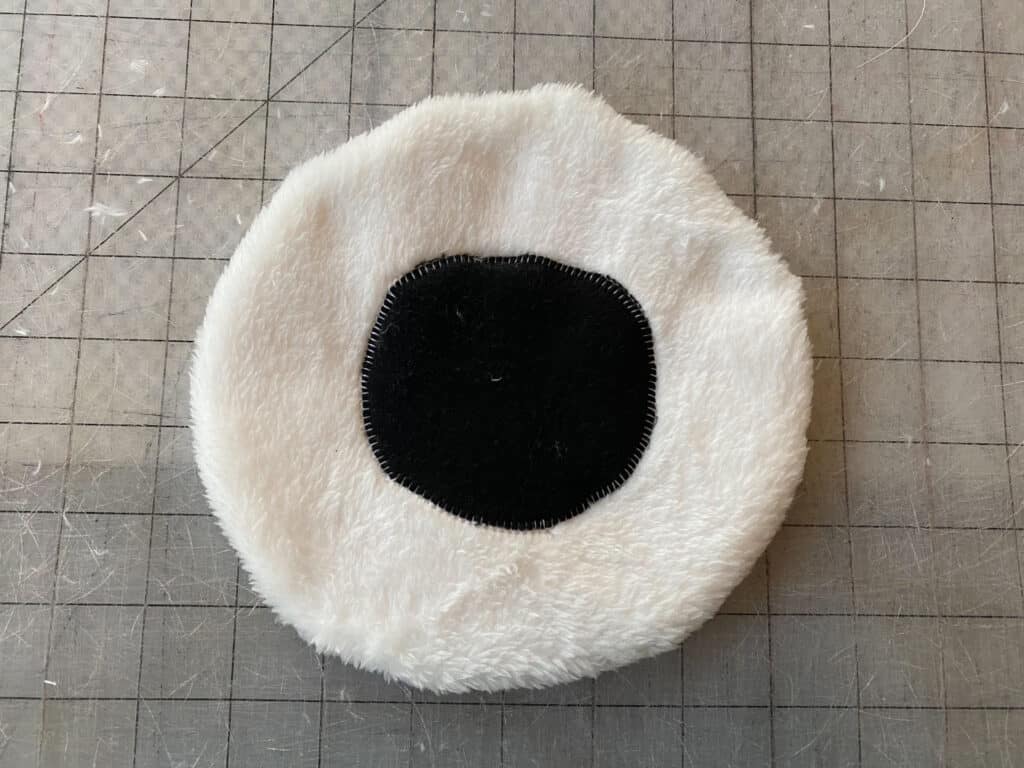
Place the snout piece, centered on the main head piece. Edge or applique stitch snout to attach it.
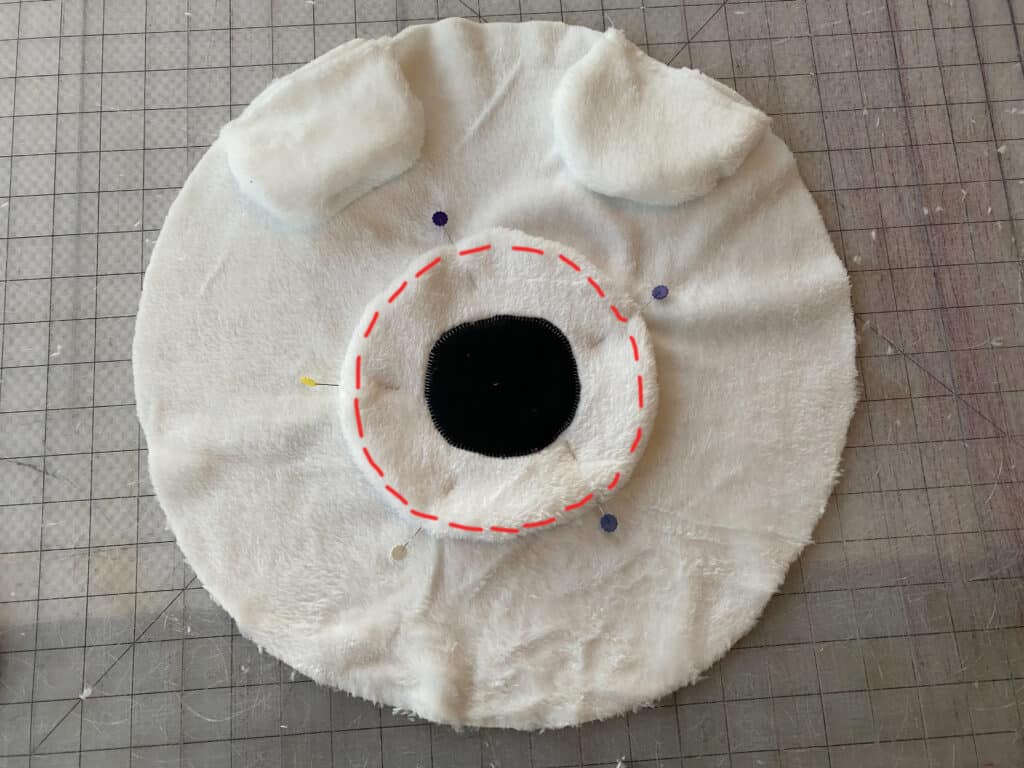
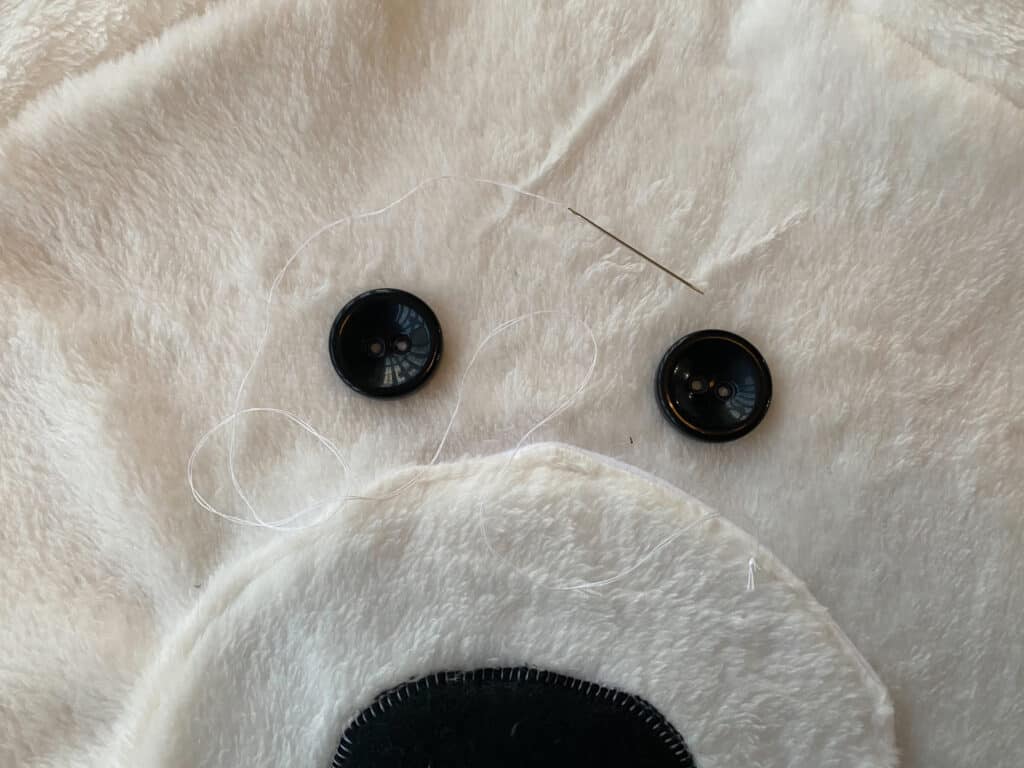
Add your eyes.
**I used these large buttons and hand stitched them on. You can also choose to embroider this detail, or add fleece circles. Whatever your preference is!
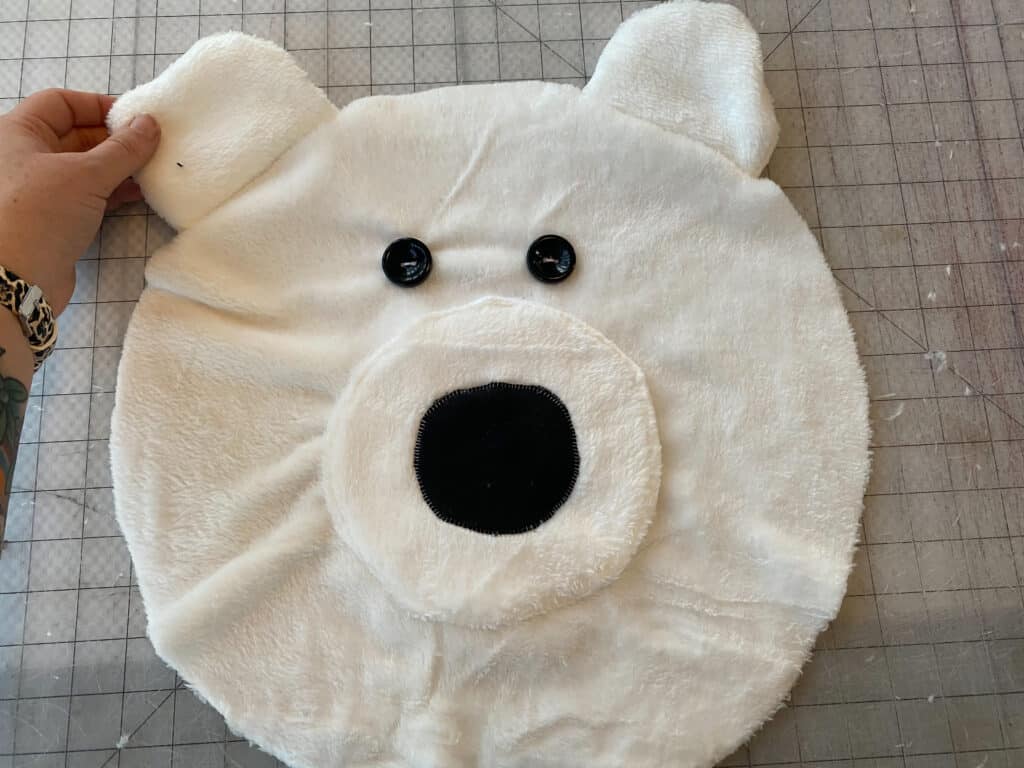
Your bear’s face should be nearly complete!
With the head right side up, place the lining fabric on top, right sides together.
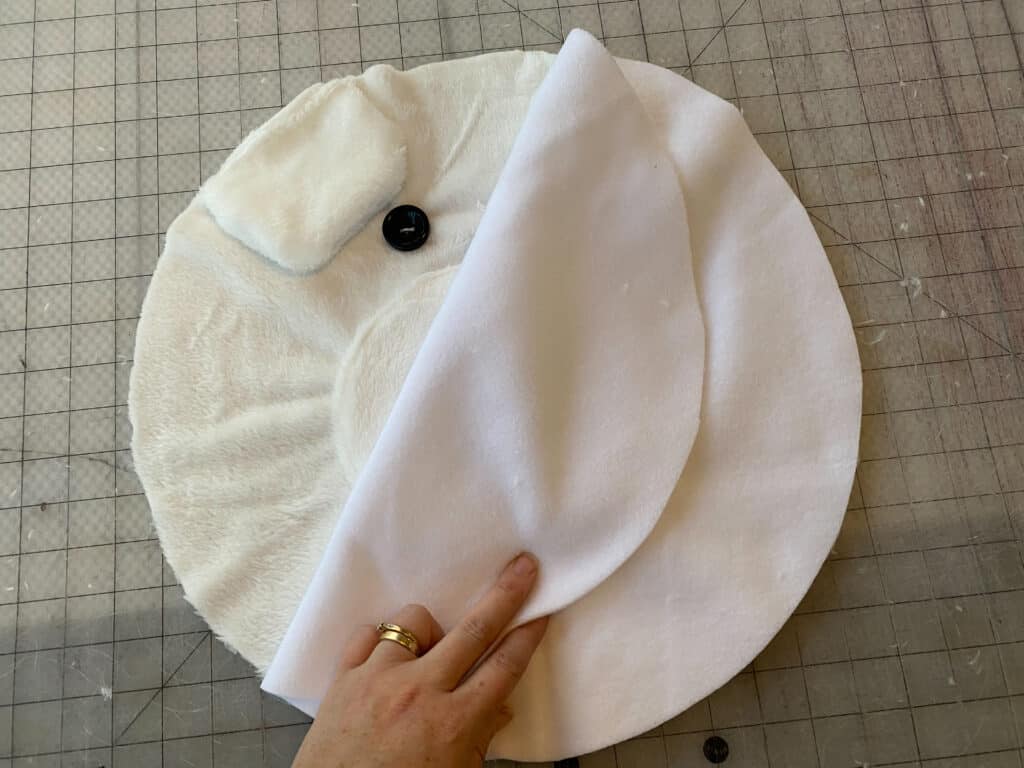
Using 1/2″ seam allowance, sew around the outer curved edge, leaving about 5″ open at the bottom for turning.
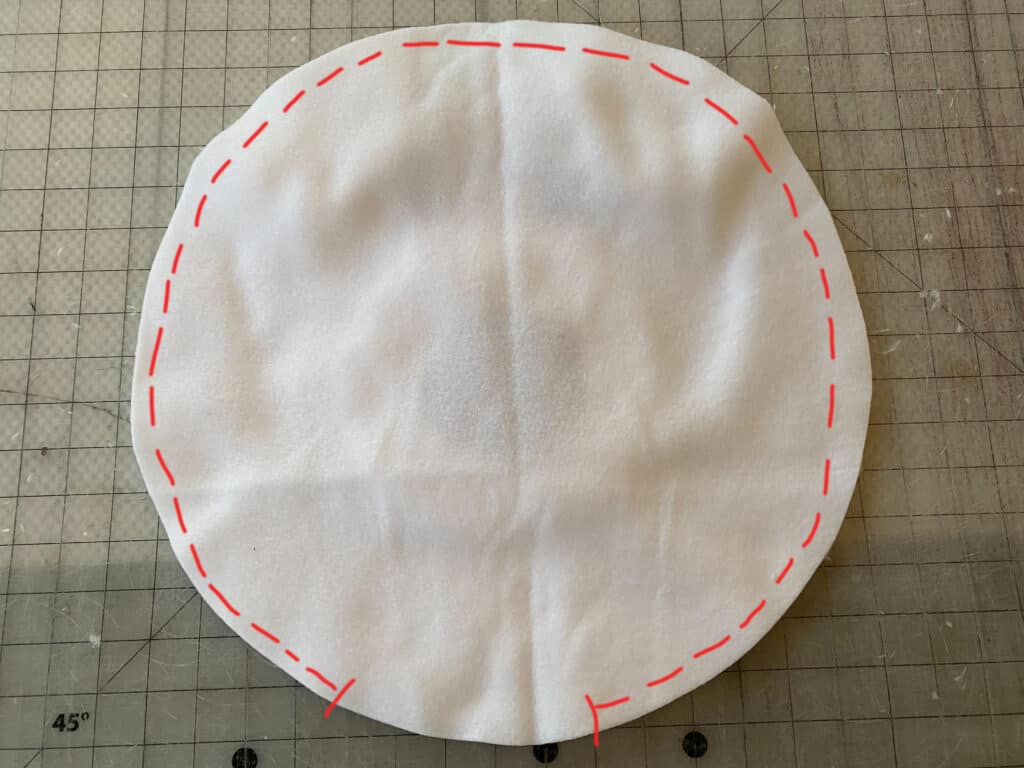
Turn the head right sides out, through the opening.
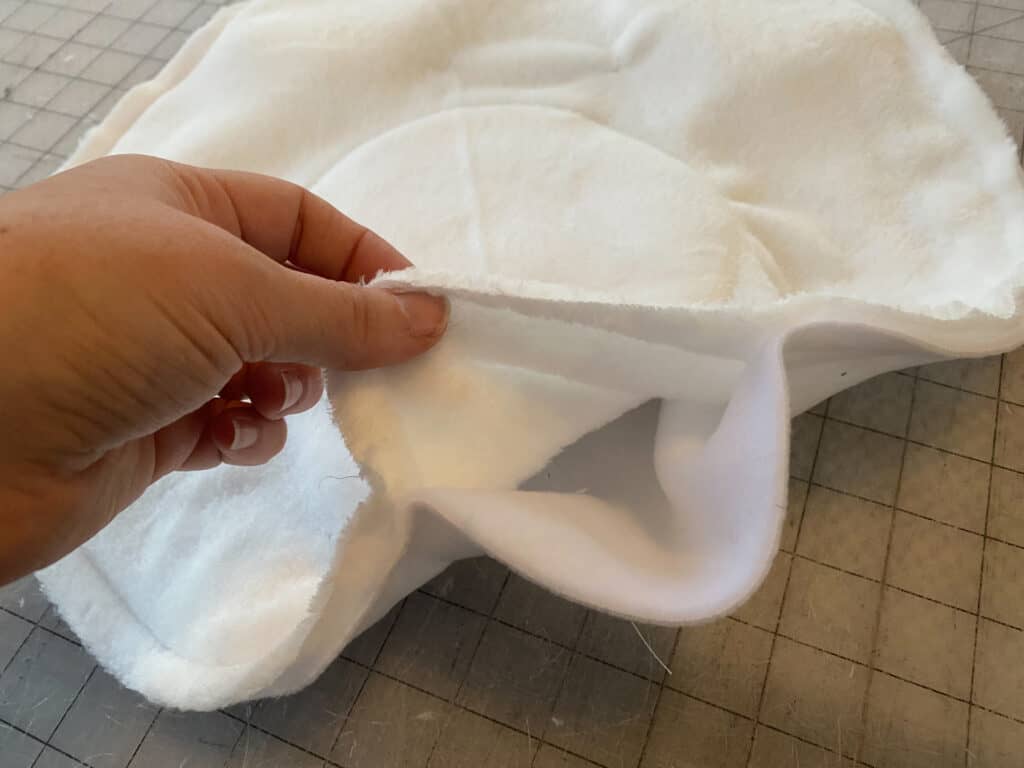
Being sure not to overstuff the head, fill it with fiberfill.
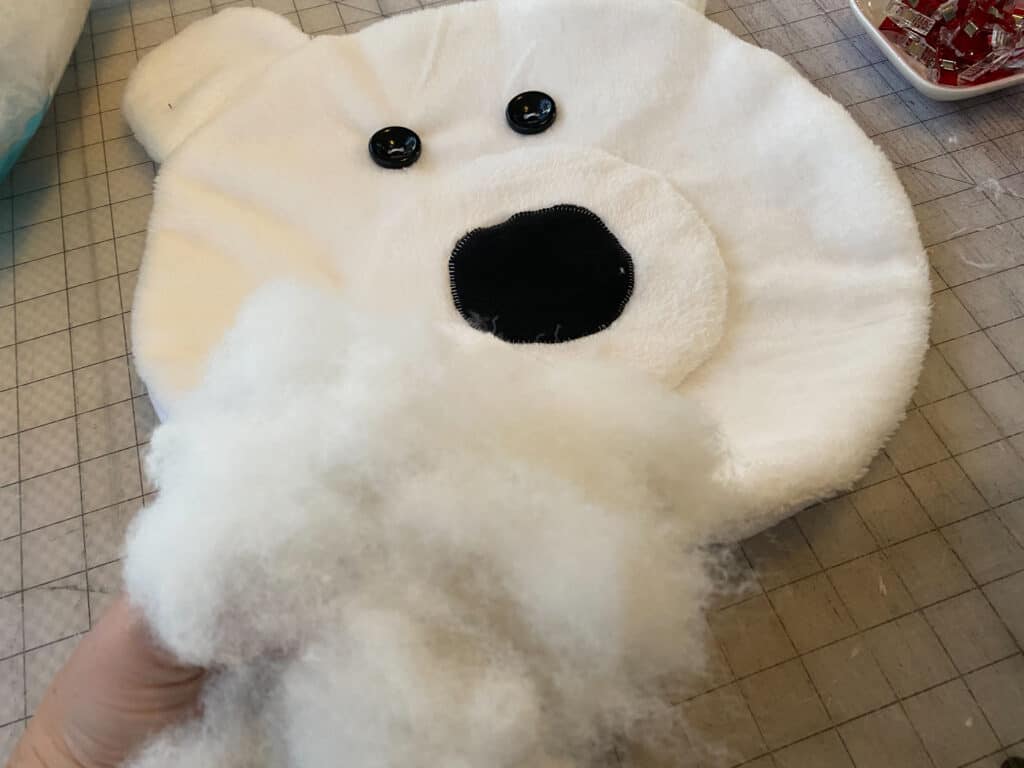
Using a blind stitch, close the opening on the head piece.
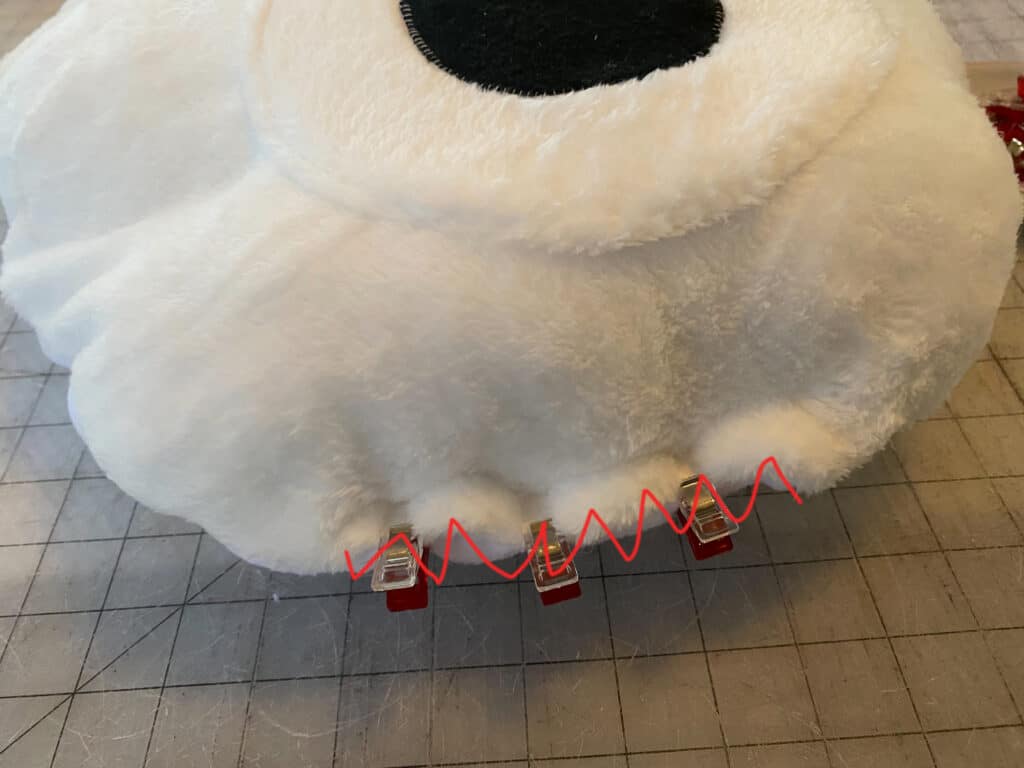
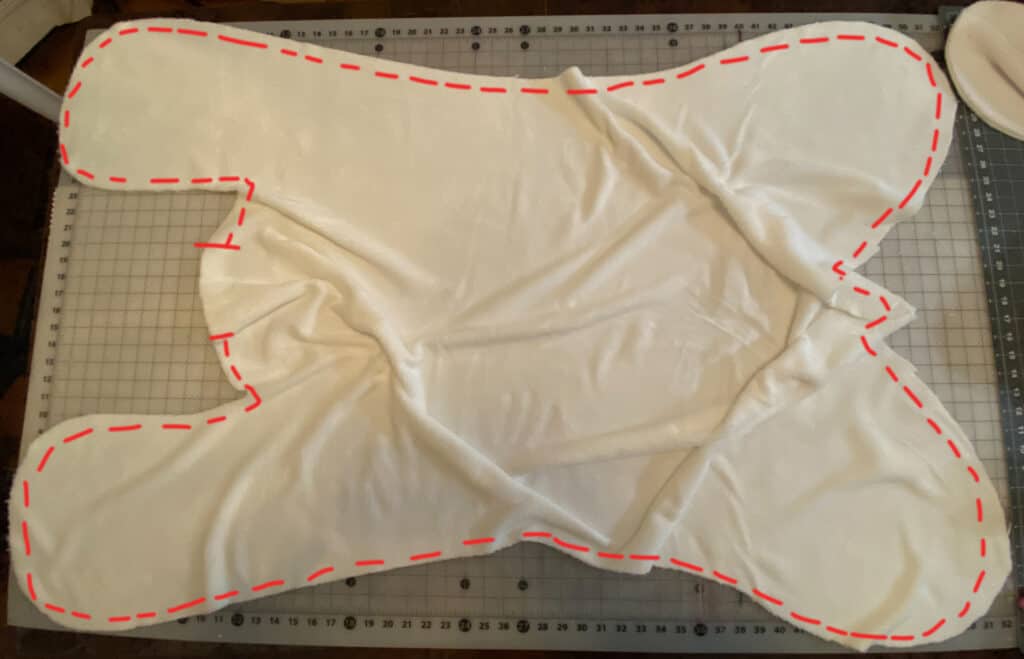
With the body pieces right sides together, sew around entire outer edge, leaving a 5″ opening for turning.
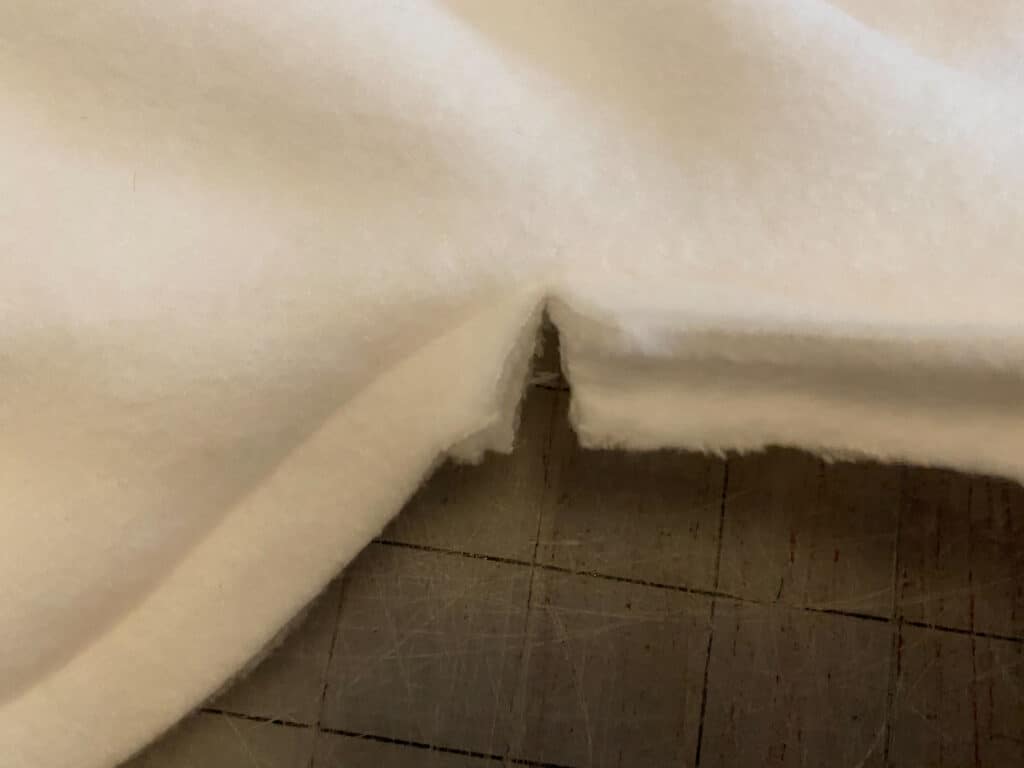
Clip all of your extra seam allowance for easier turning.
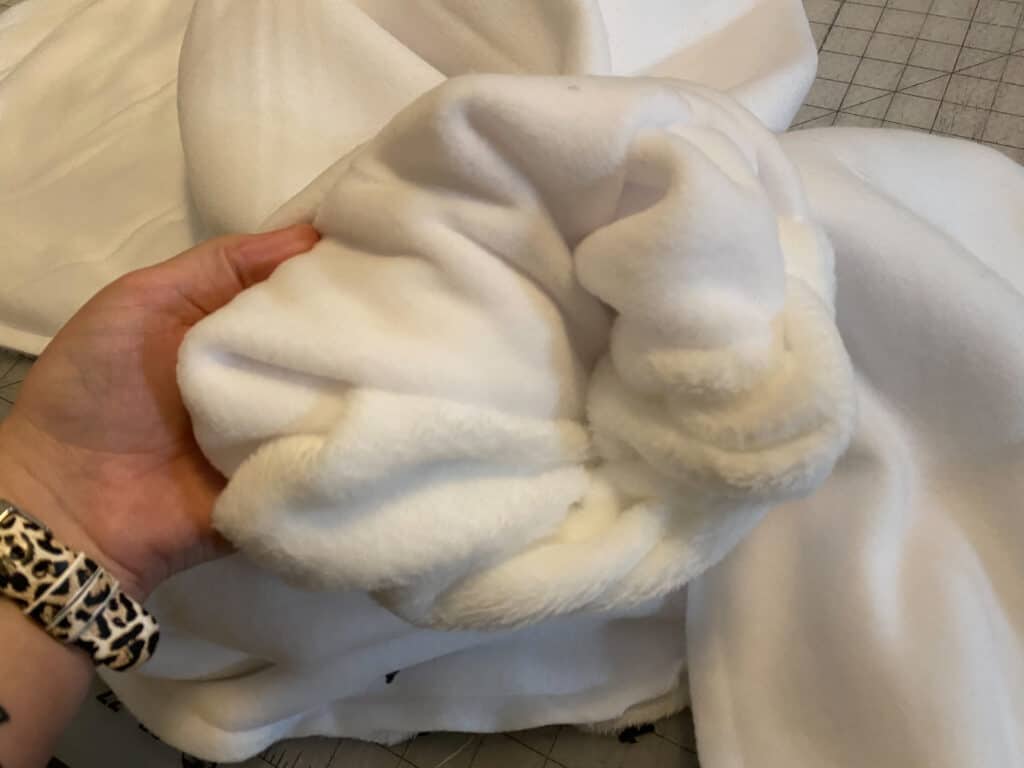
Turn through the opening.
Tuck your seam allowances into the opening and blind stitch closed.
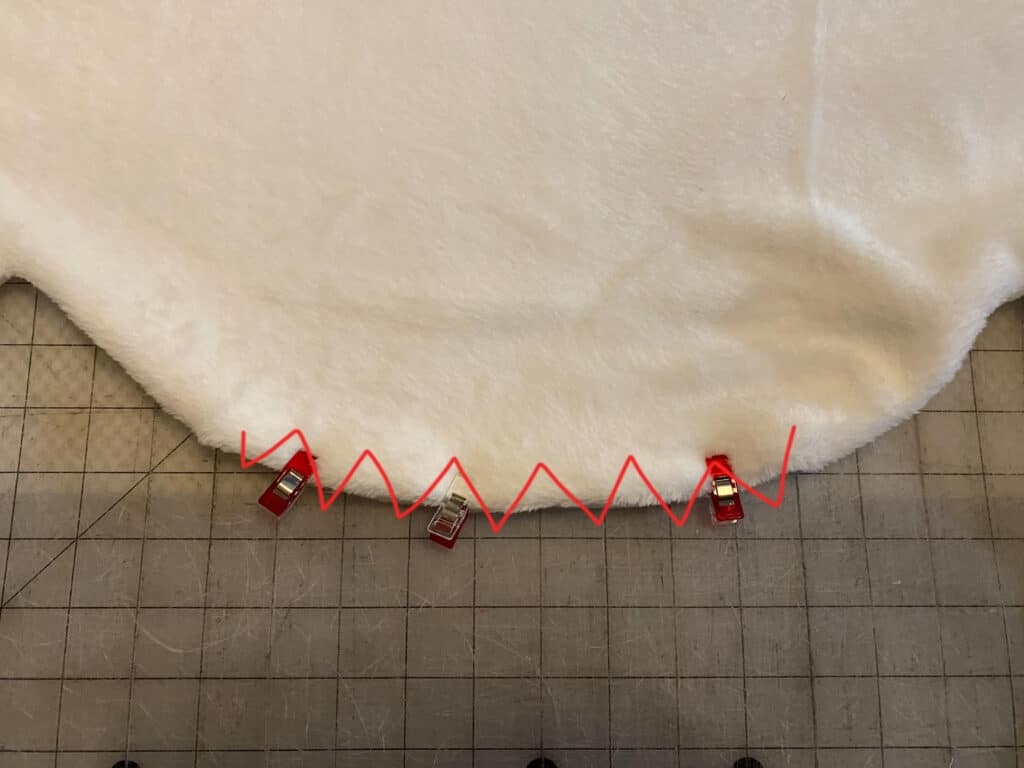
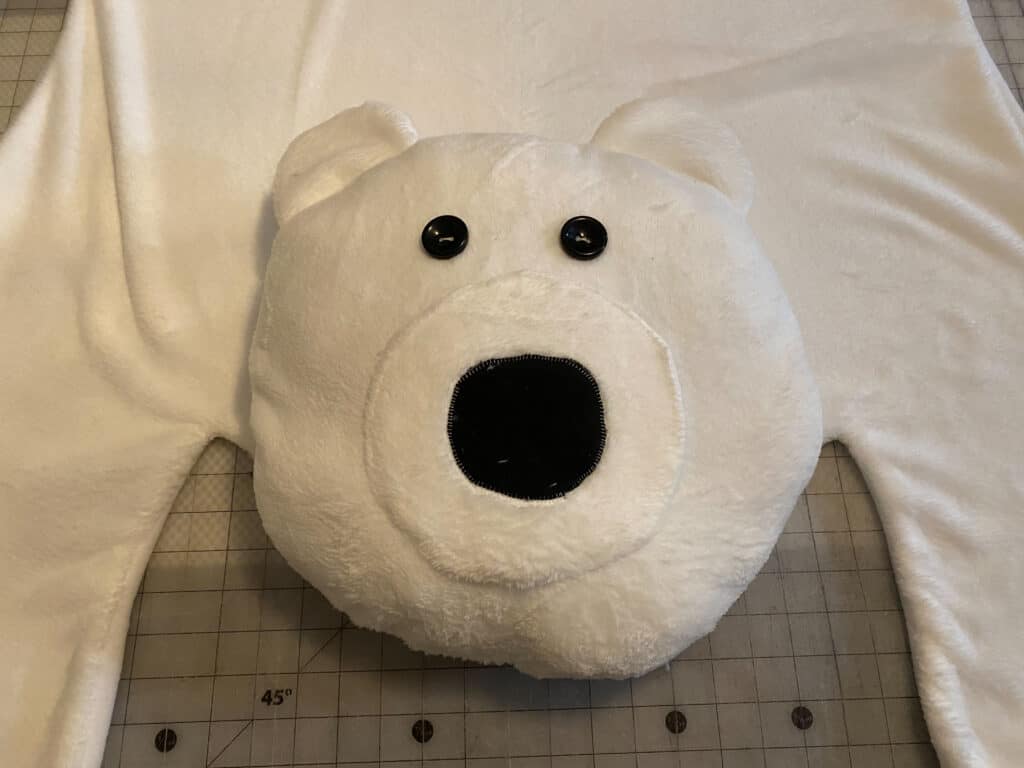
Align the head between the front legs.
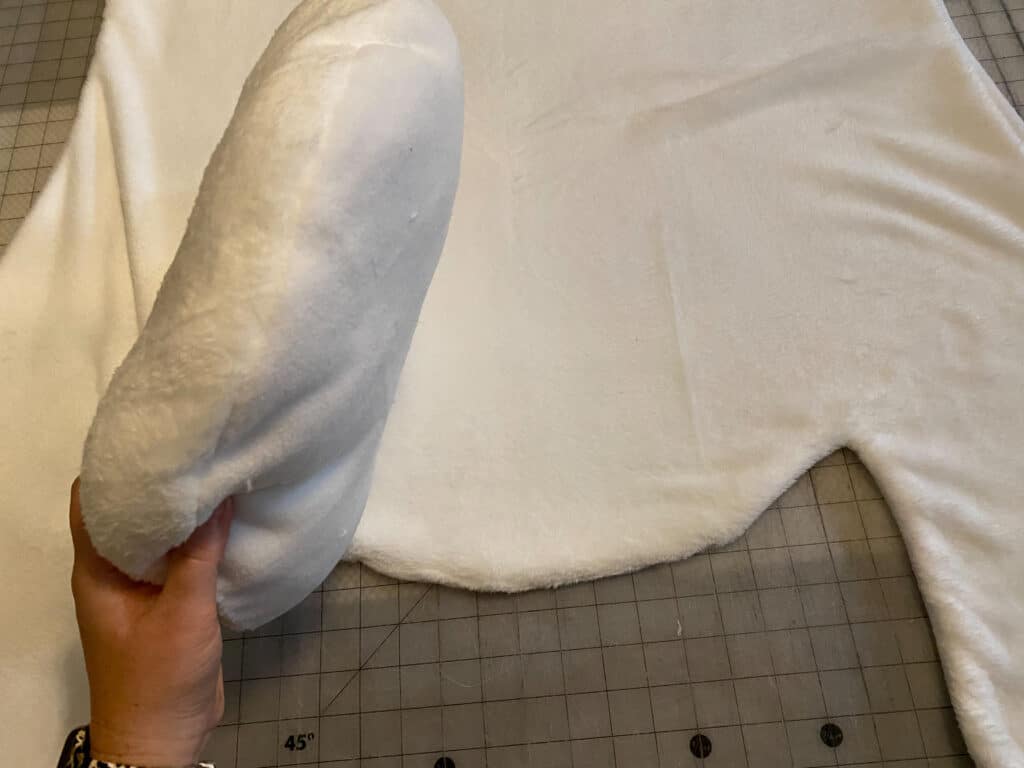
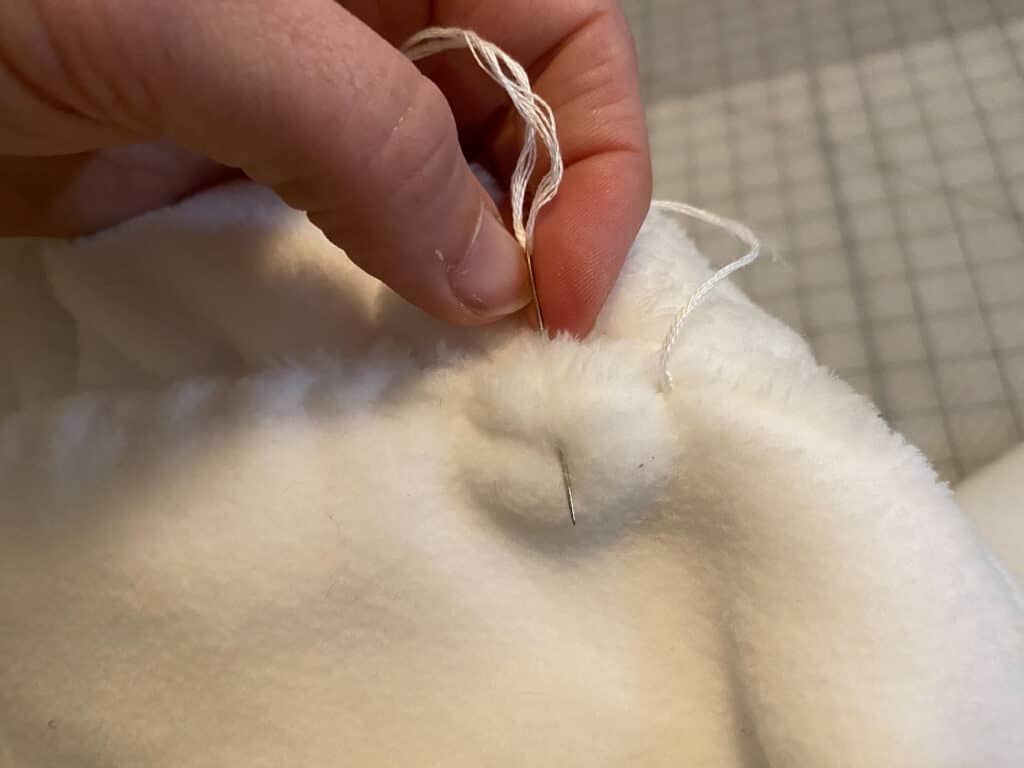
Hold head in place and flip both the body and head over. By hand, use a whip stitch to secure the head to the body piece.
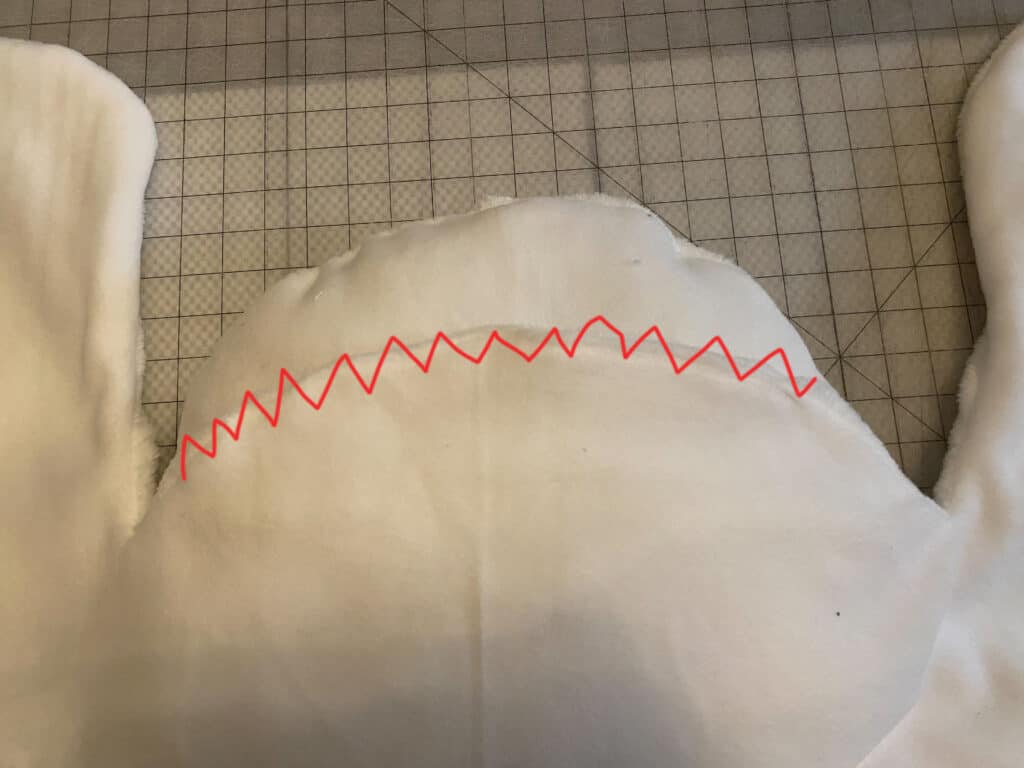
I like to use a wider-eyed needle, with embroidery floss, for some extra hold.
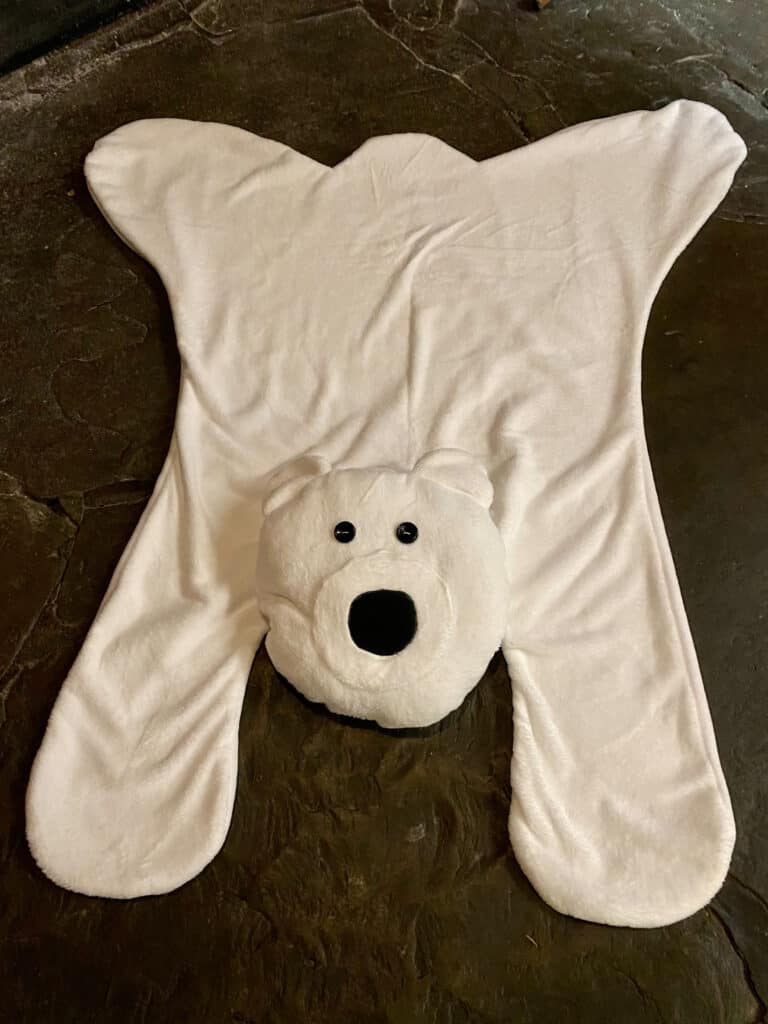
You’re finished!
Check out what our fabulous testers were able to create with this very same tutorial!


I la-la-love when you share your photos with me! Head over to the Patterns for Pirates Facebook Group and show us what you’ve made!
Happy Holidays, Pirates!

2020 Holiday Freebies :: Braided Infinity Scarf Tutorial
Happy Holidays, Pirate Friends! We are excitedly back for another year and another round of holiday freebies to share with you! Over the years, we’ve compiled different tutorials and patterns that we think would make *perfect* gifts for your friends and family. Curious about what we’ve already released in the way of holiday freebies? Head right here to see all of them: Holiday Freebies Roundup.
Today, we are bringing you the: Braided Infinity Scarf!!
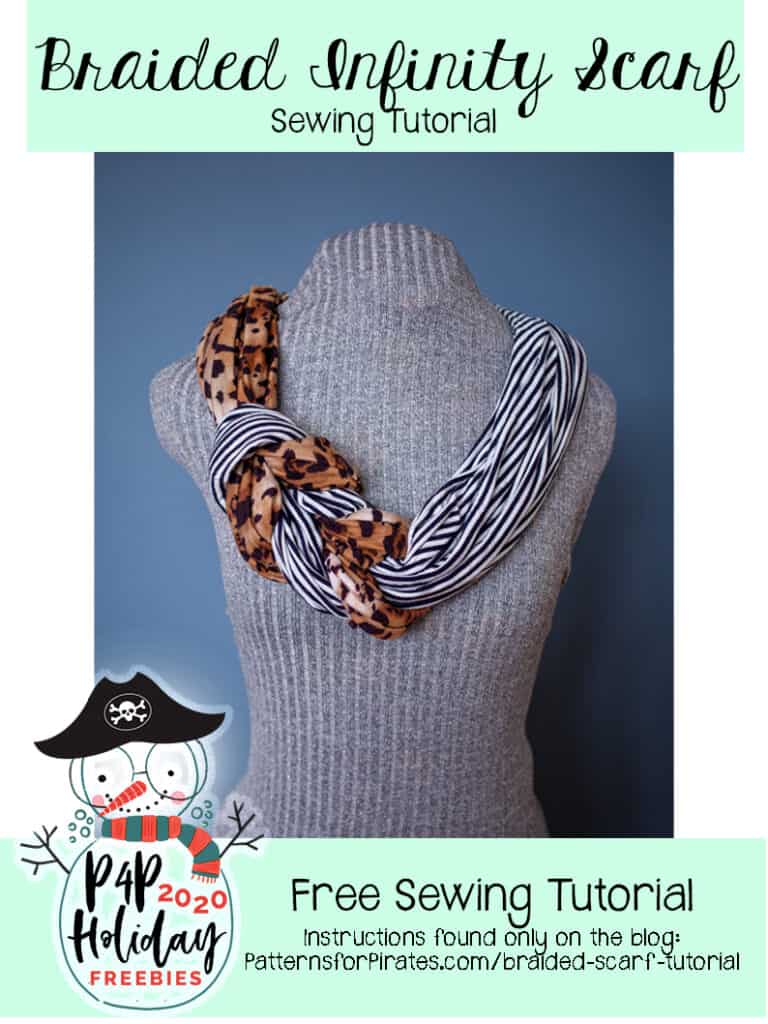
If you were looking for a quick gift to give someone, look no further. Because this “braided” infinity scarf just might do the trick! I don’t want to toot my own horn just yet, but I think you might love this even more than the Hidden Pocket Infinity Scarf from a couple of years ago. We will see, won’t we? 😉
Supplies Needed:
- Two (2) 18″ L x 54″ or (width of fabric) W pieces of knit fabric
Lay one piece with right side facing upward, and fold in half meeting the long edges together, right sides together.
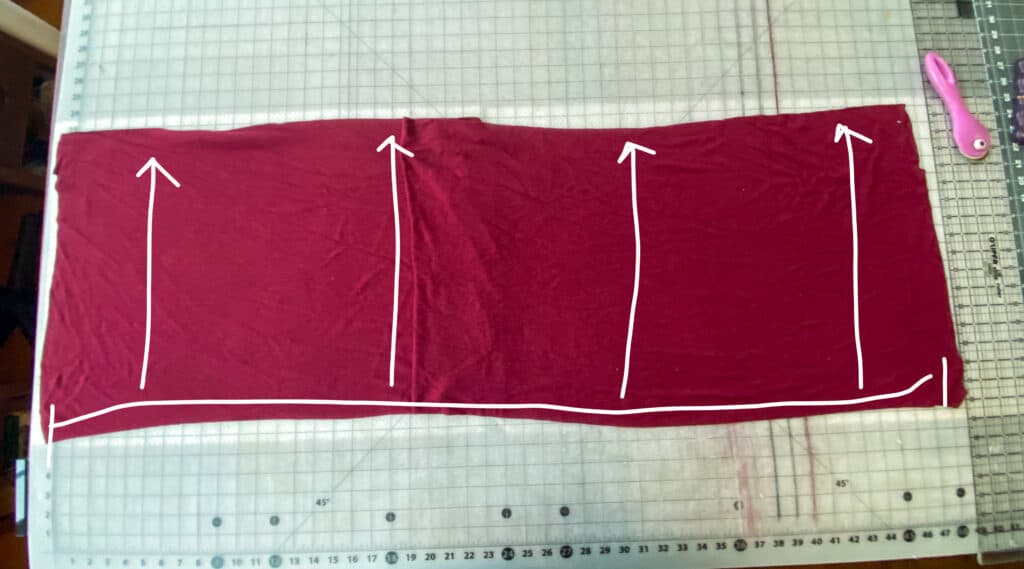
Sew along long, raw edge, using 1/2″ seam allowance.
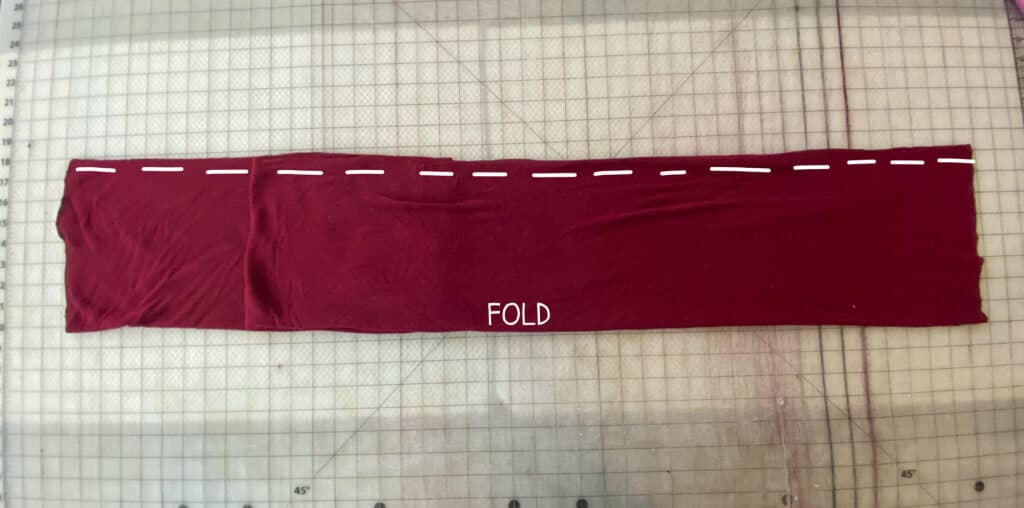
Turn piece right side out.
Repeat with second fabric piece.
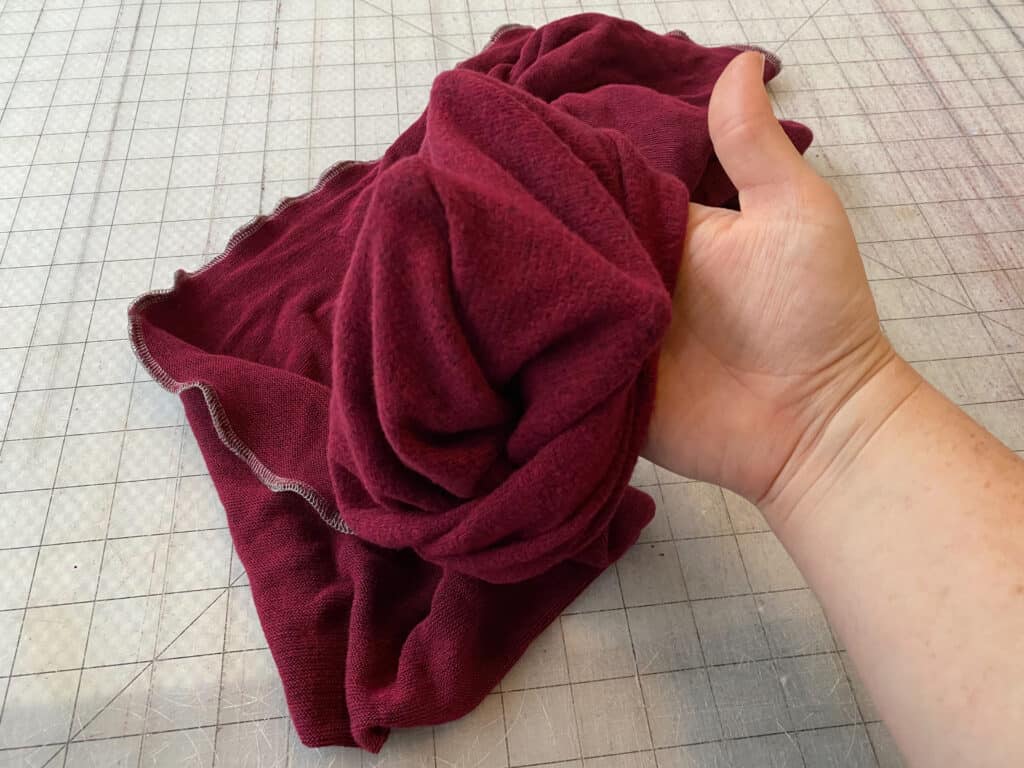
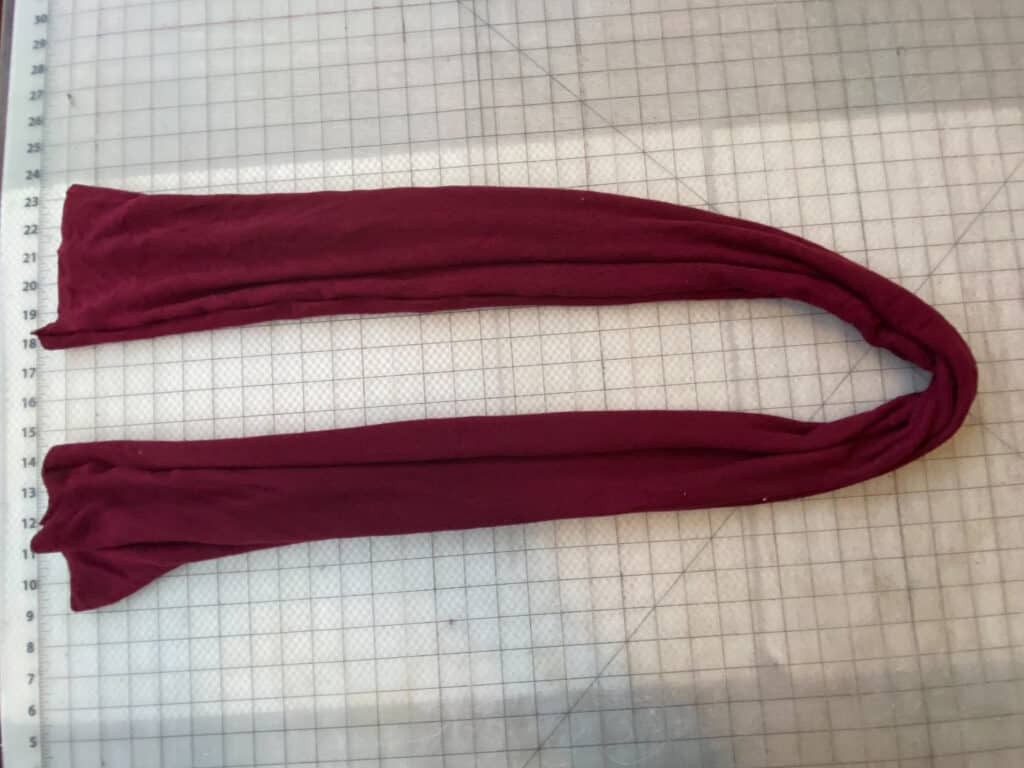
Lay one tube of fabric in half, in a “u”-shape
Lay second tube of fabric on top, in a similar “u”-shape.
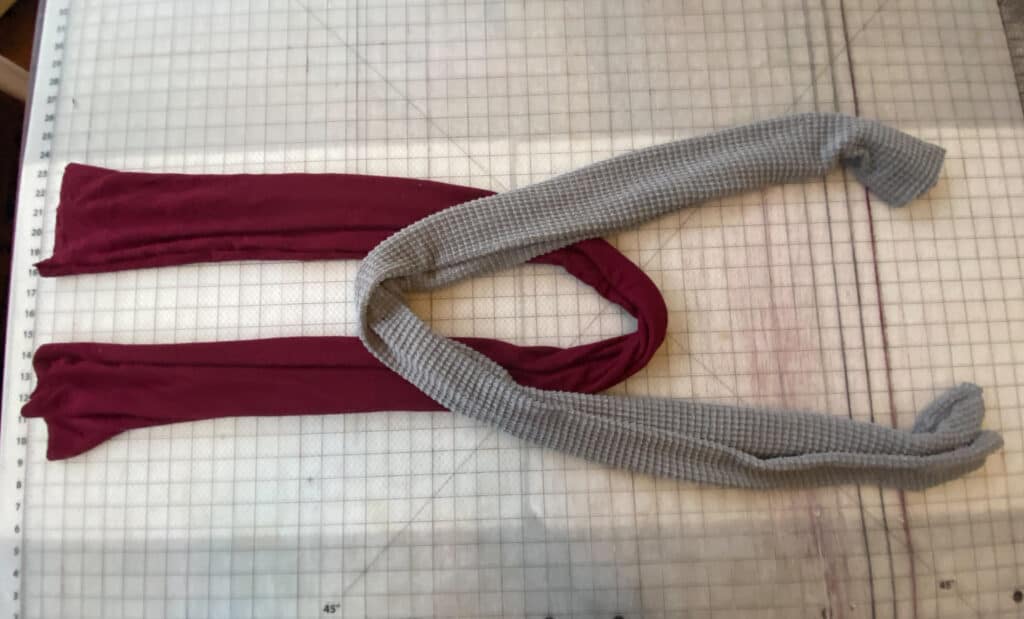
Reach your hand over the top fabric loop, and through the bottom fabric loop.
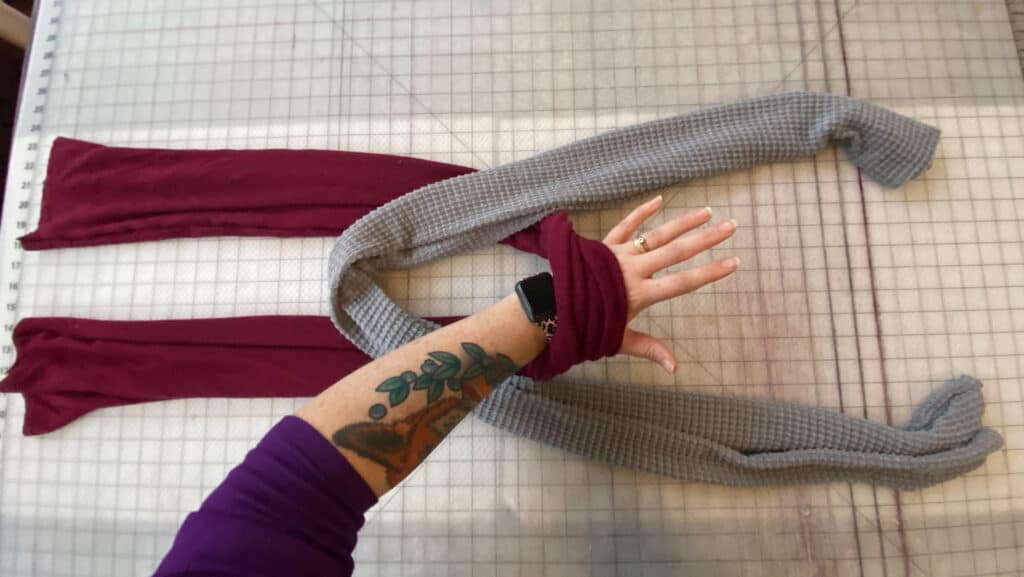
Gather both ends of the top fabric with your hand.
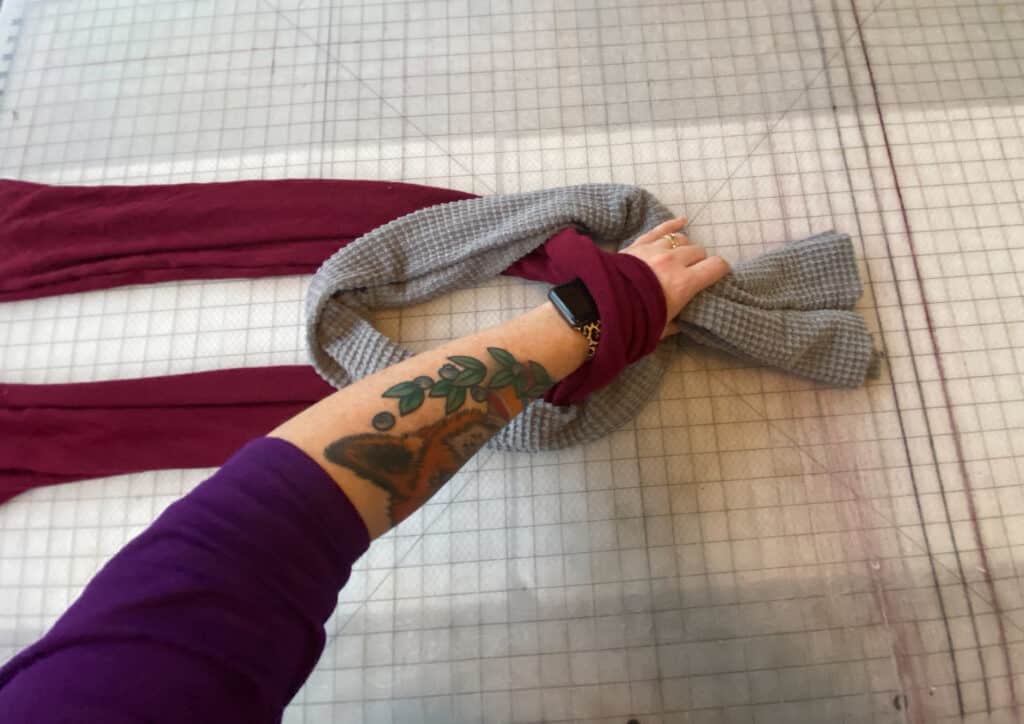
Pull the ends through the bottom loop.
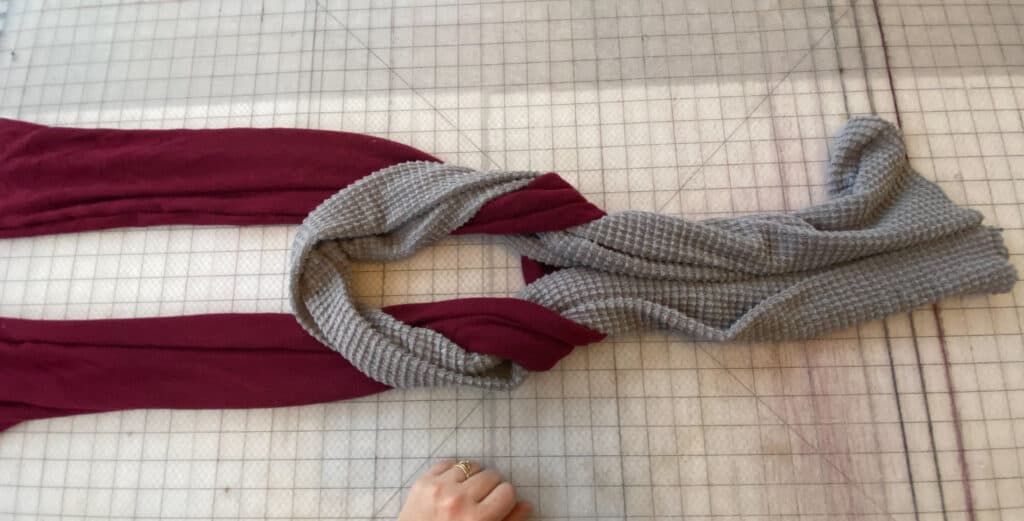
Separate the top fabric ends.
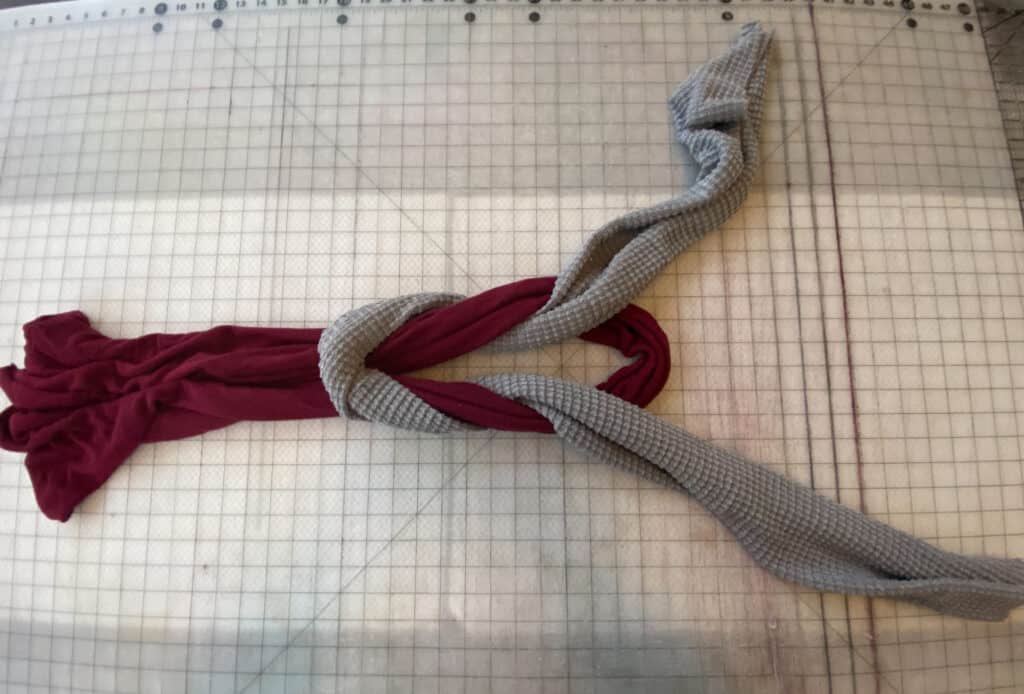
Put your hand through the bottom loop and grab the end furthest from you.
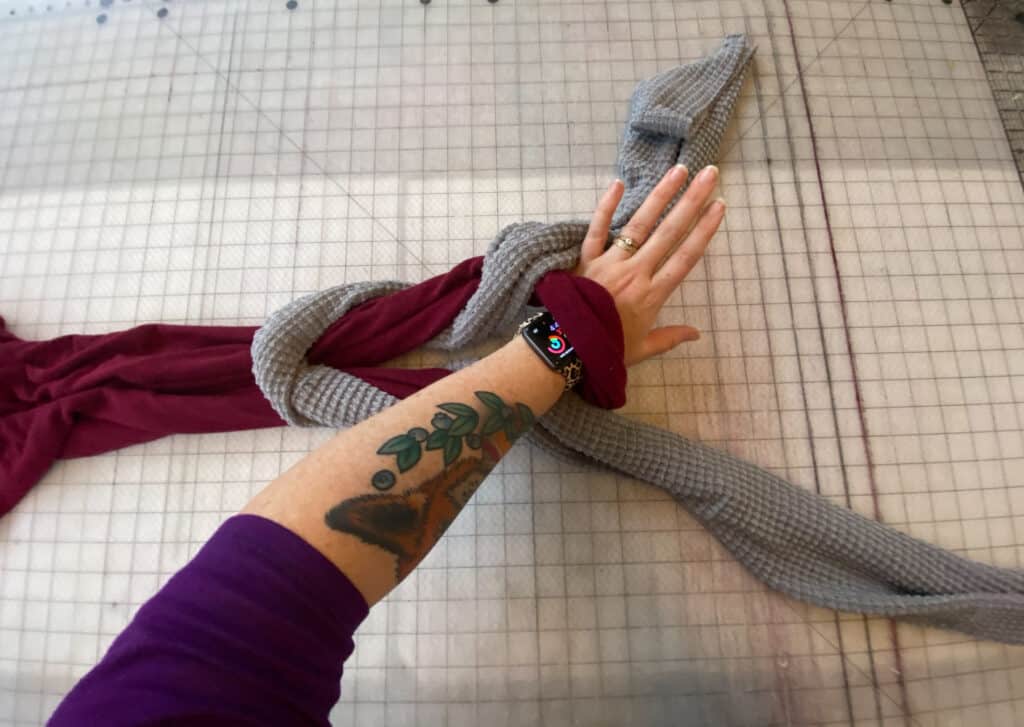
Pull end through the loop.
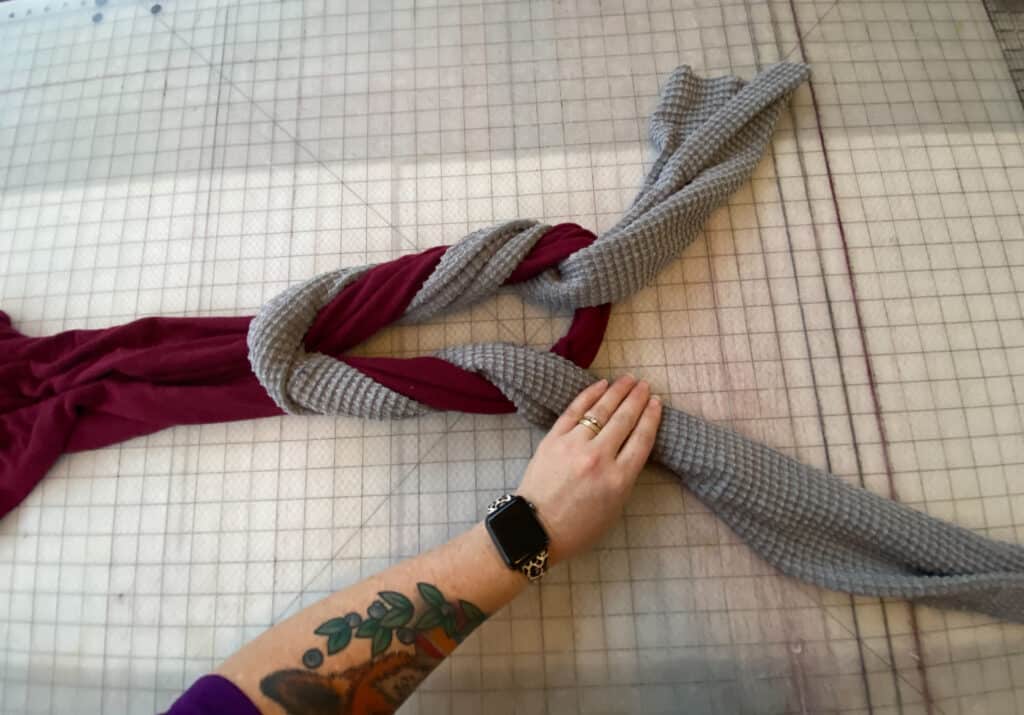
Put your hand through the bottom loop and now grab the end closest to you.
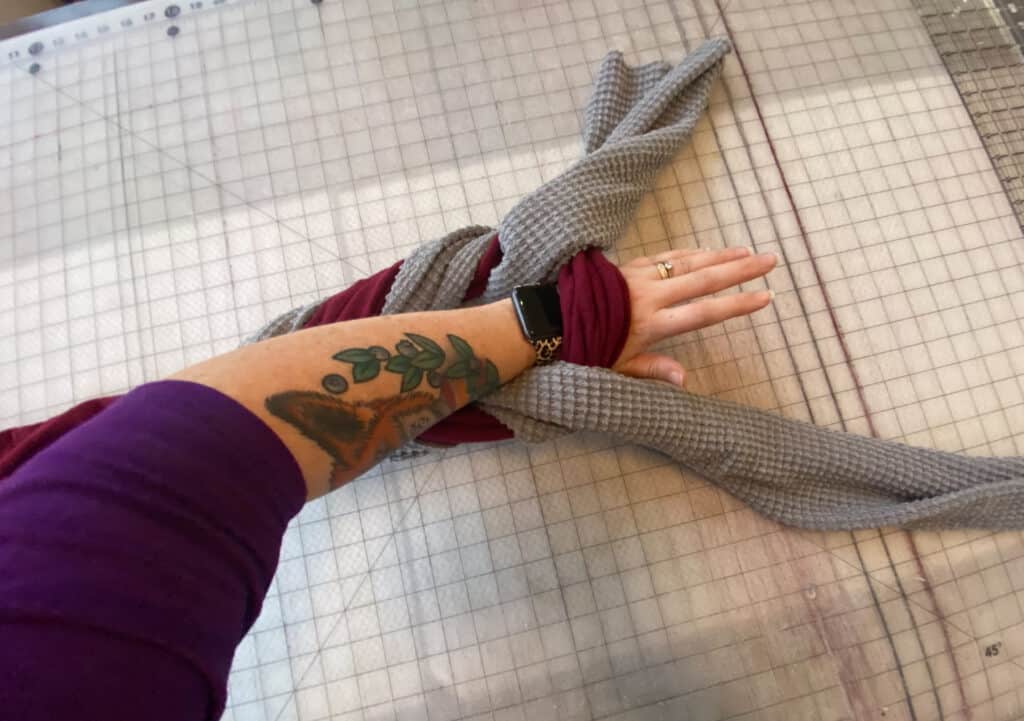
Pull end through the loop.
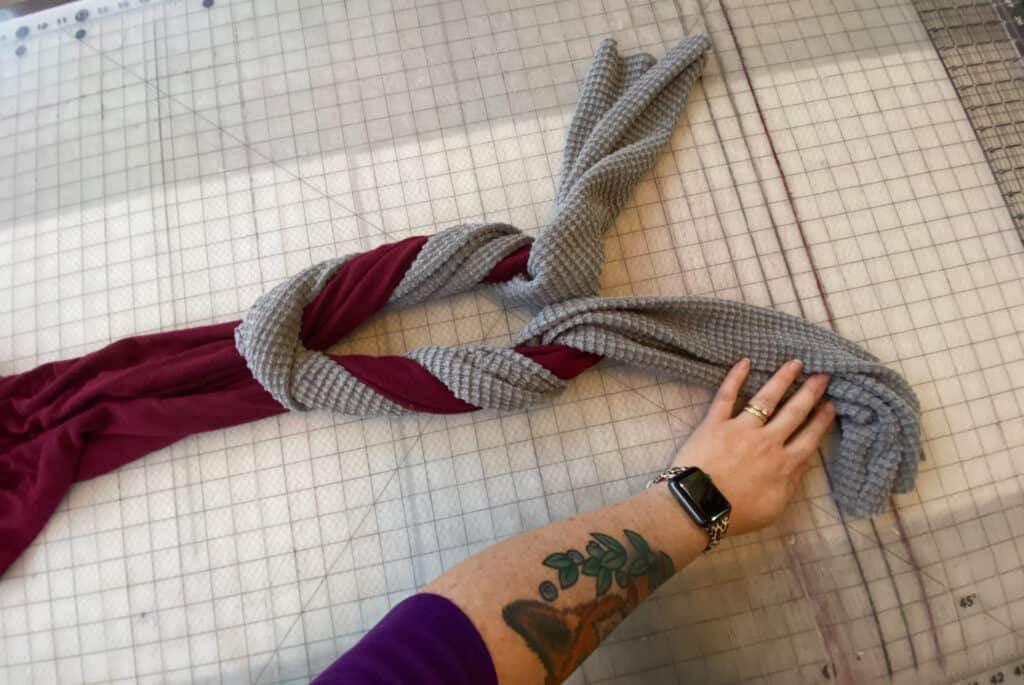
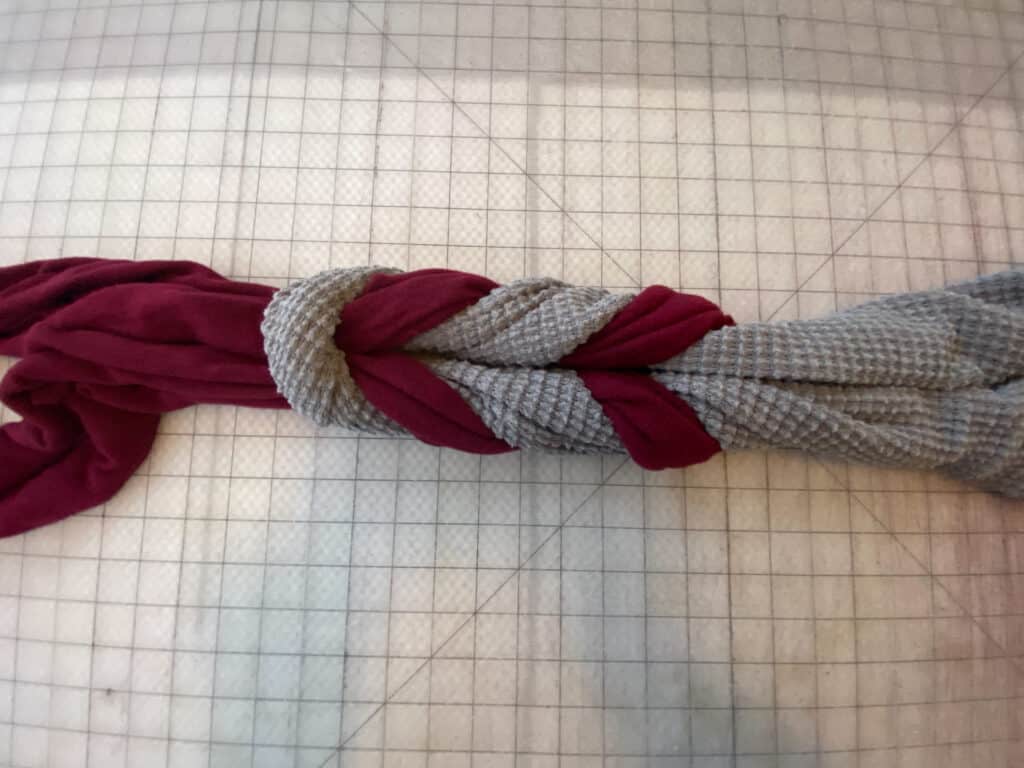
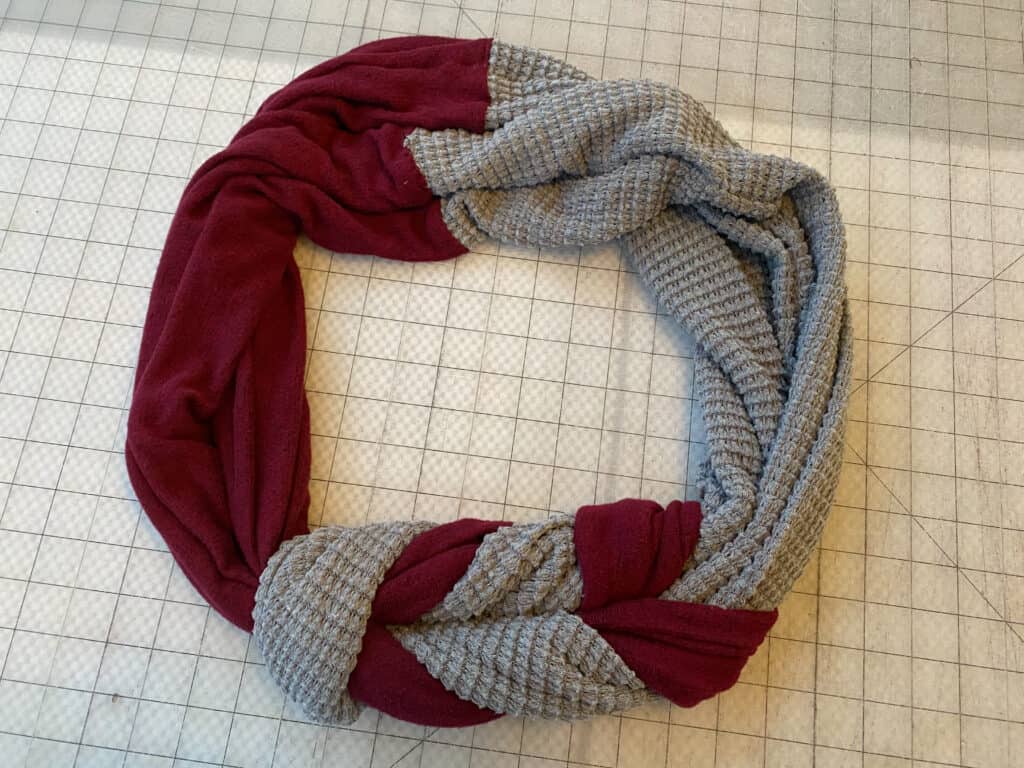
Adjust the “braids” to your liking.
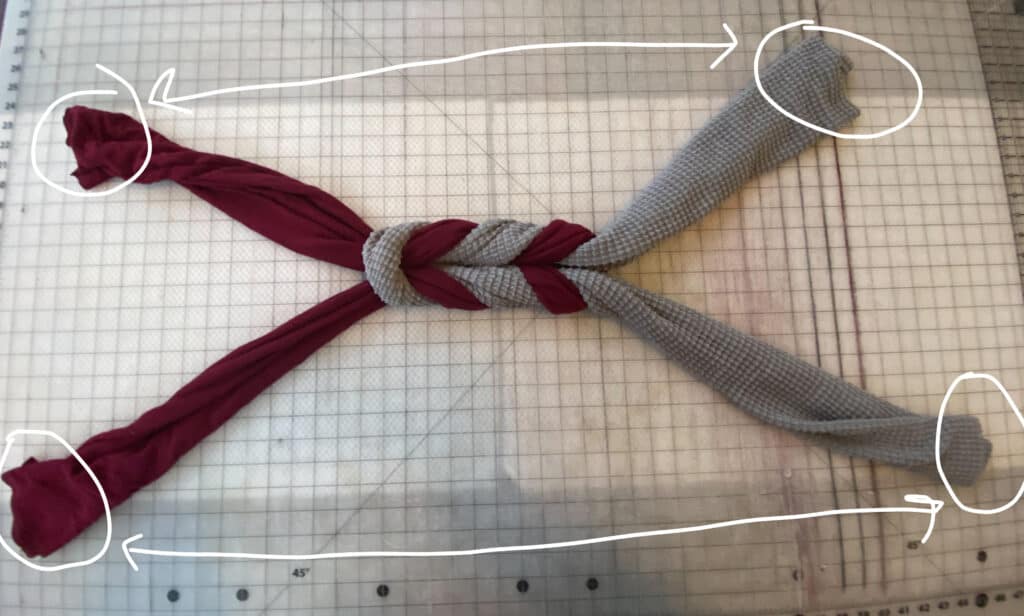
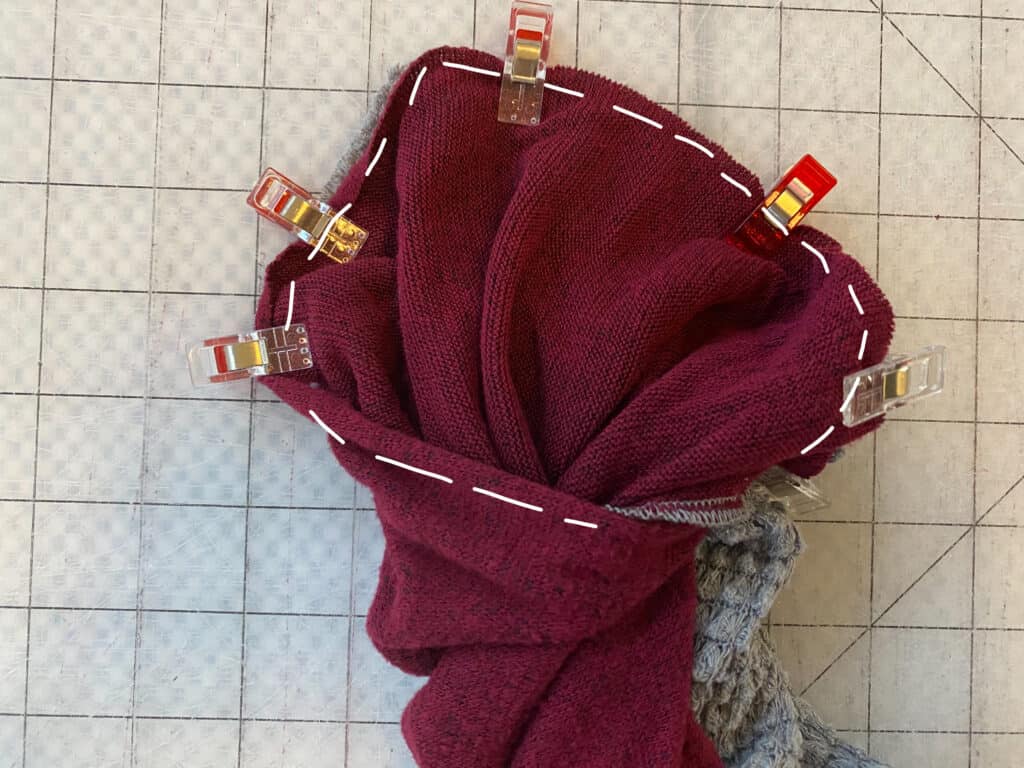
Open up the ends and match the opposite sides to one another.
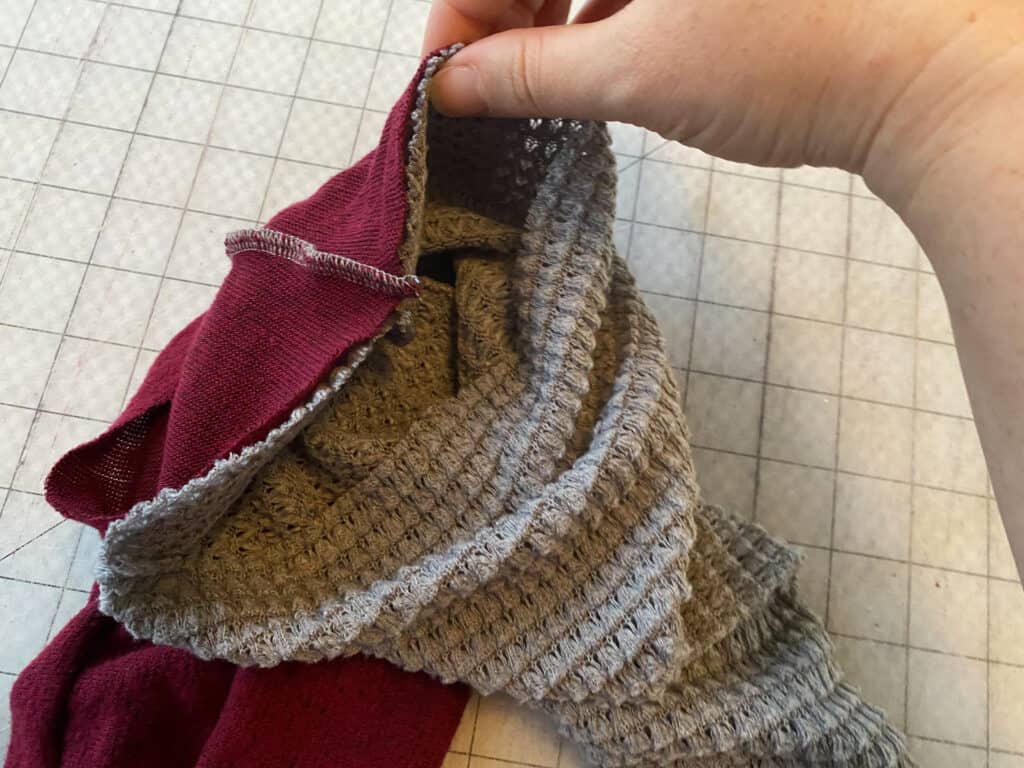
With right sides together, match up the two seams along the raw edges.
Pin / clip around the opening, matching right sides together.
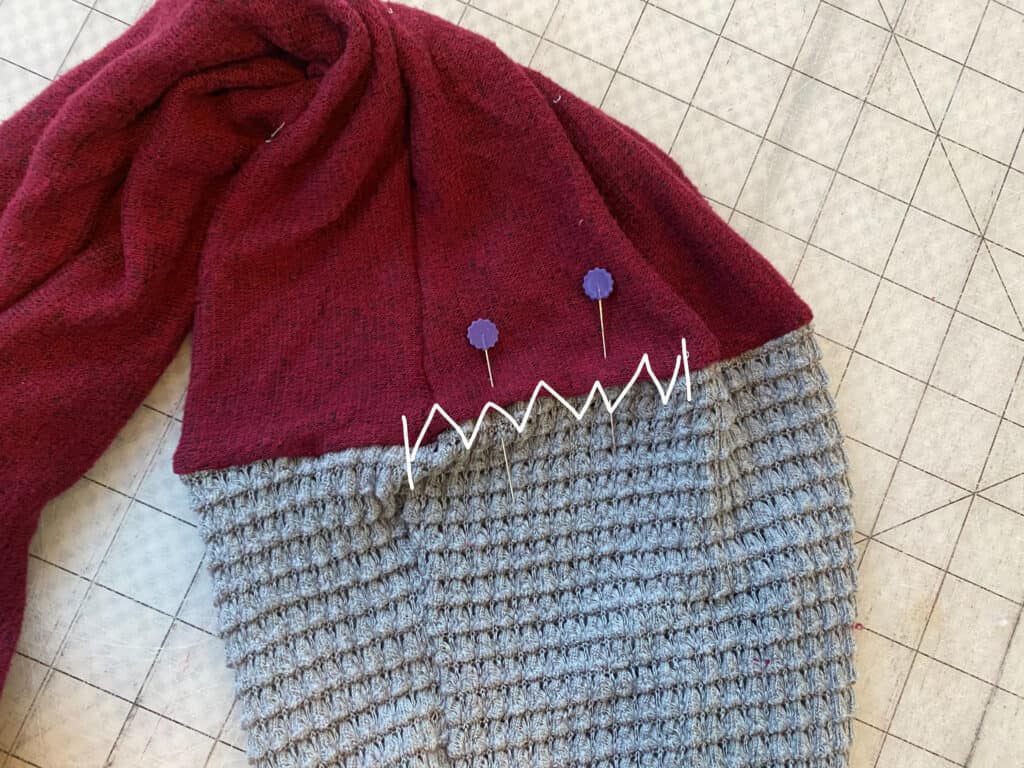
**This step is a little tricky. You won’t be able to align the two pieces all the way around. Go as far as you can without stretching out your fabrics.
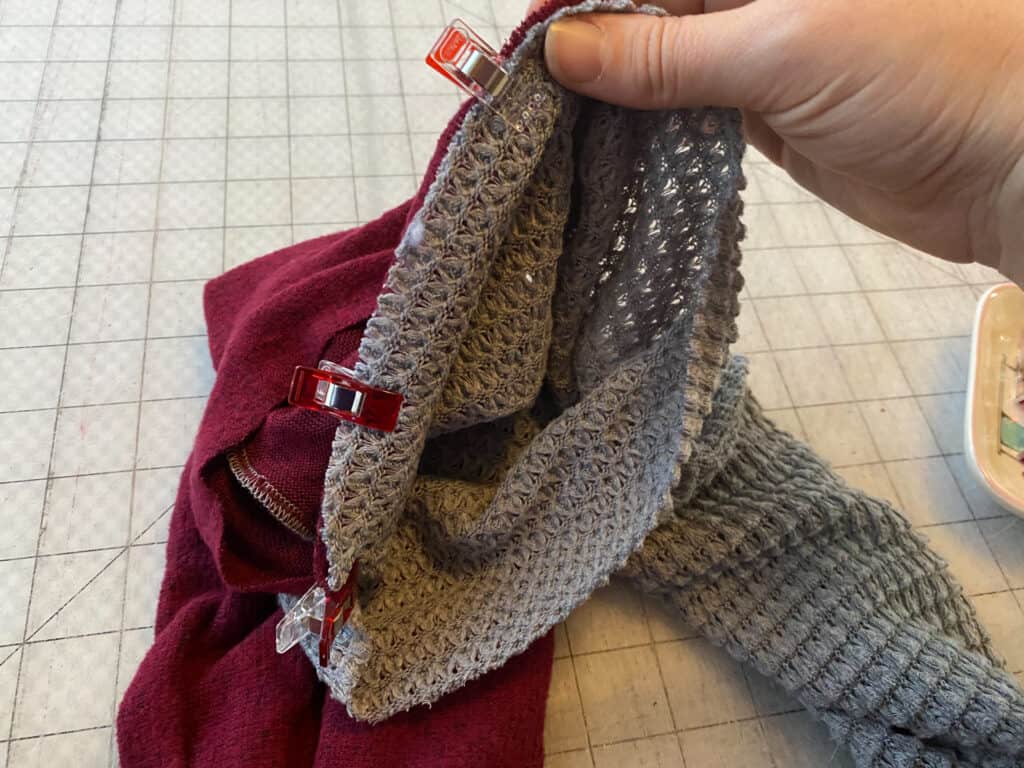
Using 1/2″ seam allowance, sew around entire raw edge. Leaving an opening for pulling/turning the fabric.
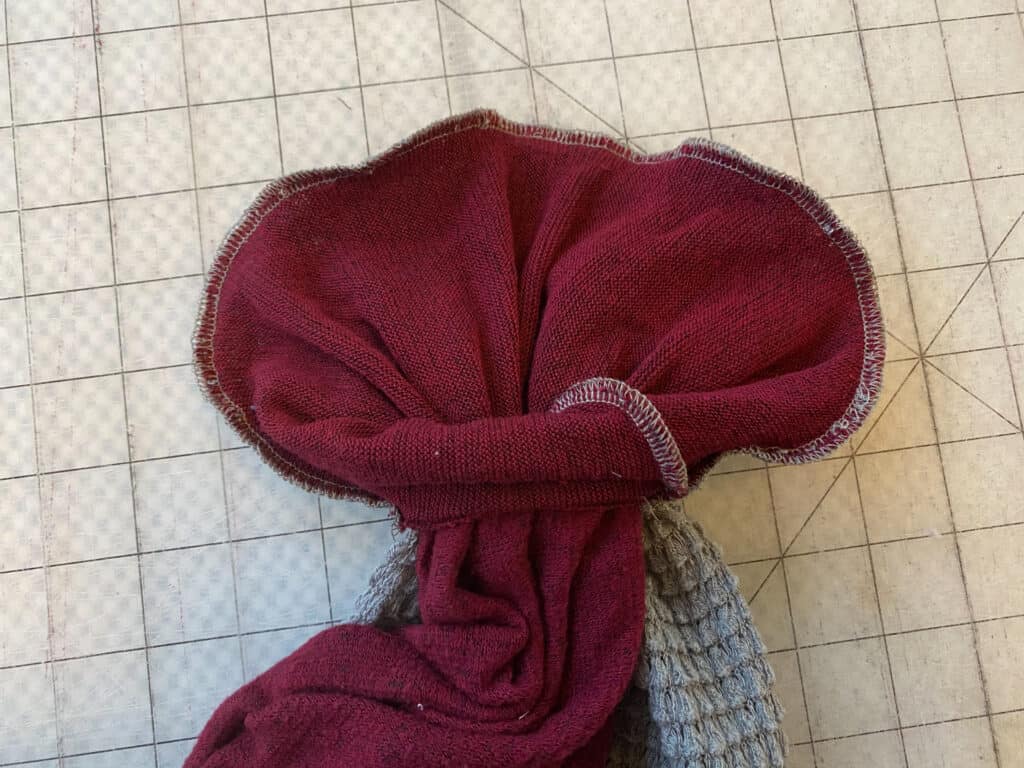
Pull the fabric through, to turn everything right sides out.
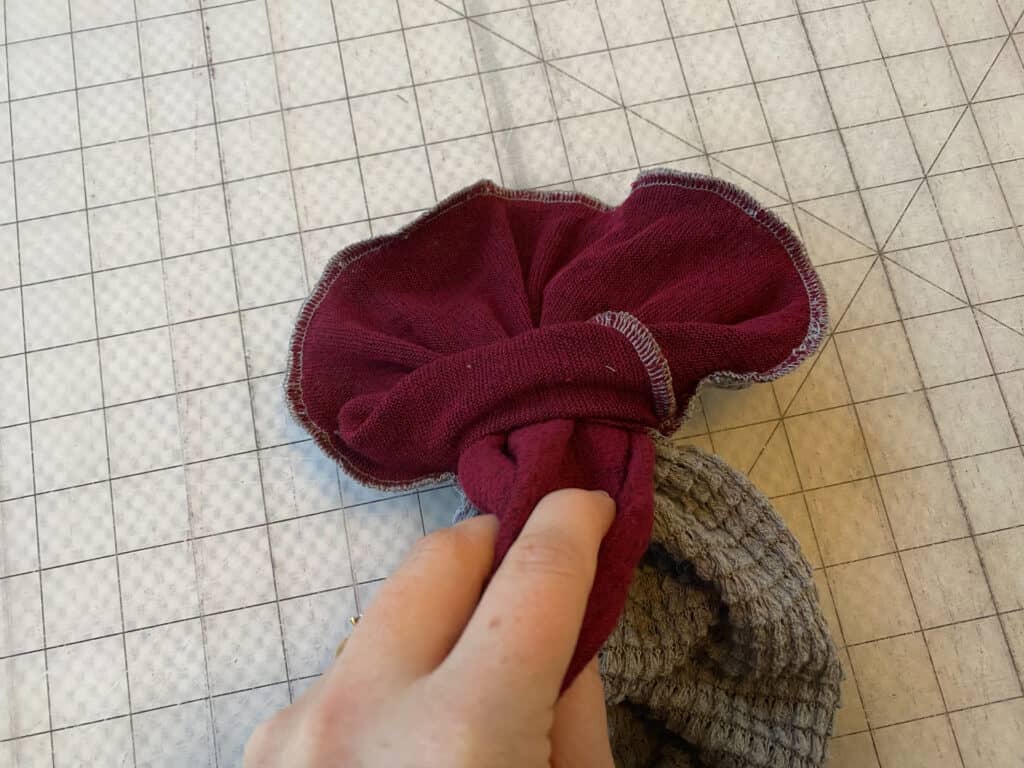
Tuck the seam allowances into the opening.
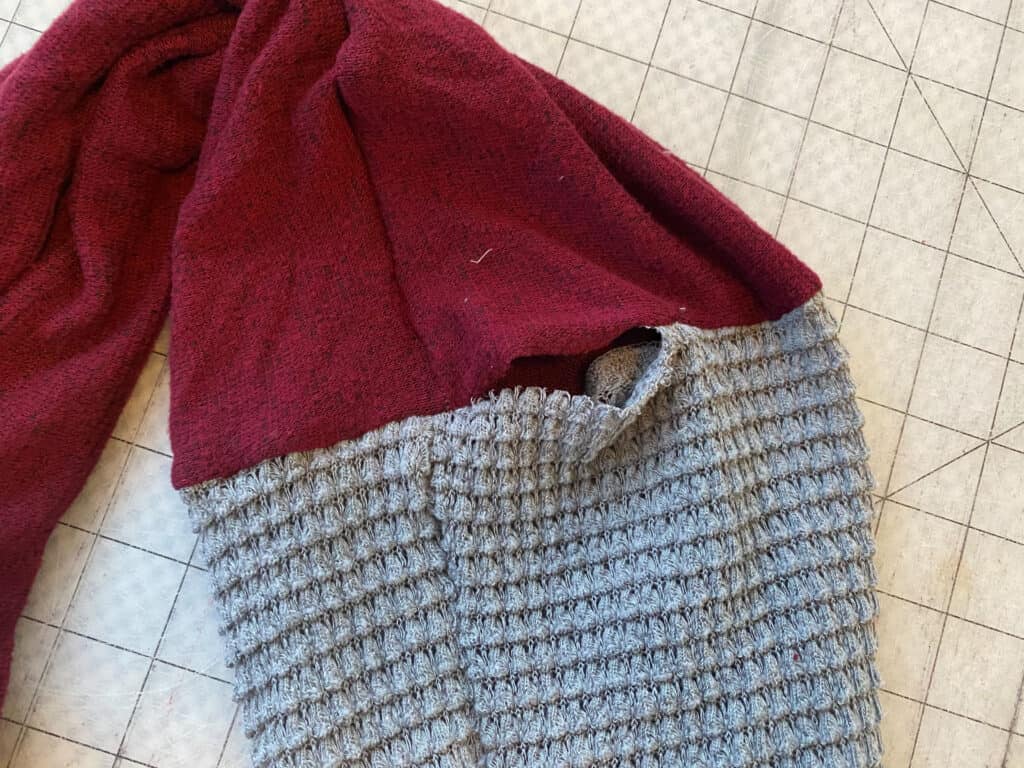
Pin and, using your favorite stitch, close the opening.
You’re finished!
In case you consider yourself a more “visual learner” here’s a video tutorial that walks you through the entire tutorial, start-to-finish.
Check out what our fabulous testers were able to create with this very same tutorial!


I la-la-love when you share your photos with me! Head over to the Patterns for Pirates Facebook Group and show us what you’ve made!
Happy Holidays, Pirates!

2020 Holiday Freebies :: Paw-Fect Stocking Tutorial
Happy Holidays, Pirate Friends! We are excitedly back for another year and another round of holiday freebies to share with you! Over the years, we’ve compiled different tutorials and patterns that we think would make *perfect* gifts for your friends and family. Curious about what we’ve already released in the way of holiday freebies? Head right here to see all of them: Holiday Freebies Roundup.
Today, we are bringing you the: Paw-fect Stocking!!
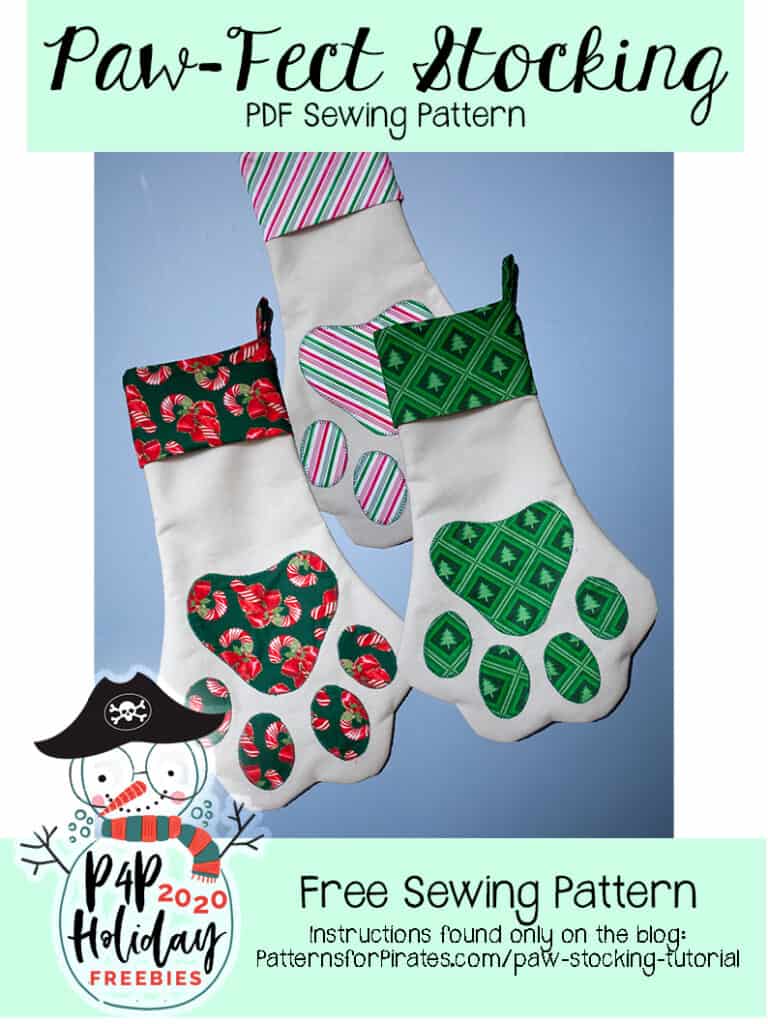
If you’re anything like me, your fur family members also get visits from Santa Claus — or maybe Santa Paws? (ba-dum-ching!) We’ve always hung stocking for our pups and filled them with toys and treats. And since we added another furry family member this year to my own household, I felt like maybe it was time to make new stockings for all three of our babies!
And I’m thinking maybe you might like this for your canine and feline family members as well!
Supplies Needed:
- Paw-fect Stocking pattern pieces
- 1/2 Yard each: Outer + Lining Fabrics and Fusible Fleece Interfacing
- 1/4 Yard Accent Fabric (for cuff and paw details)
Prepare all of your pieces.
Cut:
— 2 each: Main, Lining + Interfacing Stocking Pieces
— 2 Large “Toes” in Accent Fabric + Interfacing
— 2 Small “Toes” in Accent Fabric + Interfacing
— 1 “Pad” in Accent Fabric + Interfacing
— 1 Cuff in Accent Fabric
— 1 Hanging Tab in Accent Fabric
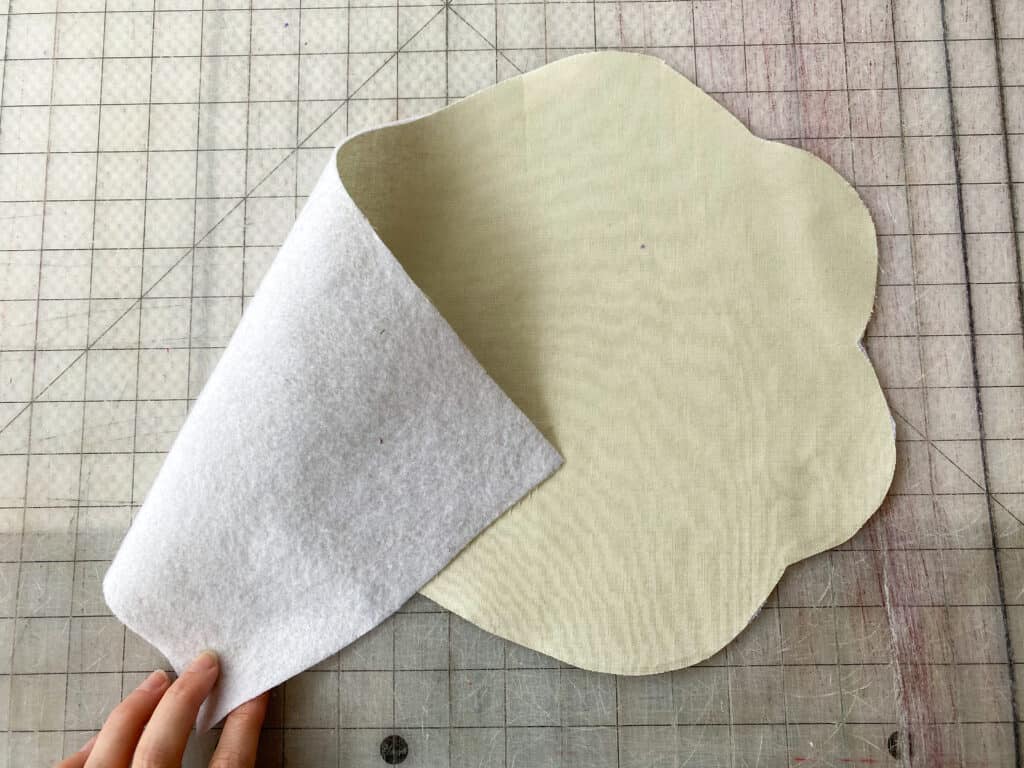
Apply interfacing to the main outer stocking pieces and the paw print applique pieces.
Using the stocking piece as a guide for placement, lay out the applique pieces.
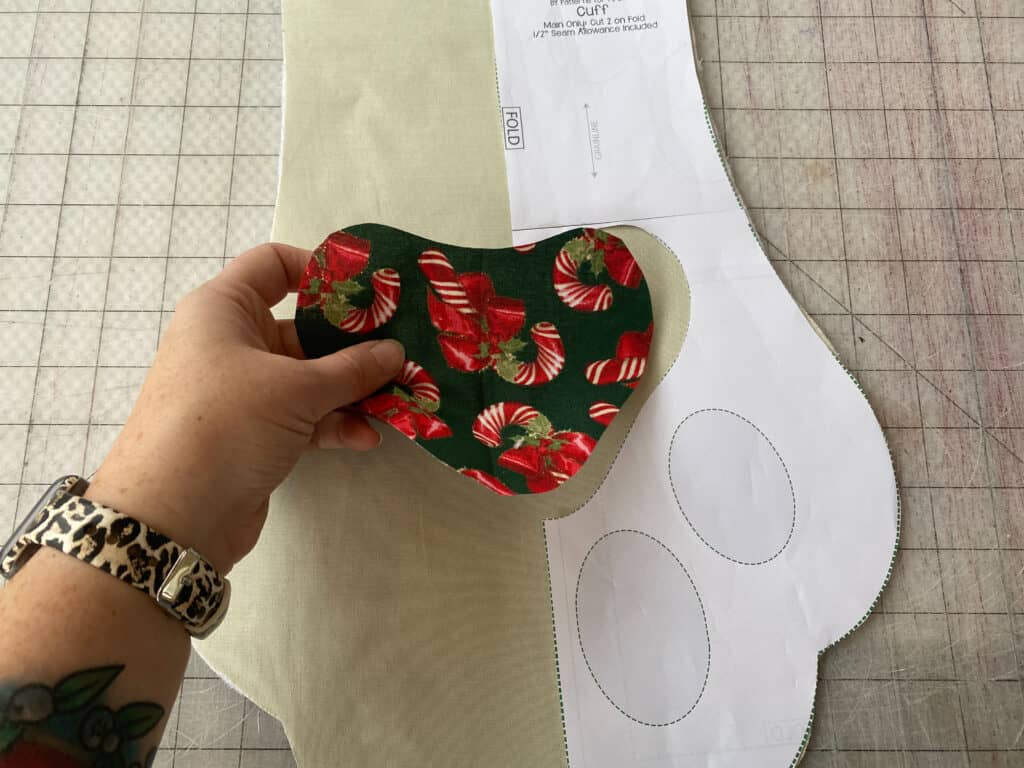
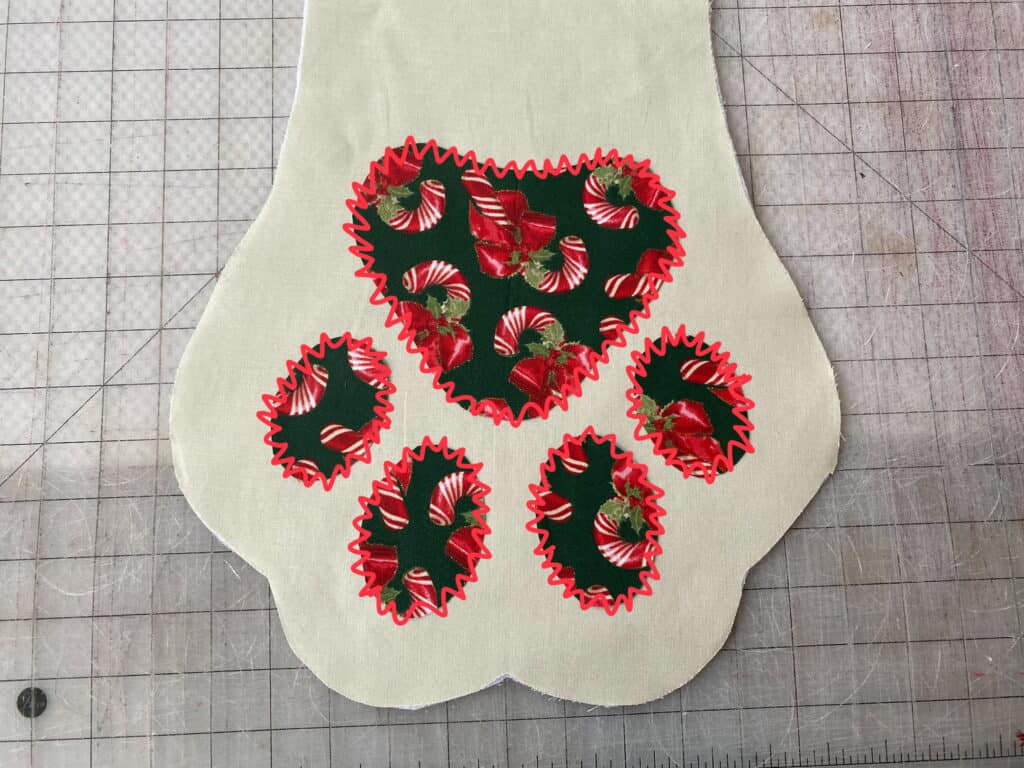
Using your favorite stitch, applique the pieces to the front stocking.
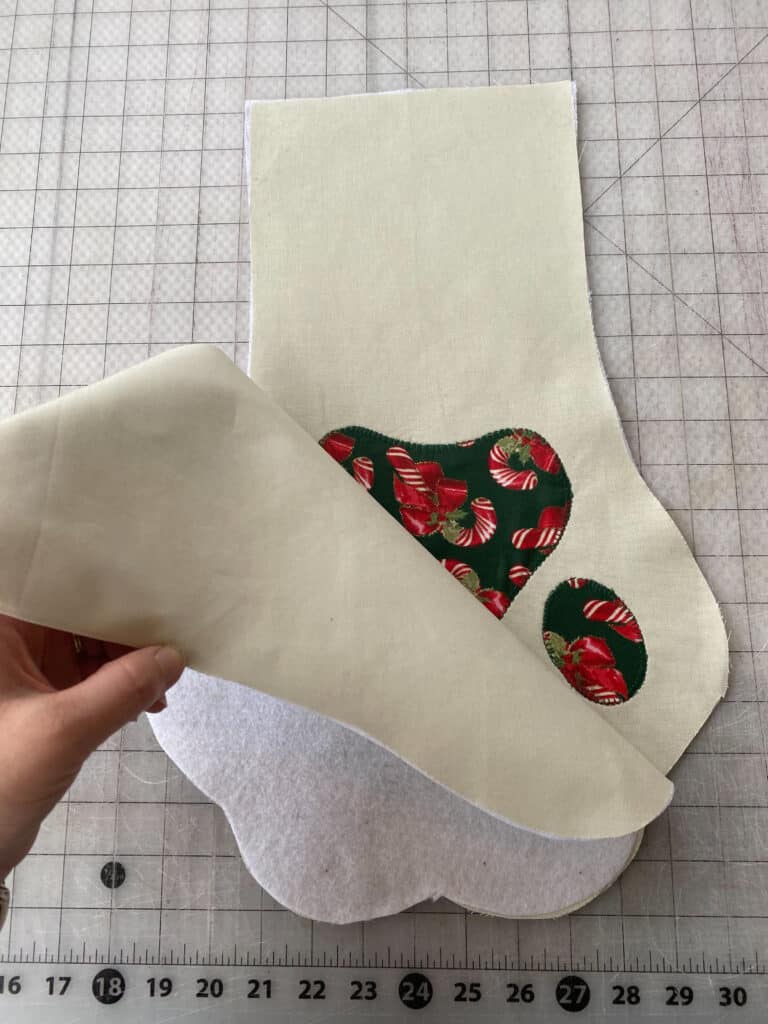
Place the back outer stocking piece on top of the front piece, right sides together.
Using 1/2″ seam allowance, sew along all edges, leaving only the top, straight edge open.
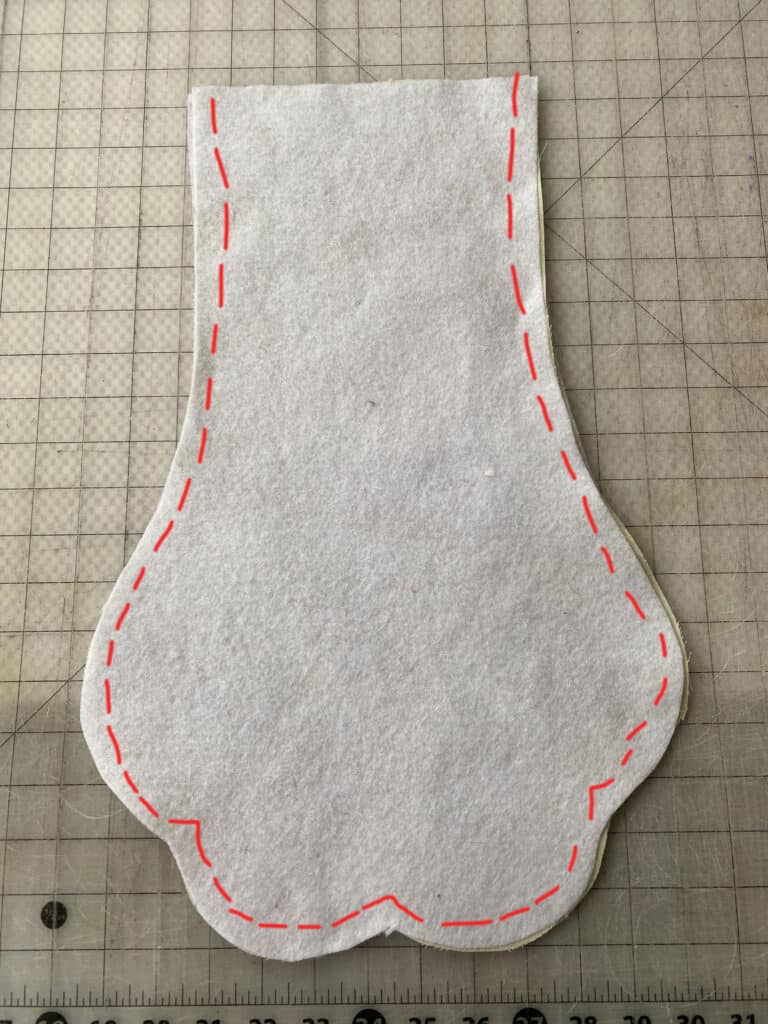
Trim down your seam allowance, and clip into the corner points of the paws, being careful not to cut your stitches.
**Repeat last three steps with stocking lining pieces.
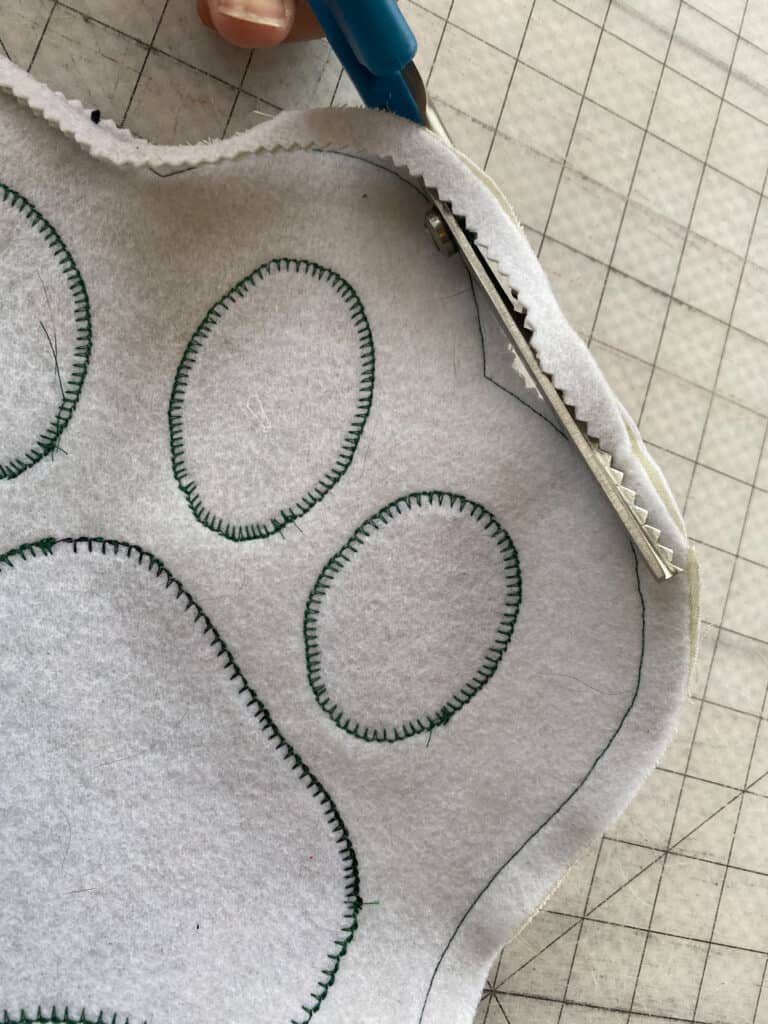
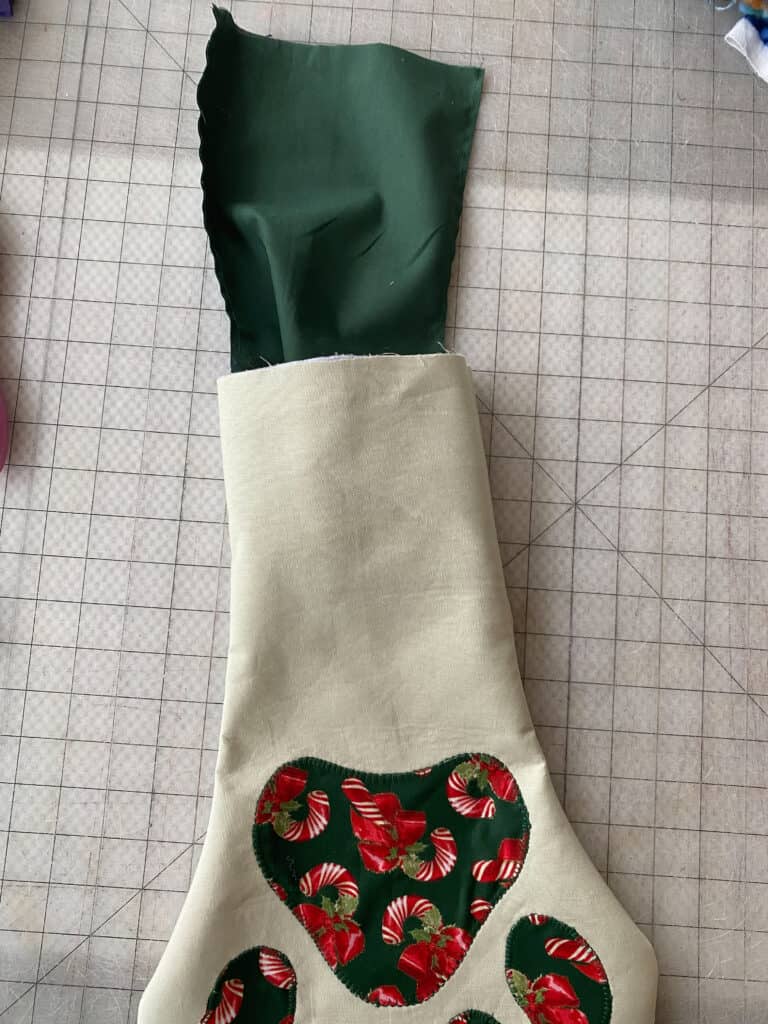
Leave your lining piece wrong sides out, and turn your main piece right sides out. Slip the lining into the main piece.
Fold hanging tab in half, wrong sides together. Iron.
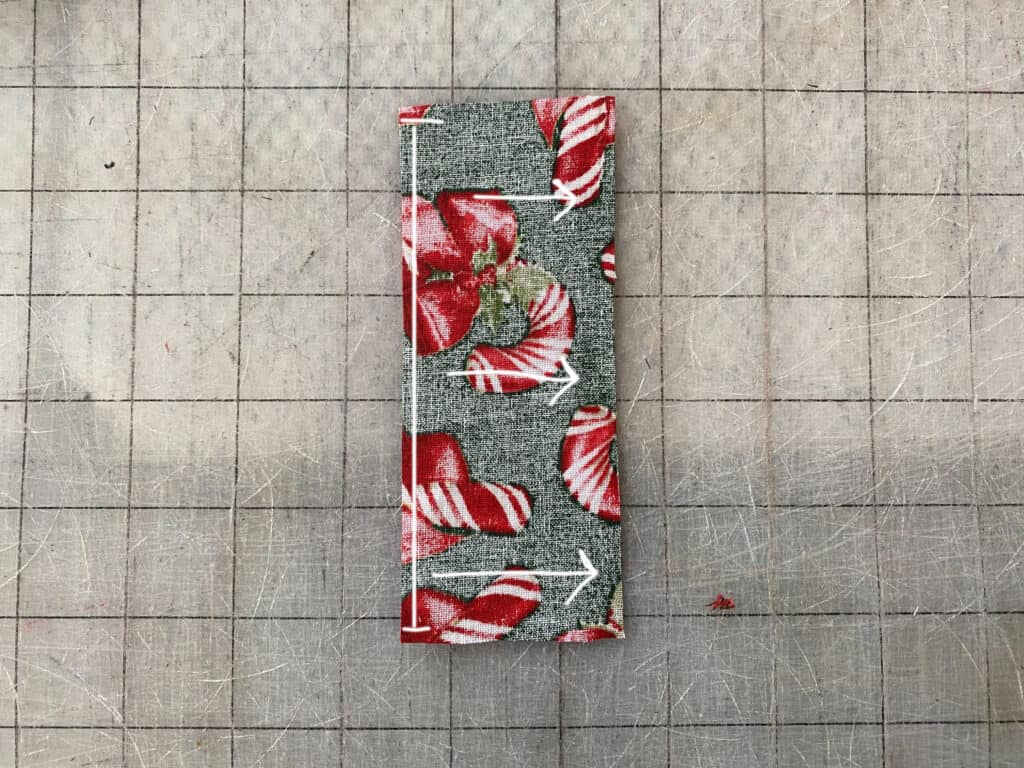
Open up hanging tab piece and fold outer long edge toward crease. Iron.
Repeat with other outer edge.
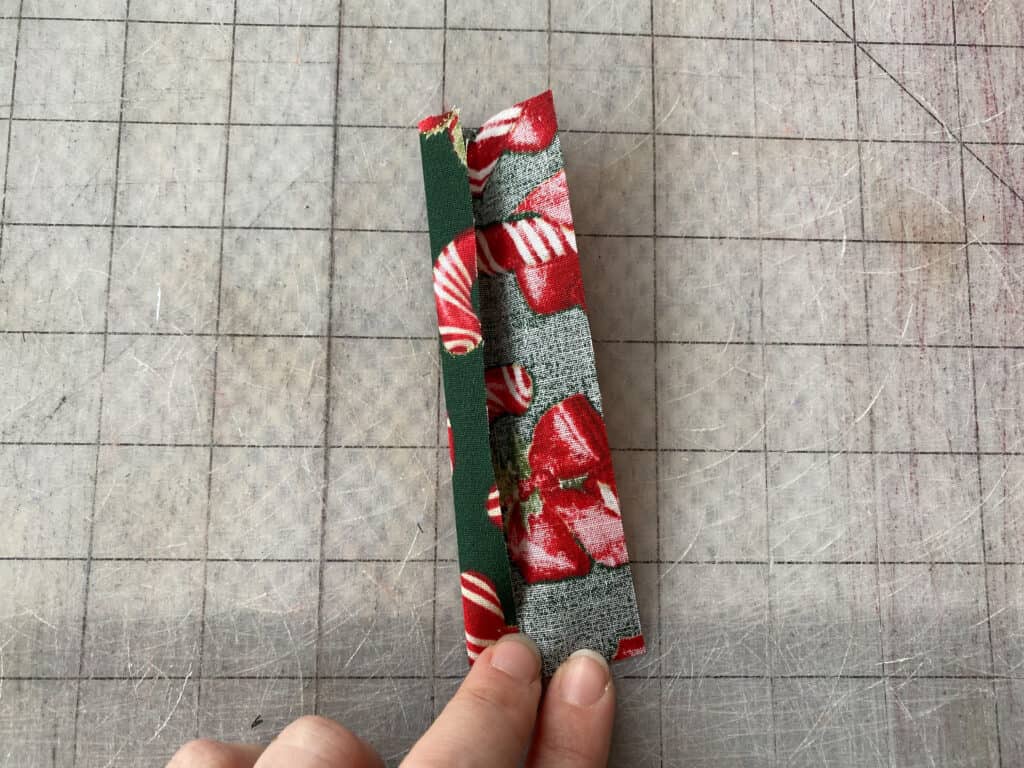
Edge stitch along double folded edge.
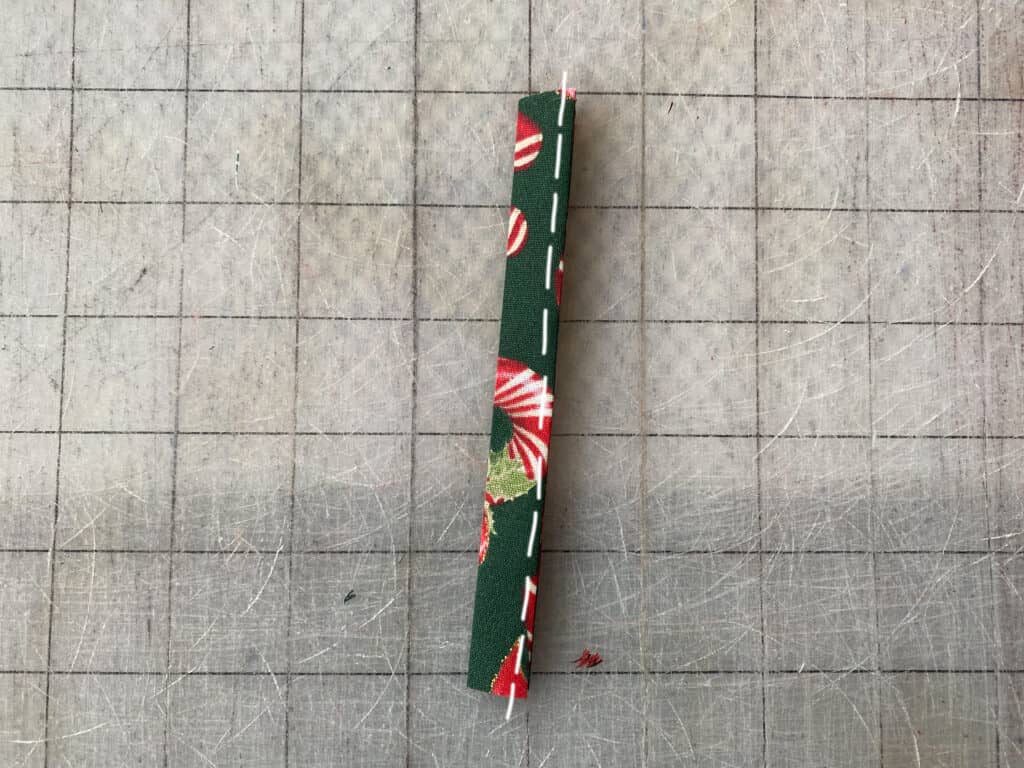
Fold hanging tab in half.
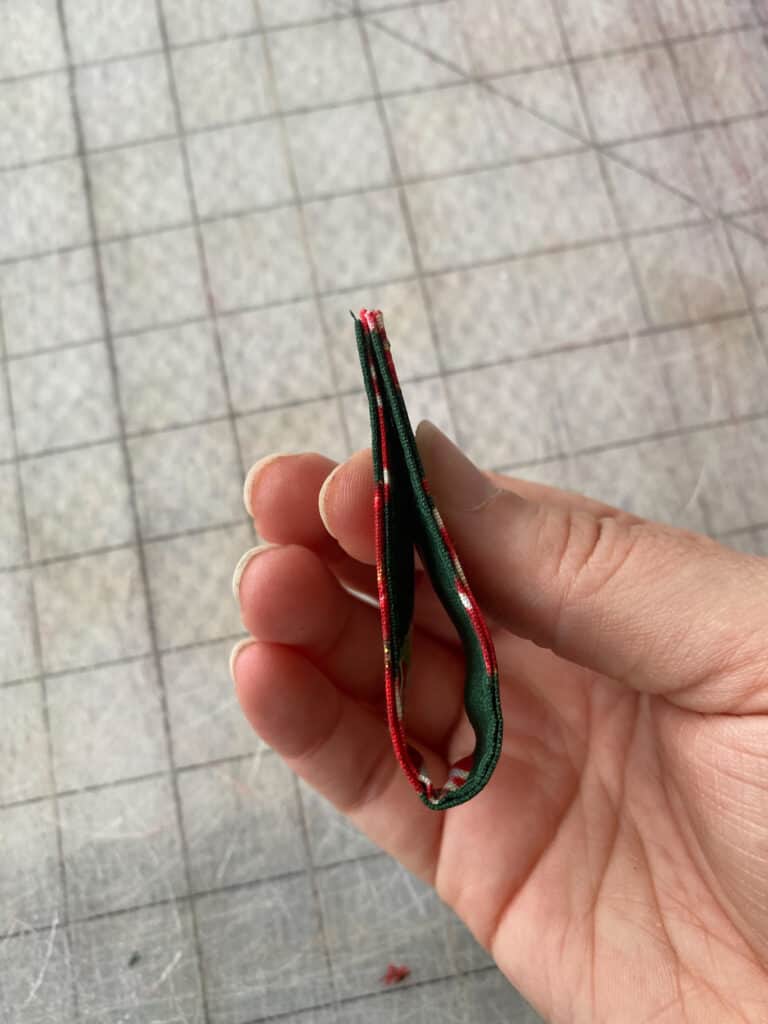
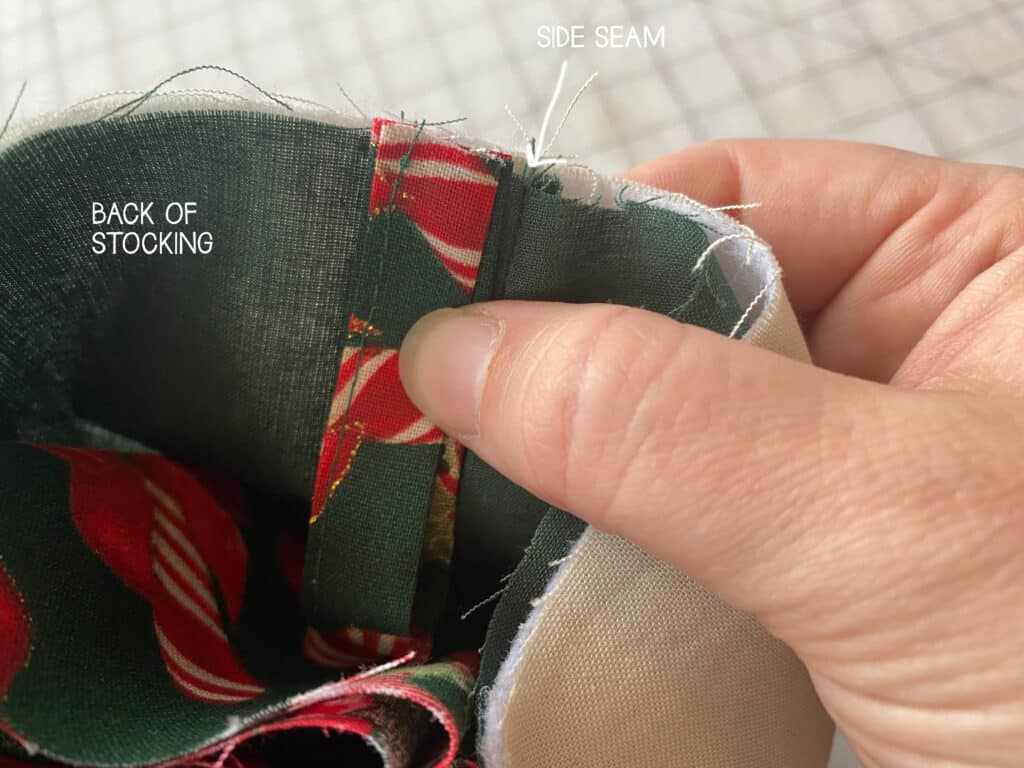
Place hanging tab inside of stocking. Align it just behind the side seam, toward the back of the stocking. Clip or pin in place.
Fold cuff piece in half, along short edges. Right sides together.
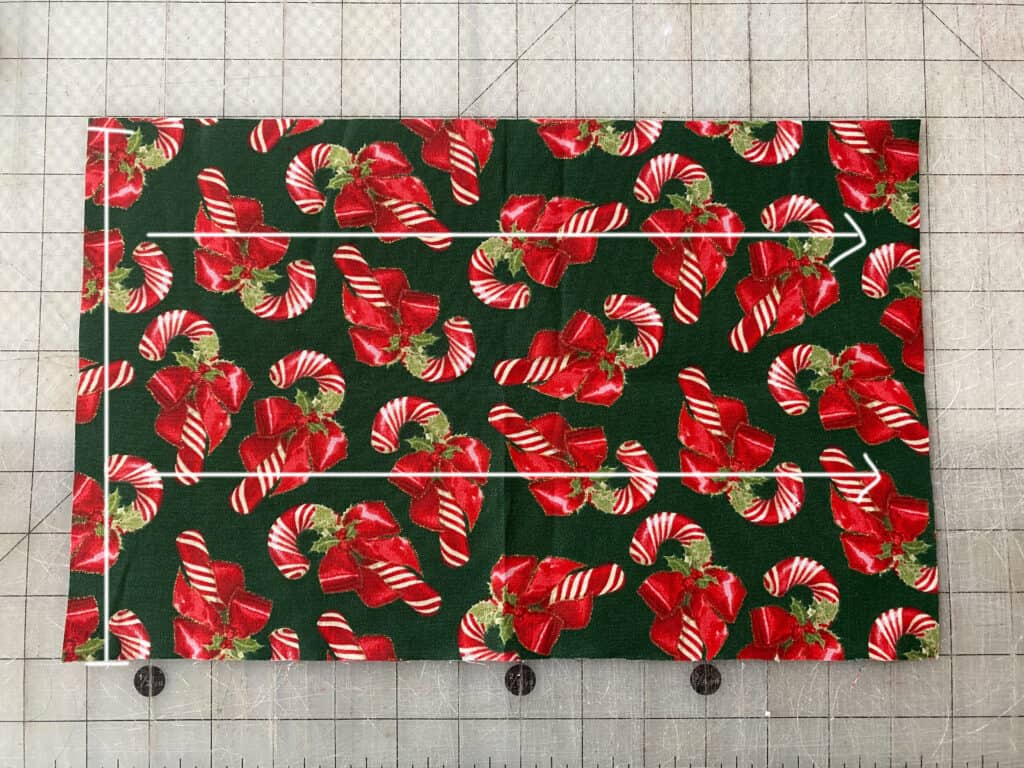
Fold in half again, this time meeting the shorter raw edges together.
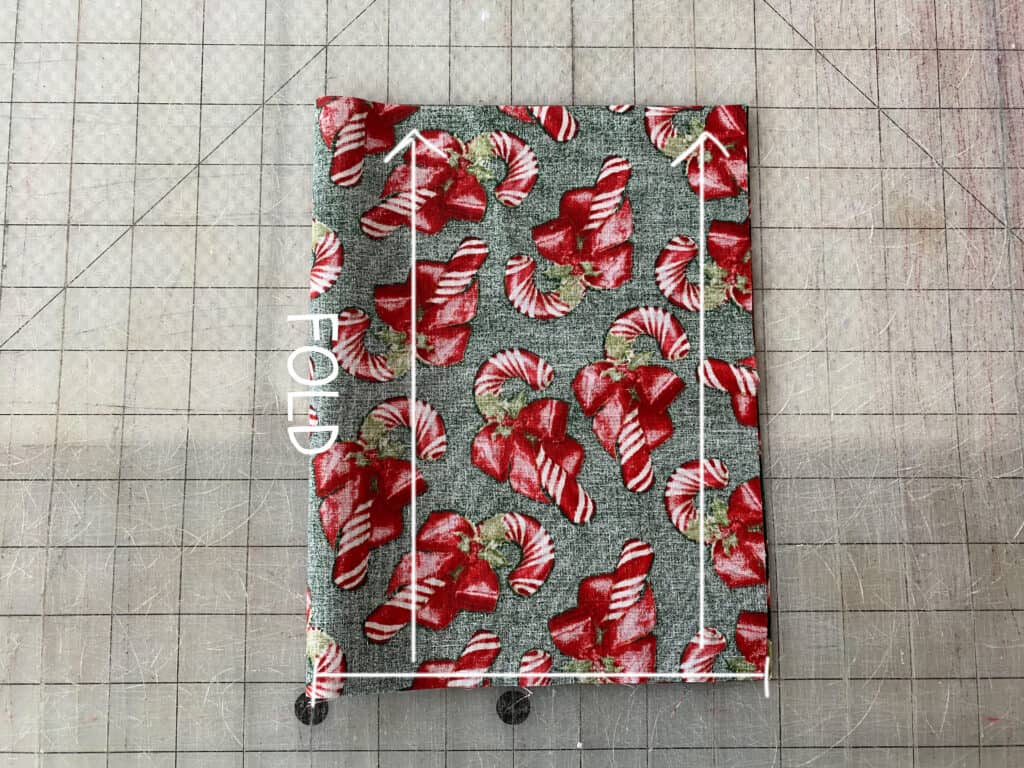
Sew along side edge, using 1/2″ seam allowance.
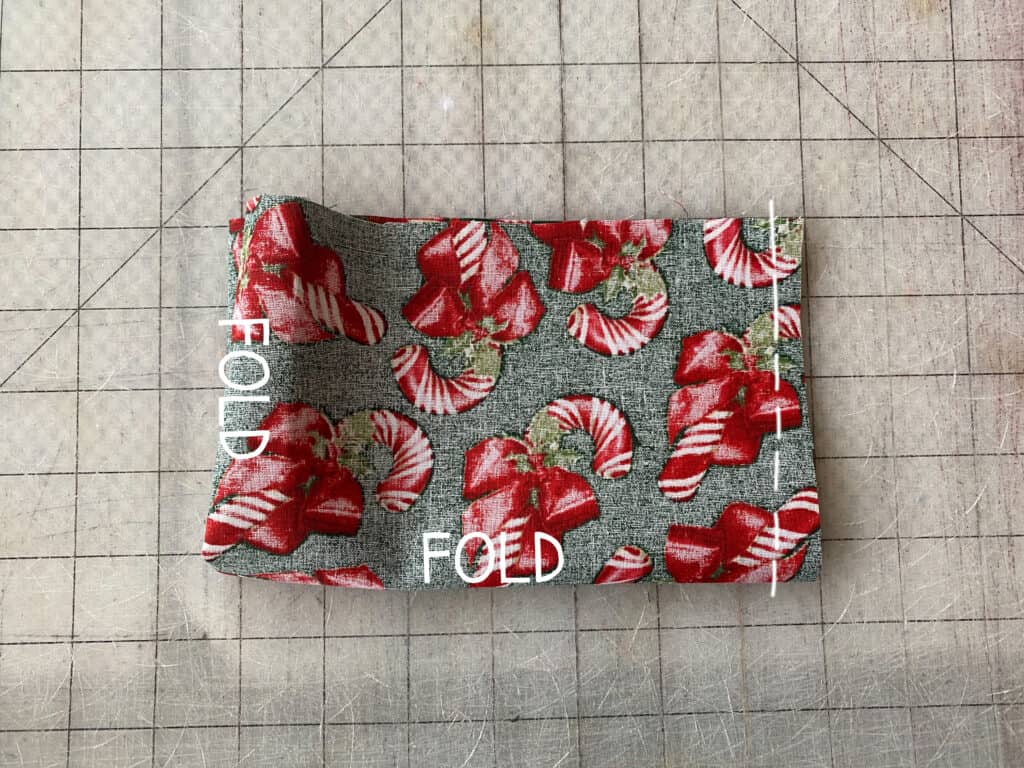
Flip cuff right sides out. Using pins / clips, mark half points of cuff.
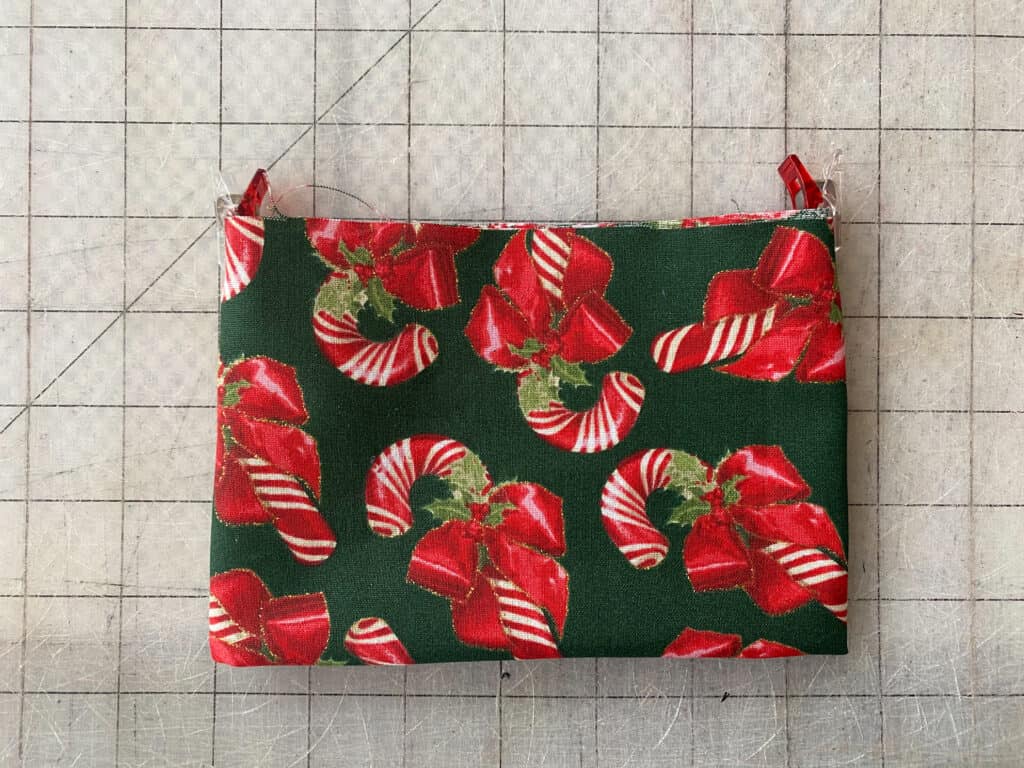
Slide cuff piece inside of the stocking, aligning the half points to the side seams.
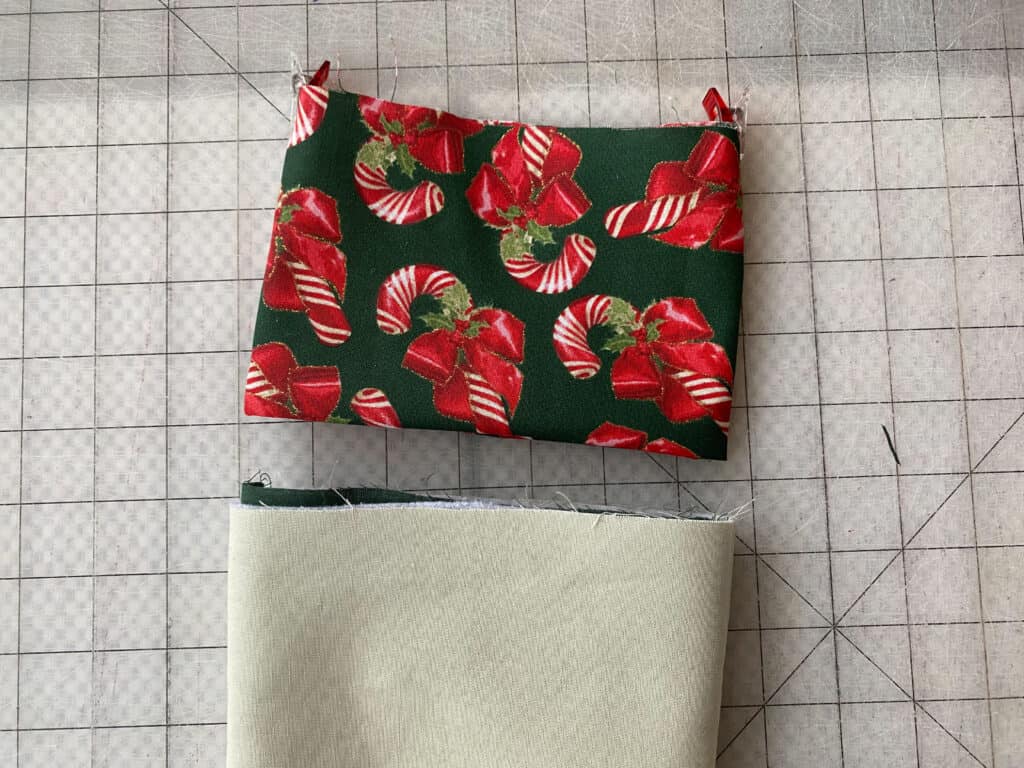
Sew along entire raw top edge, using 1/2″ seam allowance.
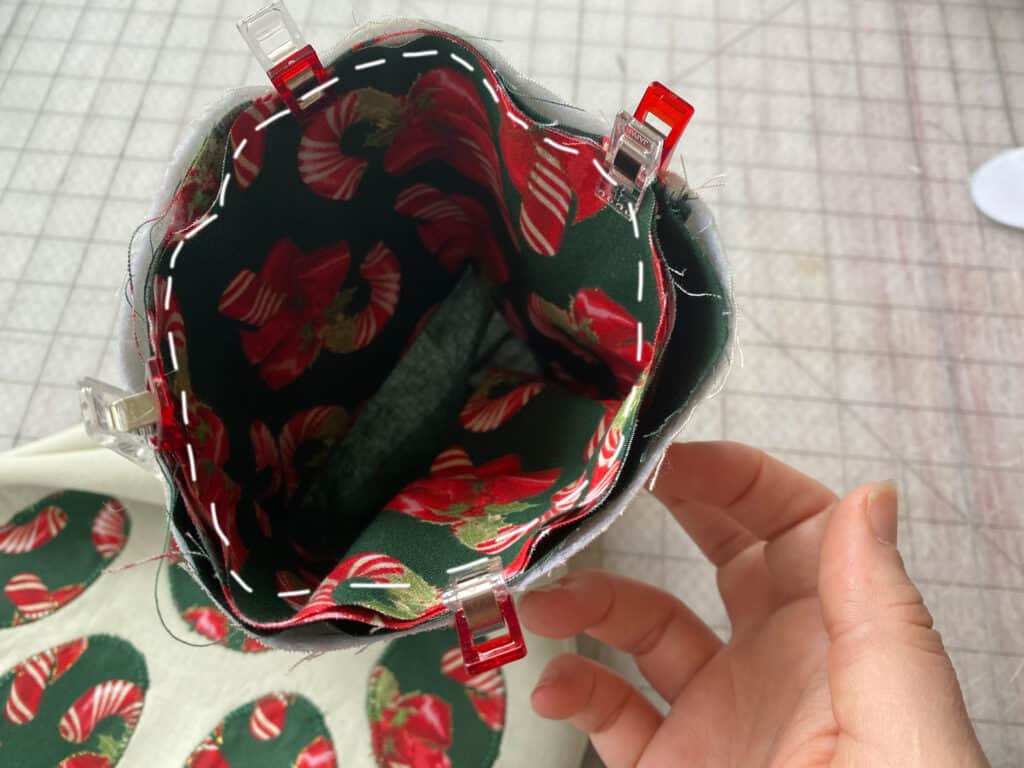
Pull cuff up and out of the stocking.
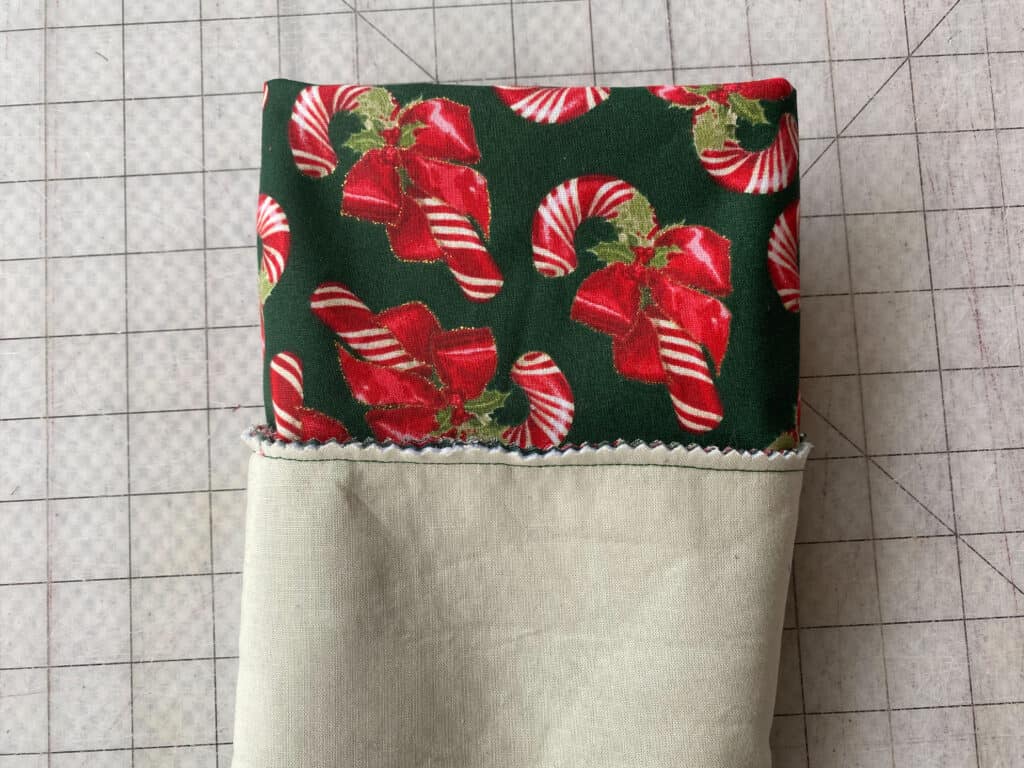
Flip cuff down toward body of stocking.
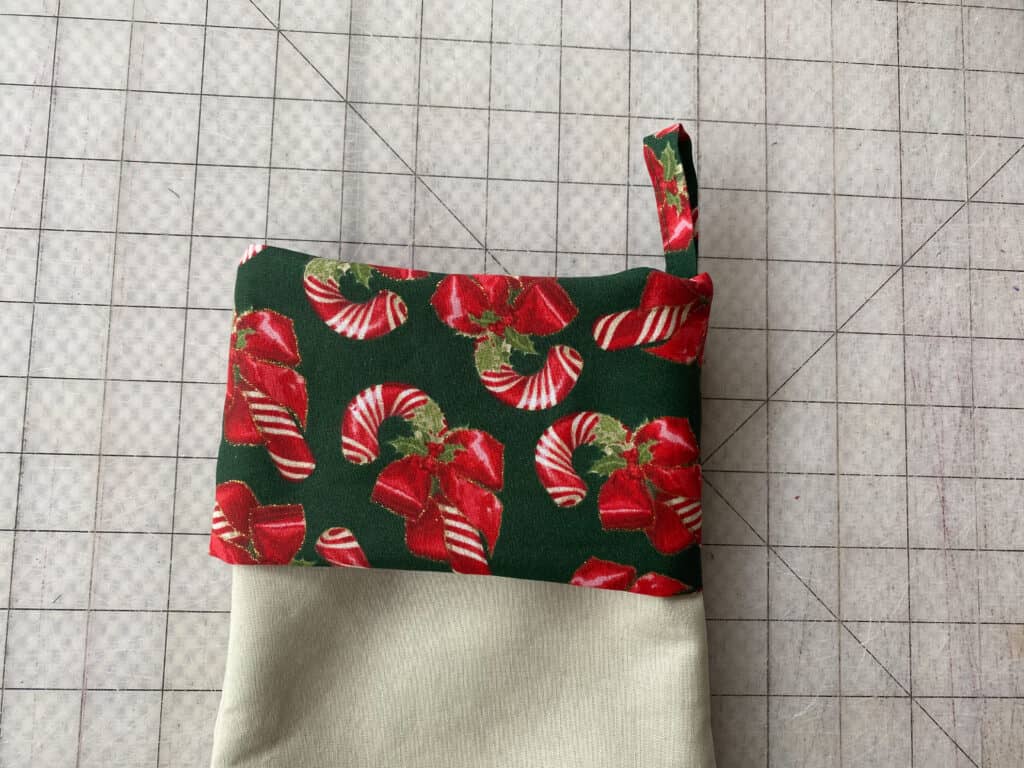
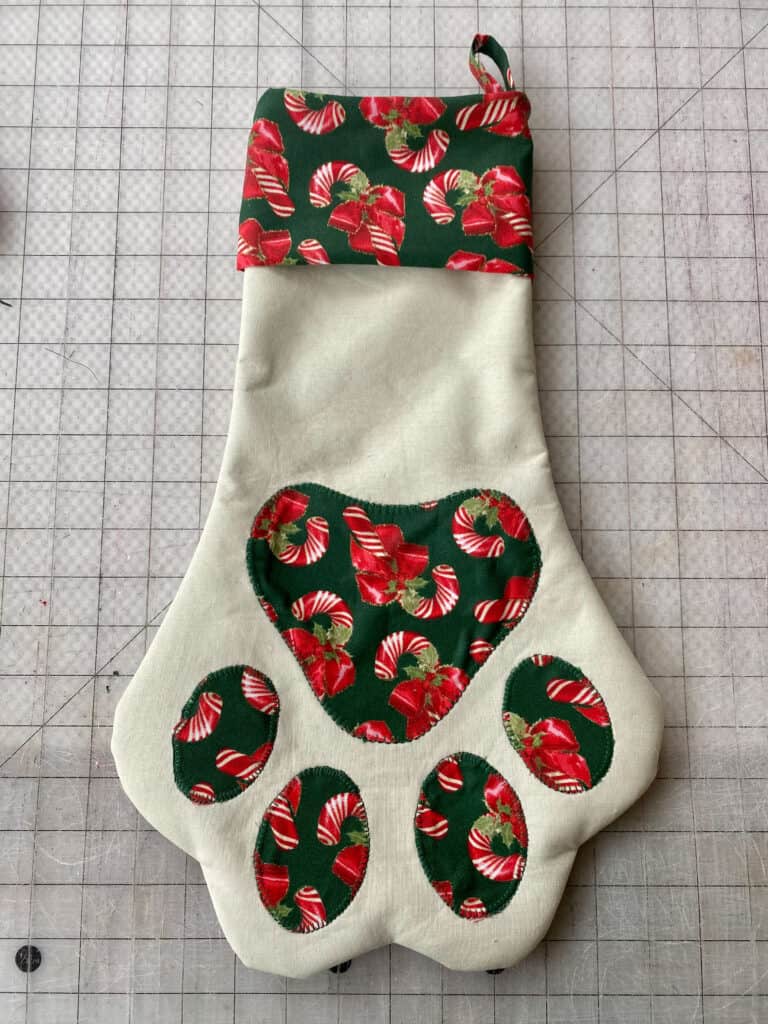
You’re finished! (Don’t forget to press your stocking before hanging it up!)
In case you consider yourself a more “visual learner” here’s a video tutorial that walks you through the entire tutorial, start-to-finish.
Check out what our fabulous testers were able to create with this very same tutorial!


I la-la-love when you share your photos with me! Head over to the Patterns for Pirates Facebook Group and show us what you’ve made!
Happy Holidays, Pirates!

- « Previous Page
- 1
- …
- 3
- 4
- 5
- 6
- 7
- …
- 29
- Next Page »


