Hi Pirates! Today we’re going to take a look at understitching and topstitching to find out how to use them while making your favorite woven patterns. The written instructions are below or you can scroll to the bottom of the page to find the video tutorial.
What is Understitching?
Understitching is the technique that is used to keep facings or linings from rolling out towards the front of your garment during wear. It provides you with the ability to keep any of the facing or lining from being visible while also giving you a nice, finished and crisp edge without any stitching showing.
How to Understitch:
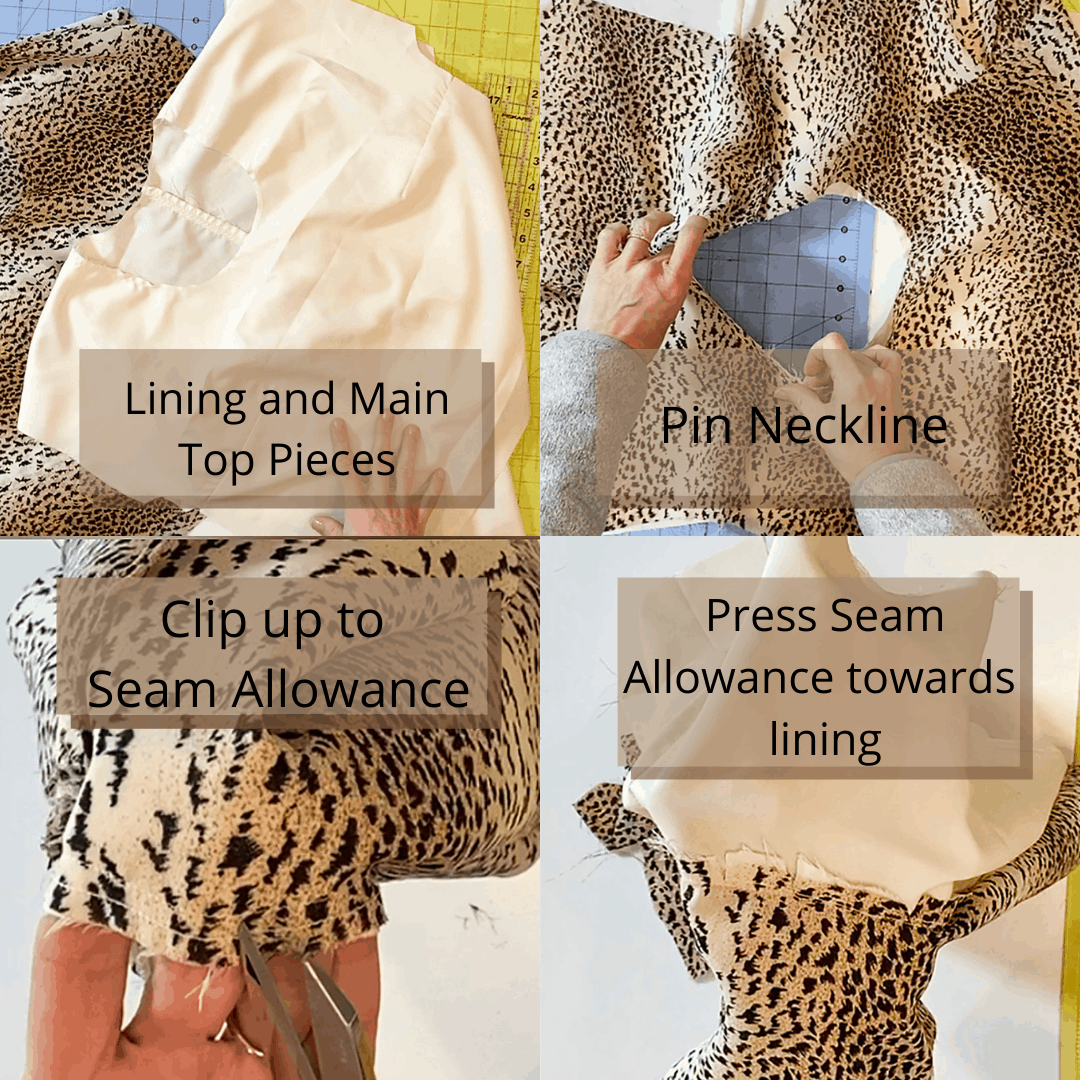
Begin by sewing your two pieces of fabric right sides together using the pattern seam allowance. In my example, I am using the Brunch Blouse and added a full lining to showcase understitching. You most often use understitching while attaching a facing or lining, so I added a lining to this pattern by cutting an identical top from lining fabric. After sewing the bust darts, center back seam, shoulder seams, and stay-stitching the necklines on both my main fabric and lining fabric, I was ready to sew them together. Open out both tops flat and pin the necklines together, right sides facing. Then sew all the way around the neckline with a 1/4 inch seam allowance. Clip around the entire neckline, about every 1/2 inch, to help the fabric release and ease around the curves before turning. You want to clip through your stay-stitching lines but not through your seam allowance. Only clip up to the seam allowance line.
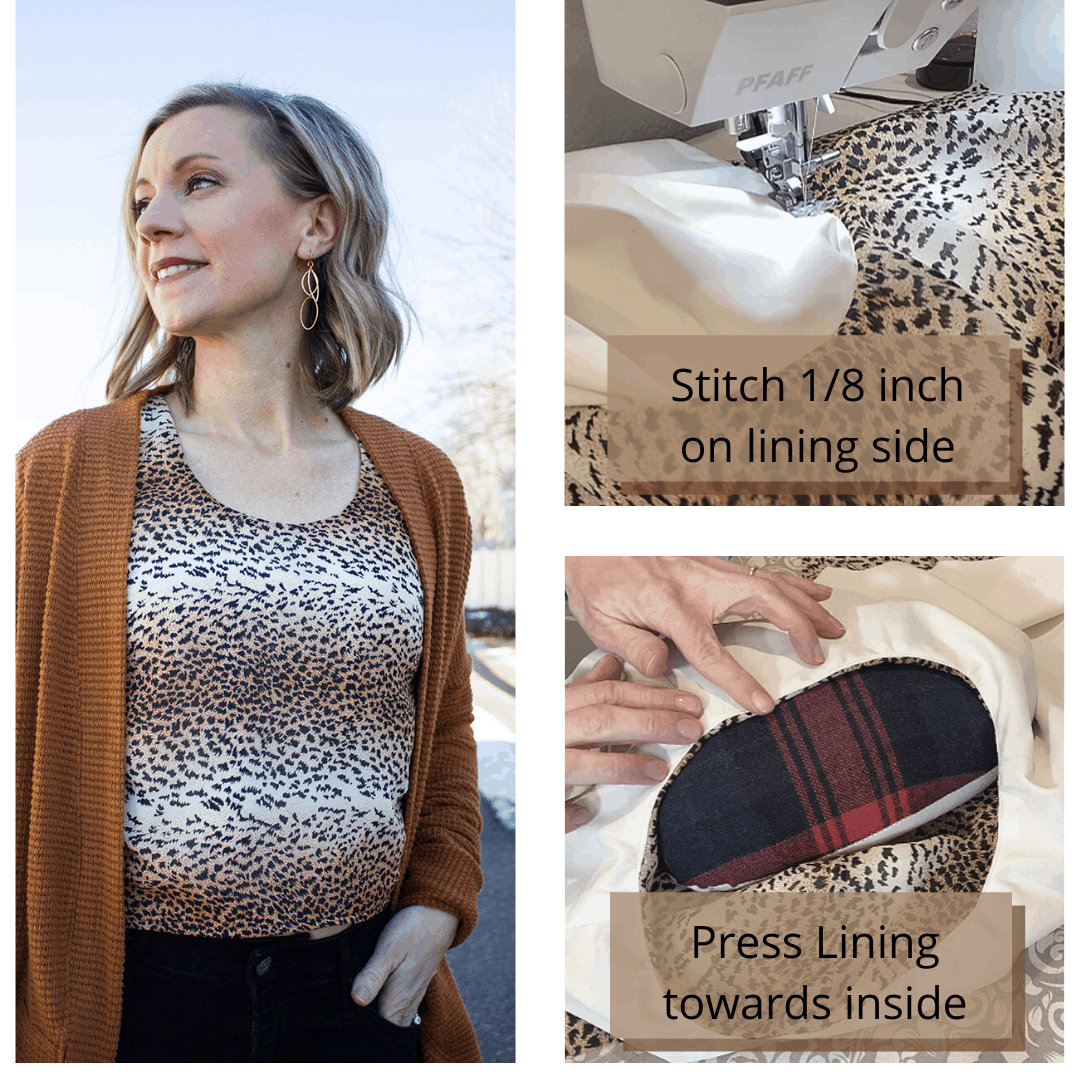
Press your seam allowance all towards the lining or facing. Make sure you press this well. Stitch 1/8 inch away from the seam line, on the lining side. This will hold all your seam allowances to the underside of the top when you are wearing the garment and will prevent the lining fabric from showing. Sew slowly while keeping your 1/8 inch seam allowance and readjust every inch or so around the neckline to make sure your curves are laying flat with no puckers. I prefer to stitch from the right side of the lining and feel to make sure the seam allowance is all under the presser foot, but you may stitch from the wrong side as well to be able to see your seam allowances while sewing them down. Finally, press your neckline well, making sure you have the lining fully towards the inside of the garment. I like to make sure about 1/8 inch of the main fabric is also towards the back of the seam while pressing to further make sure no lining will be visible.
You do not need to add topstitching when you have used understitching.
What is topstitching?
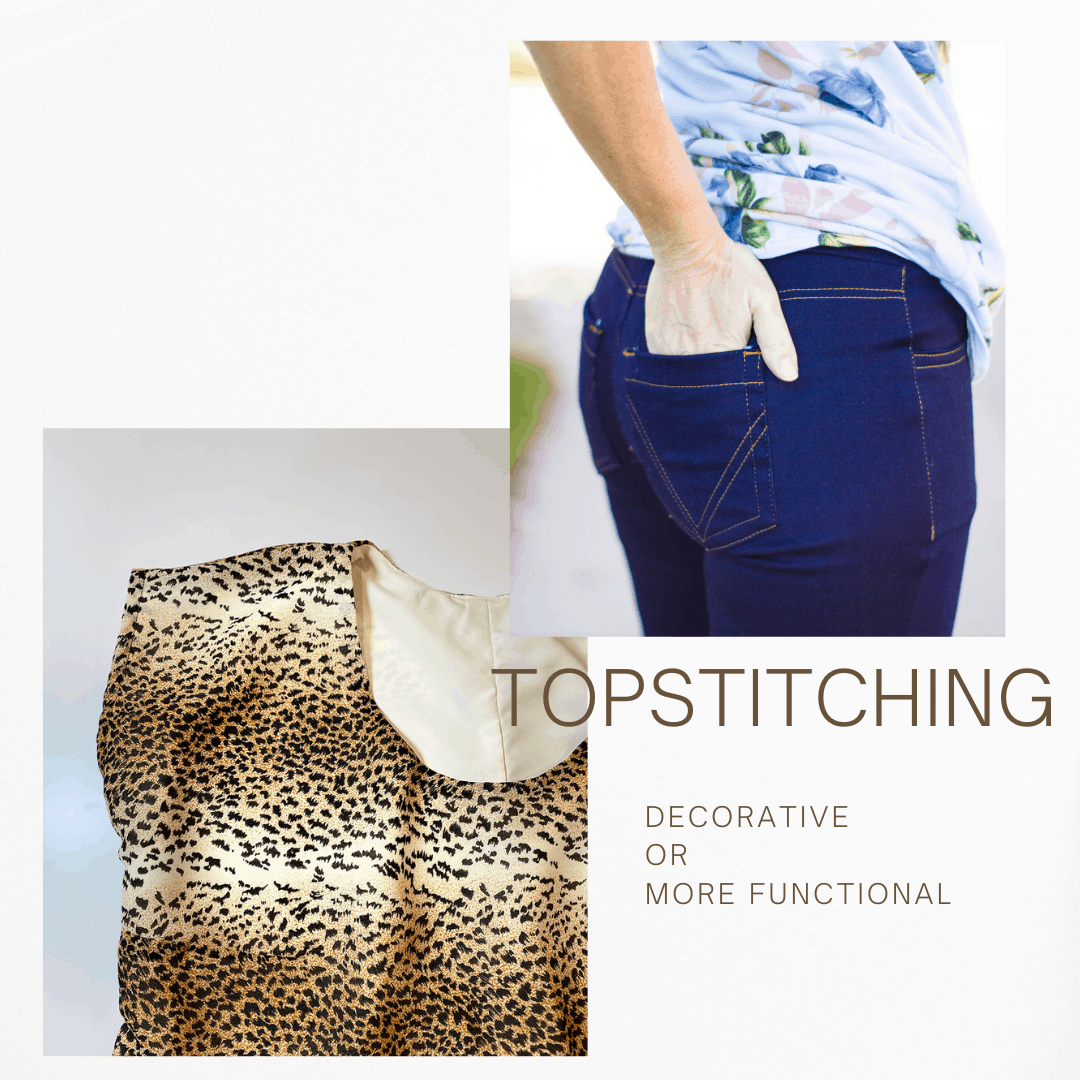
Topstitching can serve many different purposes. You can use it to add a decorative element to your make, like the back pockets of your favorite SOS pants. Or, like in today’s blog post, it can be used to hold the lining or facing to a garment. All topstitching will be visible and therefore it is important to do it carefully and have accurate stitching. Here are some tips to help your topstitching turn out great.
How to Topstitch:
Begin by selecting a thread that is suitable for your fabric. When applying decorative finishes, you may want a thicker topstitch thread and select a top-stitch stitch option on your machine which will create a thicker, more defined stitch. For my brunch blouse, I chose to use regular all-purpose thread and a regular straight stitch on my machine. You will want to slightly increase your stitch length when top-stitching. I use a 3 length for finer and medium weight fabrics and 3.5-4 length for heavier fabrics. Typically, the topstitching is sewn at 1/4 inch. You can use a specialty foot or use the edge of your presser foot to help keep a smooth, straight line.
Pressing will be equally important in topstitching as it was for understitching. Make sure you have pressed the area you will be topstitching well first to minimize any potential for puckers. You will want to avoid back-stitching while topstitching and instead, tie off your thread ends. These tips will help your topstitching turn out fantastic. Take your time and focus on keeping your line very straight.
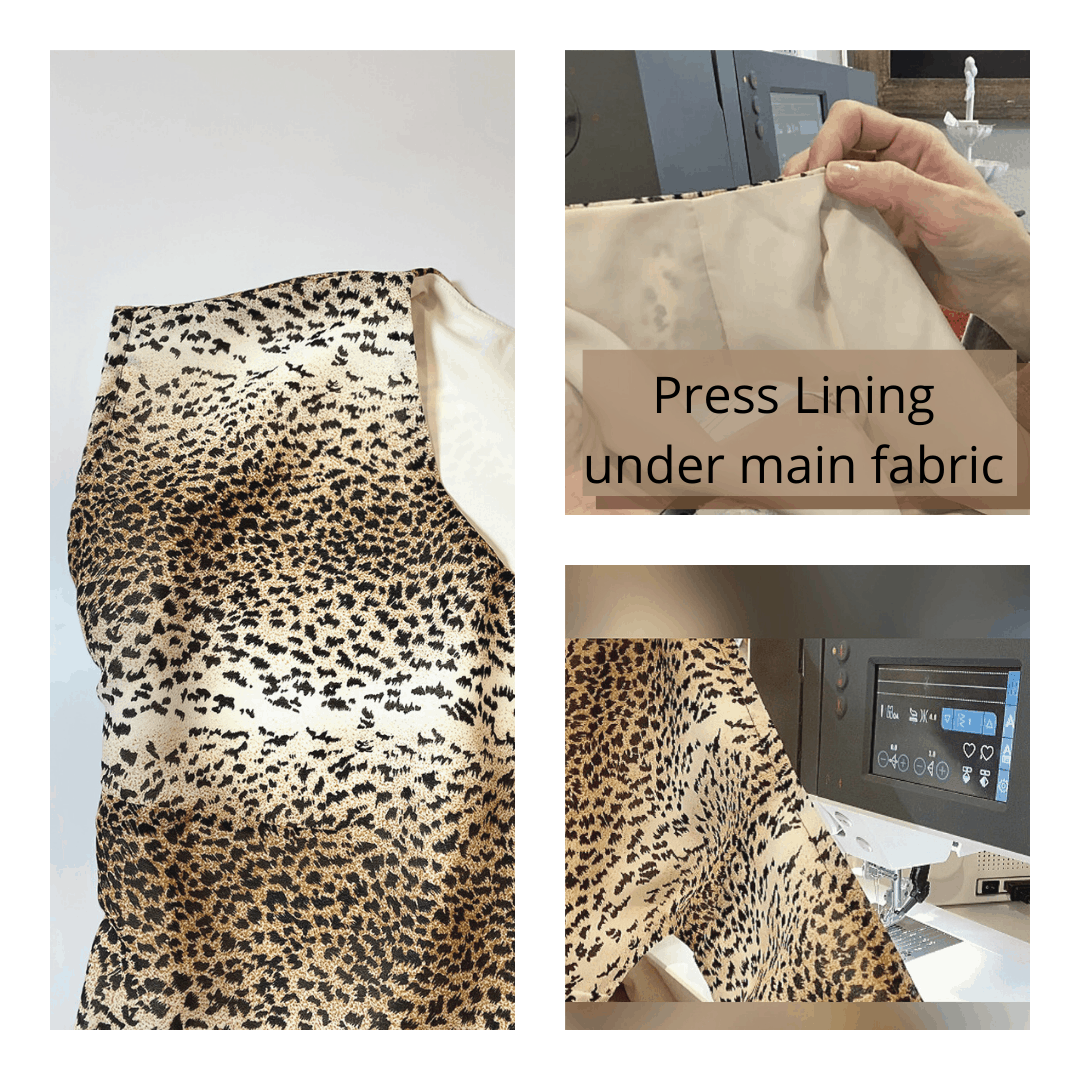
For my brunch blouse, I used a burrito roll method to finish my arms, as I added a lining. After sewing the lining and main fabric cap sleeves, right sides together, I turned the bodice right side out and pressed. Make sure you press your fabric so that all the lining is fully under the main fabric and will not show. Next, topstitch, using a 1/4 inch seam allowance and a stitch length of 3 down the sleeve hems. This topstitching attaches the lining to the fabric so that it will not be exposed during wear. Then I continued sewing the brunch blouse per the instructions, treating the lining and main fabric as one piece for the rest of the stitching.
Understitching and Topstitching Video
I hope you enjoyed this look at understitching and topstitching. If you have any questions, please visit the Facebook Group and join the discussion with so many very helpful sewists. And make sure to check out the other P4P University Posts for more help.


Leave a Reply