Ease is a term using to describe how much extra fabric there is around your body after the garment is sewn up. In sewing and pattern groups you often see the question, “Does this run big/small/true to size?” And most the time the same pattern and size will have an array of answers! Confusing right? The truth is the pattern is designed with a certain amount of ease the designer has picked based on the size chart.
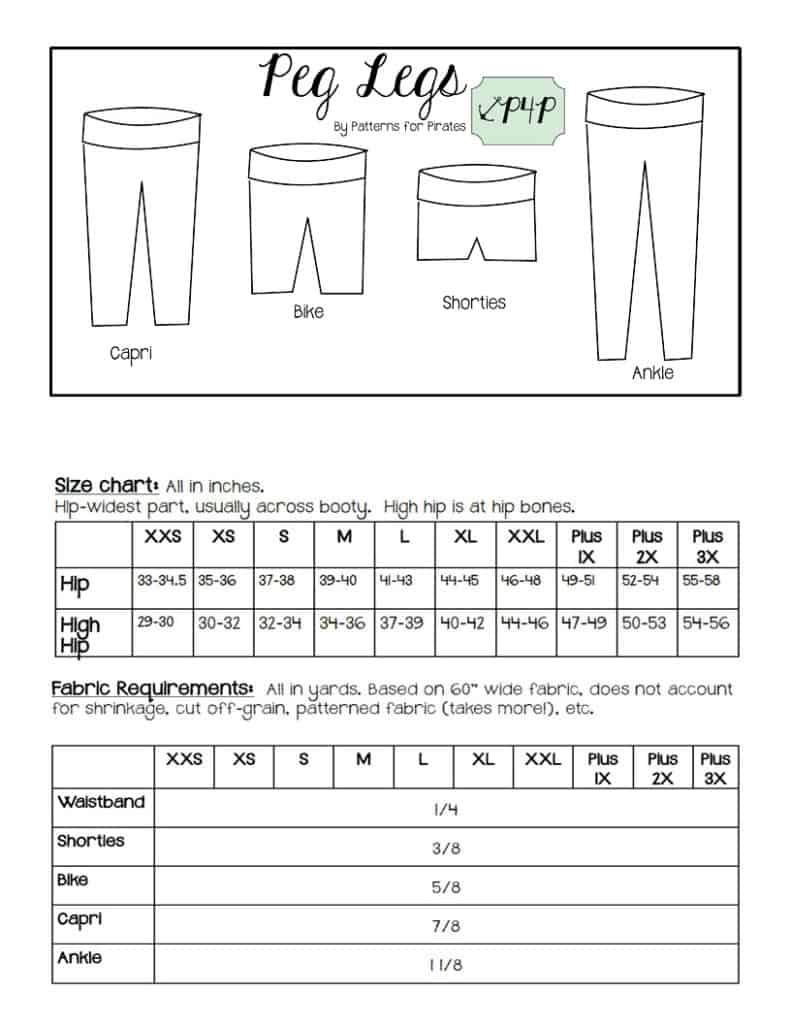
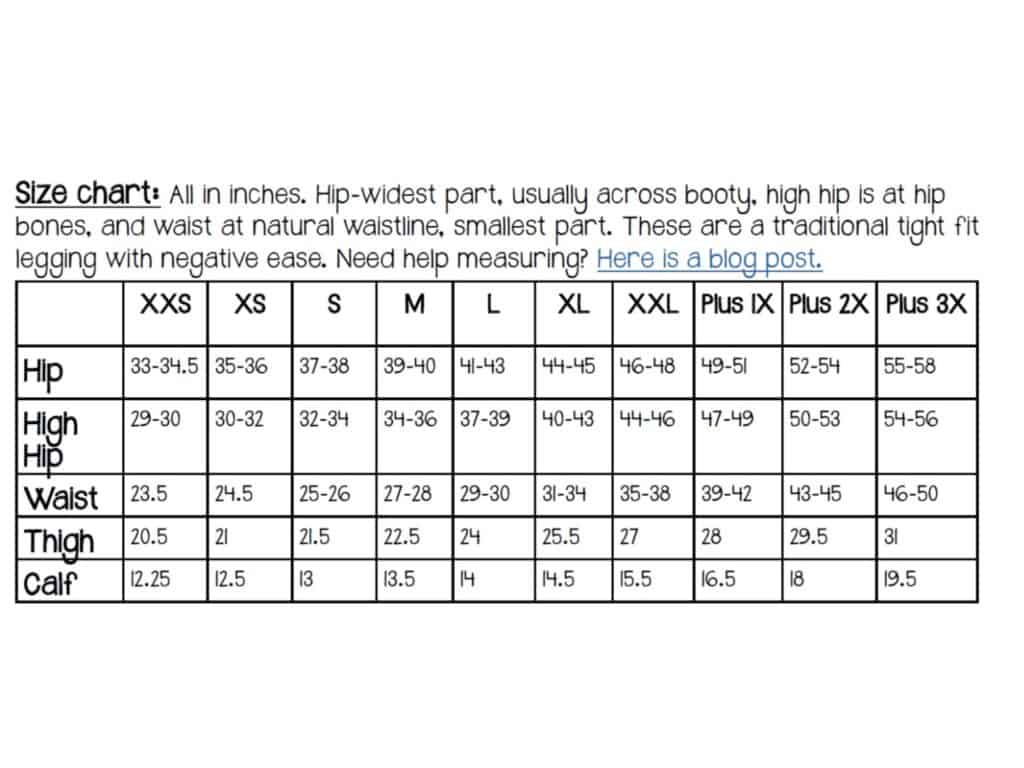
So, when the designer like me drafts a pattern they decide how much ease they want for the intended fit. They use not only the listed body measurements, but an entire book of standard/average measurements for each part of the body to give the pattern a certain amount of ease everywhere along the body. I try to give the most important measurements in the measurement chart and finished measurements to help you pick the perfect size for your preference of fit. I usually have more measurements in the tutorial than on the listing pictures so that when you’re ready to pick a size for that certain garment you can see if you need to modify, grade between sizes on that particular pattern. Here is the size chart within the tutorial for the Peg Legs:
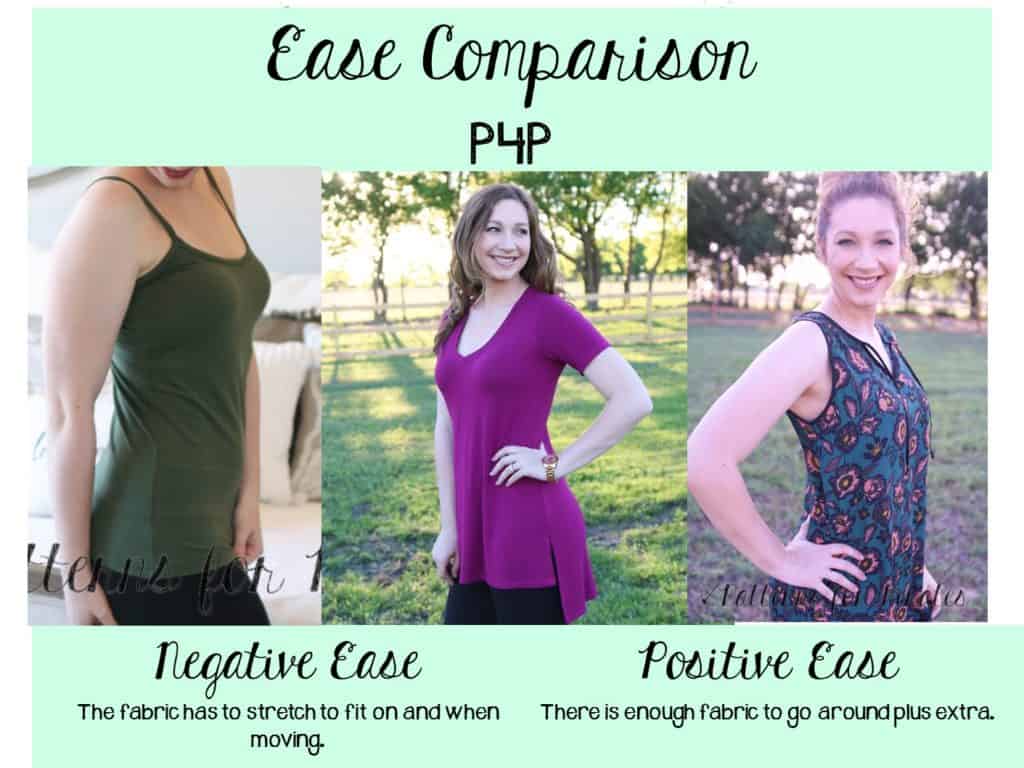
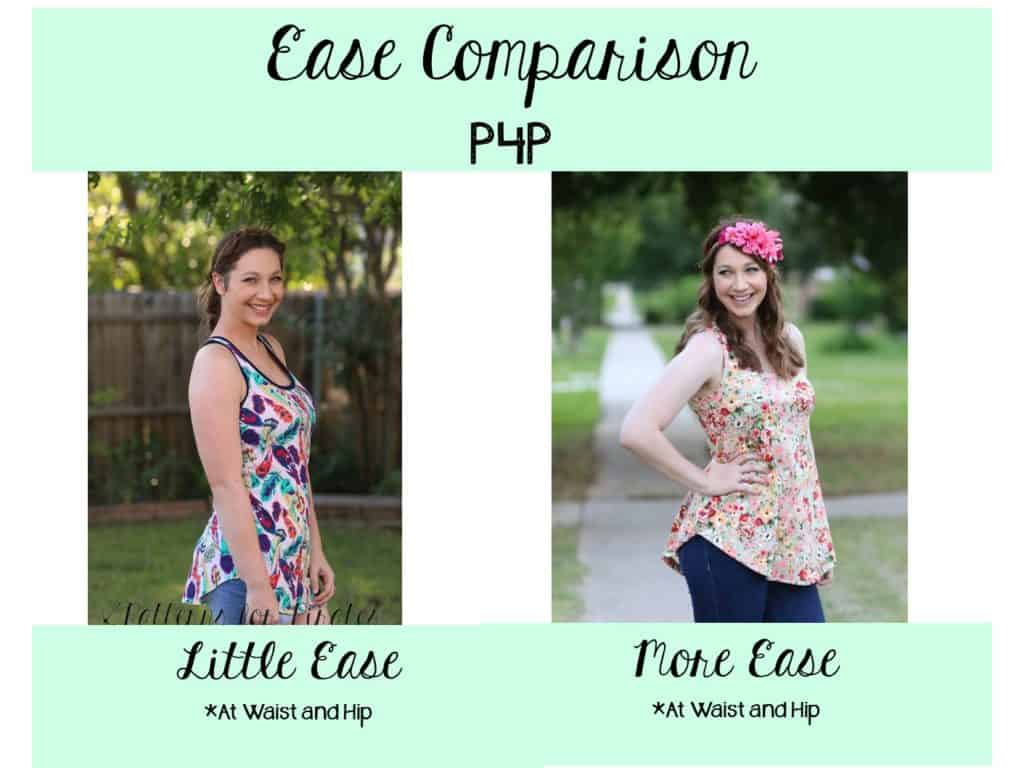
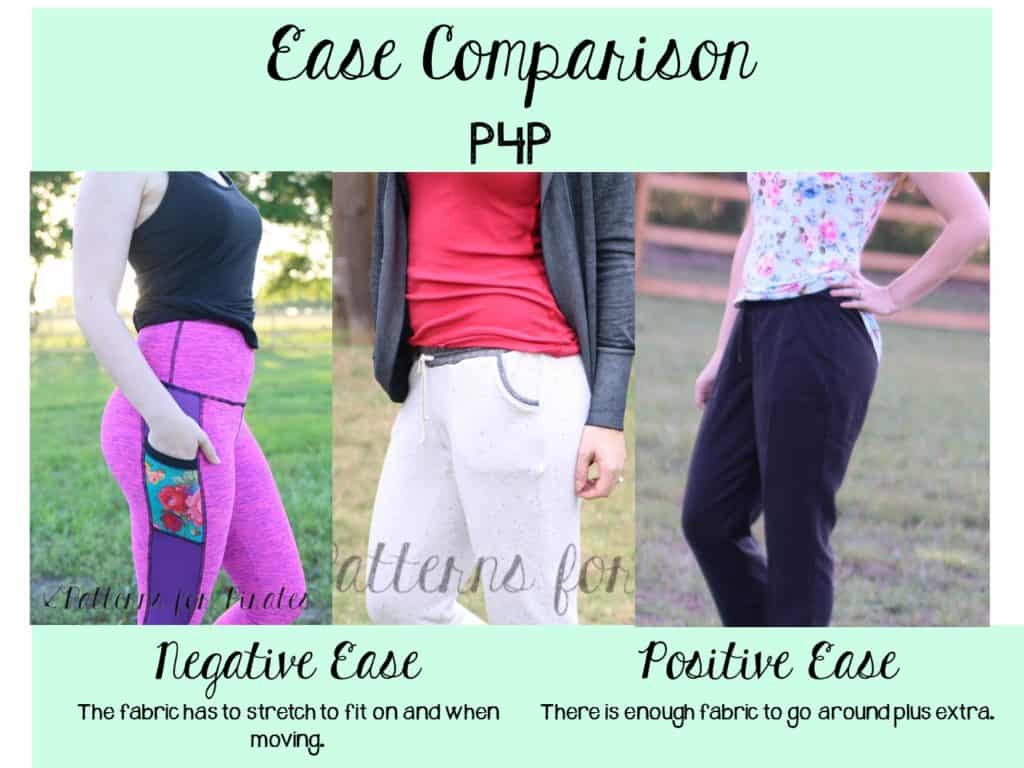
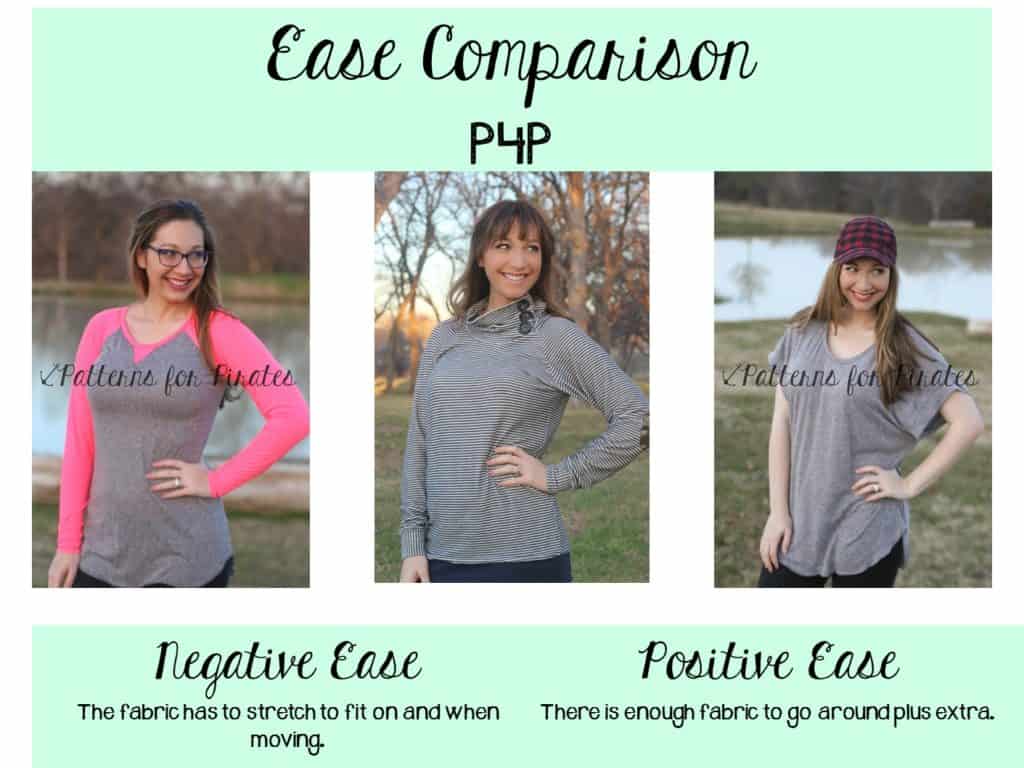
Some ease is needed for certain garments. Woven/non-stretch fabrics require much more ease since they don’t stretch. A body requires ease to move, bend, breathe, etc comfortably. Designers use the recommended amount in general for guidelines and can add more if they want a looser fit. Knit garments can, and often do have negative ease. Negative ease means the garment finishes smaller than your body and much stretch to fit on to your body as well as when you move.
There is a very wide span of “what fits” within a single garment. For a knit shirt using a stretchy fabric- lets pick cotton spandex with about 75% stretch) you can have up to about 50% negative ease and still move and breath, this would be what most would call “skin tight”. You can also have a few inches of ease for a looser fit, what most would call relaxed or baggy. And within that range, everything technically “fits” because you have enough ease for movement. The rest is up to the designer to create the design ease they have in mind. When the question is asked, “Is it true to size?” it really can’t be answered. It is true to the designer’s intended fit with the amount of ease they drafted into the garment. Whether it is how much ease you prefer personally for that garment depends on if your personal preference is the same as the intended fit. I’m always surprised to see someone post in our FB group “this is huge” or “it’s too tight”, I try very hard to show intended fit through listing pictures, use the best describing words in the listing and give a good description in the tutorial along with the measurements. But, what one person with the exact same measurements and fabric choice finds “too snug” another might describe as “huge”. It’s all personal preference!
Lets think about what a big range that is… I’m going to go down to 30% negative ease since this is a pretty tight standard athletic/swim amount of ease, most clothes wont be tighter unless we’re going to add in compression fit/slimming undergarments. I will do hips at 40 (top end of the medium). So you could easily have a well drafted pant pattern with a finished full hip measurement of anywhere from 28″ all the way to 45″ depending on the intended fit and suggested fabrics. Most knit pants can easily range from 28″-42″ depending on the kind of knit they’re drafted for.
Woven pants don’t have quite the range, since you take away the option of having negative ease and using stretch for the movement ease needed. But, A woven pant for a 40″ full hip can still range from about 42″ up to 46″ depending on the intended look of the design. We very often get the question if you can sew a knit pattern with a woven non stretch fabric. The answer is mostly no. Most knit patterns depend on the stretch of the fabric to give some, if not all, of that movement ease you HAVE to have for your body to comfortably move, bend, breathe, get the garment on and off, etc. If you would like to know how much wearing ease you need to get the slimmest possible woven garment there are ways to measure that. For your full hip you can place the measuring tape around your full hip-mine is about 40″. Keep the tape carefully in place, but loosen your grip at the front. Very slowly sit down, or bend/squat. You will notice that the tape will pull and need more room. This is called your “sitting spread”. Lovely name right 😉 , but it is how much you “spread” when you sit/squat. You need this much ease or extra fabric around your hip in any woven garment to be able to move comfortably. There are tighter dresses out there with less ease there, but you aren’t sitting cross legged on the floor in that tight woven pencil skirt. You probably aren’t even sitting comfortably in it. The hip is the easiest measurement to check your ease need. But, the same concept can be a check for bust, arms, thighs, etc. putting the tape measurer around and moving and breathing, letting the tape slide to the biggest range you use while moving. If you check this sitting/moving measurement against the finished measurements of the pattern you will know if you can use a non-stretch fabric and still move comfortably.
I did a quick video about measuring your needed “wearing ease” here:
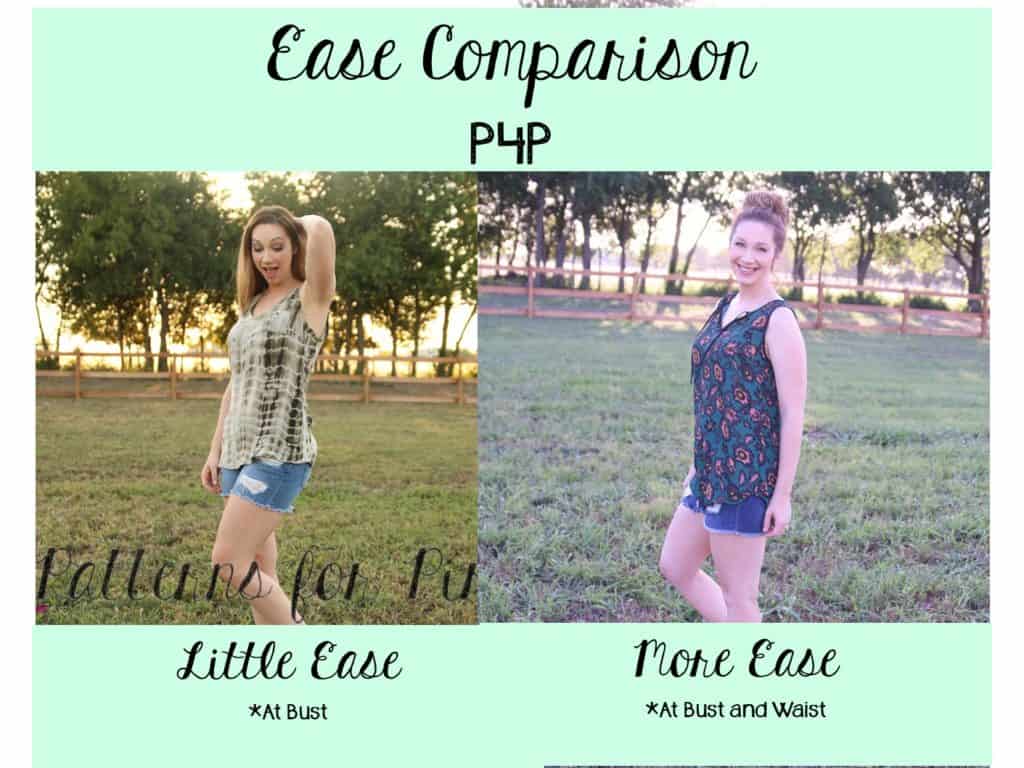
A designer’s job is to choose how much ease they want for a certain intended fit and look. Lets take one of my patterns The Pumpkin Spice Dolman. It is a looser cut with a quite a lot of ease through the bust and about 0 ease at the full hip. I intended it to be a loose, slouchy fit and works best with fabric that has a soft drape. Some might find the design ease I added too much if they don’t like the loose, slouchy look. It doesn’t mean the pattern “runs big” since that is exactly the amount of ease intended for the look I was after. It just means you prefer a tighter fit that intended.
A slimmer cut shirt like the Slim Fit Raglan or Layer Me Up has negative ease at the best and less ease through the body. Again, this doesn’t mean the pattern “runs small” it is meant to be smaller and tighter as designed.
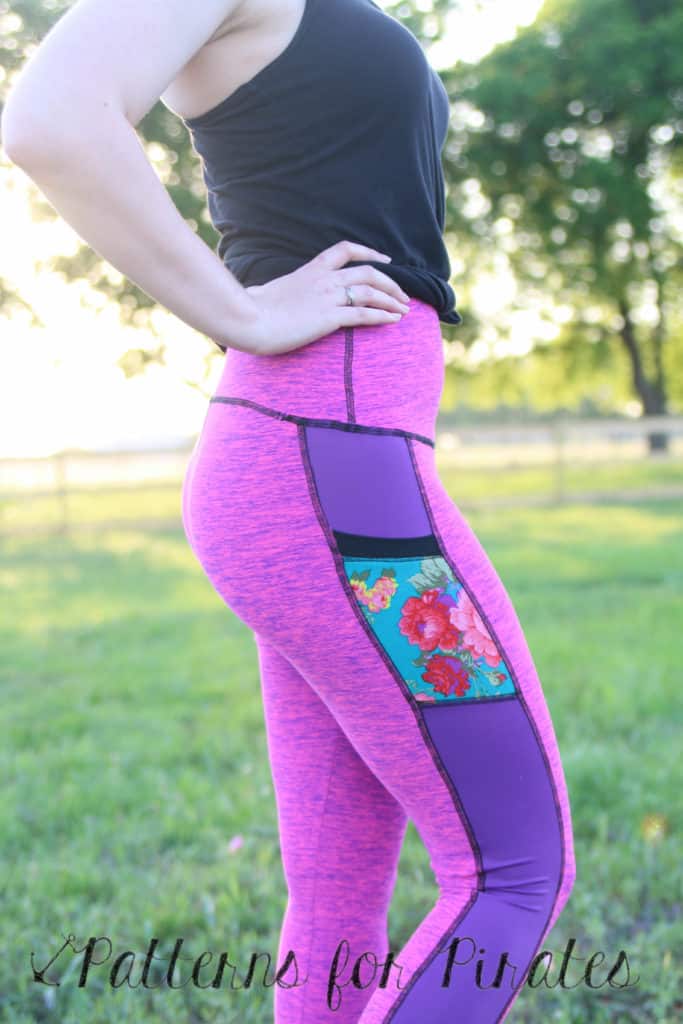
Lets take another pattern, this time a fitted one, the Peg Legs. The Pegs are a traditional tight fit legging with negative ease. The standard ease used in athletic wear is usually 20-30%. The Pegs are right in the middle through legs and up at the higher end at 30% at full hip and high hip. Since they do not have elastic I preferred the tighter end of normal to help them from inching down. We’ve seen them compared to others with less negative ease and neither are wrong, just a different preference on how fitted the designer had in mind.
Now lets talk about how you can use this knowledge to your advantage in sewing for yourself! Once you understand ease and fabric choices you can essentially make the perfect garment fit you every time before even cutting! WHAT? I know, amazing right? Now, this doesn’t happen overnight. It’s something you will come to learn about your preferences over time and experimenting. But, the more you pay attention to both your fabric choices and the design ease the faster you will get there!
Take all the clothes you love and look at them, study them! For that matter take the ones that you think are a little tight or loose too. How much ease does it have to your body? On the bust, waist, hip? What fabric is it made out of (this doesn’t have to be exact, but “thin and drapey or thick and stable categories work well). Now you can apply this to your sewing choices. You will learn if you like a looser fit with those thinner drapey knits- or a tighter fit with those. Maybe you tend to always love thicker stable knits with you do have a more fitted garment. Whatever you find in your “research” try to apply that to your pattern, fabric, size choices. If you know you tend to like at least 2″ of ease at your waist you can know if you want to grade in or out at a waist on any t-shirt pattern. Maybe you only like knit pants with some negative ease on the booty… When you open up a new knit pant pattern you can pick your size off that finished measurement chart and know for certain you’ll like the fit on the booty. If you are just beginning it’s something you will want to make an effort to pay attention to. Eventually it will become second nature 🙂 You’ll be able to open up a new pattern and know just how to use it to create YOUR OWN intended fit if you happen to not love the designer’s intended fit.


This is awesome! As a completely rookie seamstress, this is a very well written and easy to follow breakdown of some pretty key sewing concepts. Thanks so much!
Oh my this is so helpful. I’m new to sewing. My only suggestion is under each shirt/item u posted with negative/positive ease. Is if you could post the actual name of the item. Ive seen so many items and read your fabric review section but this is much easier viewing wise side by side. But now that I know I like looser (positive ease right). Now I don’t know which shirt I have been bypassing for a while cuz I thought it was too tight for me
This is a great suggestions. I was going to say the same. I can’t always tell based on picture the ease and written down would be so helpful.
Thank you so much!!! You explained things PERFECTLY!!!!