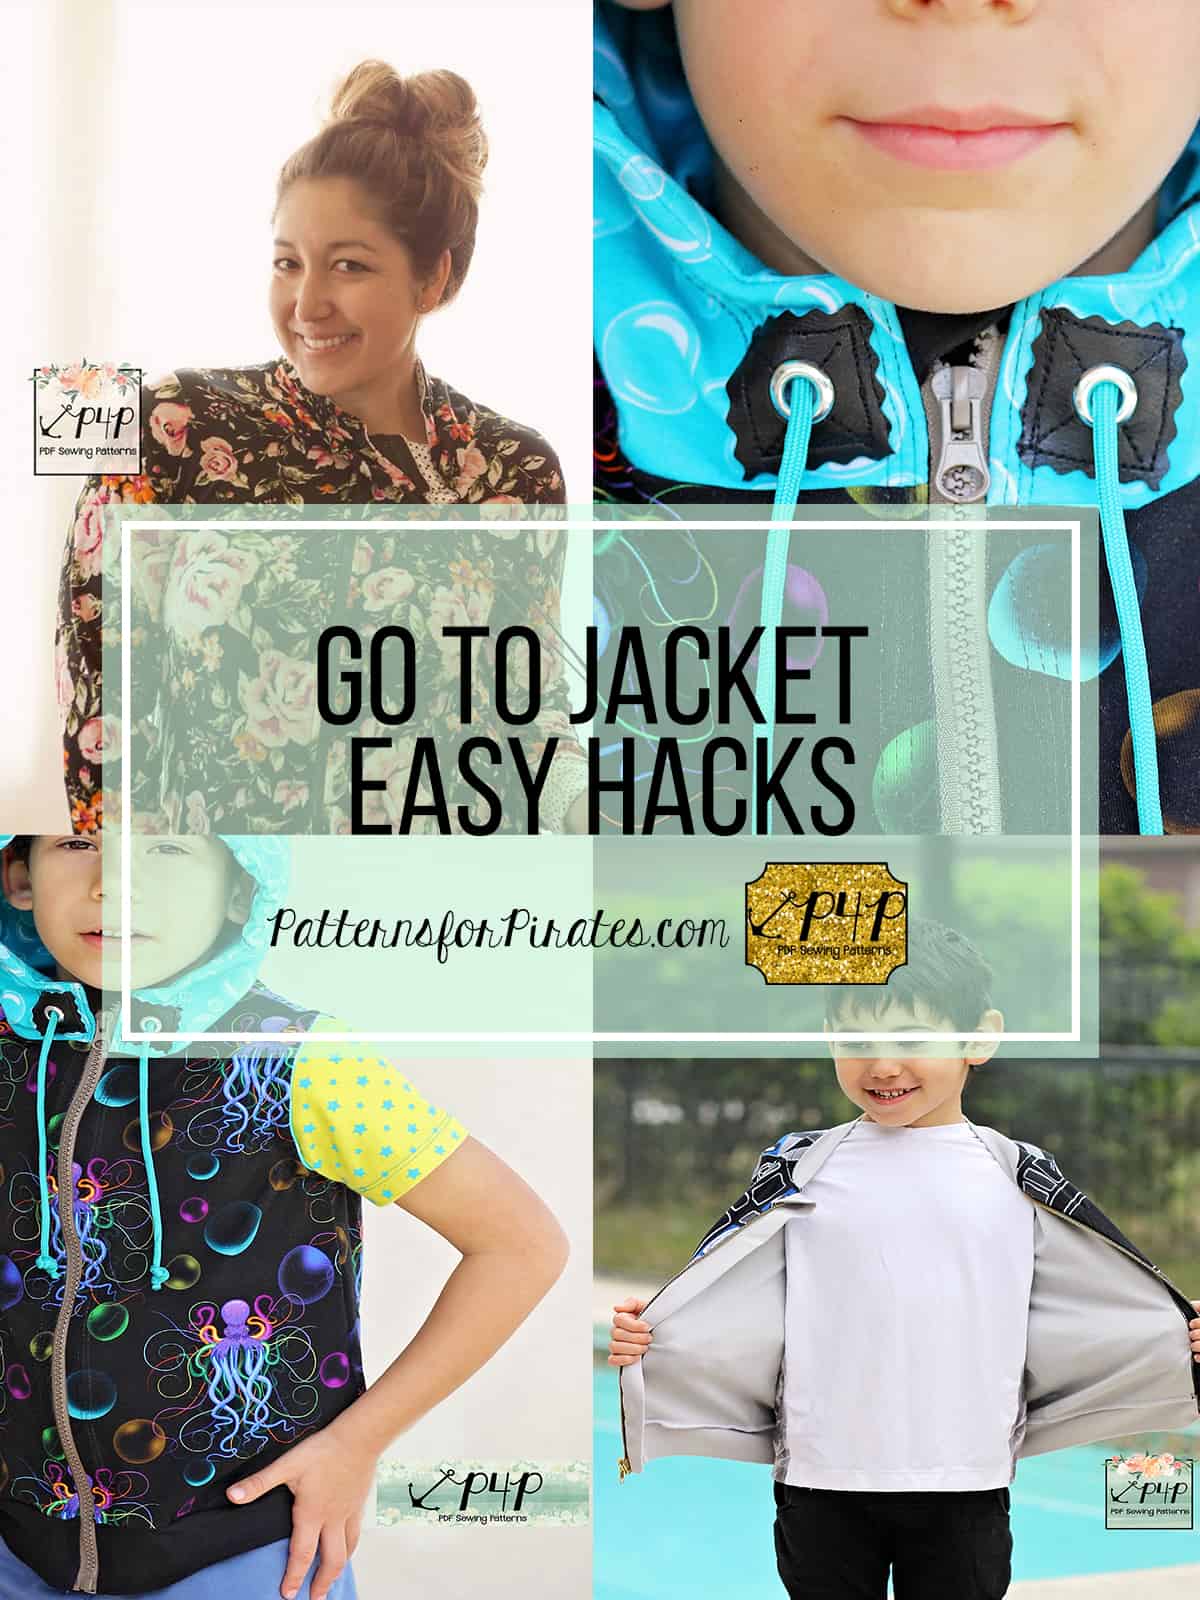
Go To Jacket :: New Pattern Releases!
Stop the presses! P4P is releasing THREE new patterns today and we couldn’t be more excited! The Go To Jacket is available in enough sizes that you can make one for every member of your family. Because we made it for Men, Women and Kids!
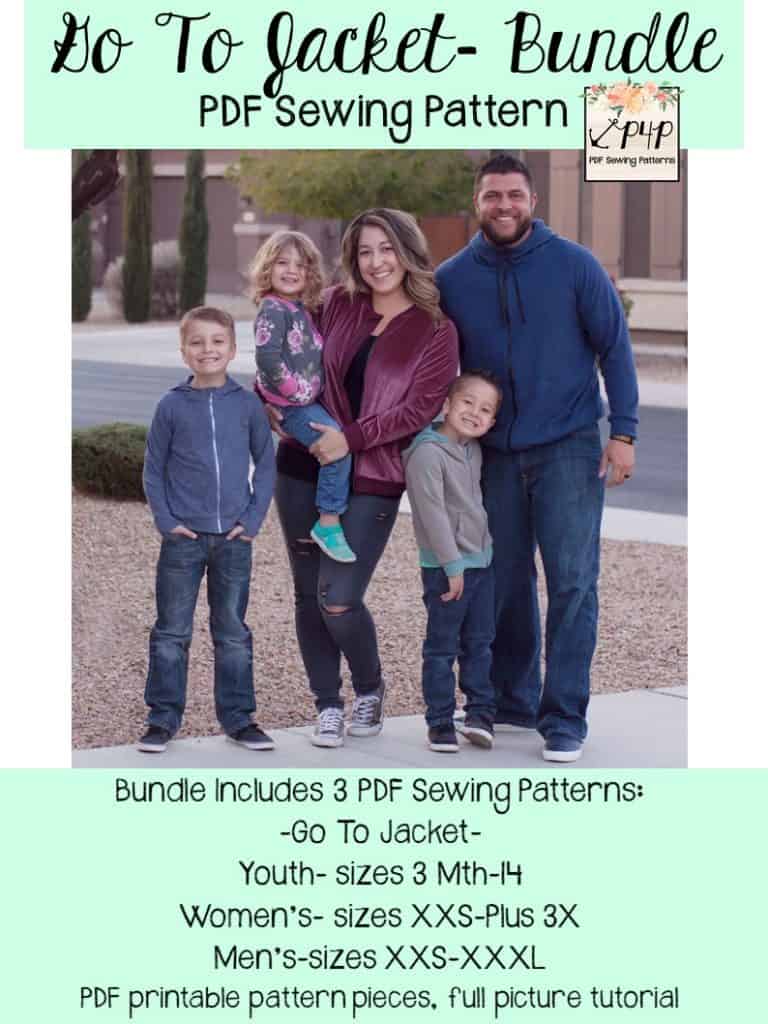
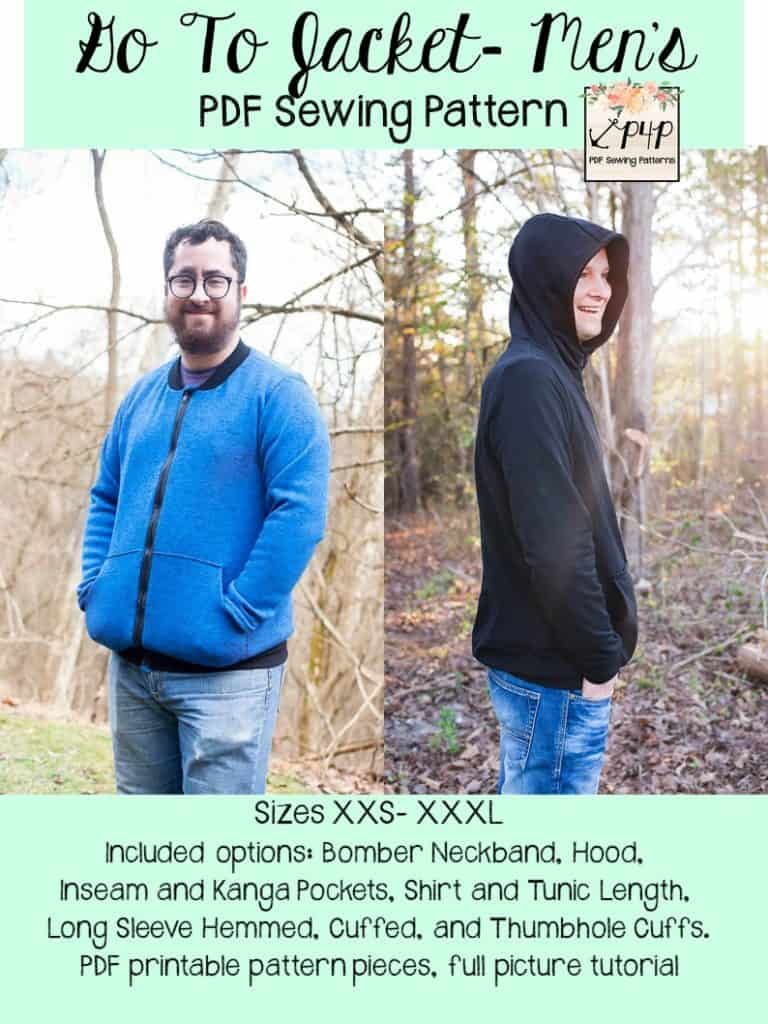
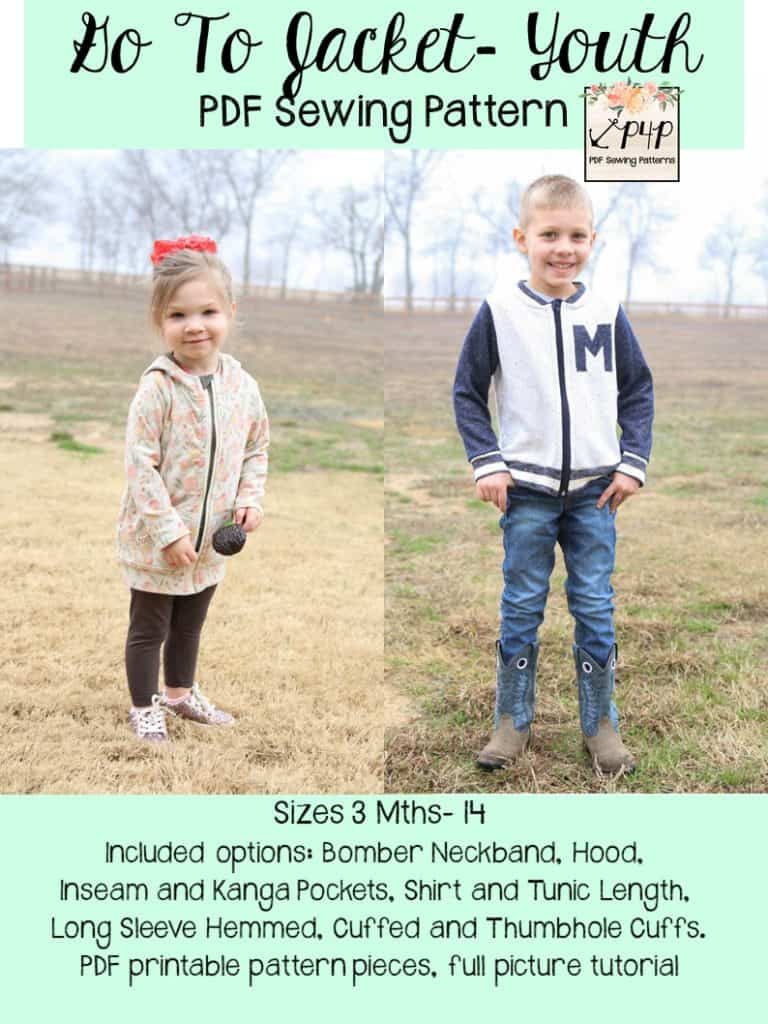
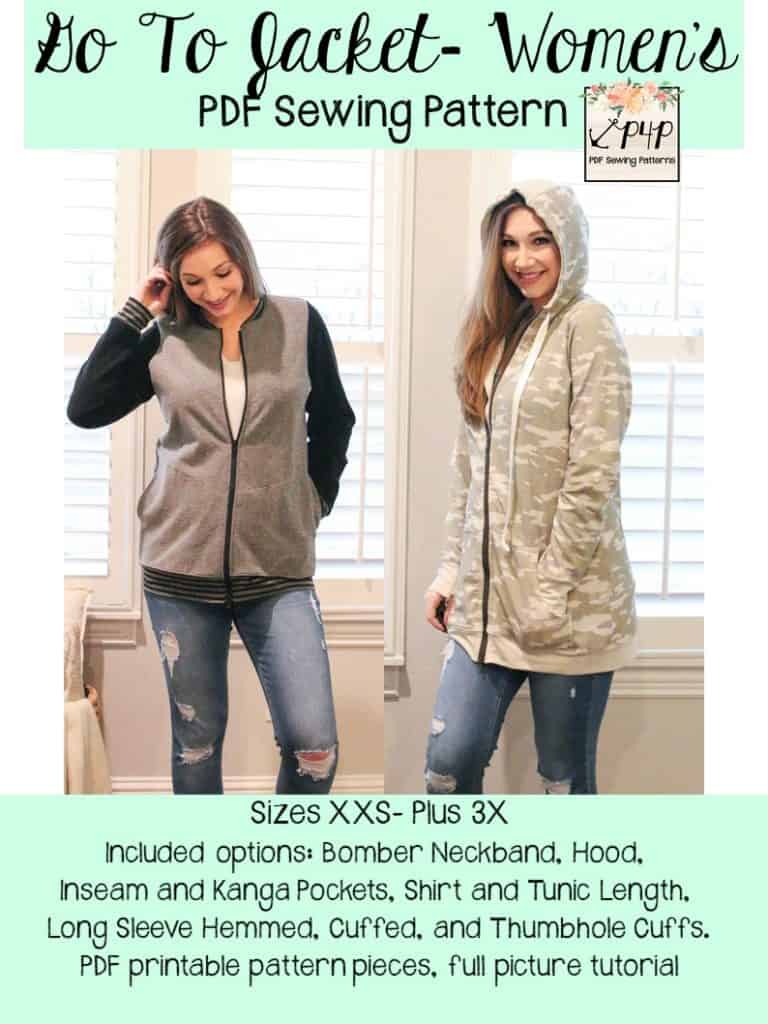
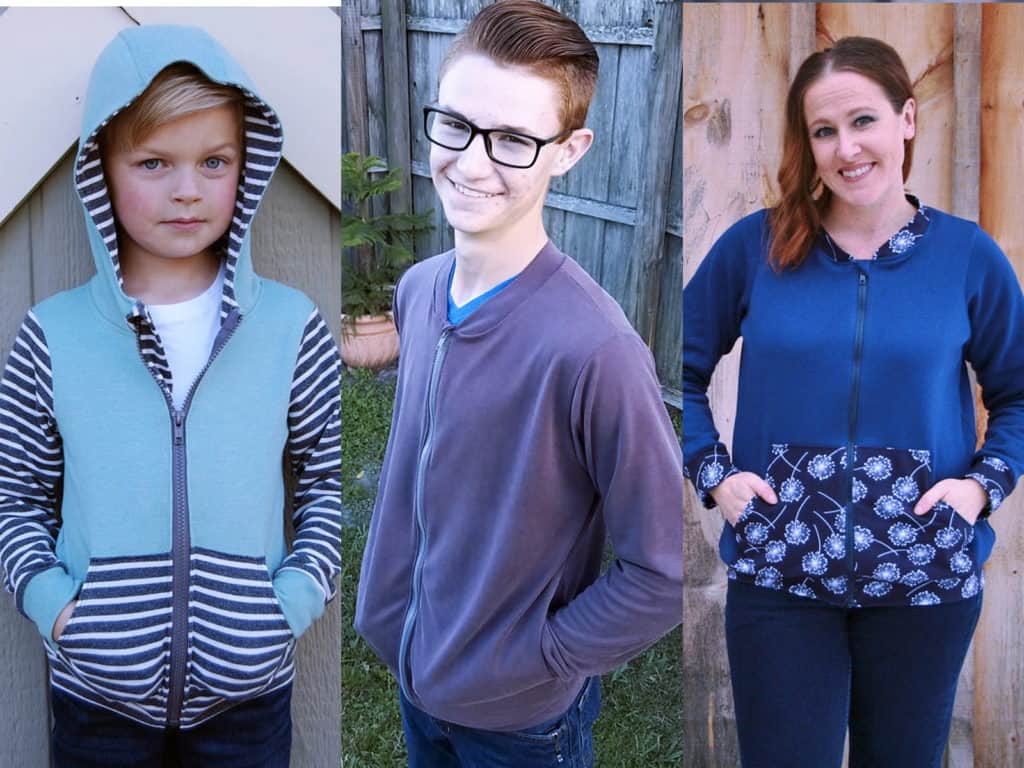
Just like the rest of our patterns, we’ve packed the Go To Jackets full of as many options as we could! It is drafted for women (sizes XXS – Plus 3X), men (sizes XXS – XXXL) and youth (3M – 14) and can be made into a bomber style, or finished with a 3-piece hood. There are two pocket options, two length options and three different sleeve hem types.
The Go To Jacket patterns were drafted for knit fabrics, which can range for lightweight fabrics to something on the heavier side, like fleece.
Don’t be scared of those zippers!! We have a couple very helpful links to walk you through them in the tutorial- you’ll be zipping ALL THE THINGS soon 😉
**Want to learn more about how to measure yourself for this pattern? We’ve got you covered with an in-depth blog HERE. And in case you’re new to Patterns for Pirates and PDF patterns in general, we have a great blog full of new user tips HERE to help you get started! And, as with all of our current releases and updates, the pdfs now include our layers feature and can be found in Letter, A4 and A0 sizes.
Let’s see some options in action, shall we?
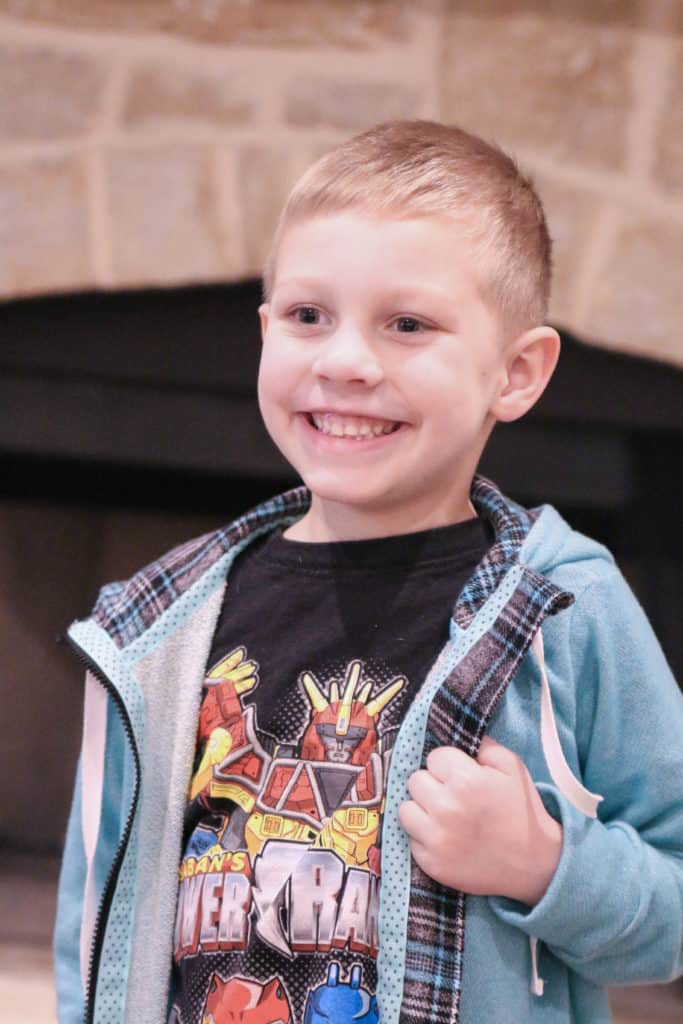
Bomber Style
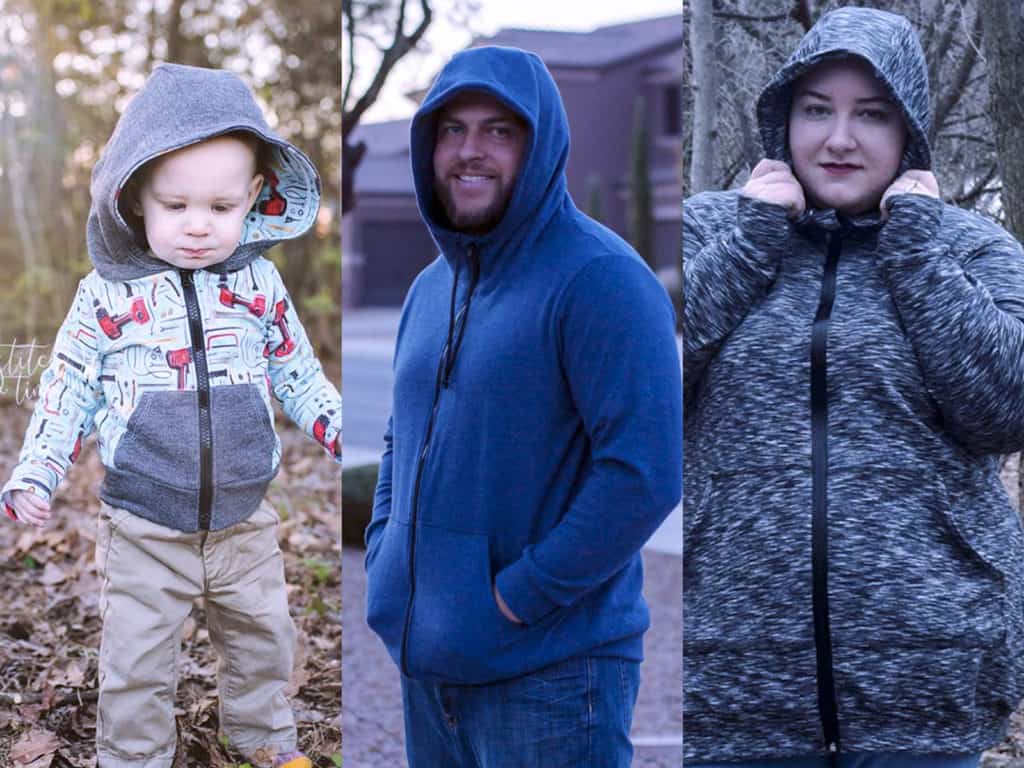
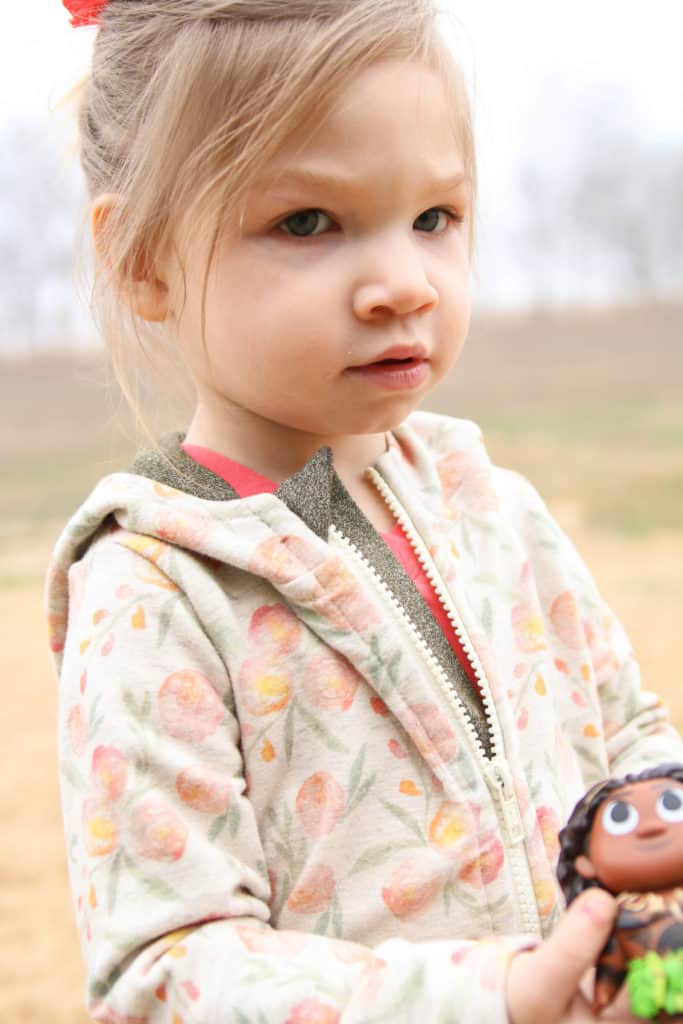
Hooded
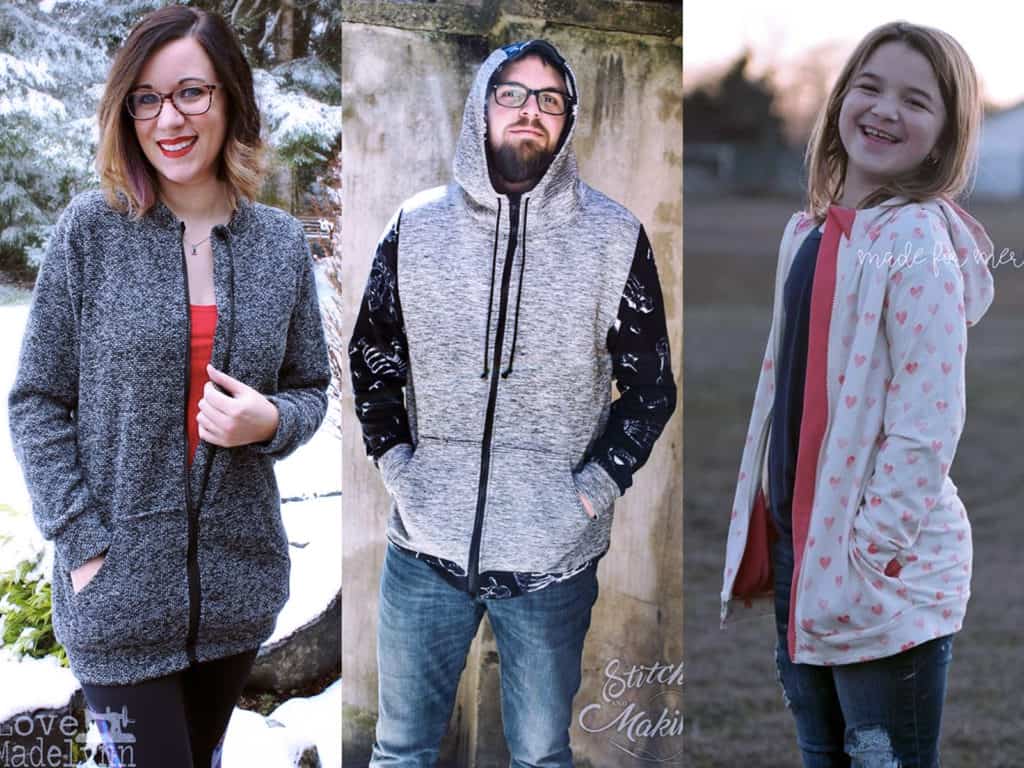
Tunic + Shirt Lengths
Cuffed / Hemmed / Thumbhole Sleeves

Kangaroo + Inseam Pockets
The jacket also boats a zipper/chin guard so your little one can zip up themselves and not worry about getting their little chins rubbed by the zipper all day! We also include instructions how to finish the neckline and zipper with a clean nice finish on the inside for extra gorgeous-ness!
Ready to grab your patterns? You won’t regret it!
Go To Men’s | Go To Women’s | Go To Youth | Go To Bundle
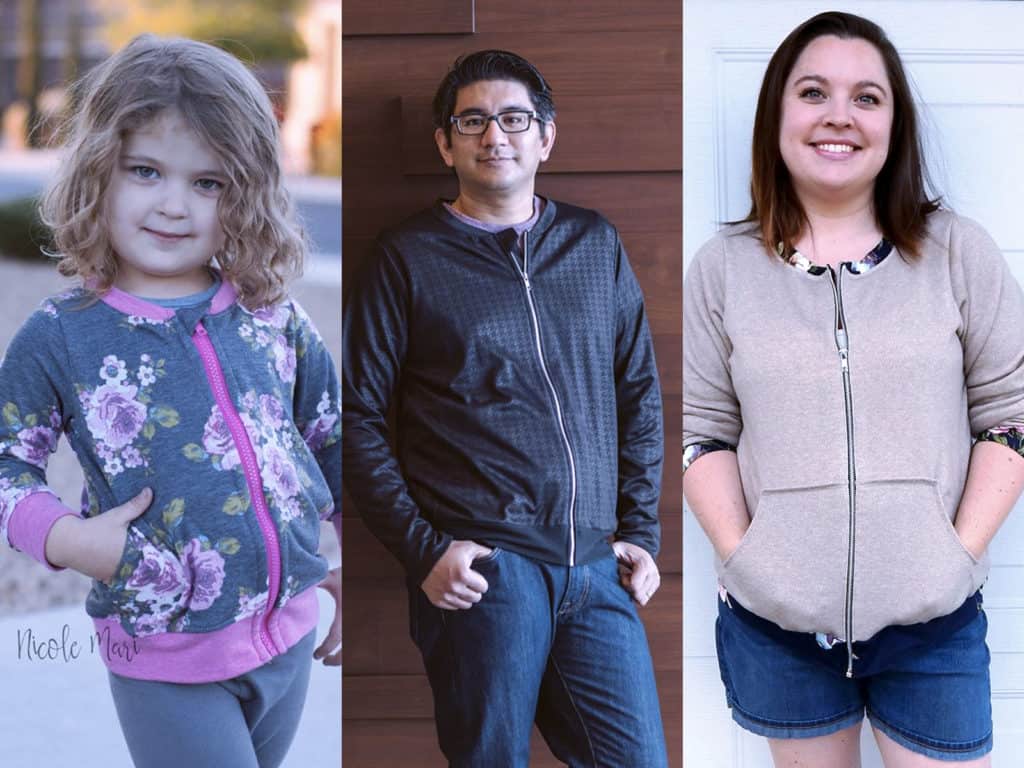
Need more convincing? Just take a look at this pattern on all of the amazing shapes and sizes of our testers, and get a look at more examples of all the options in our albums in the P4P Facebook group! Men’s Album / Women’s Album / Youth Album
The sale price will last through March 8 (11:59 PM US Central time zone) so grab it while you can at the introductory price!
And if that wasn’t enough options, make sure to check out the hacks post to help take your patterns even further. Also head over to the P4P University post to learn all about shortening zippers for your Go To Jackets!
Happy Sewing, friends!
Petite Pegs – easy cuffs hack
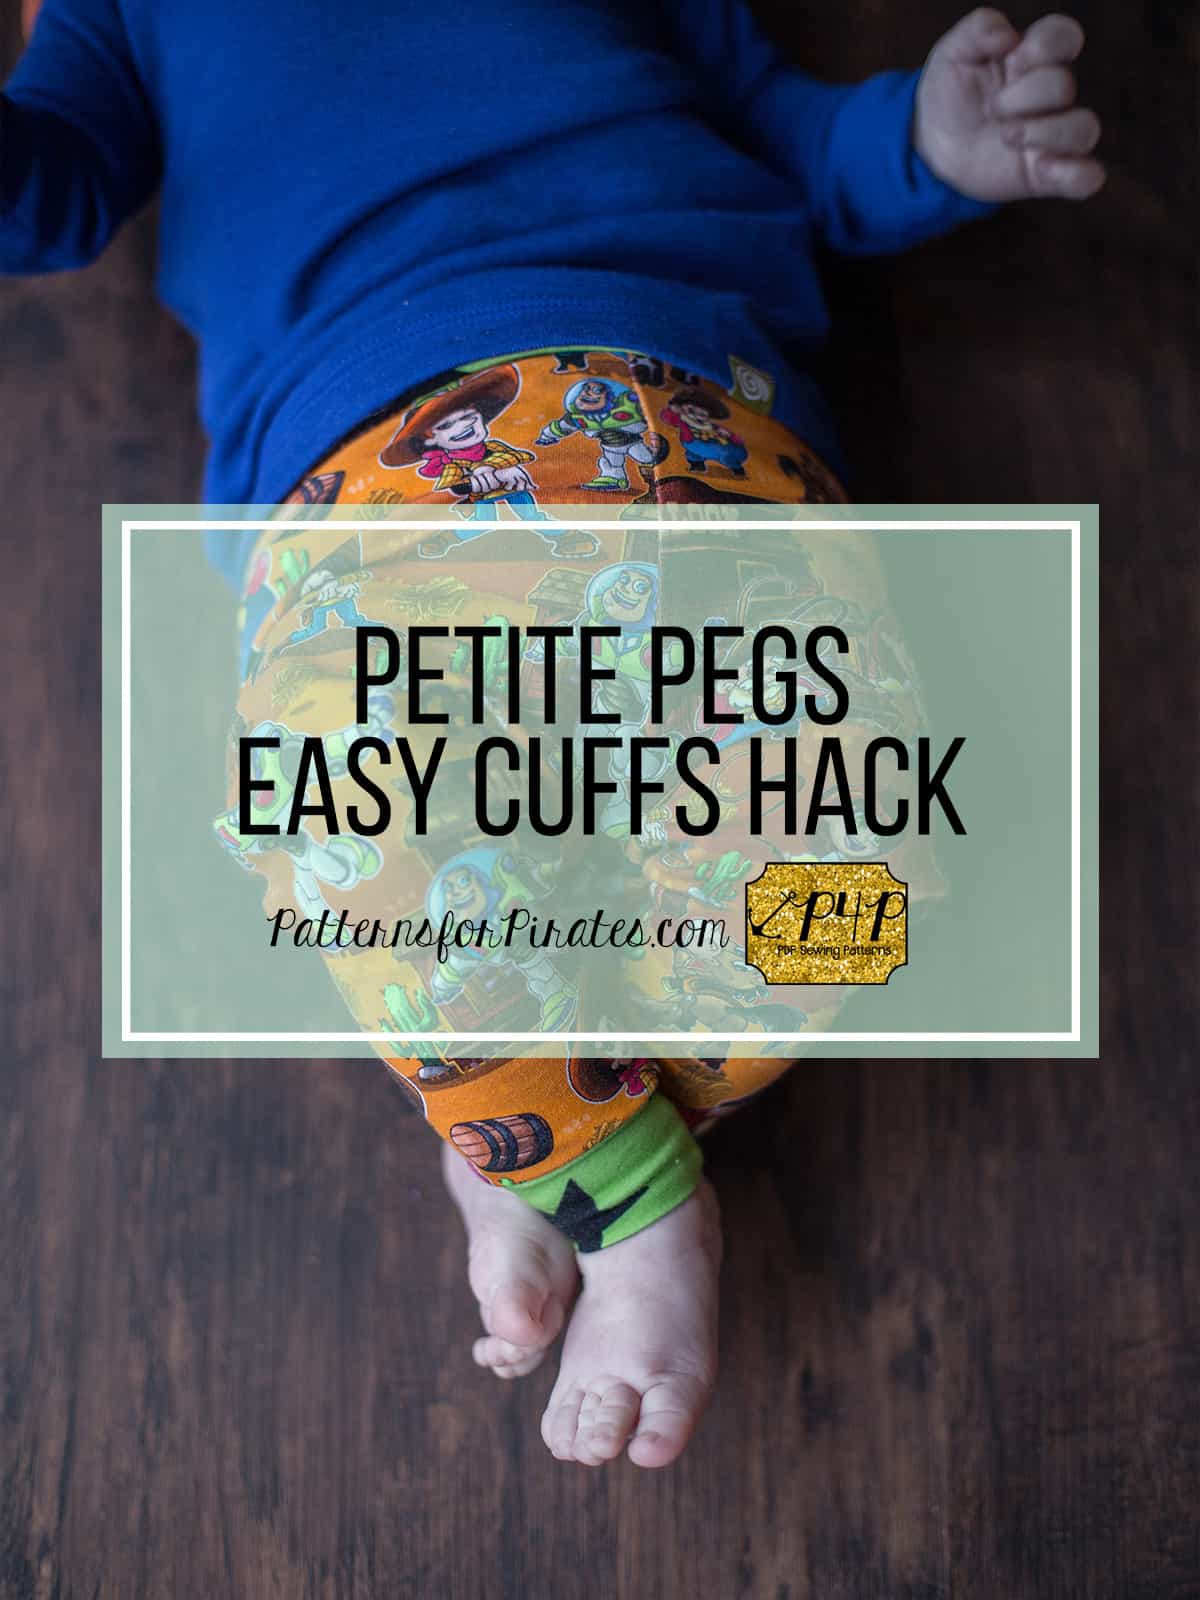
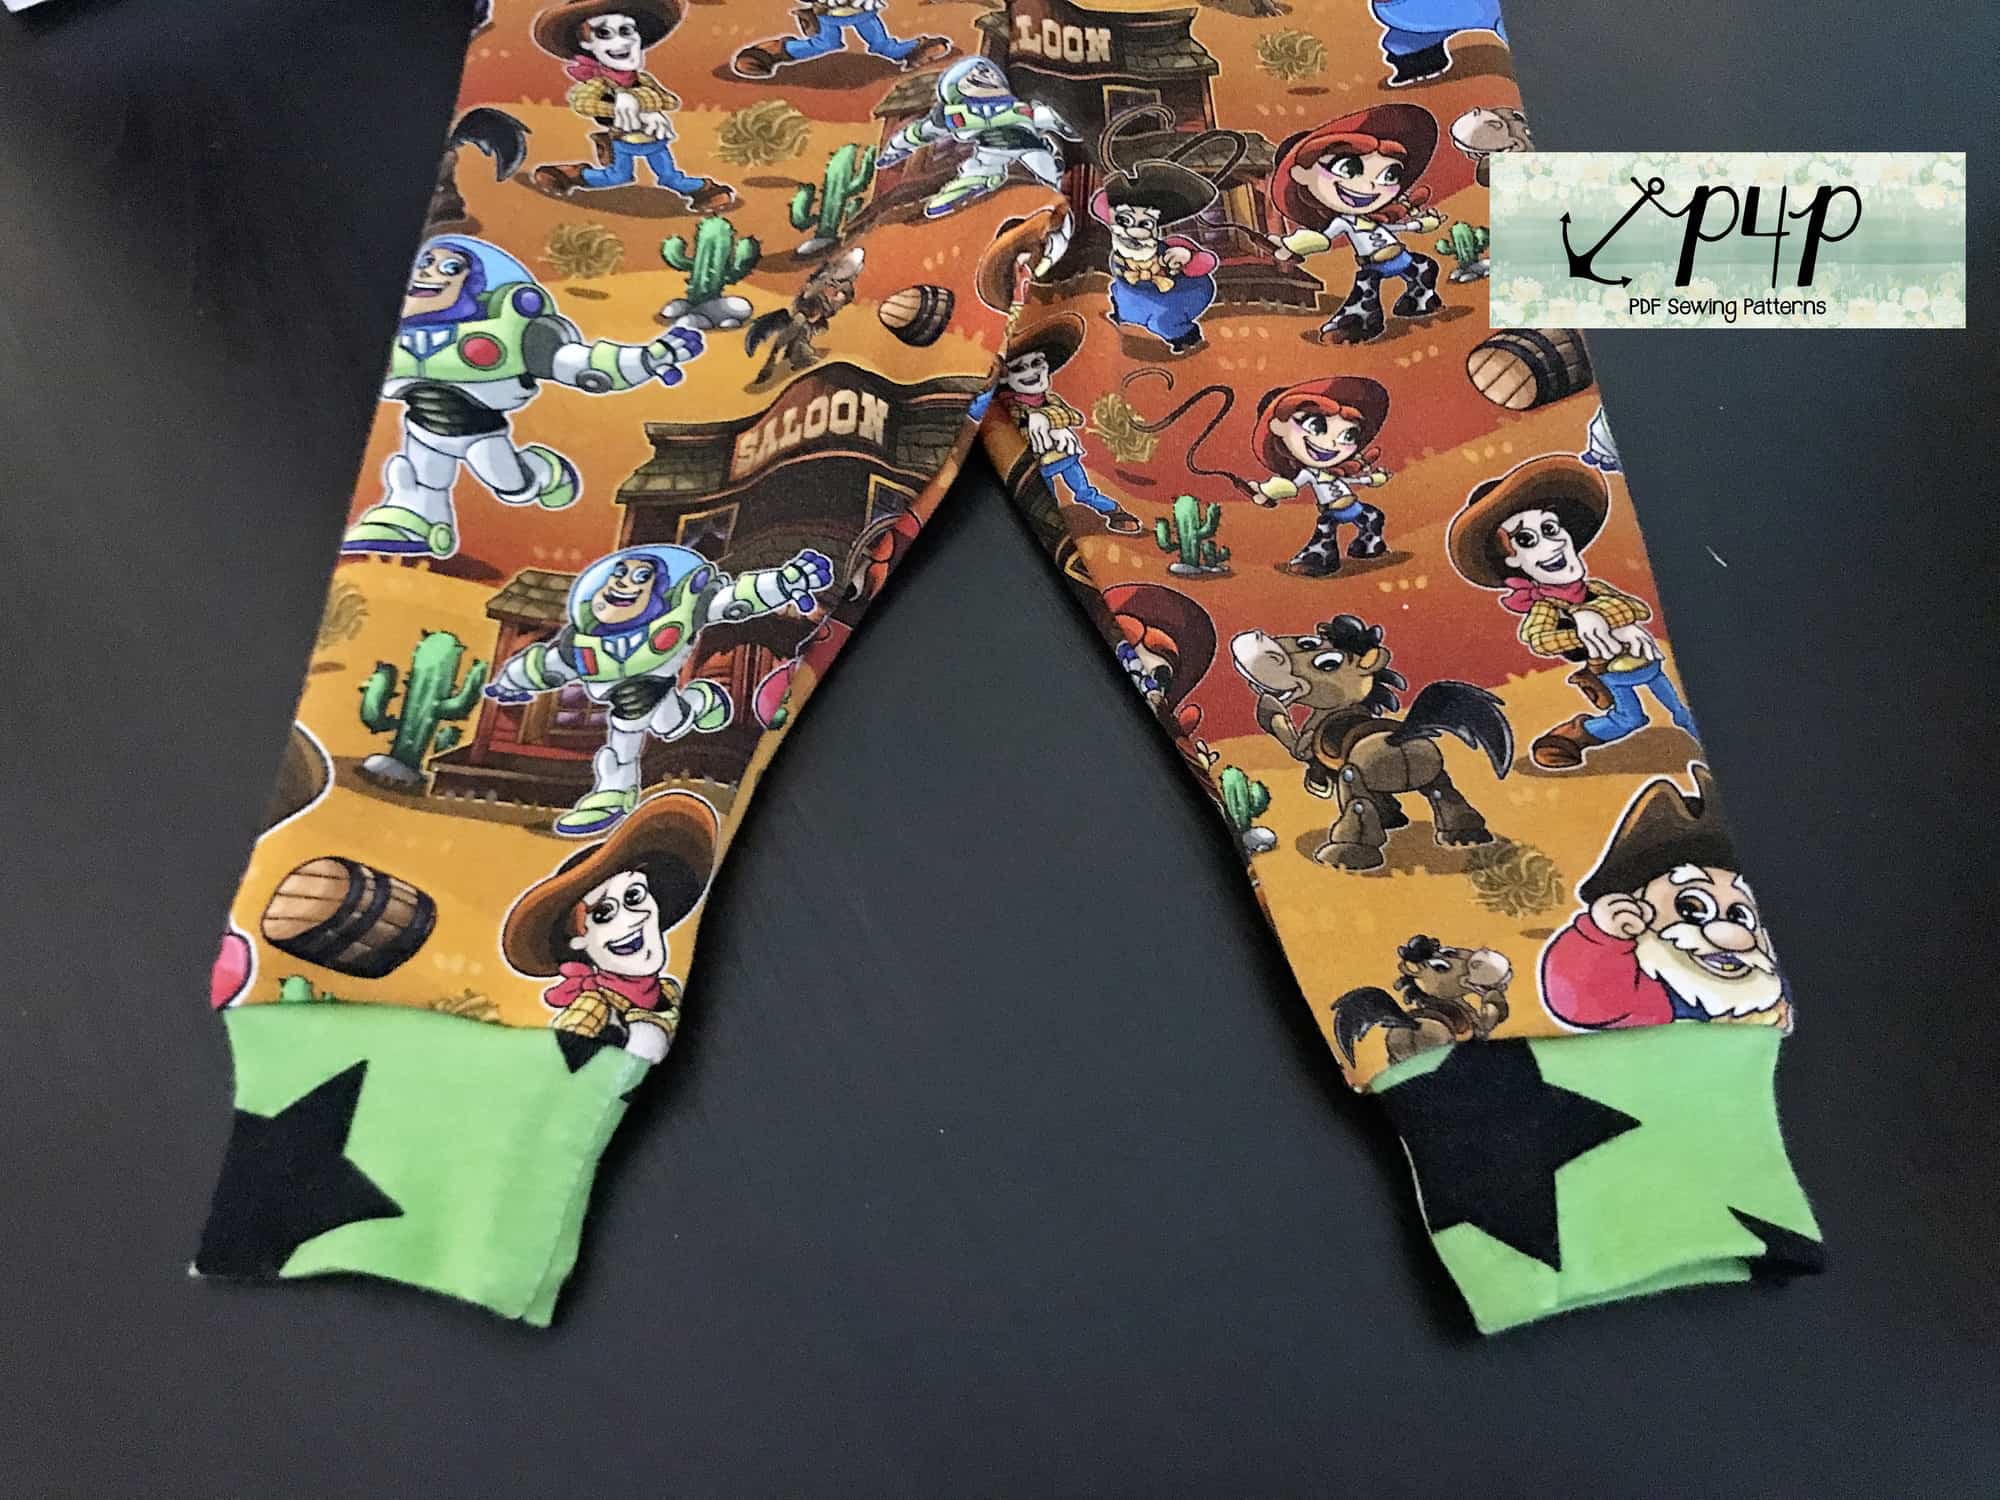
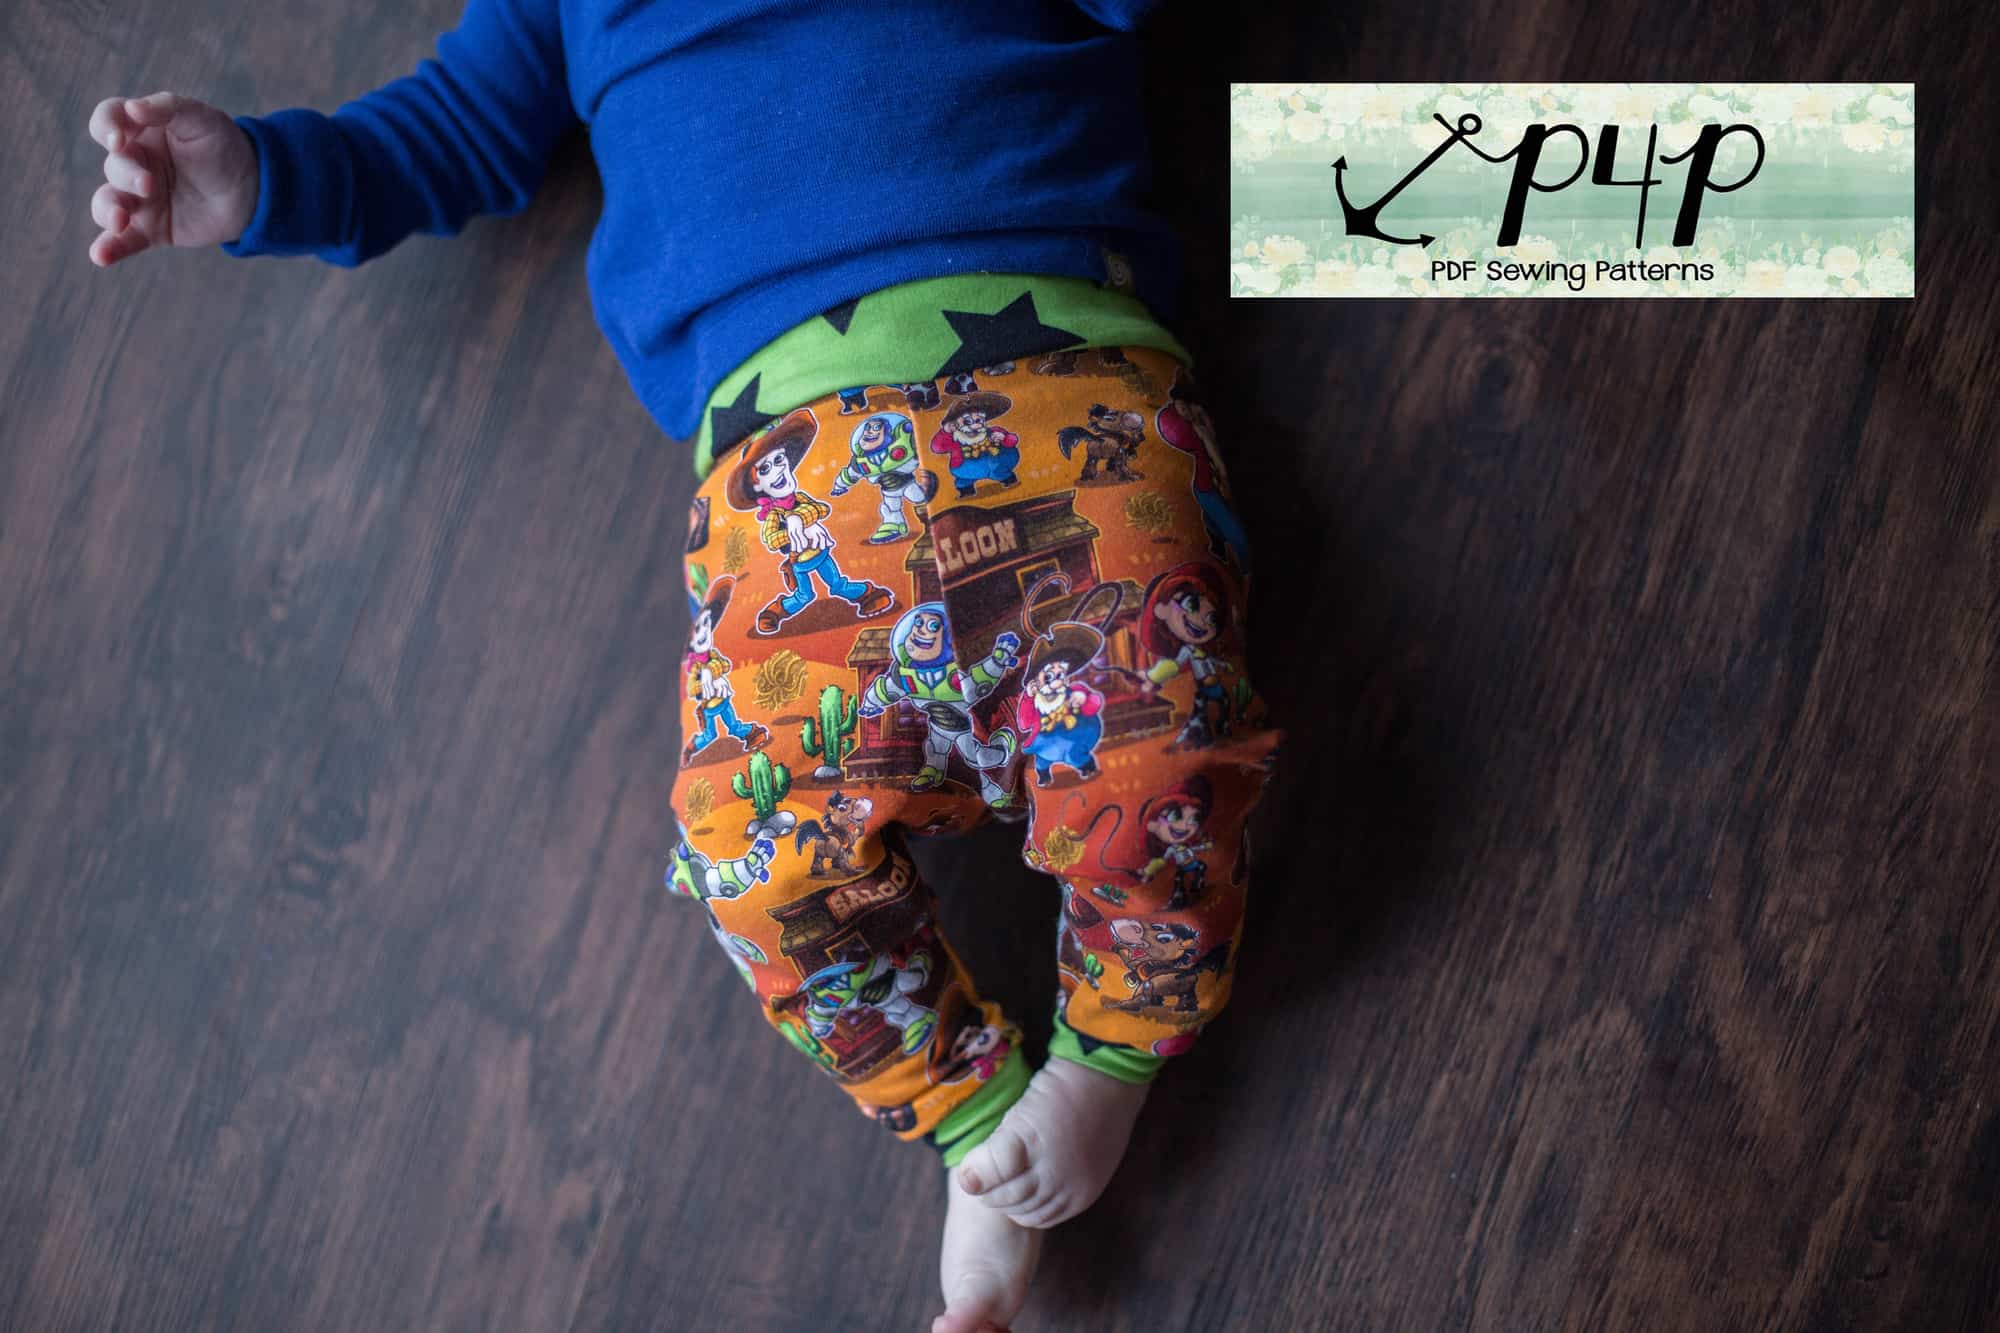
How adorable are the new Petite Pegs? So much cuteness in such a small package. If you haven’t downloaded your FREE copy, do that here. Today on the blog I wanted to show you how to add cuffs to the Petite pegs.

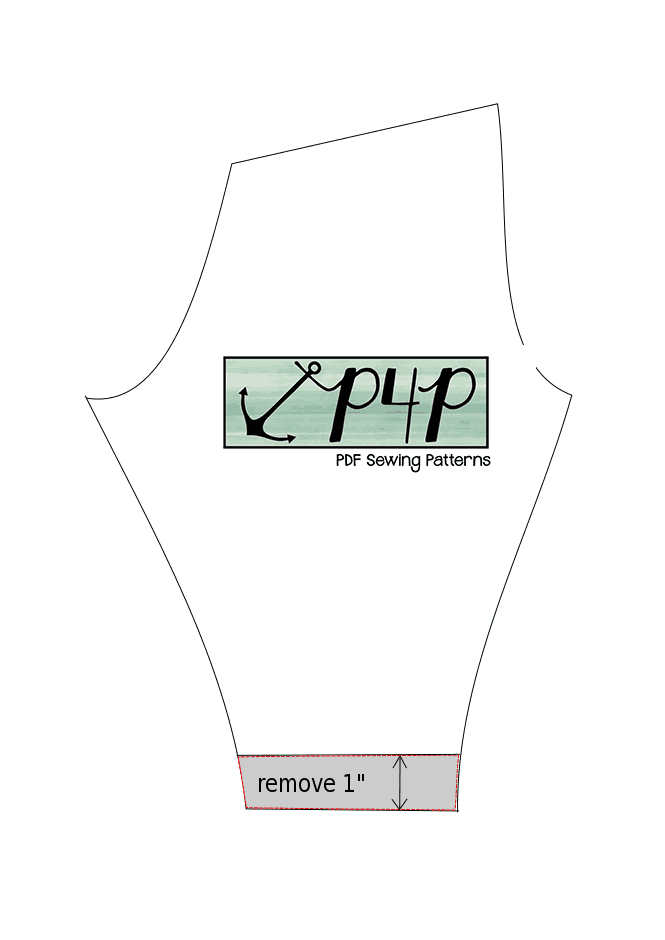
We will start by shortening the length of the Petite Pegs by 1″. To do that simply grab a ruler and draw a line 1 inch above the ankle cut line. This will be your new pegs ankle length. Cut the two mirrored legs using this new cut line.
You will now be cutting the cuffs. I did the math for you so just follow the cutting chart below. Remember to cut two cuffs, one for each leg.

*If you babywear a lot you might find it helpful to double the cuff length. This way the long cuff can be folded down over the heel. It’s a popular way to wear pants when you’re babywearing because otherwise the pant legs hike up and then the baby ankles stick out.
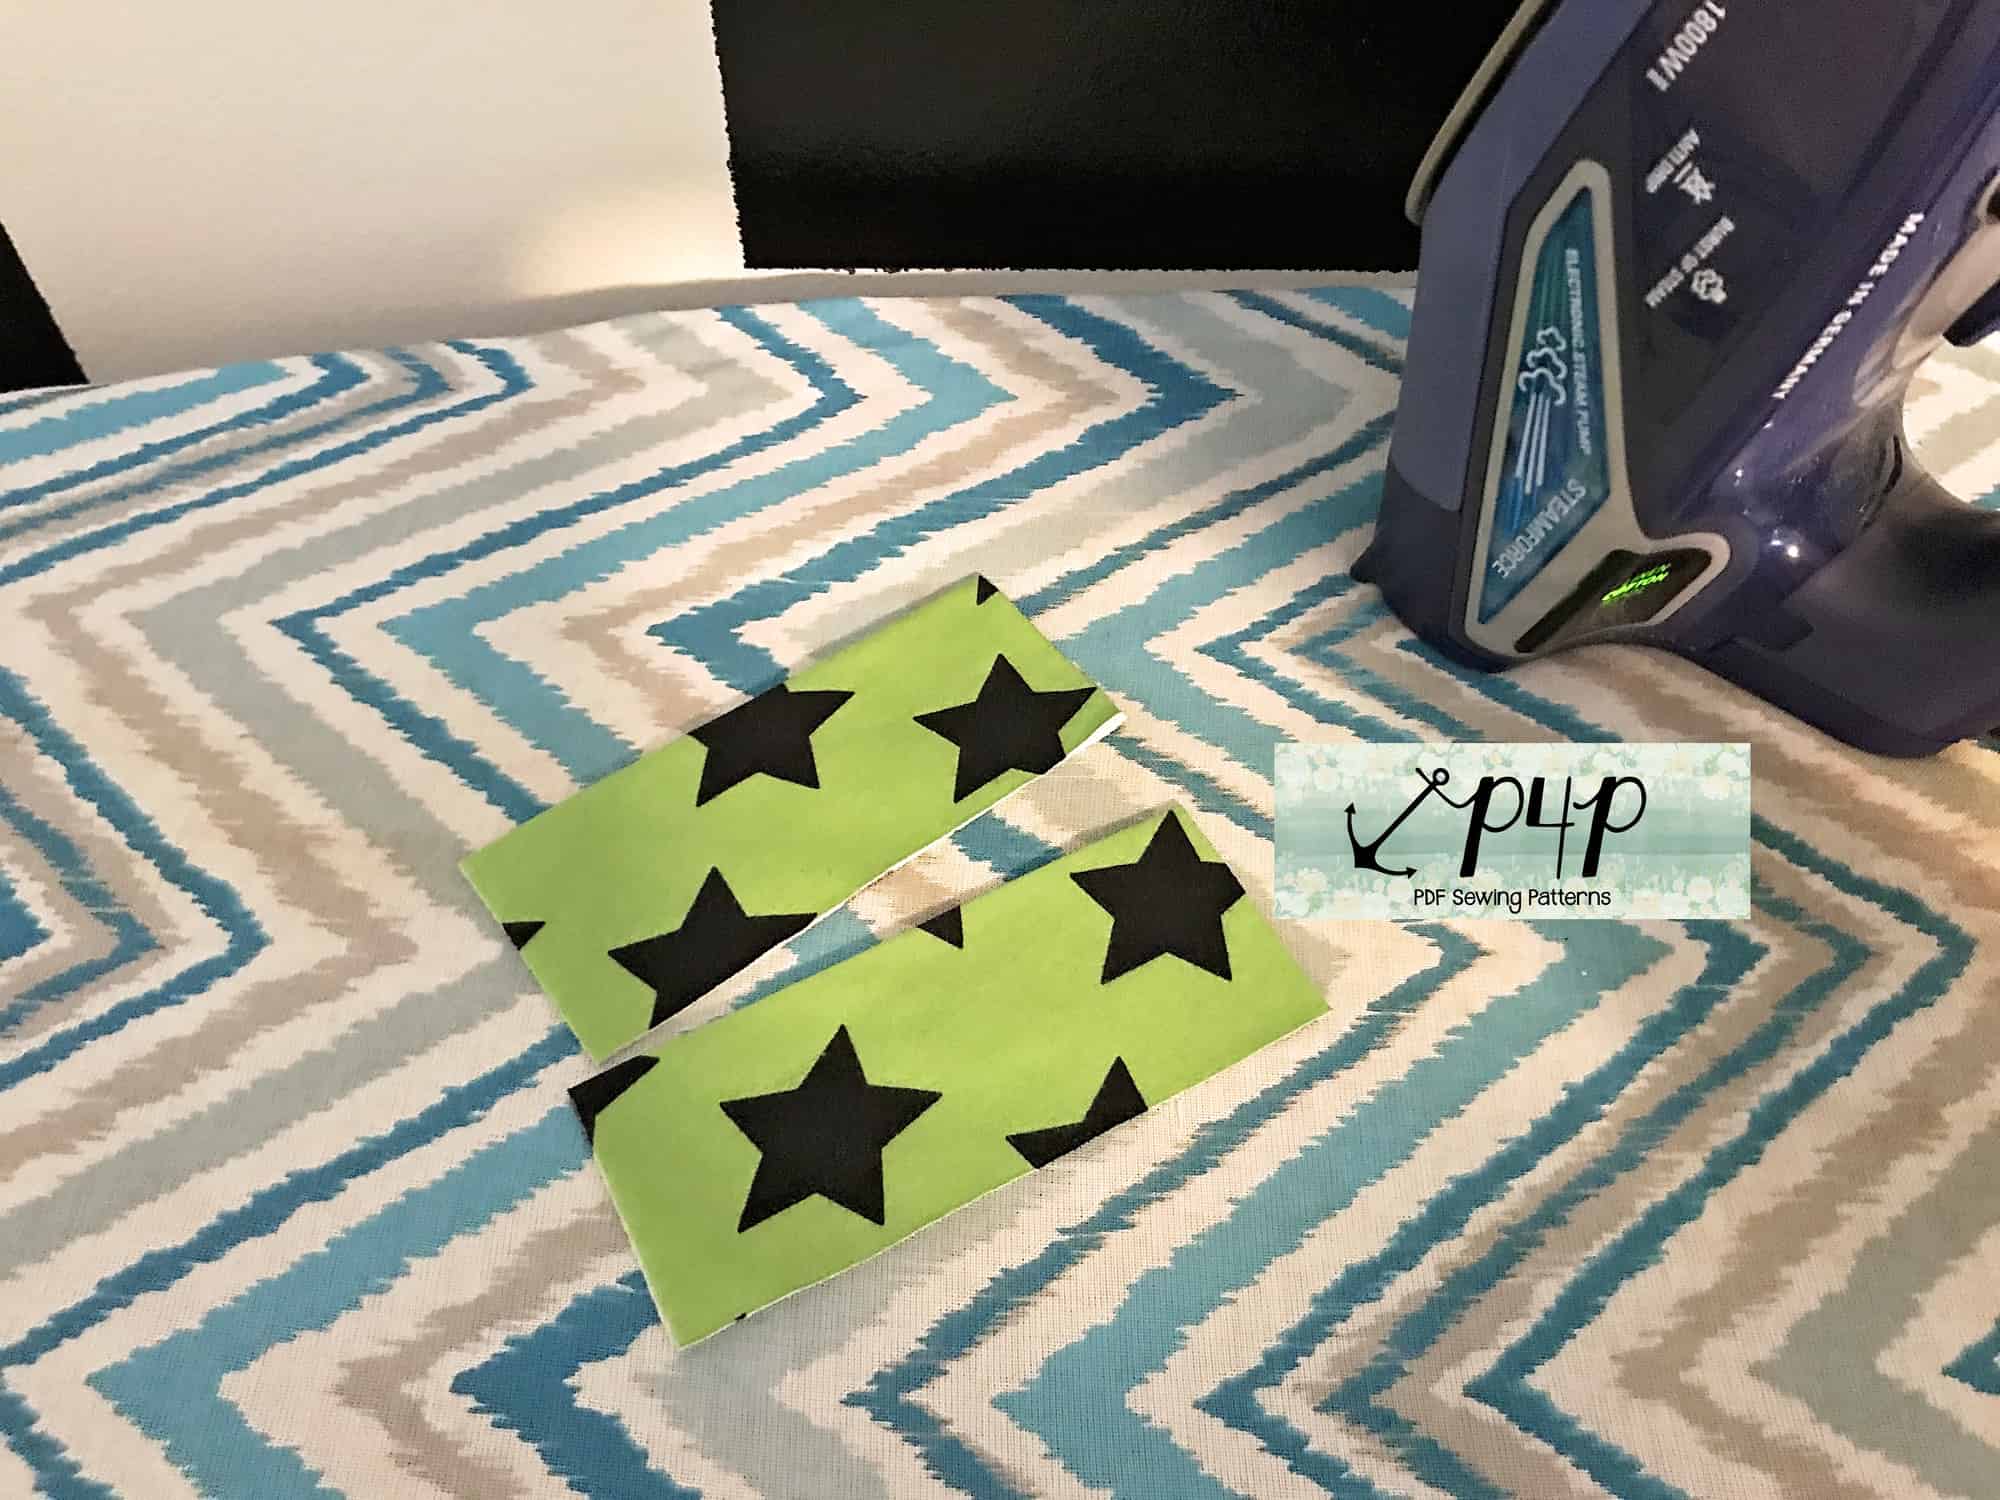
Sew the Petite Pegs as per the tutorial. Grab your little cuffs and fold them to create a memory hem. Press and steam.
Sew the cuffs to create a loop and fold them. Take a moment to look over the tips I gave you in the Knit Cuffs 101 blog. They will definitely come in handy when attaching these itty bitty cuffs to the little pegs.
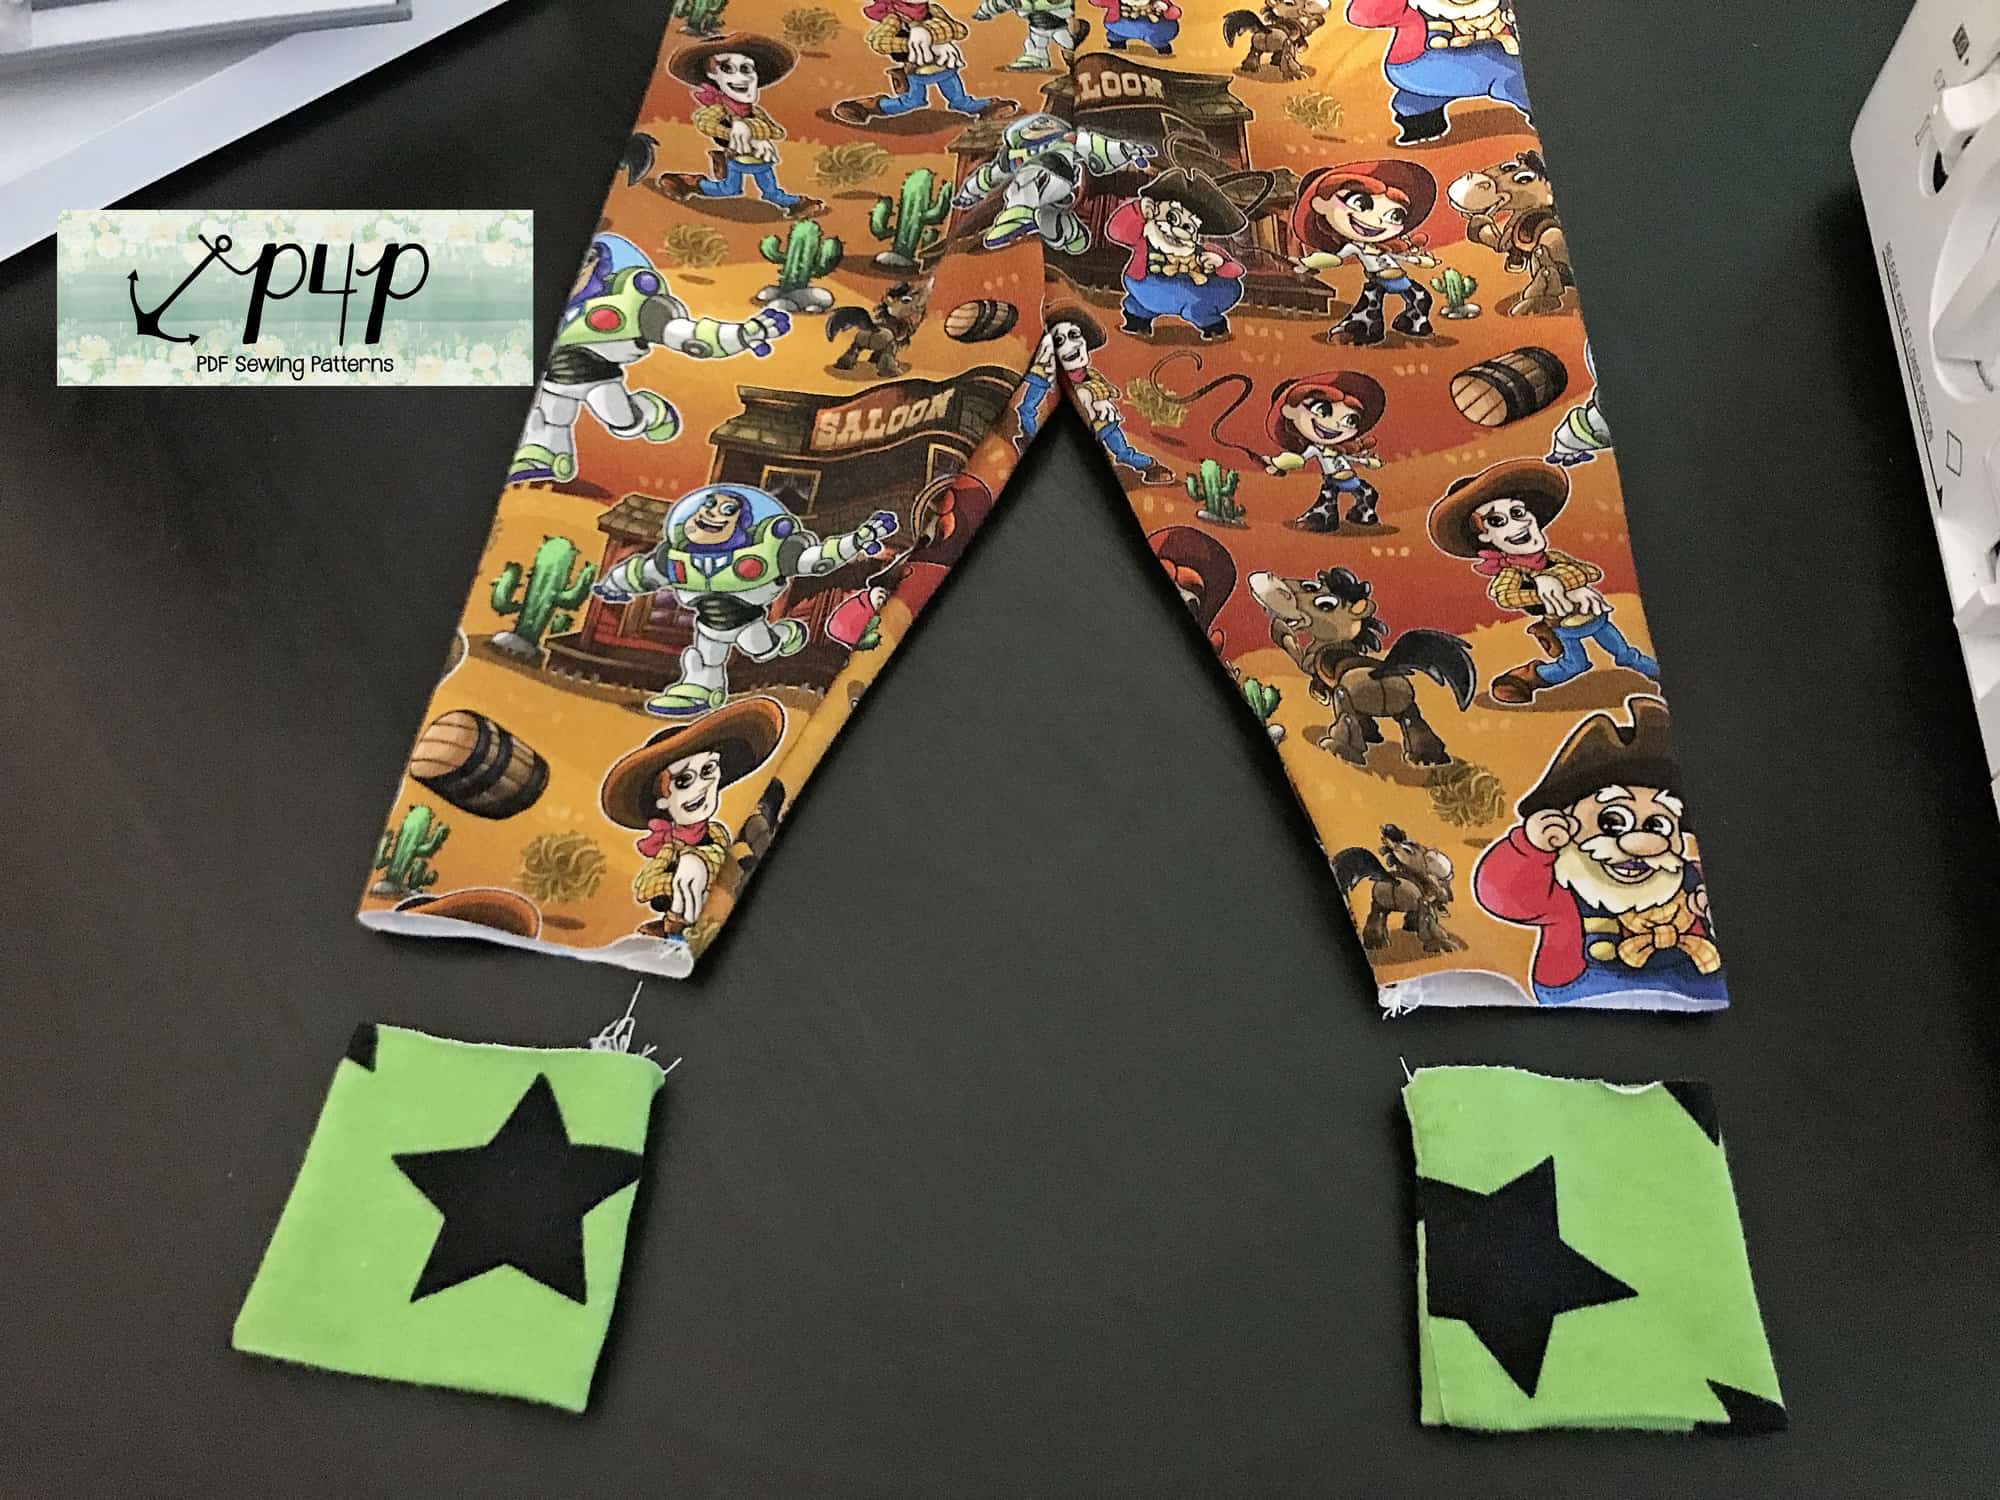
Attach the cuffs to the leg opening with your serger or the sewing machine following a 1/2″ seam allowance. Make sure you match the cuffs’ side seams to the leggings inseam. Stretch the cuff to fit the leg opening.

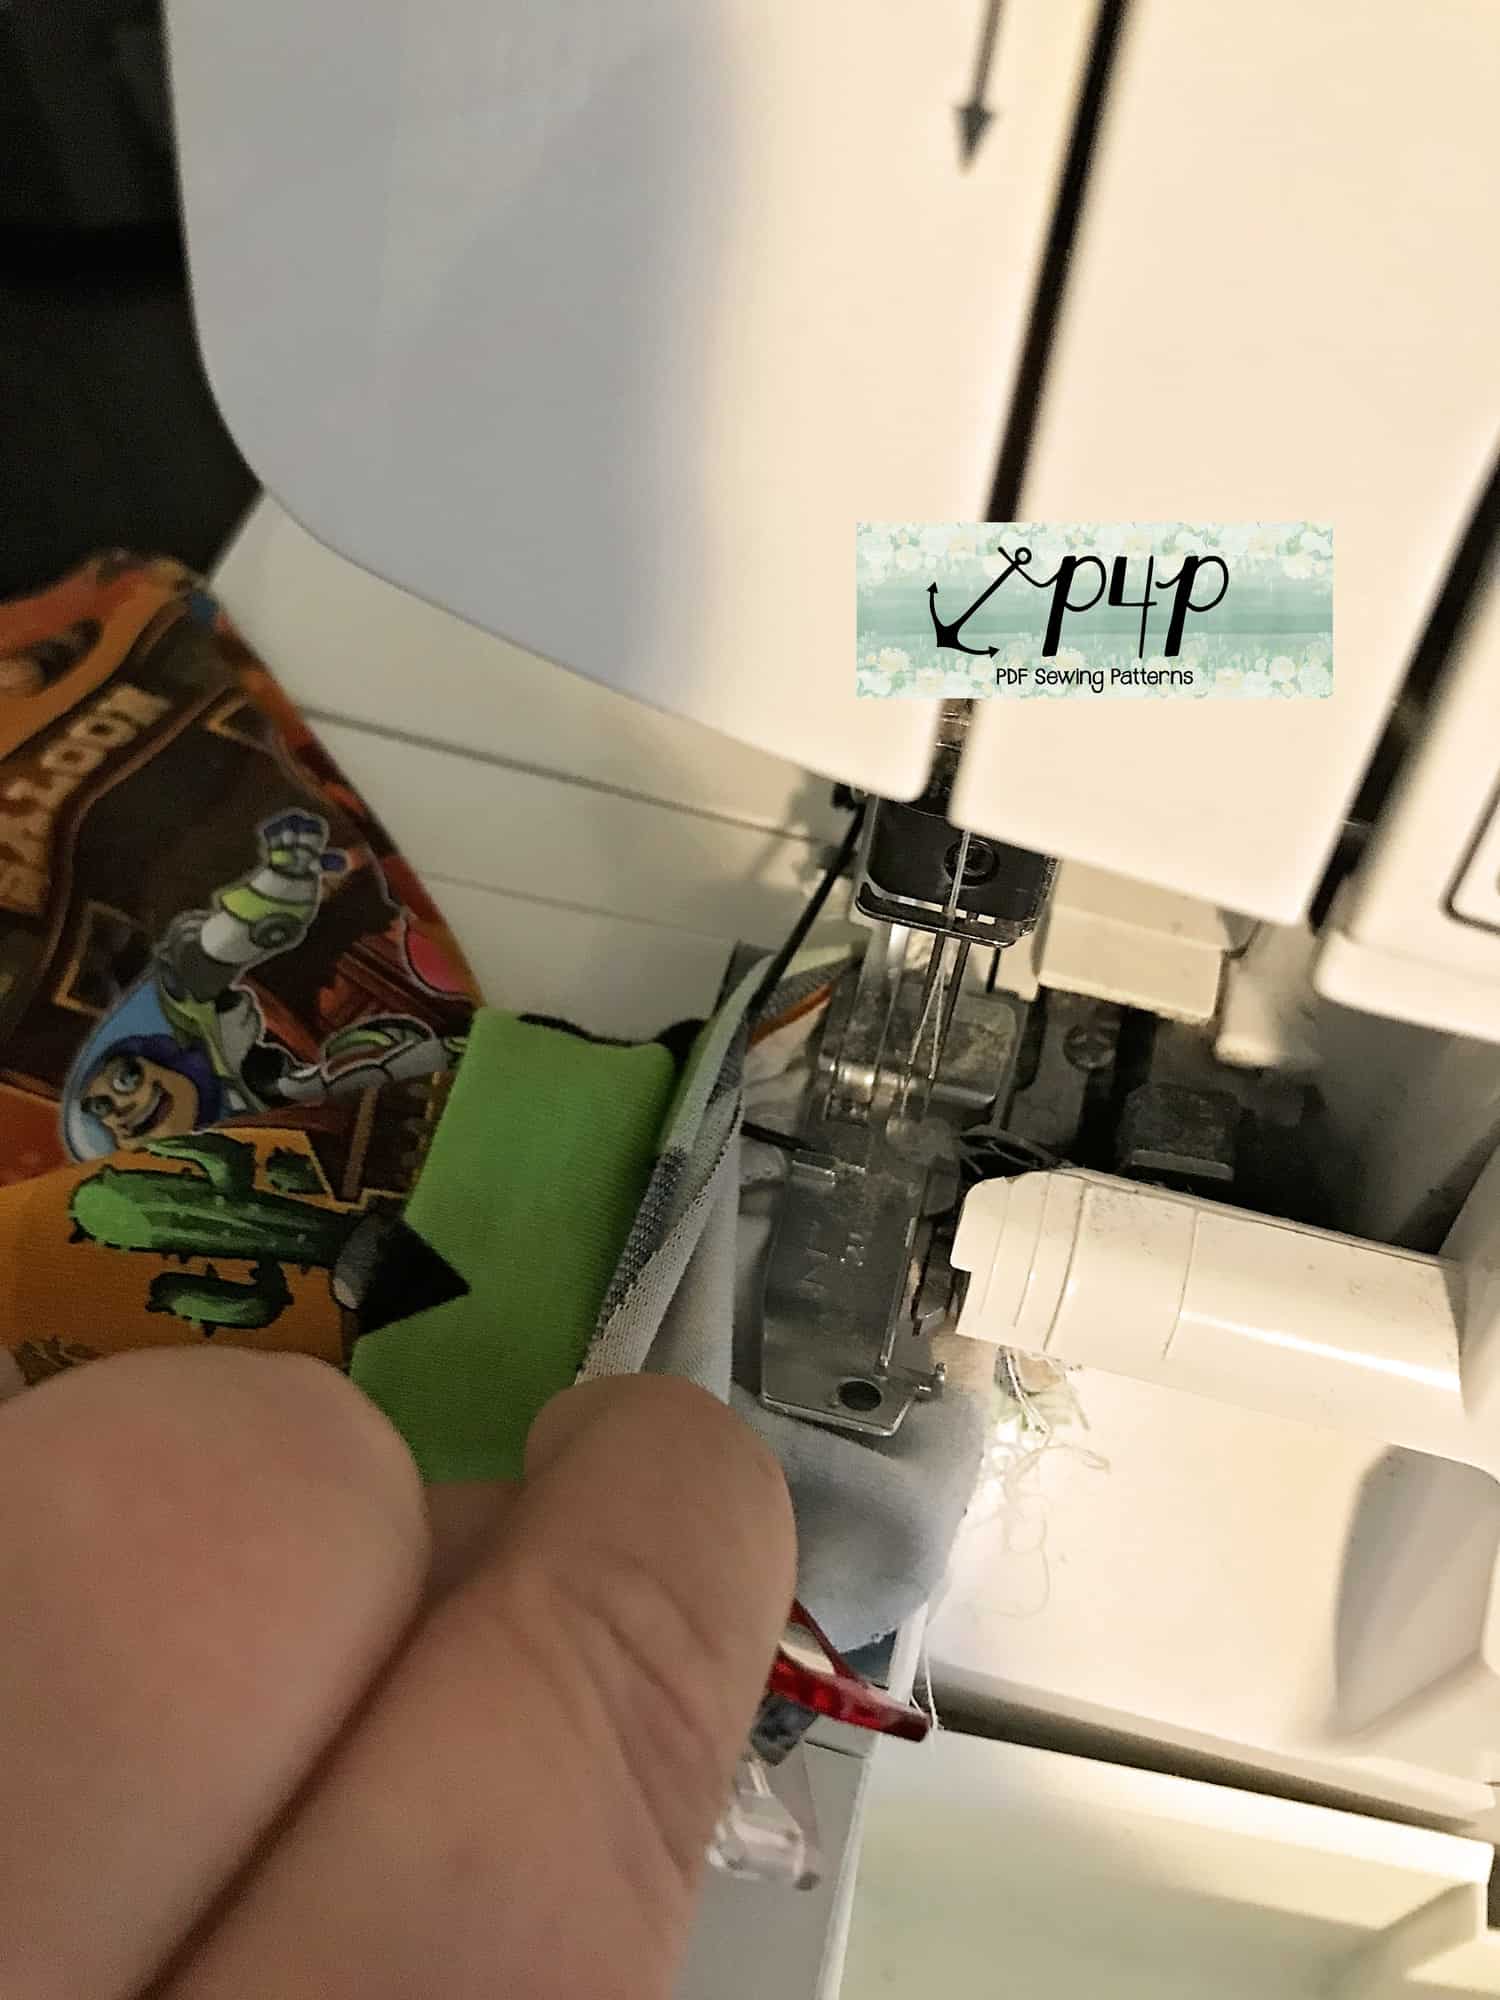
When attaching the cuffs you can place your serger foot on the outside of the leg (as pictured above) or inside the leg (as pictured below). You will be working with a pretty small loop so go slow!
Tadah! There you have it, Petite Pegs with cuffs! I can’t wait to see your little creations!
Note: You may find it easier to attach the flat cuff to the leg instead of sewing the inseams and the cuff in a loop. You can certainly do that, you will be sewing the inseam after you attach the cuffs. You can read about some ways to finish your serger seam here.

75k Member Sale-a-Bration and FREE Baby Set <3
I’m so excited to announce we’ve hit 75k members in our awesome P4P Facebook Group! <3 I love seeing all the inspiration, questions answered, fitting help, and proud first time shares in there! If you’re not a member yet, come join us 🙂
To celebrate we’re having a big sale- 30% off the total site for 10 days! January 24-Feb 2 2018 (US Central Time Zone). There is a coupon code- 75ksale – but don’t worry it will pop up for you in your checkout! So you don’t need to worry about remembering it or writing it down!

We thought we’d do even more than just a sale though and have worked hard behind the scenes to create a whole Baby Set of Free patterns for you!!! I LOVE getting invited to a baby shower and making some unique handmade items for the mama and baby! Since my patterns start at 3 months there are a few great ones I go to for baby shower gifts…BUT, I’ve always thought there were a few teeny tiny newborn size things I’d love to have a pattern for as well!
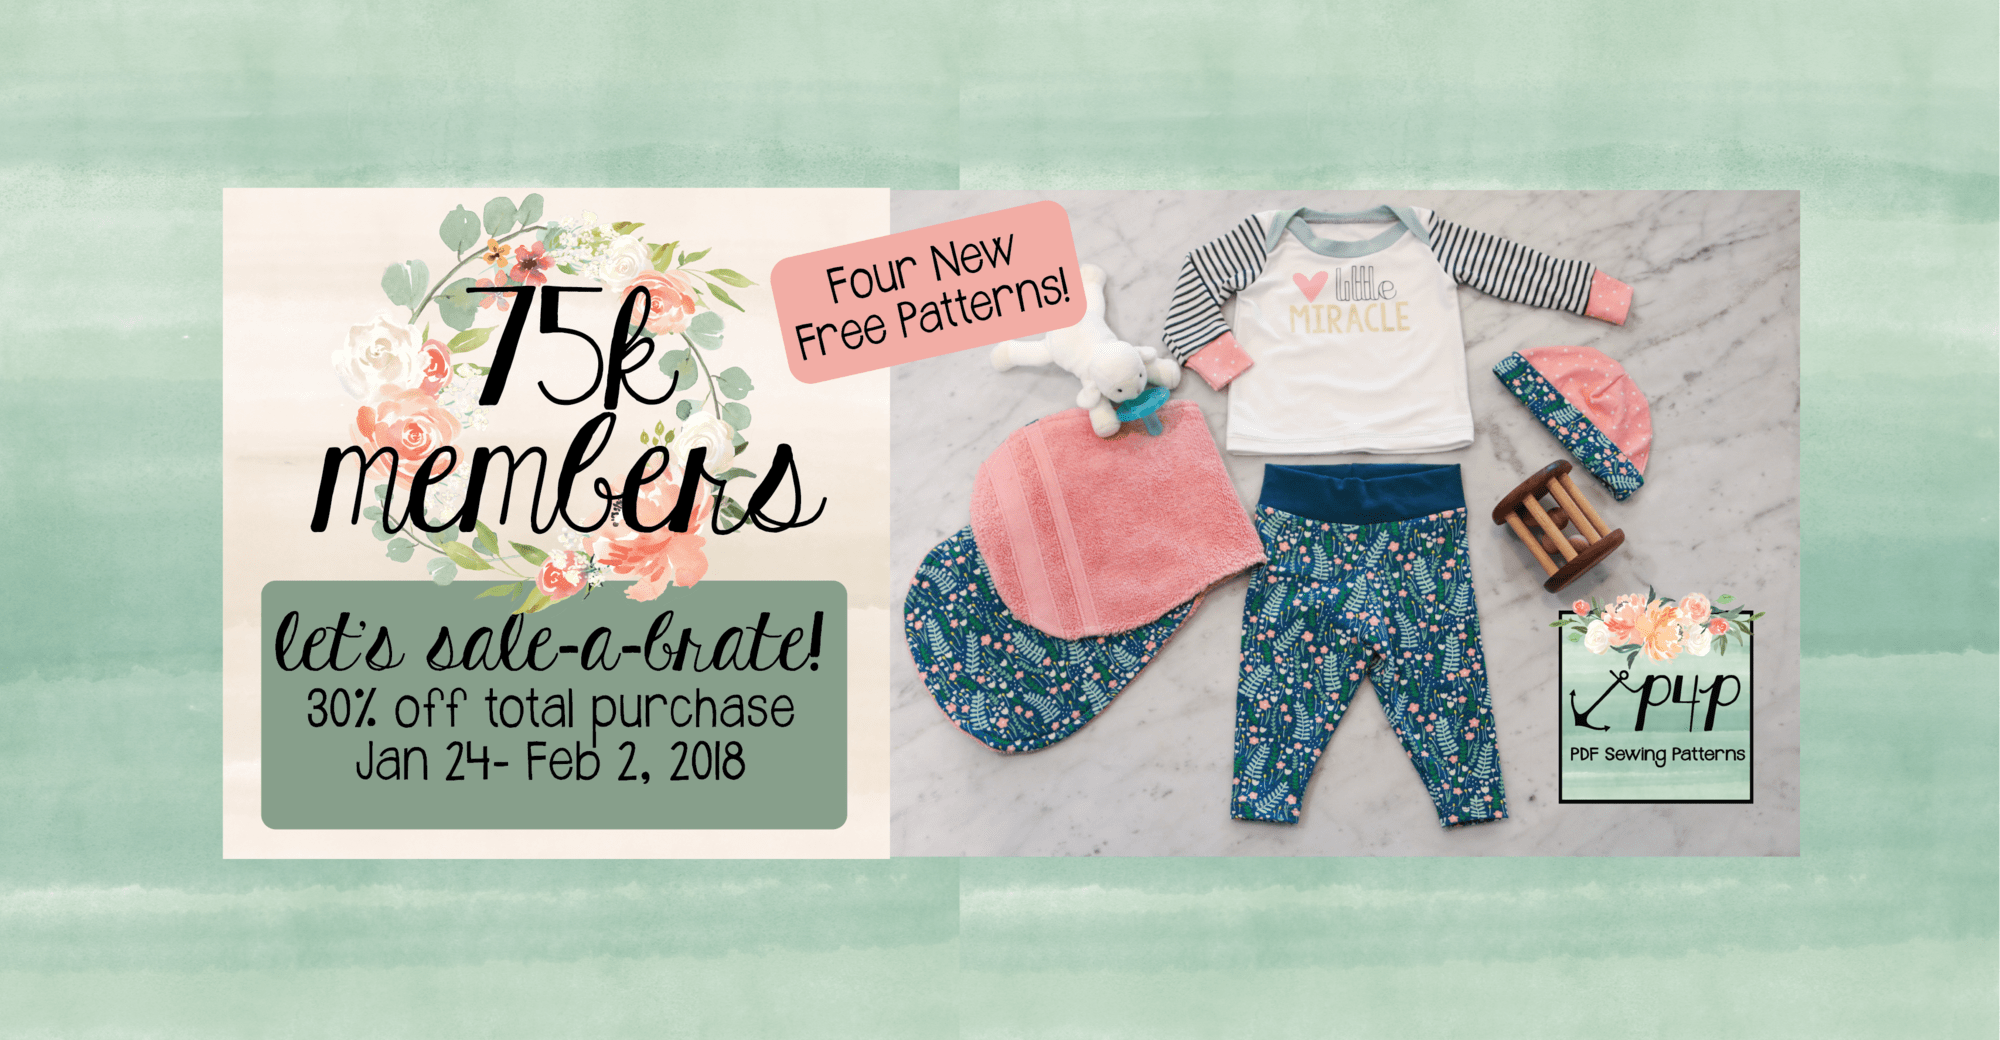
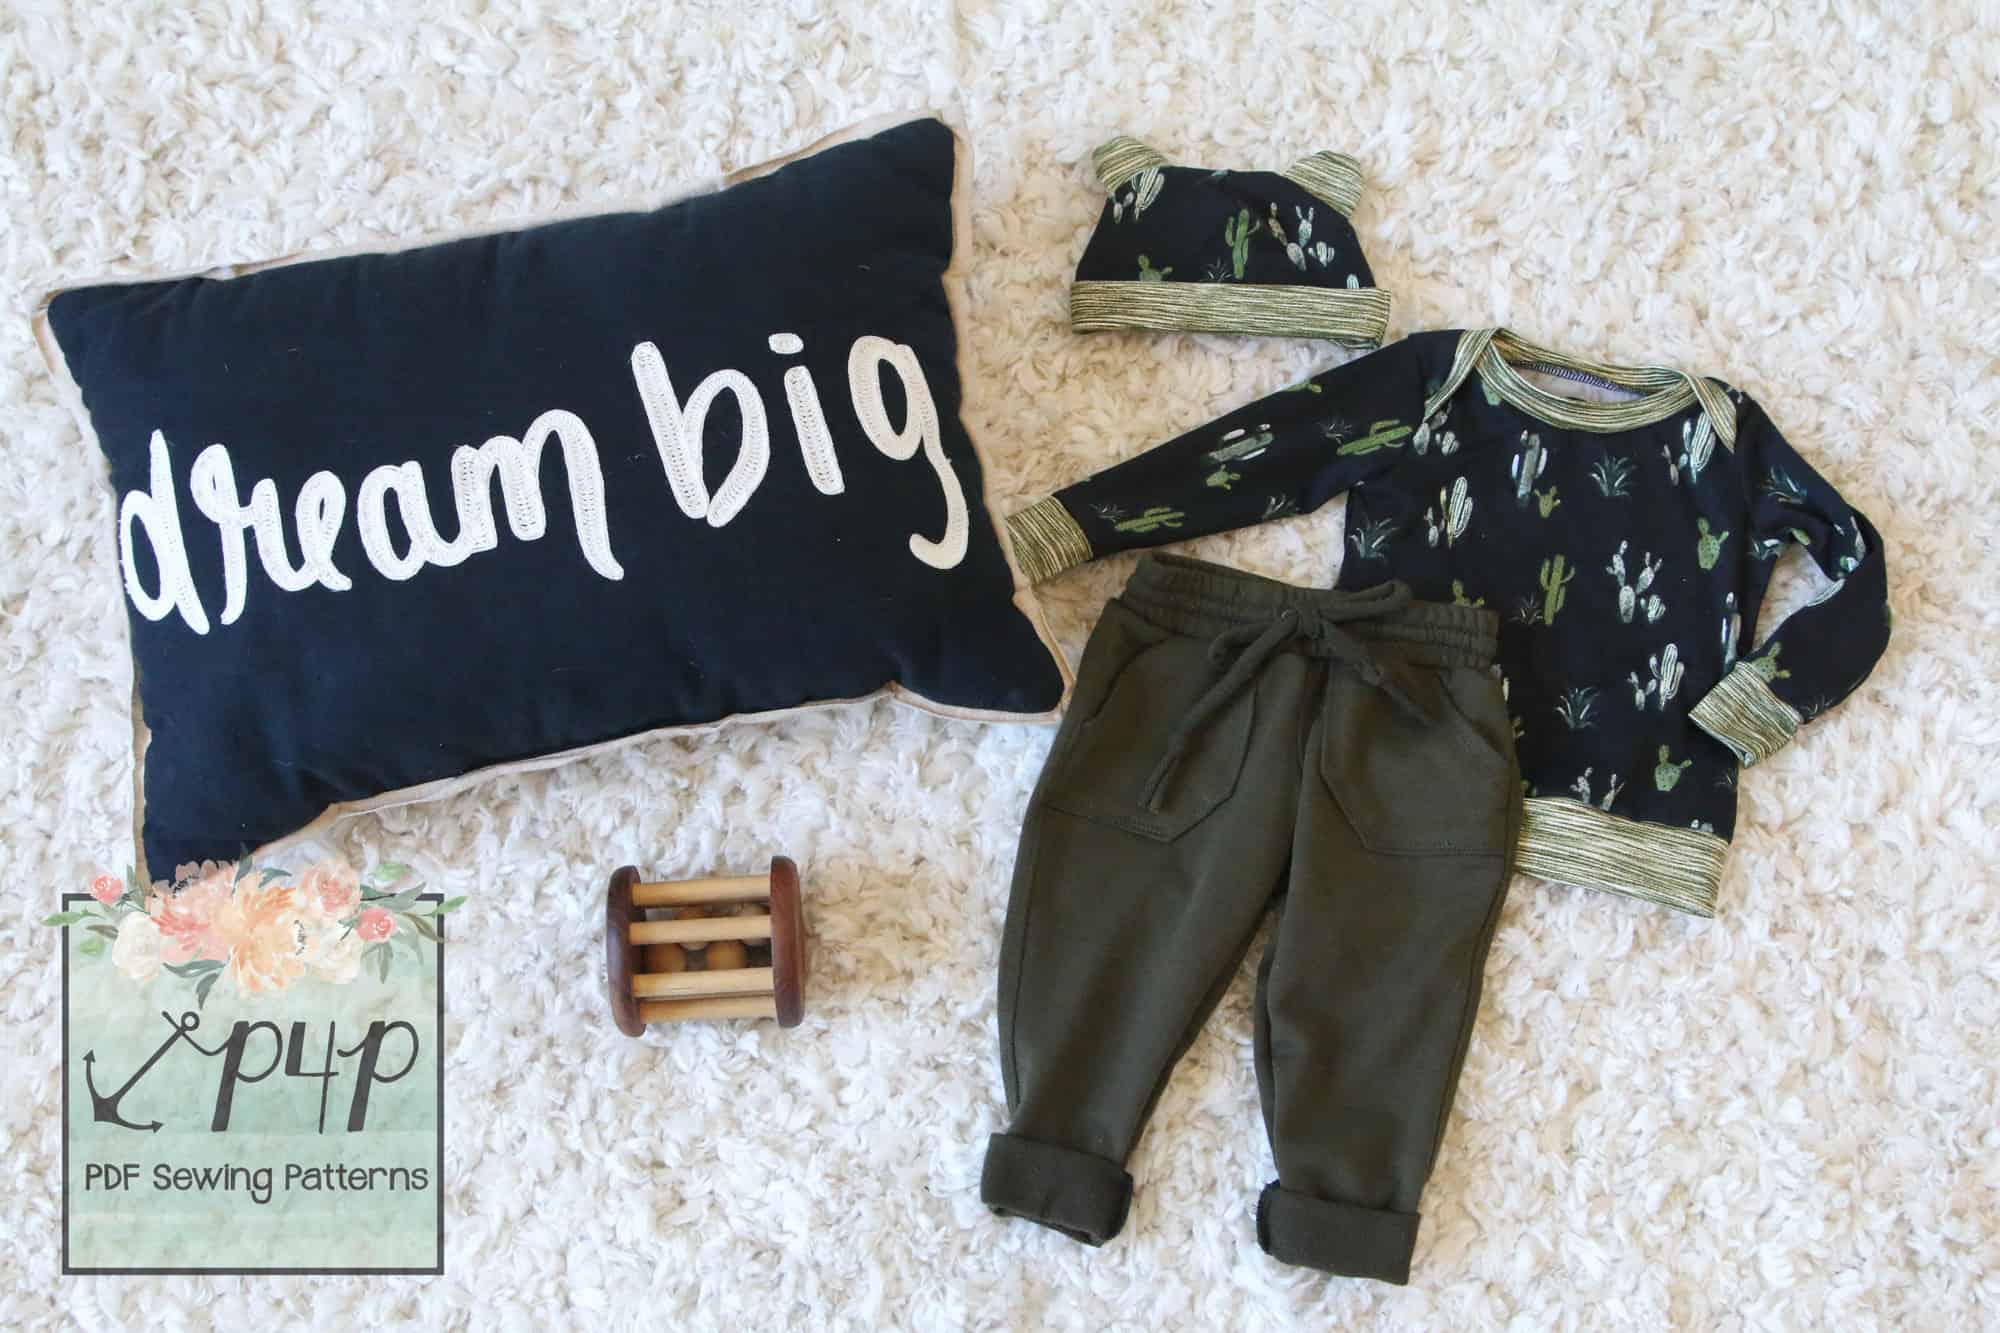
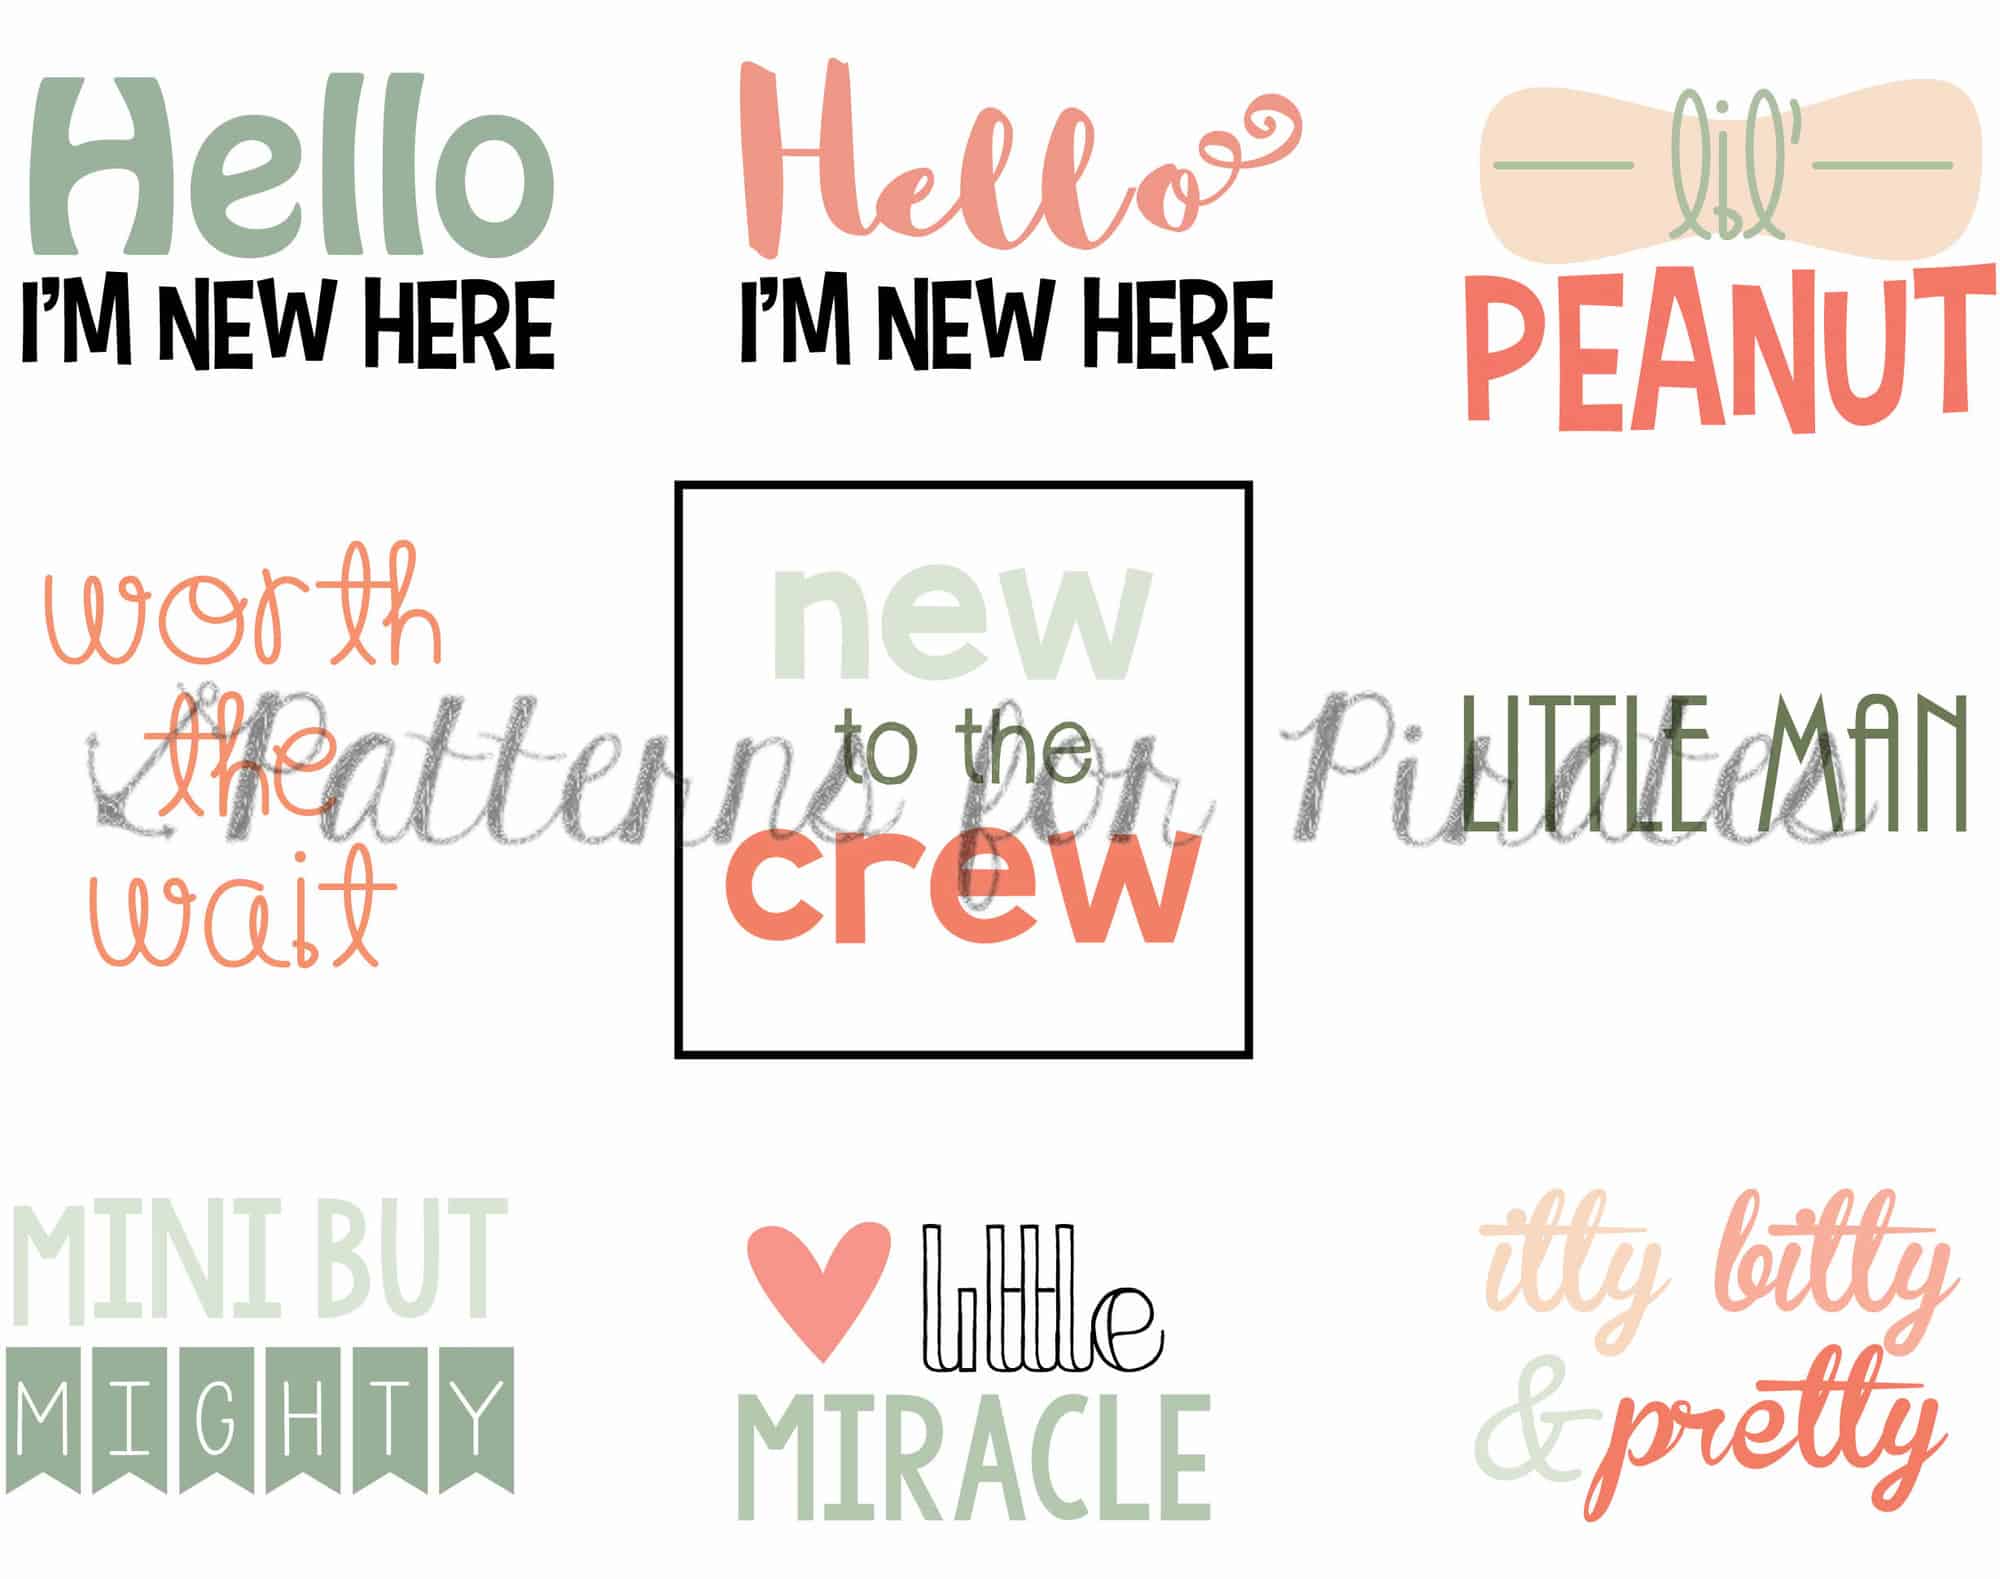
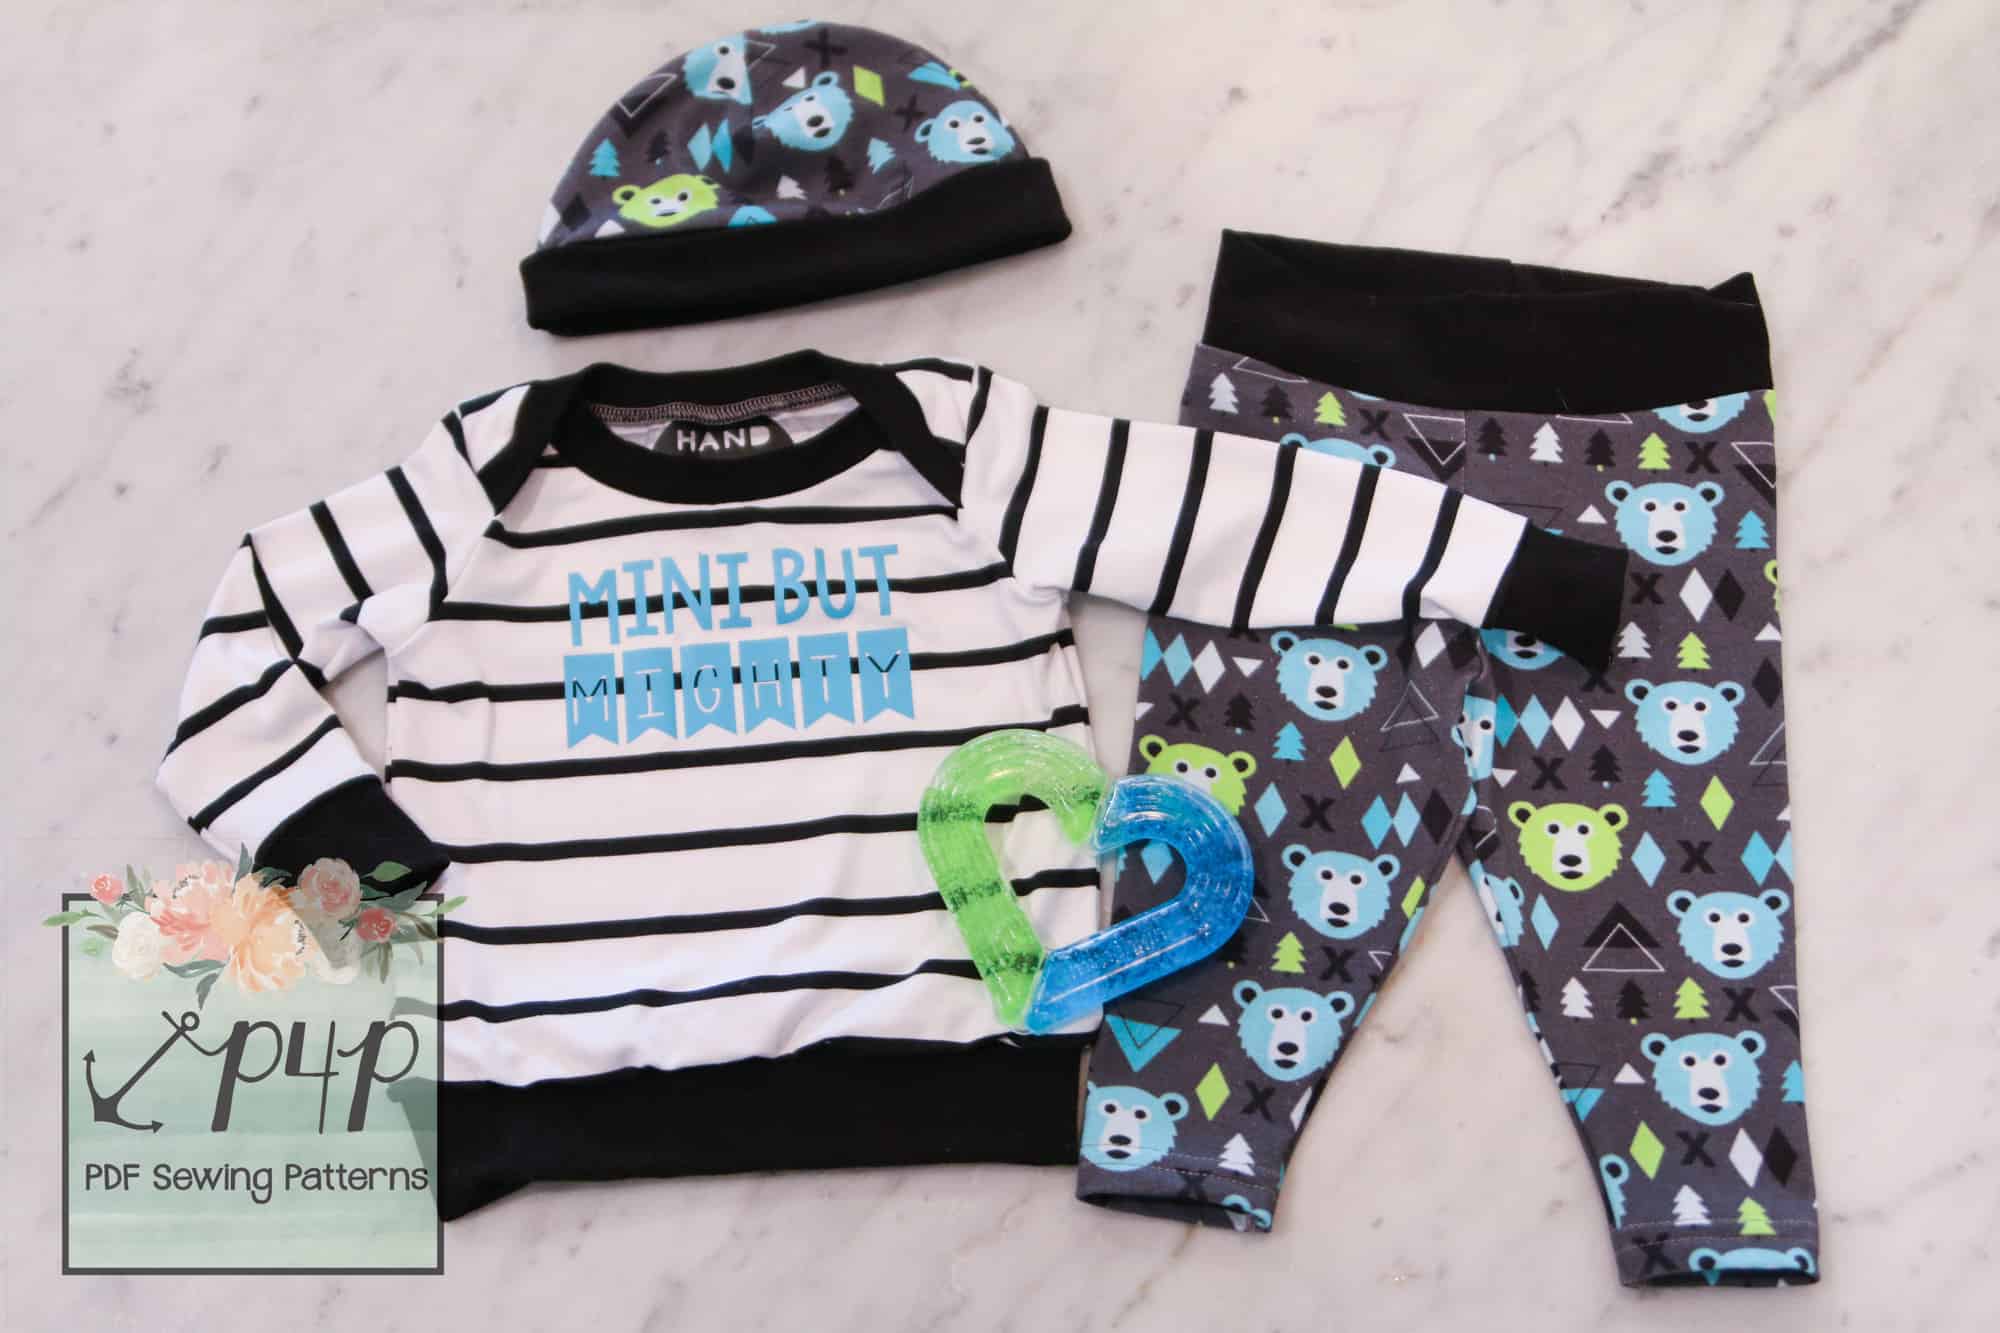
I KNEW we needed a Wee Lap Tee, the envelope style neckline makes dressing newborns easier, and OF COURSE we needed Petite Pegs 🙂 We’ve been asked so many times for baby sizes of our Free Peg Legs pattern it was a no brainer! We added the Teeny Beanie to keep those little head and ears warm and a quick and easy burp cloth too. I also couldn’t help myself to a few cute cut files to add on to the gifts as well!
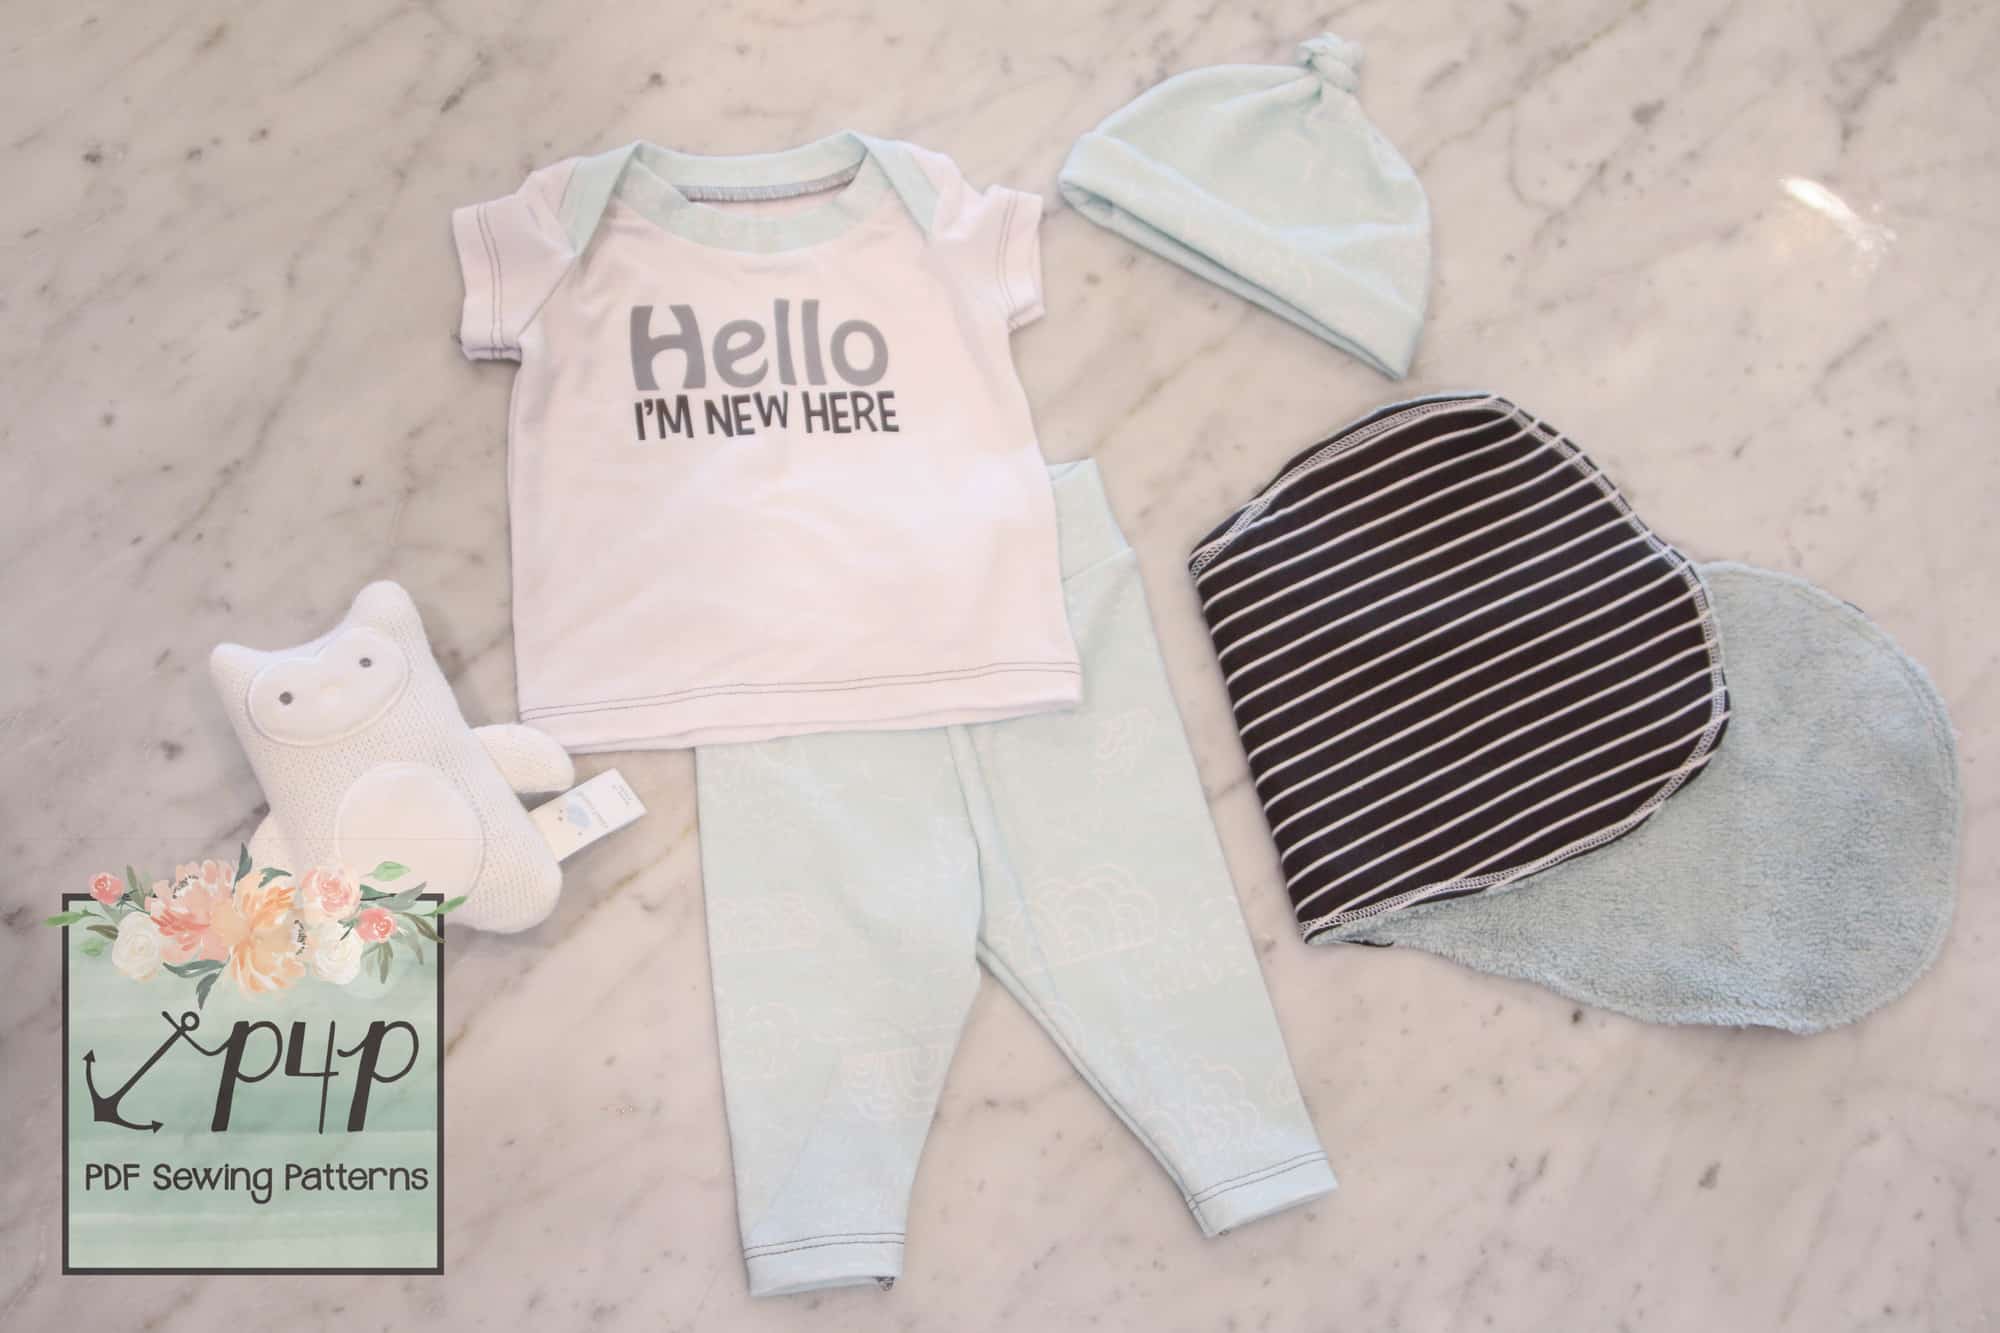
So, next time you find yourself expecting to be a mama, grandma, auntie, or just invited to a baby shower you will be set with this Free Baby Set of Patterns! You can mix and match them with the other favorite P4P patterns you have that start at 3M as well! I love the Baby Bear Joggers for babies!
I love adding an adorable design to the Wee Lap Tee! I hope you enjoy them and make your baby’s wardrobe or baby gifts that much more special!
Thank you for supporting P4P Sewing PDF Patterns! <3

2017 Holiday Freebies: Easy Button Cowl
I’m back to gift you the final item for our 2017 Holiday Freebies! Have you had fun with us so far this week?
In case you’ve missed the last four days, go take a look: Slouchy Headwarmer / Emoji Pillows / Clothing Size Tags / Camera Strap
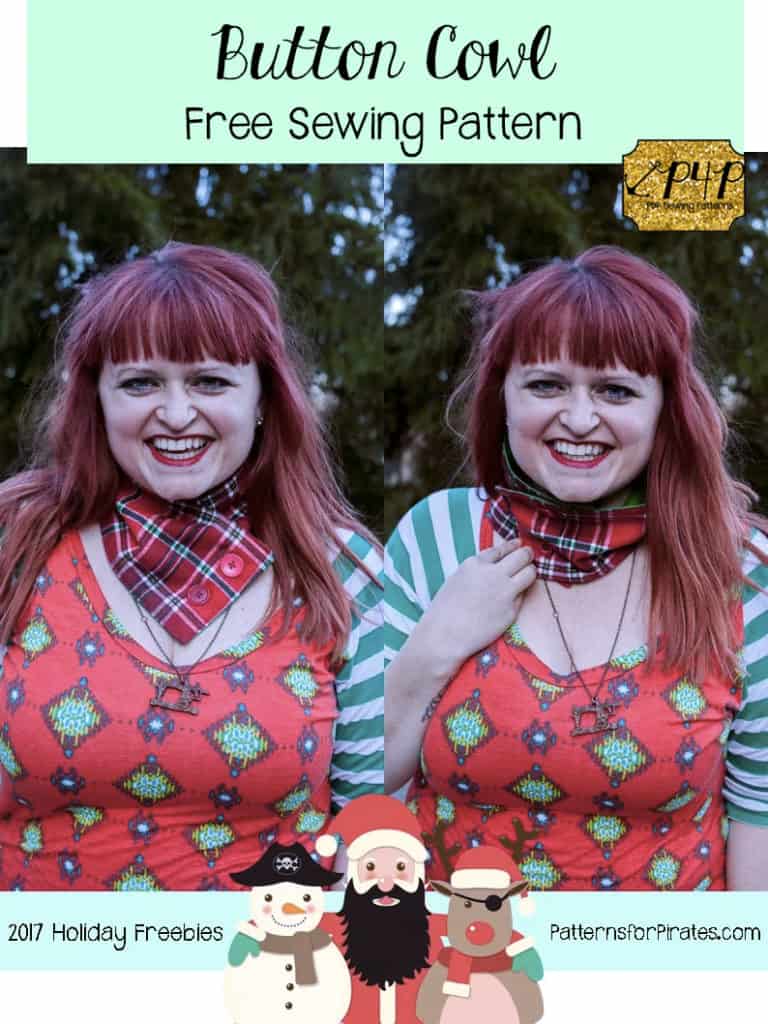
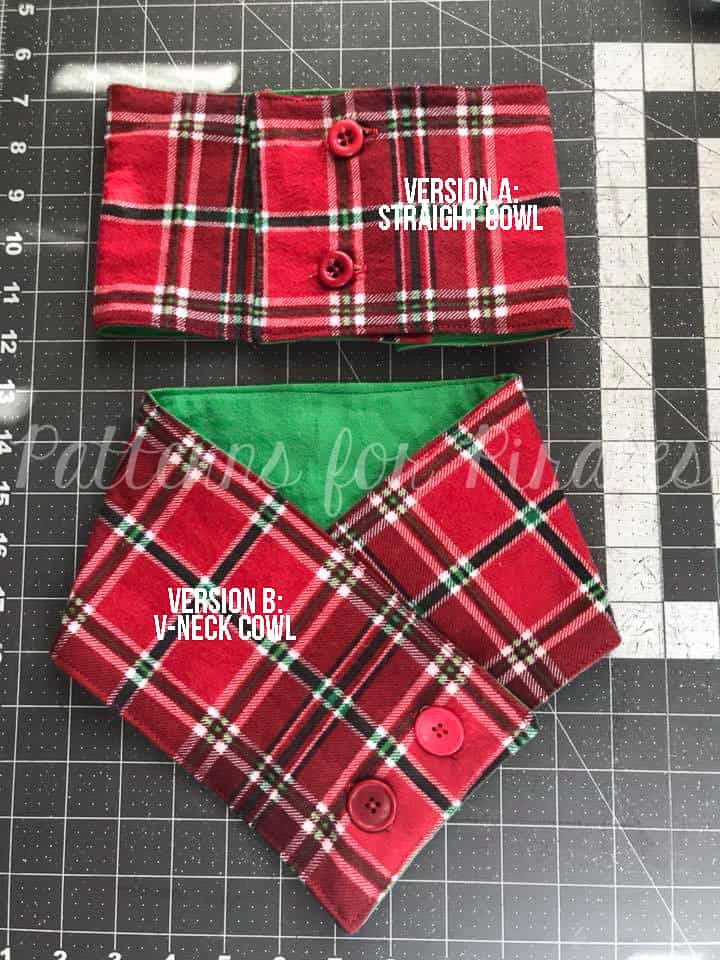
On the last day of our freebies, we are sharing how to make this super cute, quick, and easy Button Cowl. We’ve even got two ways for you to wear it. Are you ready? Let’s get to it!
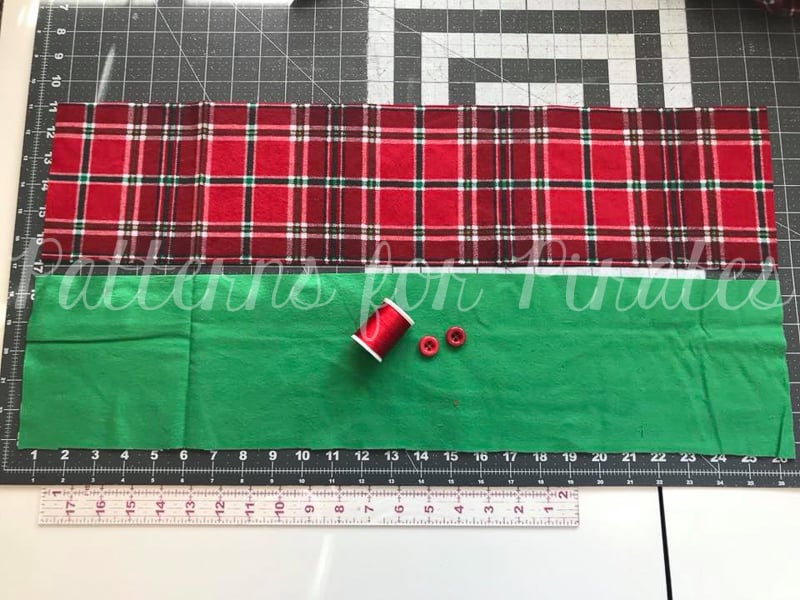
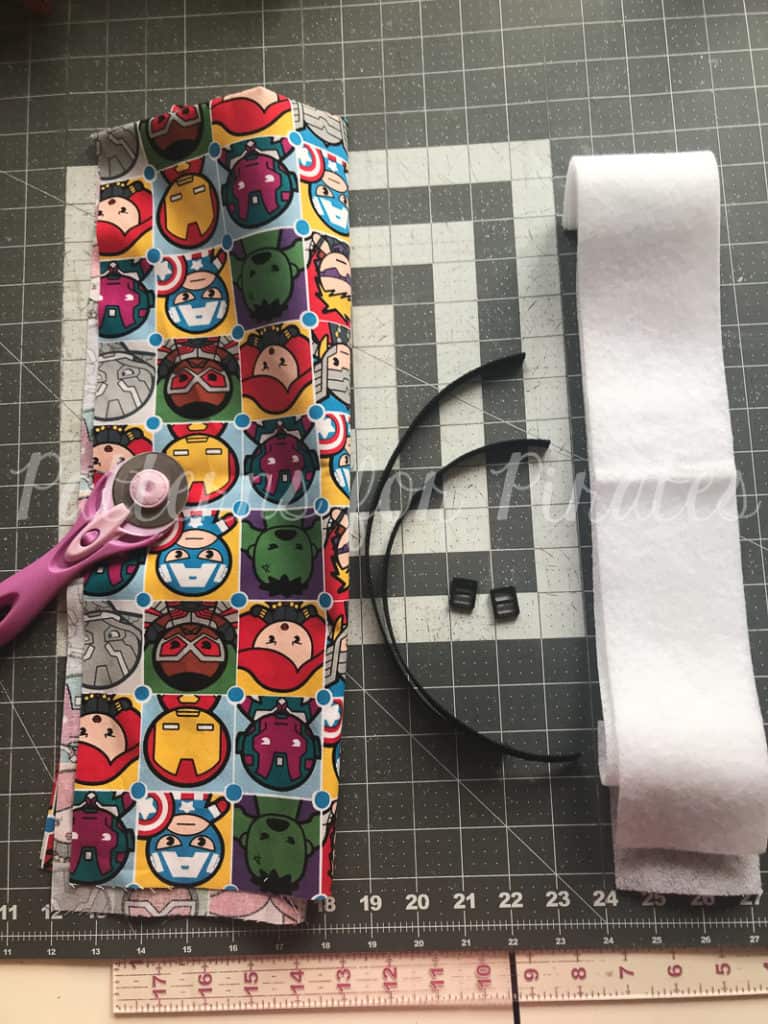
Materials needed:
- 2 – 26″ wide x 6″ long pieces of fabric (can be flannel, fleece, sweatshirt fabric, etc. Really anything will work, but obviously the cozier the better.)
- 2 buttons / snaps
- Coordinating thread
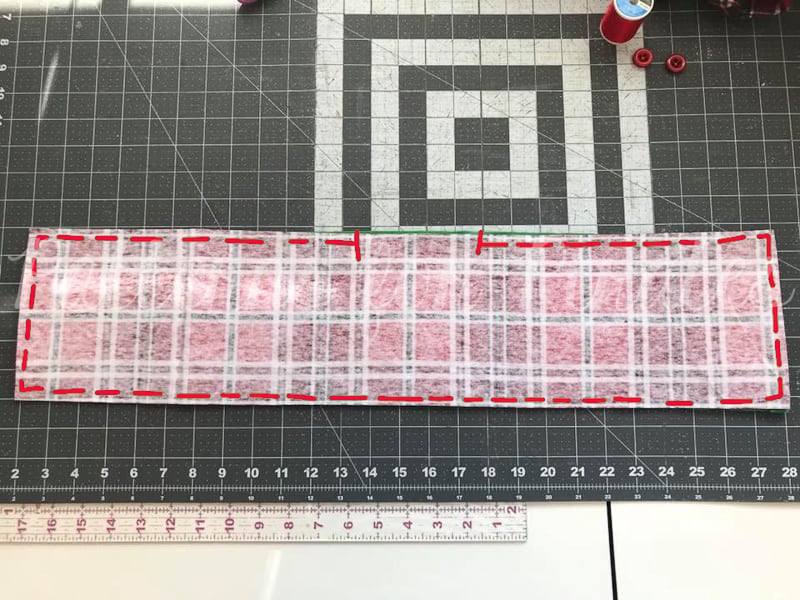
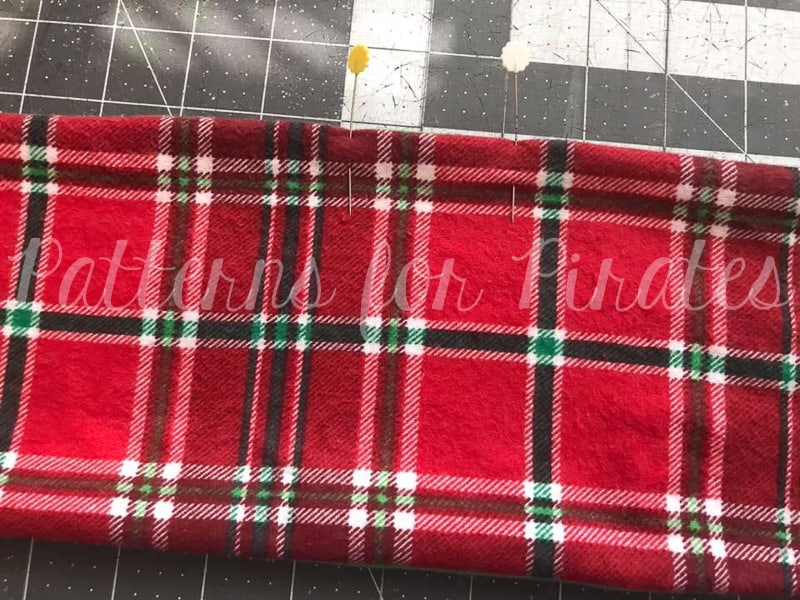
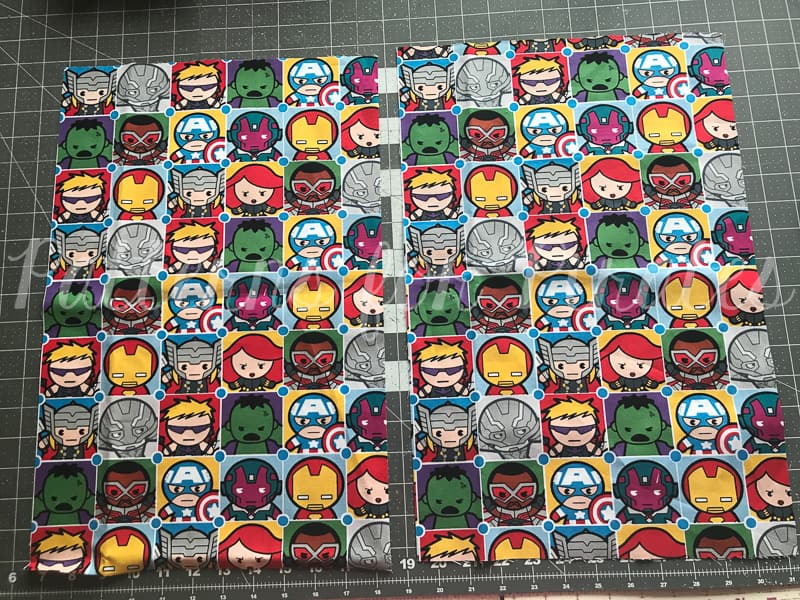
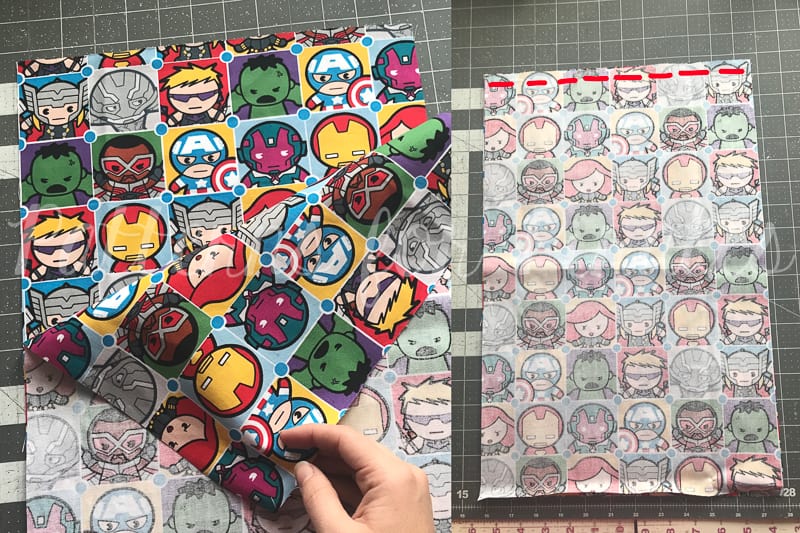
With fabrics right sides together, stitch around entire outside using 1/2″ seam allowance. Leave 3″ opening for turning.
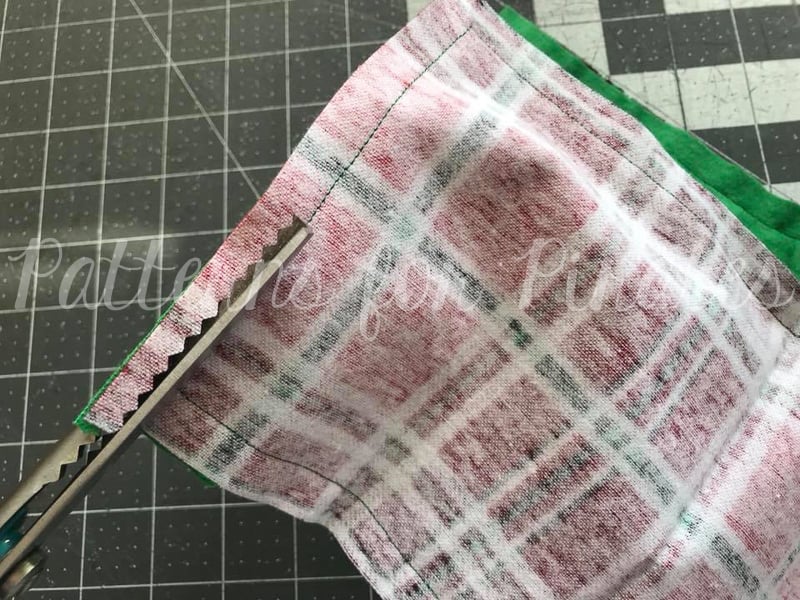
Trim away bulk, making sure not to snip through seams.
Turn right-sides-out, through the opening.
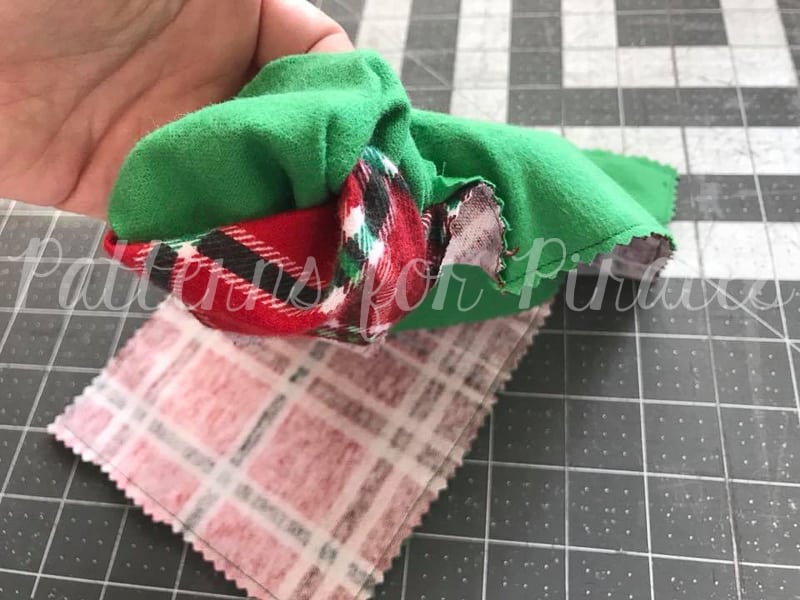
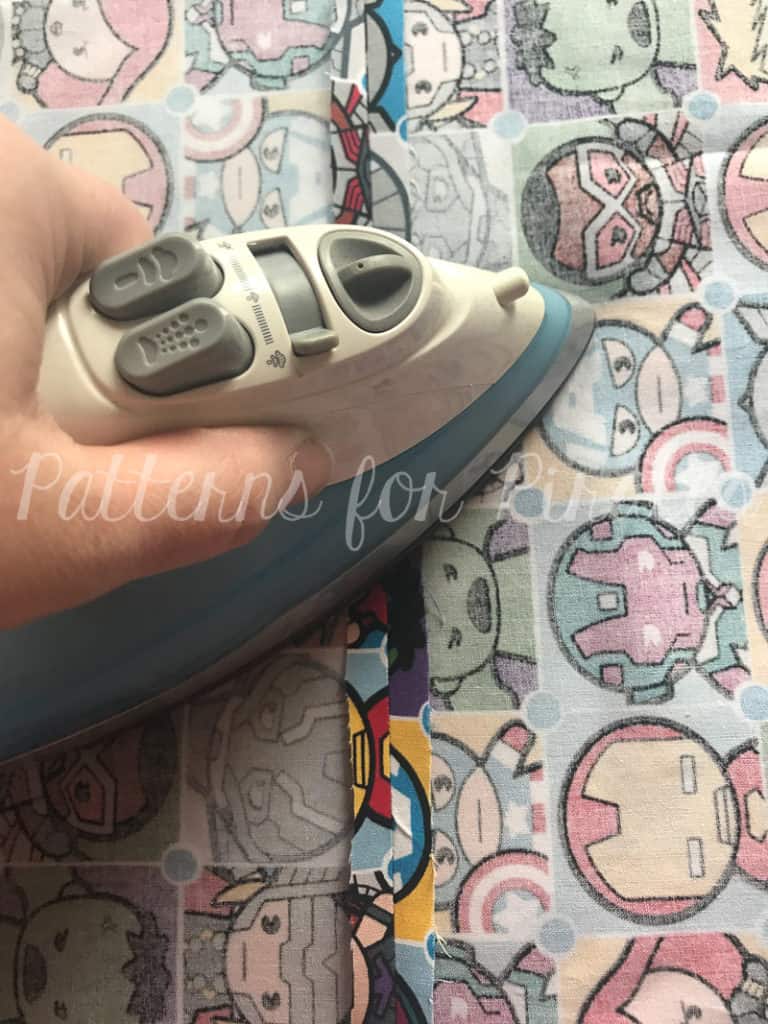
Tuck in your seam allowance, press.
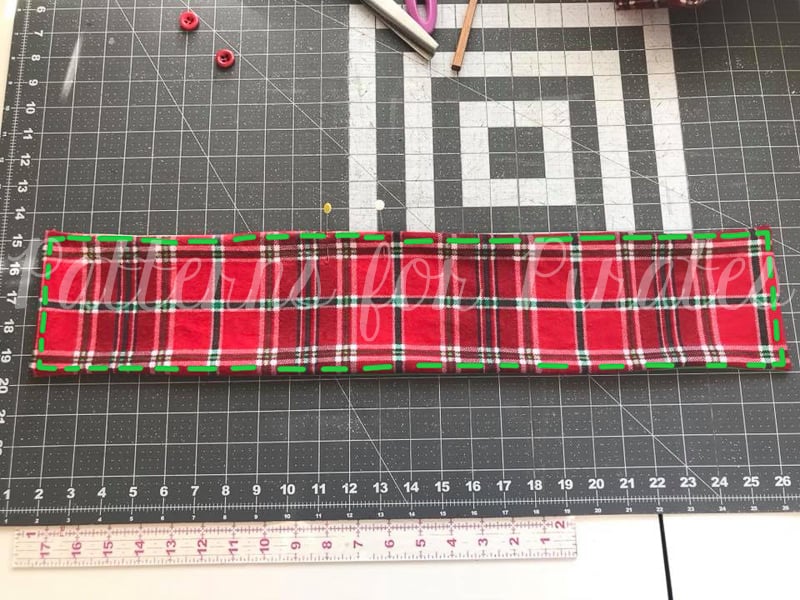
Top stitch along entire outer edge, making sure to catch your opening in there.
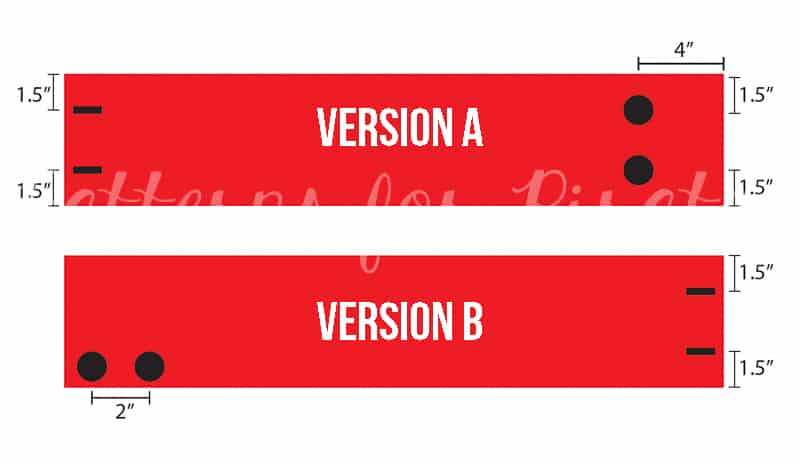
There are two ways you can add buttons/snaps to the cowl to create different ways to wear them. I created an easy diagram to help you with placement for your buttons and button holes, depending on the style you’re wanting for your cowl.
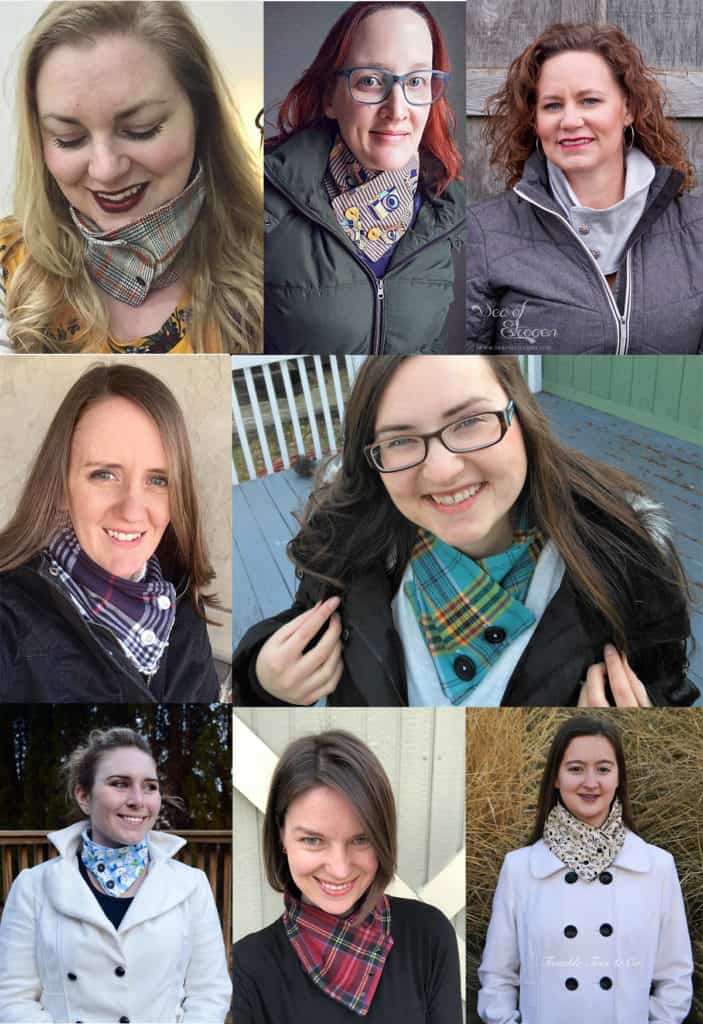
Here’s a quick peek at what some of our testers made for themselves with this pattern:
As always, we would love if you shared your creations with us! Head over to the Patterns for Pirates Facebook Group and show us what you made! Happy Holidays, friends!

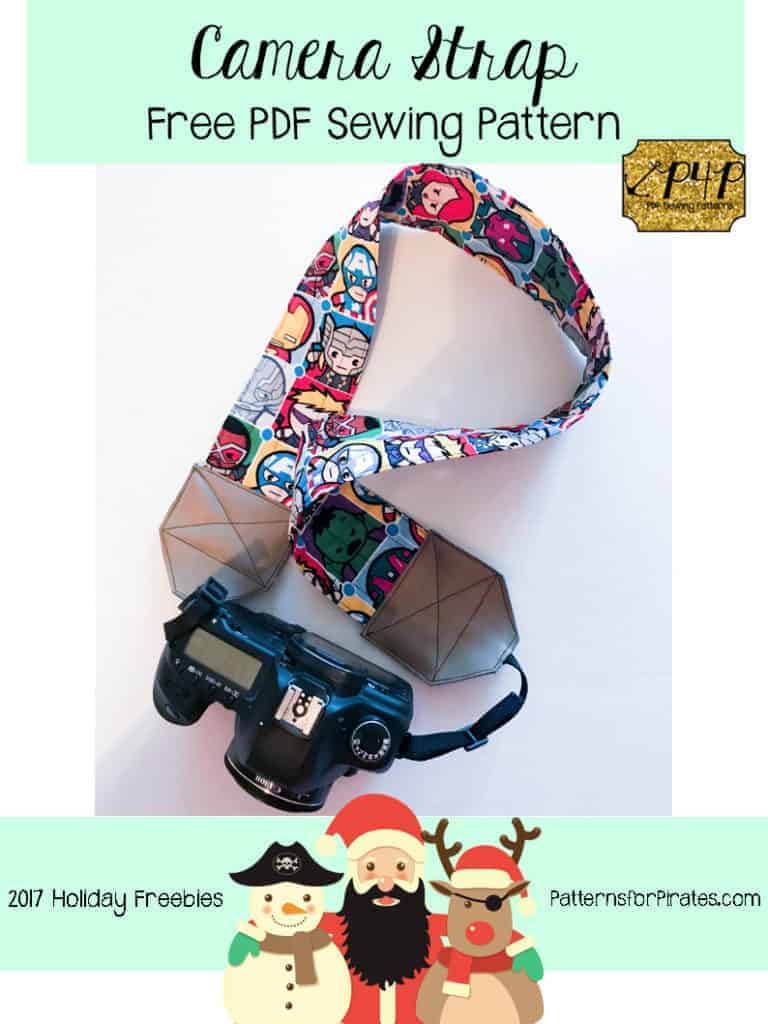
2017 Holiday Freebies: DIY Camera Strap
What? We are on day four of the 2017 Holiday Freebies already? I hope you’re having as much fun as I am! If you need to back and review the past three days, I can wait!
Here are some links: Slouchy Headwarmer / Emoji Pillows / Clothing Size Tags
Now that we’ve covered that, let’s get to today’s free pattern! Sewing and photography seem to go hand-in-hand more often, because we want to share what we’ve made with our sewing community! Why not sew yourself a sweet little strap to wear while you’re using that camera of yours? It’s super easy to do and way more fun than using what came with your camera originally. Let’s get to it!
Prep your pieces, you will need:
- Pattern Piece for Vinyl Ends
- 36″ L x 12″ W Quilting Cotton
- 2 – 12″ cuts of nylon webbing (1/2″ or 3/8″ both work) — I used THIS
- 2 – 1/2″ or 3/8″ sliding adjusters — I used THESE black versions as well as THESE fun colored ones!
- 36 L x 3″ W Fusible Fleece Interfacing
- Small scraps of Vinyl/Pleather
**If you can’t find the nylon webbing / sliding adjusters in your local fabric store, a quick trick is to buy a small dog collar from the dollar store. They tend to have the right width strap, and usually include the adjuster on it as well.
Important: The ends of nylon wedding need to be heat sealed to prevent fraying. Make sure to do this before sewing it to your strap pieces!
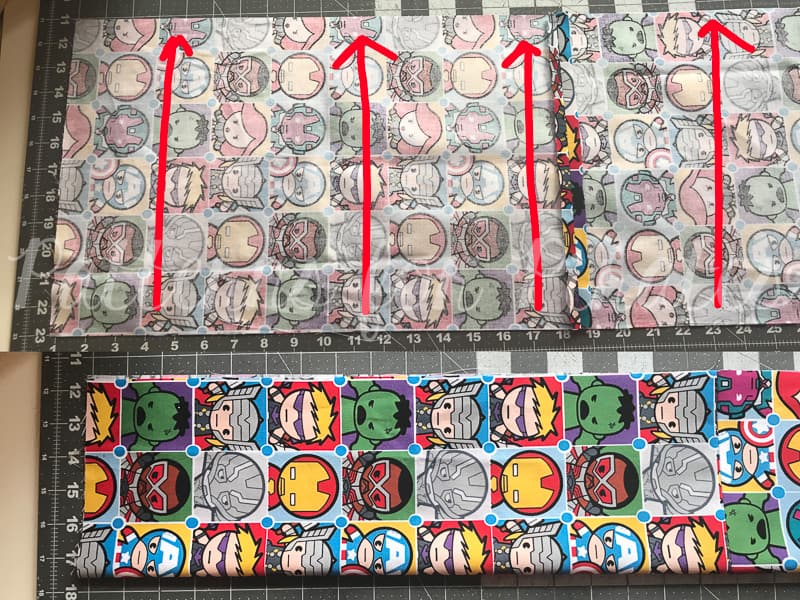
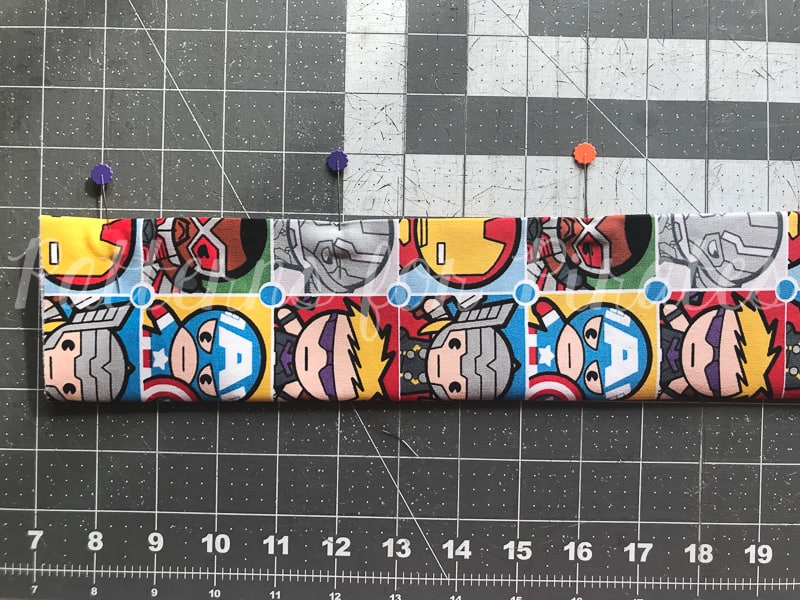
**If your fabric is directional, you will want to cut two pieces for your strap and then stitch them together. Cut two 18.5″ x 12″ pieces from your quilting cotton.
For directional fabric, place your pieces right sides together, and sew along the short edge, using 1/2″ seam allowance.
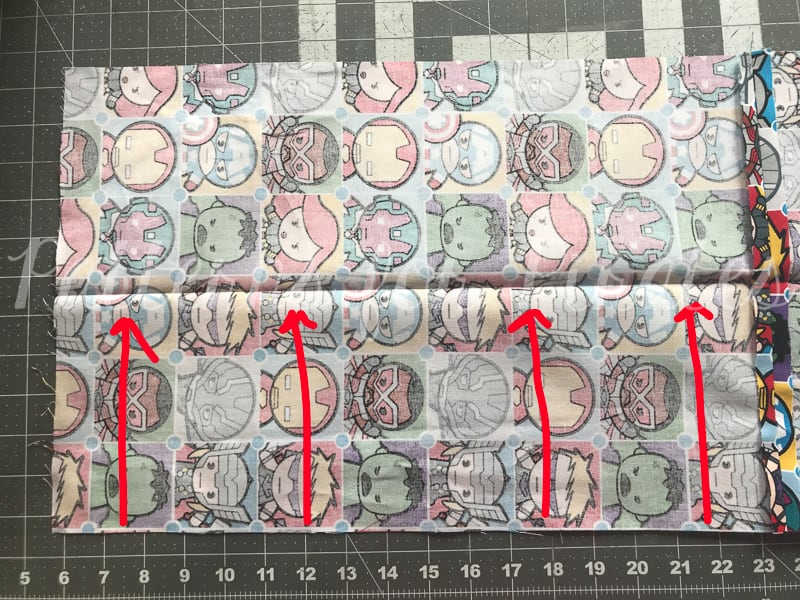
Press open your seam.
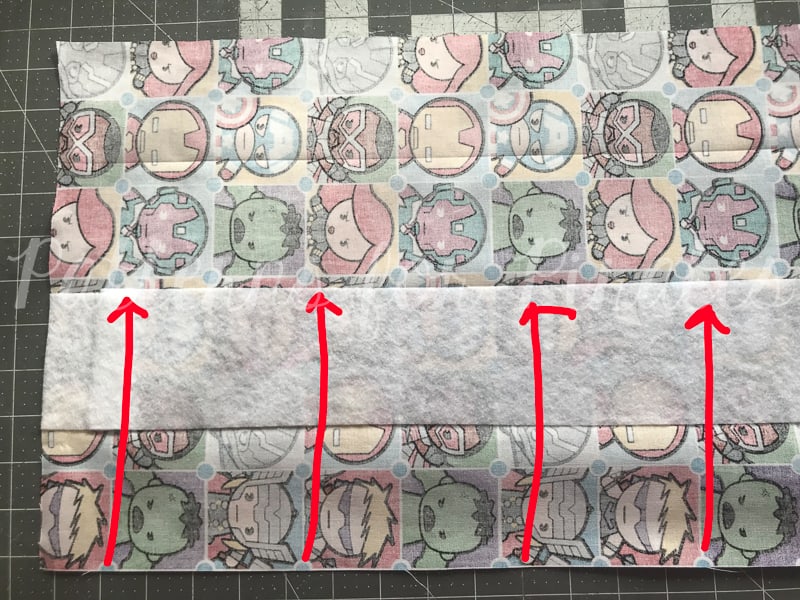
For all straps: Fold your main fabric wrong sides together, meeting the long edges to one another. Press.
Open up your piece and fold one of the raw edges toward the middle crease you just made.
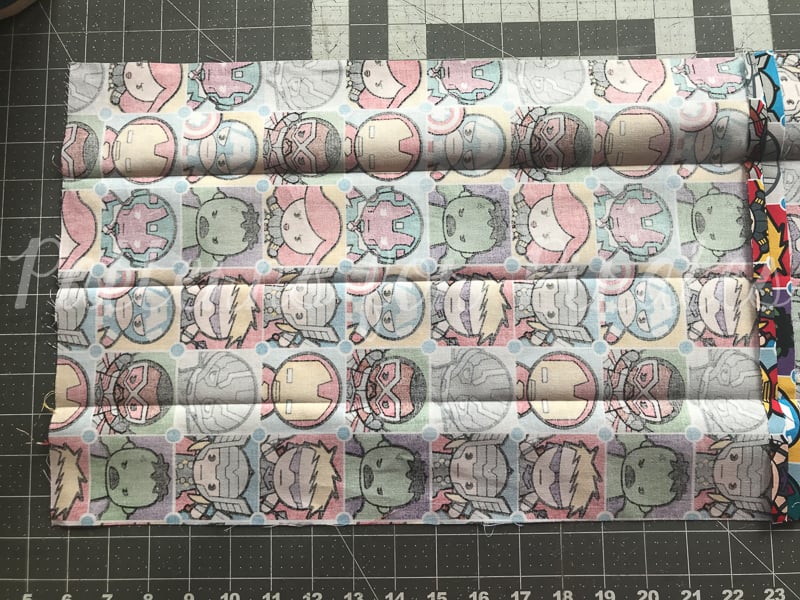
Repeat with the second raw edge. Press.

If you open your piece, you’ll now have 3 creases, spread evenly across four total sections.
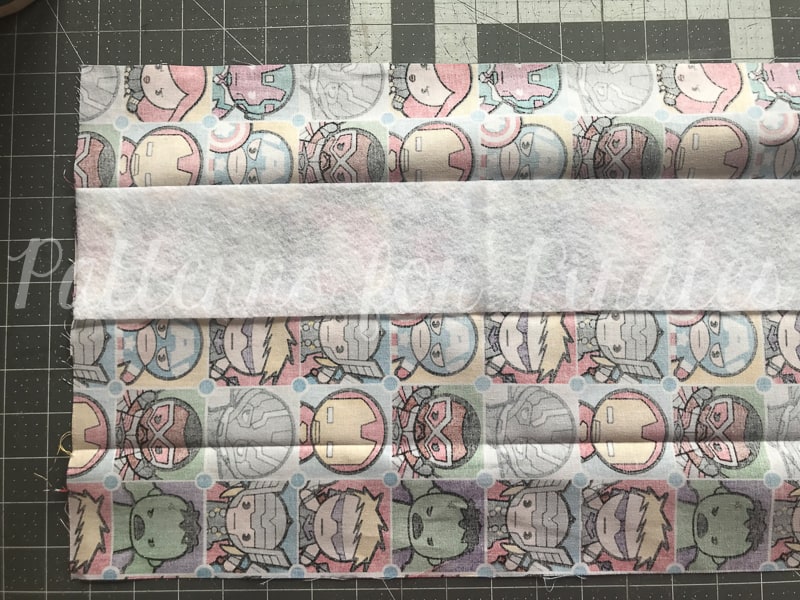
On one of the middle sections, following the directions provided by the manufacturer, iron your fusible fleece to your strap piece.
We will be refolding the strap in the same method as before. Take one of the raw edges and fold it toward the middle crease.
Repeat with other raw edge.
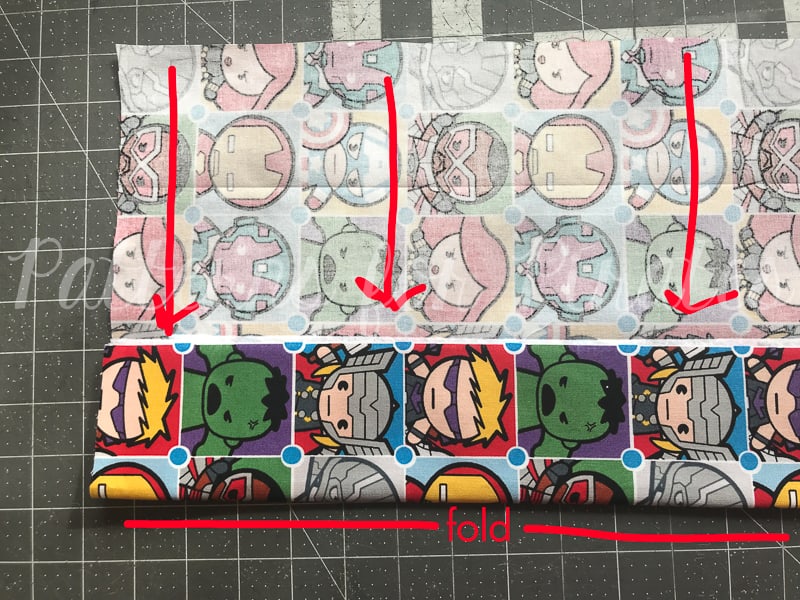
Fold along middle crease, meeting both folded edges. All of your raw edges will be fully enclosed now.
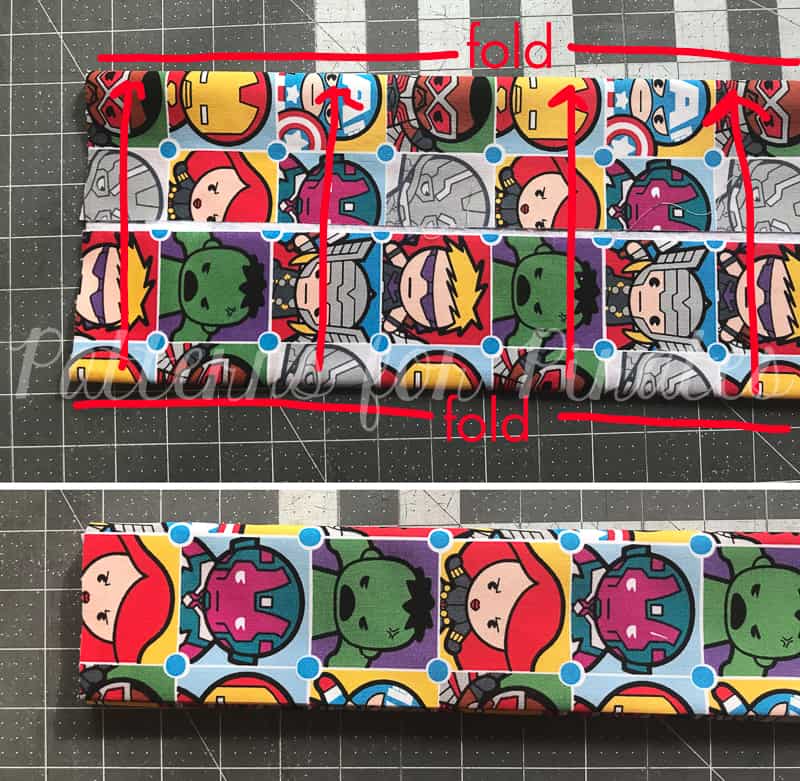
Press, press, press.
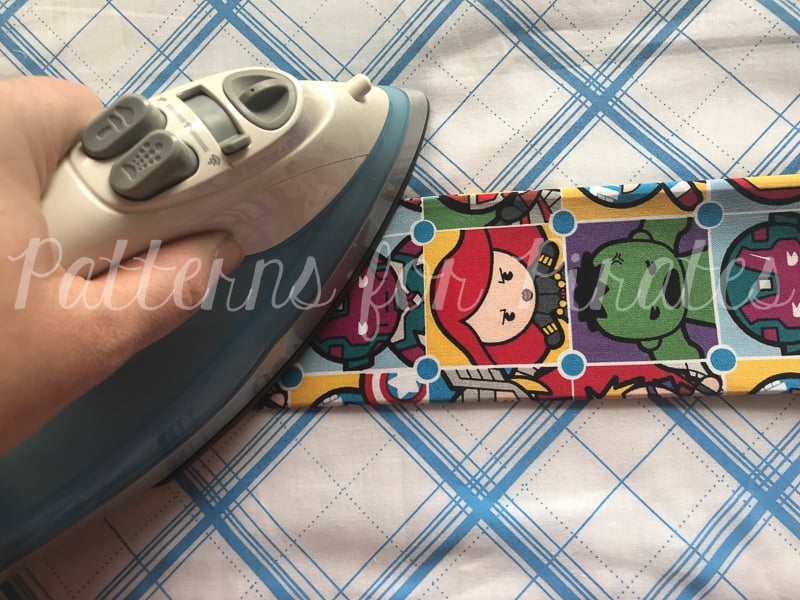
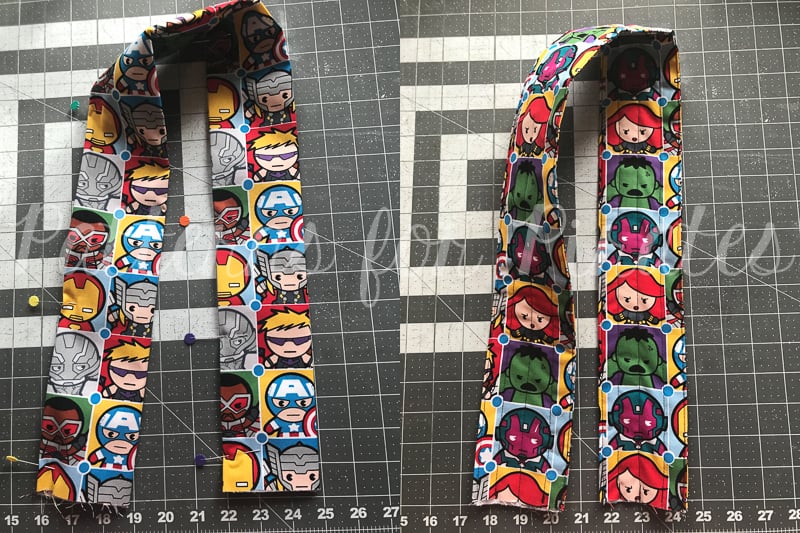
I like to clip/pin my outer edges together, to make sure they’ll align properly when I go to stitch them. Straight stitch along the entire edge you just pinned, getting as close to the edge as you can.
This part is up to you, and how fancy you want to get with your quilting. I like to run an edge stitch along the other long edge. And then three even lines across the rest of the strap. You can stitch as much or as little as you’d like!
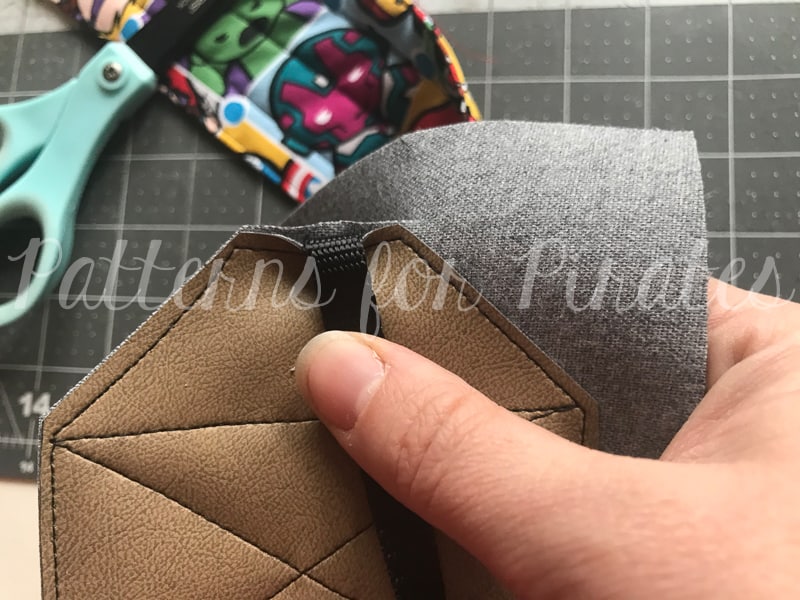
Take your nylon strap and overlap it 1.5″ from the edge of your strap, aligning it directly in the center of the strap.
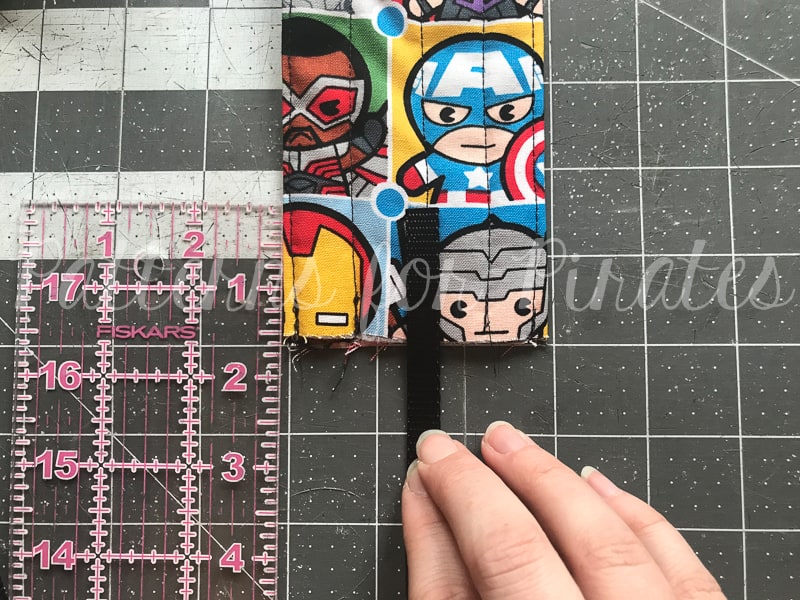
Pin and repeat for the opposite end.
Using a wide zig zag stitch, secure your nylon strap to the end.
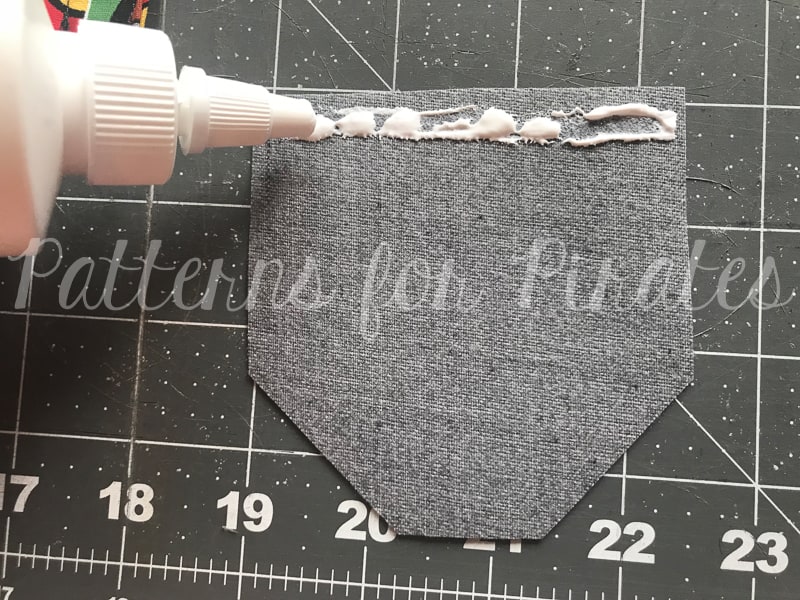
For the vinyl pieces, I recommend to only cut one actual piece — and to have an oversized rectangle for the other. It’s easier than trying to get them to line up perfectly. Especially since vinyl can be fussy to topstitch.

I like to run a line of fabric glue at the top of the vinyl backside. It helps keep it in place when sewing.
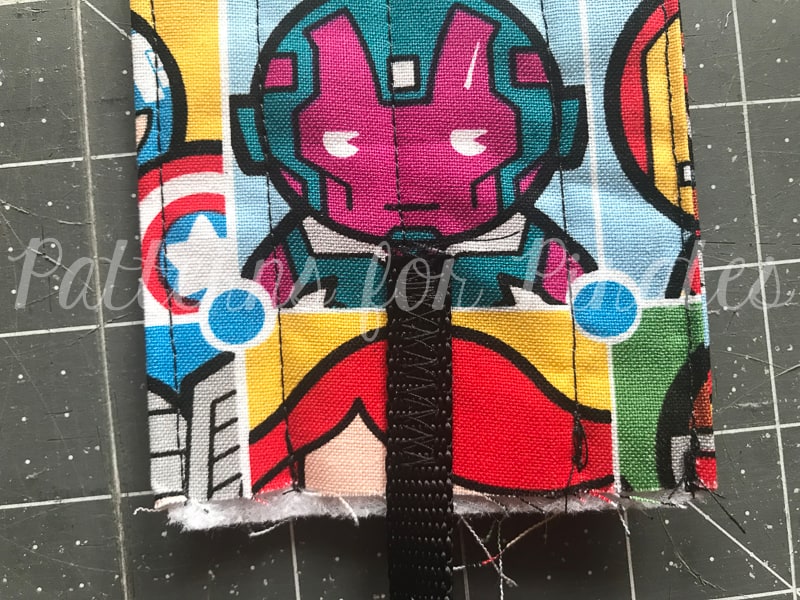
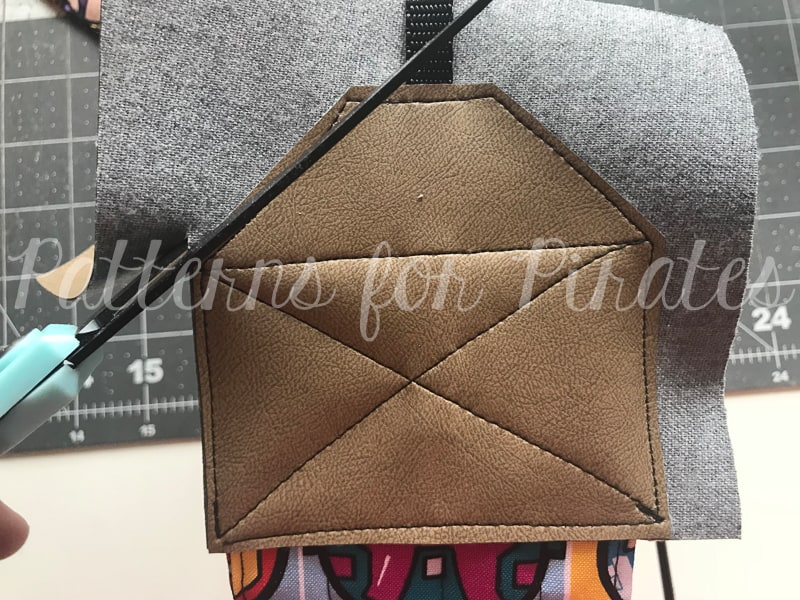
Two inches up from the bottom of your strap piece, lay out one of the vinyl pieces. The vinyl should be slightly wider than your strap.
Flip over your strap.
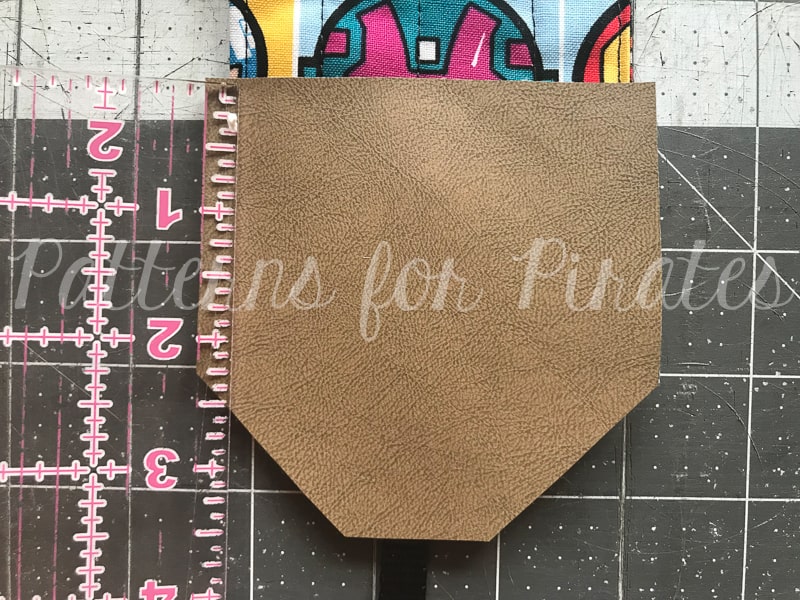
Throw another line of glue on the edge of your vinyl square.
Place it 2″ up from the bottom of your strap.
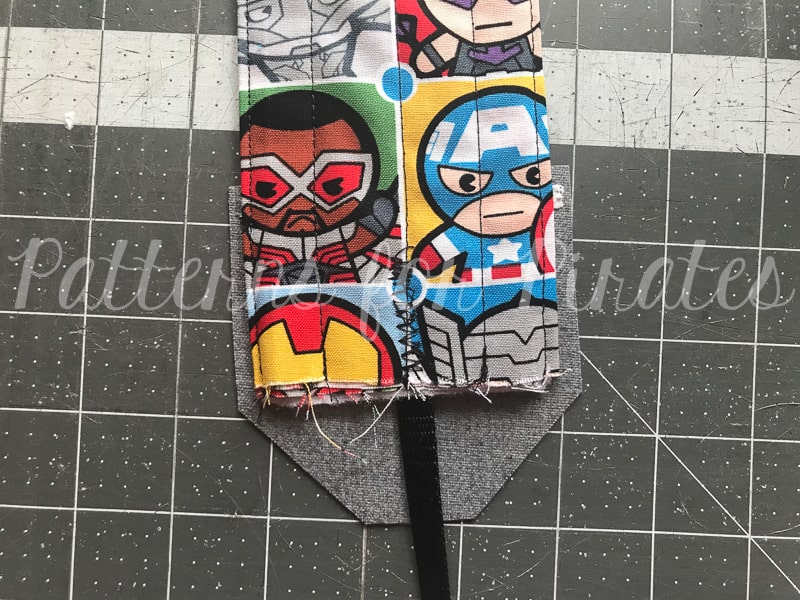
Flip your piece back over and stitch your vinyl on. This is the path I take and it allows for a continuous stitch. You can take whatever path you want. ![]()
I HIGHLY recommend using a teflon foot for this. Vinyl can be a huge brat. I know they carry them at JoAnn Fabrics, or you can snag one on Amazon.
Finished stitches.
Trim the vinyl to match your other pieces.
Be careful not to cut off your nylon strap. Just tuck it out of the way when you’re trimming.
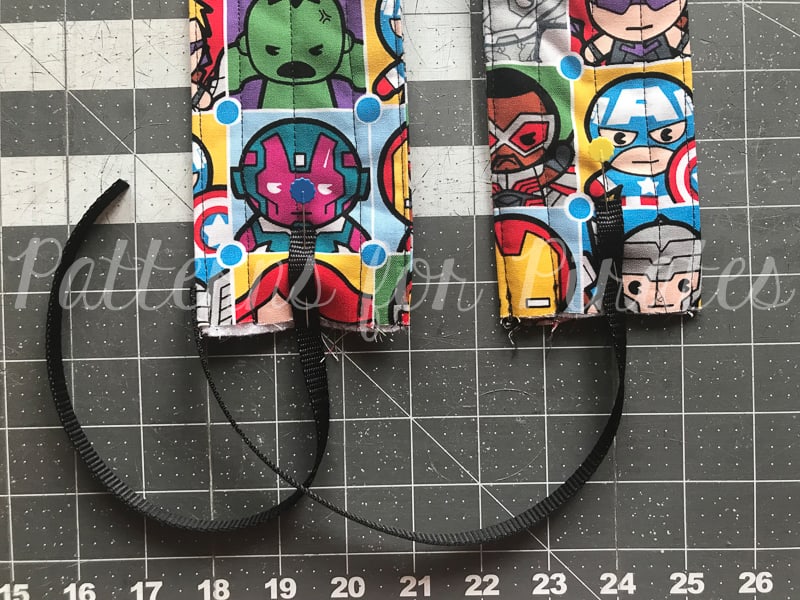
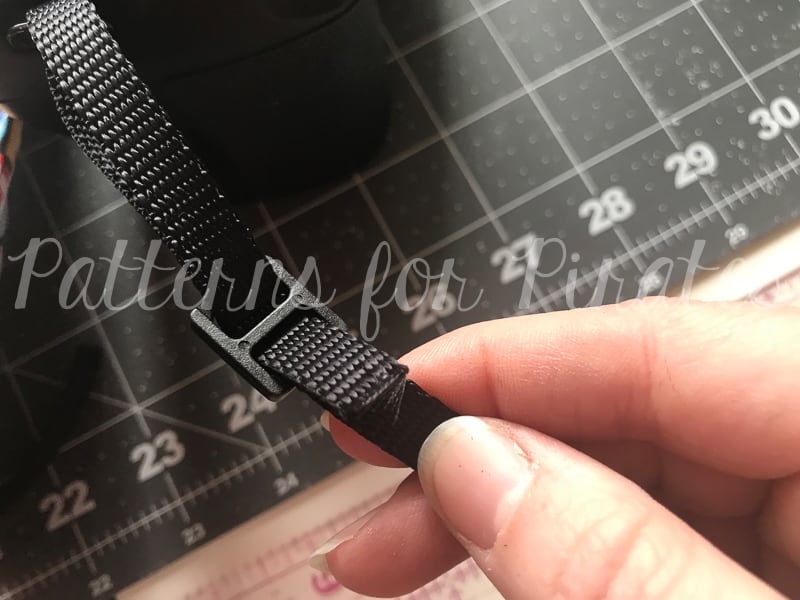
Take your slider.
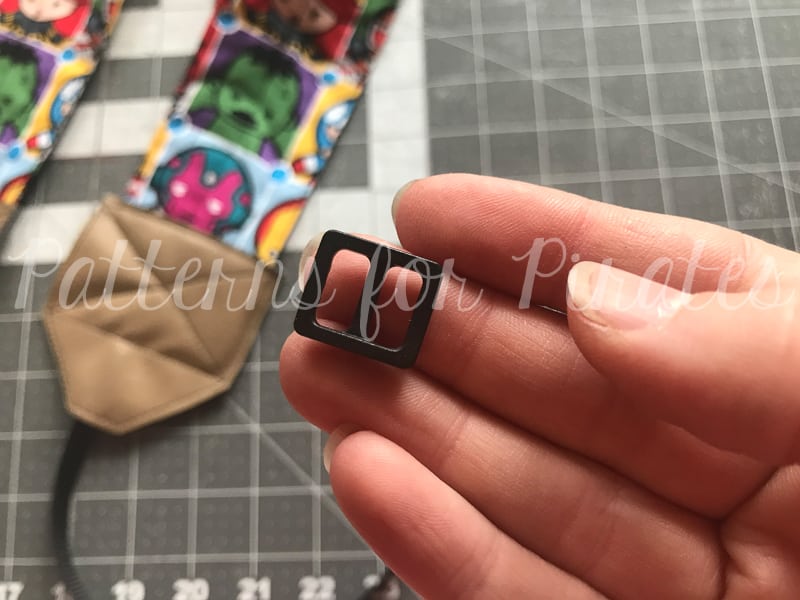
Slide it onto your strap.
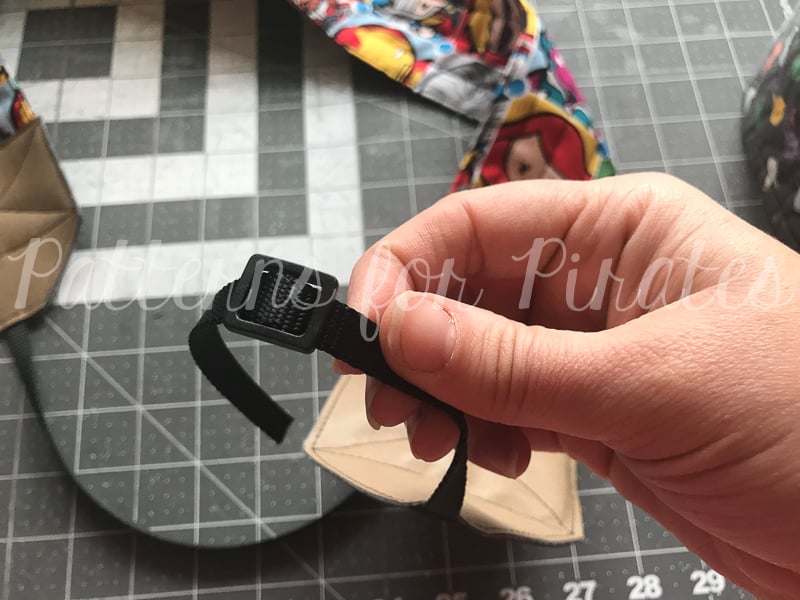
Put the cord in from the bottom-up on your camera.
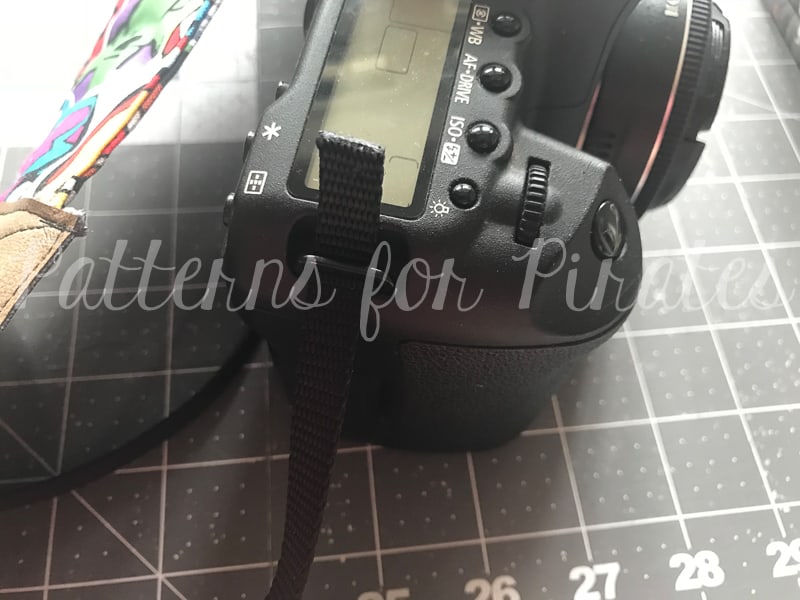
Give yourself a little slack.
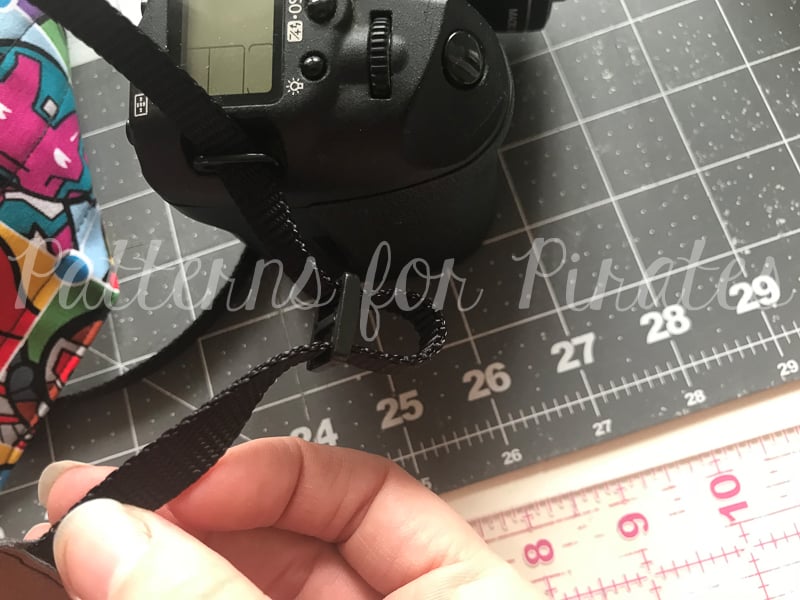
Run the cord back through the bottom and secure the strap to your camera. Easy peasy!
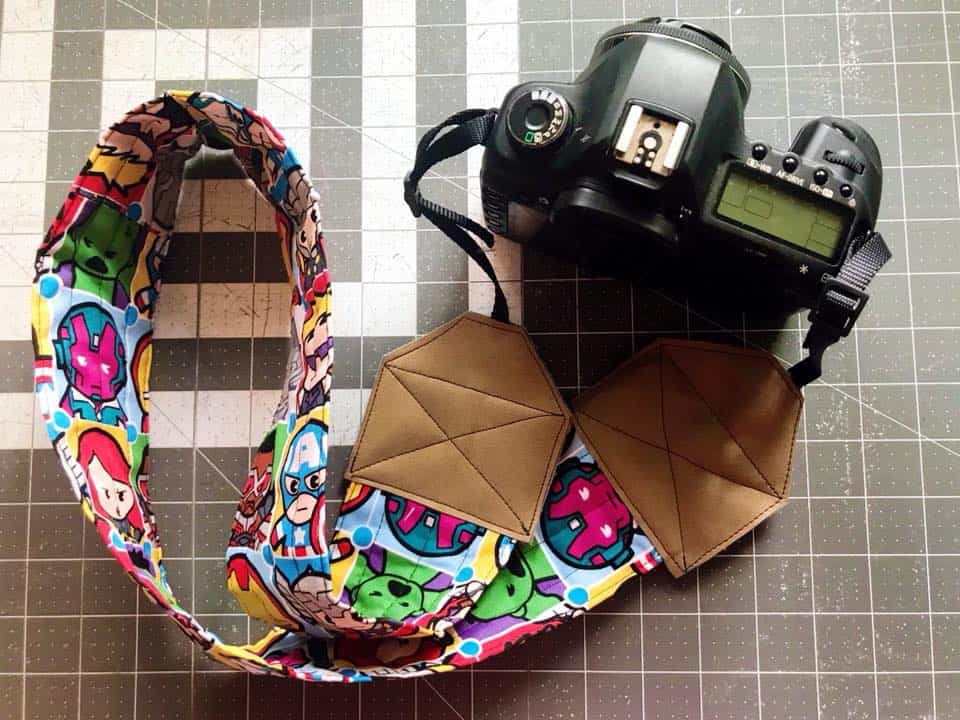
I am SO EXCITED to see your new, stylin’ camera straps! I’ve been using my me-made strap for years now (so has my hubby) and we get compliments on it all the time. I’m betting you will too! Please, if you do make one for yourself, share it with us in the Patterns for Pirates Facebook Group!
**Also, as a quick note, there are some affiliate links scattered within this post. I make a small commission for purchases made through those links, but I only link products that I’ve used and actually recommend myself.
2017 Holiday Freebies :: Size Tags
We are back for more fun with day three of our 2017 Holiday Freebies! (In case you missed the last two…check out our Slouchy Headwarmer + Emoji Pillows and then come right back!)
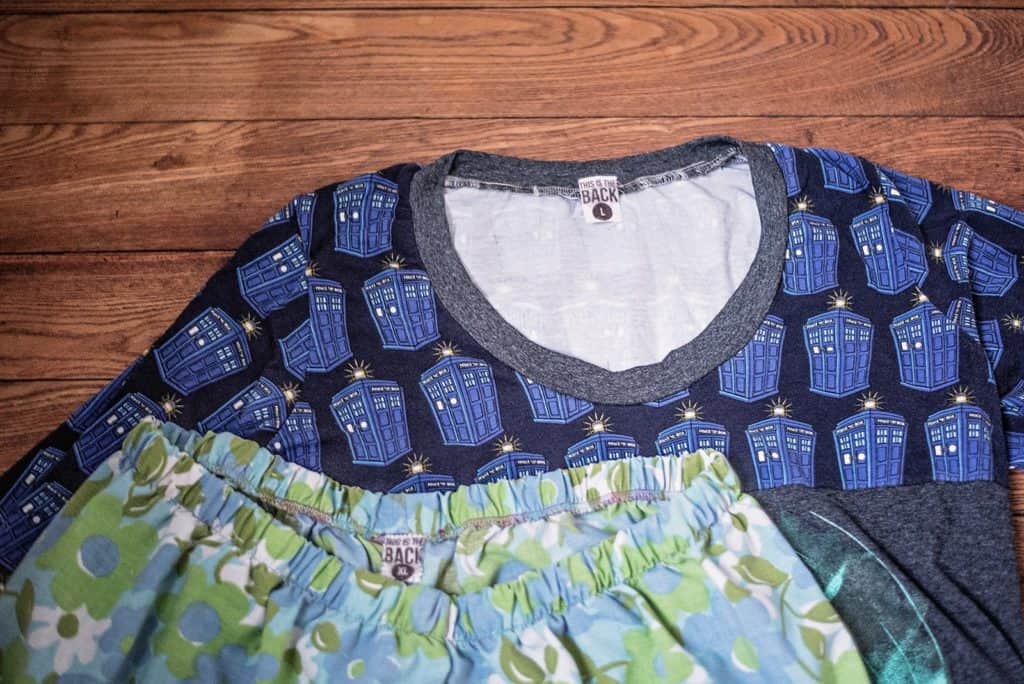
One of the only complaints I get in my household about the handmade clothes I make for my husband and son are that there aren’t tags. Apparently it’s not as easy for everyone as it is for us to find the back of your shirt! We are helping to change that with these cute clothing size tags, so now the only complaint should be that they don’t have enough of your handiwork hanging in their closets!

I made the “THIS IS THE BACK” tags for my own family’s use a while back and thought I might share it with my P4P friends! And then we couldn’t leave you with just one (kinda snarky) design, so I whipped up two more styles to go along with it. I think a favorite with our holiday help were the “Size: Unique” set. Now you can label your clothing properly with things like: beautiful, sassy, strong, healthy, etc. Kinda fun, right?
You can go pick up your copy of these designs right HERE.
Don’t own a die cutting machine like a Silhouette or Cricut? No sweat! We have included an extra file type (PNG) that will allow you to work with the designs however you’d like. We even had someone print on fabric using their at-home printer and sewed the labels in that way. Pretty clever, huh?

Here are some other ideas:
— Go old school and use an iron on transfer paper and your at-home printer.
— Use Heat Transfer Vinyl and your die cutter.
— Try your hand at Freezer Paper Stenciling. (Dana from Made Everyday has a great tutorial HERE.)
And just as a handy little tip from someone who has been using tags like these for a while now, I like to cut a bunch of tags on my Silhouette, weed them, lay them on a piece of parchment paper and then cut them out. That way, they’re ready to go when I need them. No fuss!

As always, we love to see what you make from our goodies! Please feel free to share with us over in the Patterns for Pirates Facebook Group! And make sure to come back tomorrow to see what else we’ve cooked up this week for you! Happy Holidays, Friends!
2017 Holiday Freebies :: Emoji Pillows
We are back for Day 2 of our 2017 Holiday Freebies! (In case you missed yesterday’s, head here to learn how to make this awesome Slouchy Headwarmer!)
I don’t think you’ve braced yourselves enough for today’s freebie, though. If you’ve got a kiddo (or a kid at heart!) on your holiday gift list, we just might have the perfect solution for you: EMOJI PILLOWS!

These pillows come out to be 12″ tall.
You will need:
— Emoji Pillow pattern pieces (found HERE)
— small amounts of yellow, red, black, and/or brown fabrics.
— fiberfill (aff link)
Recommended fabrics: flannel, fleece, sweatshirt fleece, kona cotton, quilting cotton, etc.
**Optional, but highly recommended for woven fabrics that can fray (affiliate links):
— If you plan on finishing your face pieces with stitching: Wonder Under Sewable or Heat n Bond Iron-On Sewable Adhesive, etc. are great because they are machine safe and won’t gunk up your needles.
— If you don’t plan on stitching the face pieces to the pillows: Heat ‘N Bond Ultra Hold Iron-On Adhesive, etc. are better since they tend to have a stronger hold. You just don’t want to stitch through those!
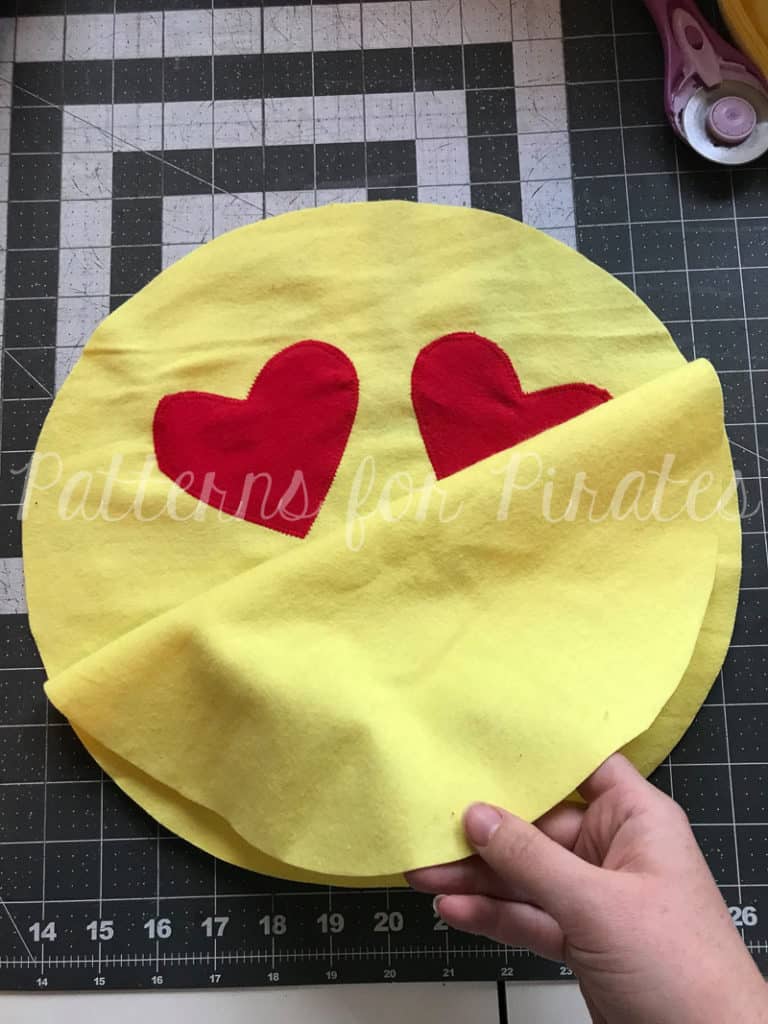
Heart Eye Emoji Pillow:
- Cut 2 Heart Eyes
- Cut 1 Mouth
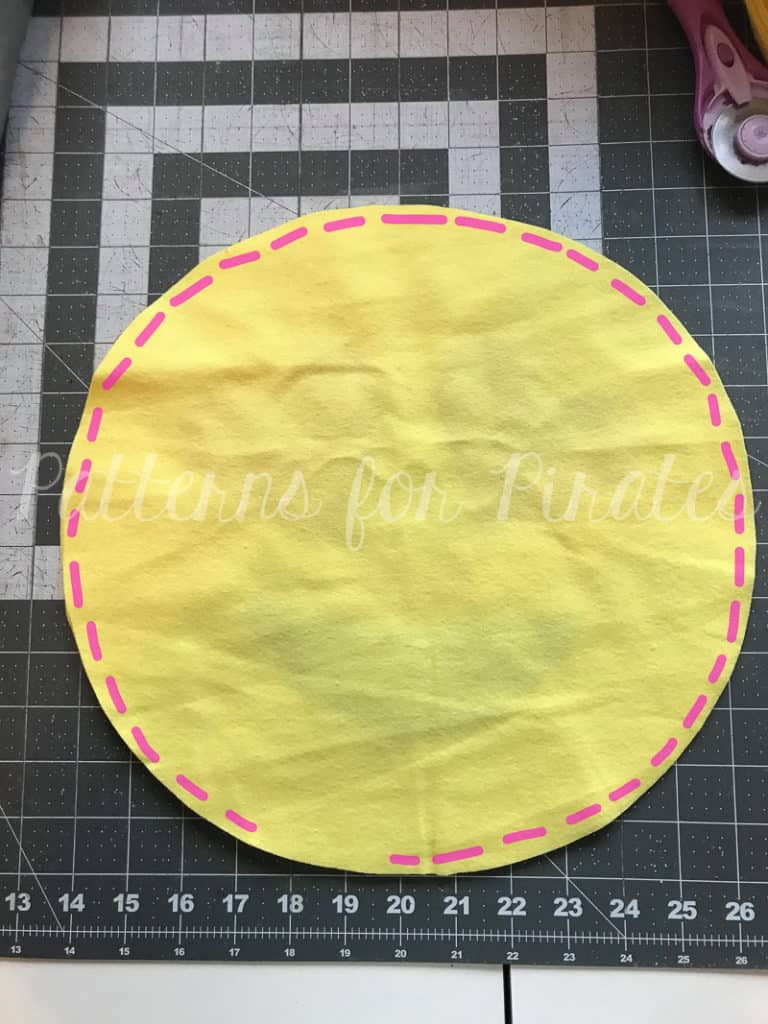
- Cut 2 Main Pillow Pieces
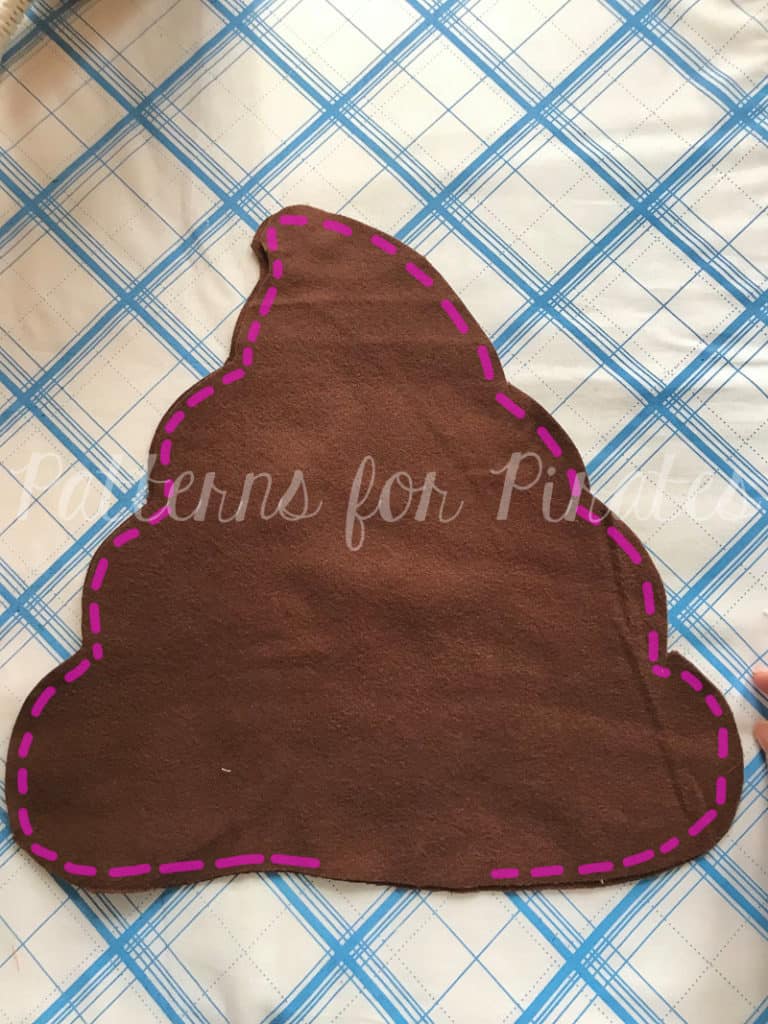
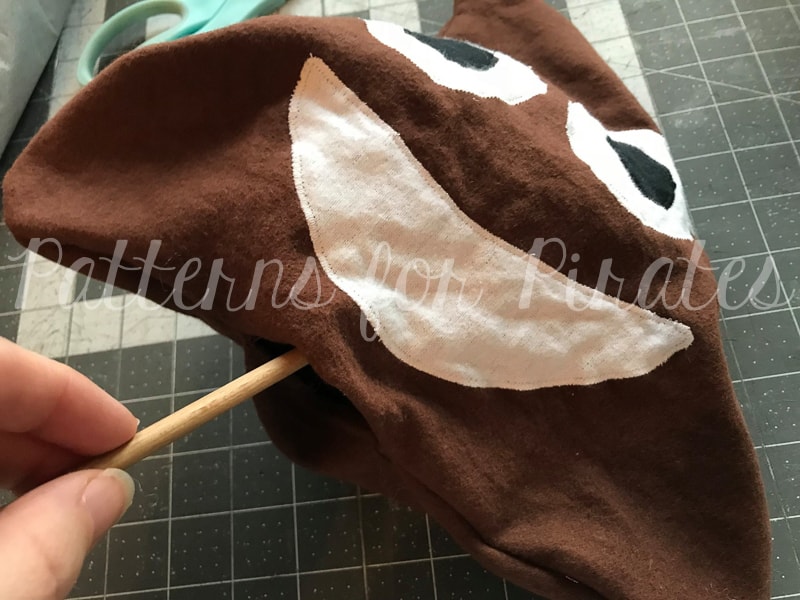
Poop Emoji Pillow:
- Cut 2 Outer Eyes
- Cut 2 Inner Eyes
- Cut 1 Mouth
- Cut 2 Main Pillow Pieces
Sleepy Emoji Pillow:
- Cut 2 Sleepy Eyes
- Cut 1 Mouth
- Cut 3 Z’s
- Cut 2 Main Pillow Pieces
Sunglasses Emoji Pillow
- Cut 1 Sunglasses
- Cut 1 Mouth
- Cut 2 Main Pillow Pieces
ALL MAIN PILLOW PIECES HAVE 1/4″ SEAM ALLOWANCE.
**THERE ARE NO SEAM ALLOWANCES ON THE FACE PIECES, AS THOSE ARE ALL APPLIQUED OR IRONED ON.
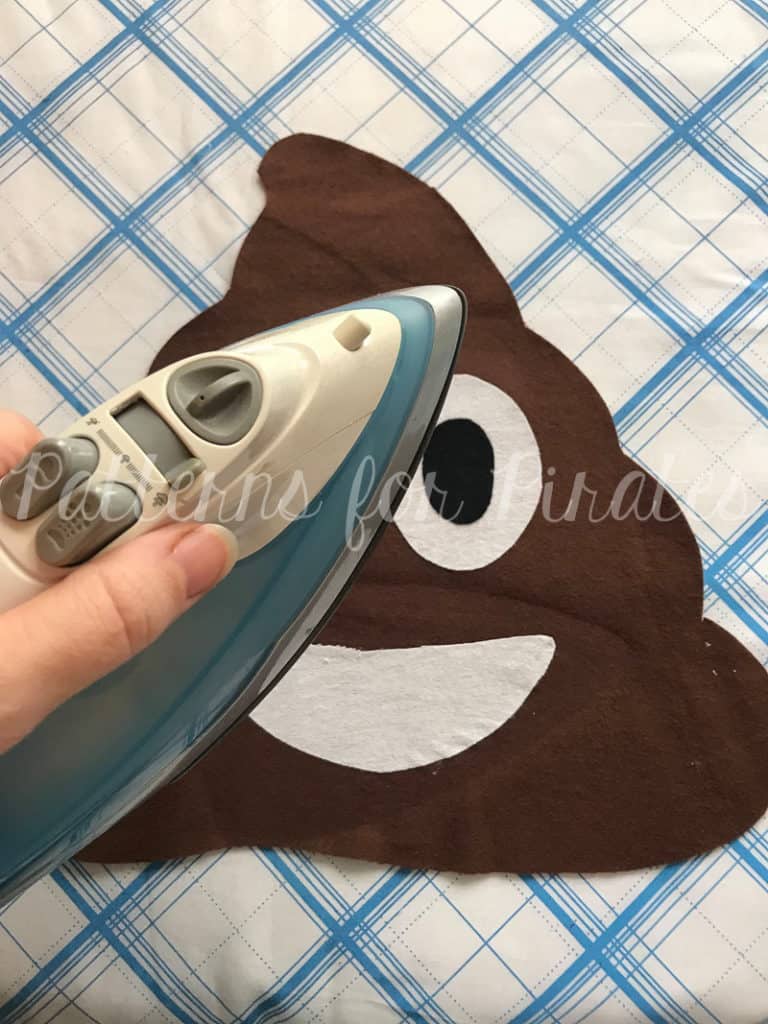
Iron pieces to interfacing according to instructions. If using an iron-on method only, apply your face pieces directly to one main pillow piece.
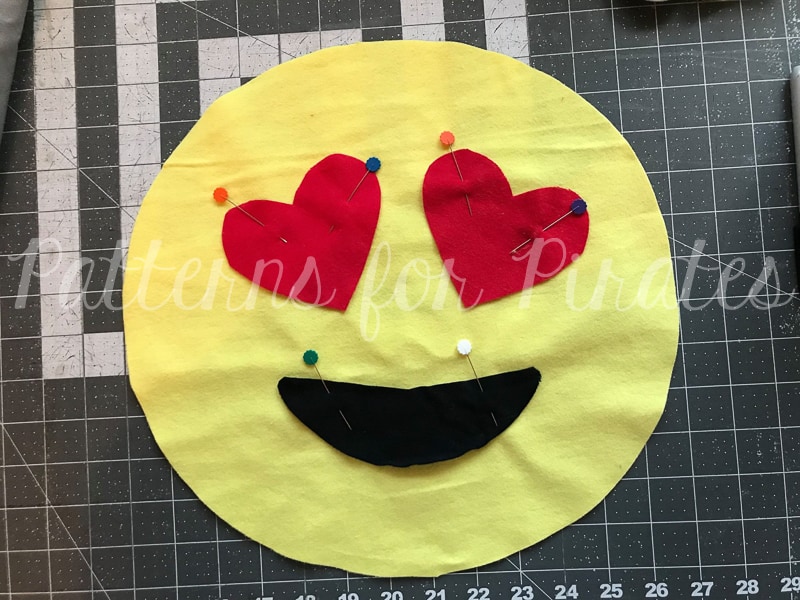
If using the applique method, pin your face pieces into place and zig zag stitch around pieces, securing them to the pillow piece.
Lay your main pillow body right sides together.
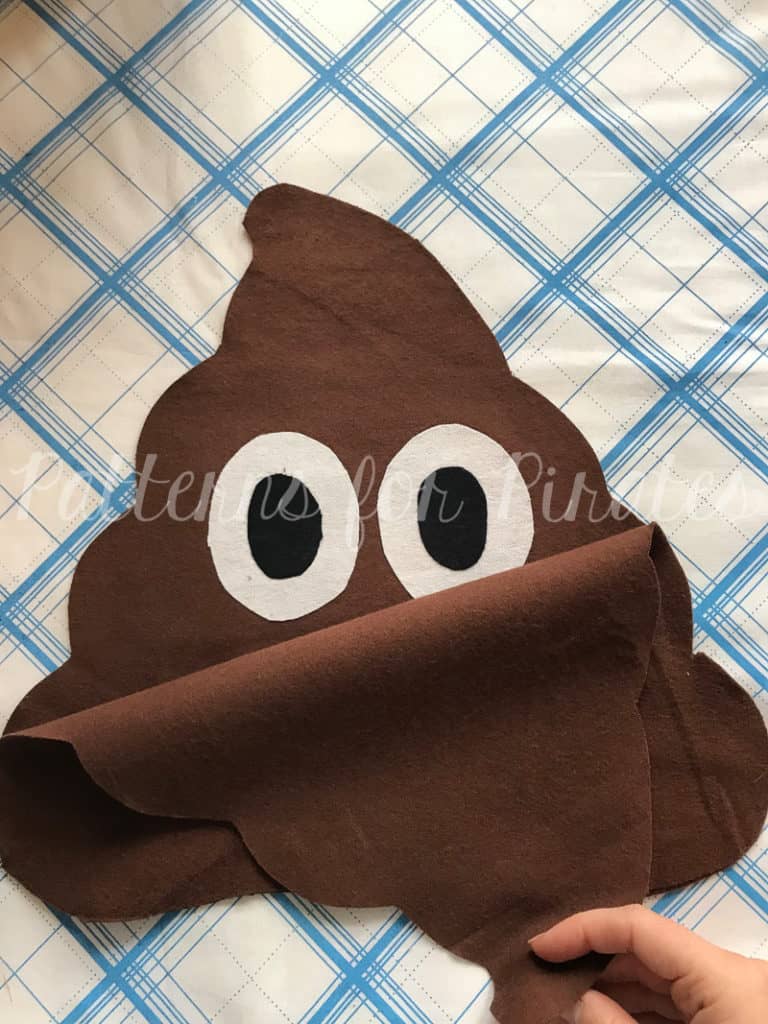
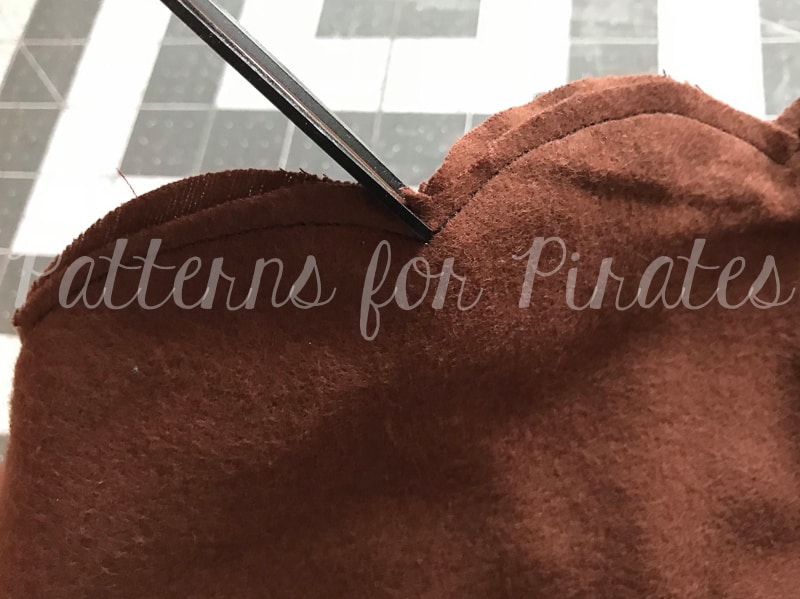
Turn pillow right-side-out, through opening you’d left in the bottom edge.
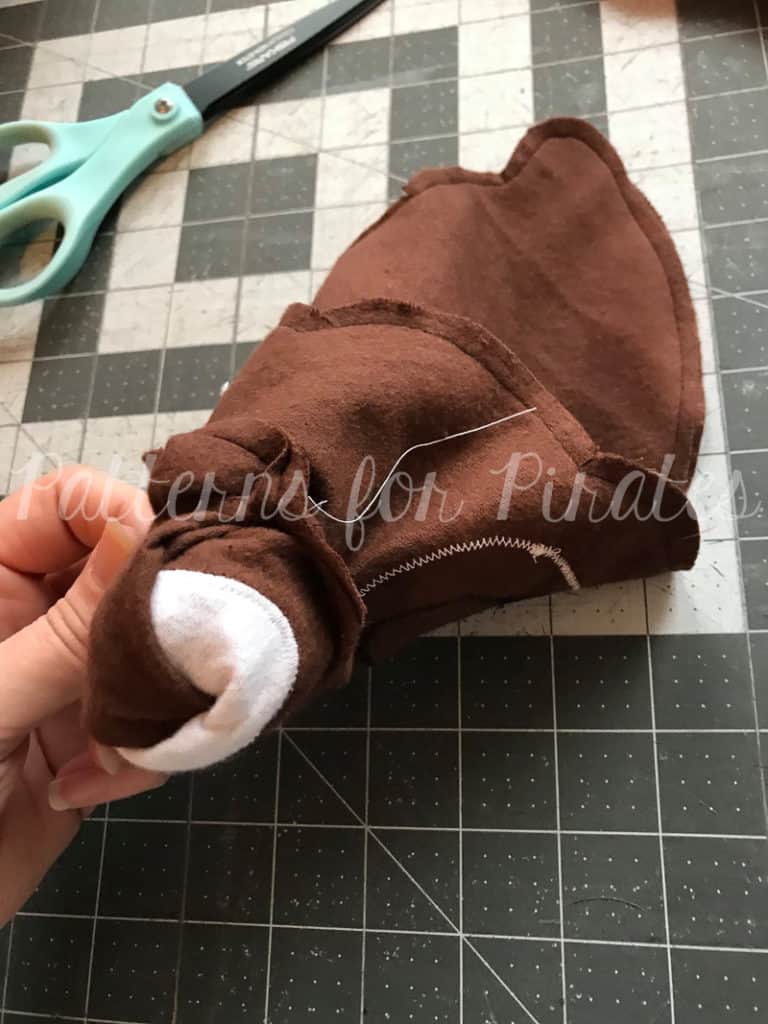
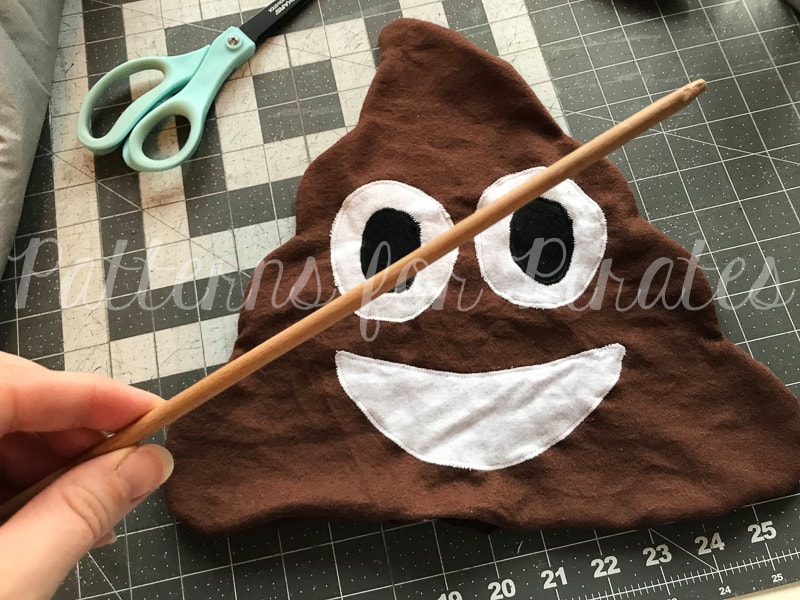
I like to use a wooden dowel to push out edges and make sure everything is turned properly.
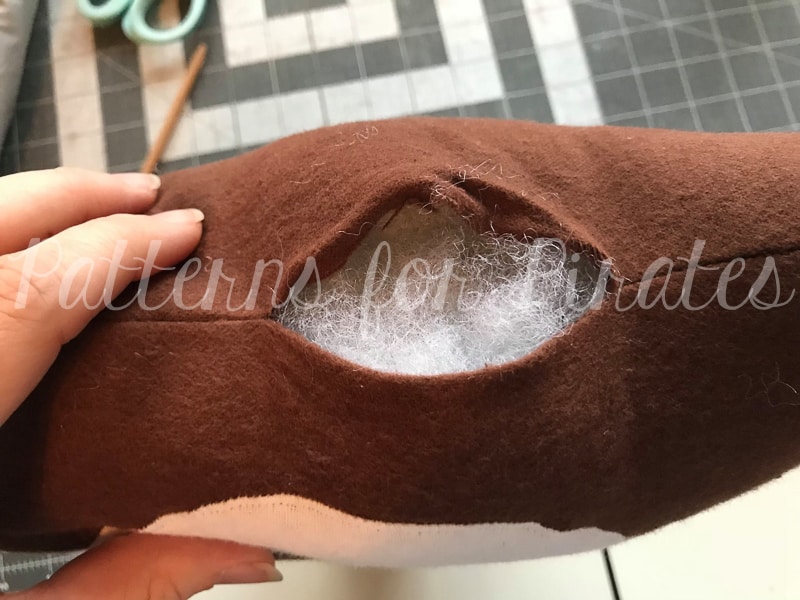
Grab your fiber fill.
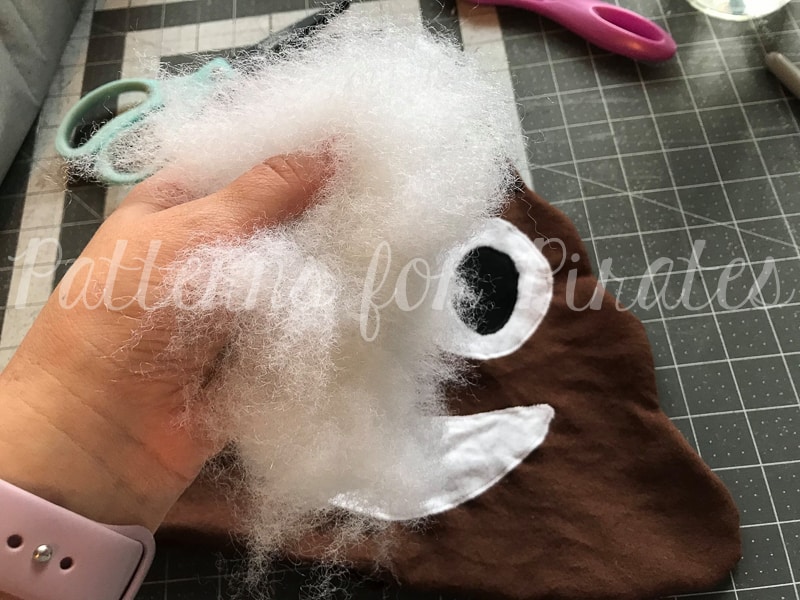
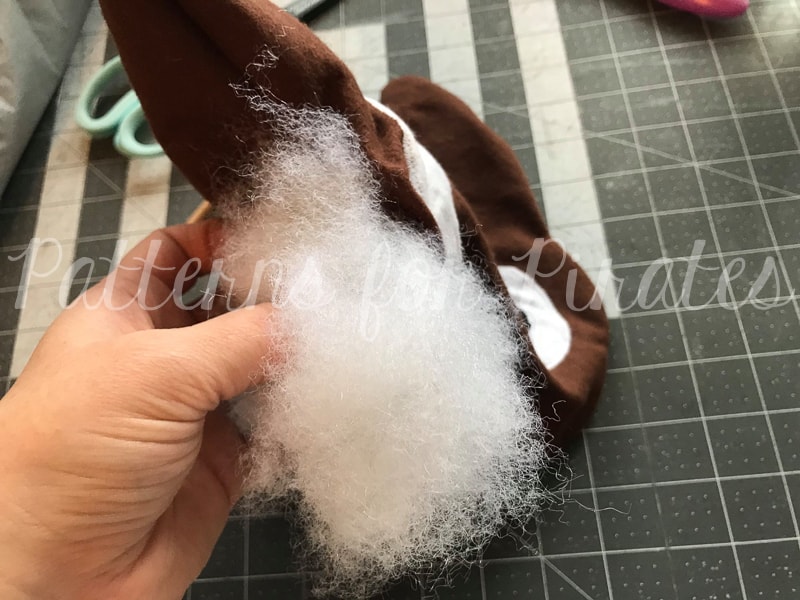
Start filling your pillow, through the opening at the bottom. I also like to use the wooden dowel to help move the fiber fill around.
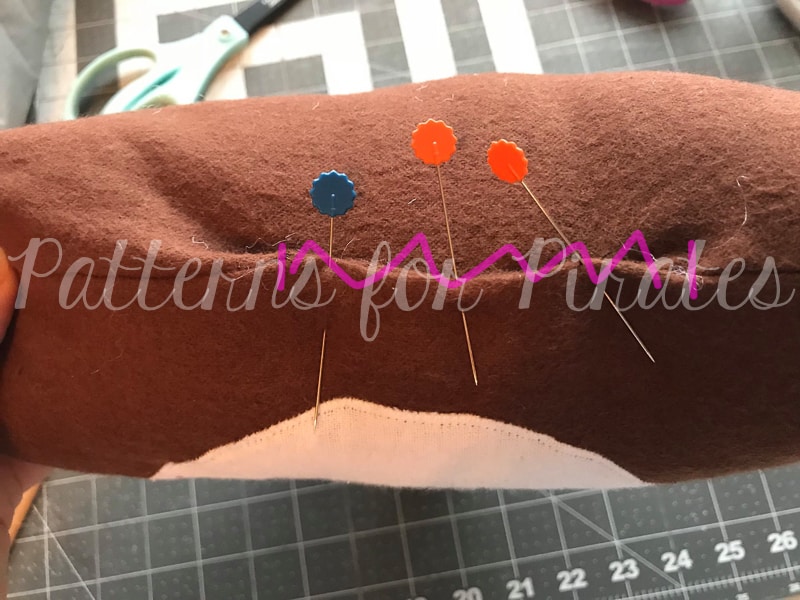
Pin and hand stitch the opening shut, using your favorite method.
You’re all done! I cannot wait to see your versions of the Emoji Pillows! Don’t forget to share your finished projects in the Patterns for Pirates Facebook Group! (I have this strange feeling that my feed is going to be FULL of poop emojis soon, haha!) Happy Holidays, friends!
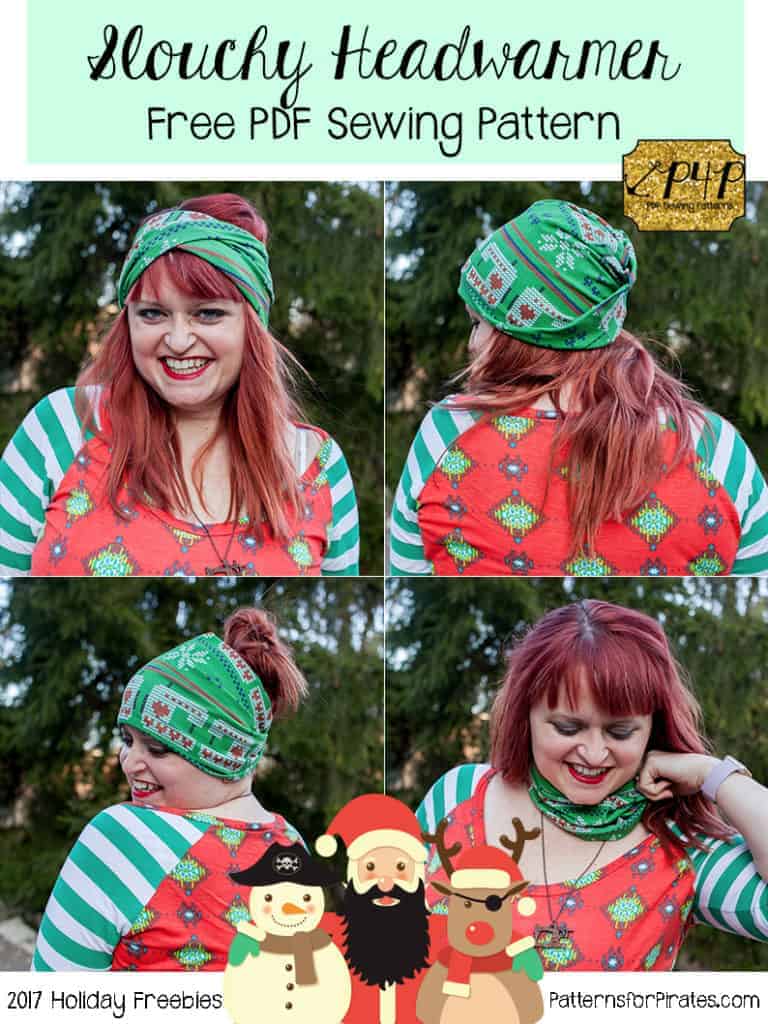
2017 Holiday Freebies :: Slouchy Headwarmer
I. Am. So. Excited.
We are kicking off another year of P4P Holiday Freebies and today is the first of FIVE days of freebies. I hope you love each and every one of them as much as I do. We brainstormed pretty hard to find things that were unique, quick to make, and totally giftable for people on your holiday lists. (And if you’re on your own holiday list, we don’t judge at all!) Today’s freebie is like four-in-one! It’s a slouchy headwarmer that can convert into a headband, hat, cowl, and messy bun hat!
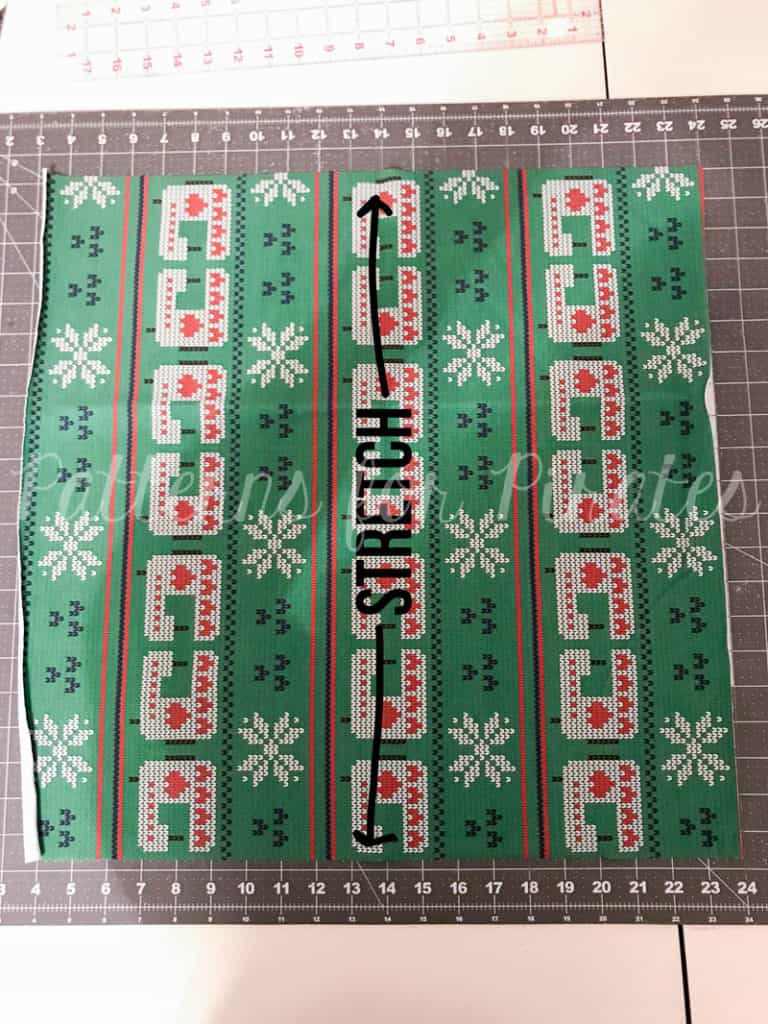
Suggested fabrics: Brushed Poly, Rayon/Spandex, (some) Sweater Knits, Cotton Lycras, etc. The fabric has to have a really good stretch and recovery factor.
Cut square: 20” wide x 20” long.
**The average woman’s head size is 21″ in circumference. If your head measures smaller/larger than this, it’s easy to adjust accordingly. I also recommend to add an inch or two if you’re using a thicker cotton/lycra blend or something with a high spandex percentage, as it can be extra tight and end up a little uncomfortable if it’s too tight.
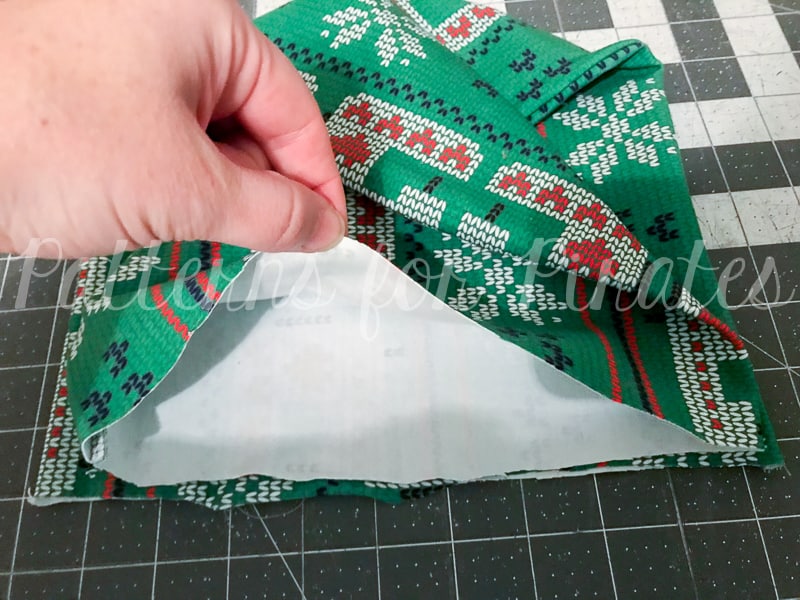
Fold in half, right sides together. Stitch with 1/2” allowance. Turn right side out.

Fold top right corner to meet bottom left corner.
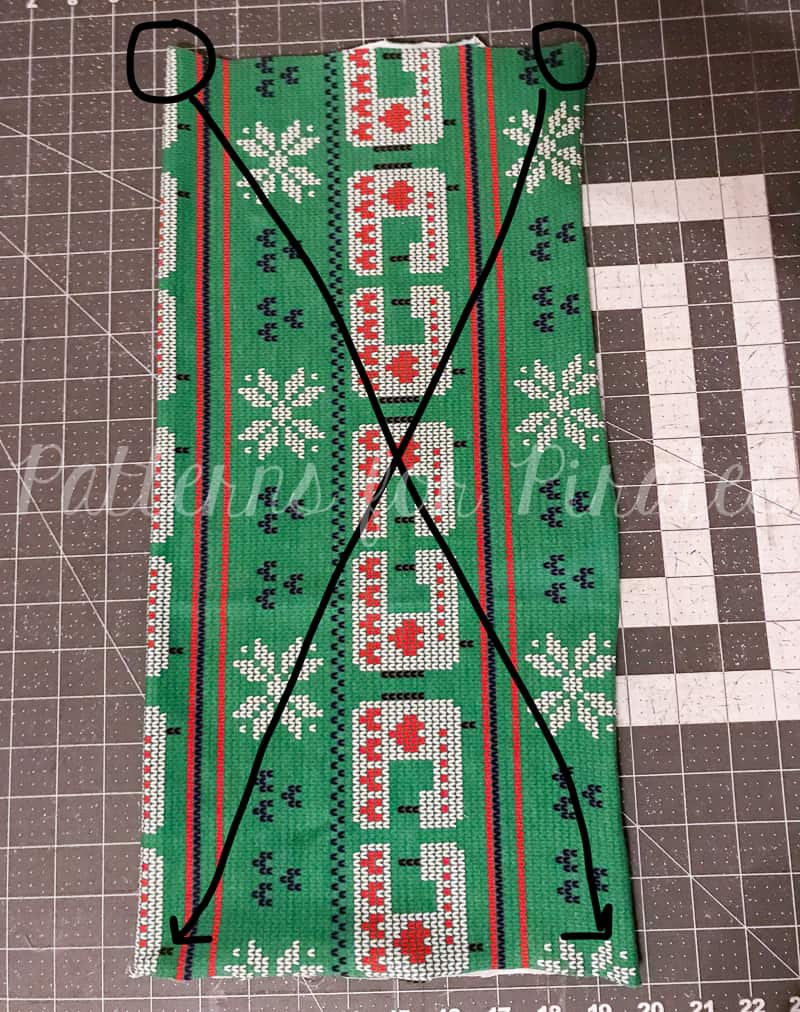
Grab the outer corner (which was top left corner before we folded in the last step) and have it meet the right bottom corner.
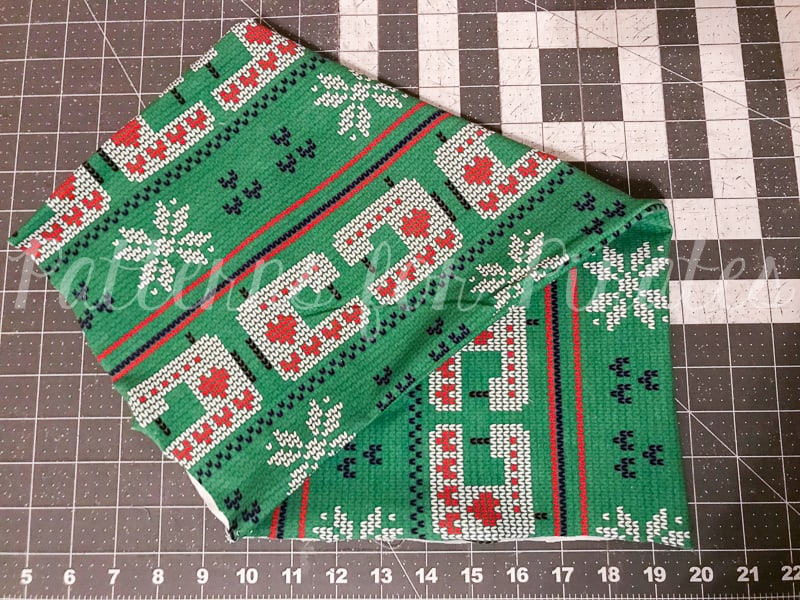
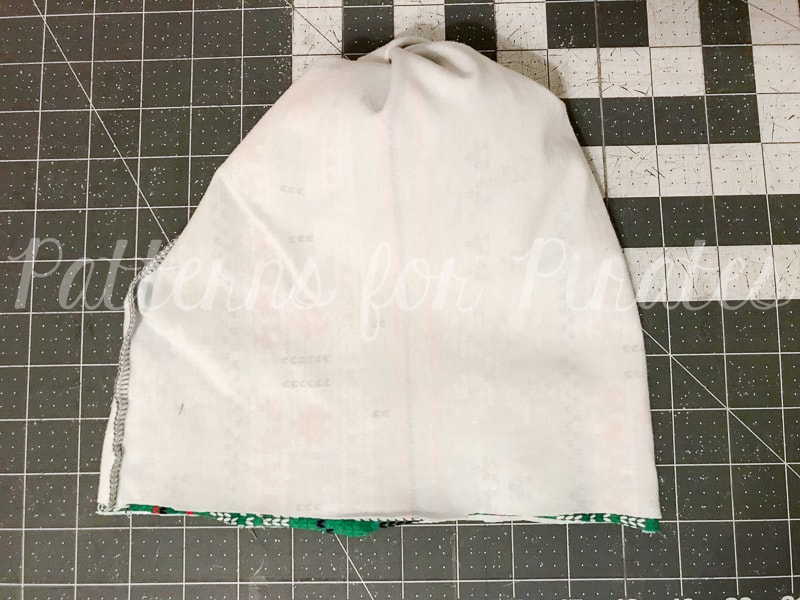
Shown folded with the twist.

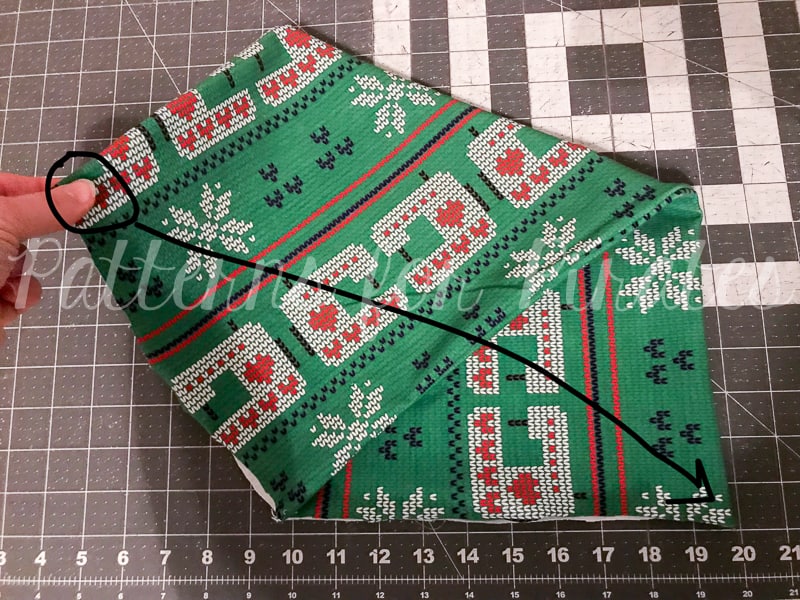
Grab the top layer of the four raw edges.
Flip it around the entire headband, so you have a pocket with right sides together.
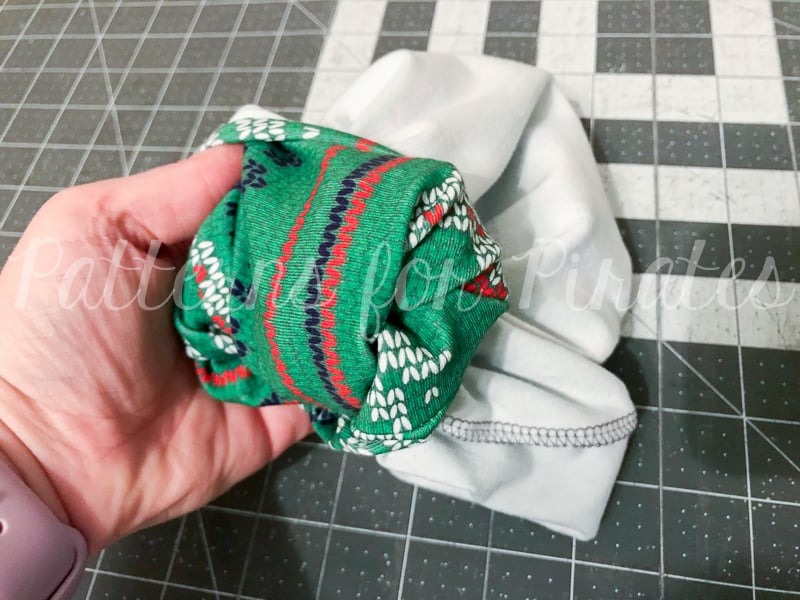
Stitch around open edge closed, leaving a 2-3” opening for turning.

Pull your headband back through opening, turning it right-sides out.
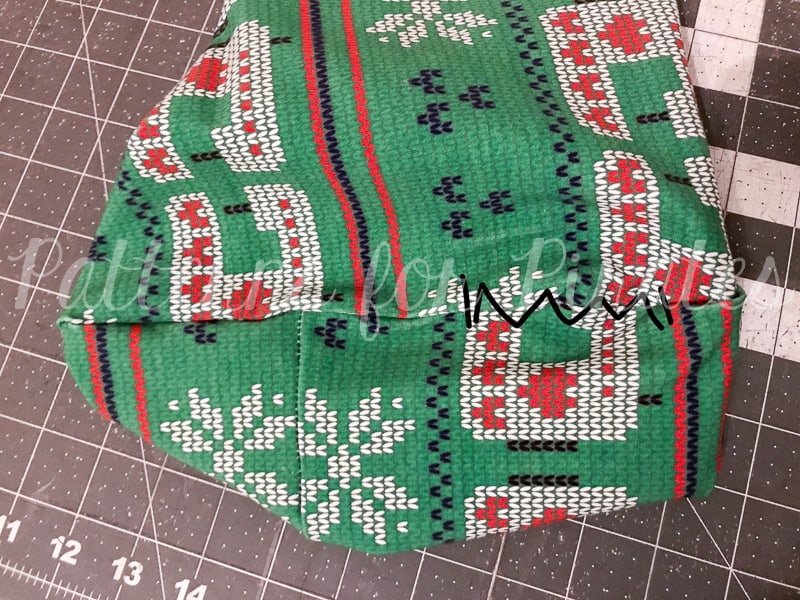
Blind stitch opening shut.
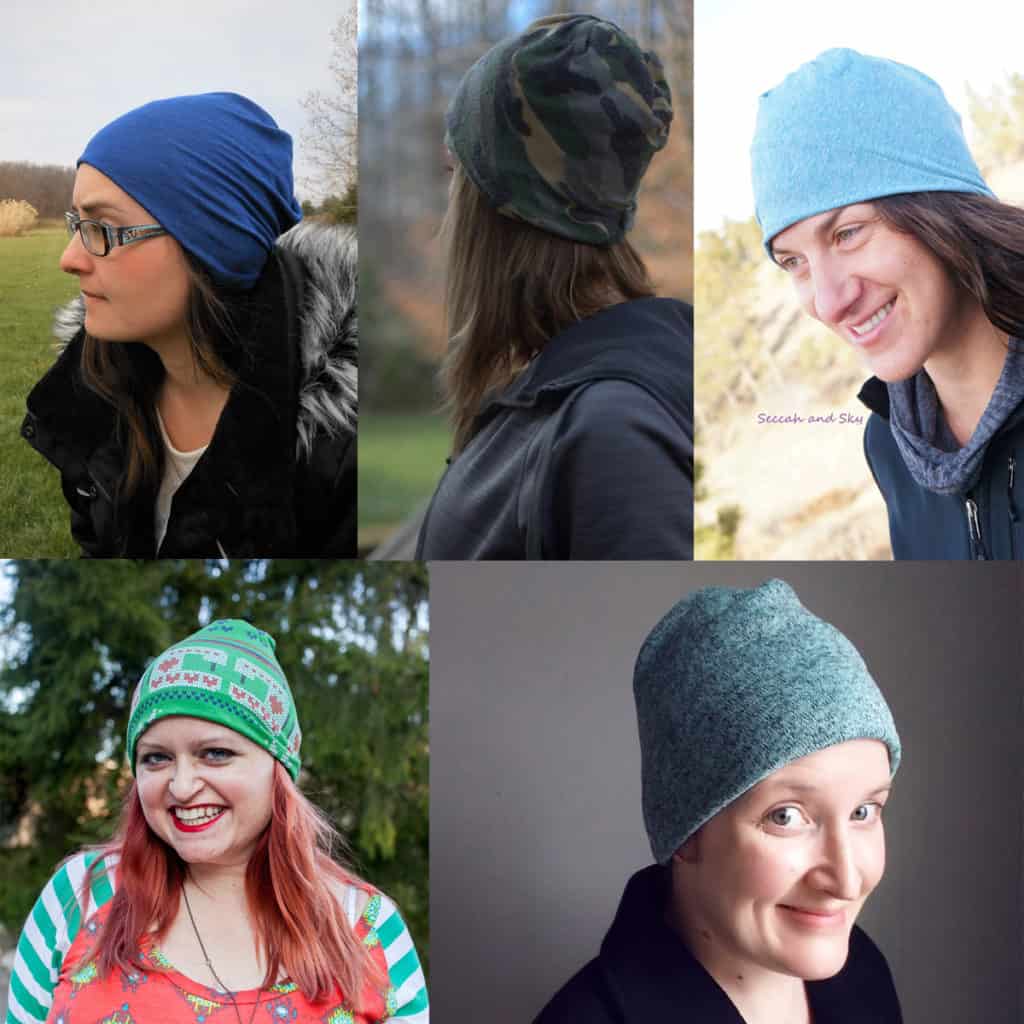
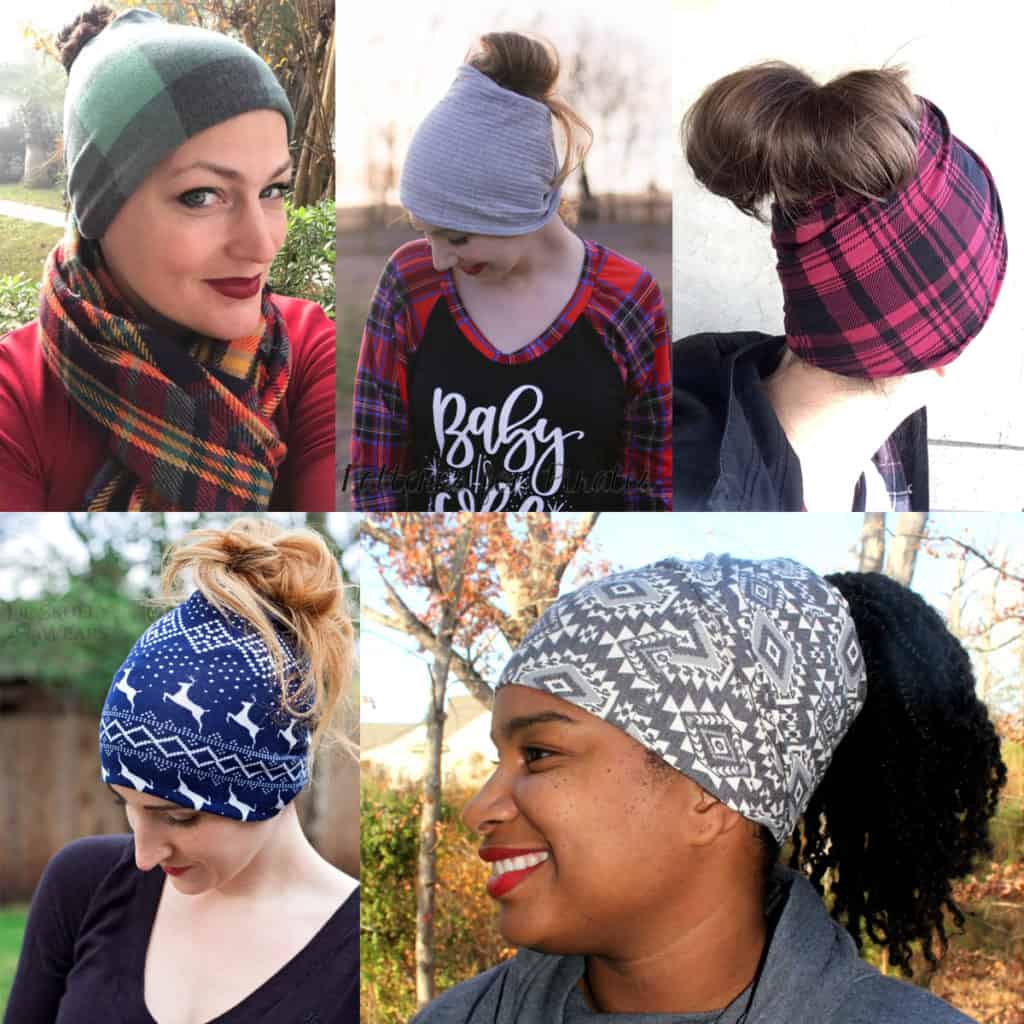
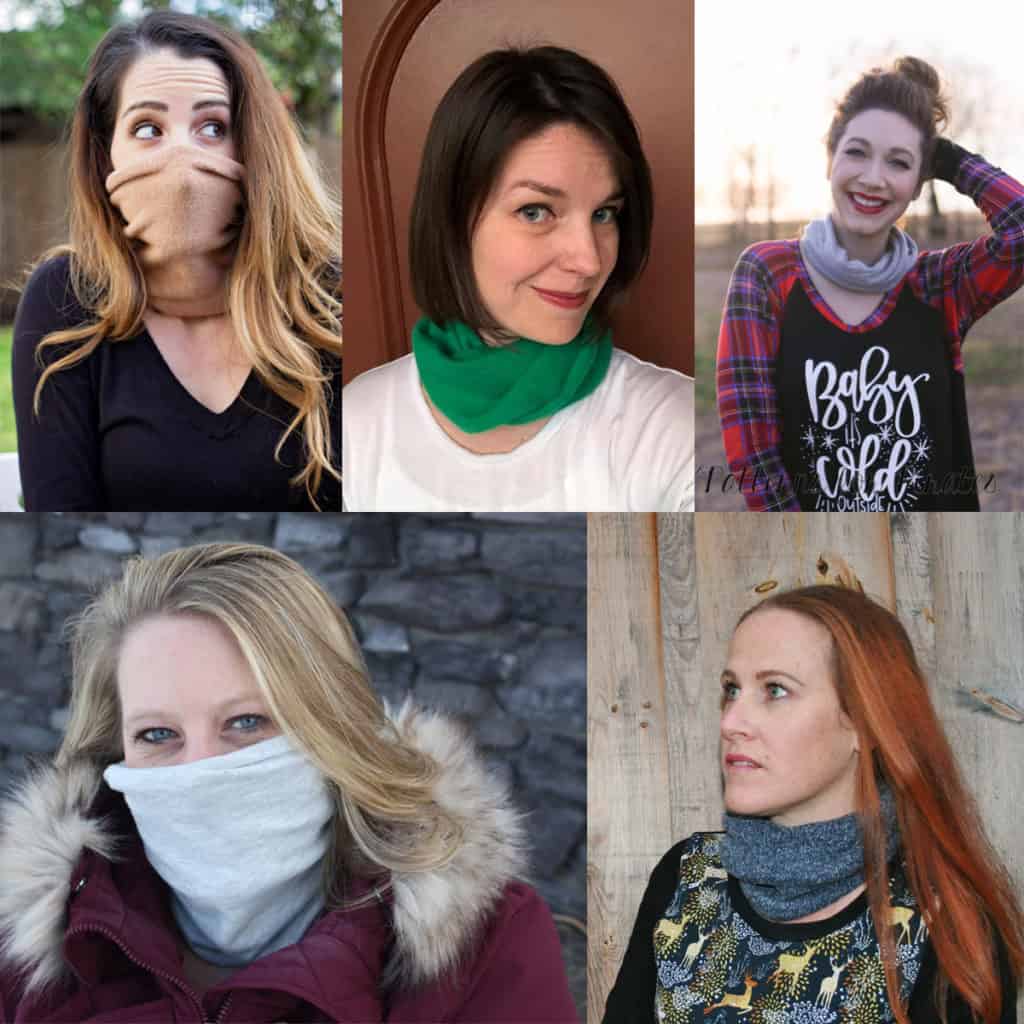
And now comes the fun part! This headwarmer can be worn FOUR different ways. Four! Amazing, right? Especially for such a simple sew! You can…..
…rock it as a headband/earwarmer.
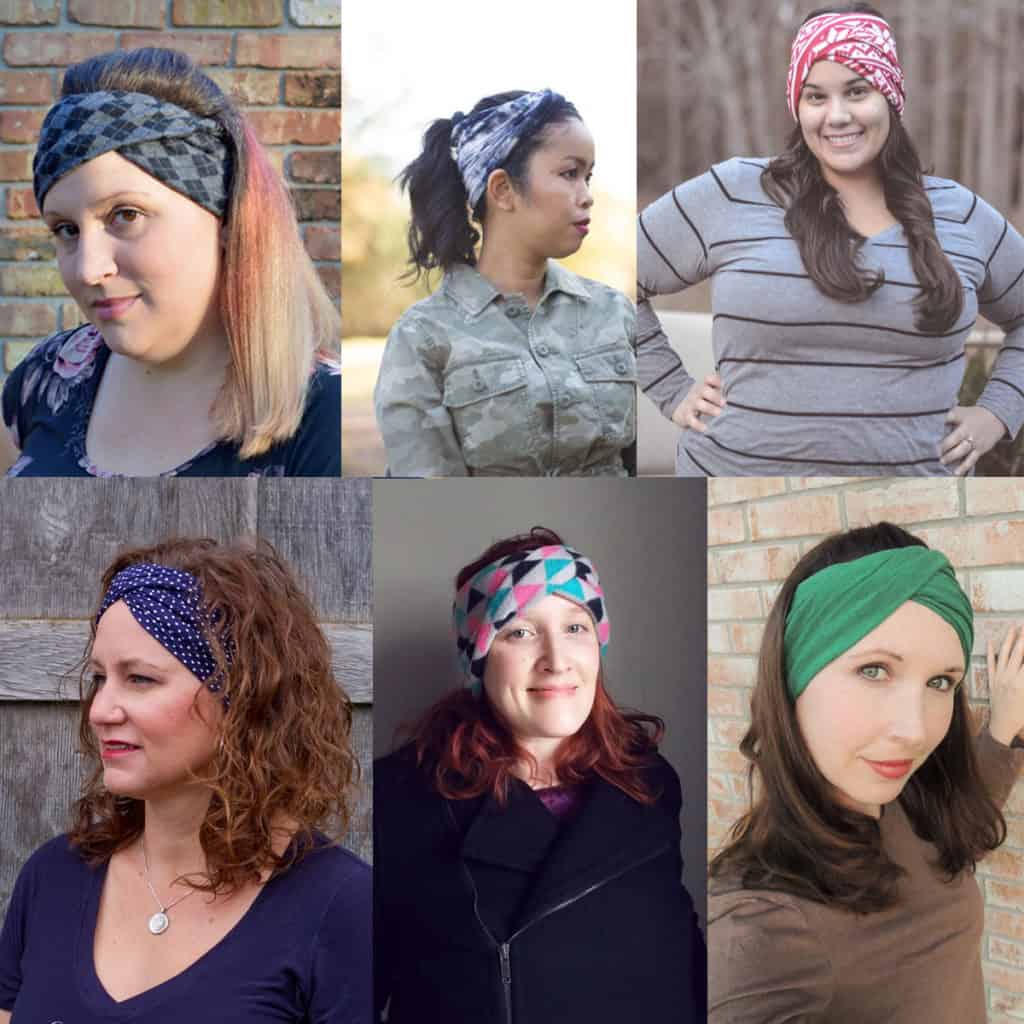
…wear it like a hat.
…throw it on over a messy bun.
…or keep your neck warm, while wearing it like a cowl.
As always, we love when you share what you’ve made with us. Head over to the Patterns for Pirates Facebook group and show off the fabulous Slouchy Headwarmer that you’ve managed to make from our freebie pattern! Happy Holidays, friends!
RagDoll Raglan :: New Pattern Release!
We are so excited to bring you the latest pattern in the Patterns for Pirates family! Judy has a mad love for slouchy, loose and oversized looks and drafted up the RagDoll Raglan to fit that niche in her closet. Allow me to introduce you to the RagDoll Raglan!!
Why “RagDoll”? We thought that it was the perfect mash-up of a classic raglan style sleeve AND a dolman “batwing”. Rag(lan) + Dol(man) = RagDoll !
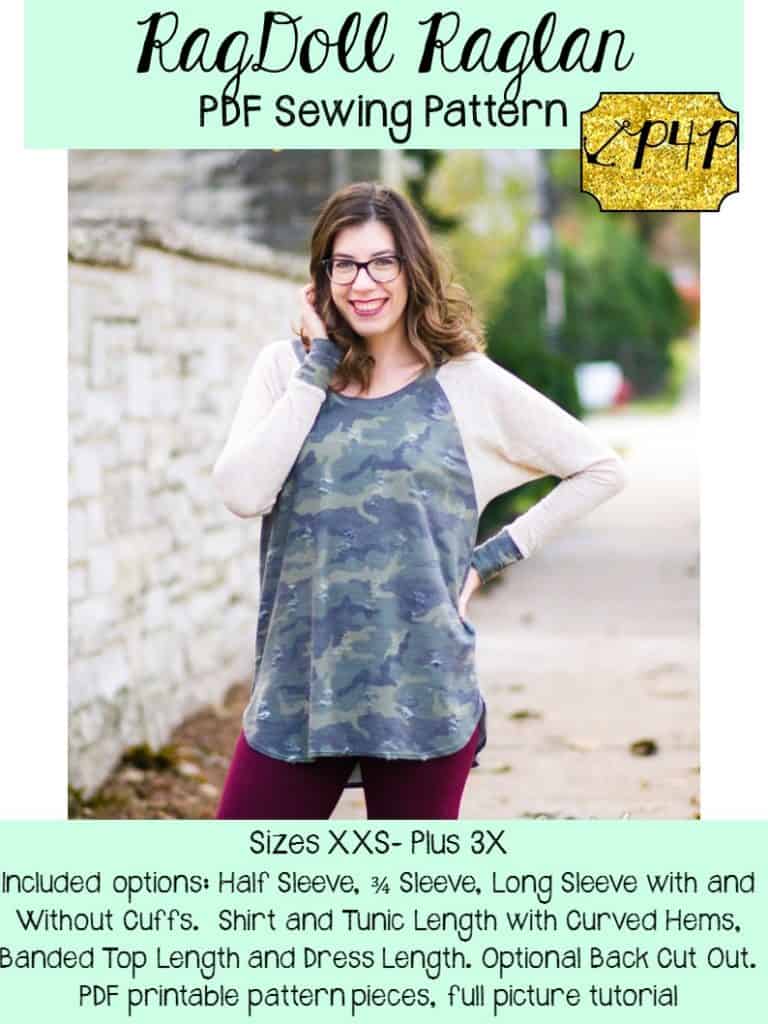
Just like the rest of our patterns, we’ve packed the RagDoll Raglan full of as many options as we could! It is drafted for women, sizes XXS – Plus 3X, with a super relaxed, straight fit throughout the body. The pattern features three sleeve lengths (half, 3/4, long), optional sleeve cuffs, four hem lengths (curved shirt, curved tunic, banded top, and dress) and two back options (full and cut-out).
The RagDoll was drafted with knit fabrics that have a good drape to them. Think: your favorite rayon blends, dbp, sweater knits, etc.
**Want to learn more about how to measure yourself for this pattern? We’ve got you covered with an in-depth blog HERE. And in case you’re new to Patterns for Pirates and PDF patterns in general, we have a great blog full of new user tips HERE to help you get started! And, as with all of our current releases and updates, the pdfs now include our layers feature and can be found in Letter, A4 and A0 sizes.
Let’s see some options in action, shall we?
SLEEVE LENGTHS
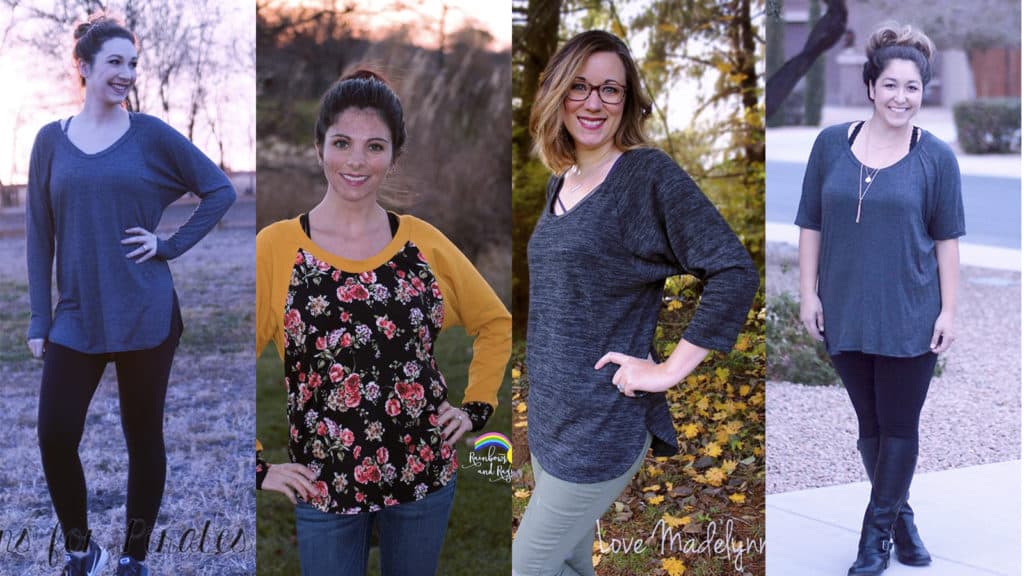
HEM LENGTHS
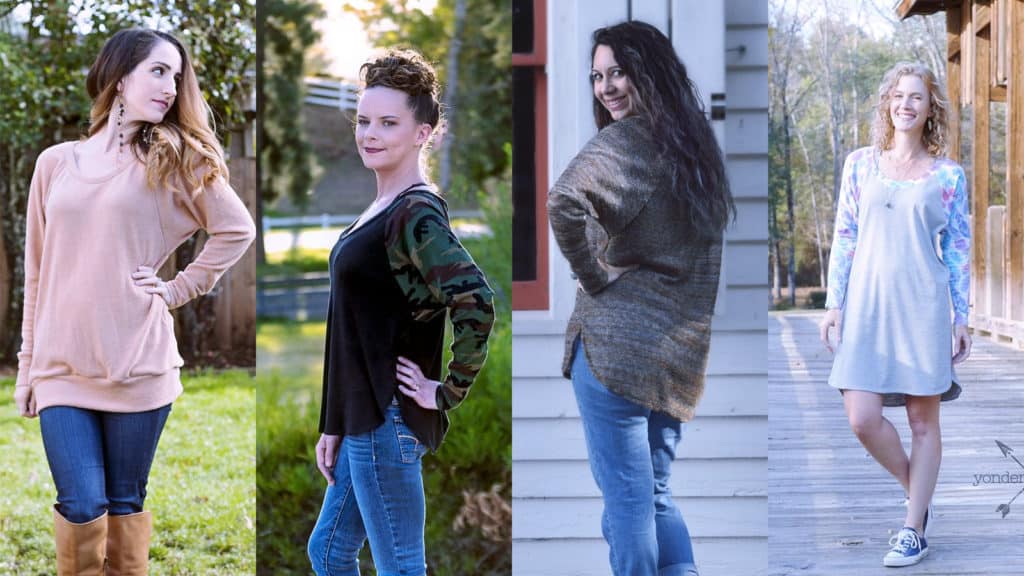
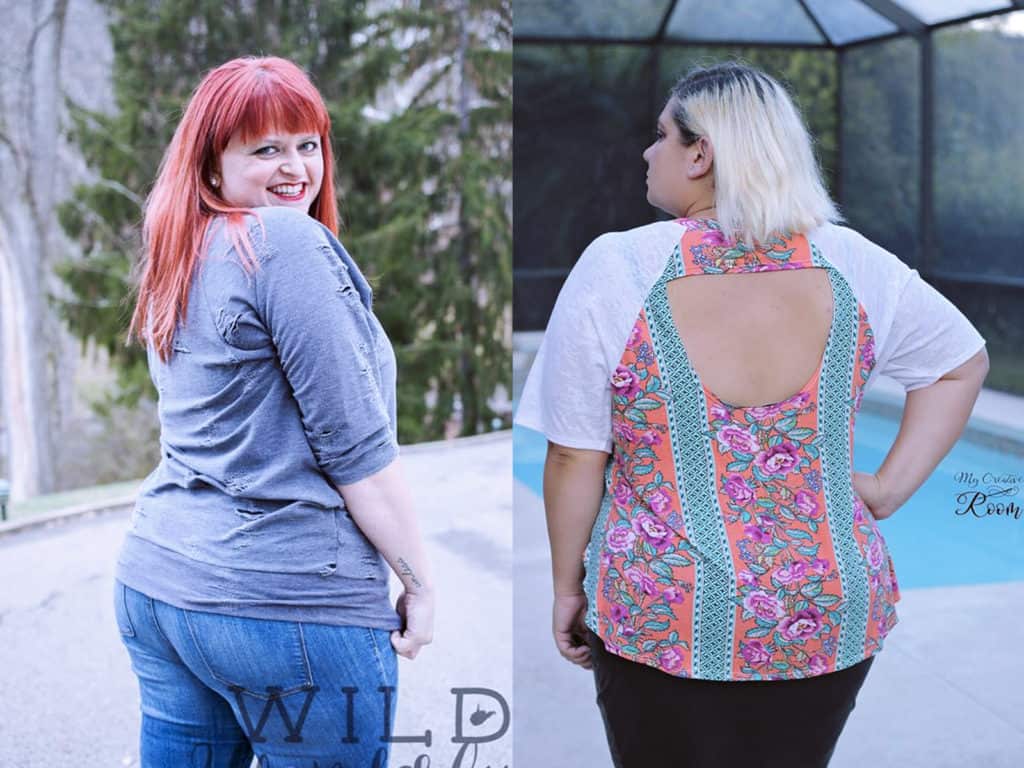
CUT-OUT + FULL BACK
Go Grab your Copy of the RagDoll Raglan Now!
Need more convincing? Just take a look at this pattern on all of the beautiful shapes and sizes of our testers, and get a look at more examples of all the options in our albums in the P4P Facebook group! Find the album HERE.
The sale price will last through December 3 (11:59 PM US Central time zone) so grab it while you can at the introductory price!
And if that wasn’t enough options, be sure to check out our all of the amazing hacks that our team has come up with: RagDoll Raglan Easy Hacks
- « Previous Page
- 1
- …
- 15
- 16
- 17
- 18
- 19
- …
- 23
- Next Page »