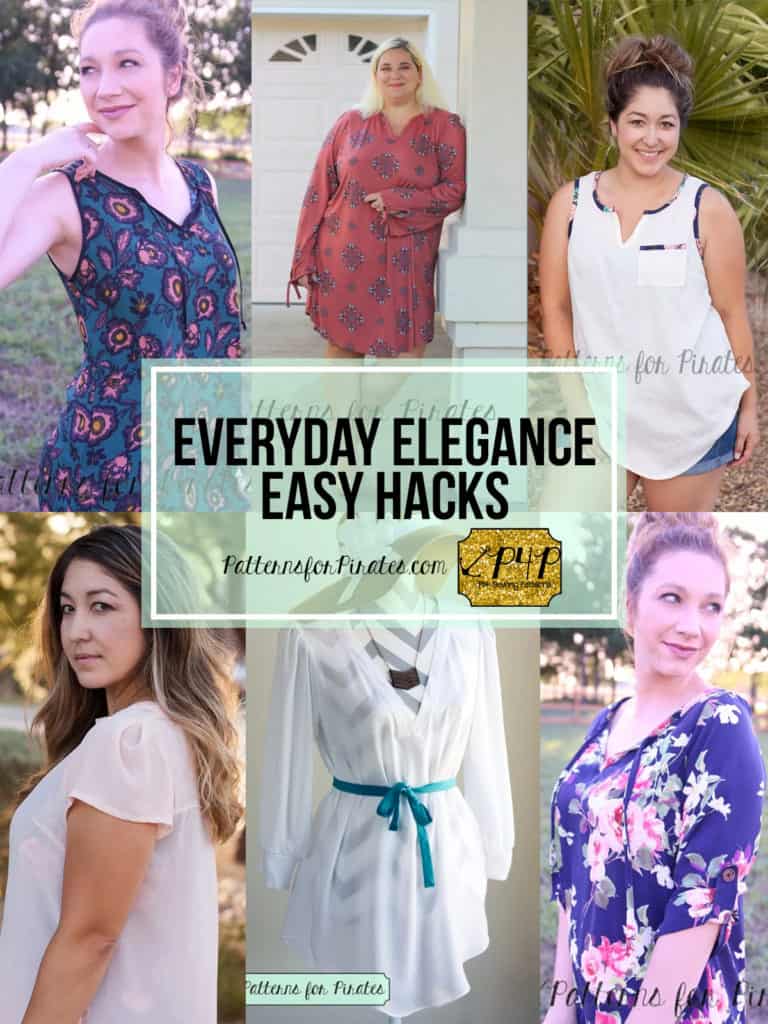
The Everyday Elegance recently received an update and and we added more options. (Read more about it the re-release here). We could not let this event pass by without showing you some easy hacks that can take your beloved EE to the next level.
P4P stylish, modern, wearable patterns
The Everyday Elegance recently received an update and and we added more options. (Read more about it the re-release here). We could not let this event pass by without showing you some easy hacks that can take your beloved EE to the next level.

One of the most important steps to follow when sewing is choosing the right needle for your project. A wrong needle can leave holes in the fabric, snag it or skip stitches so let’s answer the two most common questions regarding sewing needles.
What does that number mean?
Let’s start by understanding the numbers on the packaging or needles. You will notice most sewing machine needles have two numbers on them. The numbers from 60 to 110 reflect the European metric system while the numbers from 8 to 18 represent the American needle sizing. For example, an universal needle 90/14 means it’s Euro size 90 and US size 14. As a general rule, the lower the number, the finer the needle and the higher the number, the bigger the needle.
8-10 (60 – 70) – great for very fine weight (like fine silk, chiffon, organza)
11-12 (75 – 80) – use these sizes for light weight fabrics ( cotton spandex, cotton voile)
14 (90) – perfect for medium weight fabrics ( cotton woven, linen, jersey, fleece)
16 (100) – this size is great for heavy fabric (denim, duck, corduroy )
18 (110) – use these needles when sewing very heavy fabric ( heavy denim, upholstery)
20 (120) – very, very heavy fabric
Note: some automatic threader sewing machines may not be able to thread lower number needles so you will have to manually thread it.
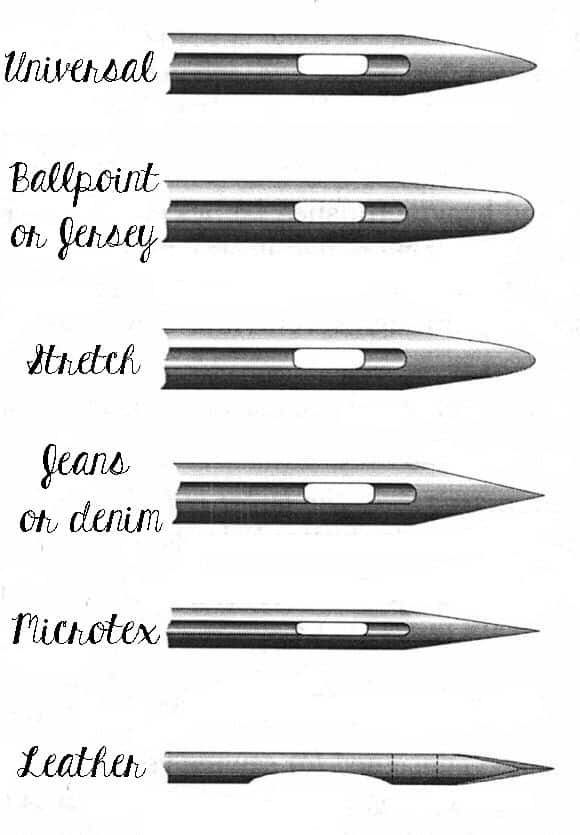
What are the most common types of needles and what fabric do I use them with?
Universal needles: These needles are the most common used ones.. They pierce through the fibers. These needles are great for woven fabrics and stable knits.
Ball point or jersey needles: They have a round tip and they go around the fibers or in between the fibers of the fabric, keeping its integrity. They are best suited for knit materials.
Stretch needles: These needles are sharper than ball point needles but follow the same concept as them. They do not pierce the fibers but go in between them. These ones are perfect for very stretchy fabric like performance knits or swimwear and elasic.
Jeans or Denim needles: This style needle is very thick and sharp. It goes through the fabric and it’s best used with denim or heavier fabric like outdoor wovens and duck.
Microtex needles: The tip of microtex needles is very sharp and thin. It is ideal for thin, delicate fabrics like chiffon or crepe.
Leather needles: The chisel point will make it easy for this needle to penetrate thick fabrics like leather and some thick vinyls. Do not use on ultra suede.
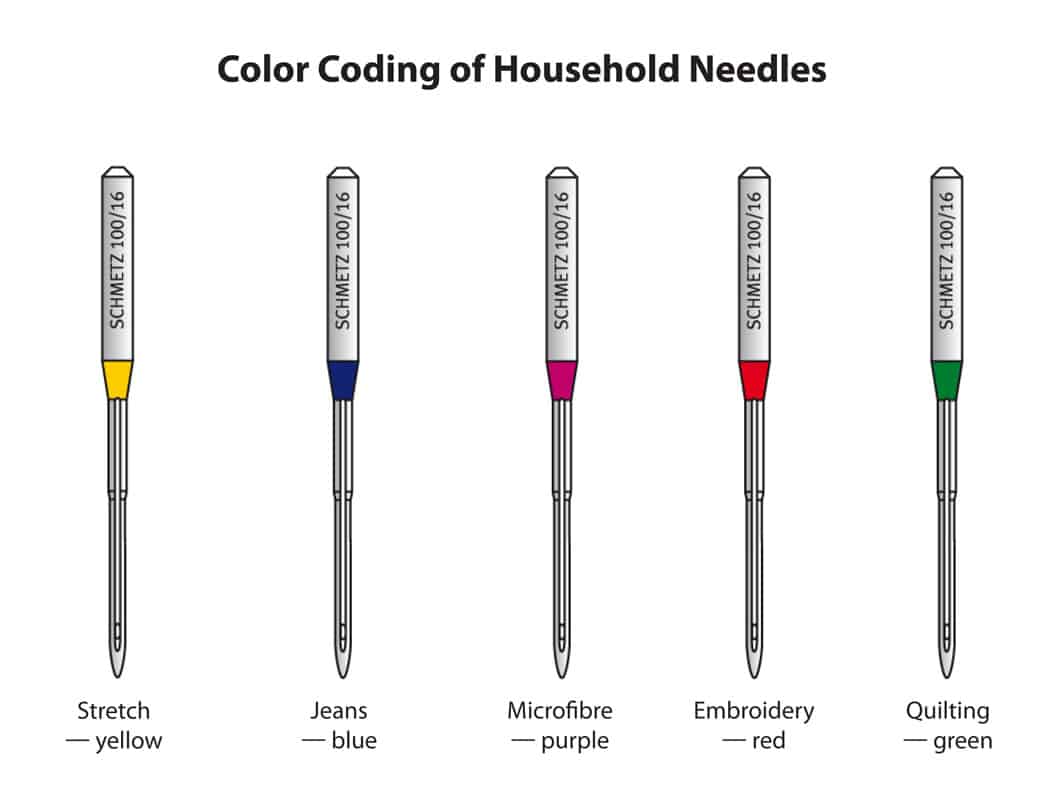
Some other type of needles you will see in the notions section are: quilting , embroidery, top stitching, metalfil, self threader, twin needles or triple needles.
You may notice colors that accompany the various styles of needles. Some needle manufacturers have started adding colors to their products so it make it easier to distinguish the type.
For the best results don’t forget to change your sewing machine or serger needles after each project. They tend to get dull rather easily and a dull needle will snag your fabric. Now that you have your perfect needle for your perfect fabric, grab that P4P pattern and don’t forget to share your creations in the group!

As many of you already know, I am a lover of knit fabrics. I love how quickly they can be sewn up, and how comfortable the different types of knits are to wear. BUT, we’ve seen in our Facebook Group that there is a desire for patterns that use woven and non-stretch fabrics. We hear you and are about to make your woven pattern dreams come true!
To help kick off the first official day of summer, our P4P Team is announcing our “Summer of Wovens”!
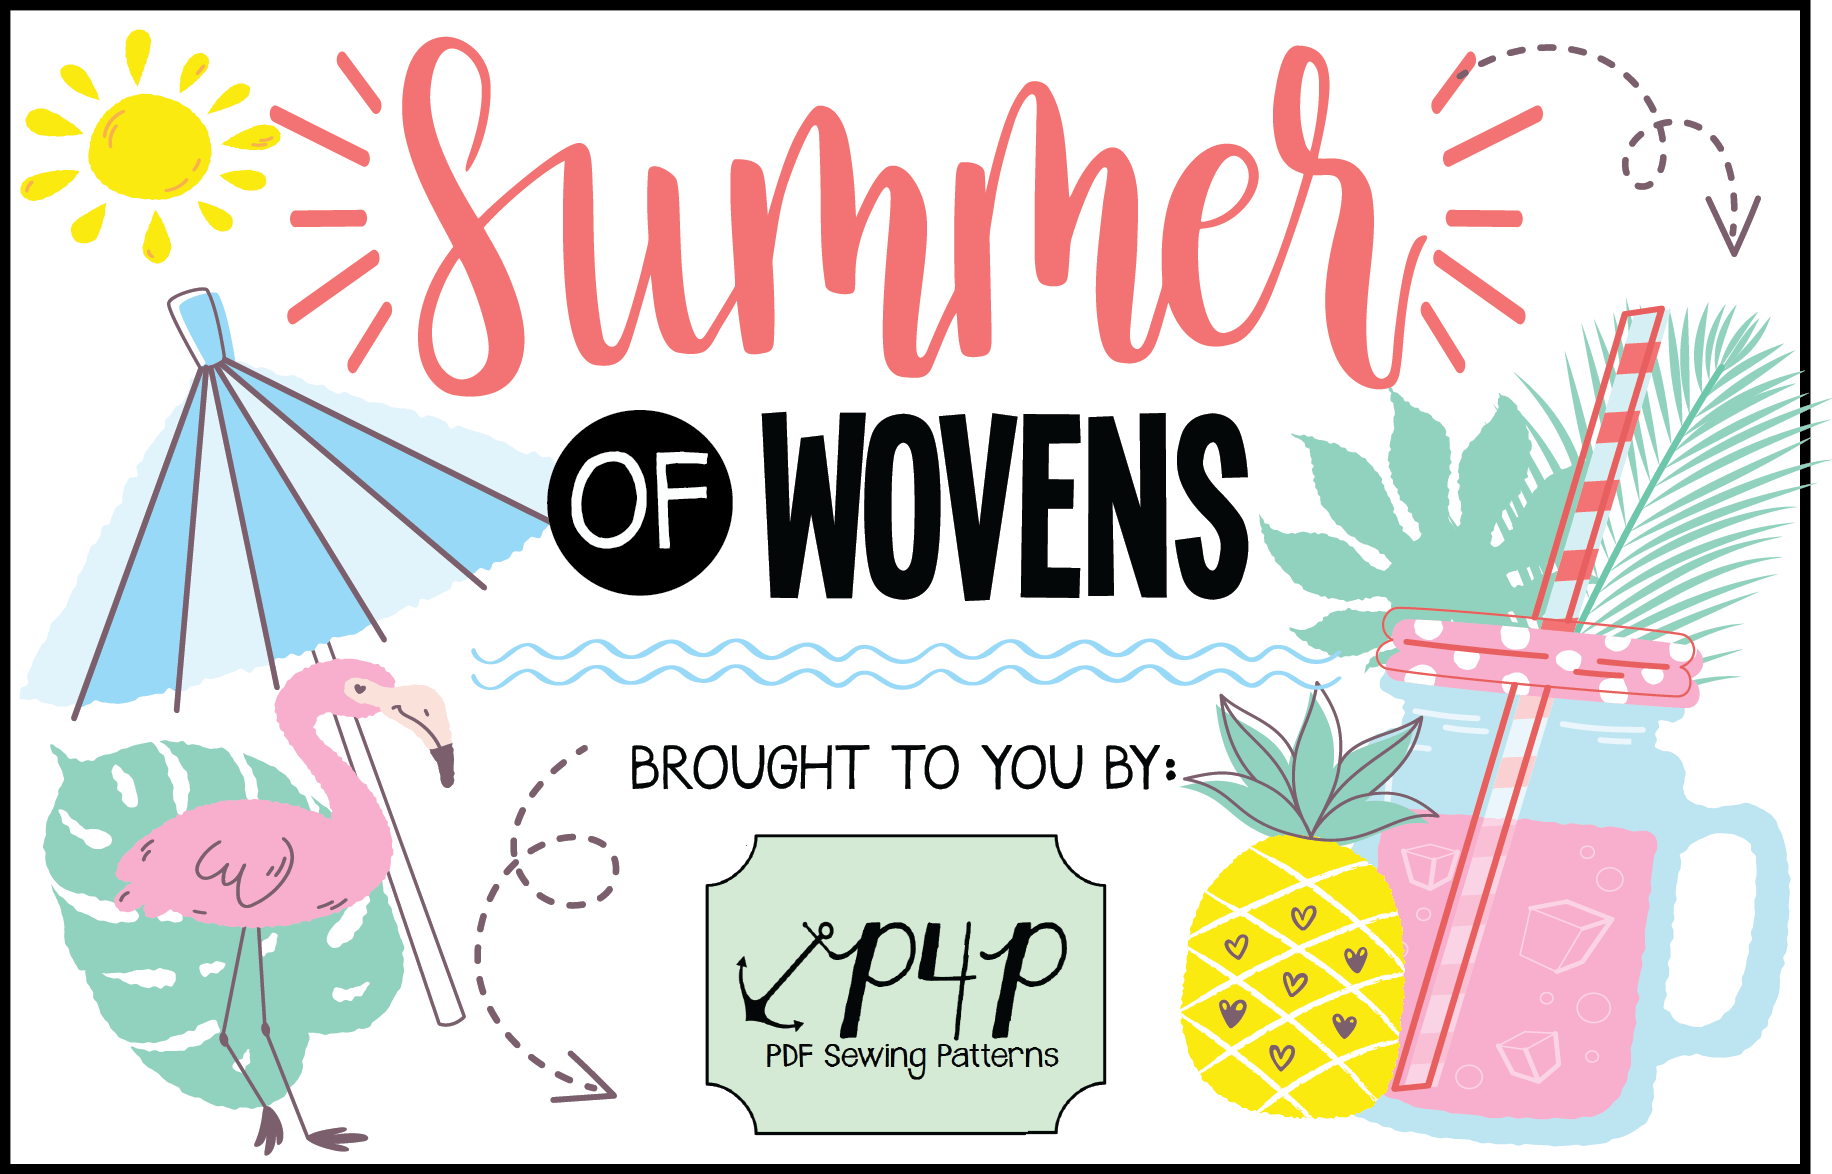
What does a “Summer of Wovens” entail, exactly?
— Our pattern releases throughout the summer will ONLY be for woven fabrics. Was there something you were hoping to see from us? Of course we’d love to hear!
— Before we can get to the new goodies, we are making sure to update our older woven patterns to feature our layers format, including the A0 copy shop printing formats. We will also be extending the sizing into the full range that we use now. Our very first woven pattern for women was The Everyday Elegance and we have been working behind the scenes on updates for this, as well as perhaps including a few new options for the pattern itself. Here is our gorgeous Nicole modeling her newest EE:

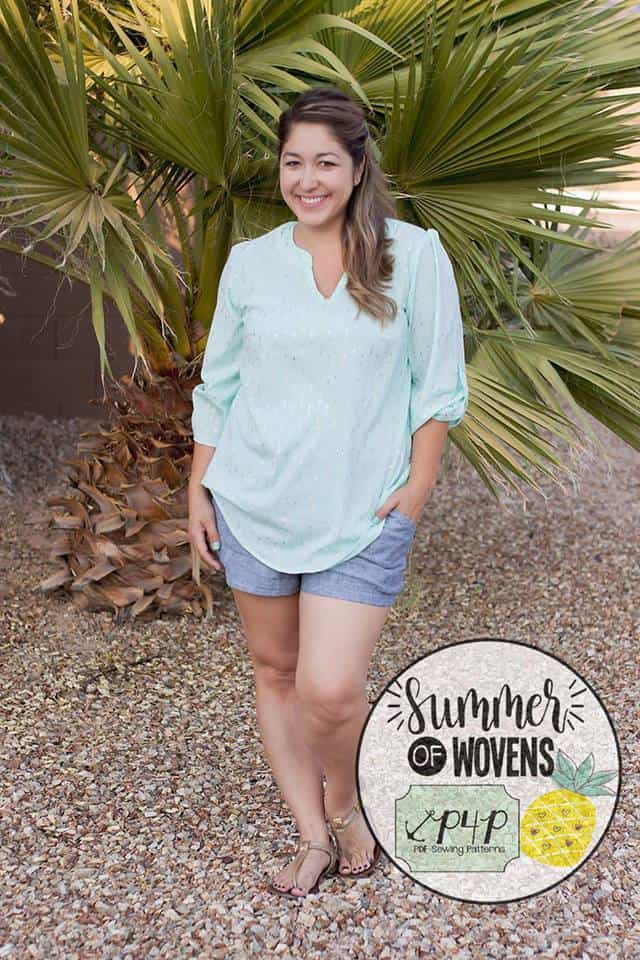
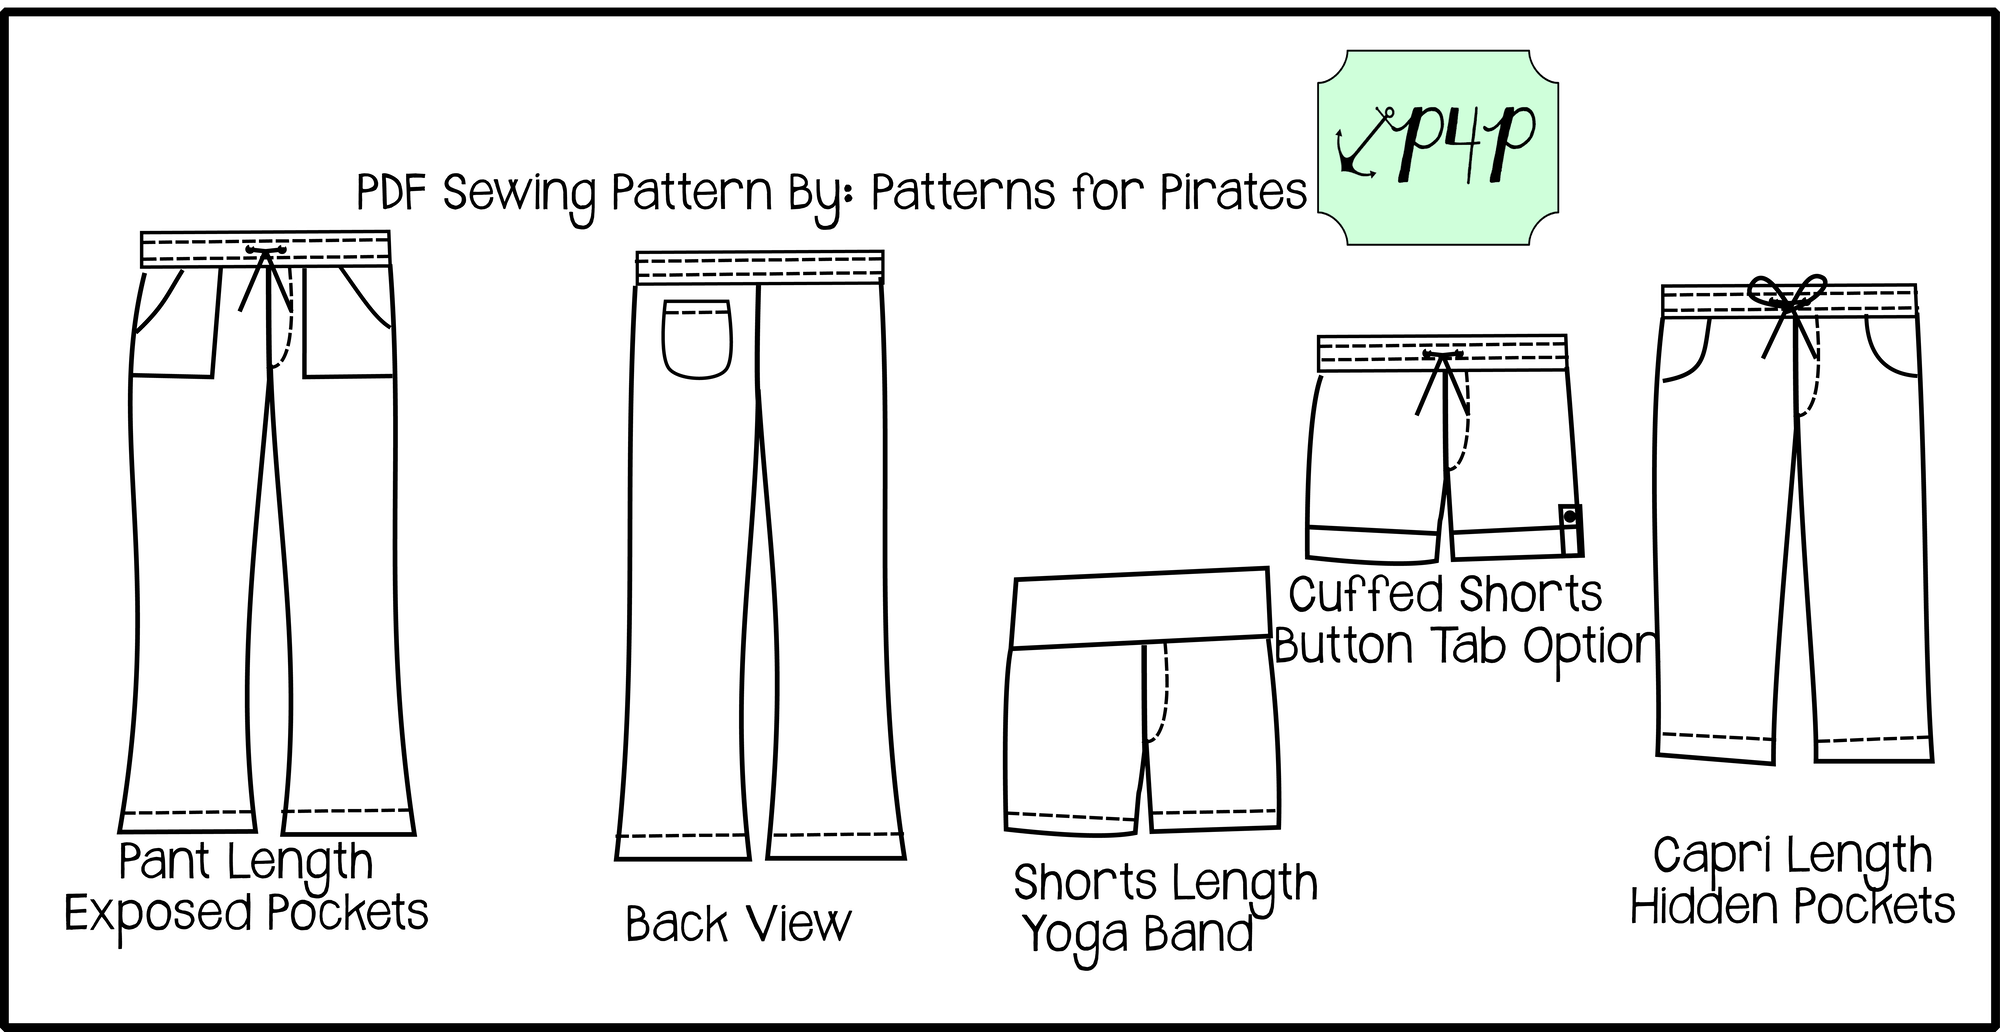
— Of course we have new patterns already in the works! Along with her EE, Nicole is sporting a sneak peek of the first *new* pattern, which is already in pre-testing! Perfect for a lightweight fabric for a comfortable and casual summer days/nights, these bottoms are a pull-on woven pant filled with options. Since we are in pre-testing now, we still haven’t found the perfect name for these pants. And, I always reserve my right to change my mind on the options we will offer on the final pattern! (I fully admit that I’m a girl who likes to exercise her right to change her mind! Lol.) So things might change but this is the basic idea of what we are working on at the moment.
— Lastly, we will dedicate the blog to tips, tricks, and posts all about sewing with woven apparel fabrics. A lot of seamstresses think of quilting cotton when they see the term woven, but we will be focusing on woven fabrics that are specifically made for apparel. After all, they will be used for apparel patterns! There is a large variety of available woven fabrics and it will be our mission to help you understand what works best for the project you’re about to tackle. Let us know the questions you have about sewing apparel in woven/non-stretch fabrics and we will try to answer as many as we can. We would really love to help you better understand this new type of fabric!
We hope everyone is excited to see what else we have coming this summer and can use up some of that woven fabric you’ve got hiding in your stash!
Once again, Patterns for Pirates teamed up with Made for Mermaids to bring some amazing vacation outfits inspiration. This blog tour is full of outfits that would be perfect for any destination.
Whether I pack for a quick getaway weekend or a week long trip, I always make sure to bring clothes that do not wrinkle easily and do not take a lot of space in my luggage. With two boys to keep up with I also need my outfits to be super comfortable.
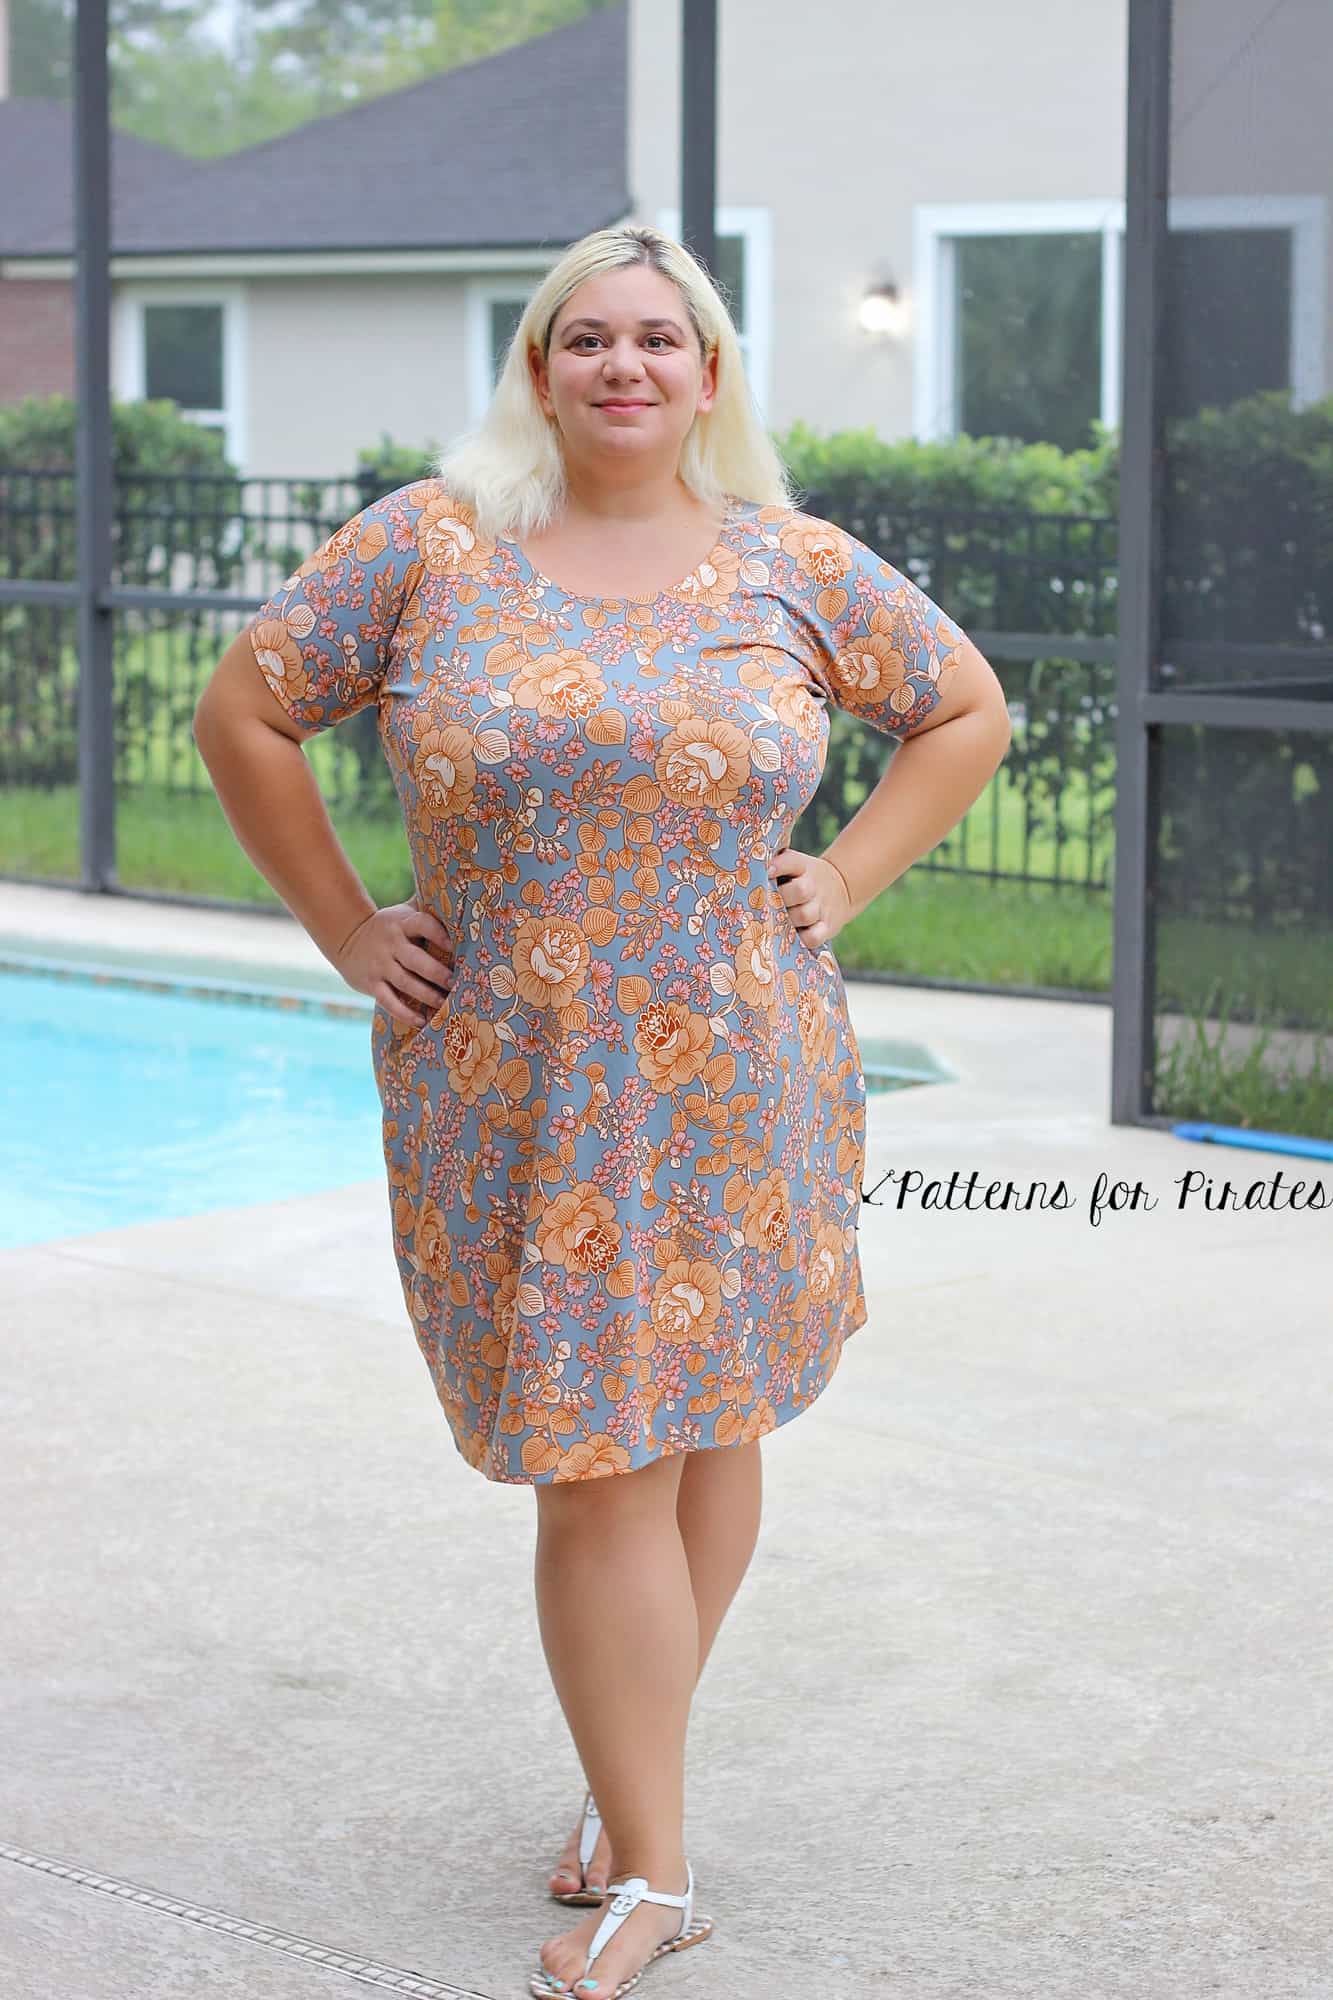
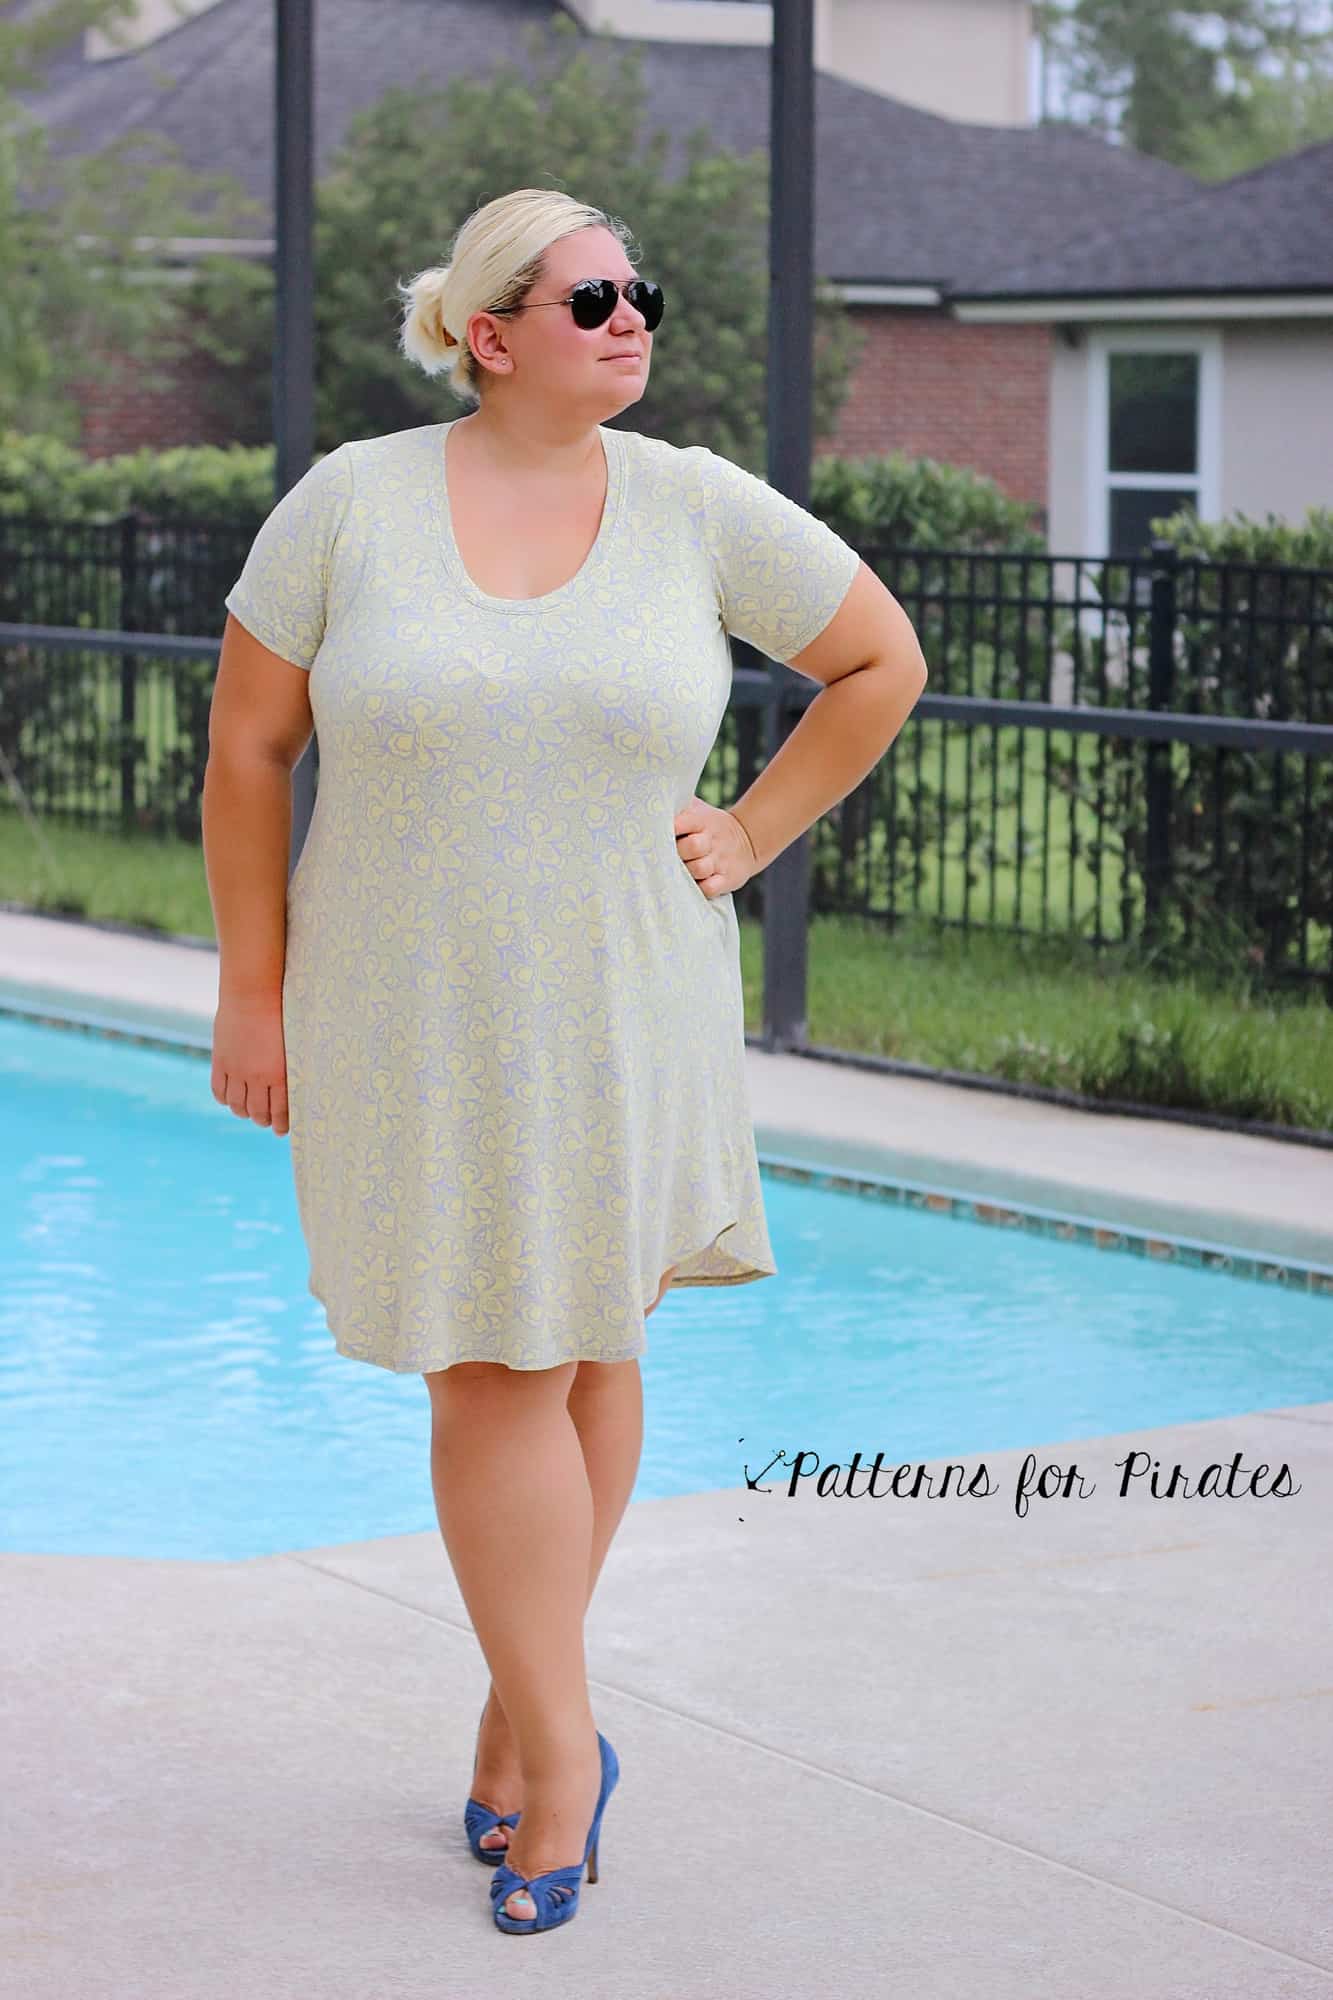
My next vacay suitcase will certainly include a few Favorite Tee dresses since I have sewn at least ten of them since the pattern launched. I am all about tshirt dresses this summer, comfortable and stylish. My favorite ones are rayon spandex, since they hardly ever wrinkle when packed and they feel great in high temperatures.
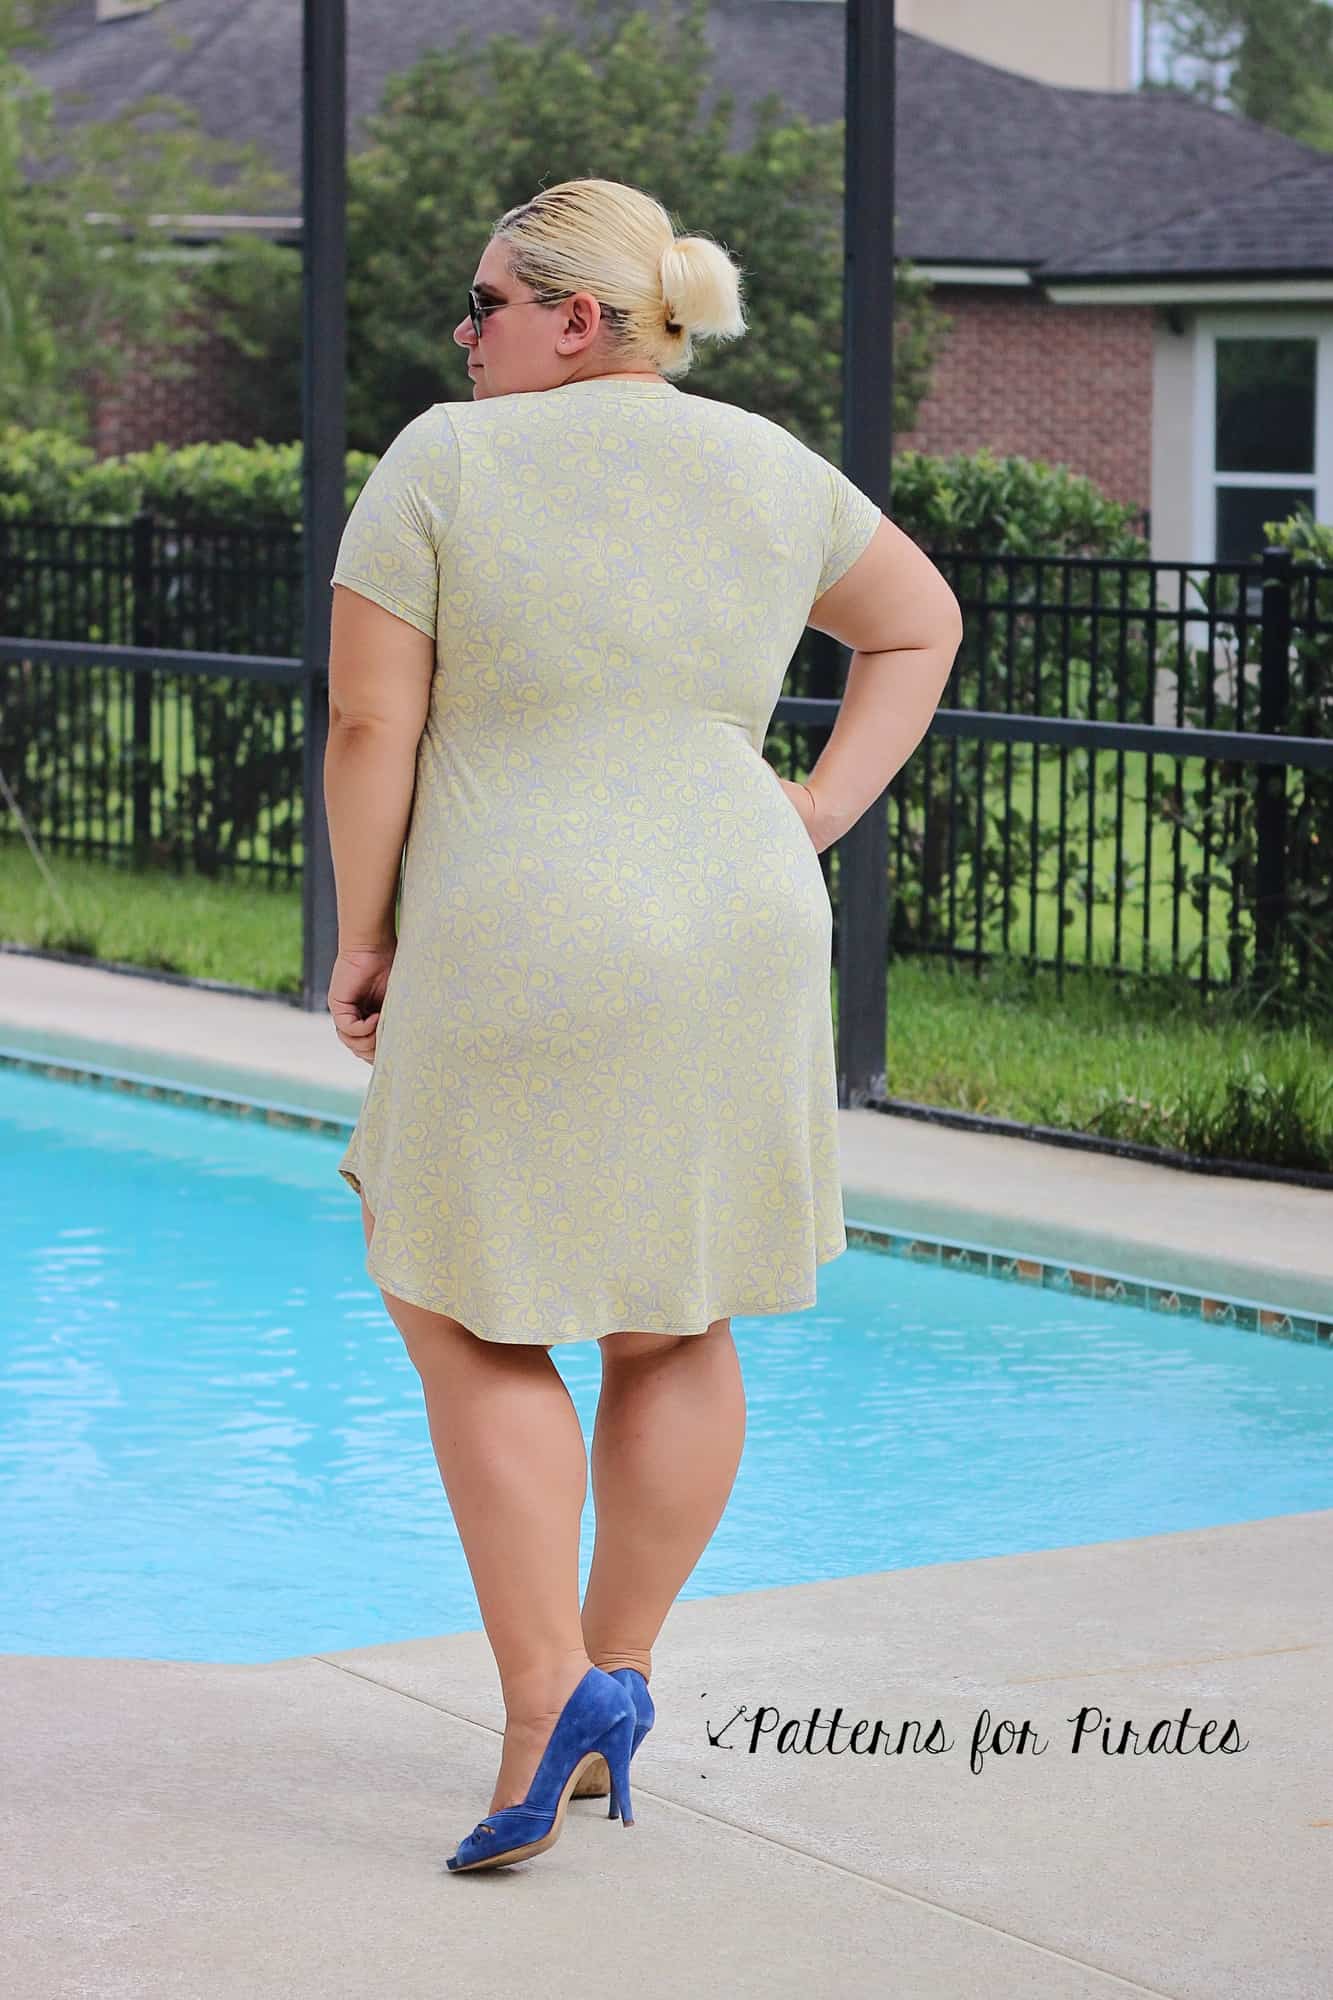
It is no secret that my closet is full of Sweet Tee dresses so they will definitely be a staple in my vacation wardrobe. They are such a quick sew and a very flattering silhouette. I do lengthen my Sweet Tee dresses about 3.5 inches, but that is just a personal preference. You can rock your flirty shorter pattern version for sure!
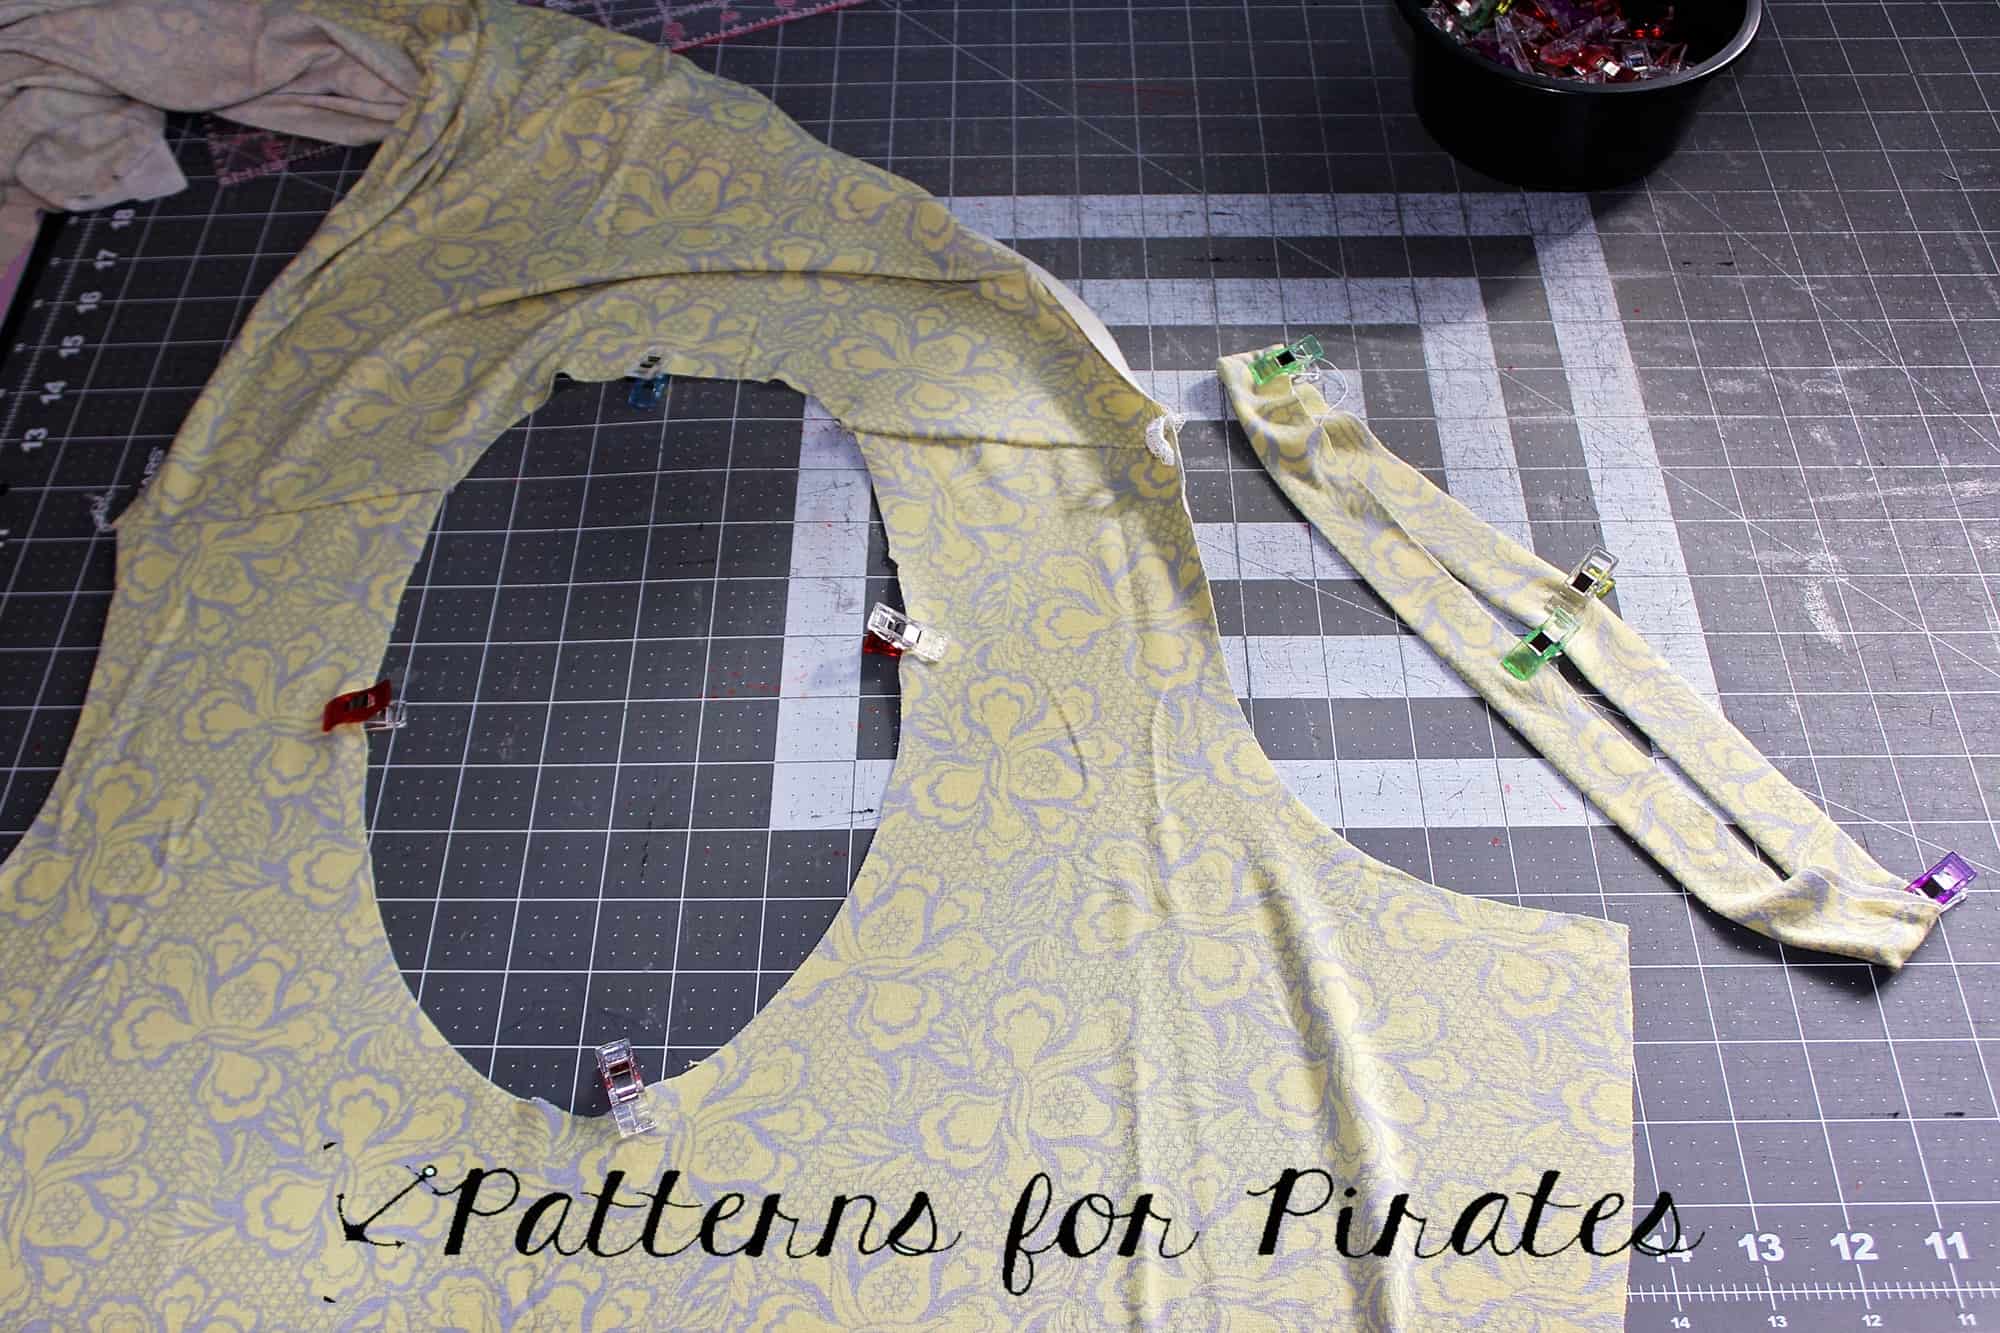
The Sweet Tee pattern includes a banded short sleeve option and a neckband finishing of the neckline. To make it an ever faster sew I hem my sleeves by folding 1/2 ” and topstitching with my coverstitch. You can very well use a zig zag stitch or a twin needle too.
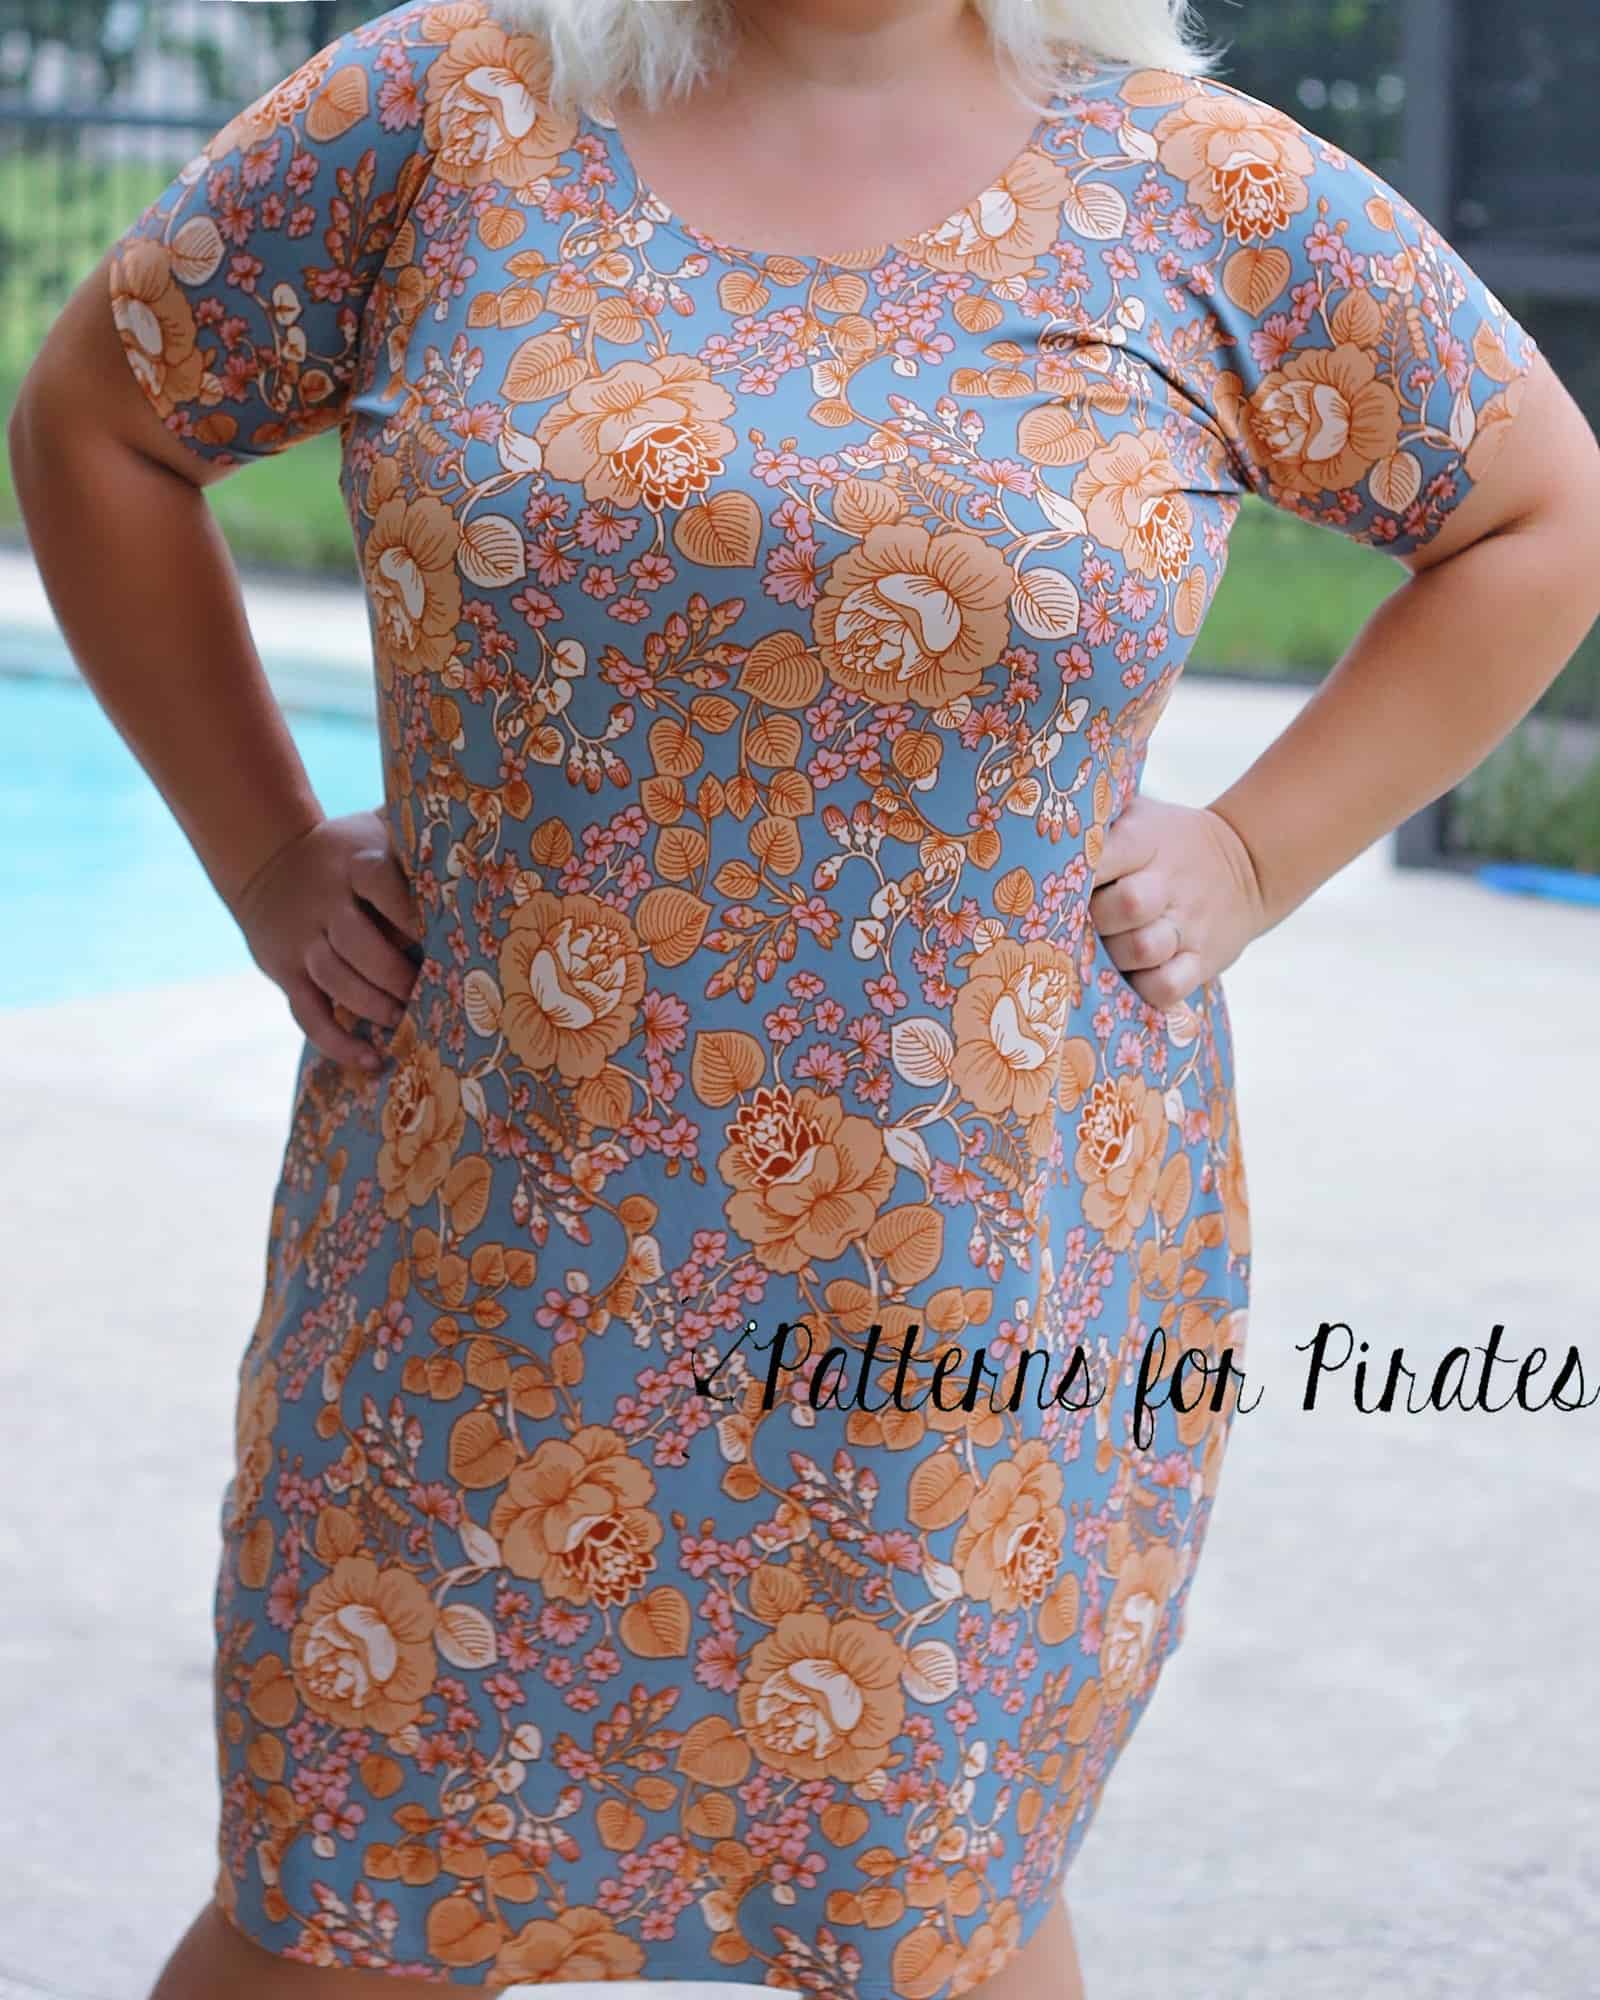
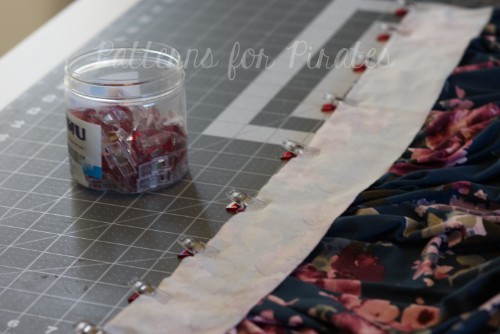
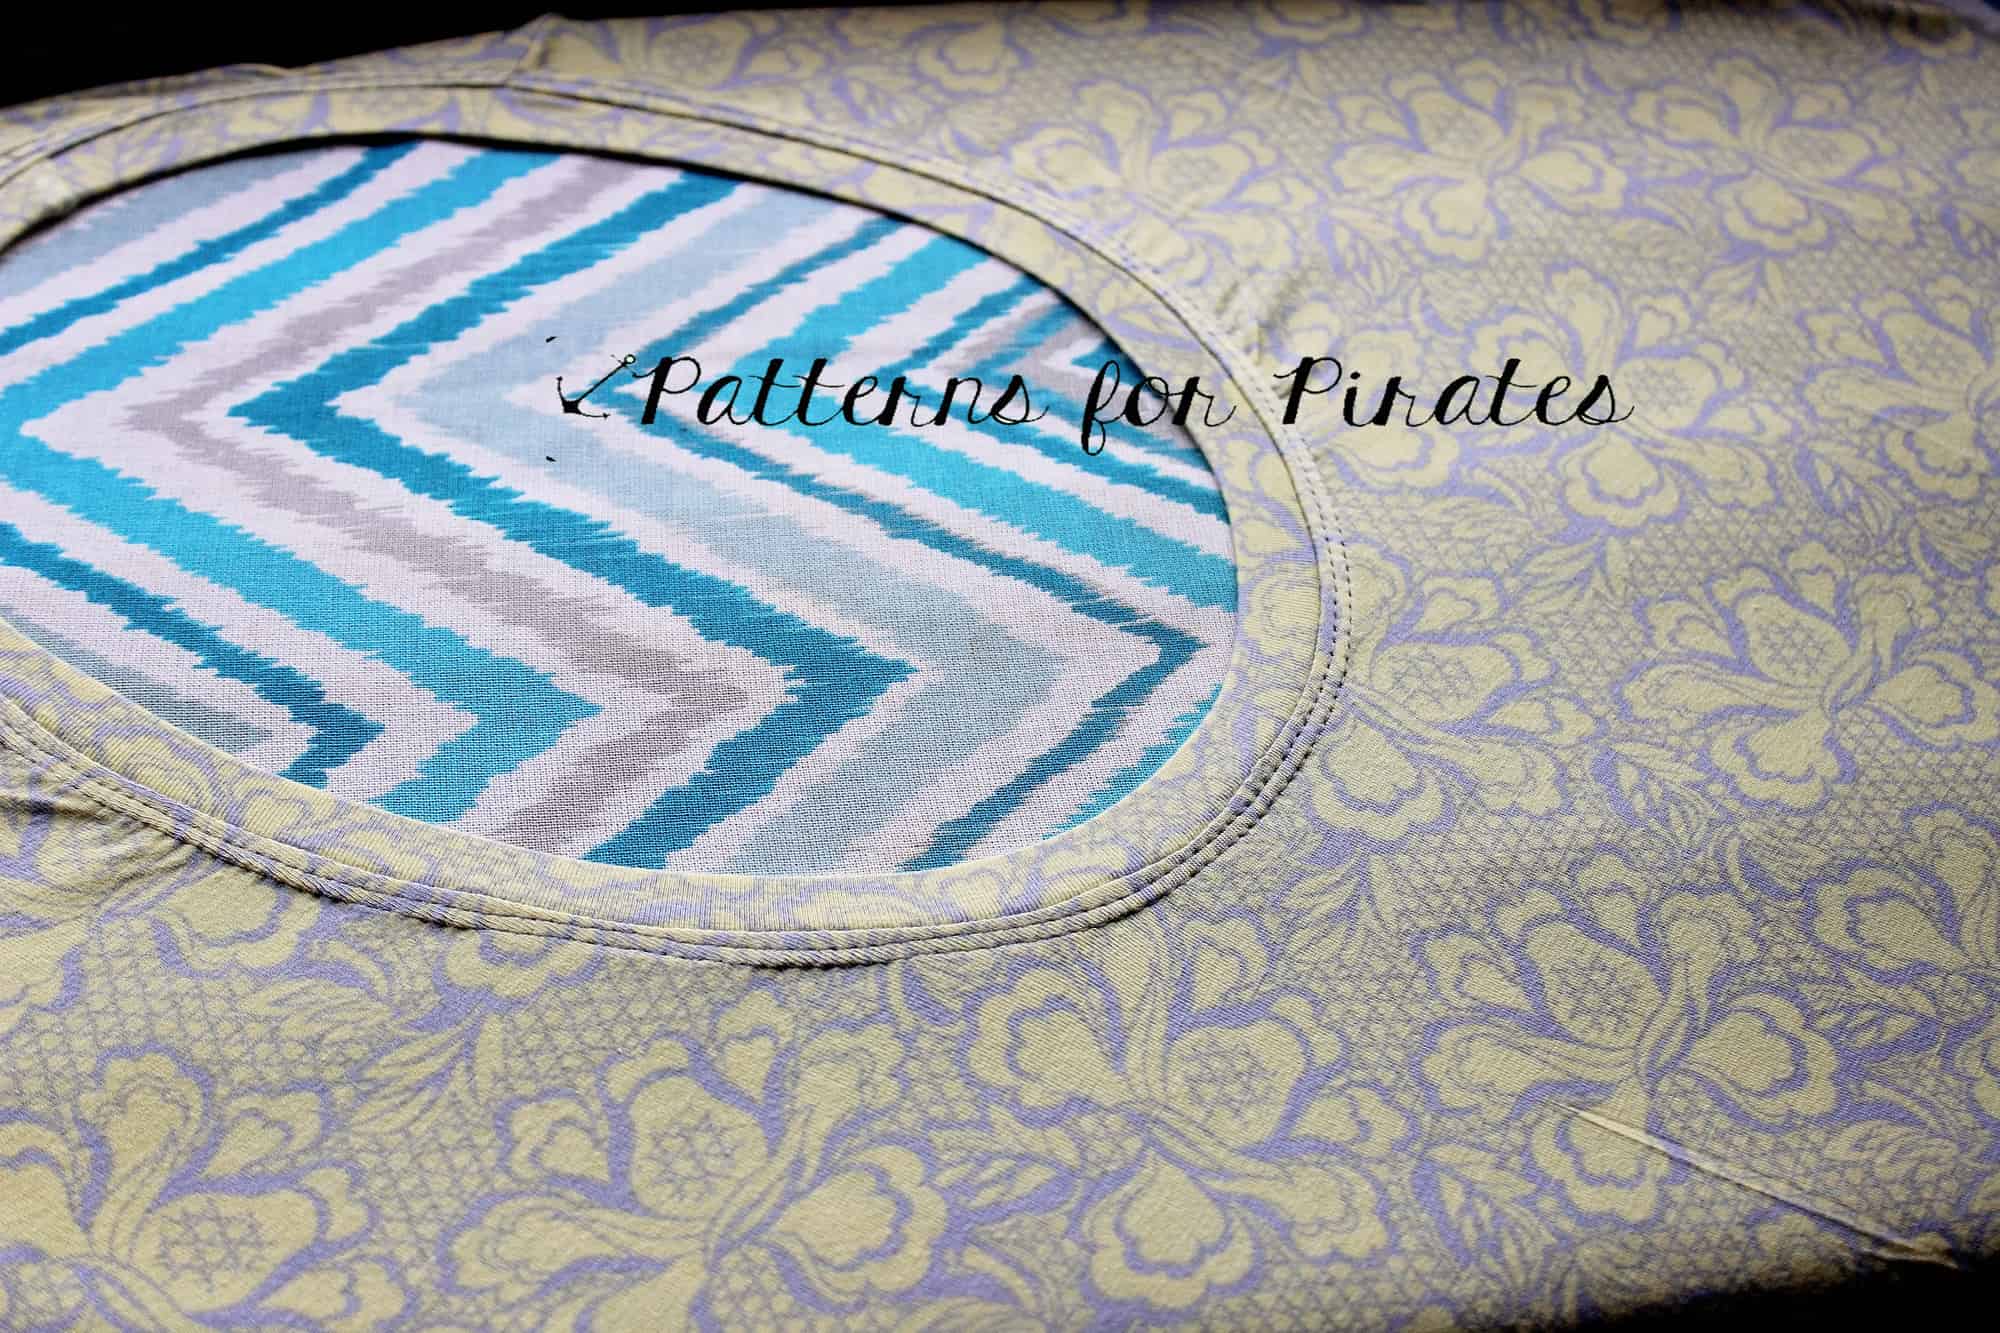
I like to use the same technique to the neckline as well. I simply fold it 1/2″ wrong sides together and clip it in place…use a lot of clips (or pins) and press it well. all you have to do now is top stitch it the same way you did your sleeves.
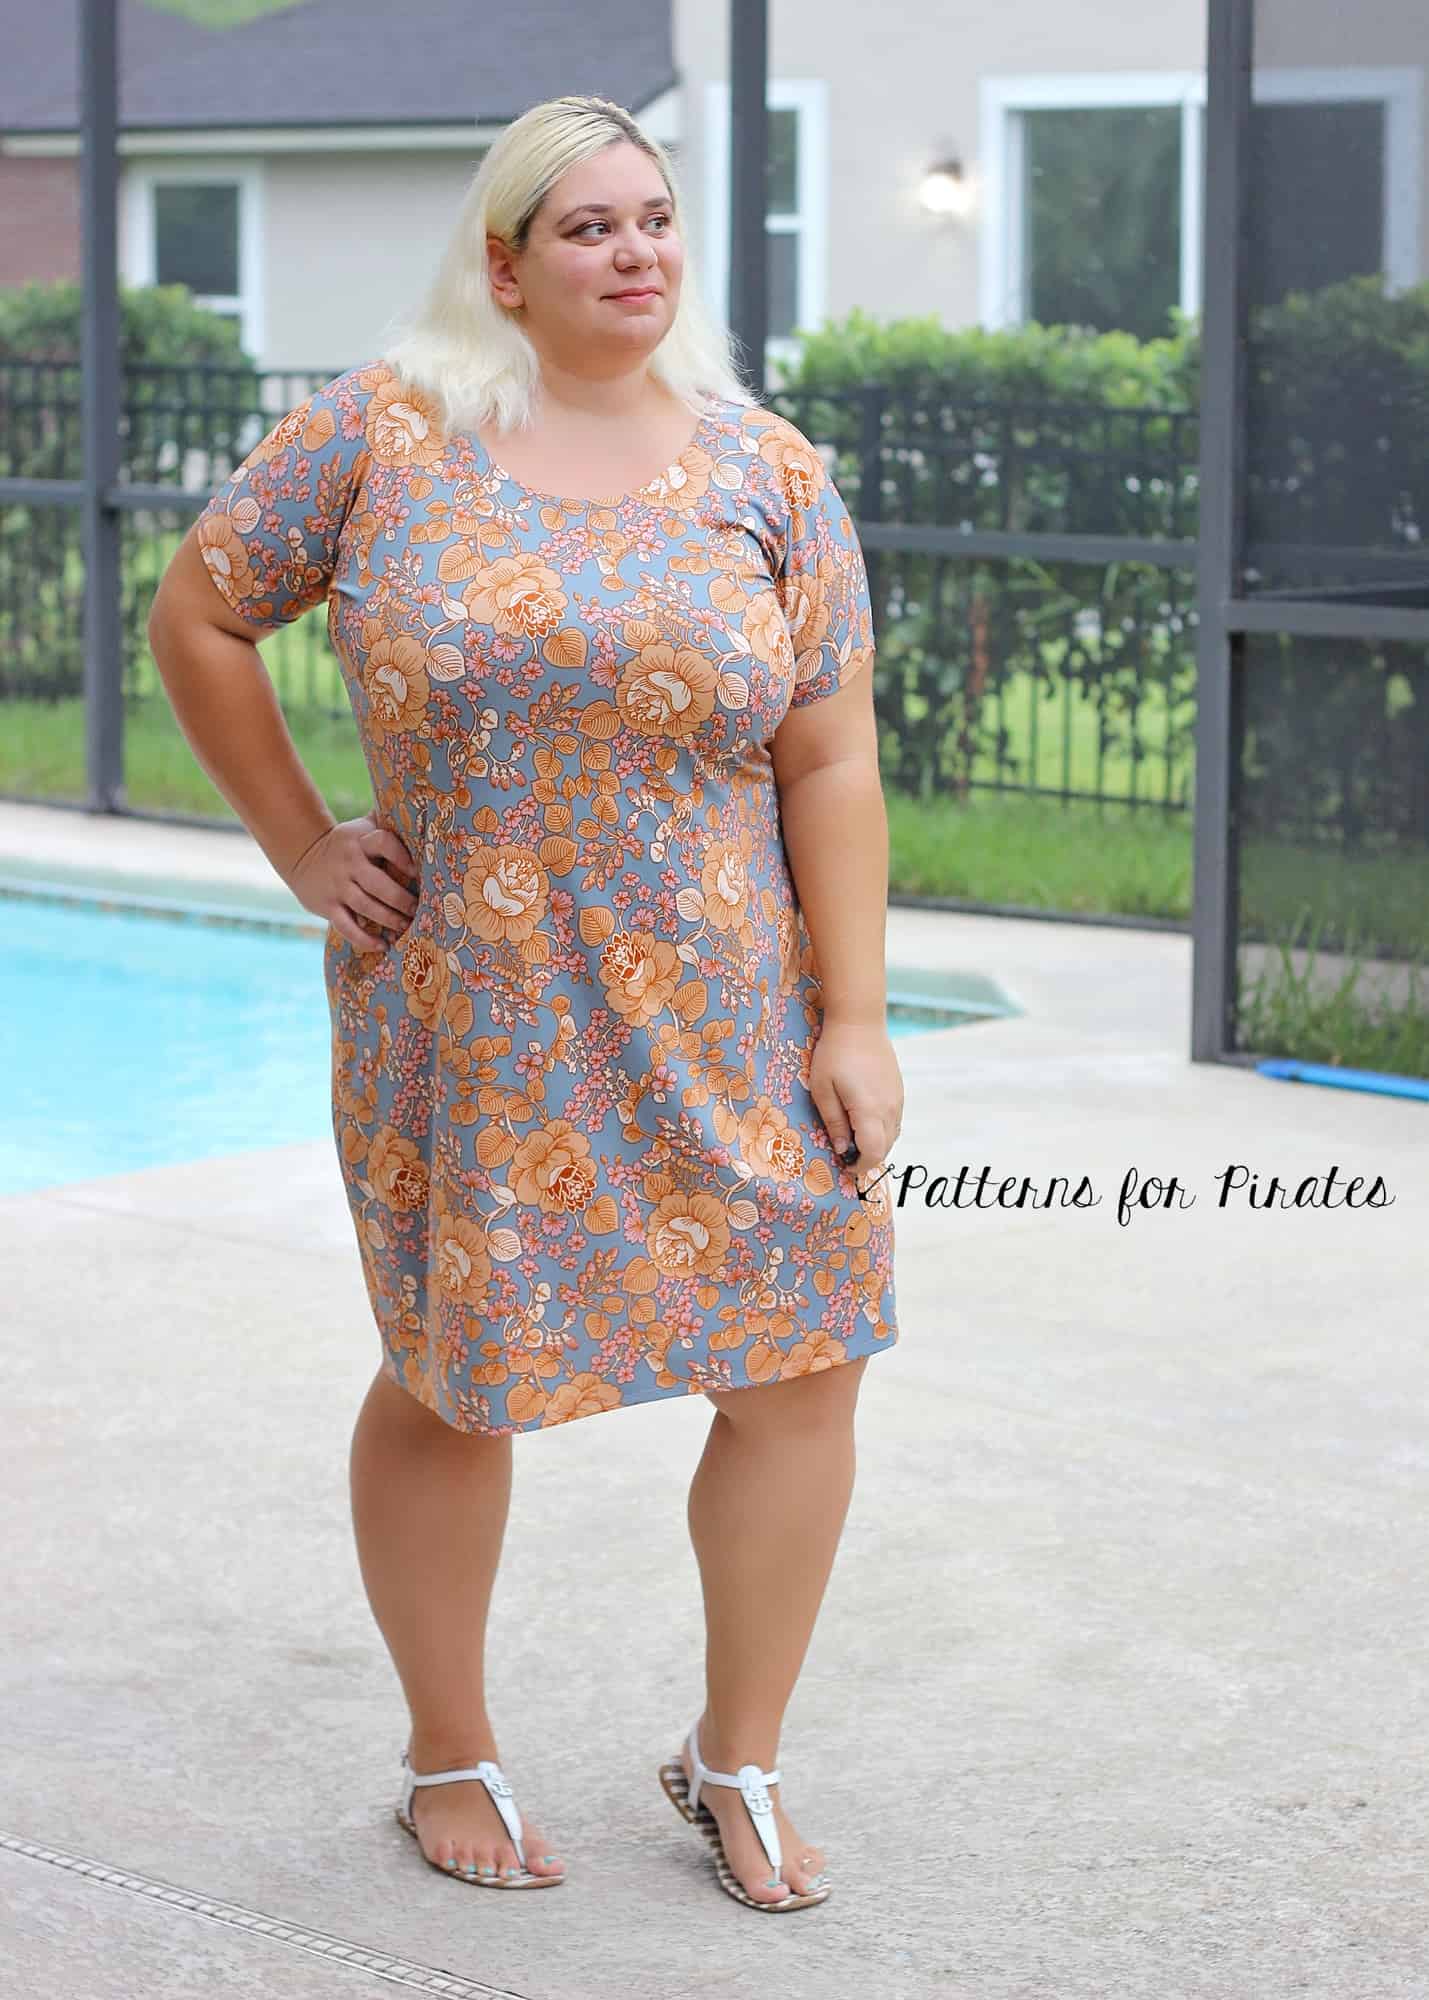
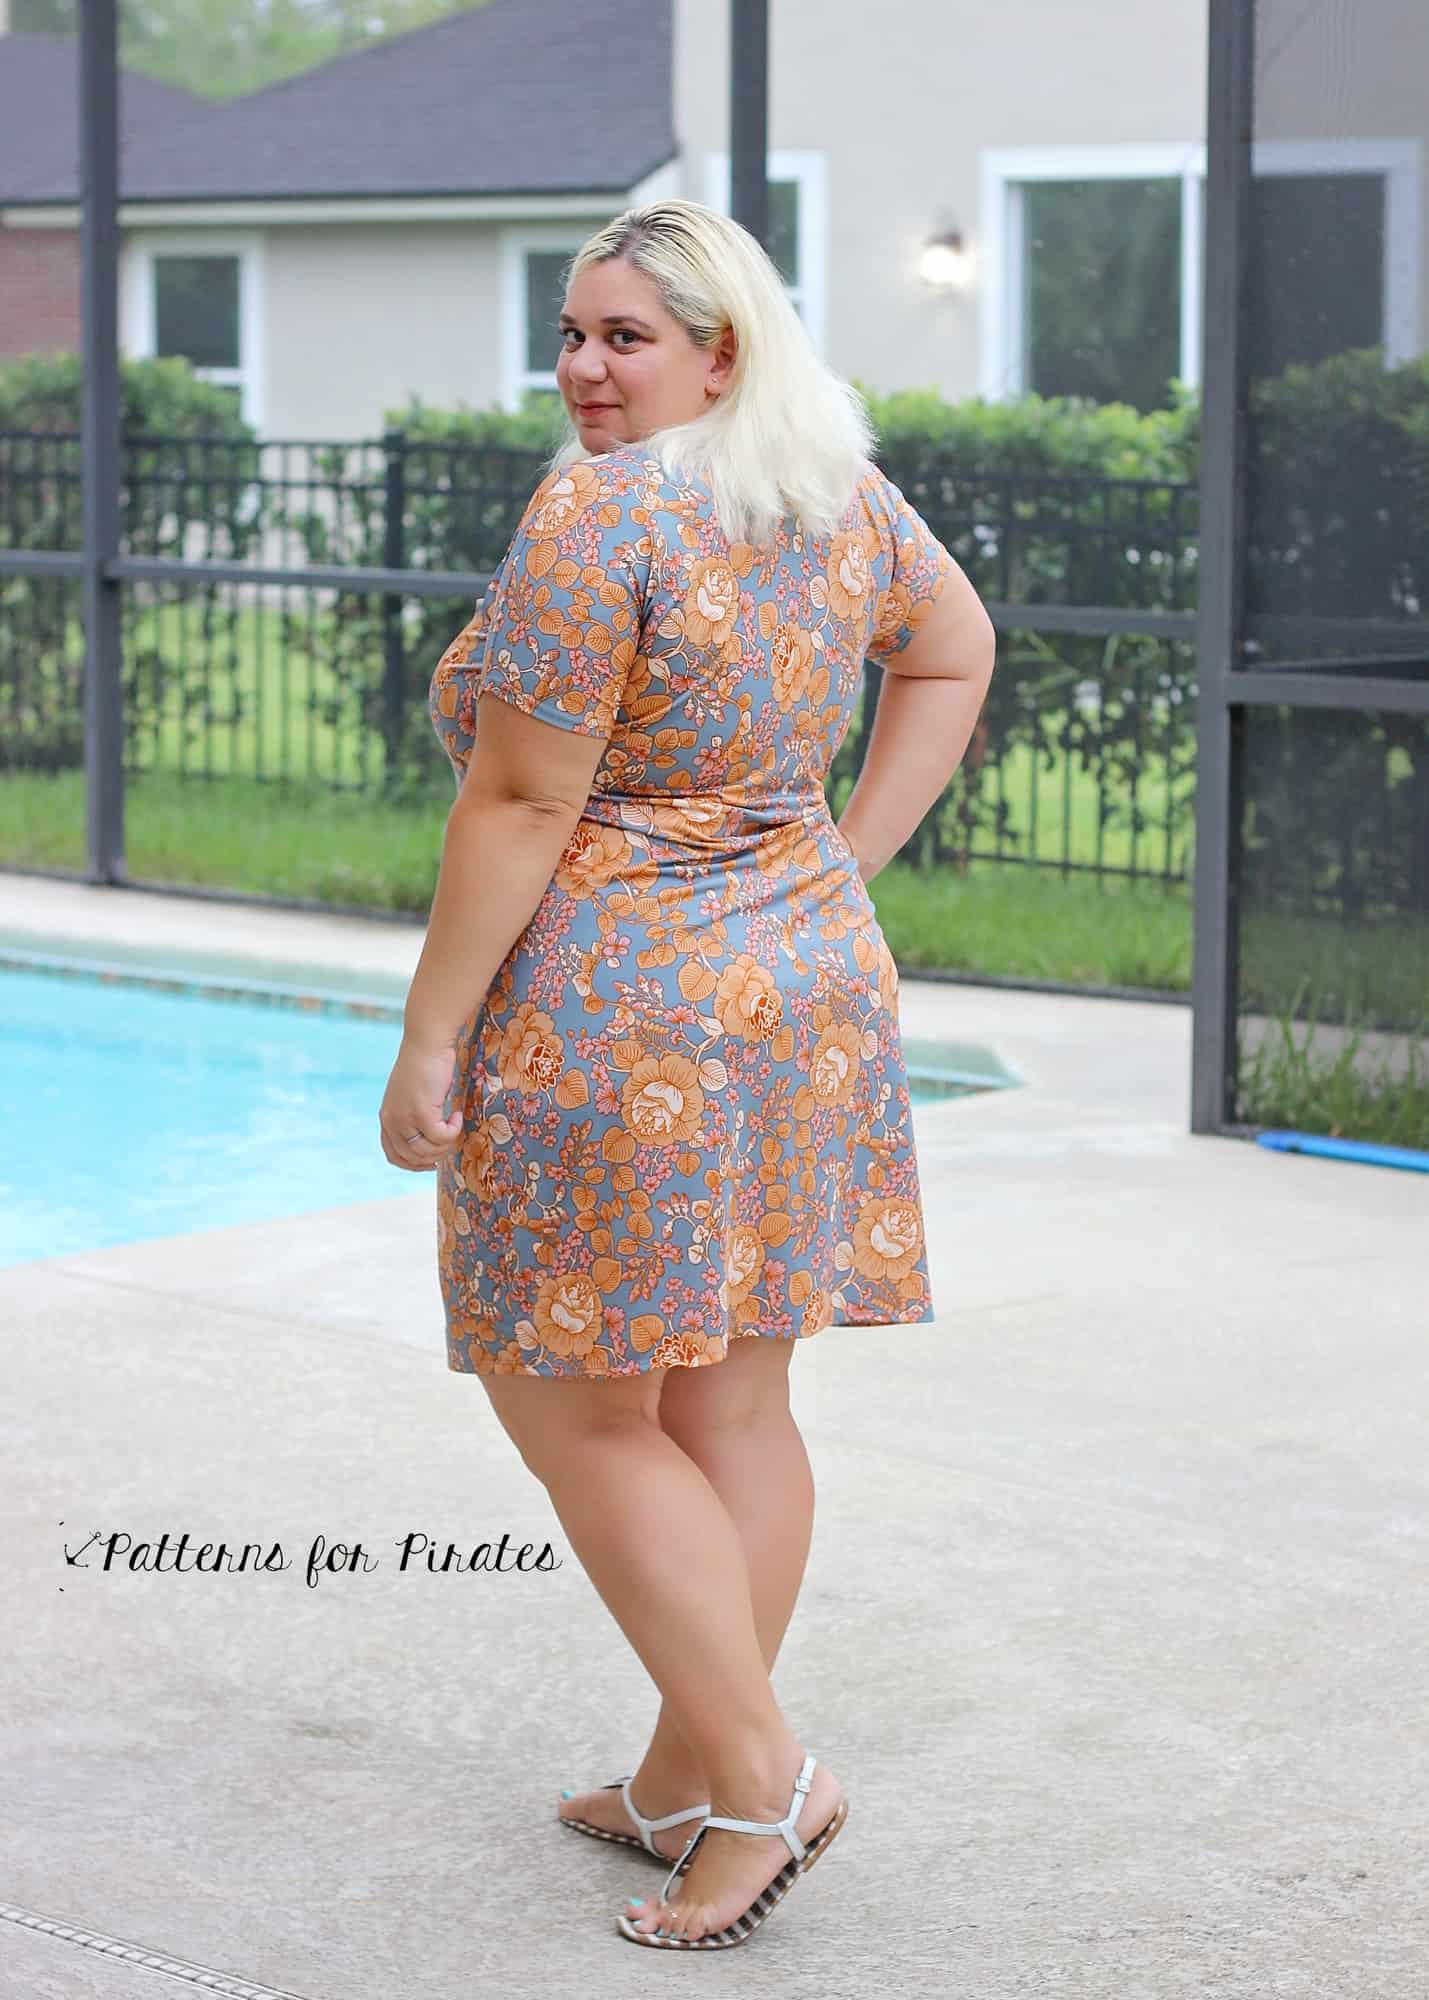
Tadah! A super quick 30 minutes sew, comfy and elegant….perfect for vacation. I love that the Sweet Tee can be dressed up or dressed done, wear it with heels for an evening out or with flats for a fun day of vacation activities.
Don’t forget to check out the other blogs in this tour! The ladies really delivered!
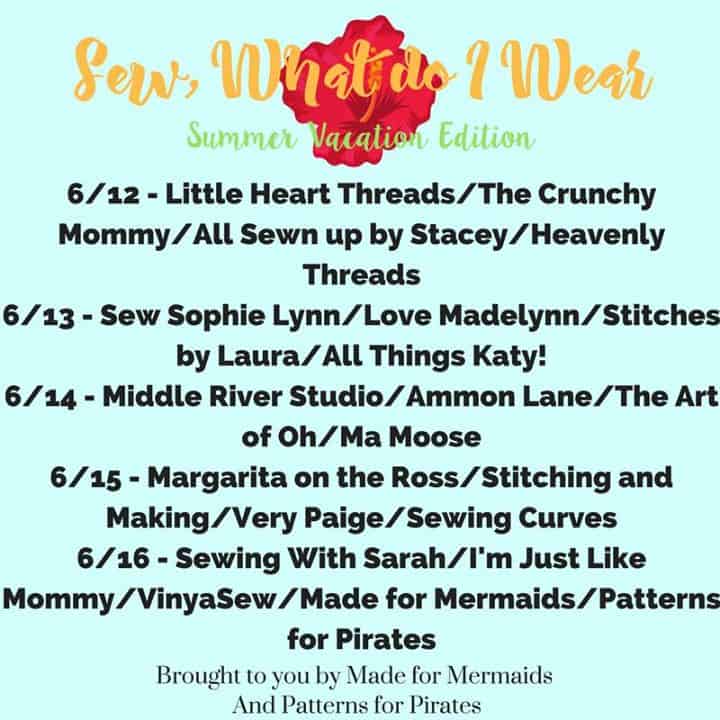
June 12: Little Heart Threads , The Crunchy Mommy , All_Sewn_Up_By_Stacey , Heavenly Threads Blog
June 13 : SewSophieLynn , Love Madelynn , Stitches by Laura , All Things Katy!
June 14: Middle River Studio, Ammon Lane , The Art of Oh, Ma Moose
June 15: Sewing Curves, Margarita on the Ross, Stitching and Making, Very Paige,
June 16: Sewing with Sarah, I’m Just Like Mommy, Vinya Sew,
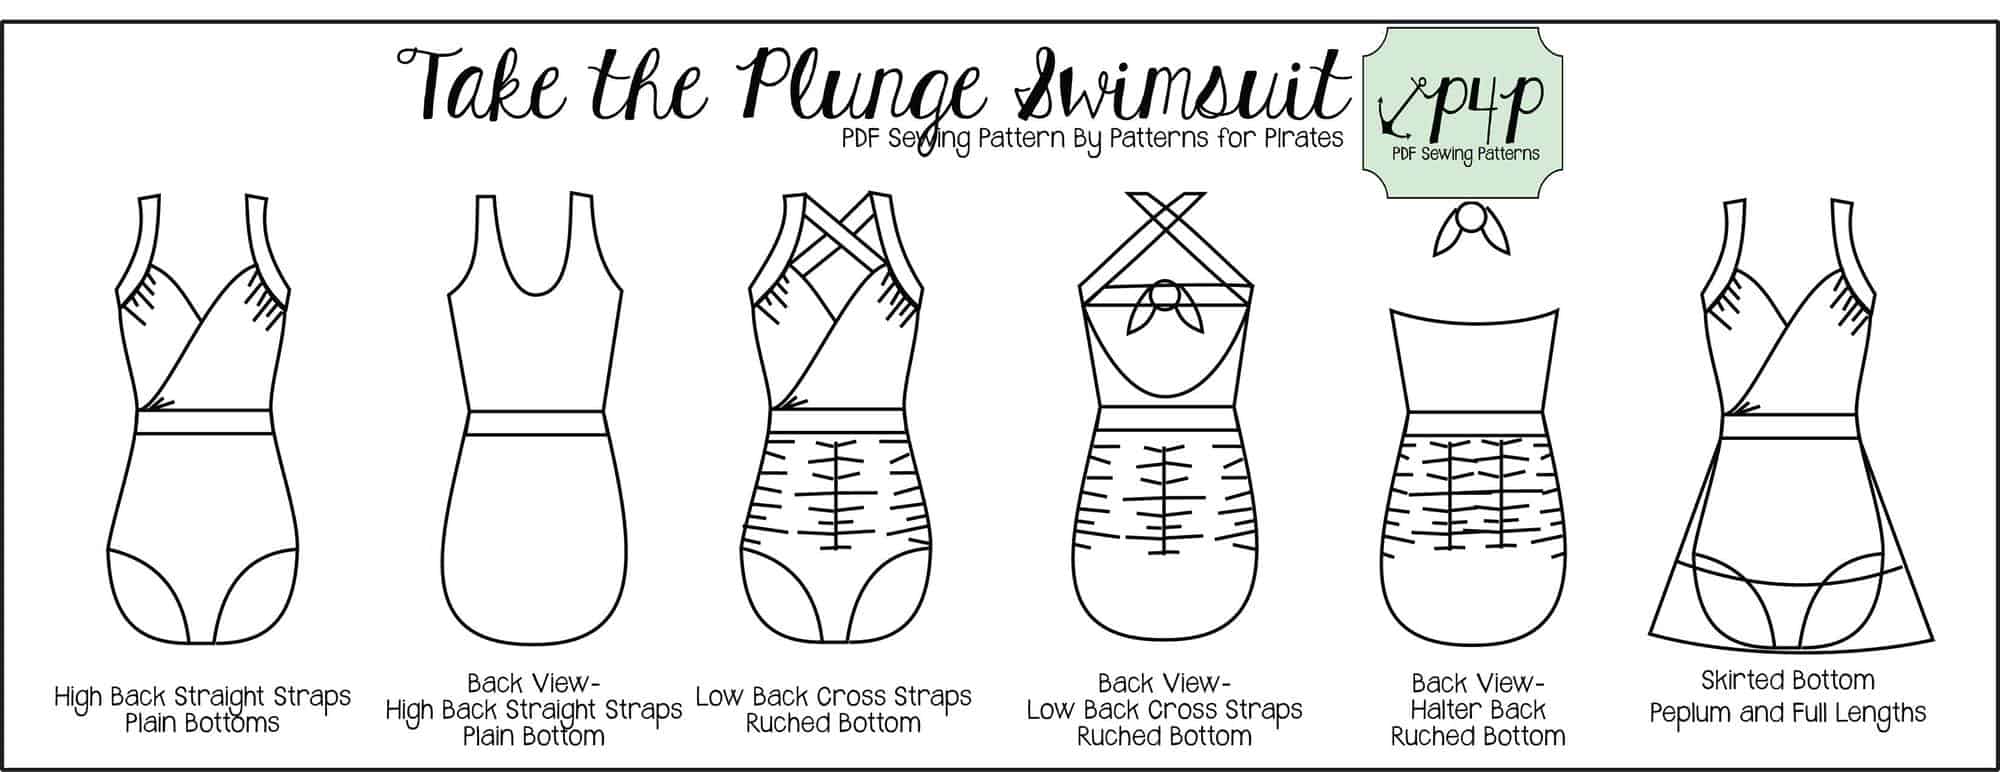
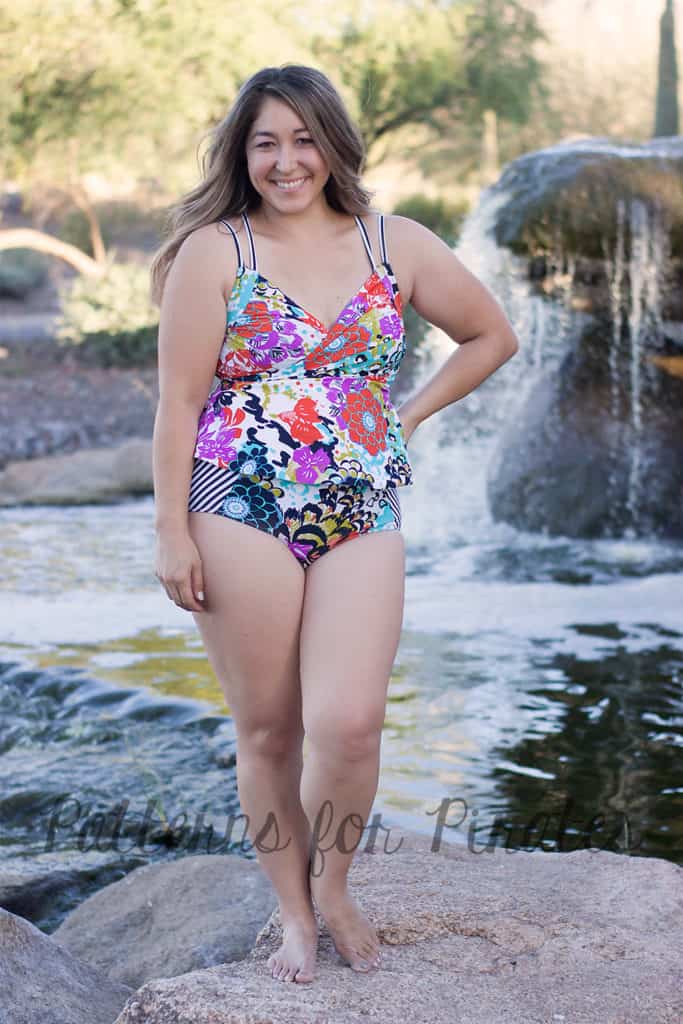
Just about this time last year, we released our first ever swim patterns. The Siren Swim Top and Hello Sailor Bottoms have received a lot of love, but we still had a lot of requests for a one-piece suit. Your wishes are being fulfilled today, with the brand spankin’ new release of the Take the Plunge Swimsuit!
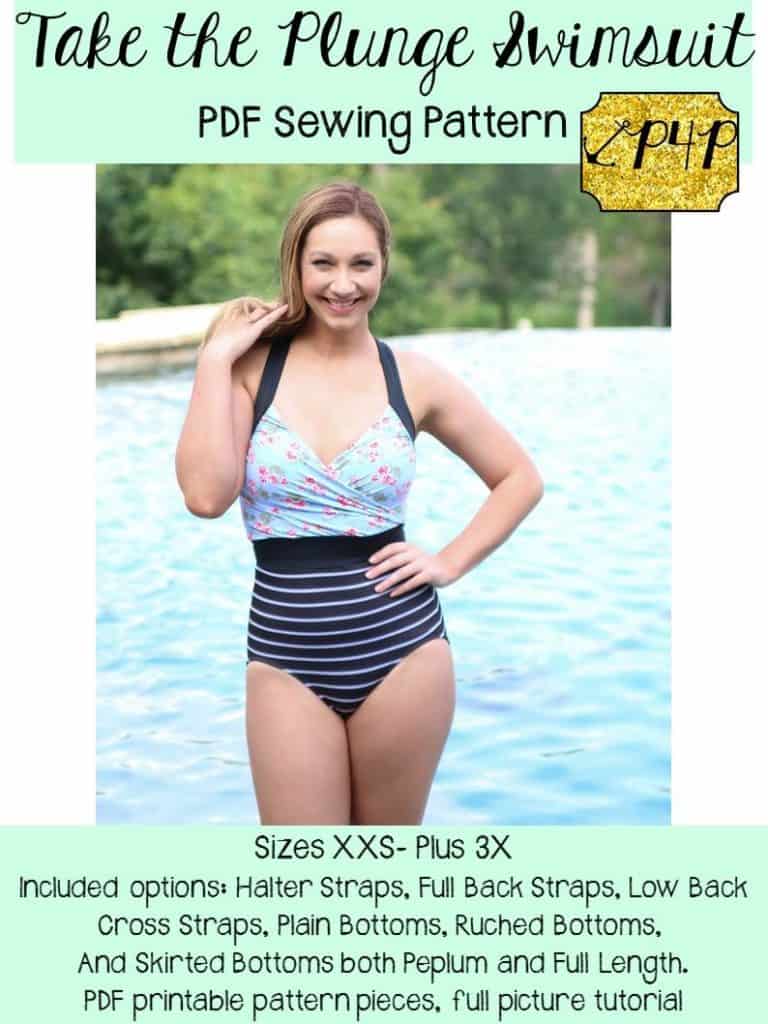

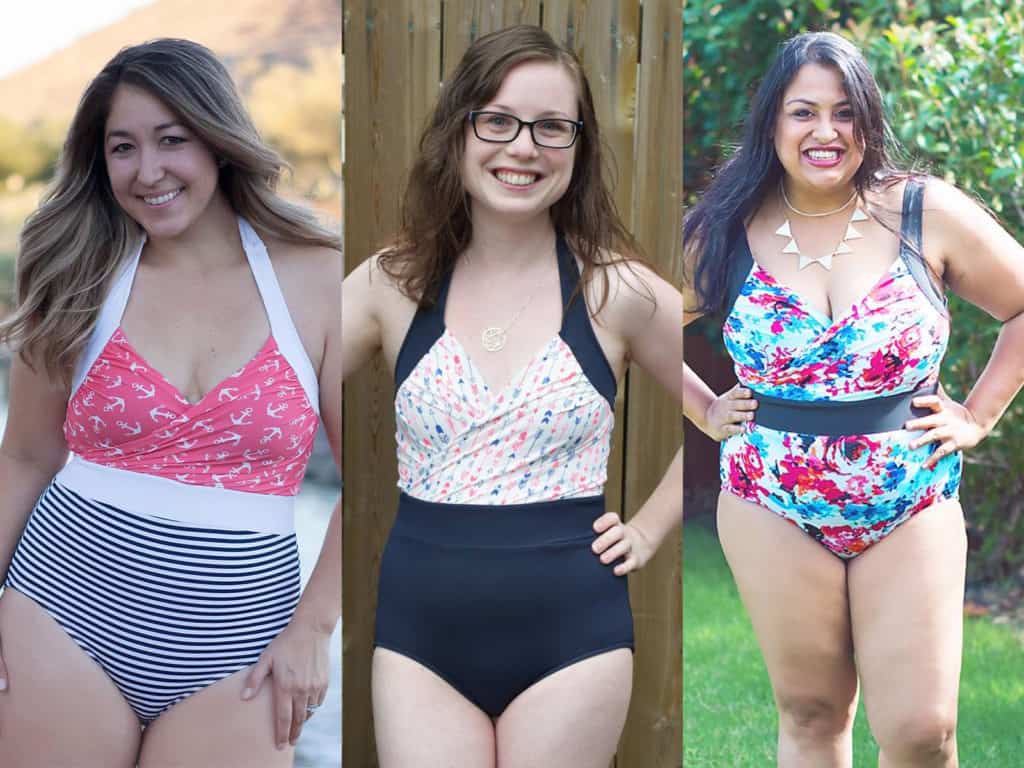
Take the Plunge will make you want to swim all summer long. We’ve done all we can to pack it full of options and to make it flattering for ALL body types, sizes XXS – Plus 3X.
This is an intermediate knit pattern, and fits in a traditional, body hugging, one-piece swimwear style. The suit is fully lined and includes directions to add bust support (swim cups / power mesh / under bust elastic). All of your seams are enclosed for that professional finish, and the edges are all finished with elastic so you will be completely secure in your suit while taking a dip in the pool.
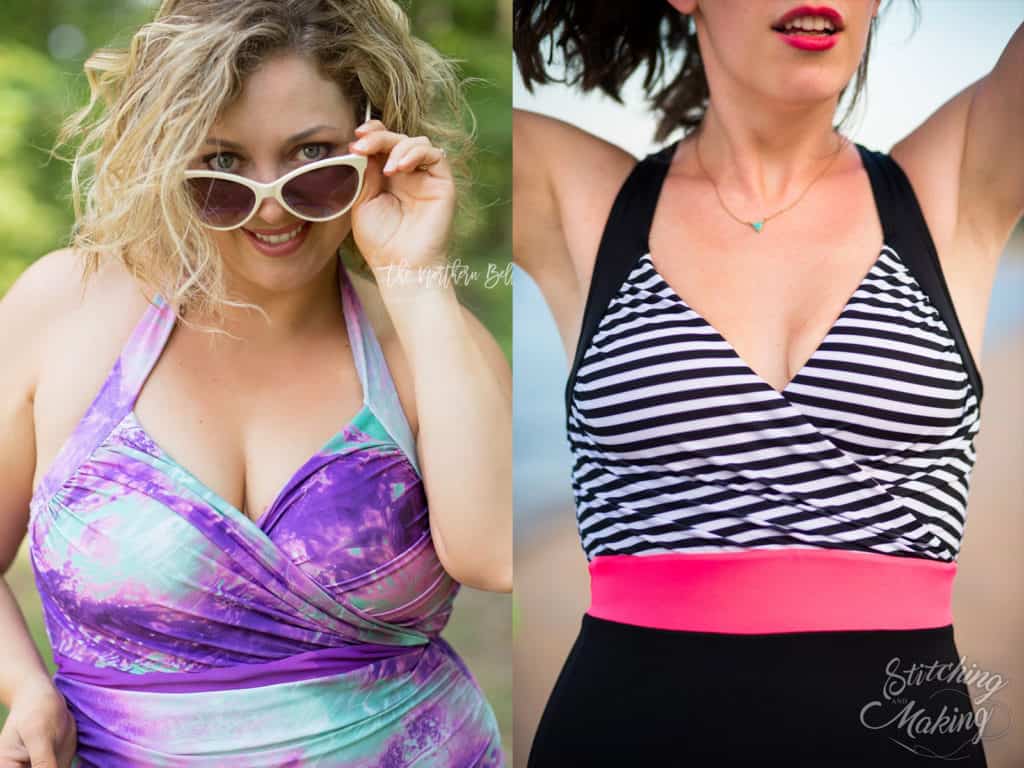
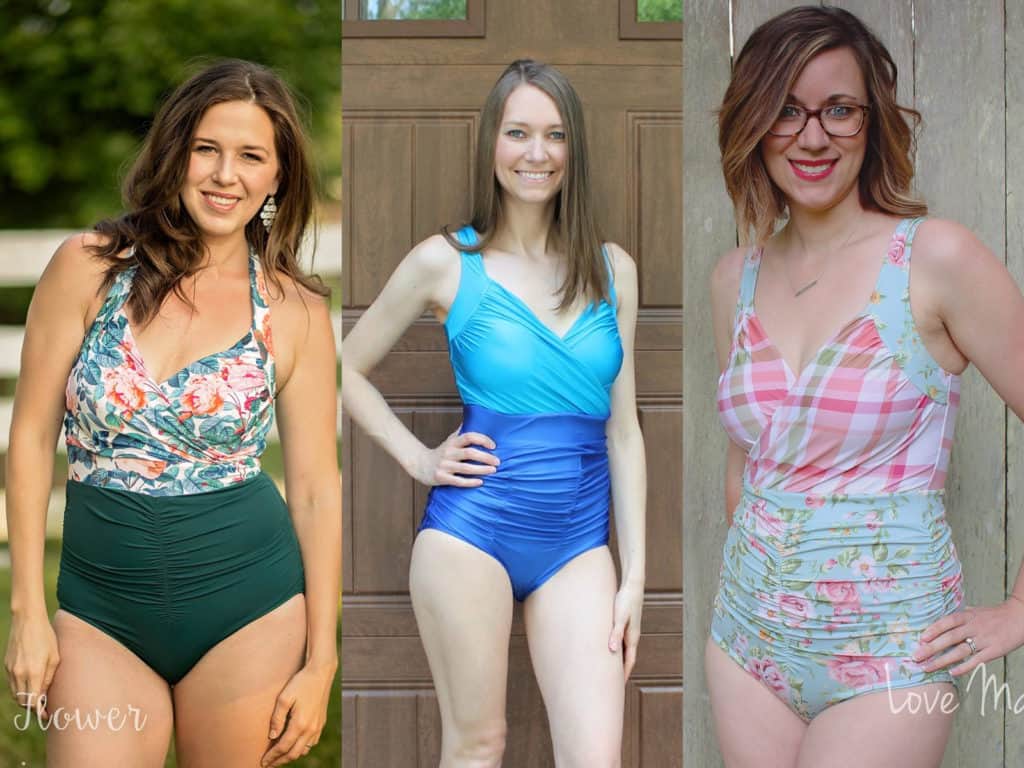
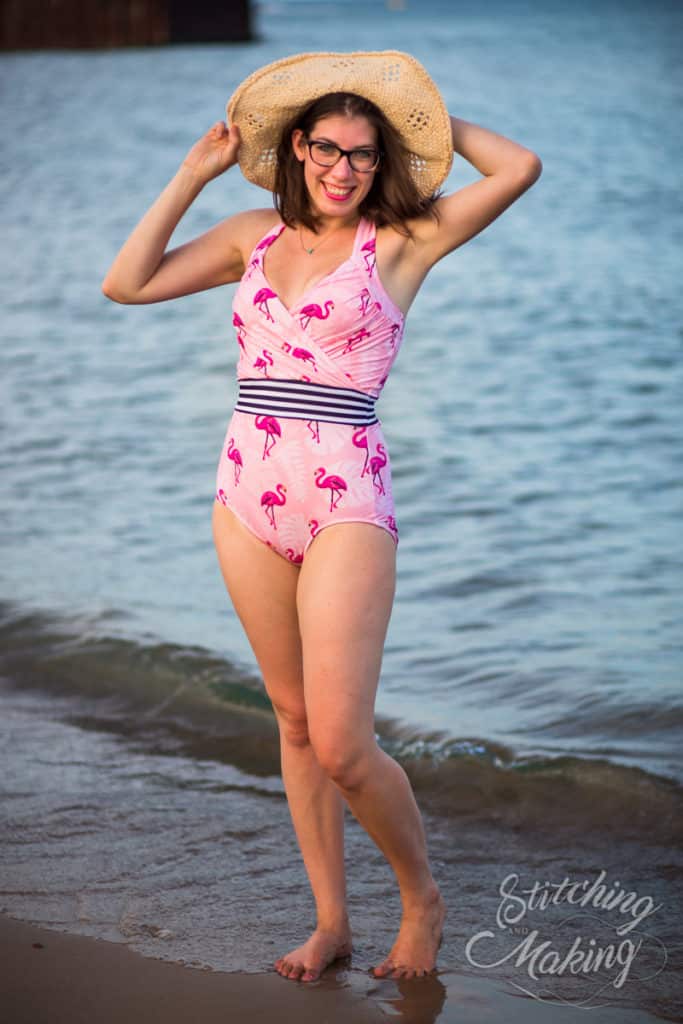
The pattern features a cross-over front bodice that plunges a little lower for a sexy look, while still keeping you contained, covered, and secure. The waistband hits at and slightly above the natural waistline, to create an extra slimming silhouette, and is also great for color blocking. And the leg openings come up a little higher in the front for a longer, leaner look. There are three band-back options (high back with straight straps / low back with cross straps / halter back), two bottom types (plain / ruched) and an additional option for a skirted bottom in two lengths (peplum / full).
The retro vibe of the Take the Plunge Swimsuit will be a classic for years to come and can be paired with so many different fabric prints for unlimited looks!
**Want to learn more about how to measure yourself for this pattern? We’ve got you covered with an in-depth blog HERE.
And now let’s see some suits!
FRONT CROSS-OVER BODICE
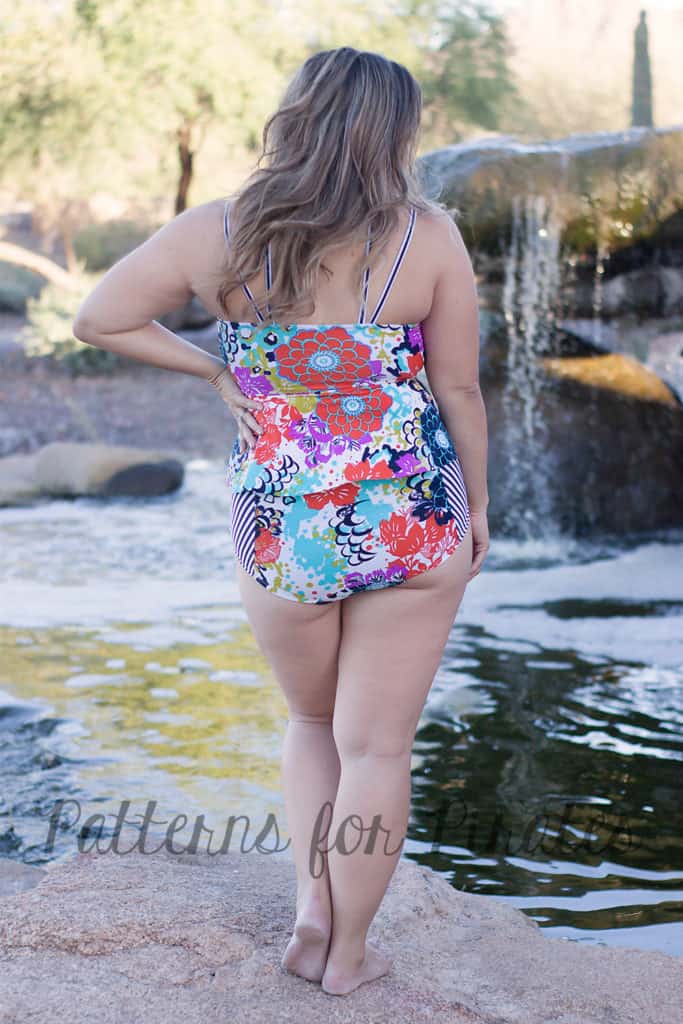
HIGH BACK, with straight straps
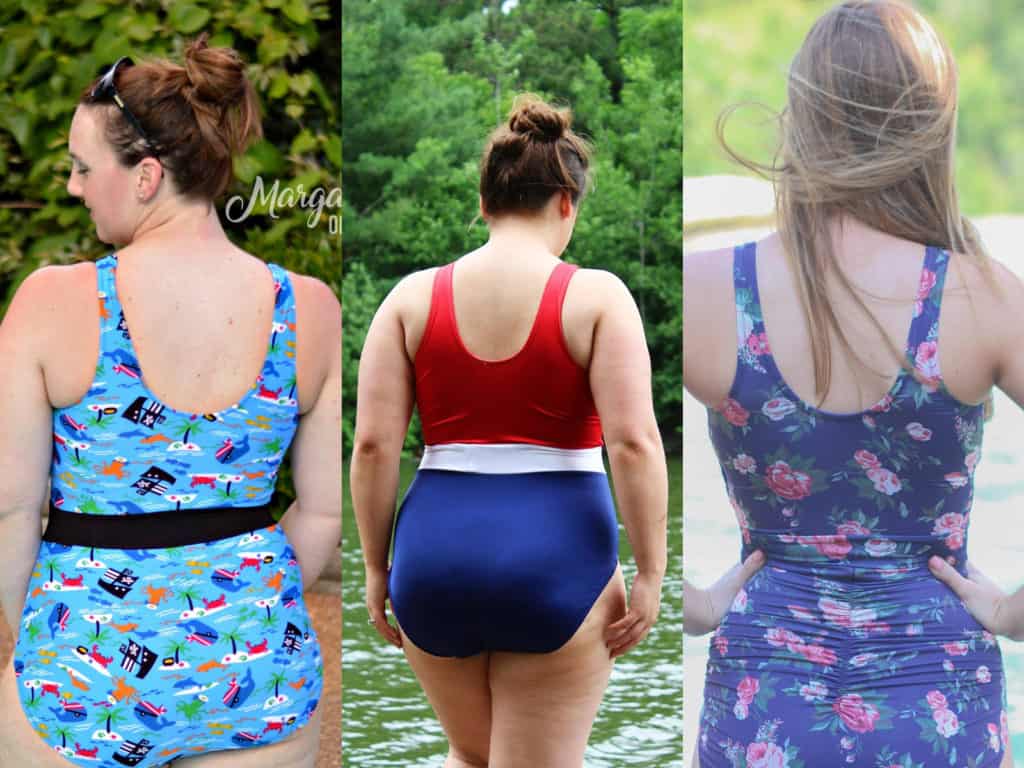
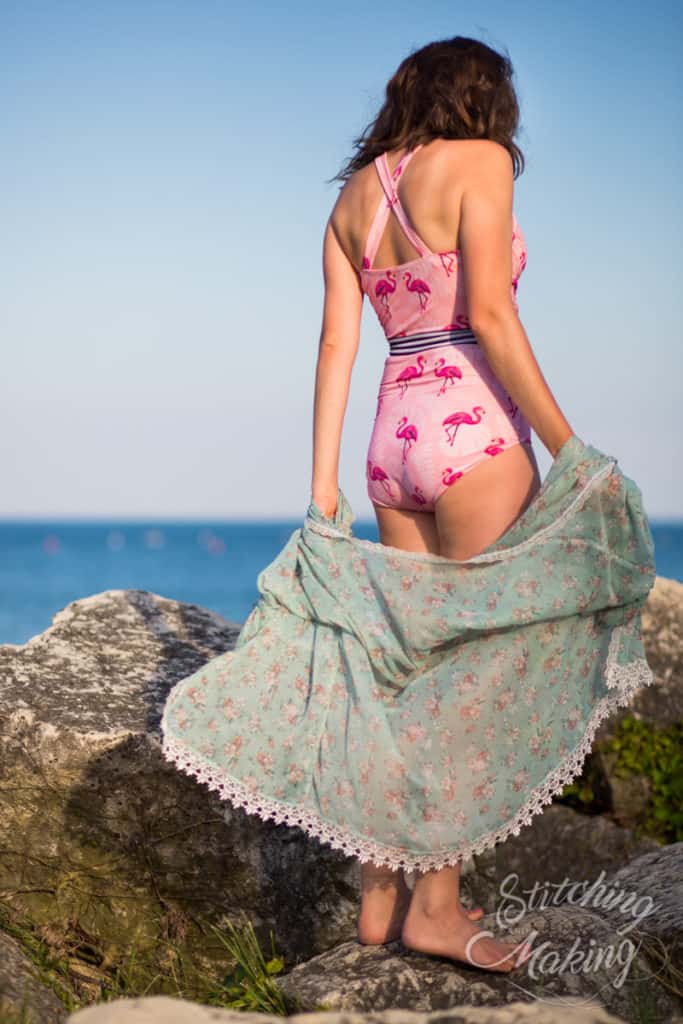
LOW BACK, with cross straps

HALTER BACK
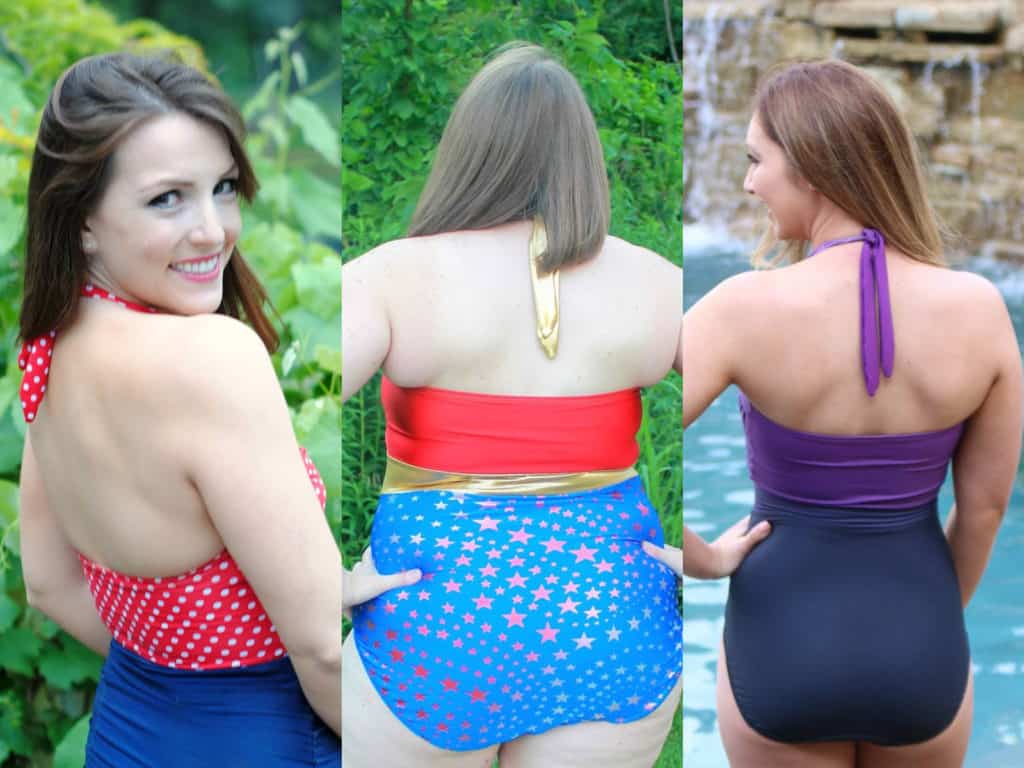
PLAIN BOTTOMS
RUCHED BOTTOMS
OPTIONAL SKIRTED BOTTOMS

Feeling inspired to go buy all the swim knits now and sew a million suits for yourself? Before you do, don’t forget to snag the Take the Plunge Swimsuit pattern HERE.
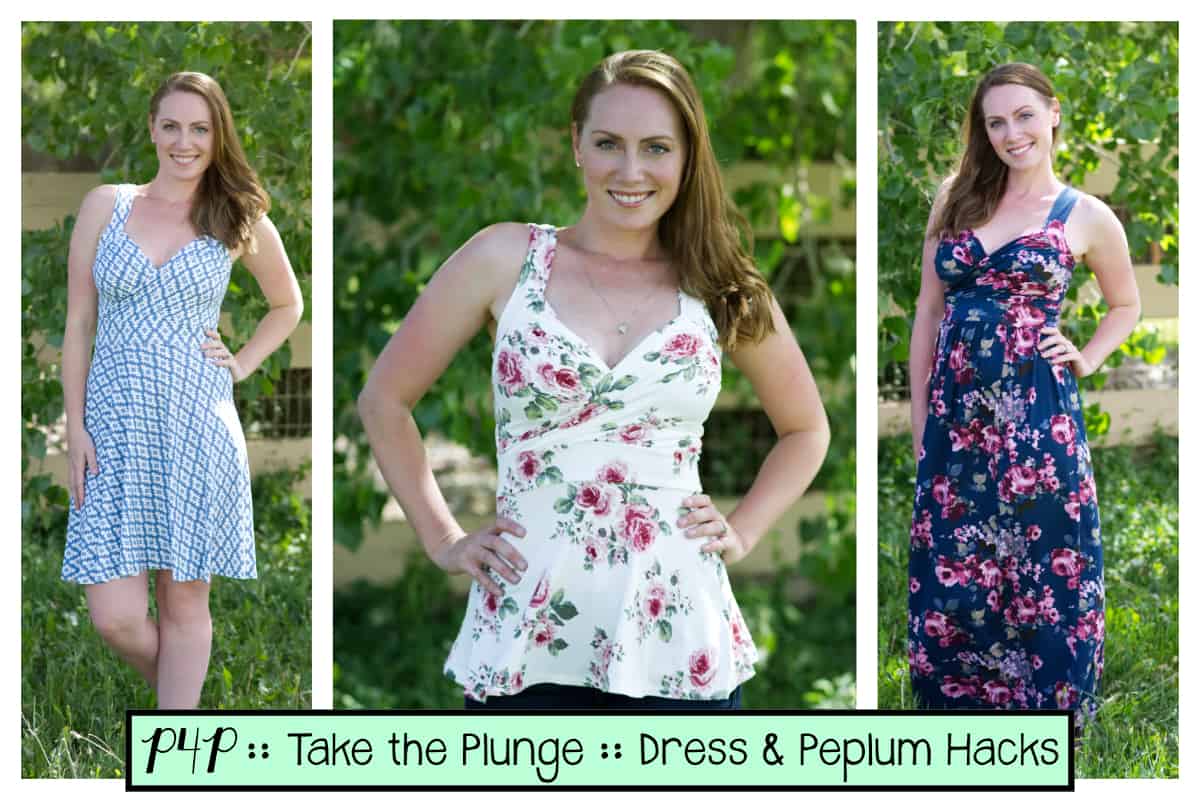
And don’t think we’d leave you with only the original pattern. We’ve explored the extra potential of Take the Plunge and have an entire set of pattern SWIM HACKS and even a DRESS + PEPLUM HACK.
Needing more inspiration? Head over to our Facebook Group Album, where are gorgeous testers of every shape and size have shared their versions! Happy Sewing, friends!

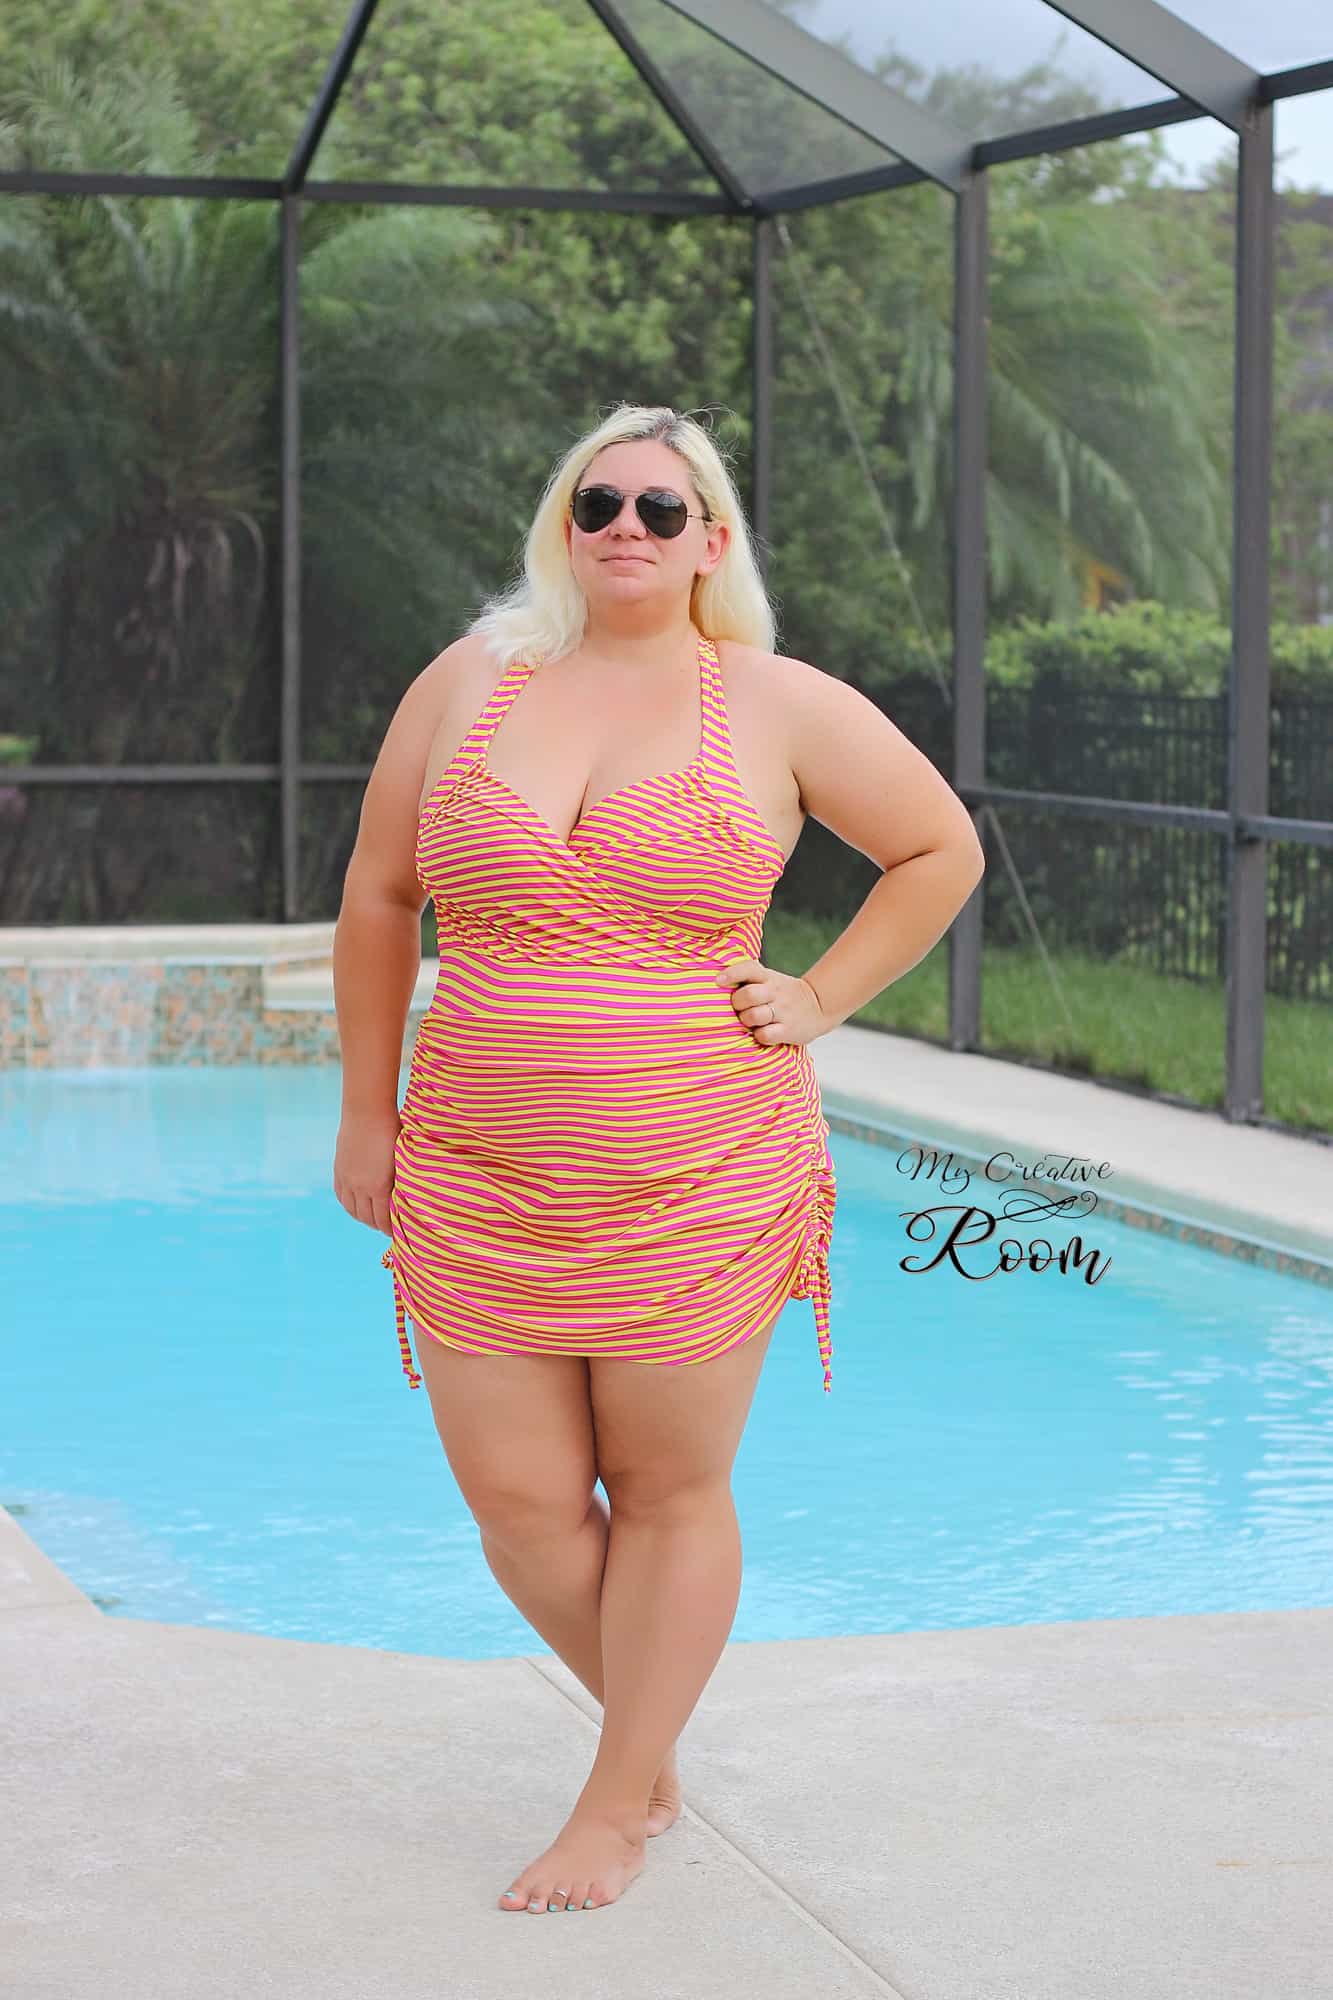
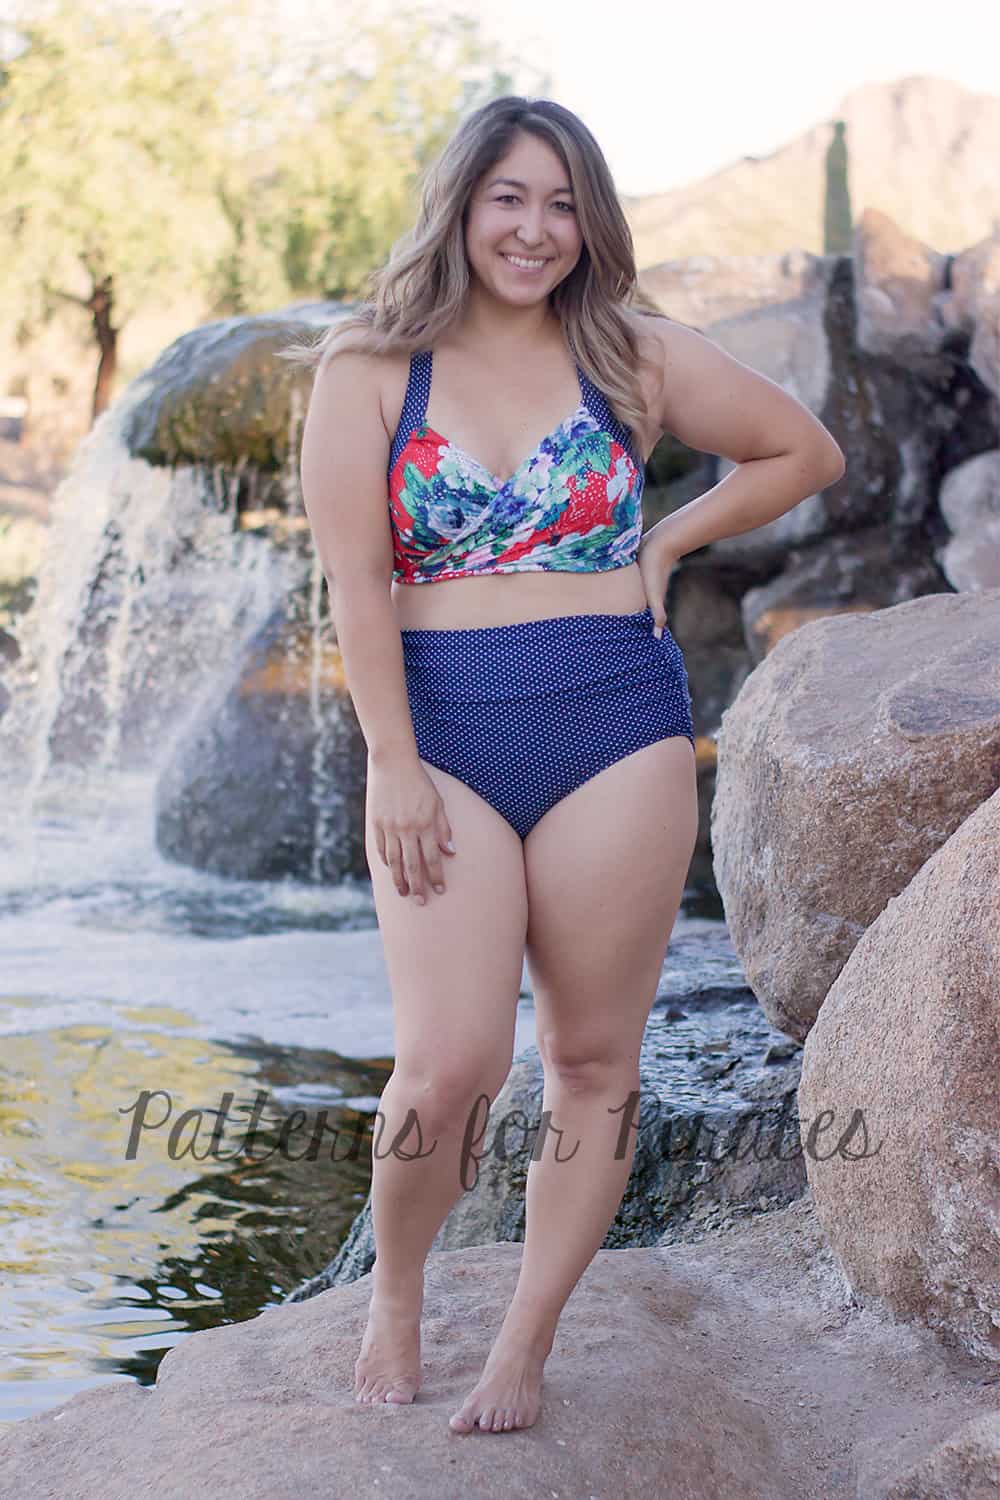
The ultimate one piece swimsuit is here and it’s packed with so many options. Mix and match the halter, low back or high back with any of the bottoms styles for a unique look every time but in true P4P fashion we could not have released this pattern without some easy hacks to get you even more looks out of your Take the Plunge Swimsuit.
First on the hack line up is a super easy swicharoo! 🙂 Simply switch the half circle skirt included in the Take the Plunge swimsuit with the rushed skirt of the Hello Sailor Swim Bottoms.
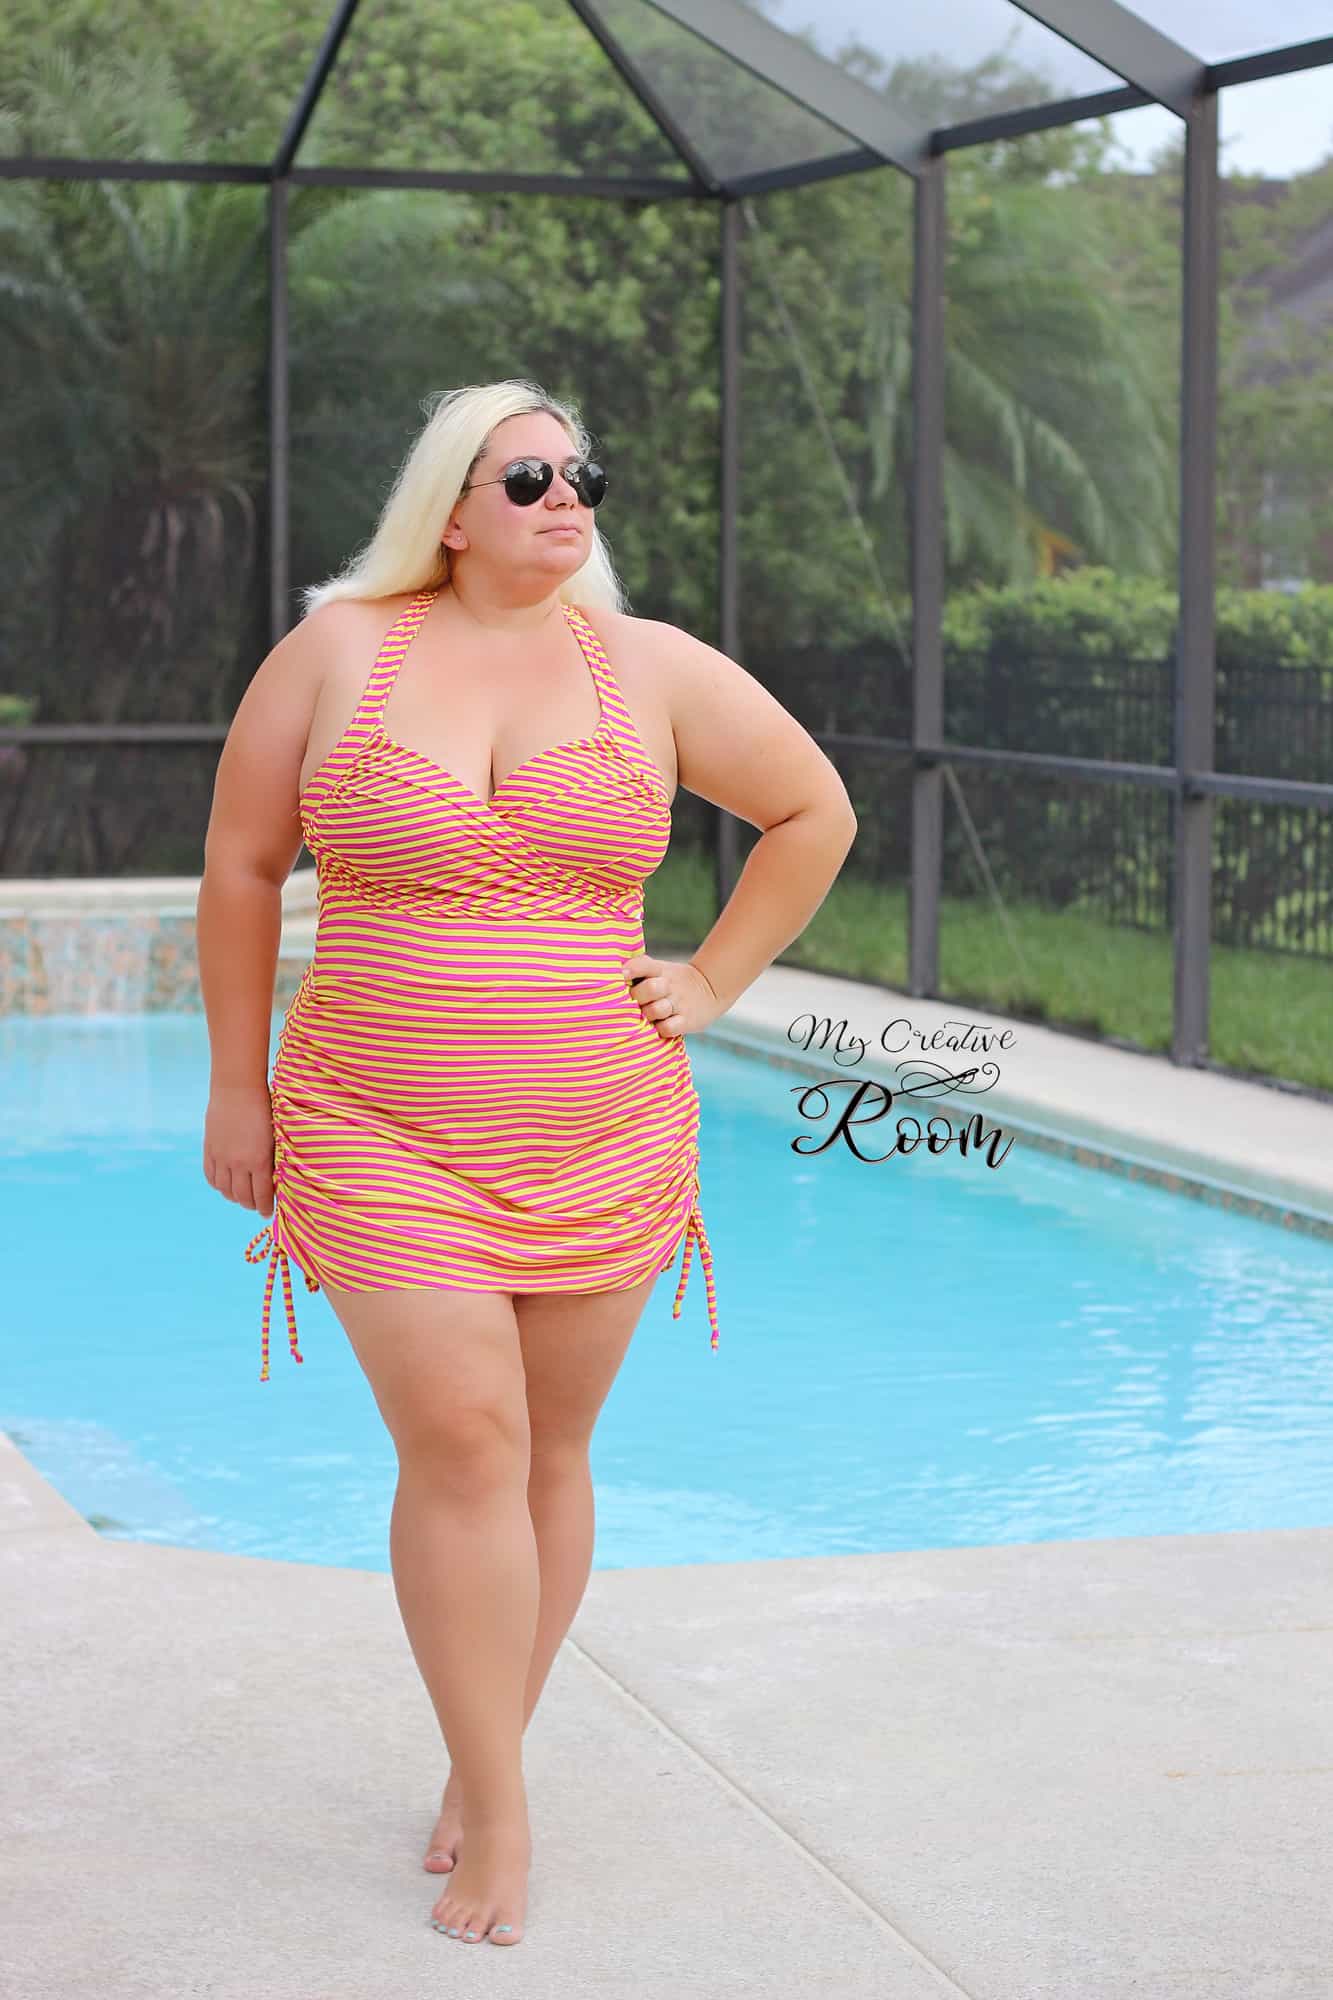
This “retro” look is so easy to achieve when using the ties option of the Hello Sailor Swim Bottoms. If you prefer to use the elastic rushing option included in the tutorial you can certainly do that too.
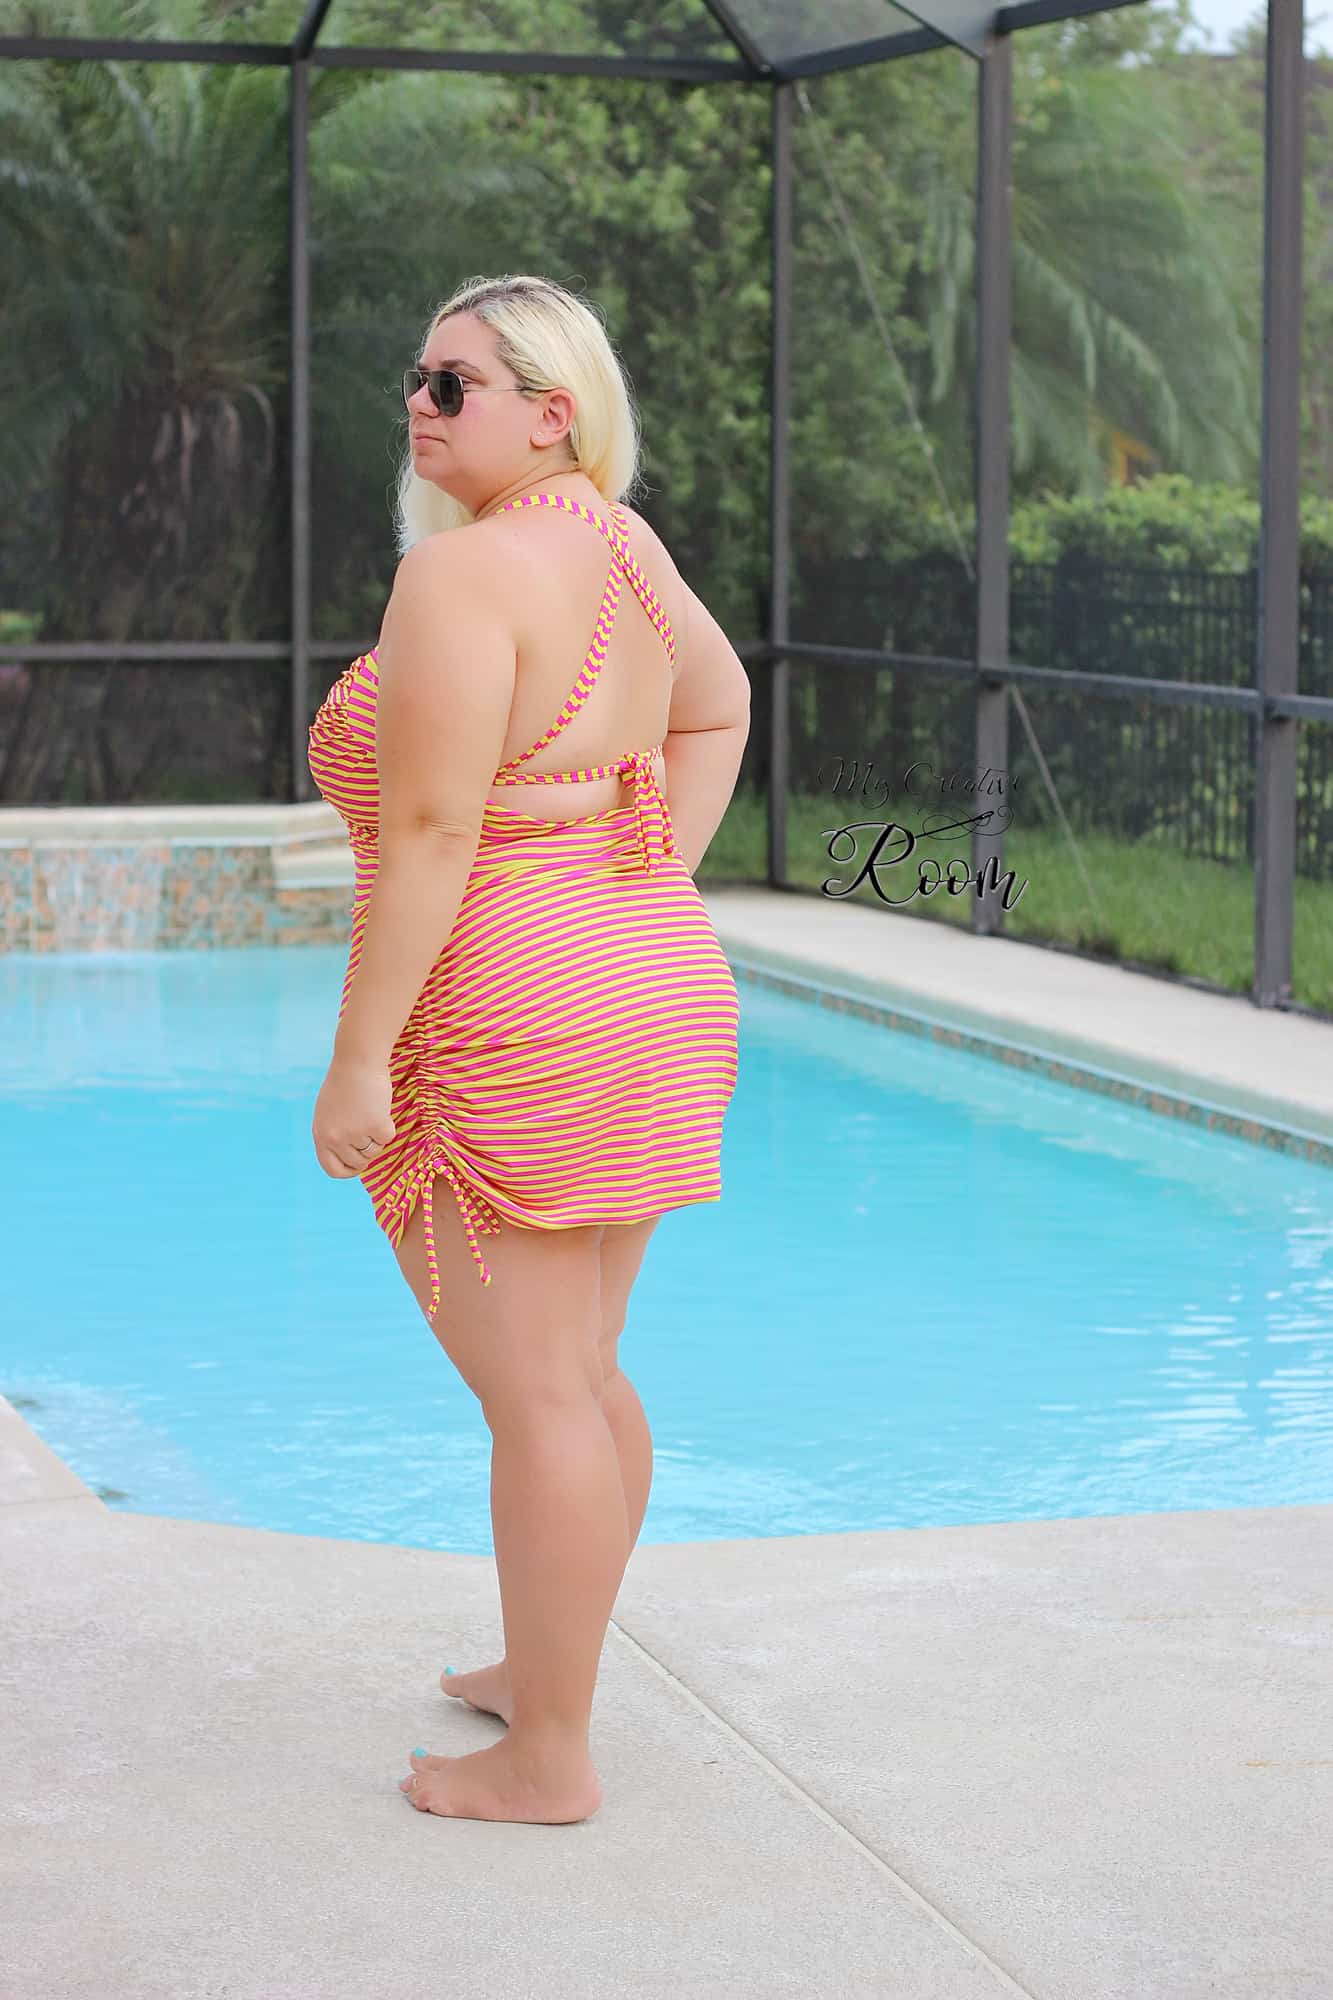
I used the low back option of the Take the Plunge swimsuit but either one of the other tops would look amazing with the skirted bottoms. Make yourself a high back option and you’ll be ready to chase your little ones at the beach this summer. 🙂

There was no alteration needed to make to the pattern. Follow the tutorial for the Take the Plunge swimsuit and replace the skirt included with the Hello Sailor Swim Bottoms skirt. Easy peasy!
Alex
—
For another quick and easy way to mix up this pattern, try modifying the straps! In this example, I’ll show you how to hack the halter back and straps into a trendy criss-cross.
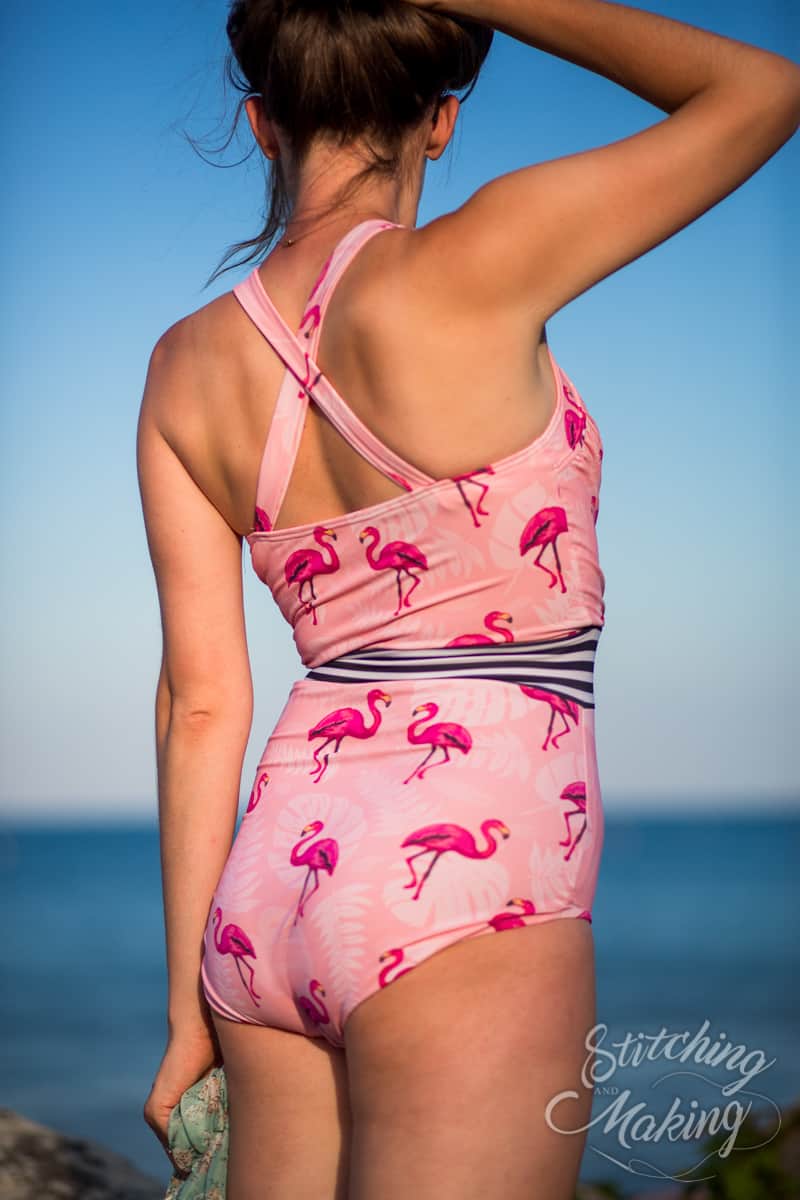
1. When cutting out your halter straps, you don’t need to cut the pointed tip. Just straight across is easier. For me, the length worked as-is, but if you are extra tall (I am 5’8″), you may want to cut a couple extra inches just to be safe.
2. Assemble the pattern as the instructions direct, until you get to the step for adding the elastic in the back.
3. After you’ve added the elastic, on each side, mark the middle point between the center back and the side seams. (I happened to take this picture before I added the elastic, don’t be confused by that part!)
4. Pin/clip (or baste) the straps in place where you’ve marked – make sure to cross them and that they aren’t crooked. You’ll want to try it on at this point to make sure the strap lengths are comfortable. I found that I needed to attach the straps about 1.5″ from the end.
5. Once you know exactly where you want the straps placed, now you’re ready to sew them down. There’s multiple ways you could do this, but I found this method reduced bulk the most.
6. With your strap facing up, sew it through the elastic on the back. This area will receive a lot of stress so make sure to use a good stitch – I like the triple stretch stitch or zigzag.
7. Now turn your elastic edge down to get ready to top-stitch along the edge as the pattern instruction indicate.
8. Before you top-stitch, pull the straps upwards again. Now, you’ll also catch the strap as you top-stitch along the back of the suit.
9. That’s it! Now finish the suit as usual.
Have fun experimenting different ways to change up these straps. You could try using the low back option instead of the halter, double or even triple straps on each side, or even weave them together for a completely different look!
– Elisabeth
—
Not really a one piece kind of girl? Whether you like to rock a bikini or prefer a little more coverage of a tankini, with a few minor changes you can Take the Plunge to new depths (or looks 😉 )
First up, the Peplum Tankini. I also had some fun and played with the straps a little and might blog those later but for now we will focus on the peplum.
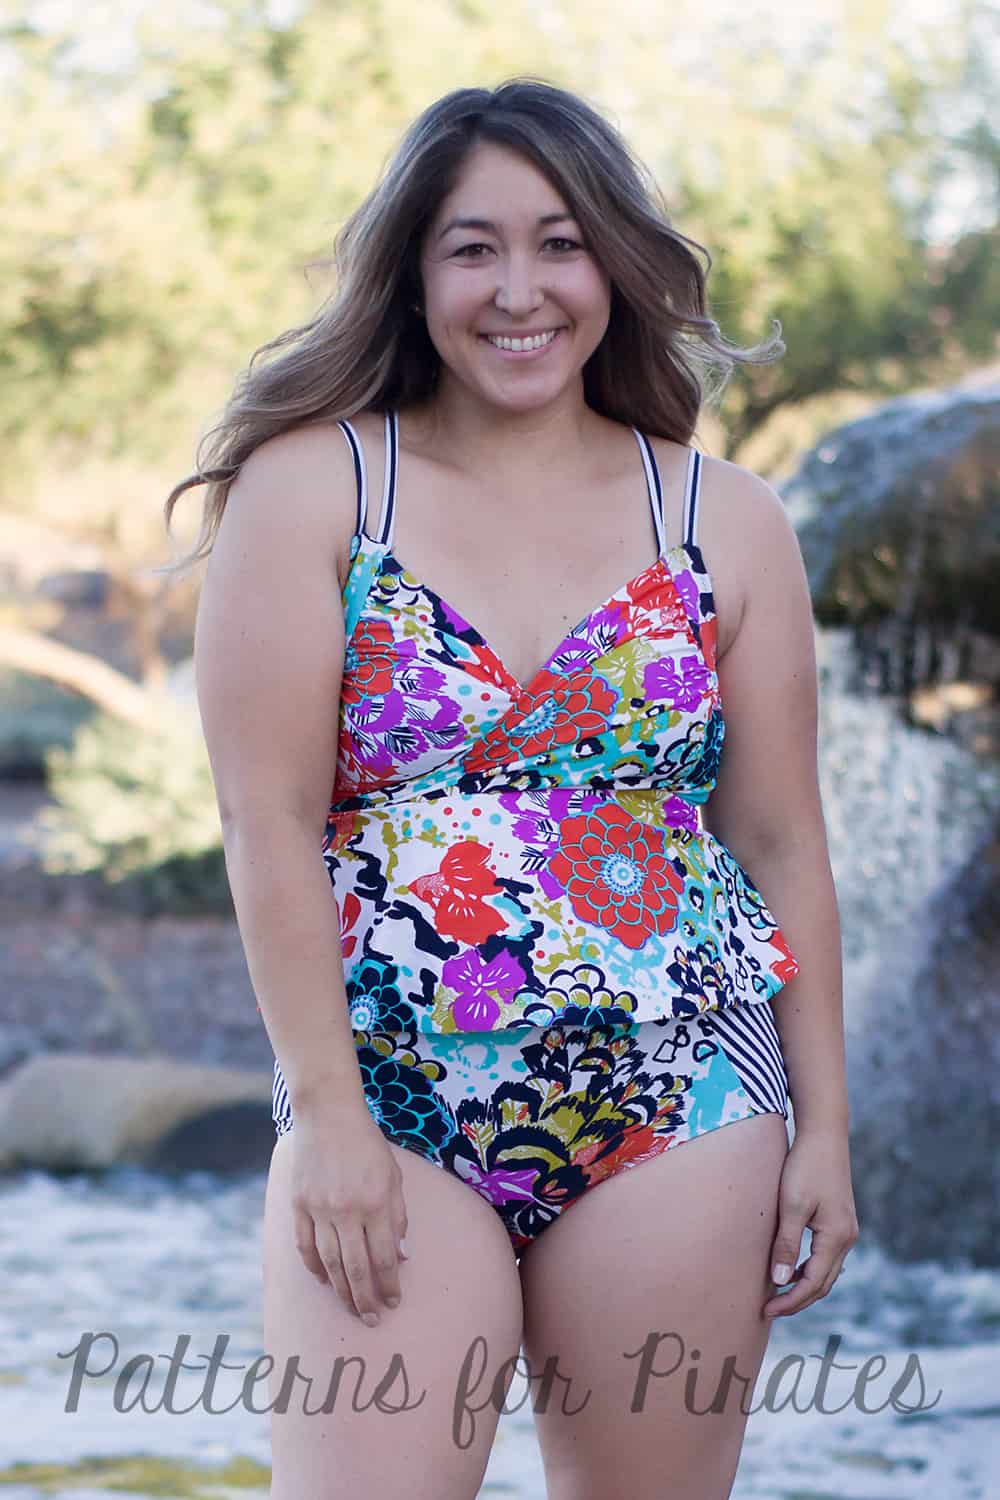
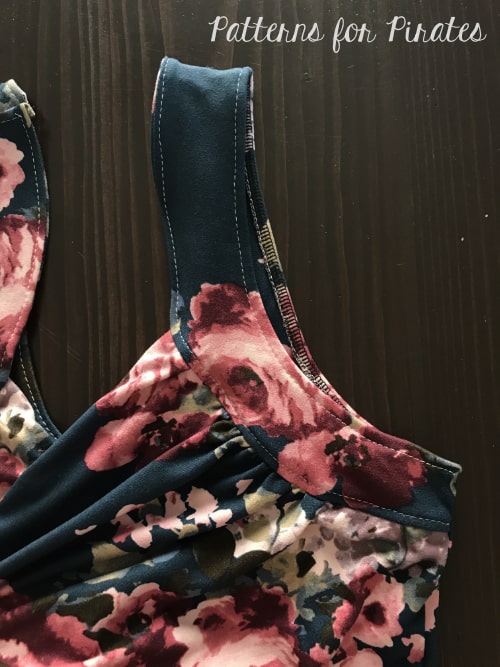
Instead of attaching the skirt to the bottom portion of the waistband as directed in the pattern, you will attach it the to the bottom edge of the bodice. Using a 1:1 ratio, add 3/8″ elastic and stitch together! This will give you some extra stability and help keep the top in place. I wanted the skirt to hit just about my high hip so shortened the peplum length in the pattern by 1″. You can choose any length of your preference though. I paired this with the Hello Sailor Swim Bottoms, however you could easily use the bottoms in the Take the Plunge Swimsuit (I’ll show those later too!)

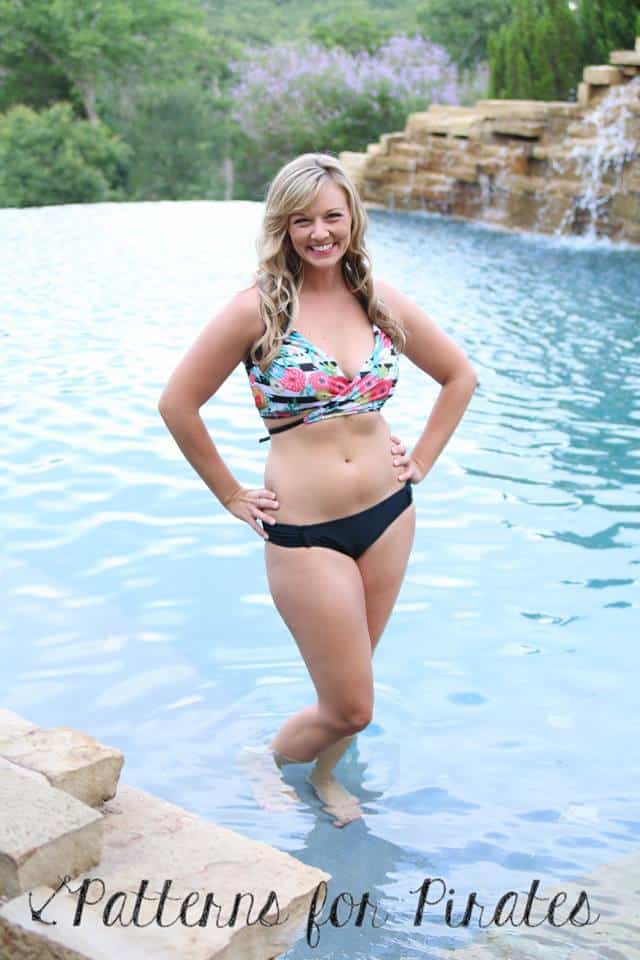
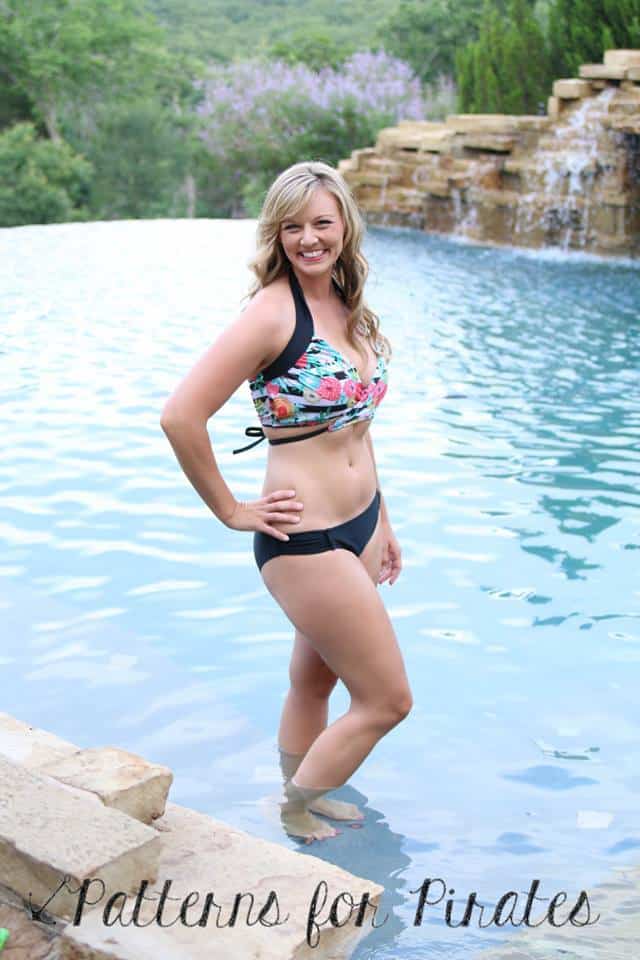
Now for the Bikini option… Not one, but two!!

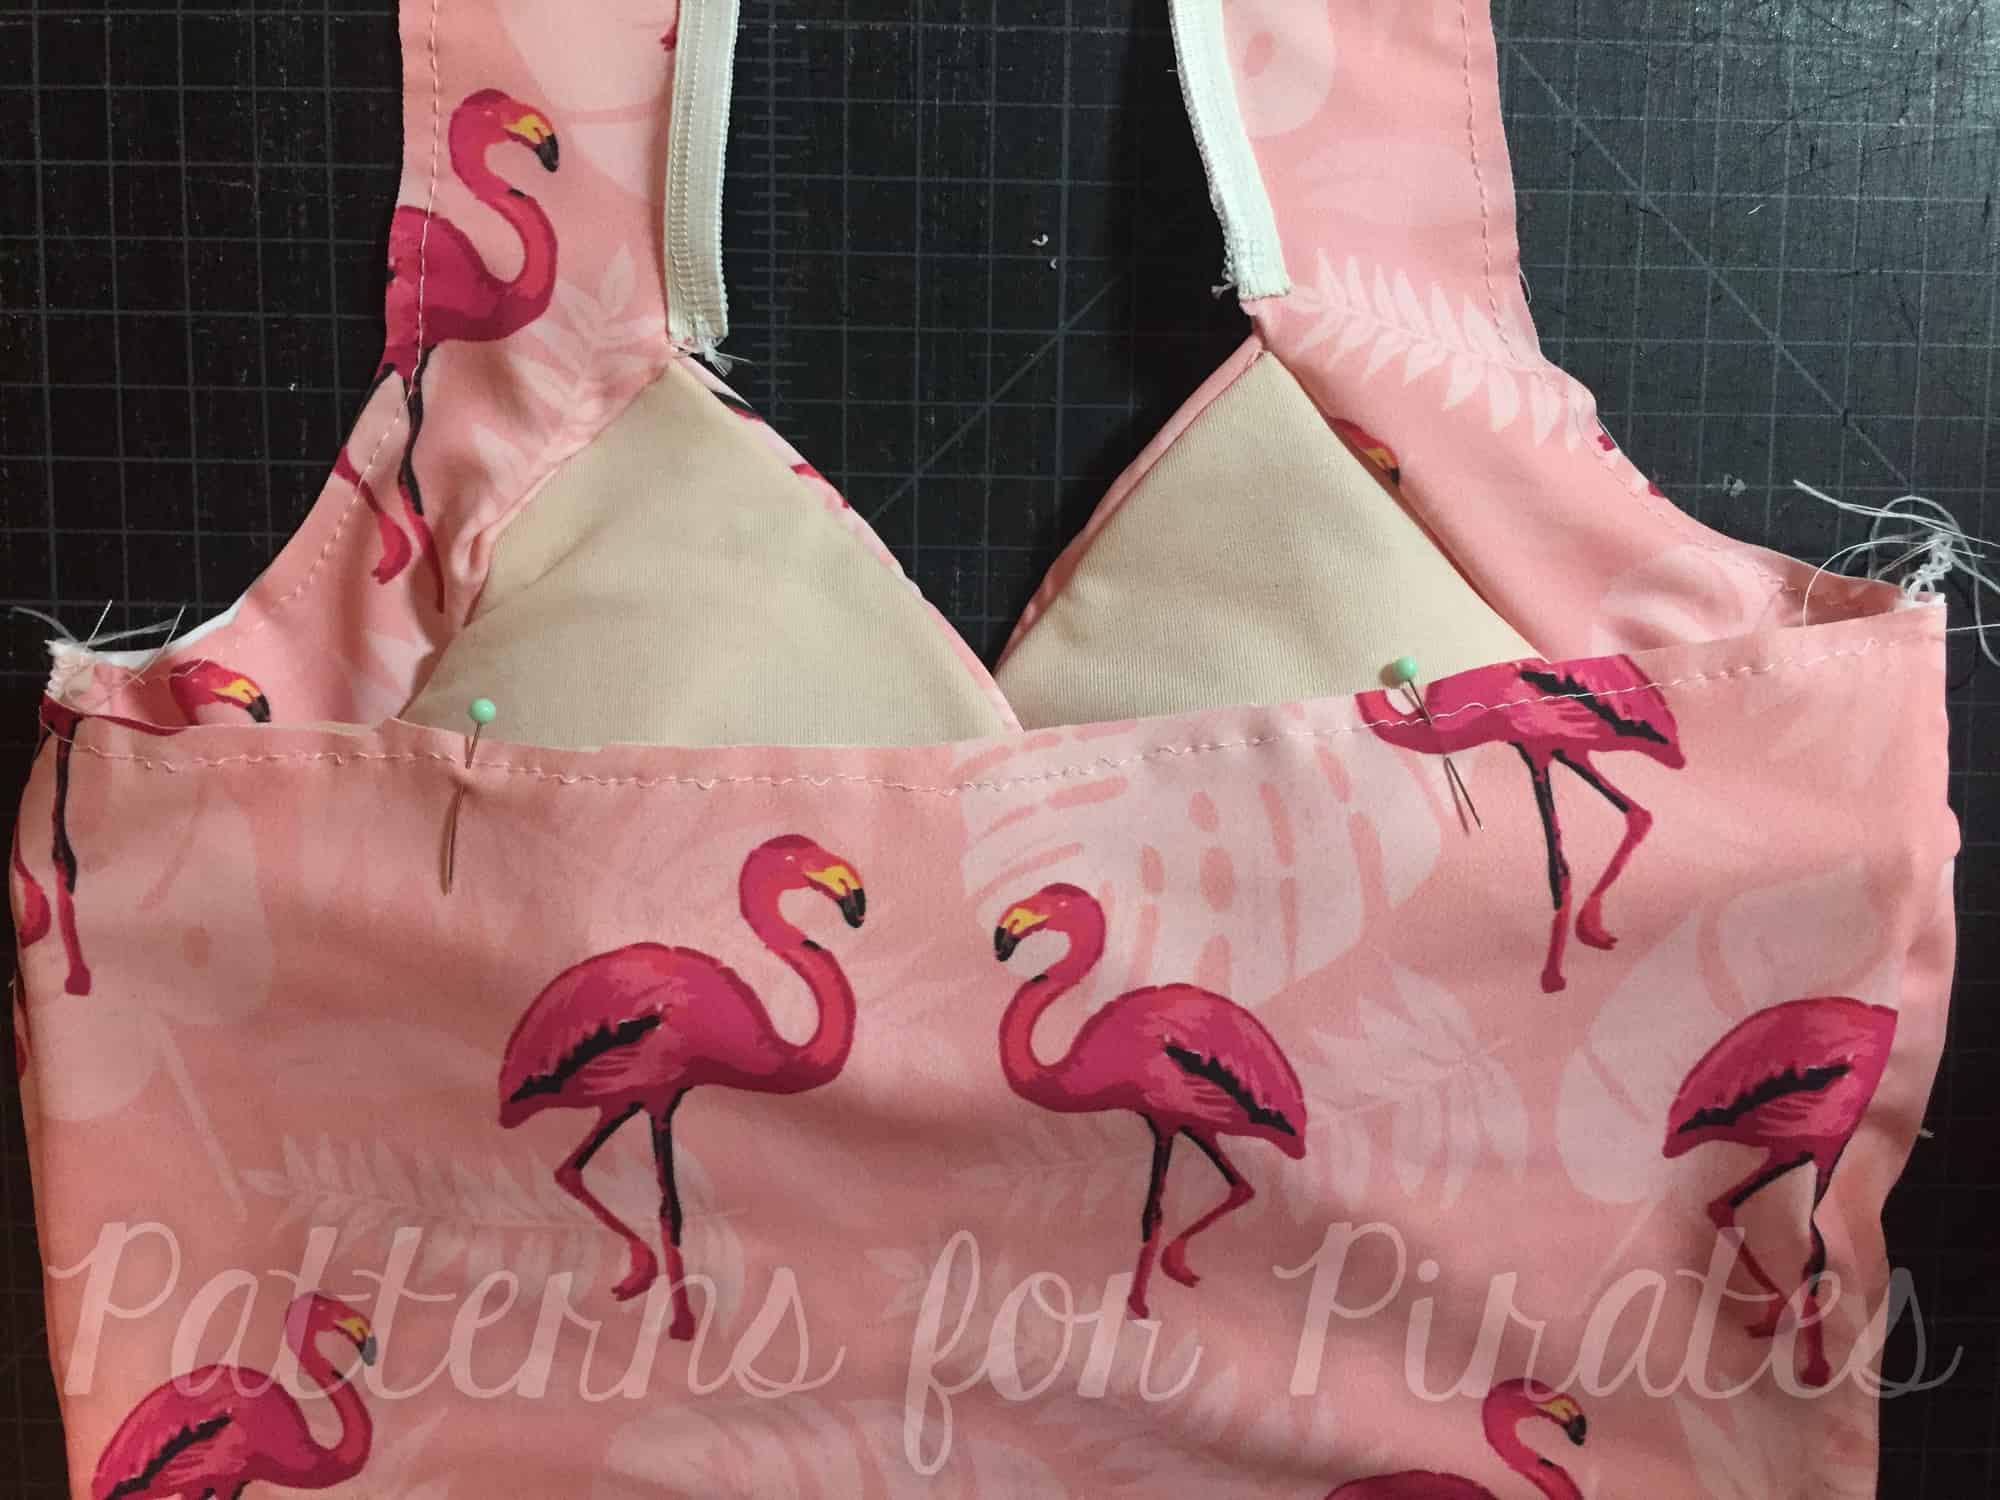
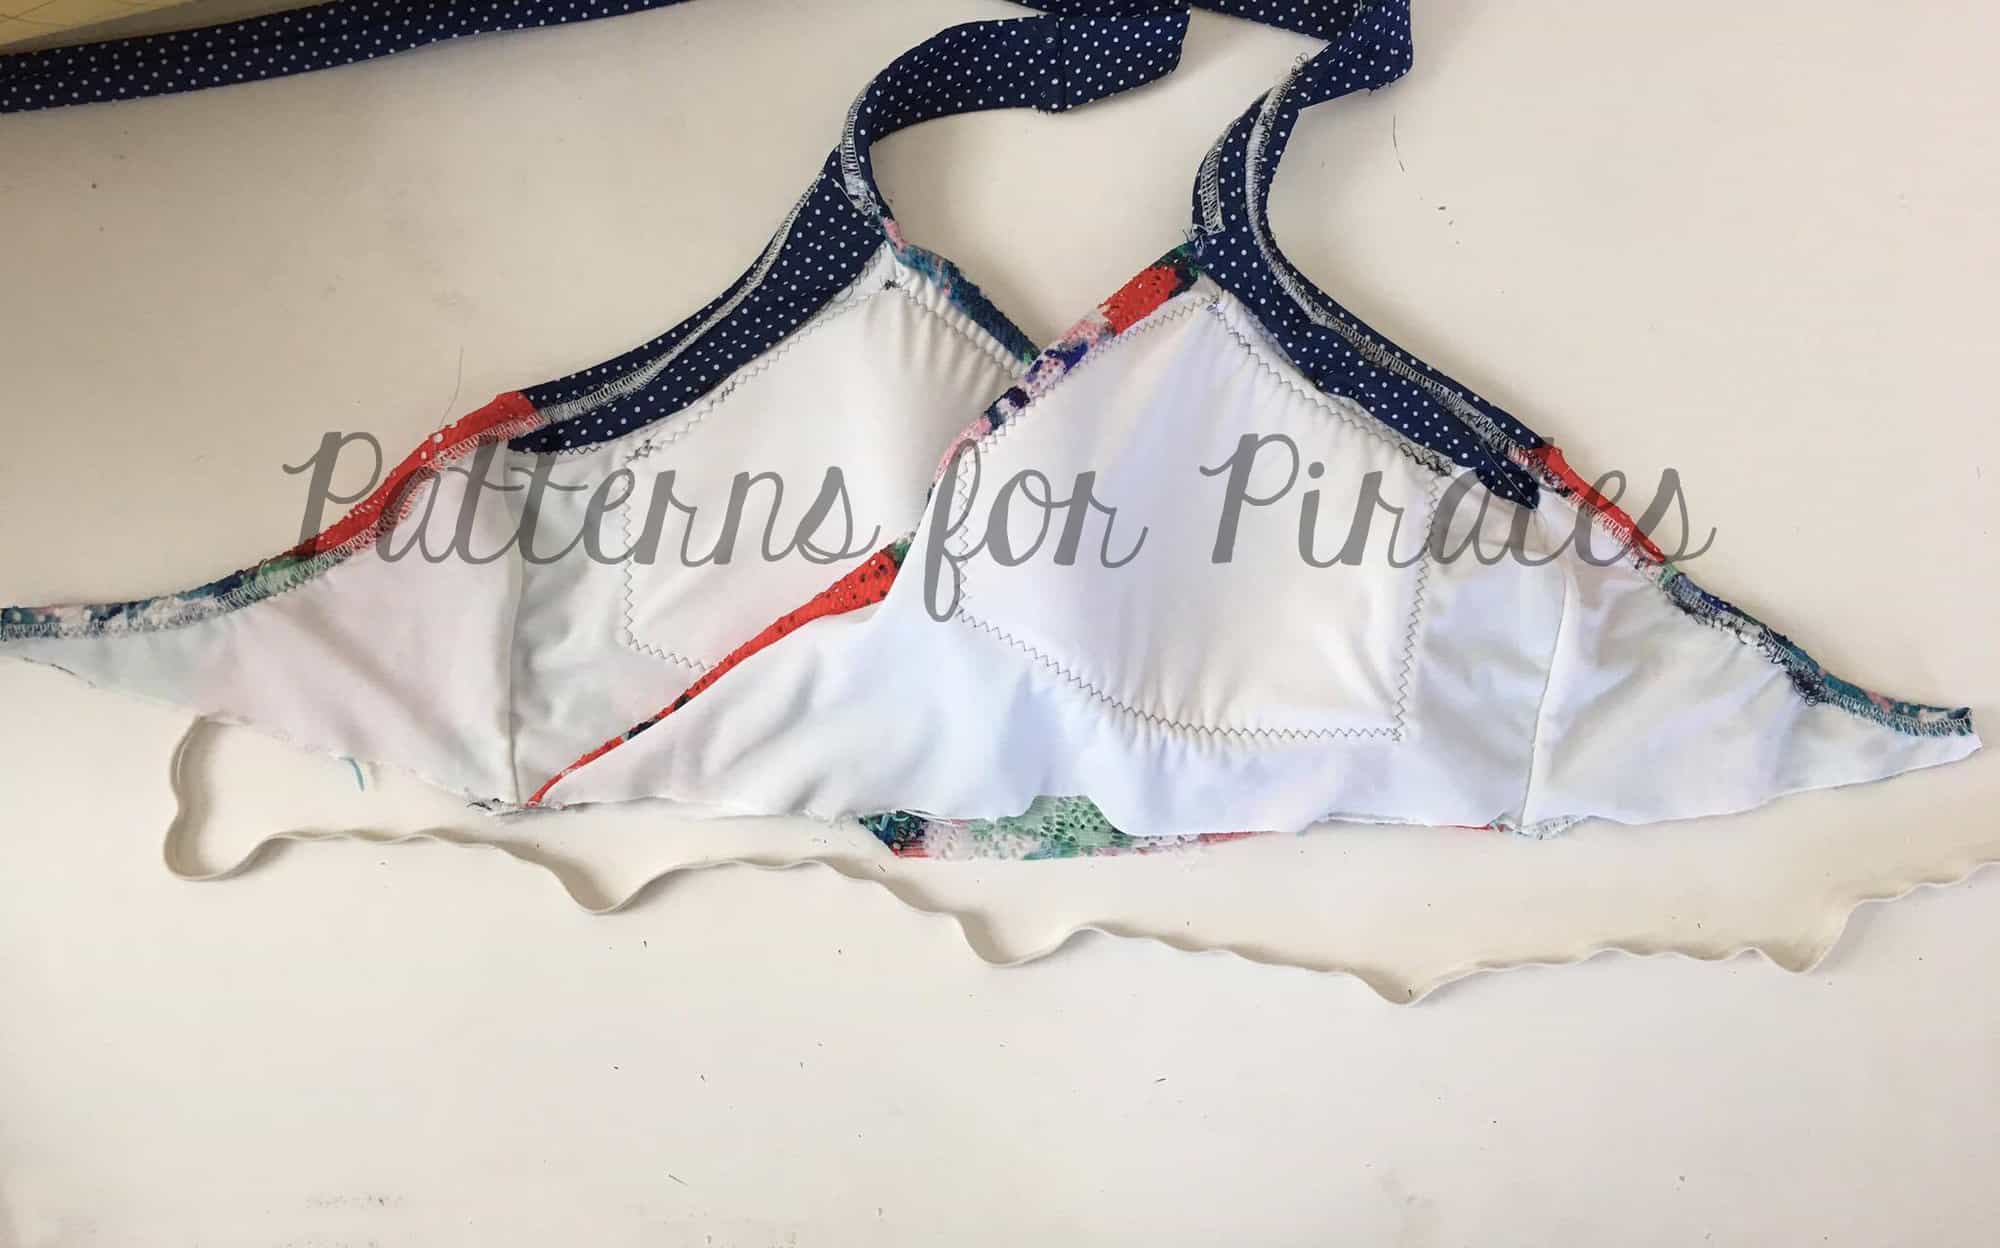
For this version, you will construct your top exactly as the pattern instructs and need to choose the low back crossover version. You will also need a 3/4″ swim bra hook.
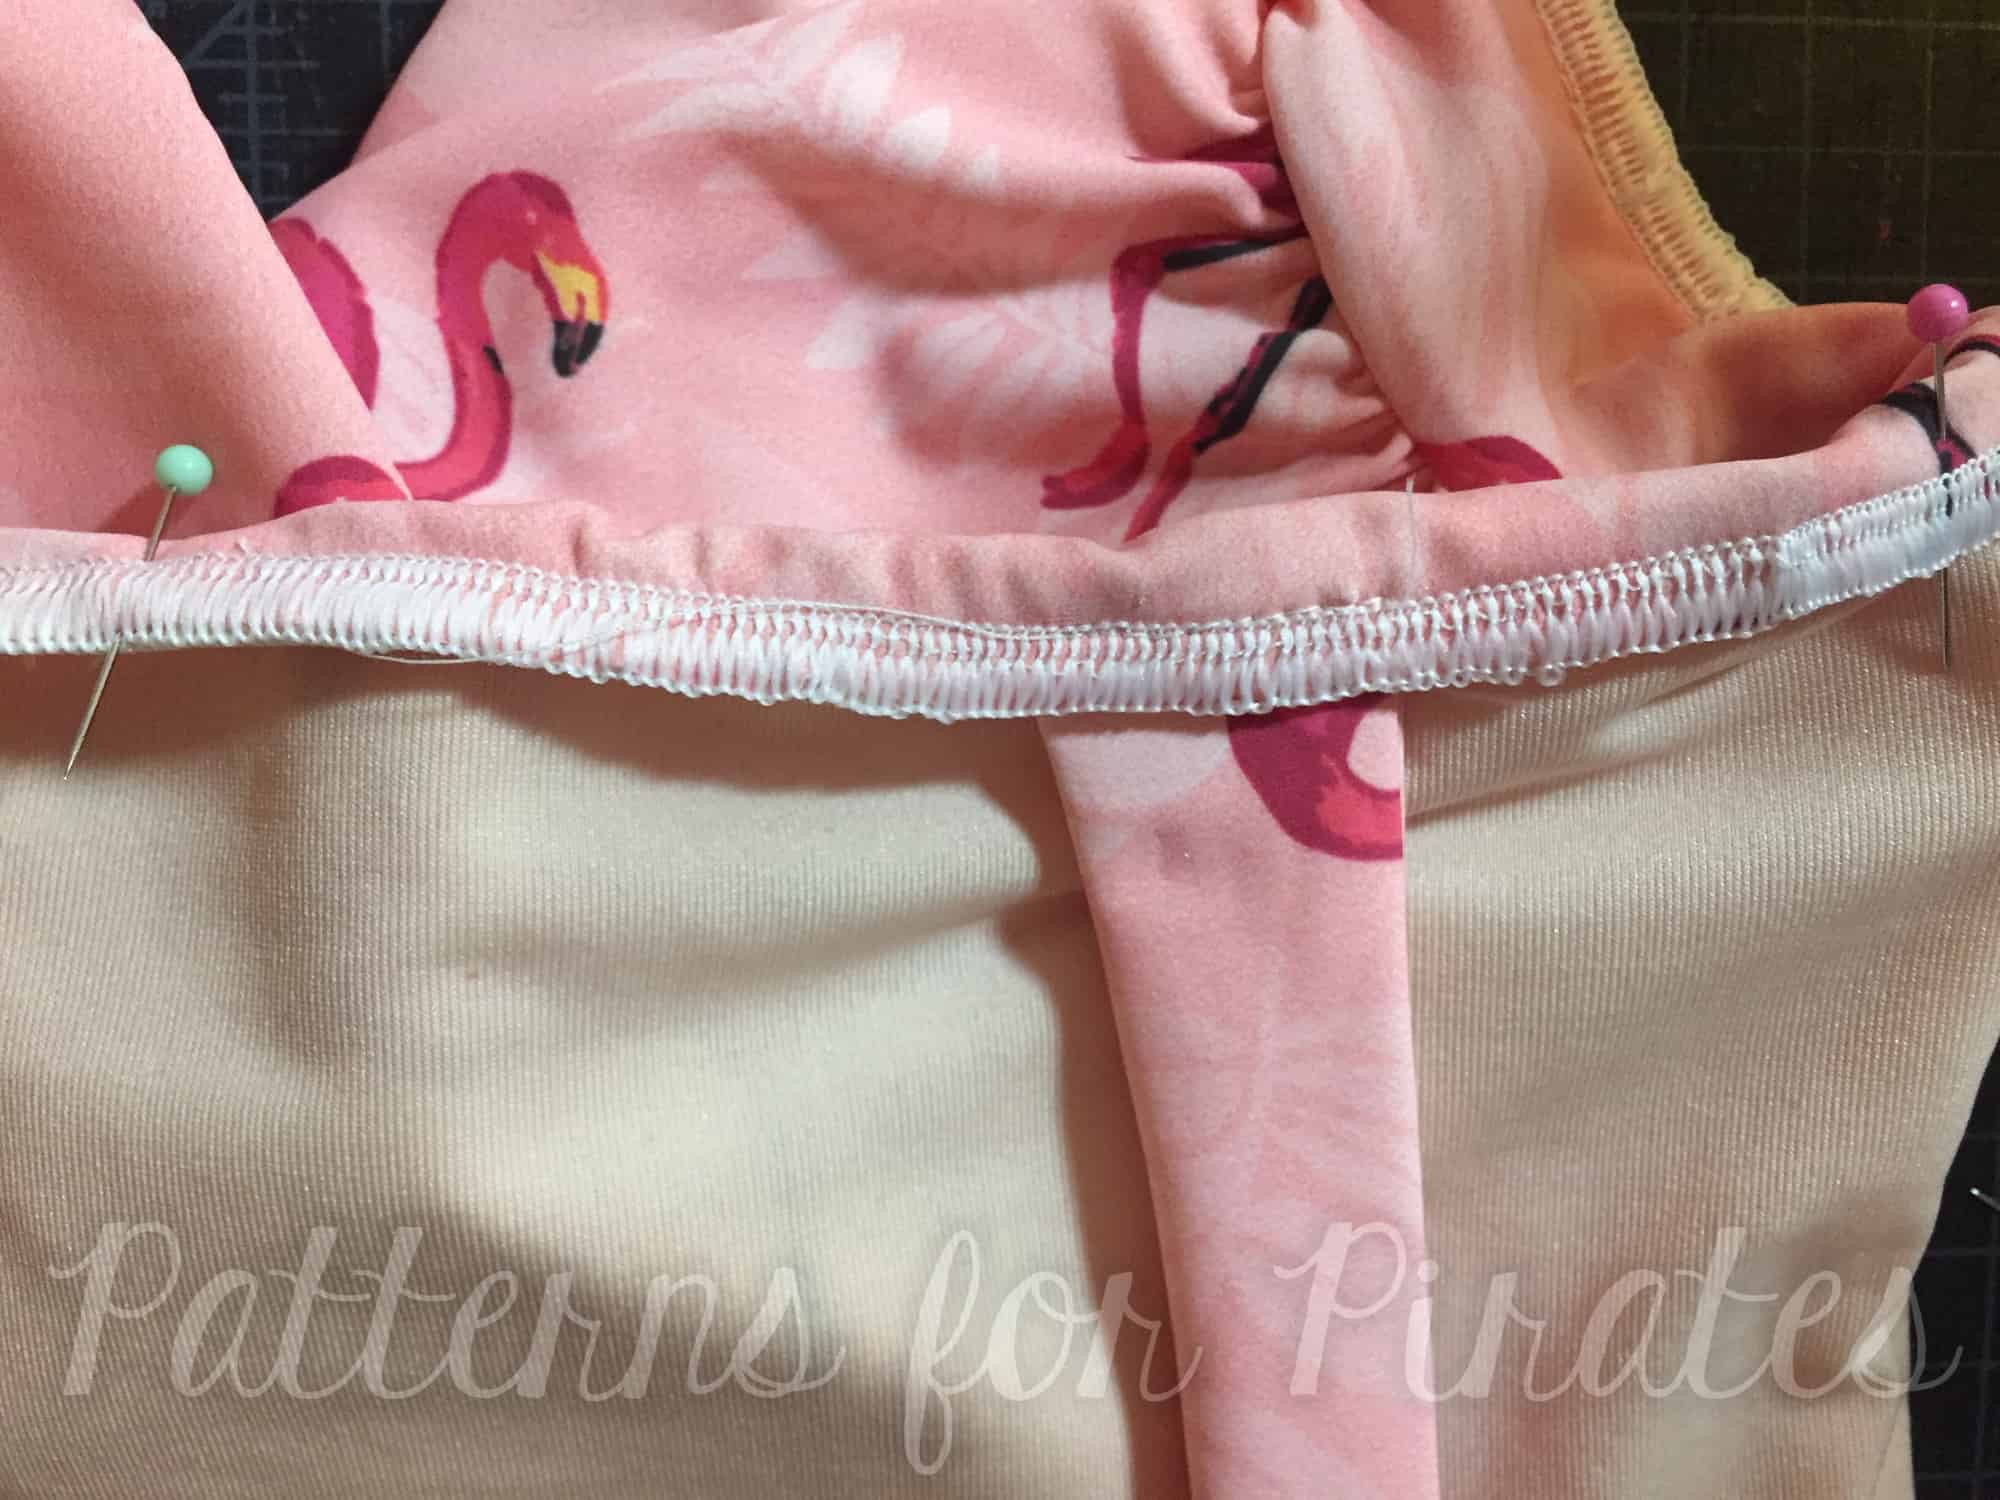
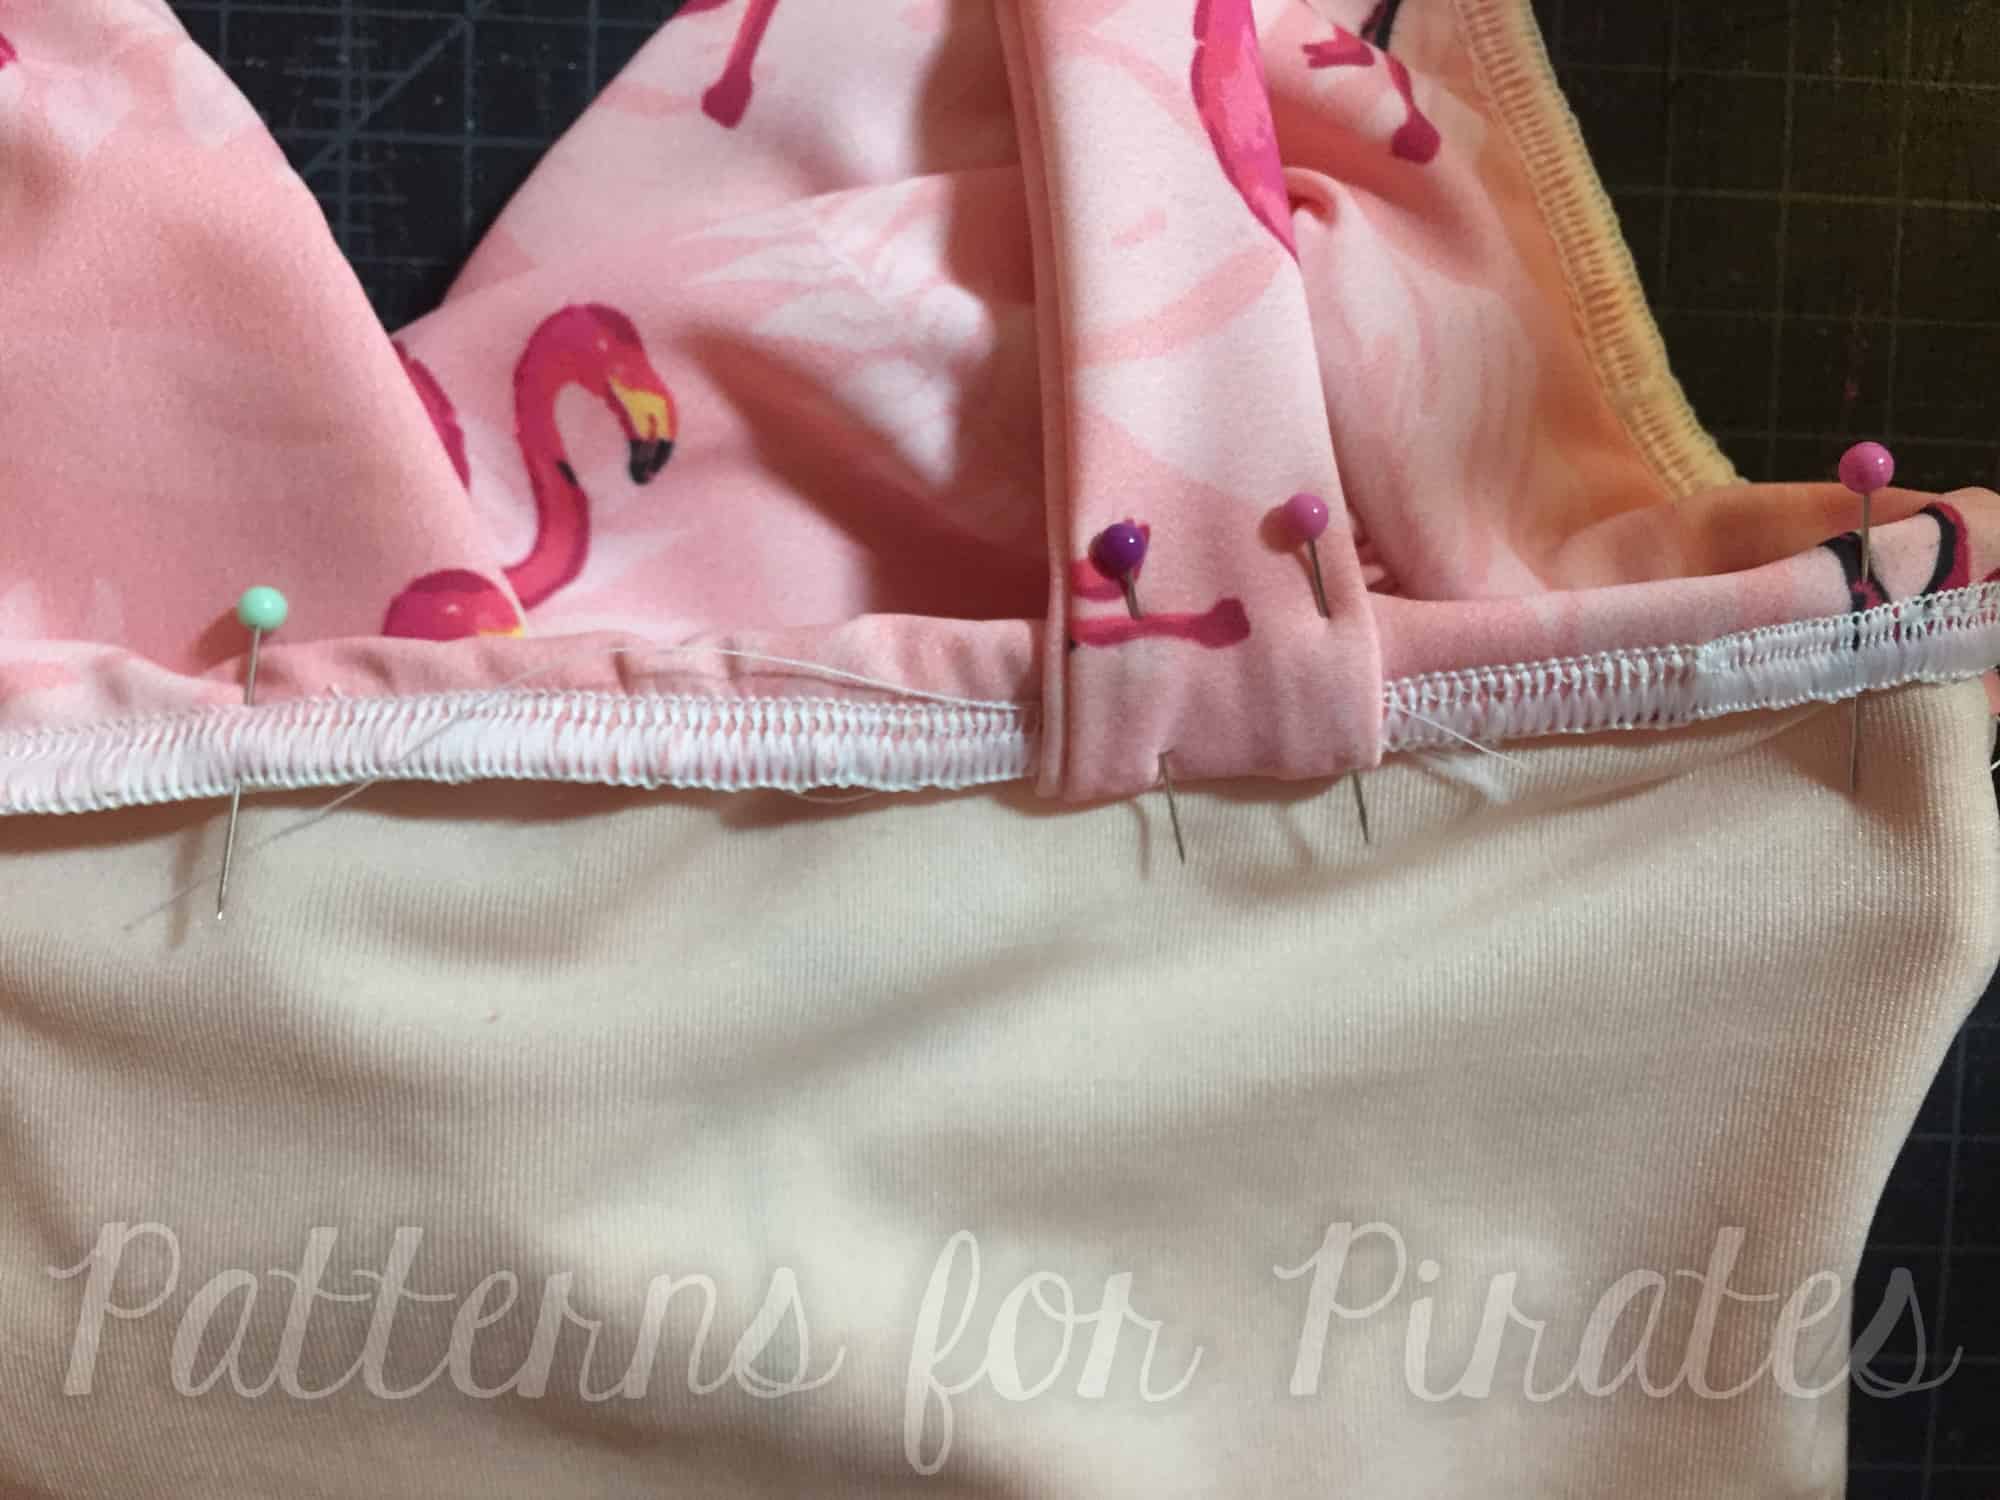
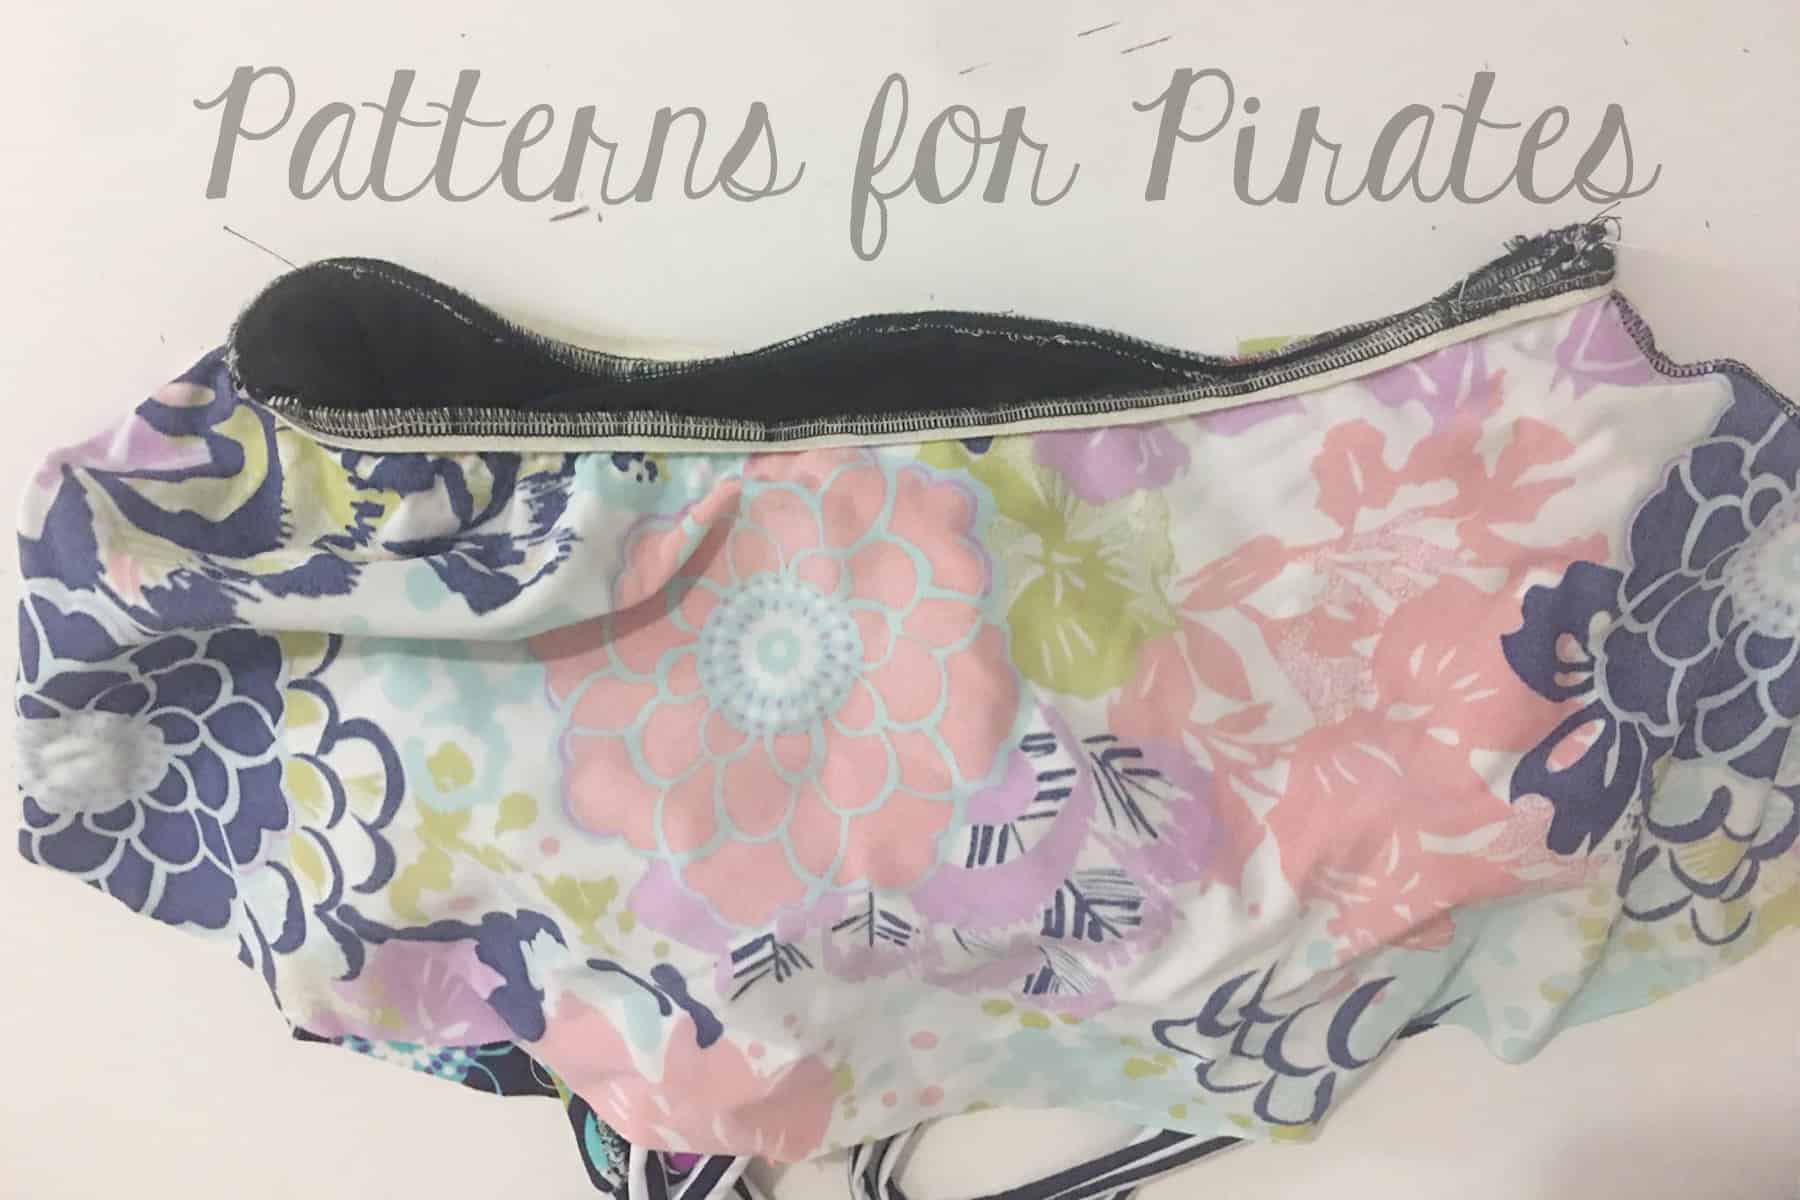
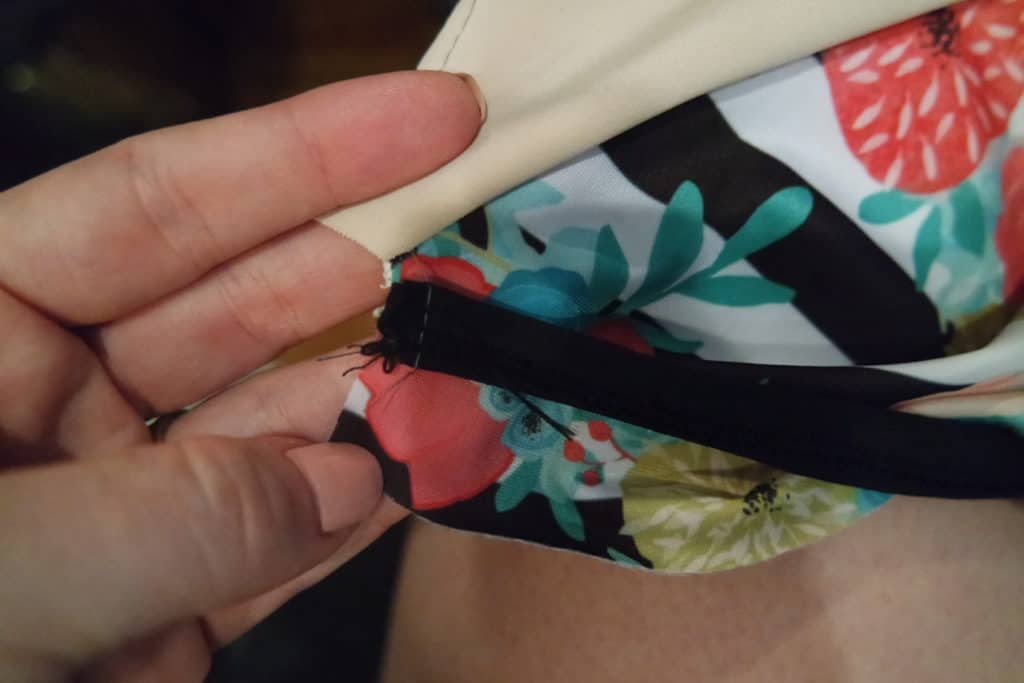
Construct your top exactly as you would in the pattern. Once you have completed your top, find the center back and clip. Be sure to baste the bottom edge of your bodice to ensure it is aligned correctly at the center notch and side seams. (Note: bottom edge has not been basted in this pic)
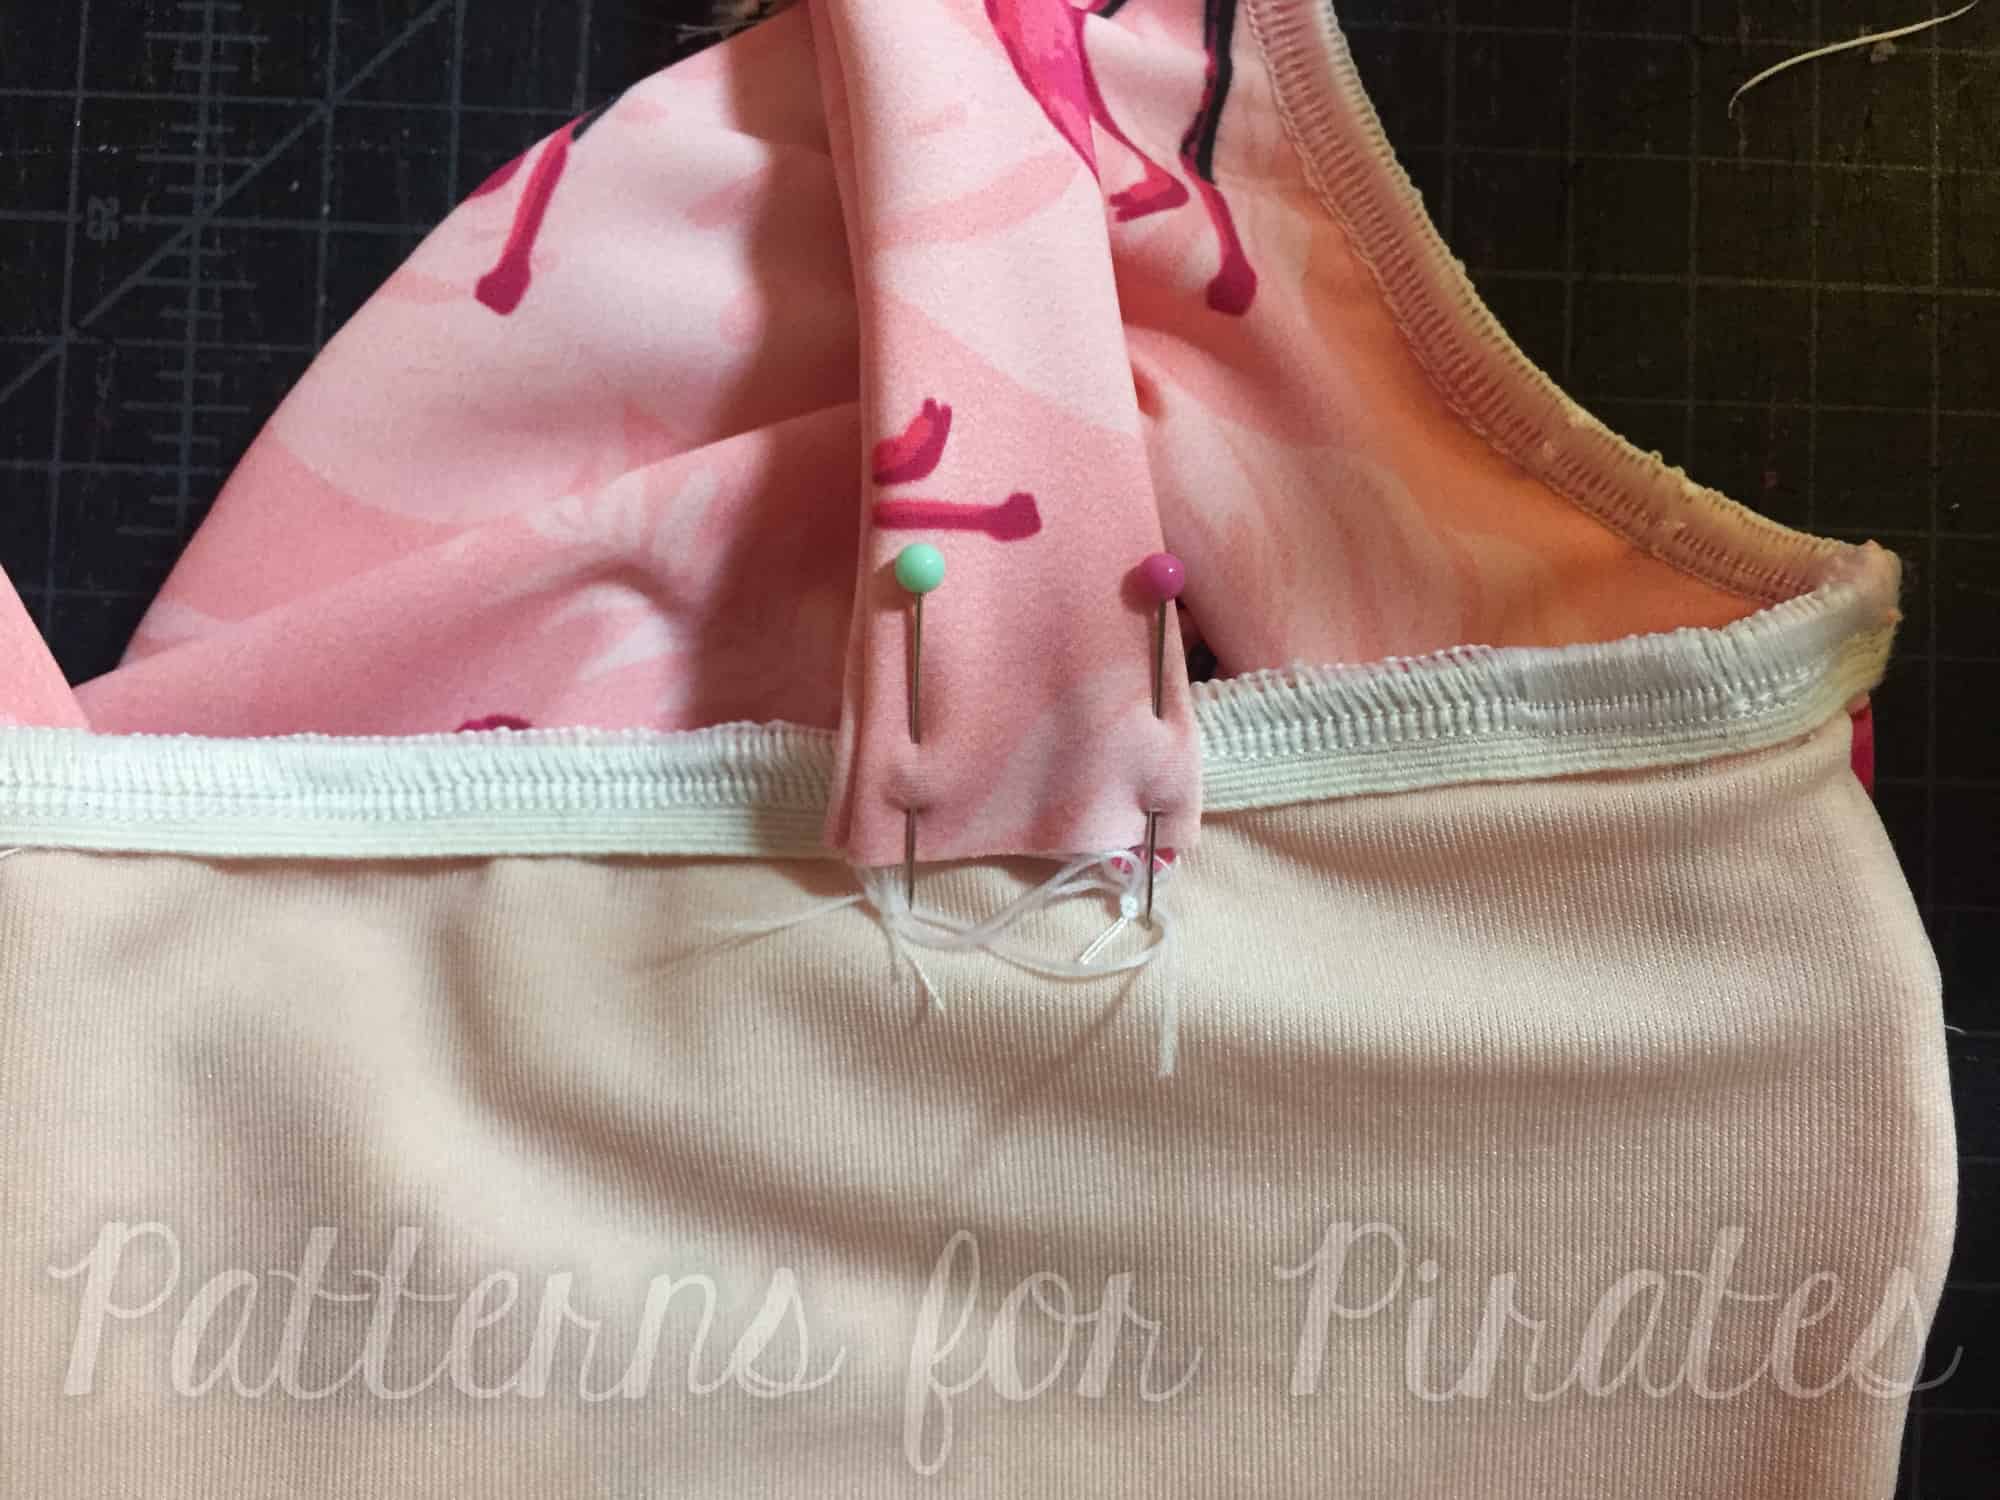
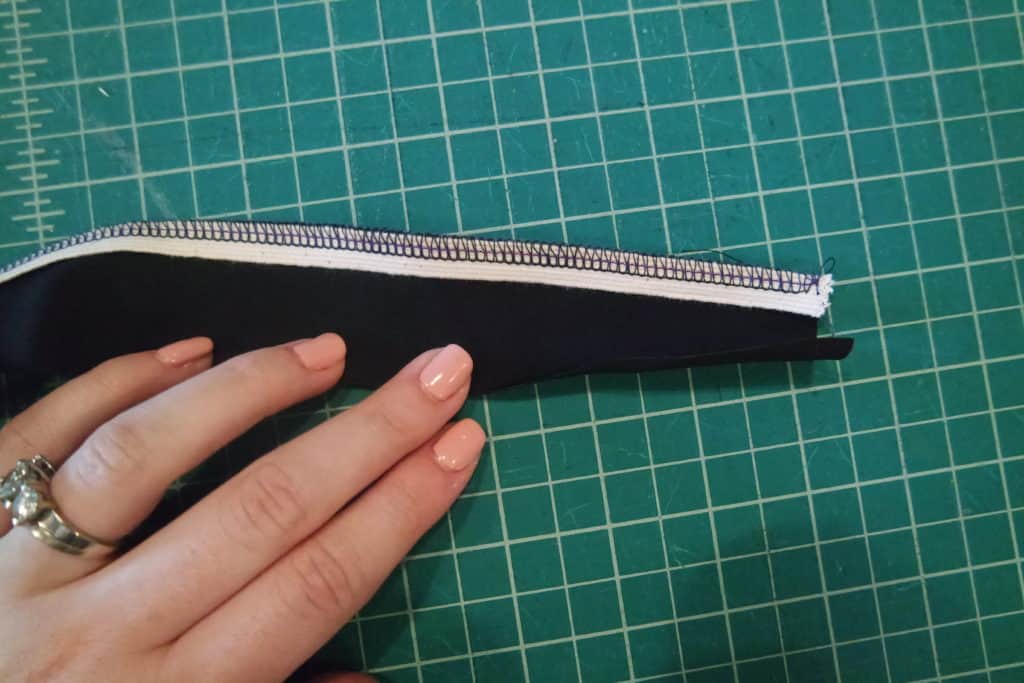
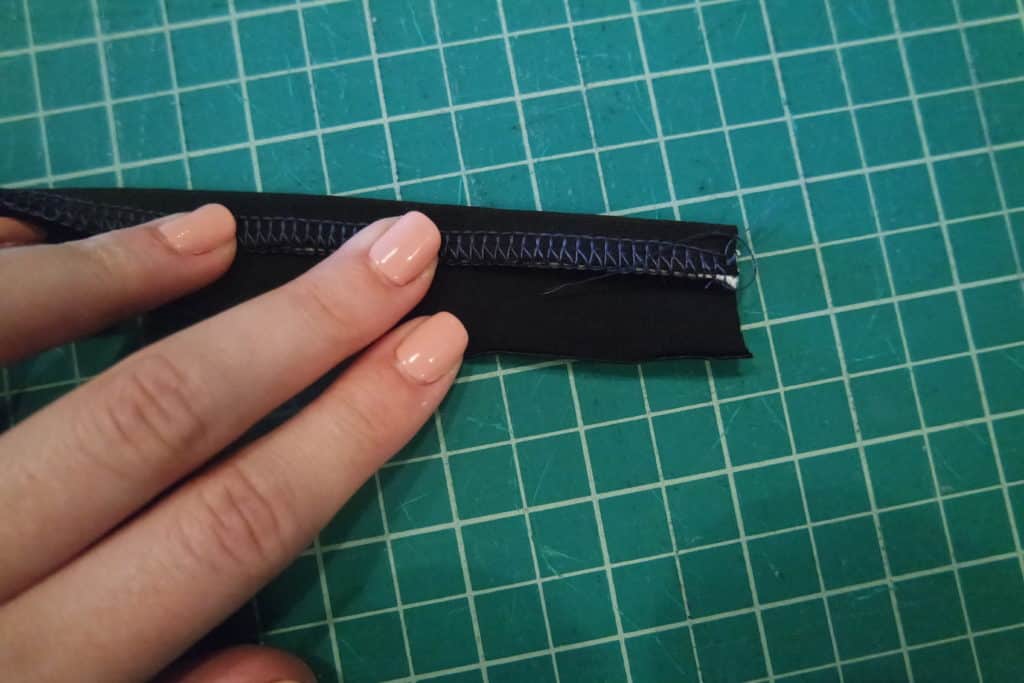
Using a 1:1 ratio, stitch elastic to the lining side along the bottom of the bodice edge. Flip up and top-stitch.
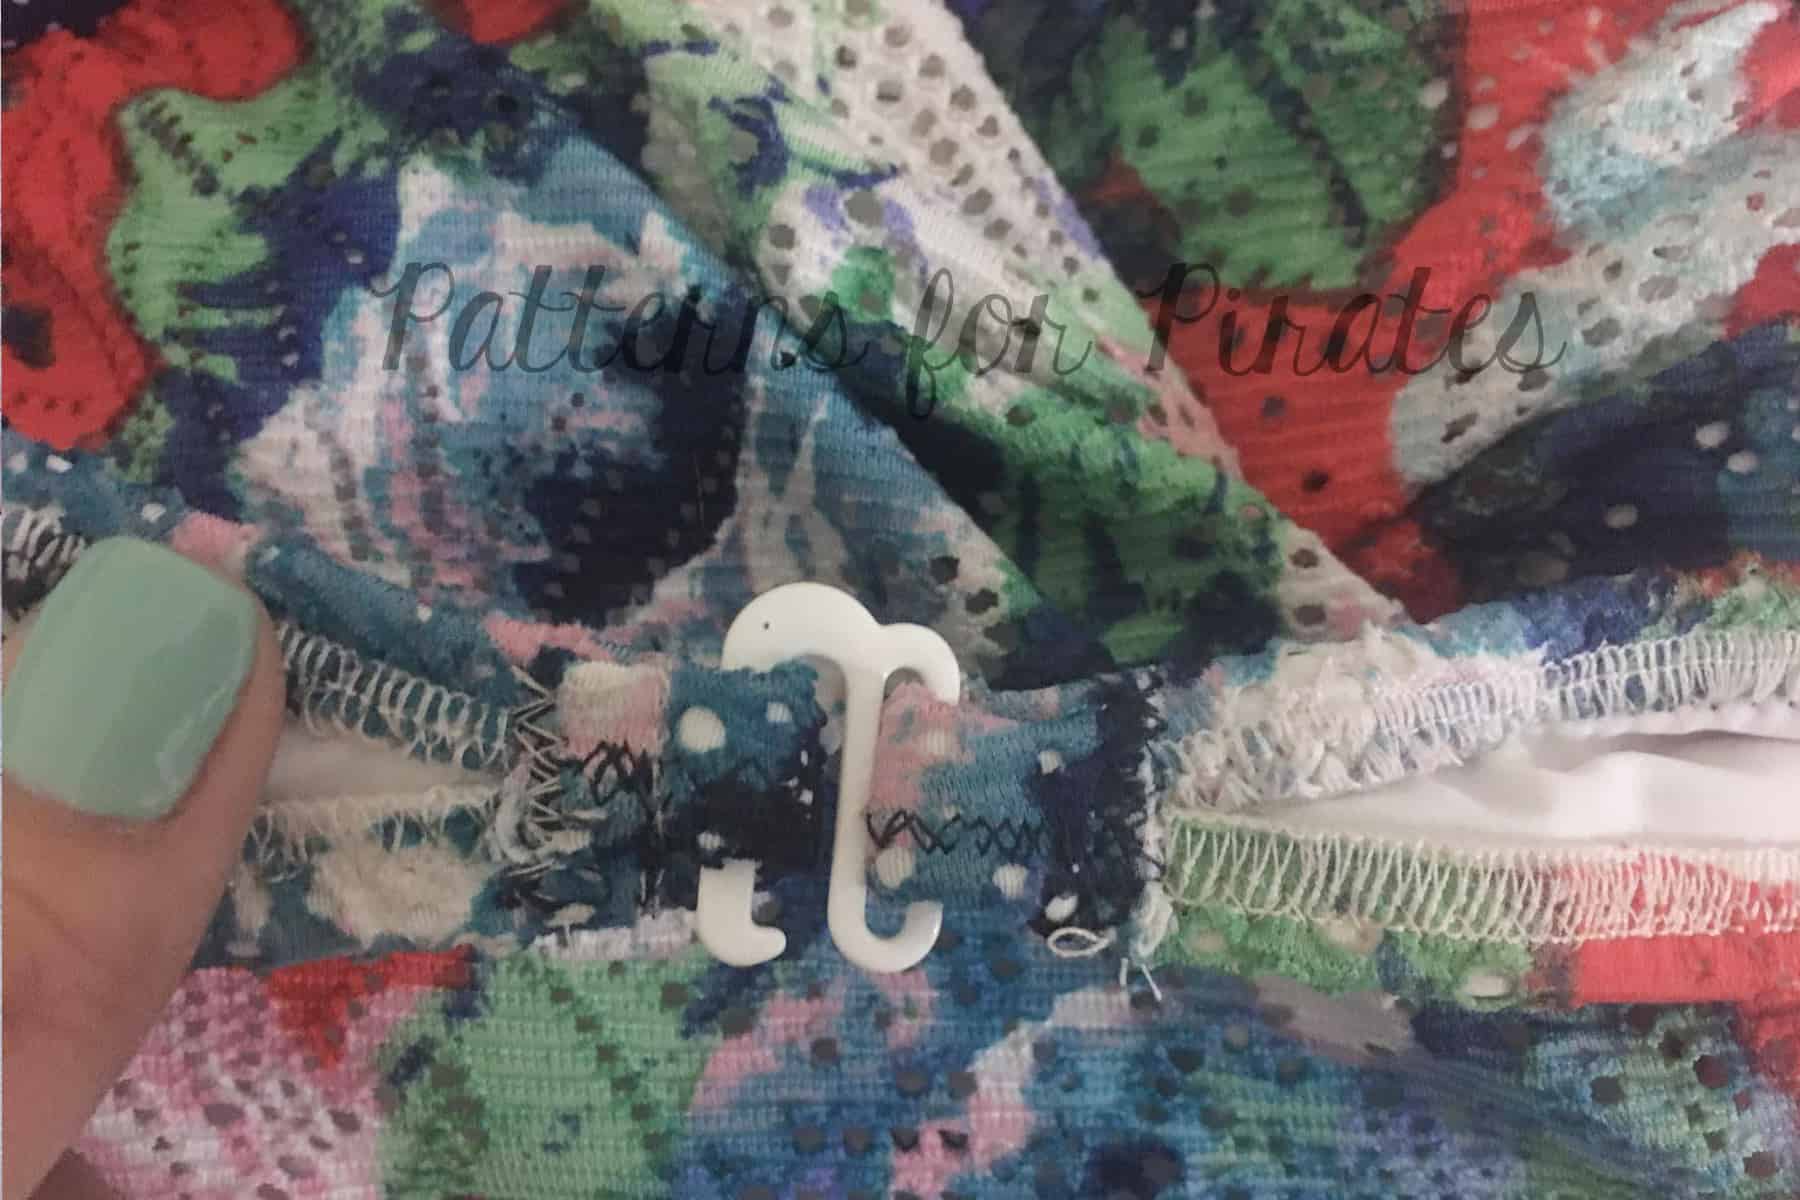
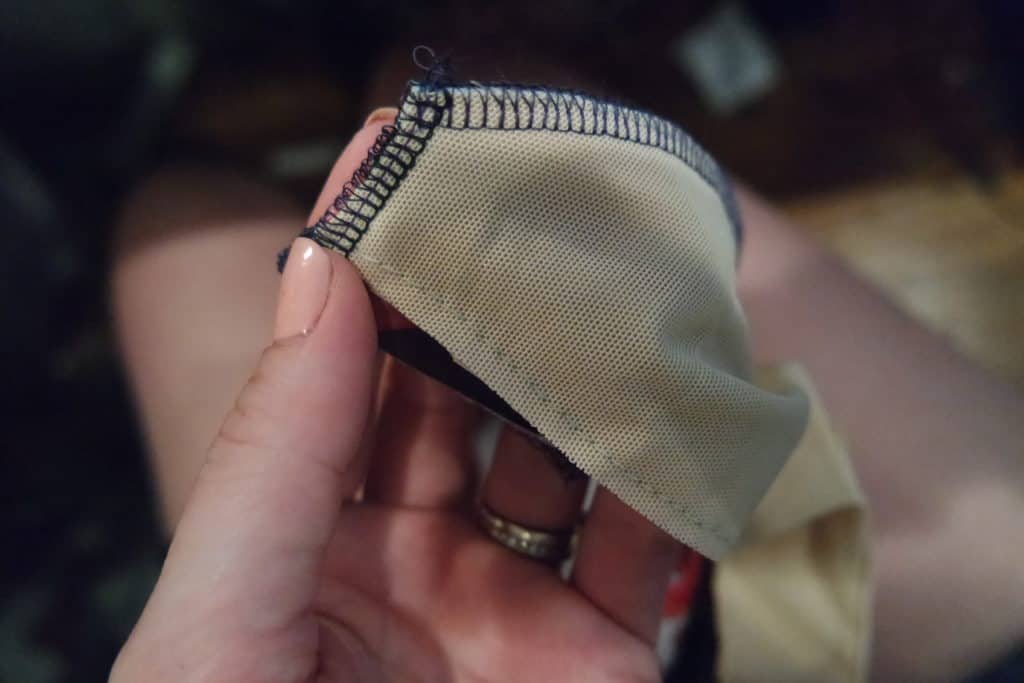
Slide one end in to the swim bra hook and stitch. Fold over opposite end and stitch, creating a hole for the hook to go through.
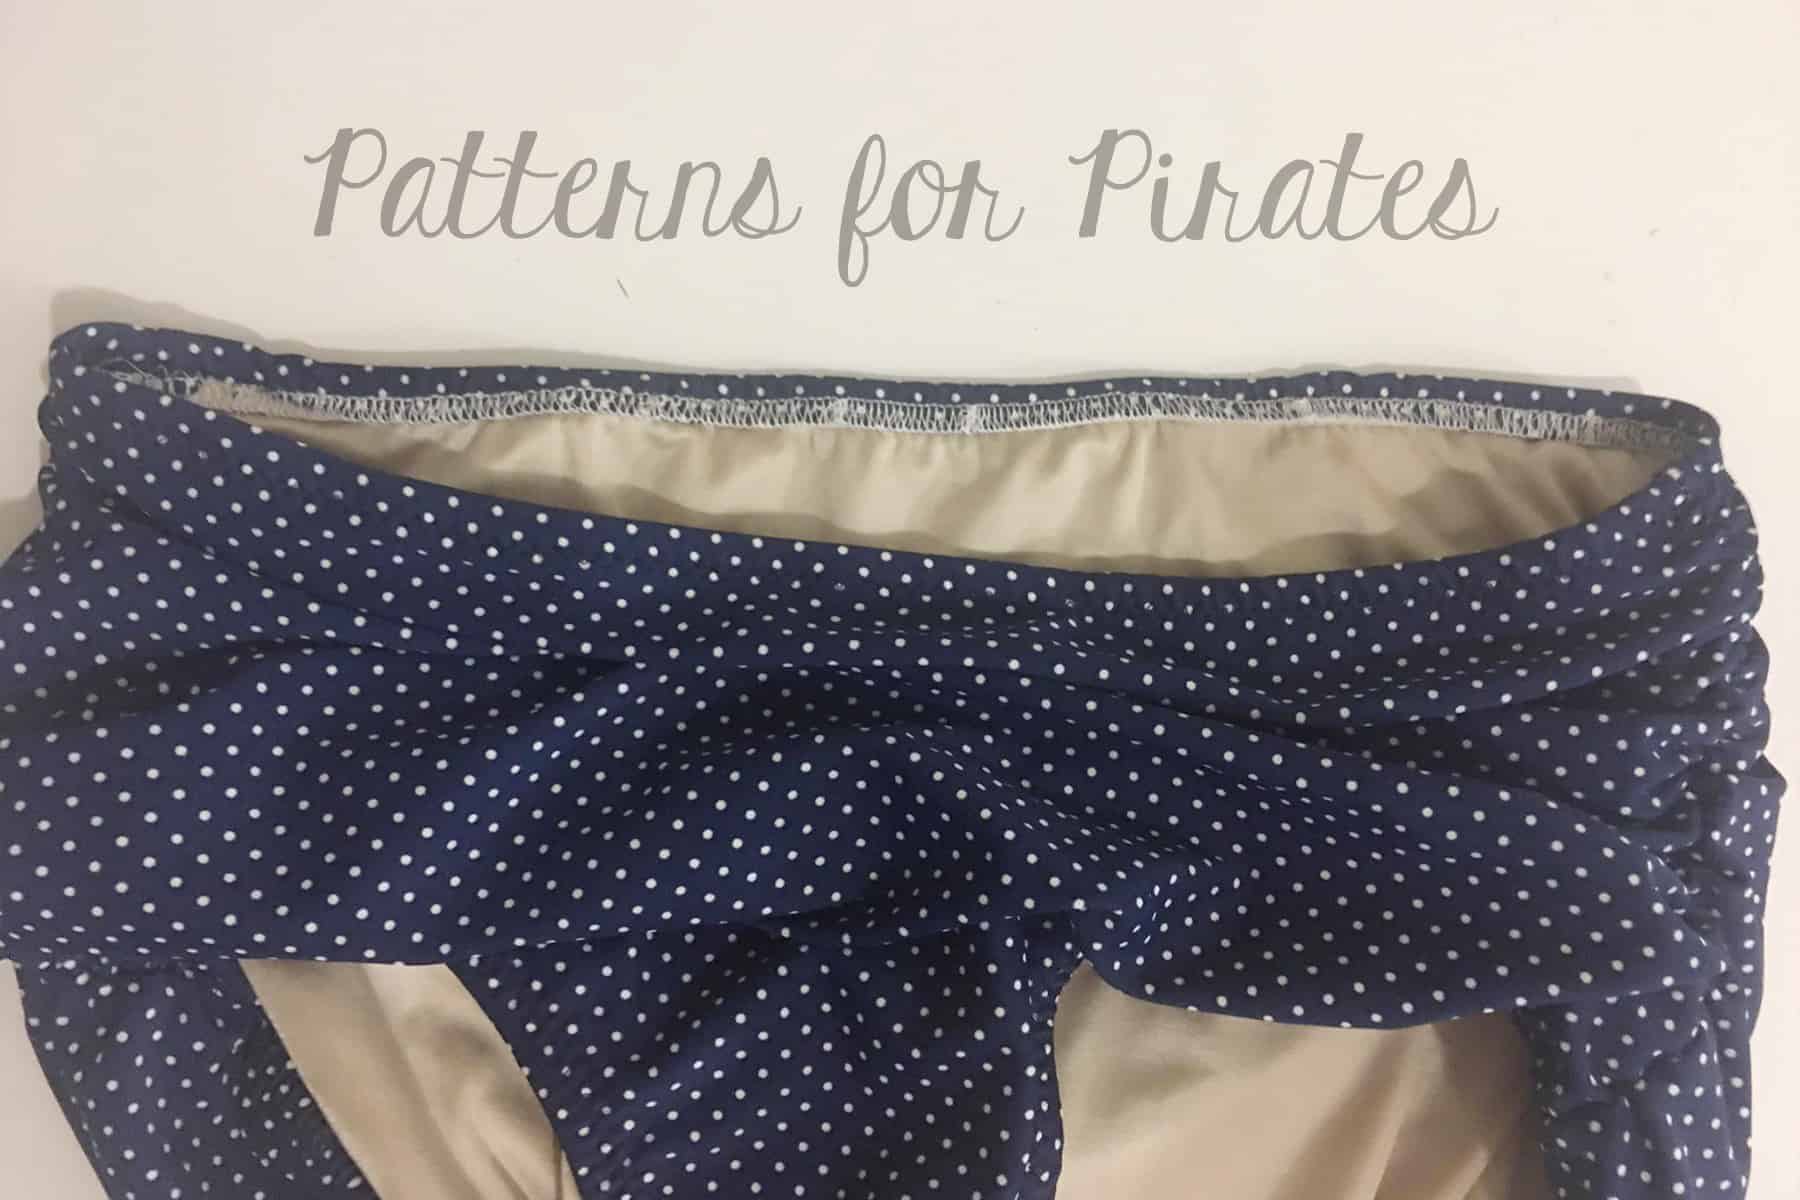
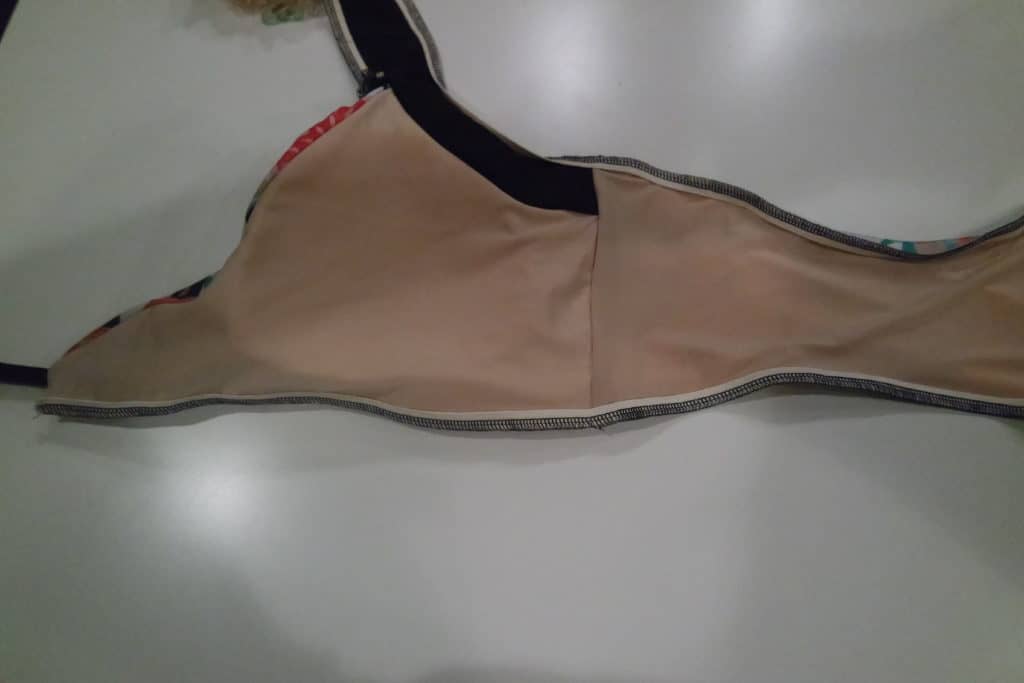
To create the separate Take the Plunge bottoms, construct as the pattern indicates. Using a 1:1 ratio, stitch 3/8″ elastic to the lining side of the top edge of the bottoms. Flip down and top-stitch. I used the ruched version here with only the side elastic and omitted the front and back elastic ruching.
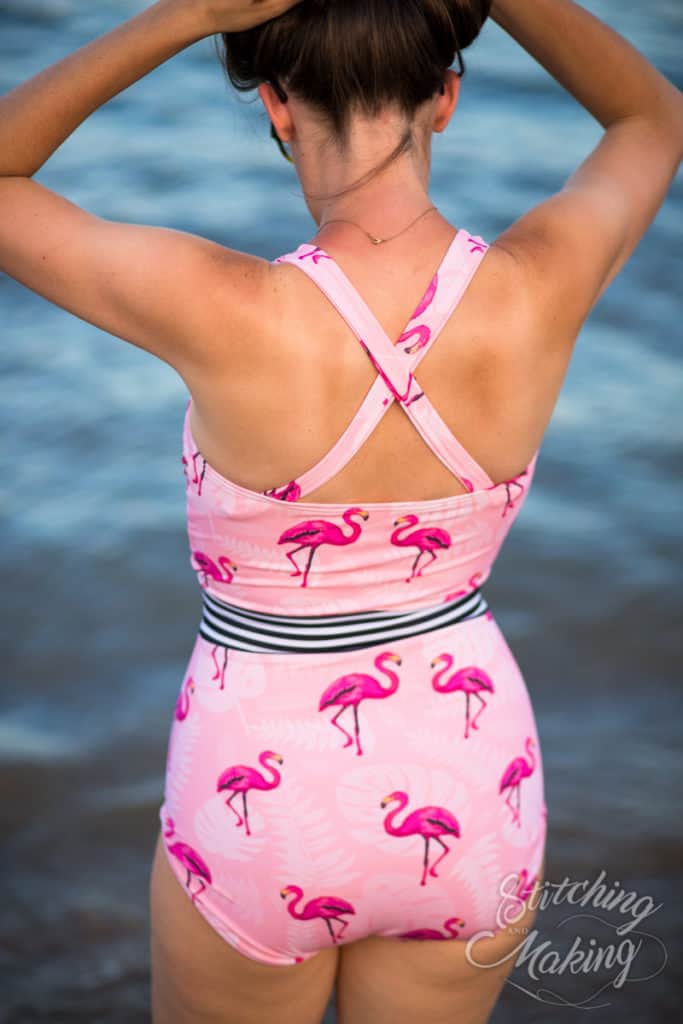
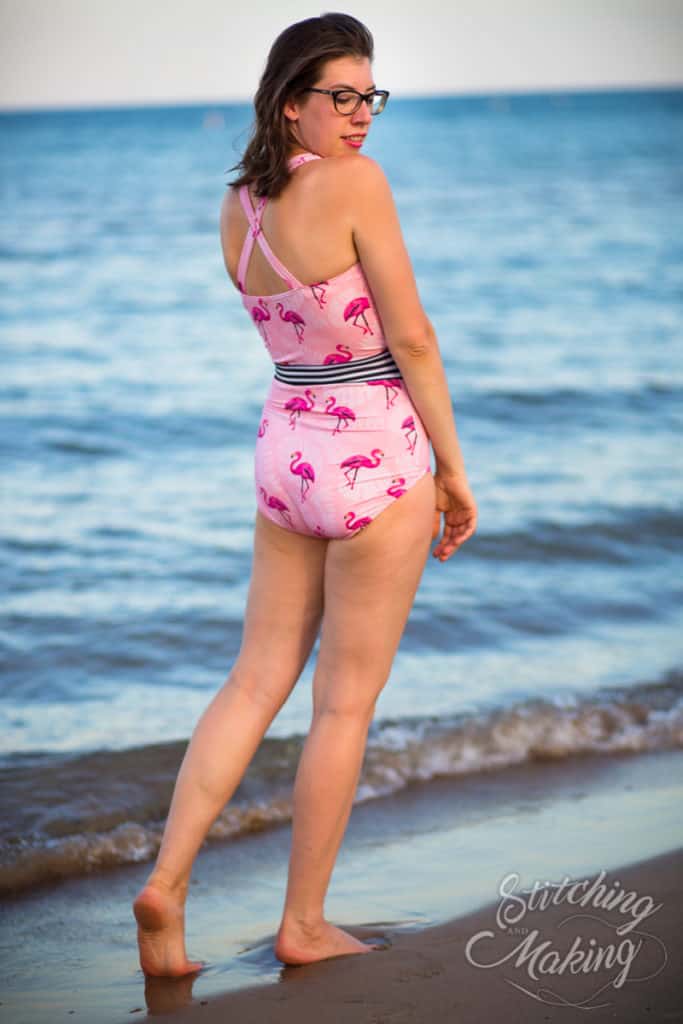
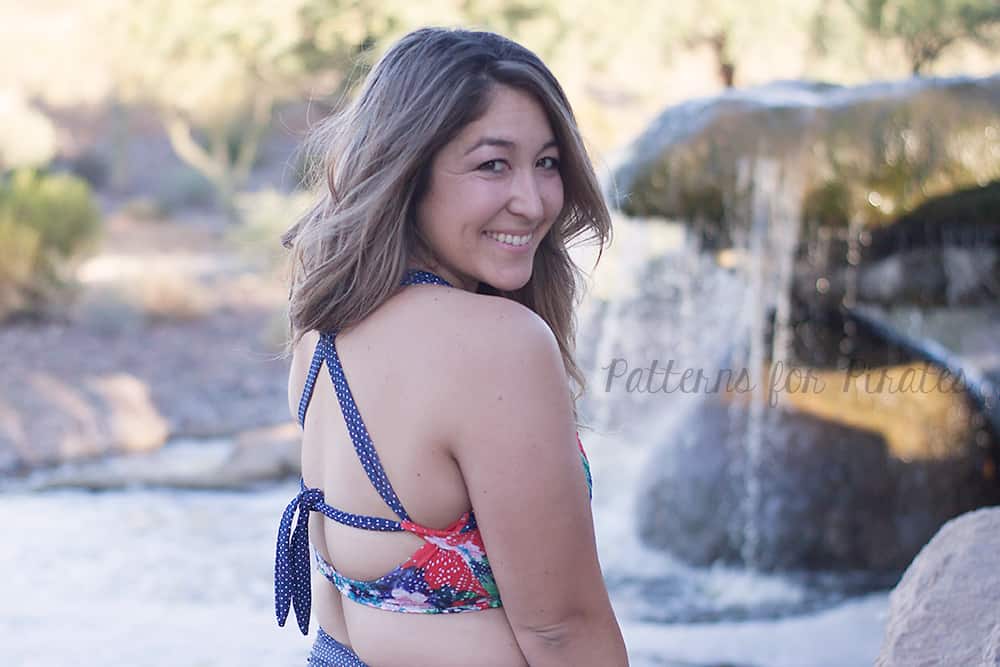
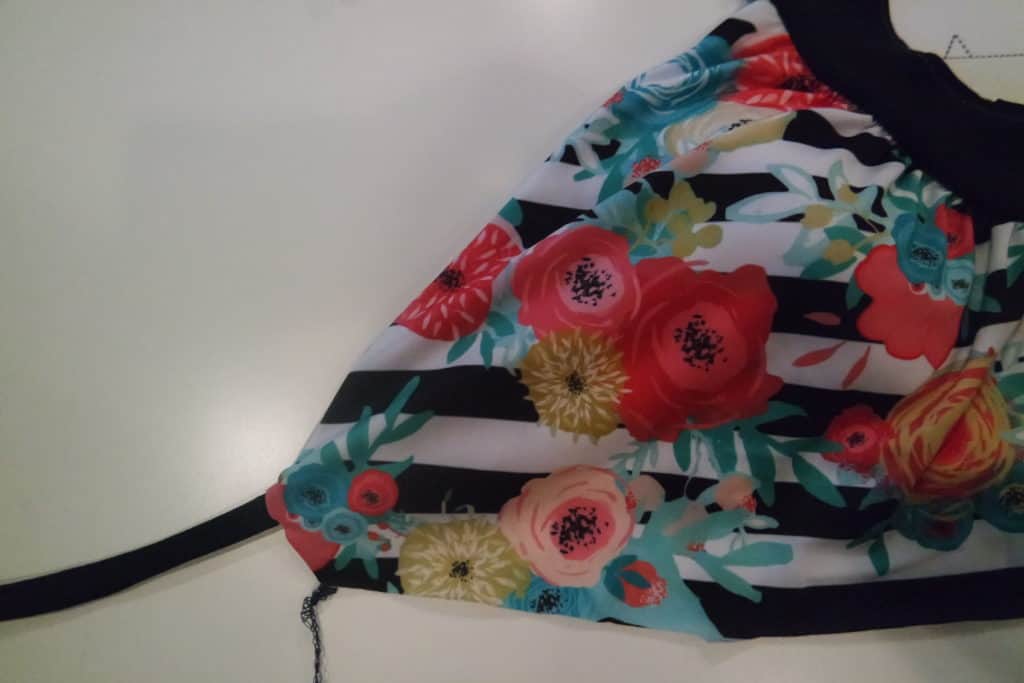
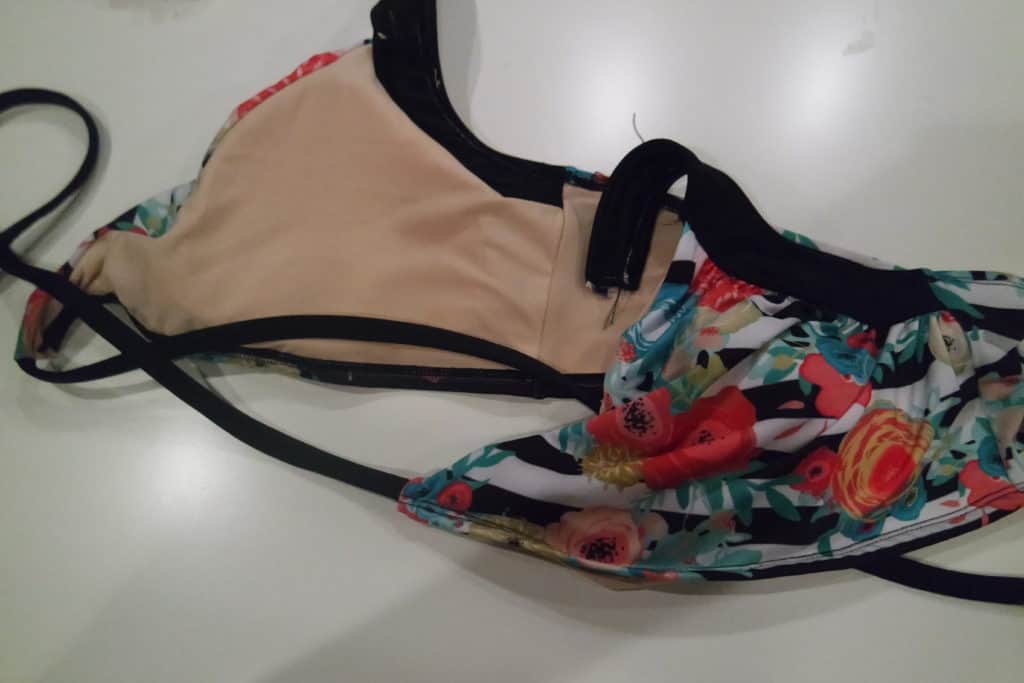
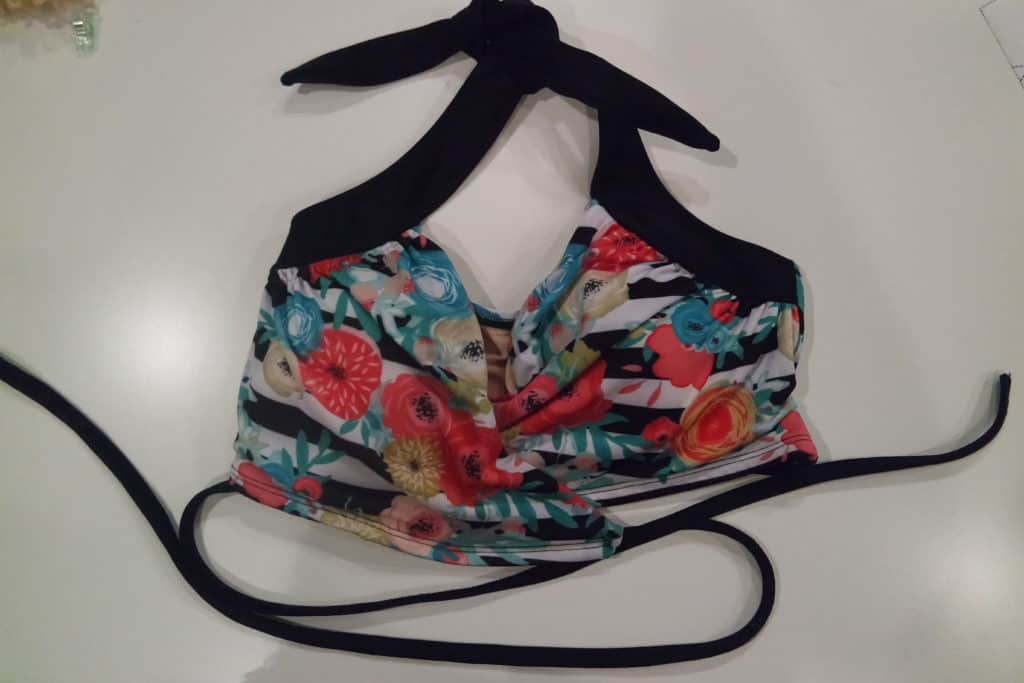
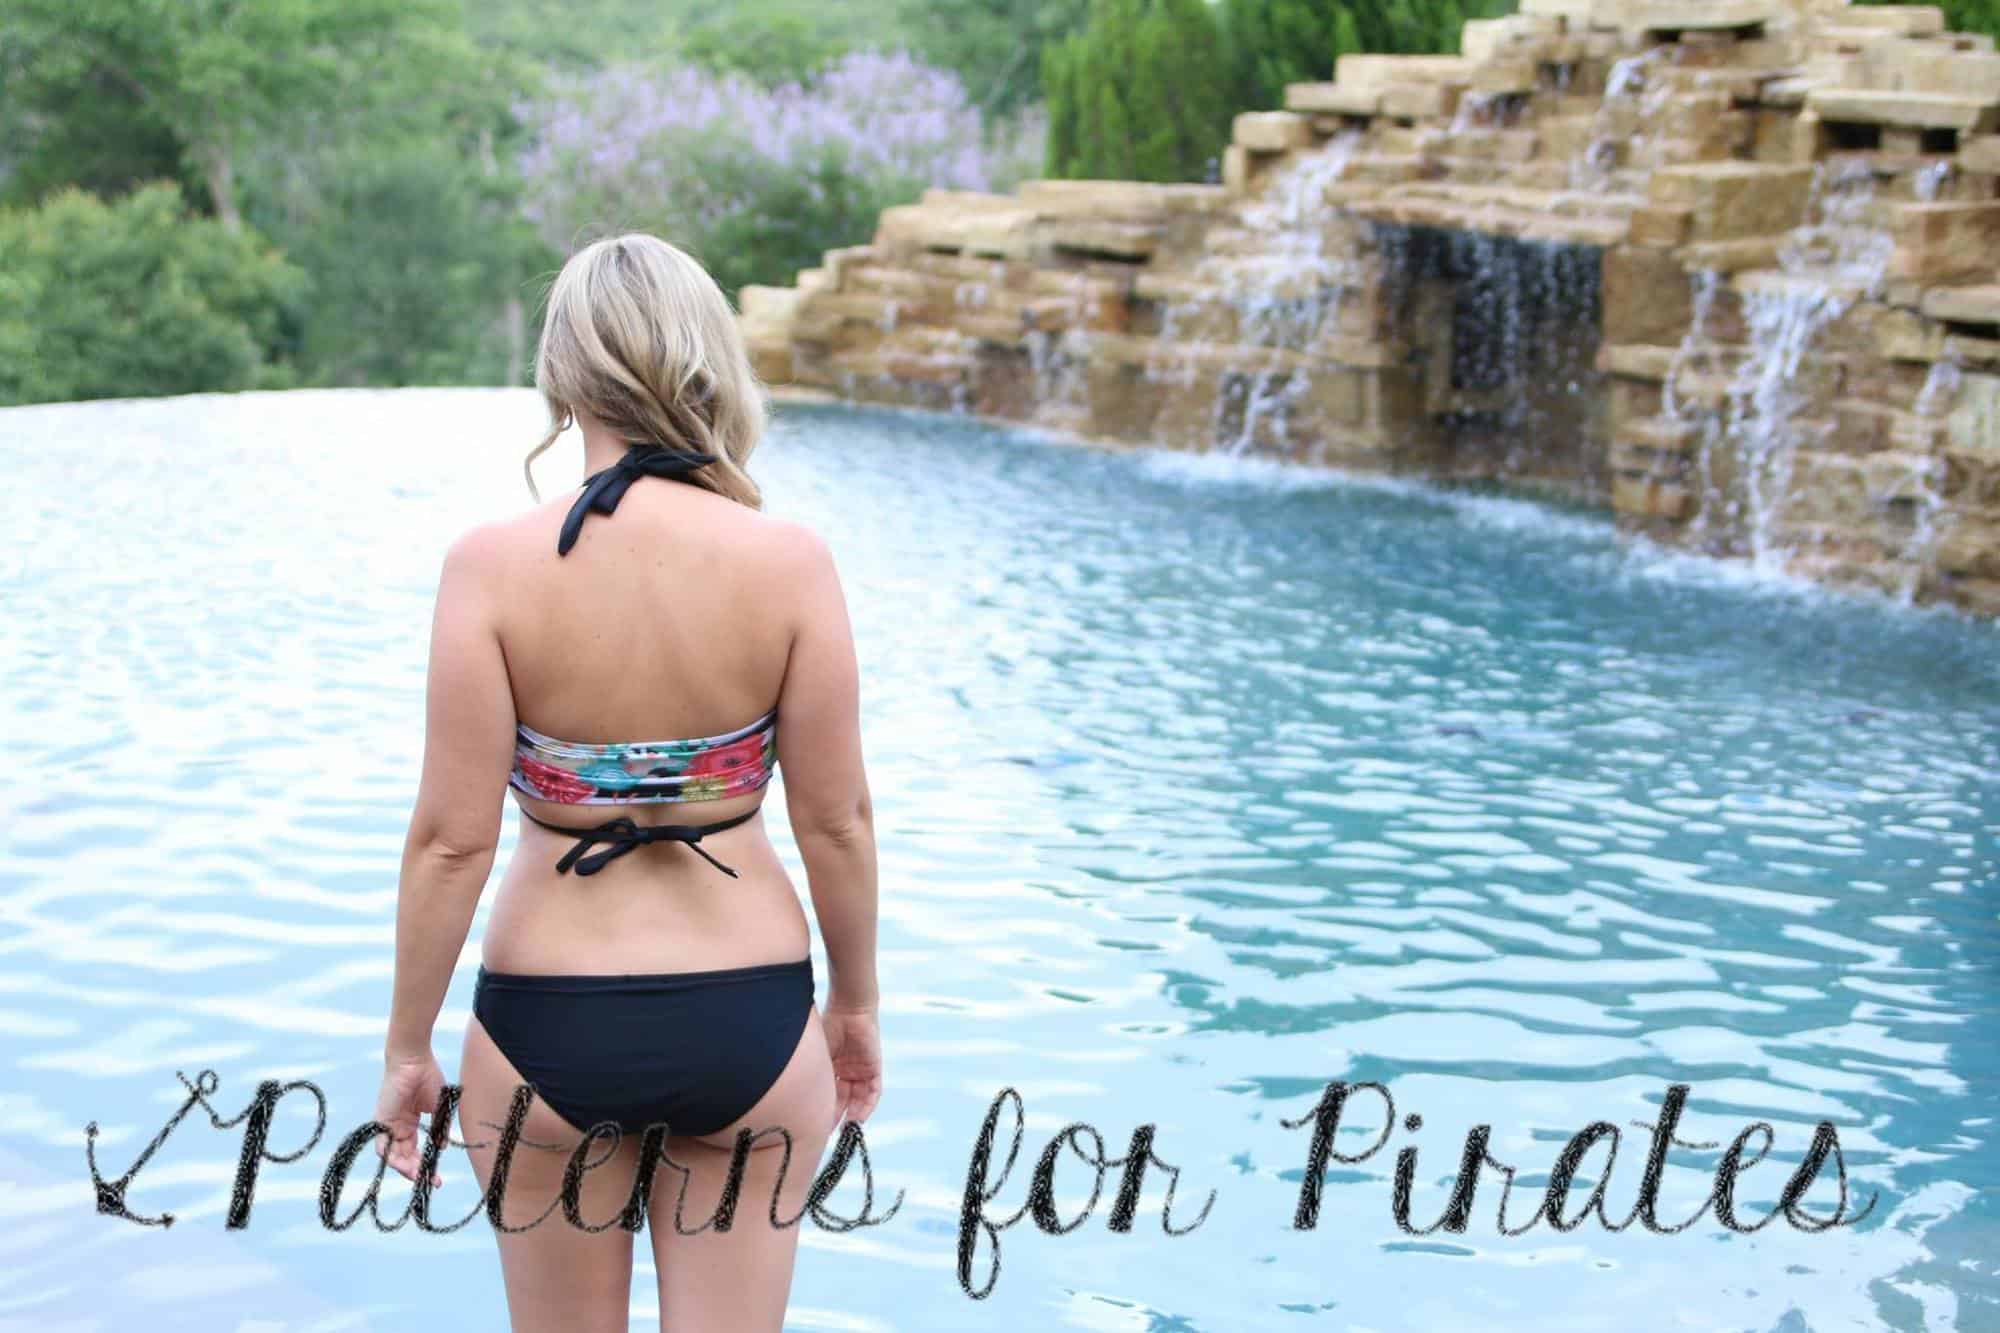
Our second bikini hack is super cute and ties around the back. You will want to use the Halter back (or even the full back) option for this version.
First, create your bikini straps. Cut a 1.5″ x 15″ strip. You can adjust the length to your preference depending on how long you would like your ties.
Now, on to the bodice. I trimmed the bottom 1″ off the bodice before beginning.

Looking for more inspiration? Be sure to check out our Facebook album with all the lovely tester pics and how to take the pattern one step further and turn it in to a gorgeous top or dress HERE!
We are all loving the new Patterns for Pirates Take the Plunge Swimsuit that was just released! So naturally, we had to take this pattern a step further and morph it into some cute apparel! In this tutorial I am going to show you how to add some super cute skirts in place of the swim bottoms to create adorable everyday garments! As a total bonus you can follow the swim pattern instructions to add built in bra cups and under bust support. How awesome!
This pattern is intended for pretty sturdy but stretchy swim knit. So in order to turn this into a comfortable dress I recommend choosing a main (outside) fabric that has both great 4-way stretch and good recovery. Brushed poly, rayon spandex, cotton spandex and maybe a very very stretchy scuba or liverpool would work. For the bodice lining you will want to choose something light and stretchy such as rayon spandex or brushed poly. All versions pictured in this tutorial were made using double brushed poly spandex. Also, you do not need to use swim elastic on this, regular braided elastic is sufficient. I will also detail how you may omit the elastic altogether for the full back option.
First things first. Go ahead, cut out all pieces of your bodice exactly as instructed in the pattern. None of these pieces need to be altered. You can choose any strap/back option. Choose to add bra cups and under bust support elastic if you feel like having an all-in-one dress! I personally love the push up bra cups for a little extra support when going with the all-in-one option. Remember, you do not need to use swim elastic for non-swim garments. Traditional braided elastic will be a little easier to sew with. Go ahead and assemble the bodice exactly as instructed by the pattern and skip to the Skirt Options portion of this tutorial.
{Optional} :: If you are choosing not to include bra cups, you are using the full back option AND you are using a sturdier fabric like brushed poly or cotton spandex, you may omit the elastic. Fabrics like rayon spandex and ITY, and built in bras that provide support do require that elastic be used to prevent your straps from stretching out. Also, the low back or halter version likewise require elastic to hold the dress up. To omit the elastic follow along with these next steps before getting to the skirt options.
First construct the front bodice pieces as instructed by the tutorial. You can skip the part when you clip the inner strap to fold it over and attach elastic. Instead sew the entire length up the strap to give a nice seam.
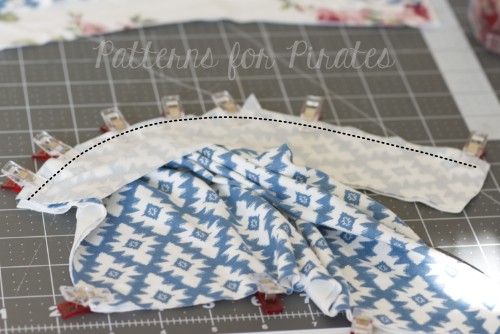
Next attach the main back bodice to the lining back bodice by laying them right sides together and stitching along the neckline. Then match up all bodice pieces at the shoulders right sides together and stitch.
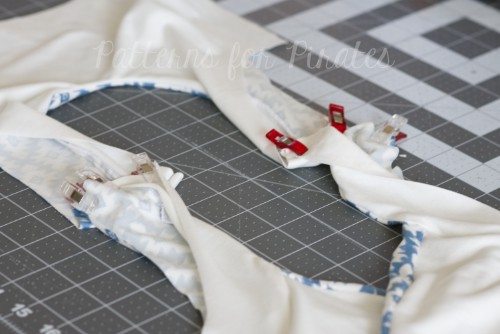
Topstitch inner neckline now if preferred. Next, lay your bodice out and fold the back bodice over on top of the front bodice pieces, matching up side seams main fabric to main fabric. Stitch side seams together and then baste the front bodice pieces together along the bottom as instructed in the pattern tutorial.
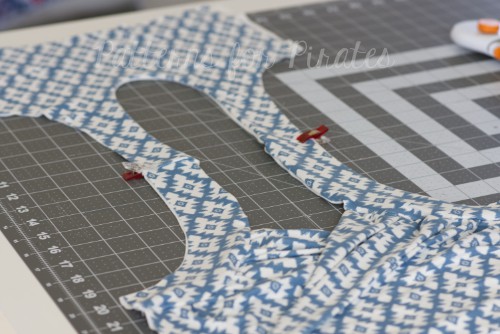
At this point you can baste stitch the outer armholes to prevent fabric shifting. I chose to run my serger around them. Fold the unfinished edges under about 3/8″ and topstitch armholes in place. The burrito roll method to enclose the armholes cleanly does not work here. There is simply too much fabric on the front bodice to work around. Now it’s time to add your skirt!
• • • • • • • • • • • • • • • • • • • • •
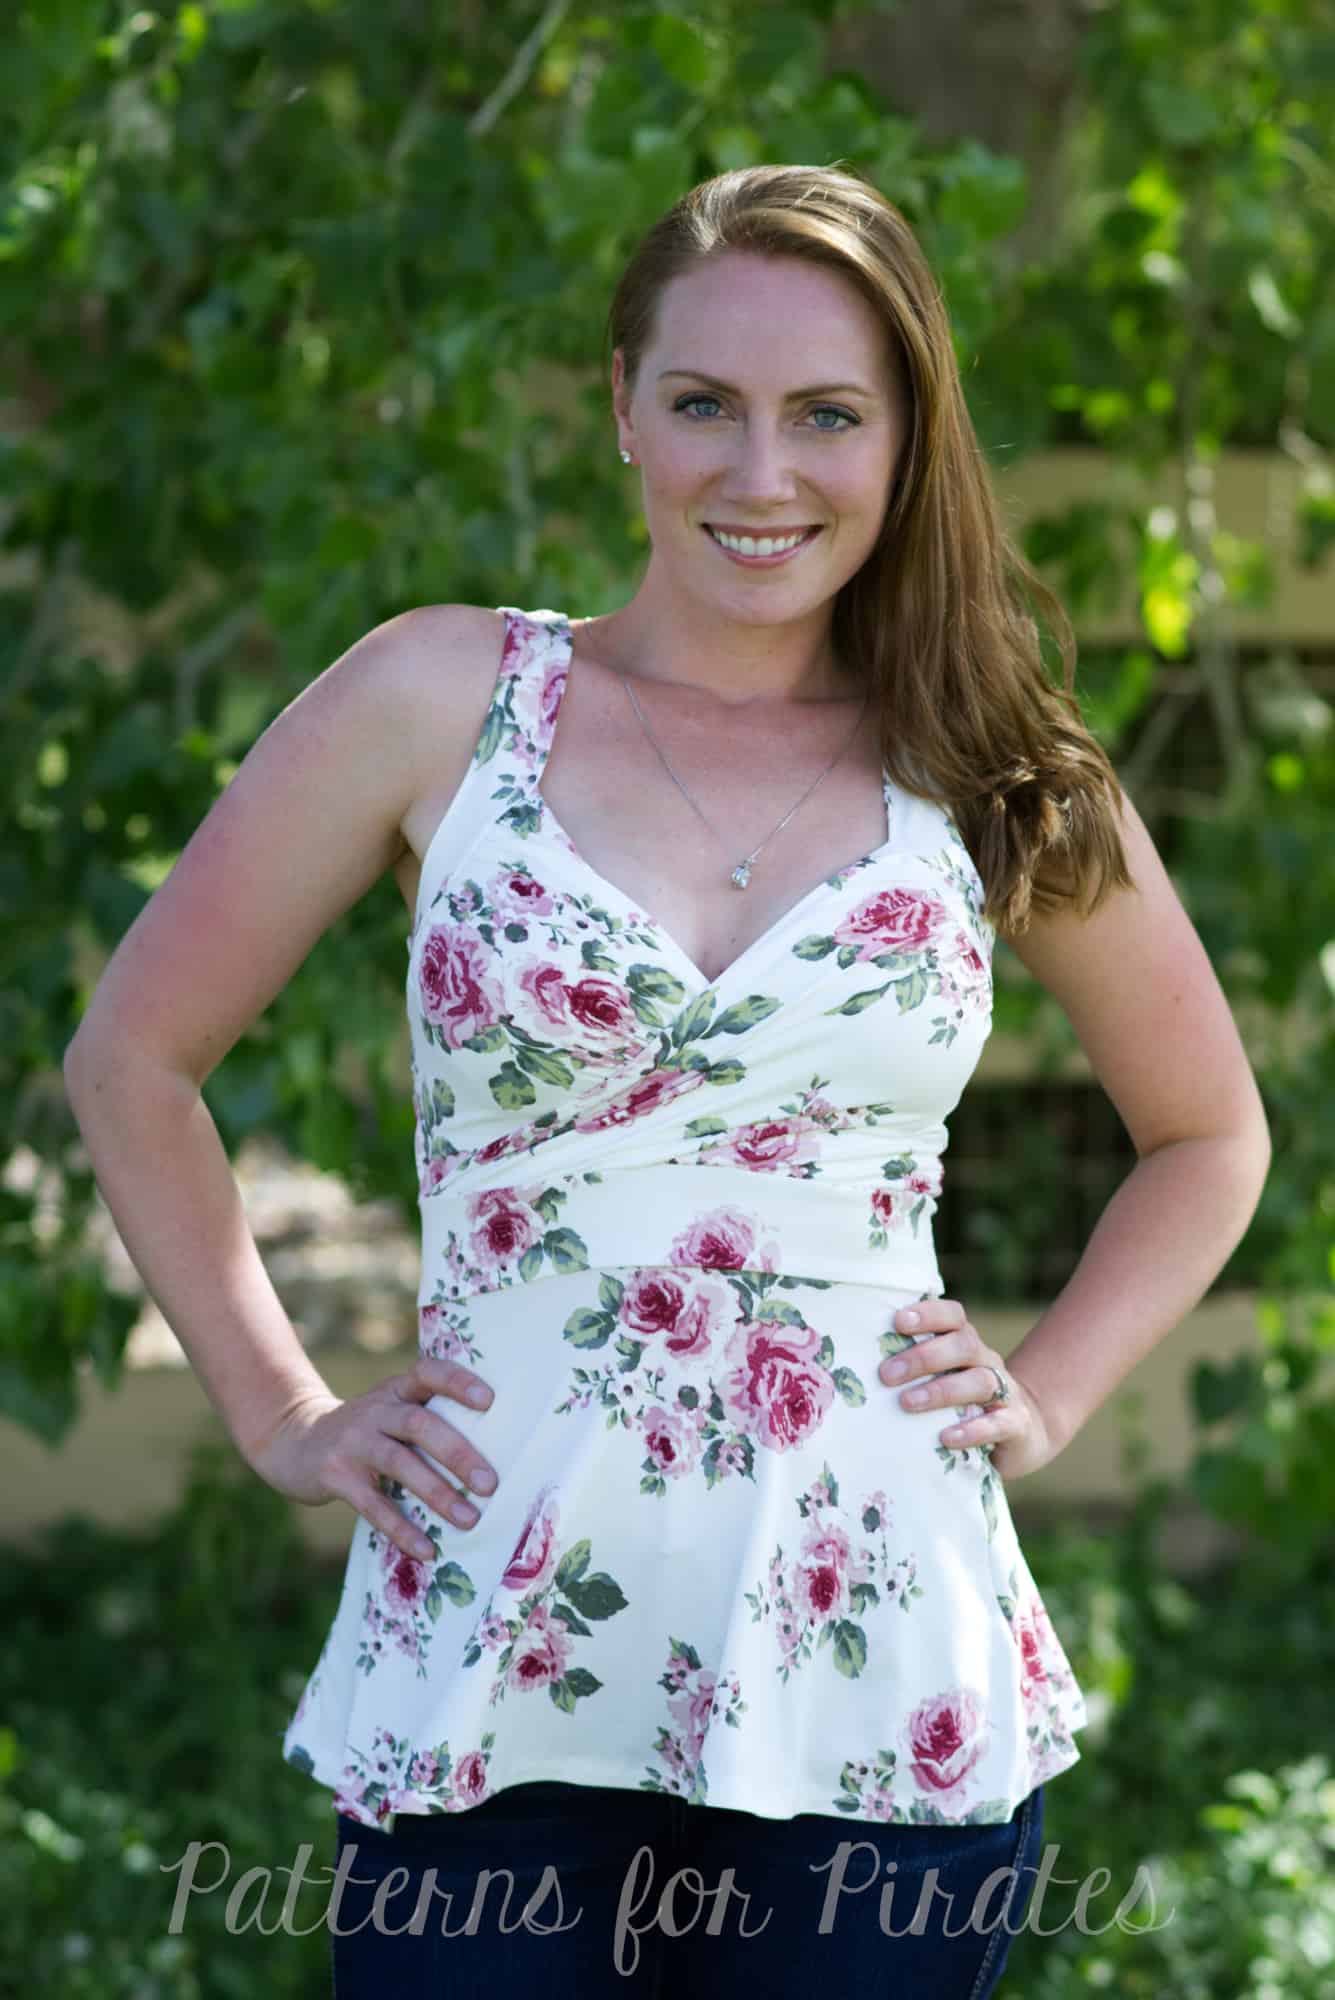
There are 3 skirt options that I will show you. The first option is a super fun peplum length. Cut your peplum piece to match the “skirt length” on the swimsuit pattern. I suggest measuring yourself for a preferred peplum length and double checking it against the pattern. You might want to shorten it up an inch or possibly add length depending. See the option below for more details on how to measure your skirt length. Once cut, simply follow the pattern directions and omit the swim bottoms to complete the top.
NOTE: The “peplum length” on the swim pattern will be too short for an everyday top.
• • • • • • • • • • • • • • • • • • • • •
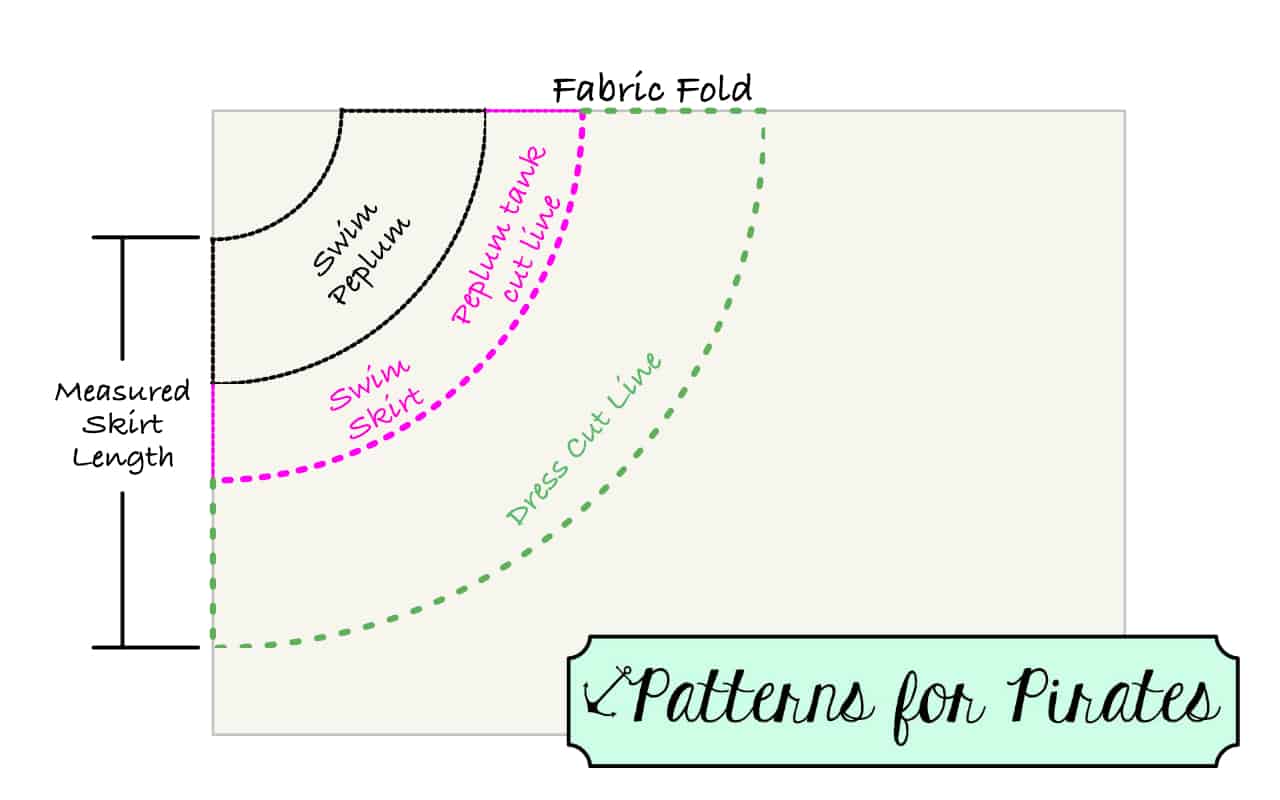
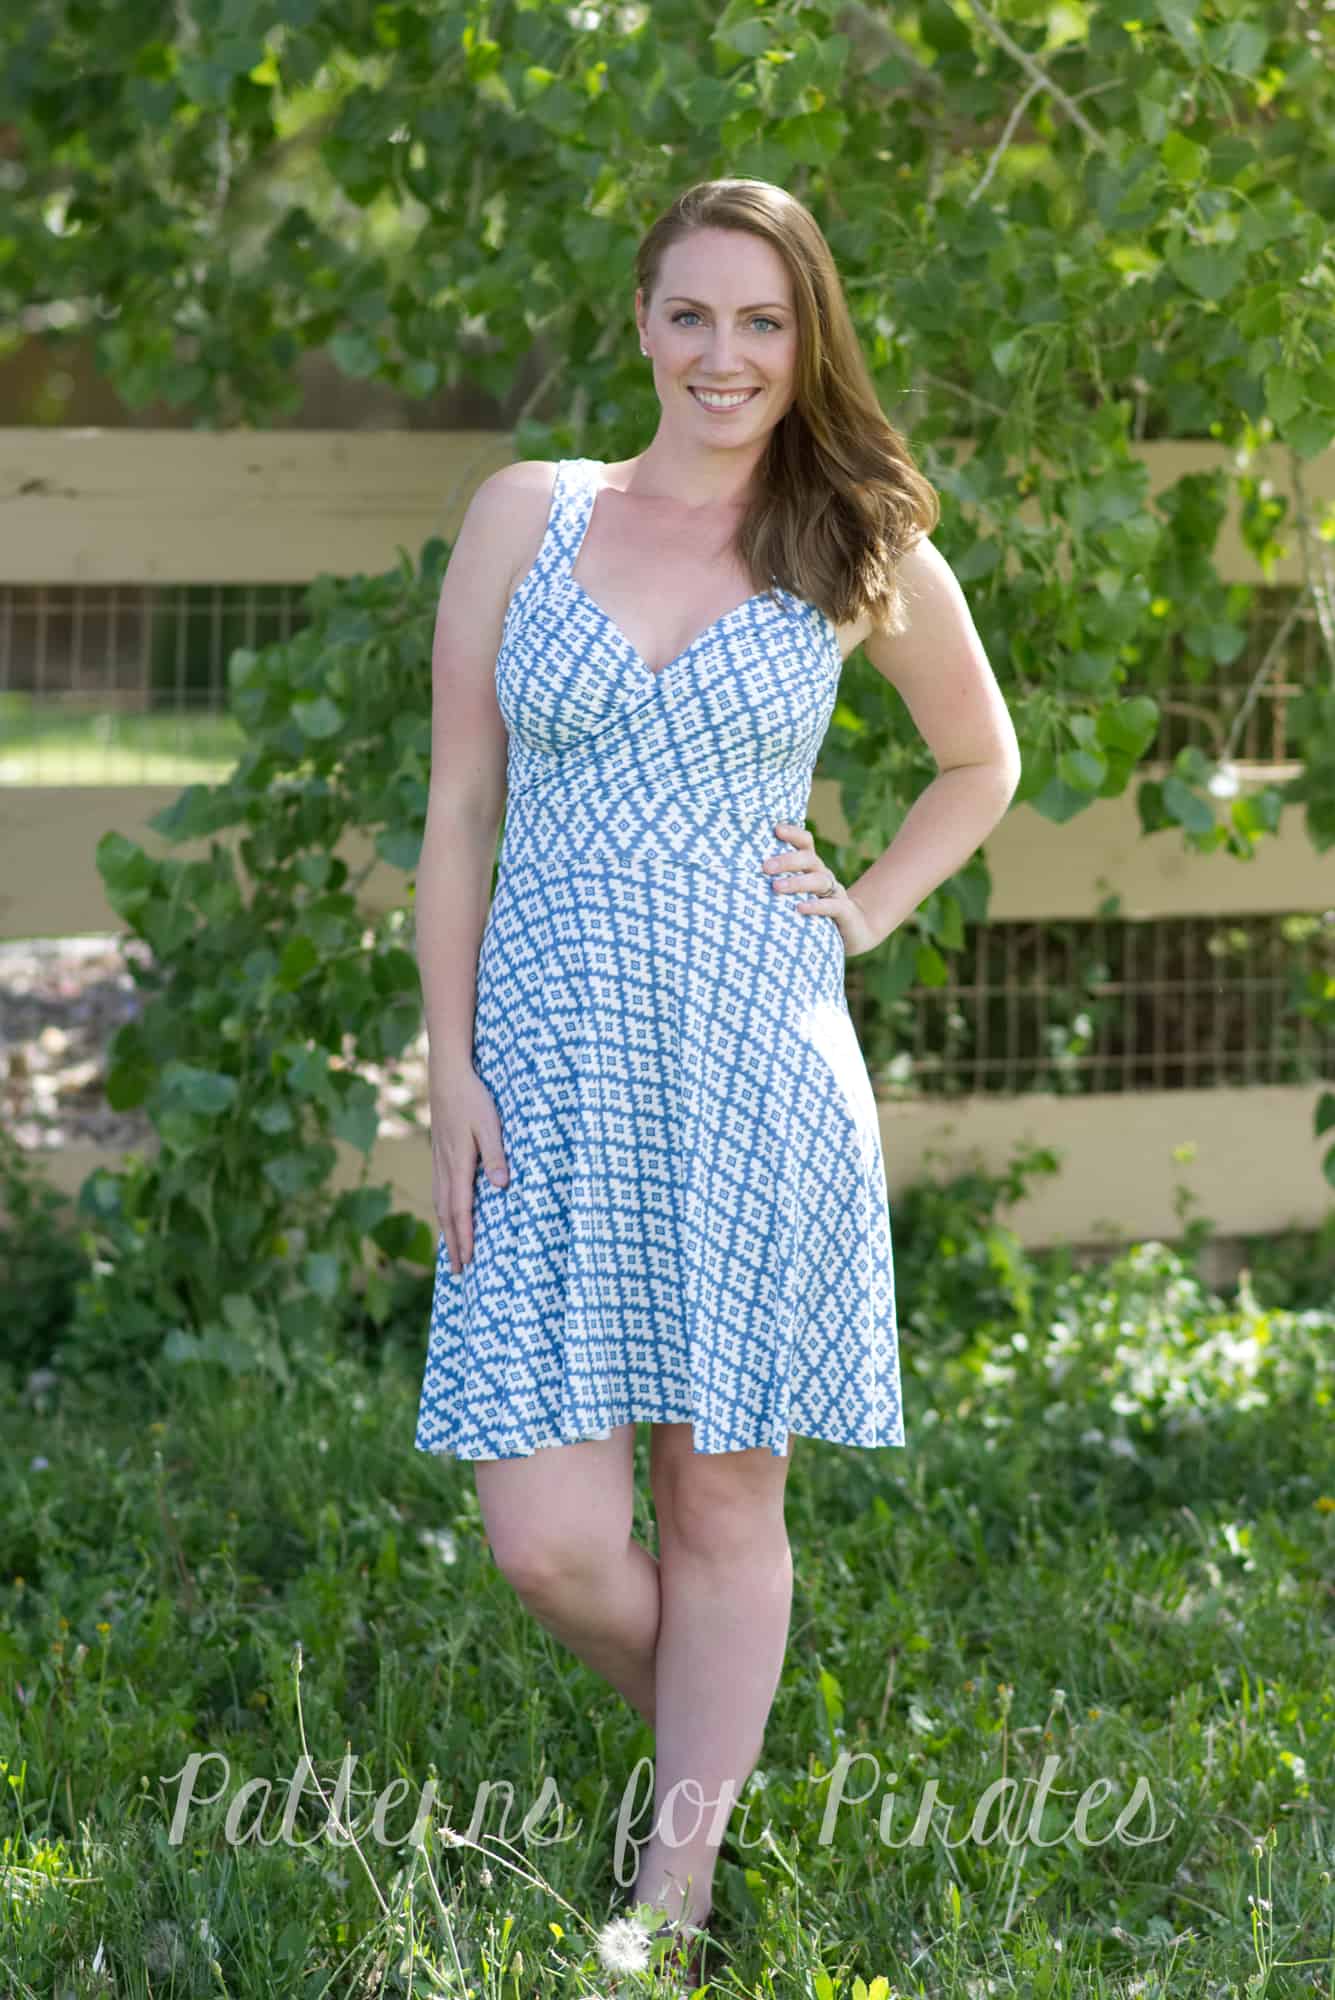
Next, I will show you an above the knee half circle skirt option. Decide where you would like your dress to land and measure skirt length by holding the end of the tape at your natural waist and allowing the tape to drape along your body. Add 1/2″ to that measurement for your bottom hem and another 3/8″ for your seam allowance. I also like to add an extra inch or so to this measurement just to be safe! You can always trim the hem length down at the end but you can’t easily add extra later! Place your TTP skirt pattern on your fabric and measure out as indicated below. Alternatively you can grab skirt lengths from the Patterns for Pirates Sweetheart Peplum and Dress for the ‘at the waist’ option if you already own that pattern.
Cut out your skirt piece, trying to keep your curve as even as possible. Cut your waistband (main and lining as indicated the the pattern) and assemble as instructed omitting the swim bottoms. Attach your waistband/skirt to your bodice. I do recommend cutting both the main waistband and the lining waistband to add structure. Try on your dress for length, hem it and you’re finished!
• • • • • • • • • • • • • • • • • • • • •
For the final option I will detail how to add a gathered skirt in place. This option is really simple. If you own the Boundless dress pattern you can simply attach the waistband from the TTP pattern instructions to the gathered skirt size from the Boundless. If you don’t own that one you can simply cut your rectangle skirt piece by doubling the waistband length and finding your desired skirt length through measuring as described in the previous option. Cut two skirt panels and sew them together if your fabric isn’t wide enough. Direction of greatest stretch should go across the 2x waistband length. See Illustration below:
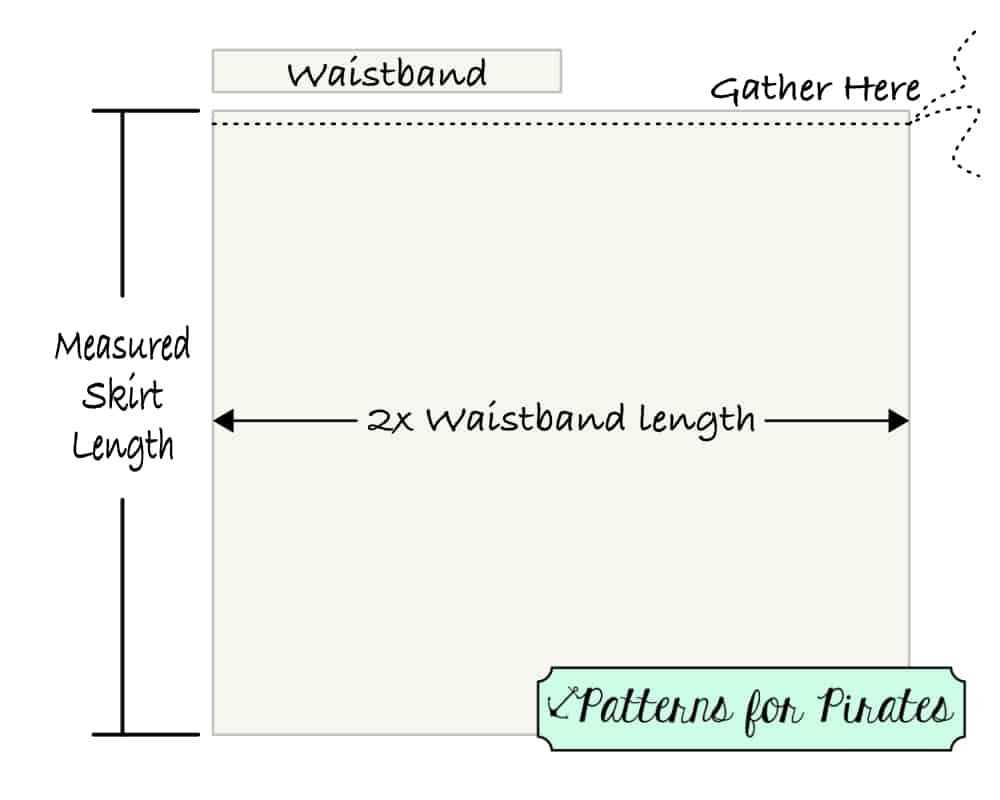 Gather one of the doubled waistband length sides by running a long baste stitch across and pulling the bobbin thread. Fit and sandwich the gathered end between the waistband pieces being sure the main fabrics are right sides together. Stitch in place.
Fold the long ends of the skirt to meet right sides together. Stitch down the entire side seam, from waistband to bottom of the skirt. Now attach your skirt/waistband to your bodice, right sides together. Try on your dress and hem to the appropriate length. You’re all done!


• • • • • • • • • • • • • • • • • • • • •
So you can see how versatile this swim pattern really is! I hope you have all found this tutorial to be helpful. Go forth, make some swimsuits, peplum tanks and dresses for the summer. Share them with us in the Patterns for Pirates Facebook group. Don’t forget to check out the TTP pattern release roundup for some more swimsuit photos and check out the hack post for some more fun Take the Plunge swimsuit options!
So you spent an hour picking the perfect fabric, perfect coordinates and matching thread. You’ve sewn your favorite P4P shirt and you only have one step left…the dreaded neckband. That’s when you start panicking and getting nervous about attaching the neckband and finishing your outfit. Fear no more!
Today on the blog I will give you 5 tips that will help you achieve that perfect neckband you are striving for all the time.
1. Choose the right fabric for your neckband!
Neckbands will be stretched when you attach them, they will be stretched when you put on or take off the shirt, so it is very important that fabric you use for the neckband has great stretch and great recovery. My favorite type of materials for neckbands are cotton spandex, rayon spandex, ribbing and rib knit. You can get away with using some brushed poly as long as the recovery is good. Avoid, scuba, french terry and 2 way poly blends.
2. Always cut the neckband cross-grain!
Never cut your neckbands along the grain. Even if your fabric has 4 way stretch (which it should) the vertical stretch is not going to be as much as the horizontal one. If you don’t have enough of the main fabric to cut the neckband is best to use a coordinating fabric than cutting the neckband along the grain.
3. Mark the quarters of your neckband and neck opening!
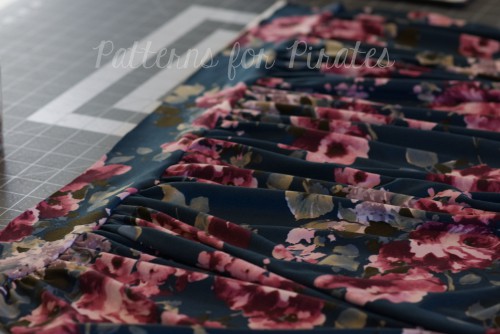
It’s very important that you find and pin (or clip) the quarter points of the neckband and neck opening. After you have sewn the neckband RTS at the ends so you have a loop, fold it length wise and mark where the seam is. This will be the back of your neck band. The center front of the neckband will be on the opposite side. Now fold it in half bringing the center front and back markings together. The fold will mark your two quarters.
To find the front and back neck opening centers, bring the shoulder seams wrong side together. Where centers will be where the folds are. Mark them with a pin, a clip or a small snip. With the fabric still laying flat, bring the center front and back together. Your quarter marks will be at the folds. Mark them as well. You will see that the side neck opening quarter marks are NOT at the shoulder seam. The front opening is larger than the back opening.
For all you visual learners, here is a video of the process.
4. Use the right stitches!
Avoid using a straight stitch when attaching the neckband. As I mentioned earlier, the neckband will be stretched and pulled so you want to make sure the stitches are up to the job. If you are using only your sewing machine, attach the neckband with either a stretch stitch or a narrow zig zag stitch. I prefer to use my serger for this step but it is not mandatory. Once you attached the neckband, press the seam allowance towards the shirt. You will now be top stitching it down with your coverstitch machine or your sewing machine. You can top stitch with a wide zig zag stitch, a stretch stitch or twin needles. Be sure to check out our Twin Needles tips and tricks blog too.
You can see how I attached the neckbands here:
5. Press, press, and steam some more!
If you’ve followed the tips I gave you and notice a slight waviness, don’t panic. It’s normal when sewing knits especially if they are on the bias (as is part of the neck opening). Go back to your ironing board and give the neckline a good hefty steam press. Most of the times my neckbands are cotton spandex based and I crank up my ironing machine all the way to the “linen” setting. Make sure you test the heat of your iron on a scrap fabric first. If your shirt is poly based you will need a lower ironing temperature, you do not want to melt your fabric 🙂
There you have it! 5 easy to follow steps to achieve a perfect neckband all the time!
Happy sewing, pirates!

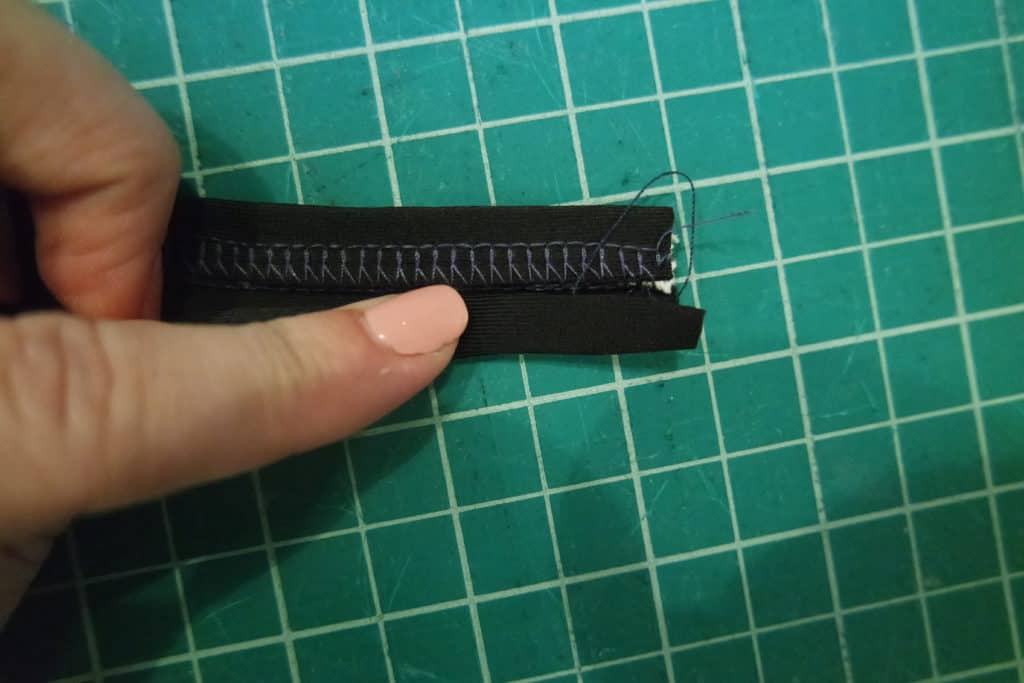
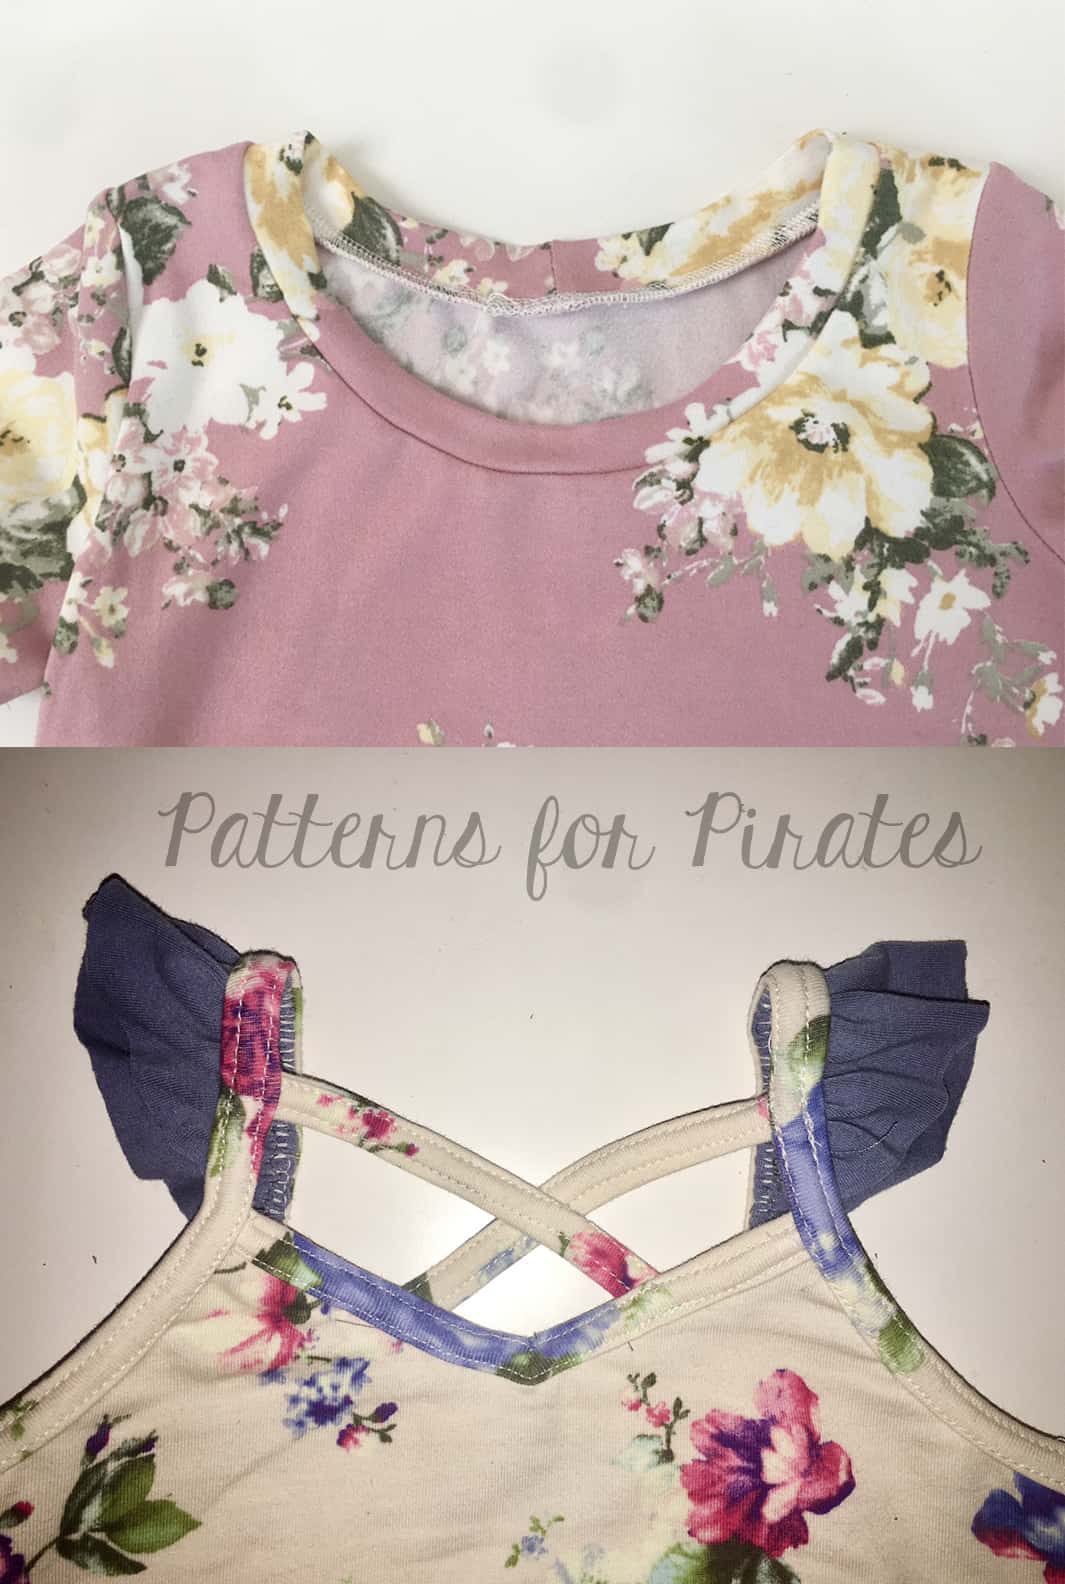
With our recent release of the Cross my Heart and Heart Breaker Cami patterns, we’ve had some questions and hesitation about the straps… because, well, they look scary! They may look intimidating but they truly are not as bad as they appear. We’re going to show you a few different ways to do knit binding and hopefully help ease those fears.
What is Knit Binding?
Tools to create successful knit binding:
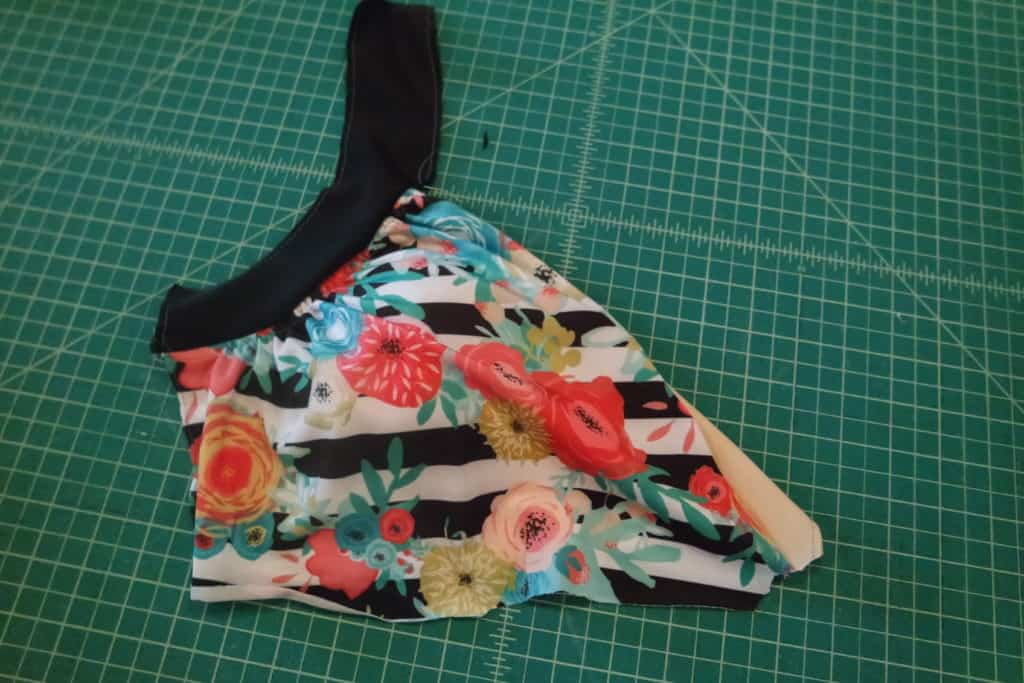
Both the cami patterns, the Sweetheart and Me Hearties Dress, and Essential Tank use knit binding to finish the necklines, armholes or sleeves but you can apply this method to other tops and skirts in lieu of bands or hemming. Just be sure to take in to account your seam allowances and band heights as they will finish lower or higher if no adjustments are made.
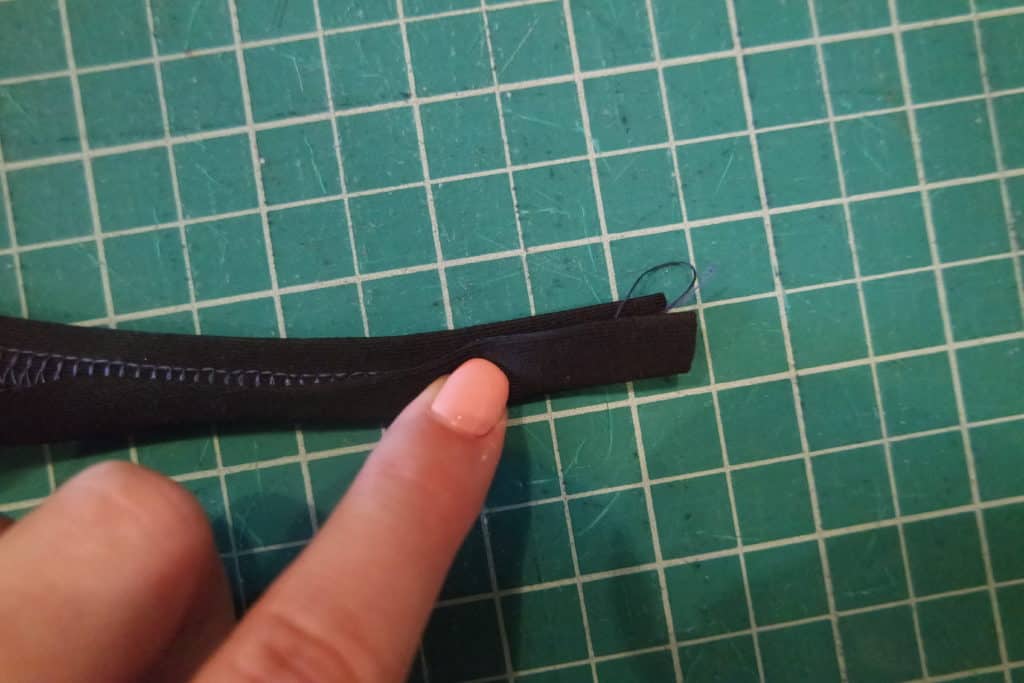
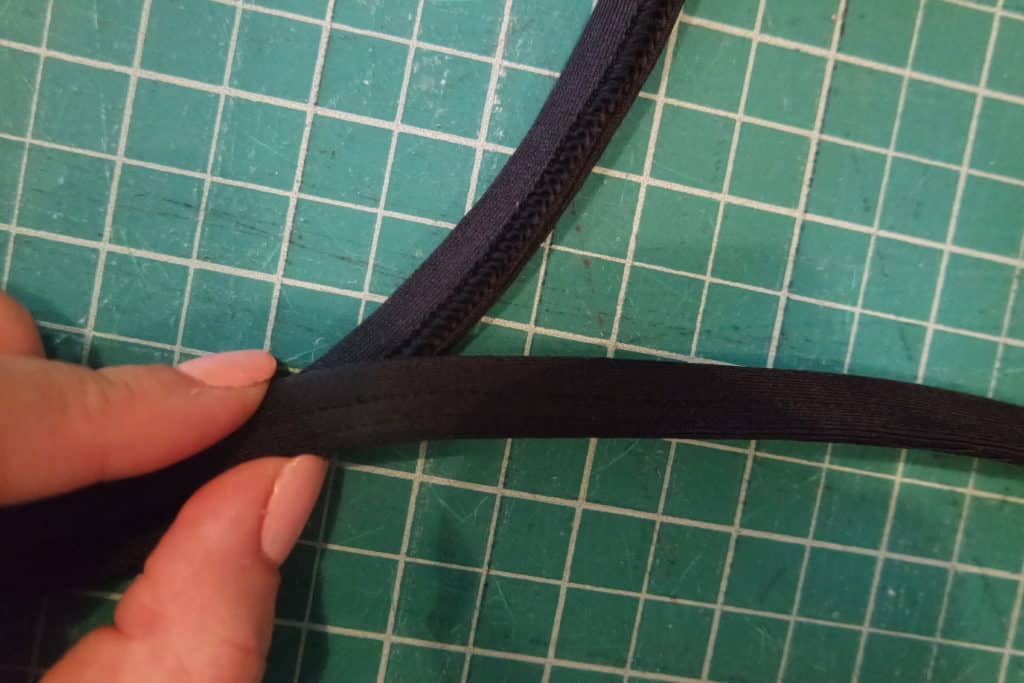
Methods to do knit binding:

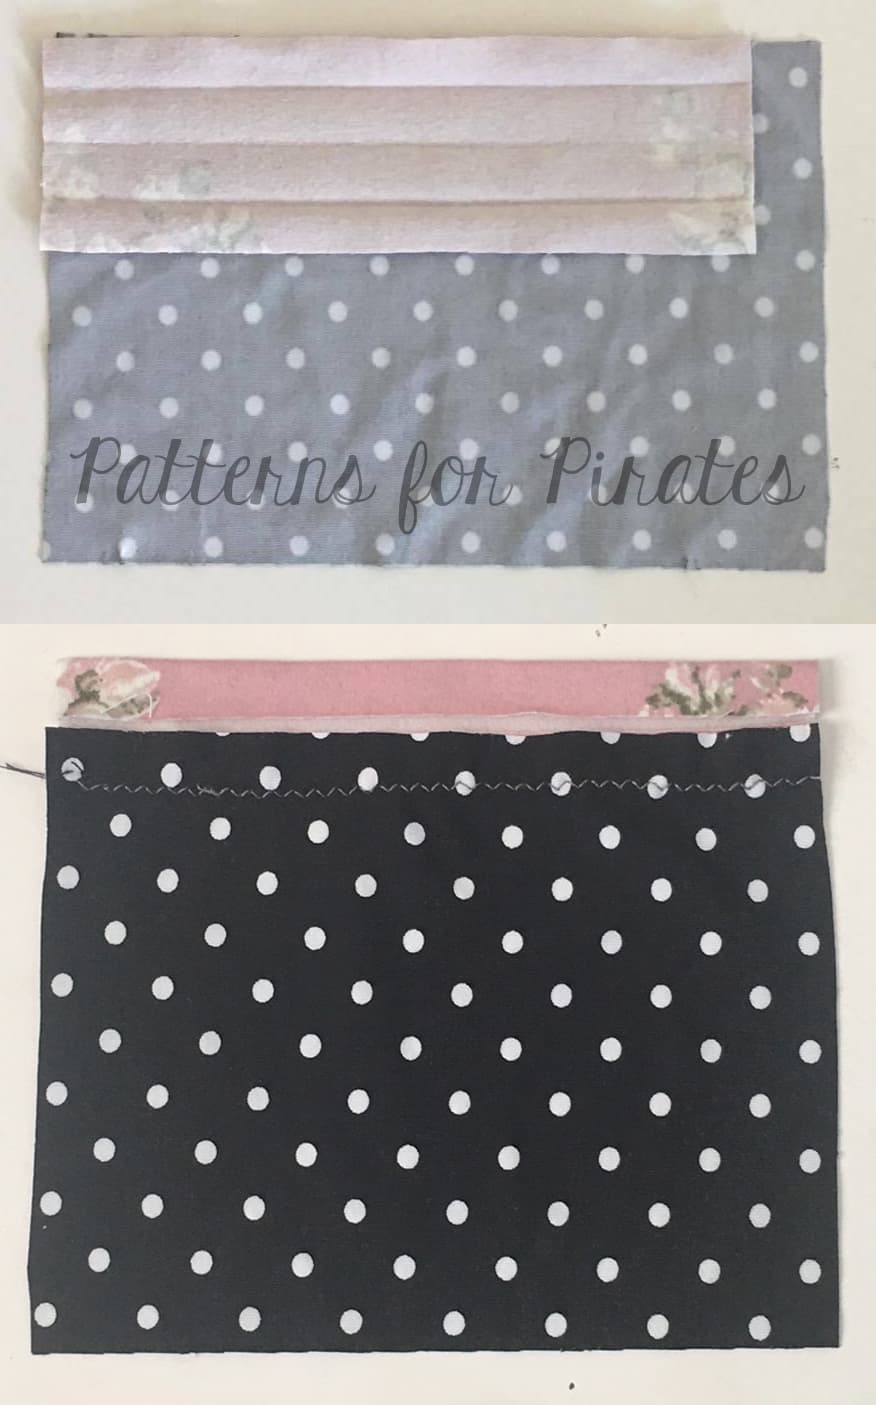
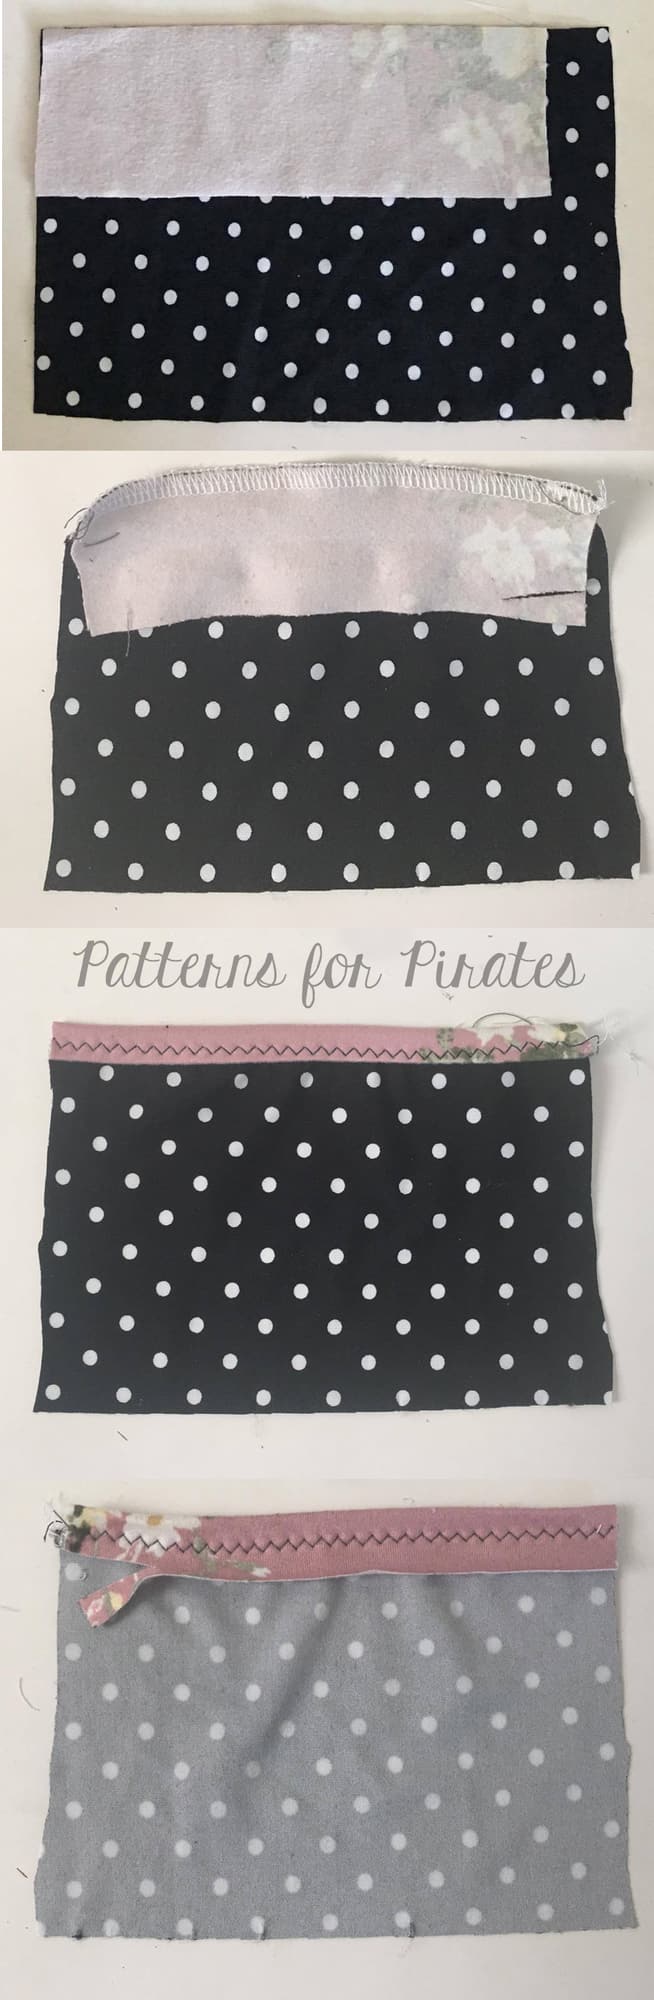
There are multiple options for Top-stitching binding. Here are few of our favorites:
Need more help? Here’s a video of the binding options described above 🙂
Hopefully this answered your questions about knit binding and eased some of your fears. Just remember, press and go slow! As with any new skill, it takes time to master, so keep practicing and you’ll have added another finishing method to your sewing arsenal.
Finished a project using knit binding? Be sure to share in our Facebook Group! We’d love to see it.
Joggers have been a really popular trend lately. A big reason, aside from the pure comfort, is because they can be dressed down with a pair of sandals or they can be dressed up with some heels for a day out in the city. But did you know? The Patterns for Pirates Mama Bear Joggers (as well as Papa and baby of course) only require 20% stretch! This leaves SO many options to choose from when deciding on fabric to sew your own. Inspired by Judy’s olive poplin version (below), I sewed up a couple joggers for myself in some other fabric options.

While rummaging around for something to use, I discovered some stretch denim that was hiding away in my fabric stash. I just knew it would be perfect! This denim is about 25% stretch and wears incredibly comfortably. I wear these joggers around the house or I like to style them with a pair of heels and a blousey, loose or fitted tank top for a day out. The denim definitely adds some structure to the pants but certainly does not take away from the comfort.

I also found some stretch twill in my stash and knew I HAD to whip up a pair of summer shorts with it! I used the Mama Bear pattern in shorts length, but added about 2.5″ to the bottom hem line in order to do the roll-up hem instead. I love the look of it over the traditional version for this purpose. Some ribbon in my stash was used for the drawstring and really finished off the look. These are just seriously cute and comfortable!


So next time you’re at the fabric store or digging around in your stash at home, break out your stretch ruler (you can find one in Judy’s cheat sheet) and then use those stretch wovens!
::: Written by Kelly Bailey – P4P Blog Contributor :::
Read more about sewing joggers for the entire family here!
Read some easy Bear Jogger hacks here!
 Judy Tee
$0.00
Judy Tee
$0.00
 Darling Dress
$12.00
Darling Dress
$12.00
 Wide Leg Cargos
Original price was: $12.00.$10.50Current price is: $10.50.
Wide Leg Cargos
Original price was: $12.00.$10.50Current price is: $10.50.
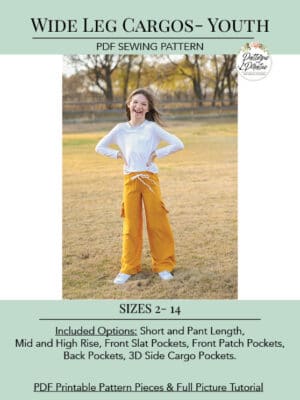 Wide Leg Cargos- Youth
Original price was: $10.00.$8.50Current price is: $8.50.
Wide Leg Cargos- Youth
Original price was: $10.00.$8.50Current price is: $8.50.
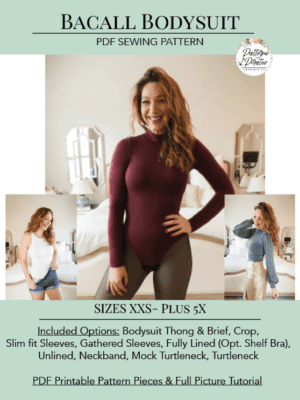 Bacall Bodysuit
$12.00
Bacall Bodysuit
$12.00


