2020 Holiday Freebies :: Bear Hug Rug Tutorial
Happy Holidays, Pirate Friends! We are excitedly back for another year and another round of holiday freebies to share with you! Over the years, we’ve compiled different tutorials and patterns that we think would make *perfect* gifts for your friends and family. Curious about what we’ve already released in the way of holiday freebies? Head right here to see all of them: Holiday Freebies Roundup.
Today, we are bringing you the: Bear Hug Rug!
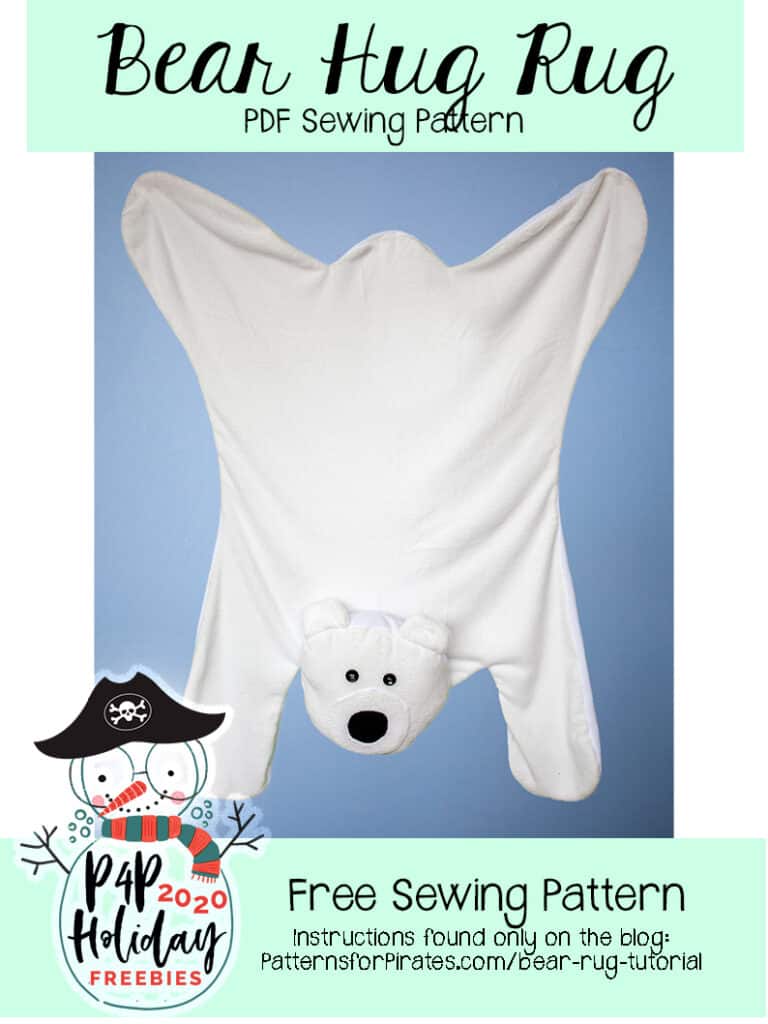
The Bear Hug Rug is pretty much a giant stuffed animal, with function. It can be used as a rug on the floor, while relaxing or reading a book. It can be used as a blanket with a big ole’ head for cuddling up with. Or it can be used as a giant stuffed animal, ready to be loved.
The pattern construction is super simple and the results are so fun. We hope you love it!
Supplies Needed:
- Bear Hug Rug pattern pieces
- Fabric Requirements: Fleece / Minky / Faux Fur, etc, 54″ wide
- 2 Yards Main
- 2 Yards Lining
- Fiberfill (for head)
- Scraps of fabric for facial features
- Buttons / Embroidery Thread for Eyes
TUTORIAL
Place 2 ear pieces, right sides together.
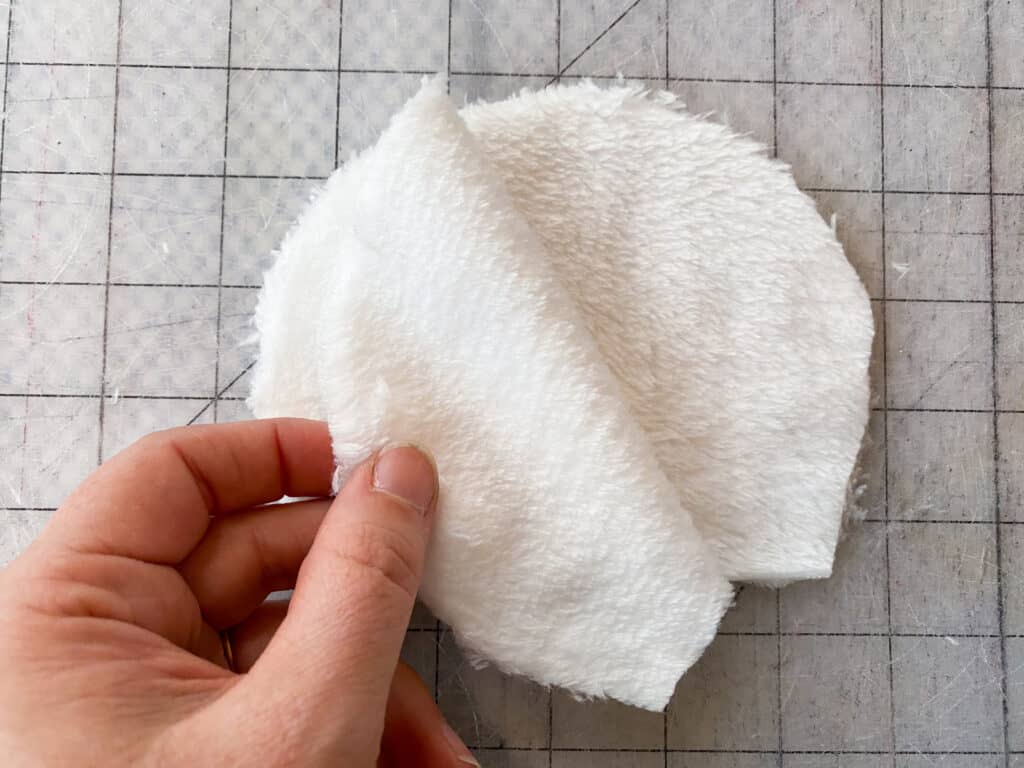
Using 1/2″ seam allowance, sew around entire round edge.
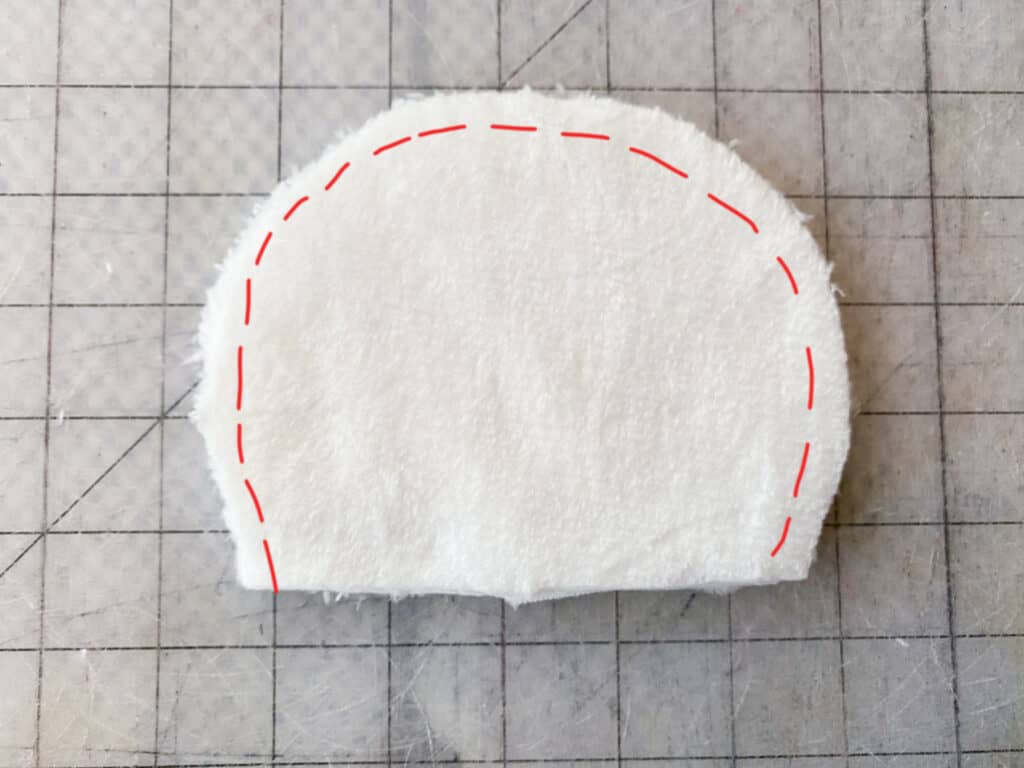
Turn right side out and place pin/clip at the middle, bottom edge. Repeat for second ear.
**Tip from our testers: if your ears are on the floppy side, you might want to add a little polyfil to them to help them stand up.
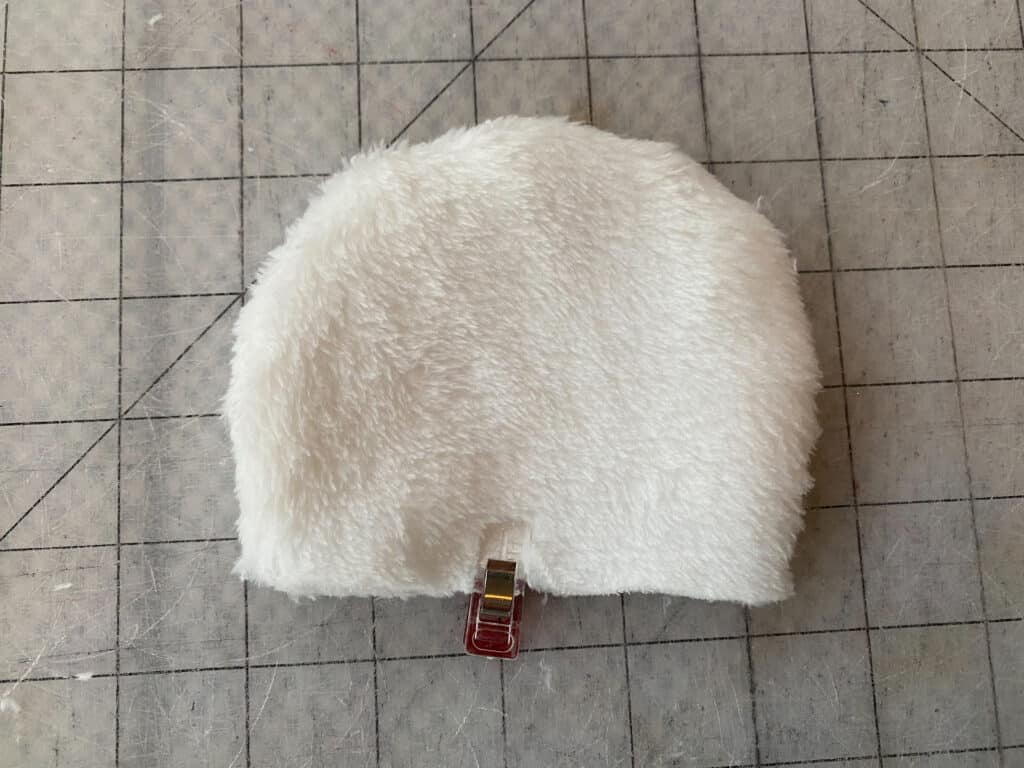
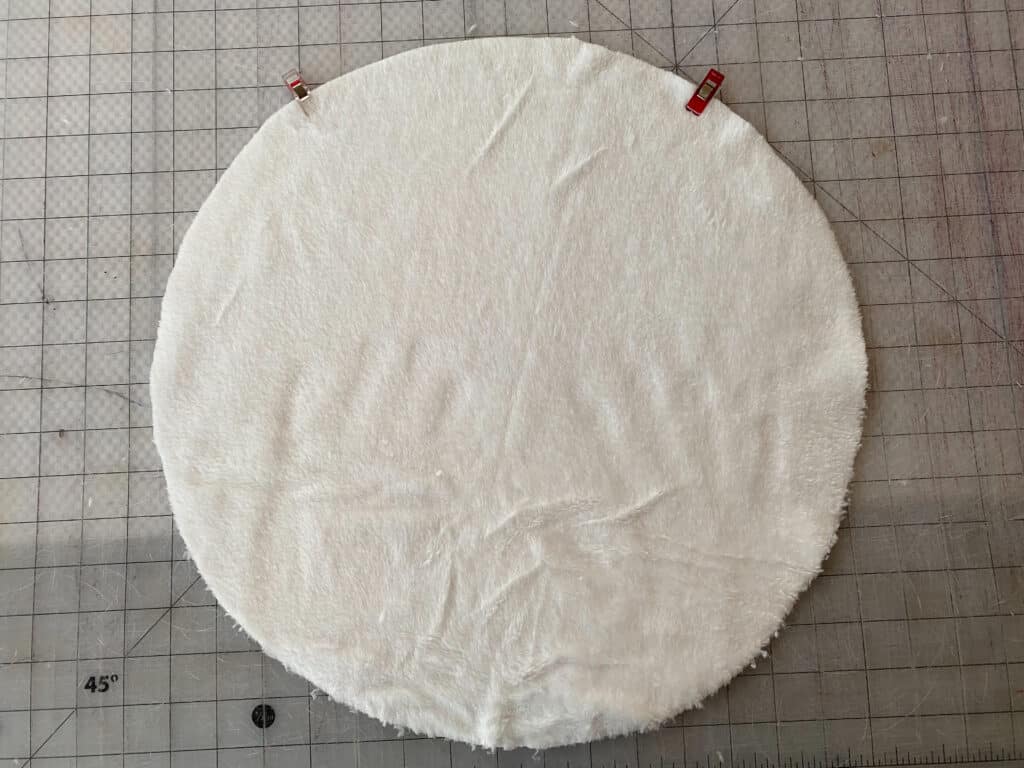
On head piece, use the pattern piece to place pin/clip for ear markings.
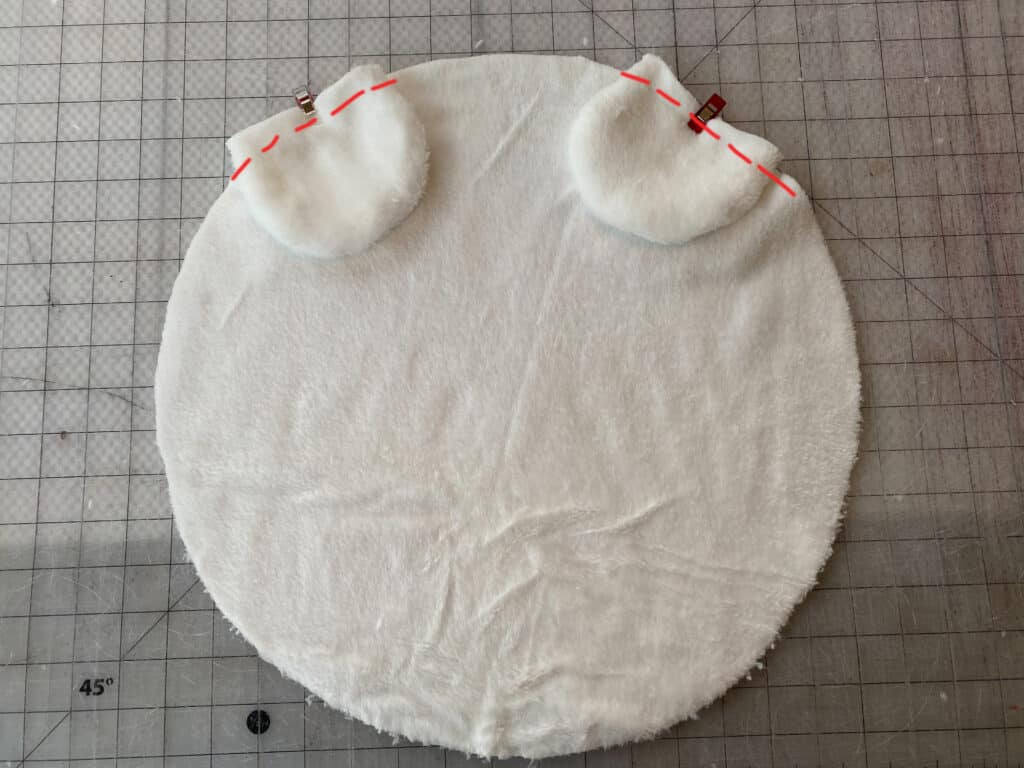
With right sides together, match ear pieces to markings on the main head piece. Baste ears in place.
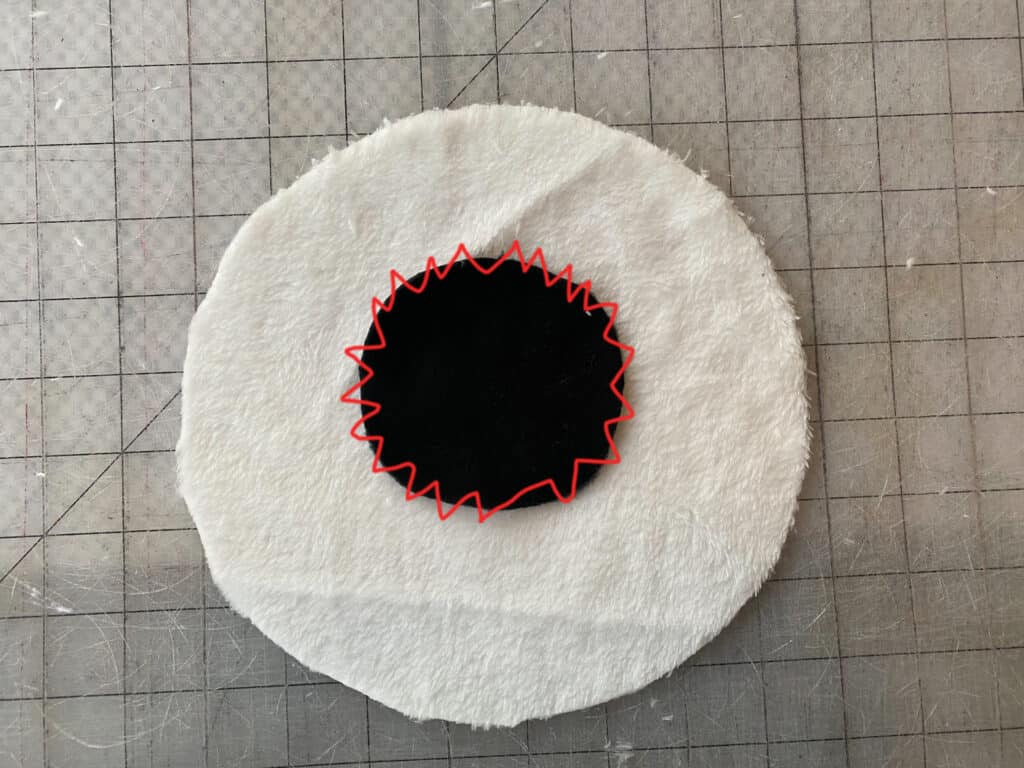
On main snout piece, center the nose piece and attach using your favorite applique stitch.
Note: If nose fabric is woven / can fray, be sure to use an interfacing before fixing it to the snout to avoid future issues with fraying.
With main snout facing up, place lining fabric on top, right sides together.
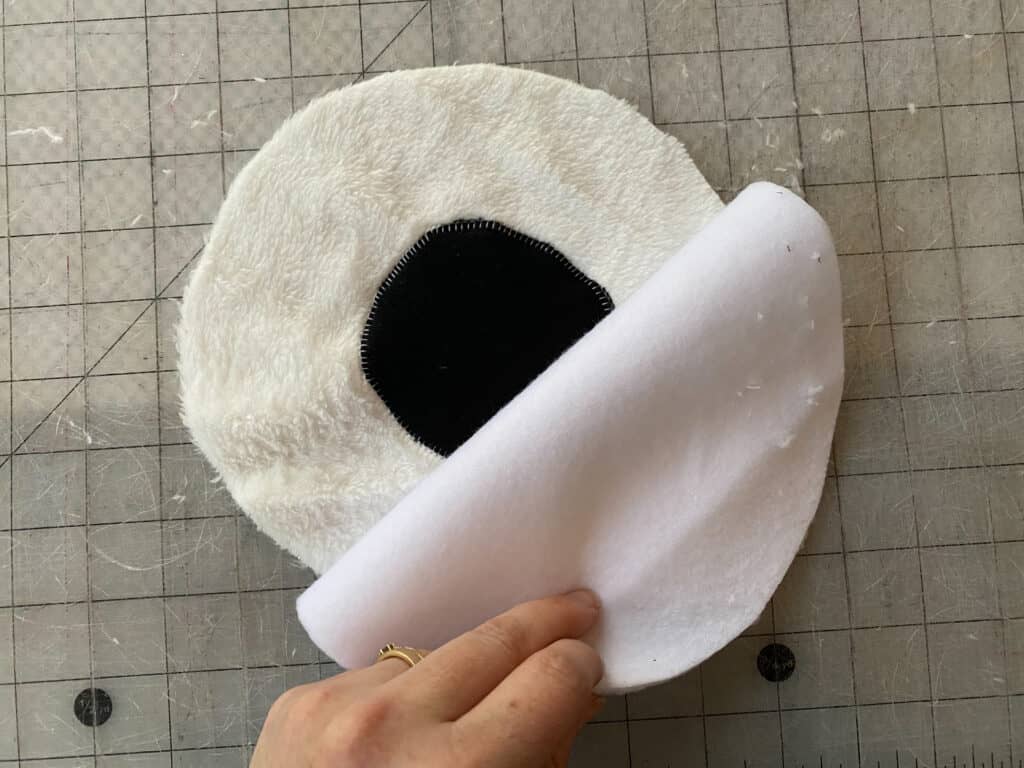
Sew around entire outer edge, using 1/2″ seam allowance.
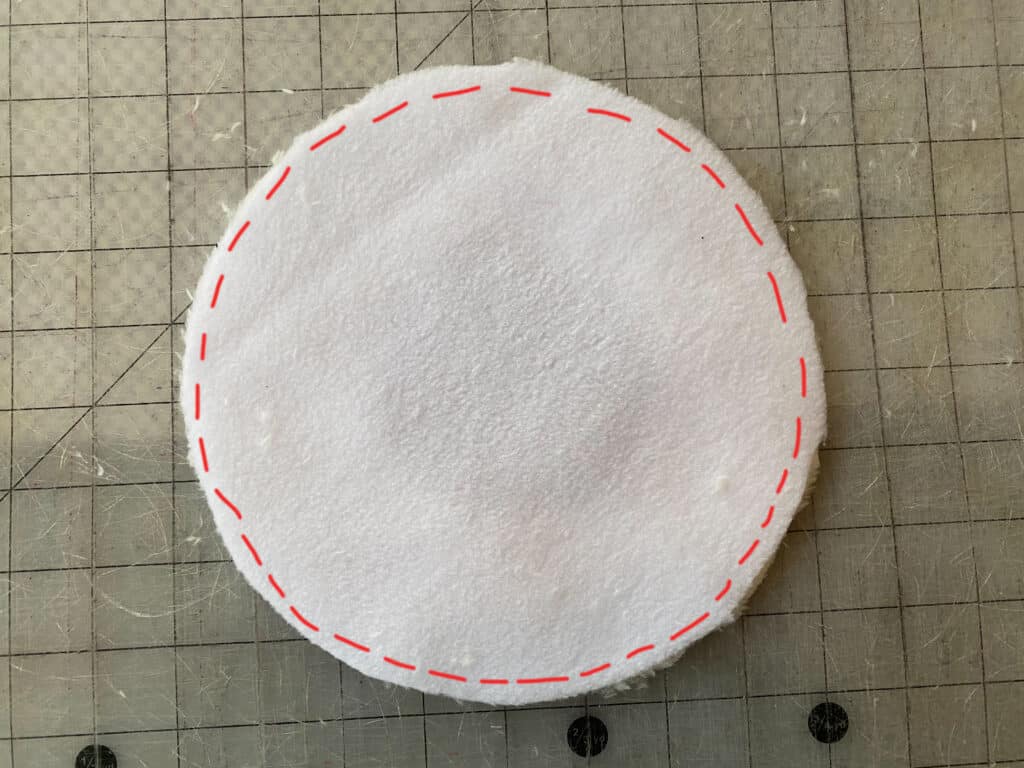
Clip curved edges, using pinking shears / “v” pattern to help with a smoother turned edge.
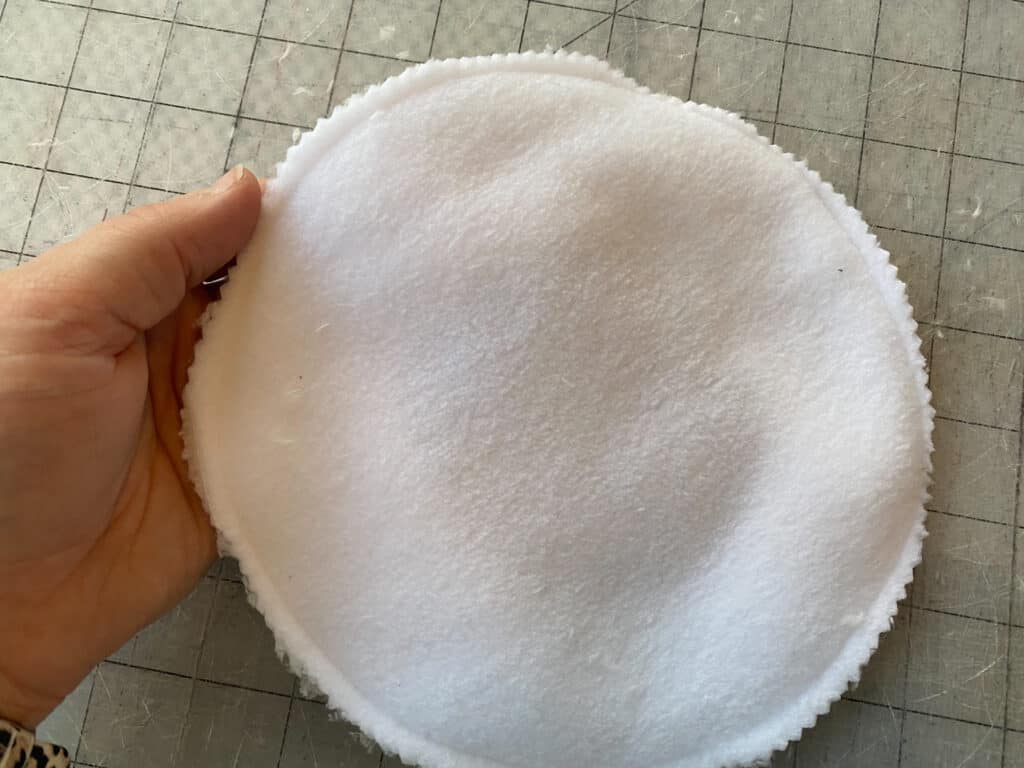
Careful not to cut through the main fabric, clip a hole through the middle of your lining fabric piece.
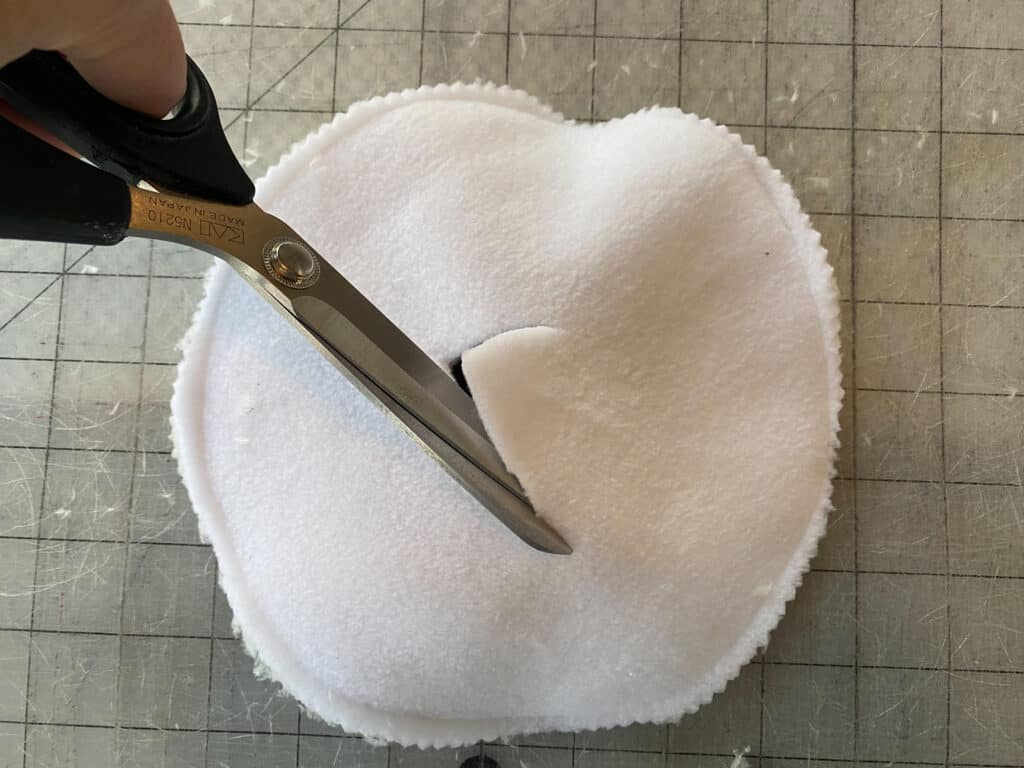
Turn the snout right sides out, through the hole you just cut.
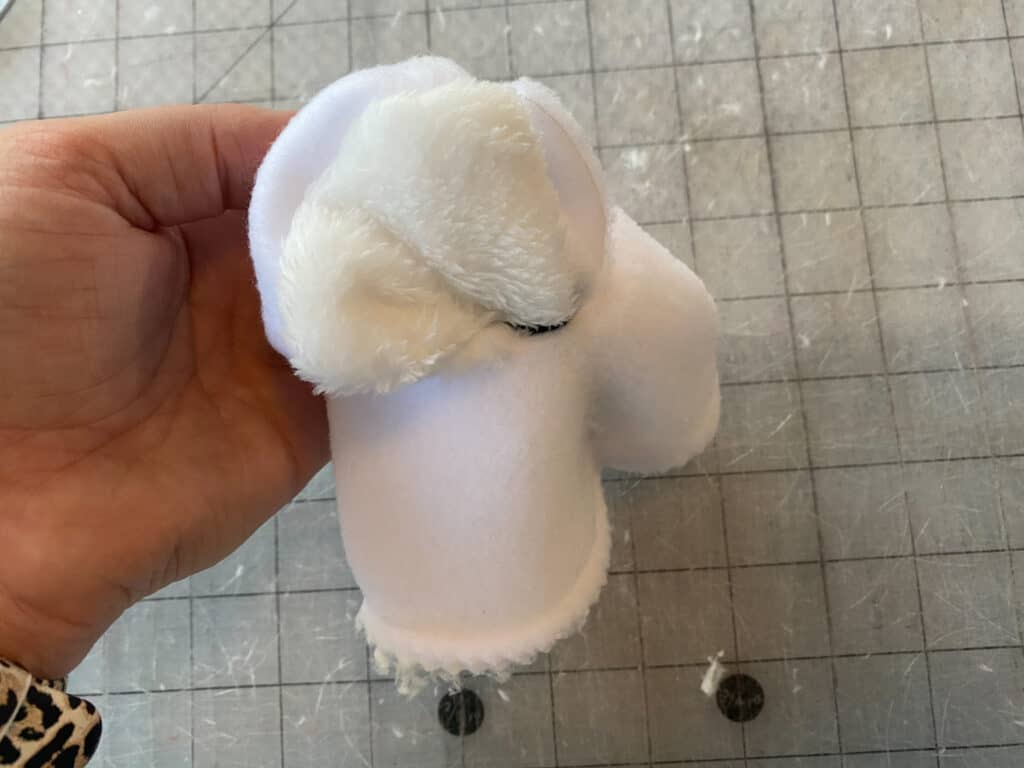
Press out all of your seams.
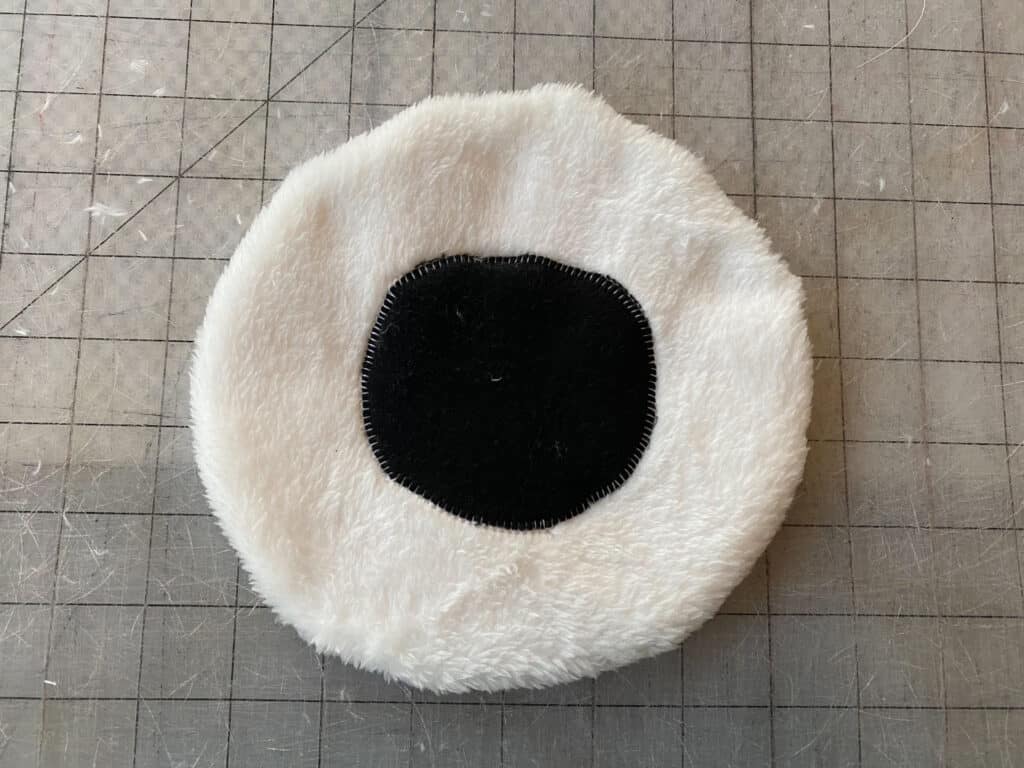
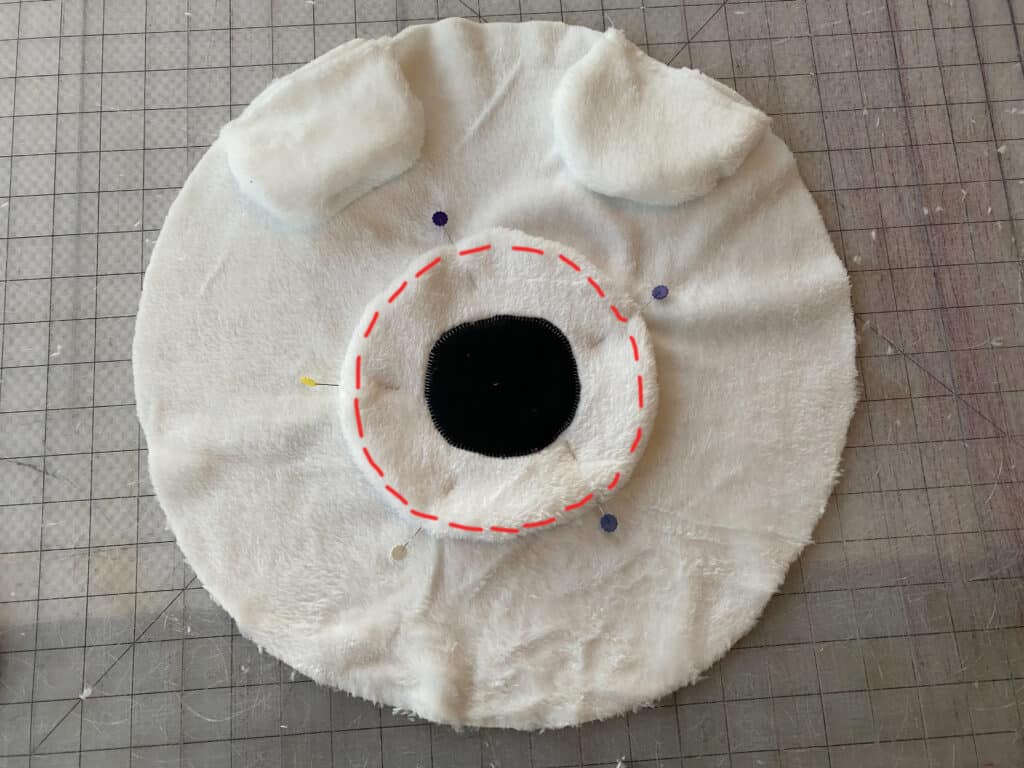
Place the snout piece, centered on the main head piece. Edge or applique stitch snout to attach it.
Add your eyes.
**I used these large buttons and hand stitched them on. You can also choose to embroider this detail, or add fleece circles. Whatever your preference is!
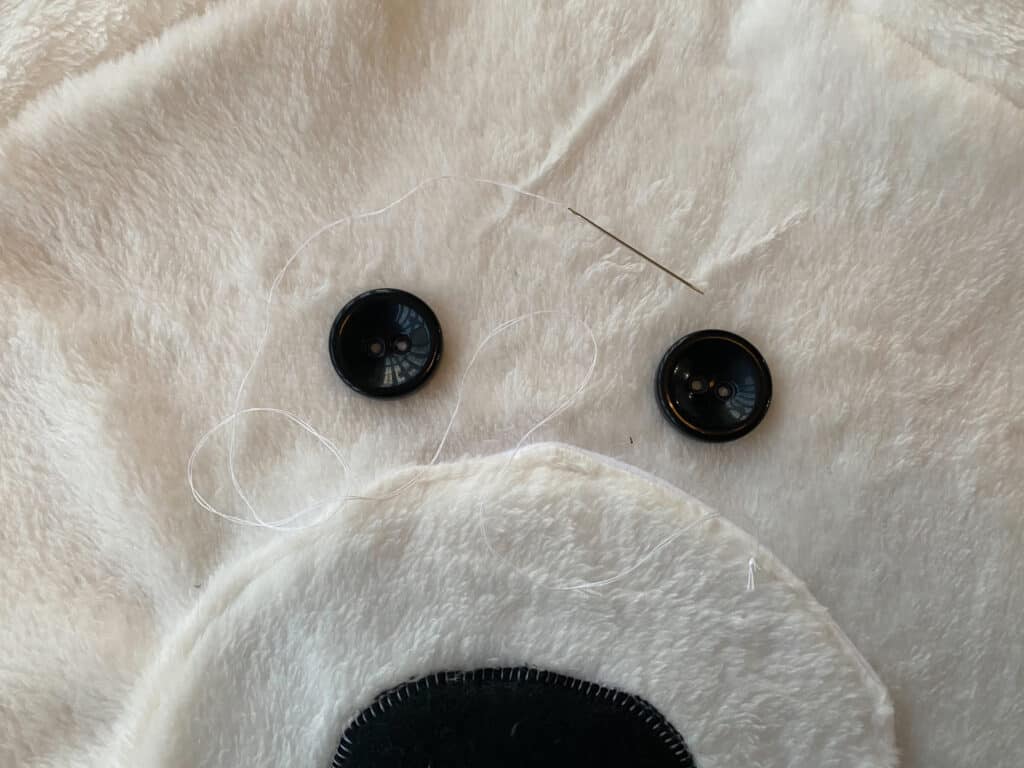
Your bear’s face should be nearly complete!
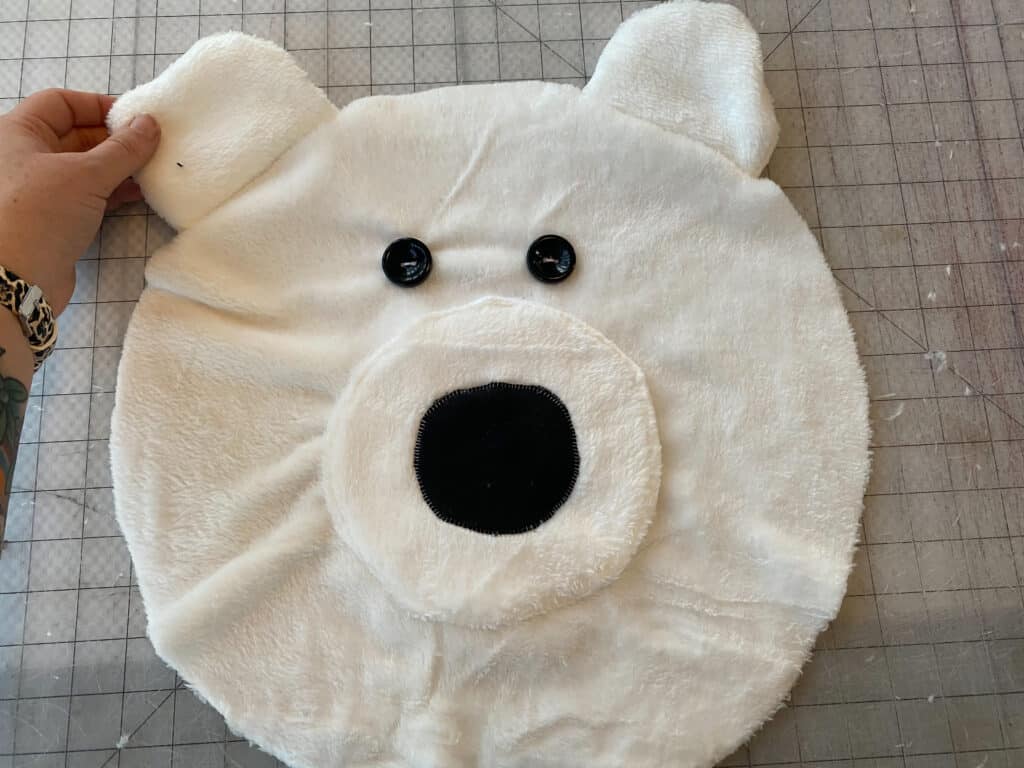
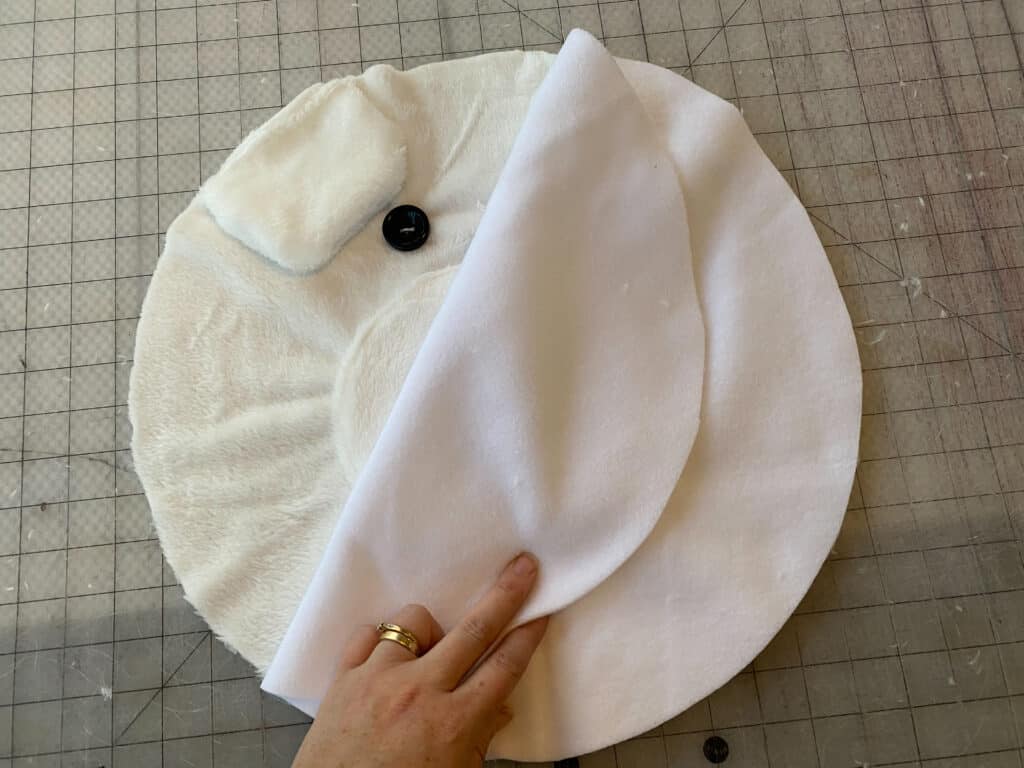
With the head right side up, place the lining fabric on top, right sides together.
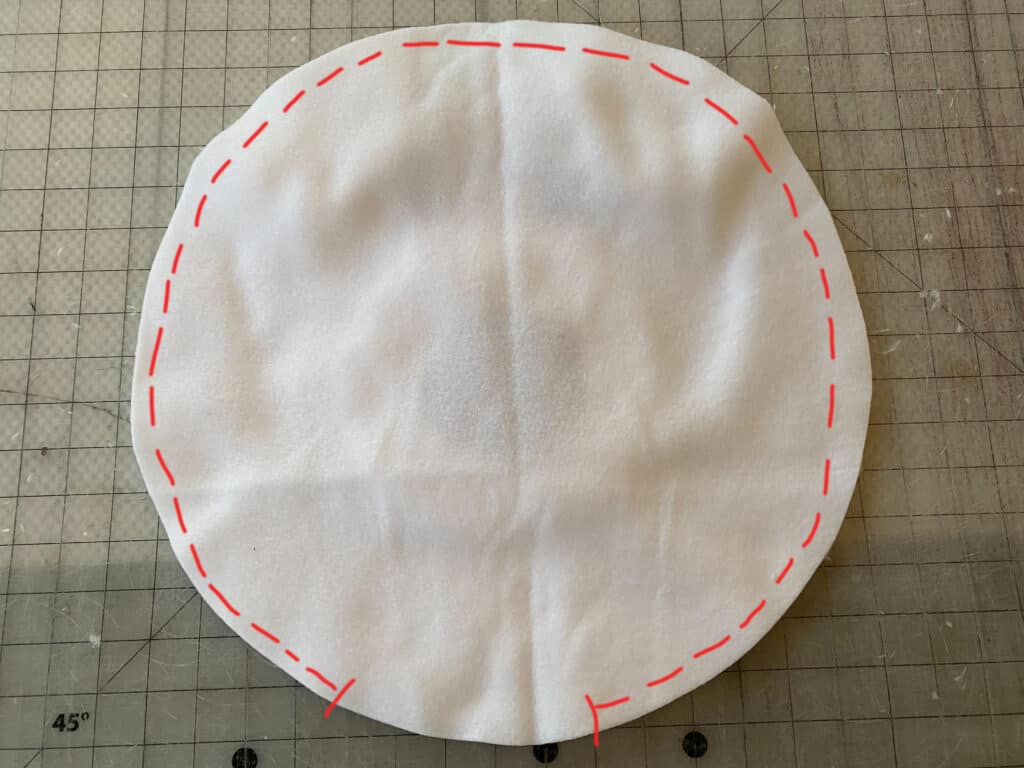
Using 1/2″ seam allowance, sew around the outer curved edge, leaving about 5″ open at the bottom for turning.
Turn the head right sides out, through the opening.
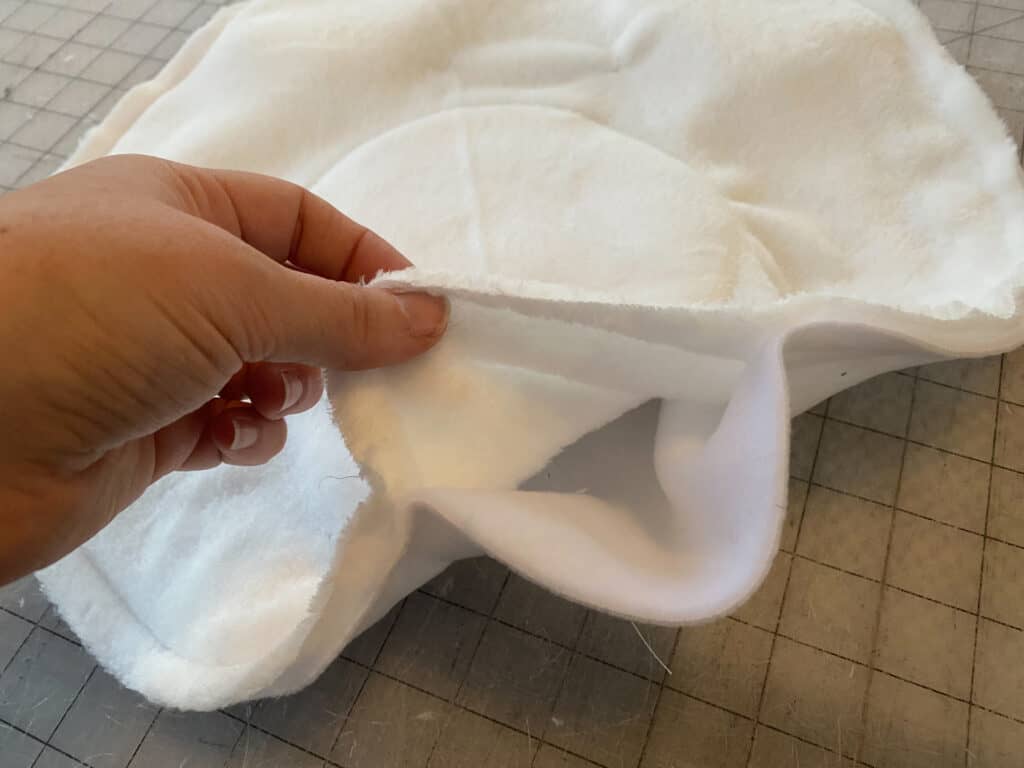
Being sure not to overstuff the head, fill it with fiberfill.
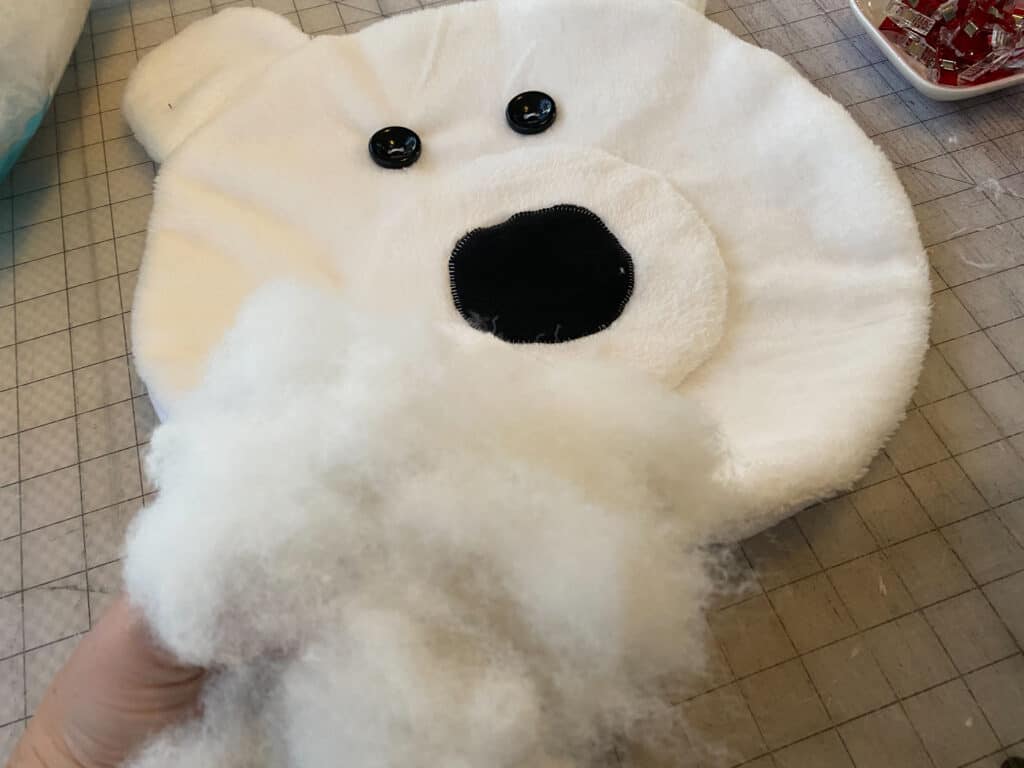
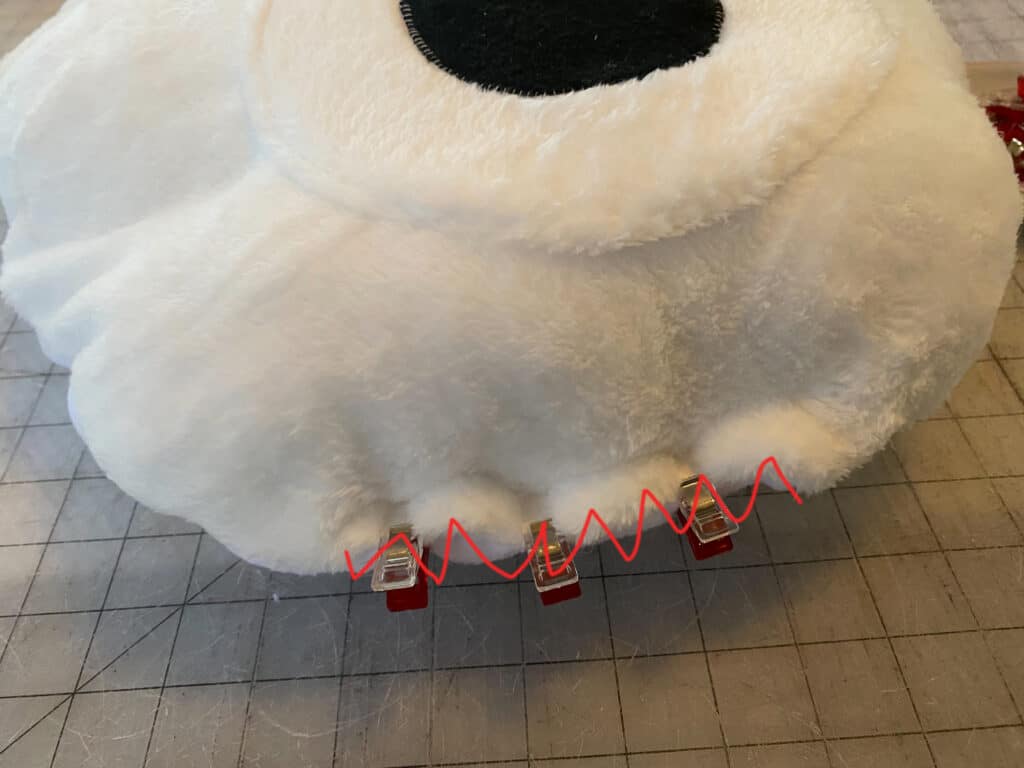
Using a blind stitch, close the opening on the head piece.
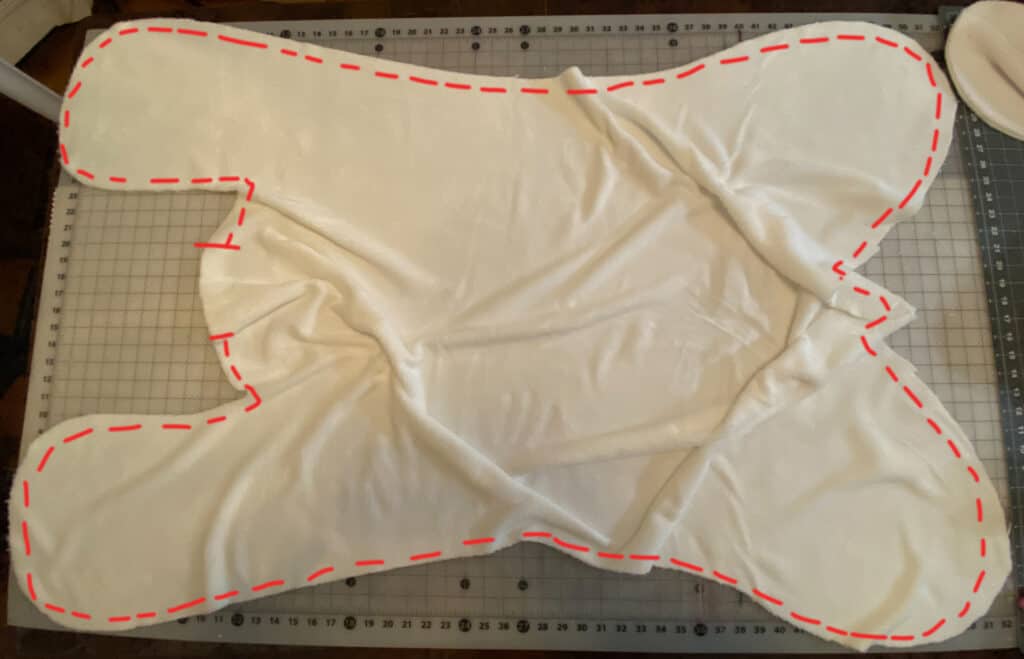
With the body pieces right sides together, sew around entire outer edge, leaving a 5″ opening for turning.
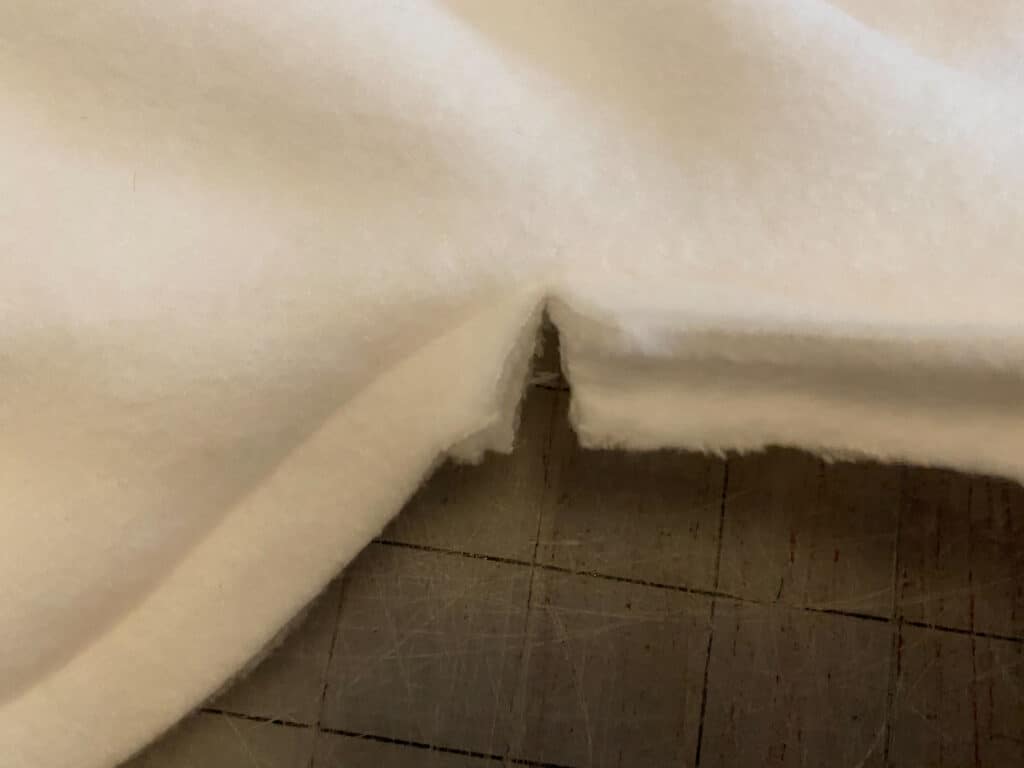
Clip all of your extra seam allowance for easier turning.
Turn through the opening.
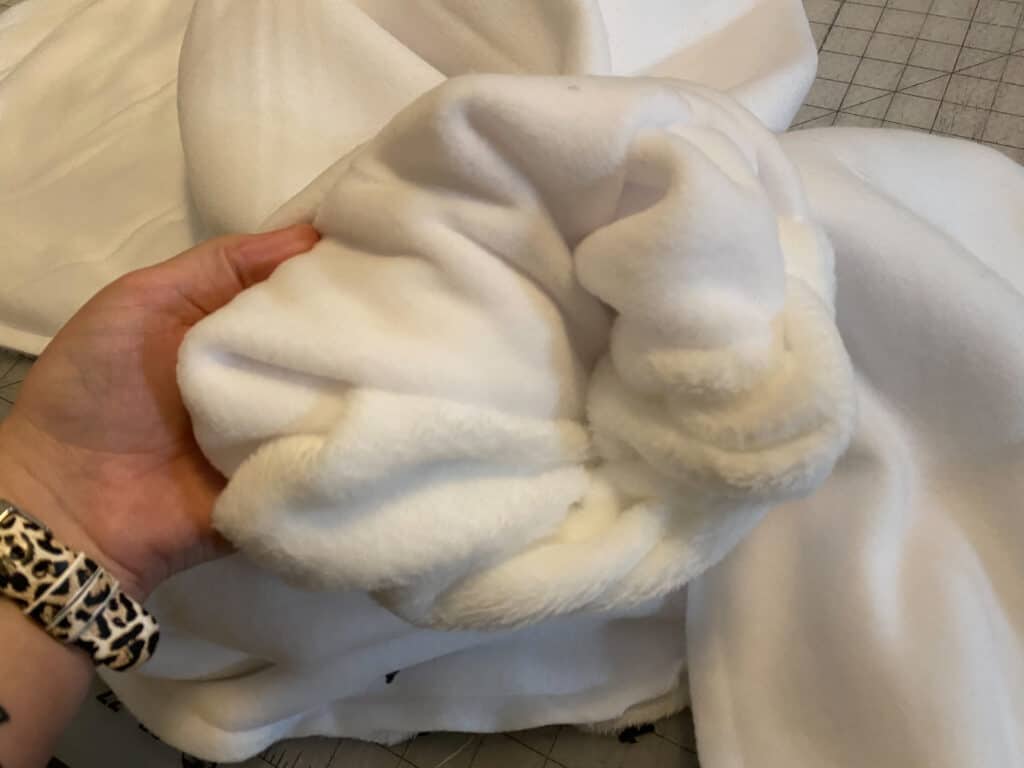
Tuck your seam allowances into the opening and blind stitch closed.
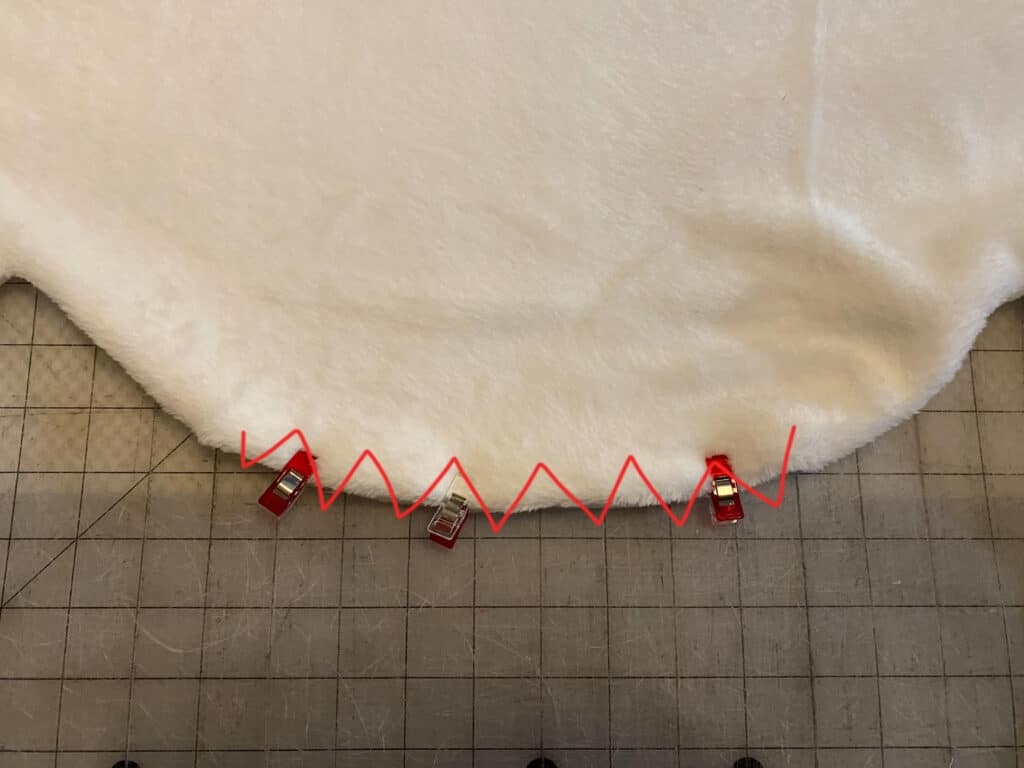
Align the head between the front legs.
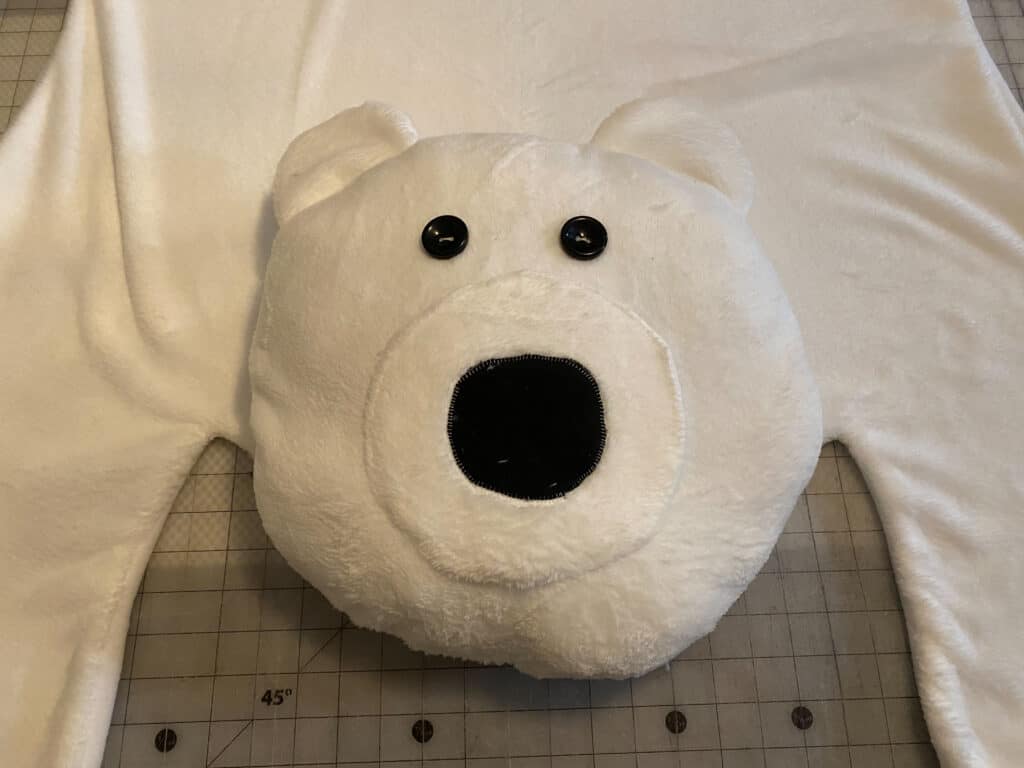
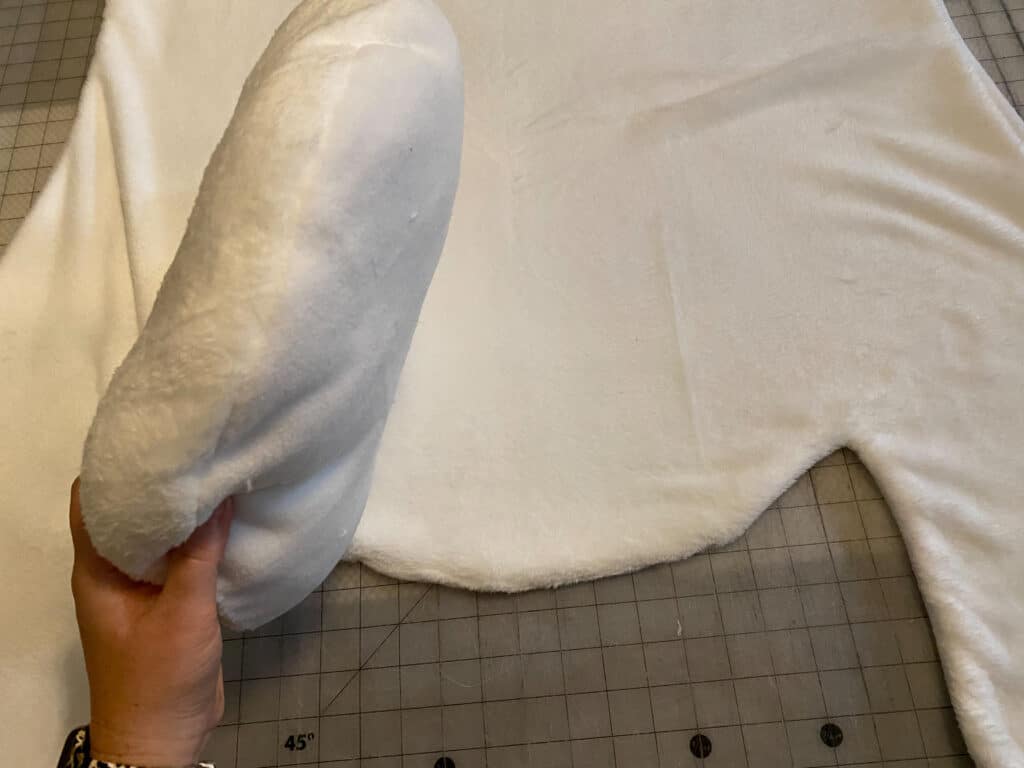
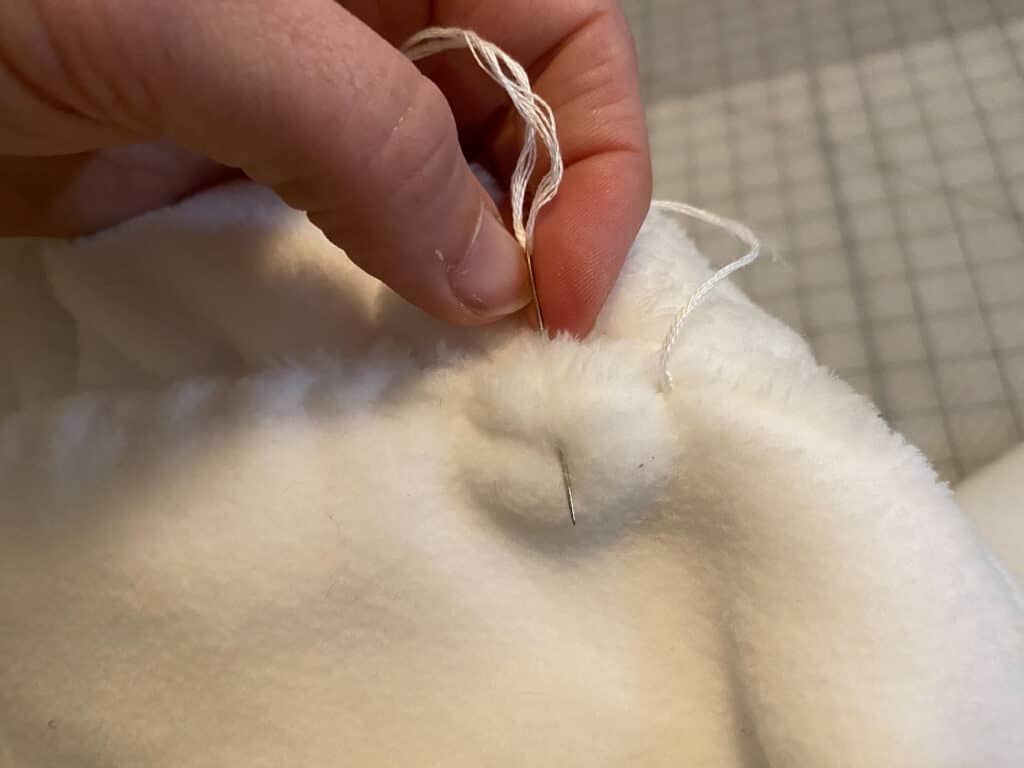
Hold head in place and flip both the body and head over. By hand, use a whip stitch to secure the head to the body piece.
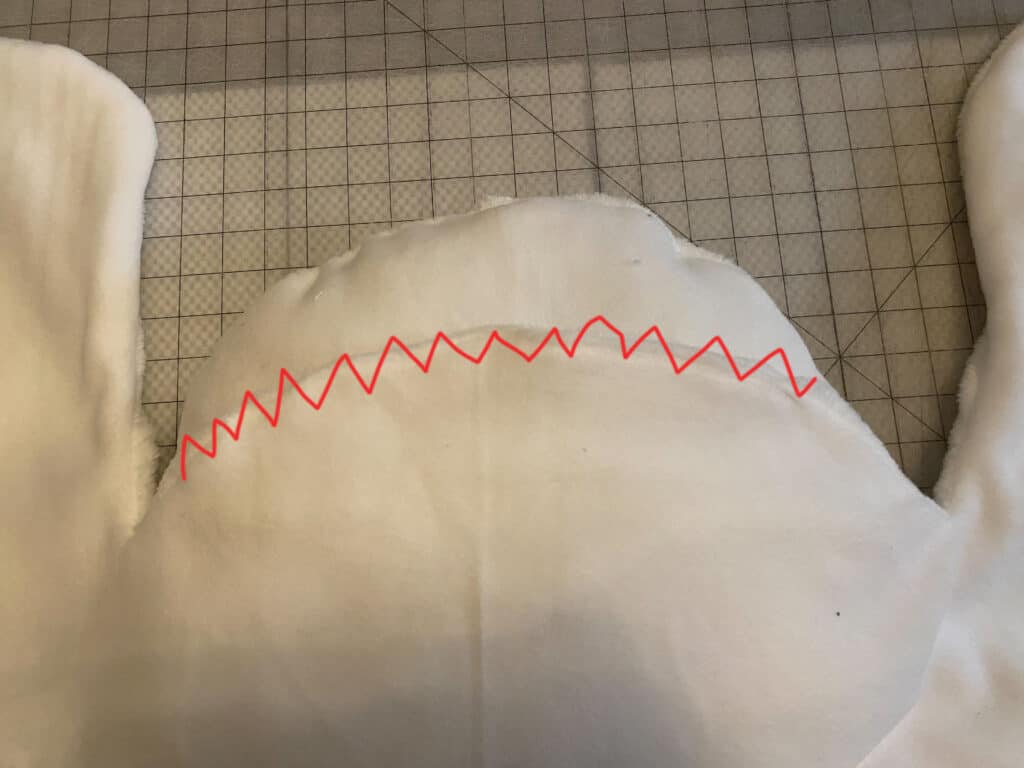
I like to use a wider-eyed needle, with embroidery floss, for some extra hold.
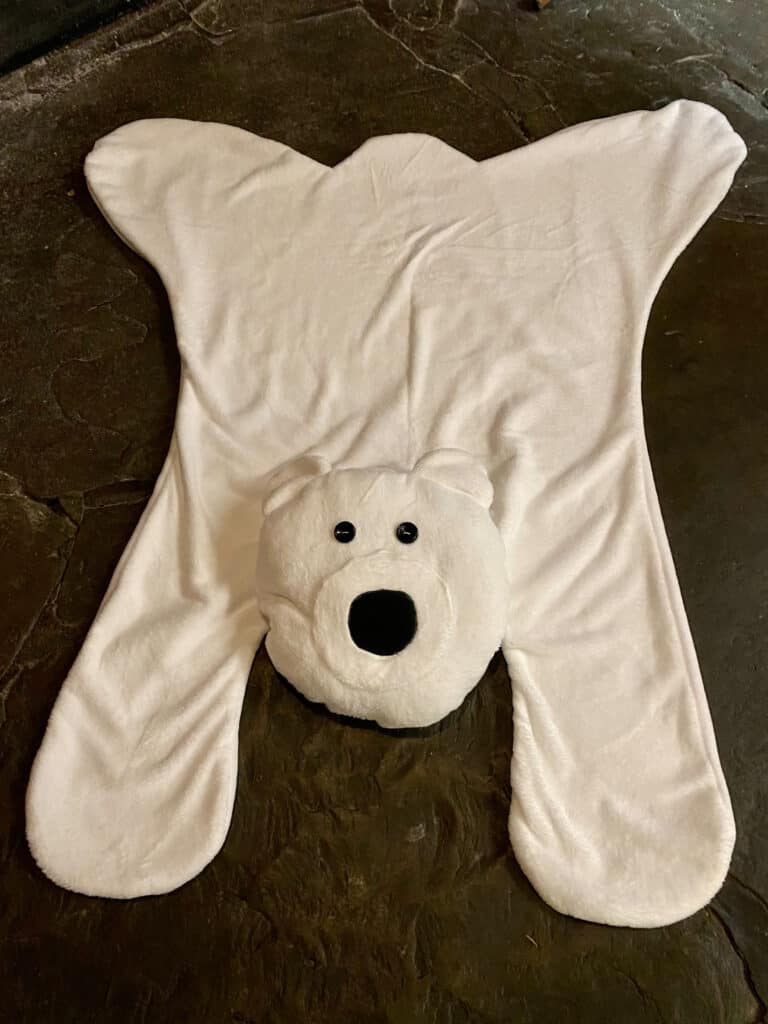
You’re finished!
Check out what our fabulous testers were able to create with this very same tutorial!


I la-la-love when you share your photos with me! Head over to the Patterns for Pirates Facebook Group and show us what you’ve made!
Happy Holidays, Pirates!

2020 Holiday Freebies :: Braided Infinity Scarf Tutorial
Happy Holidays, Pirate Friends! We are excitedly back for another year and another round of holiday freebies to share with you! Over the years, we’ve compiled different tutorials and patterns that we think would make *perfect* gifts for your friends and family. Curious about what we’ve already released in the way of holiday freebies? Head right here to see all of them: Holiday Freebies Roundup.
Today, we are bringing you the: Braided Infinity Scarf!!
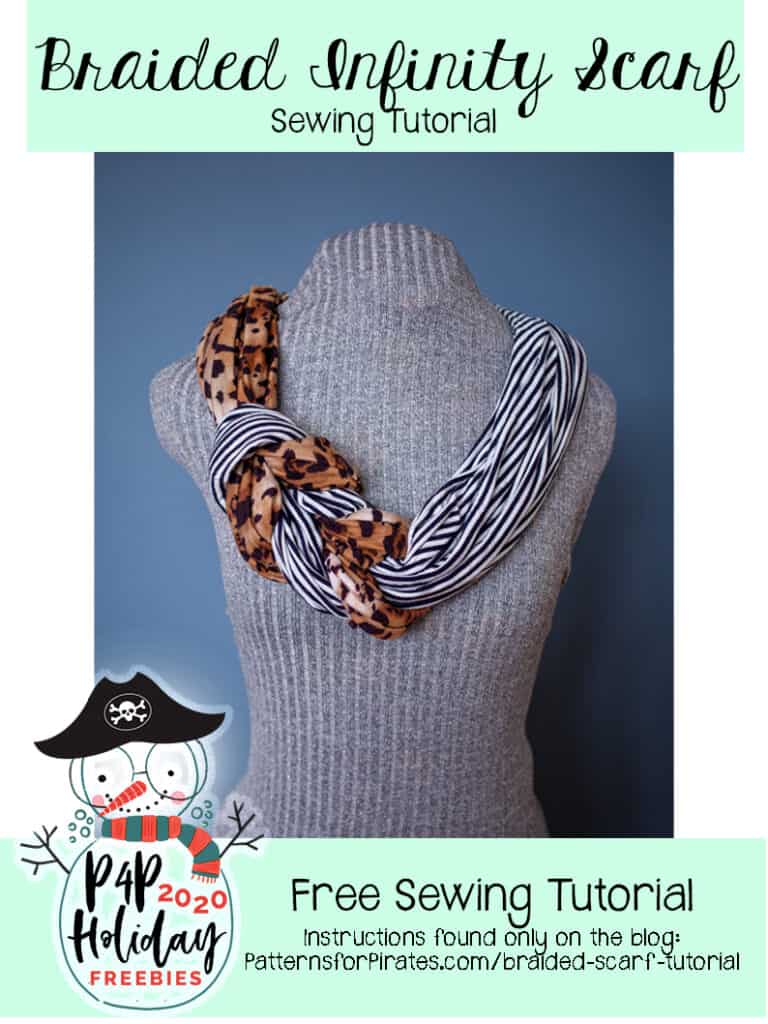
If you were looking for a quick gift to give someone, look no further. Because this “braided” infinity scarf just might do the trick! I don’t want to toot my own horn just yet, but I think you might love this even more than the Hidden Pocket Infinity Scarf from a couple of years ago. We will see, won’t we? 😉
Supplies Needed:
- Two (2) 18″ L x 54″ or (width of fabric) W pieces of knit fabric
Lay one piece with right side facing upward, and fold in half meeting the long edges together, right sides together.
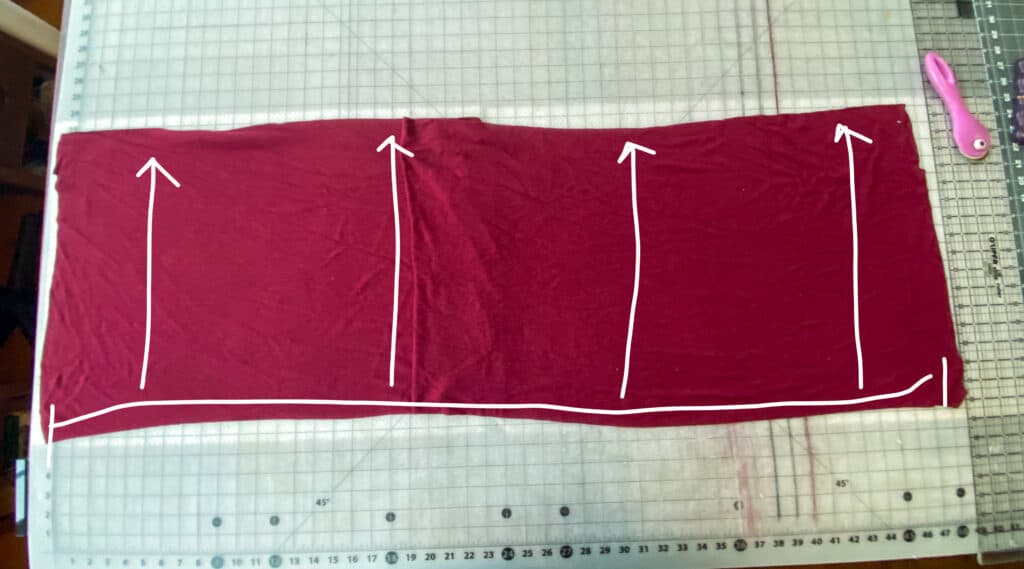
Sew along long, raw edge, using 1/2″ seam allowance.
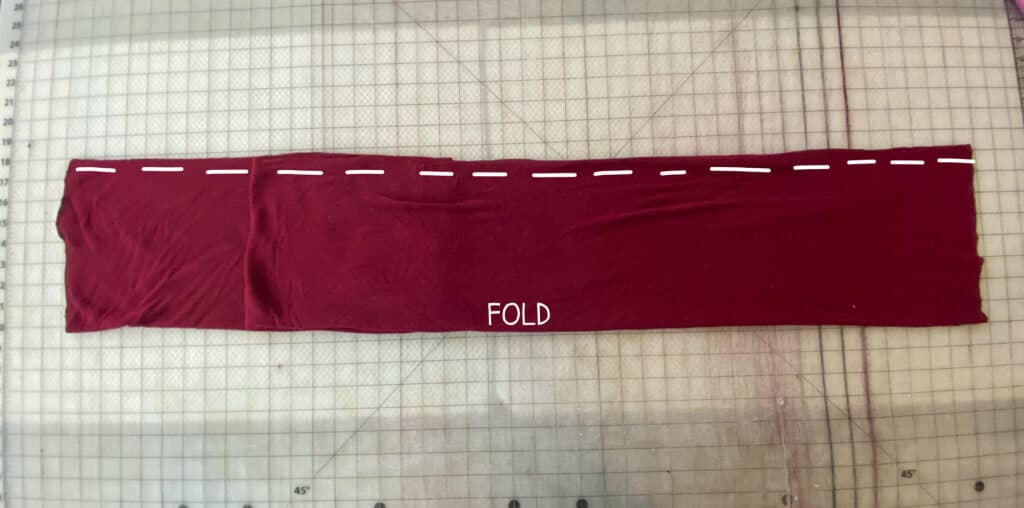
Turn piece right side out.
Repeat with second fabric piece.
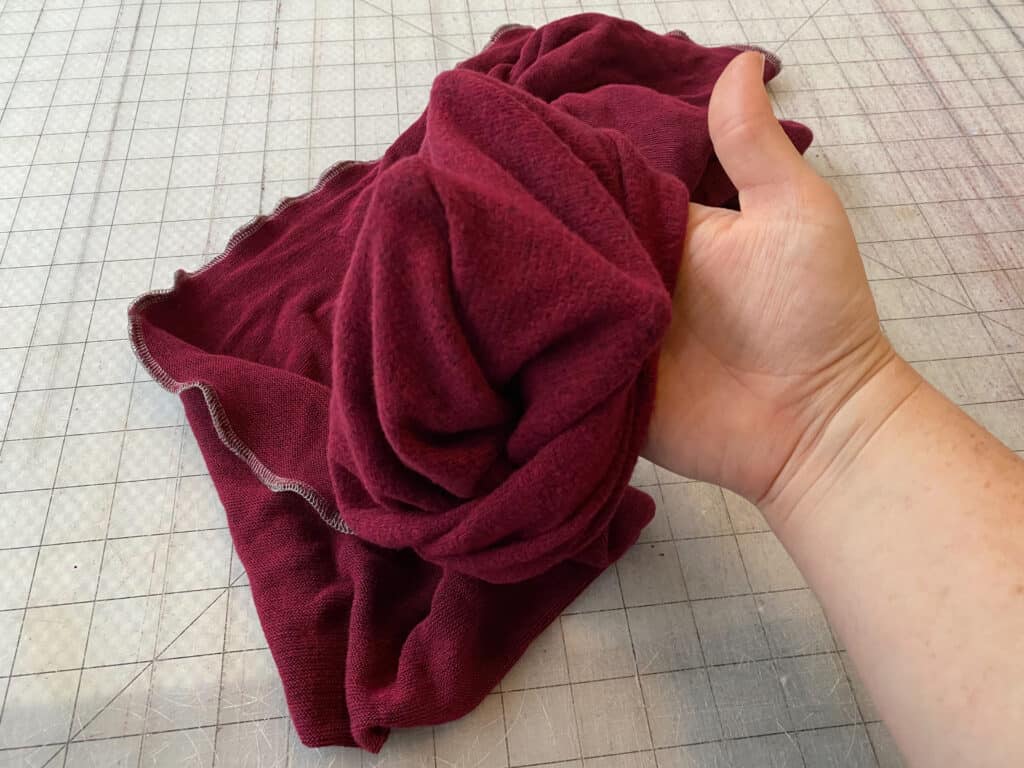
Lay one tube of fabric in half, in a “u”-shape
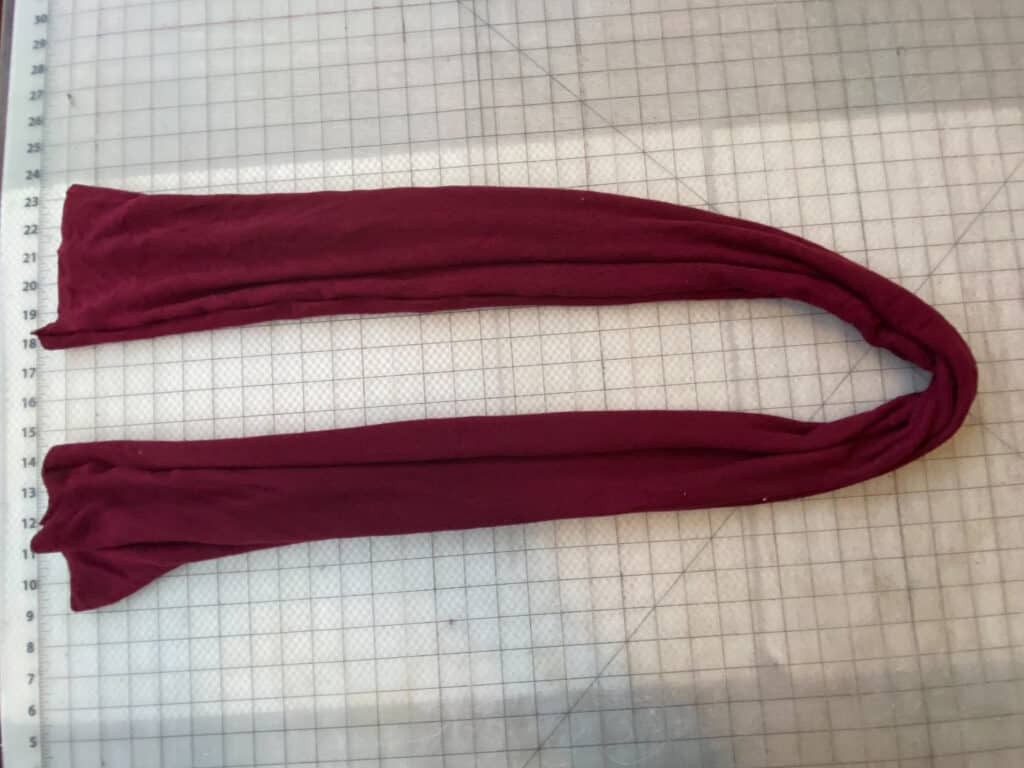
Lay second tube of fabric on top, in a similar “u”-shape.
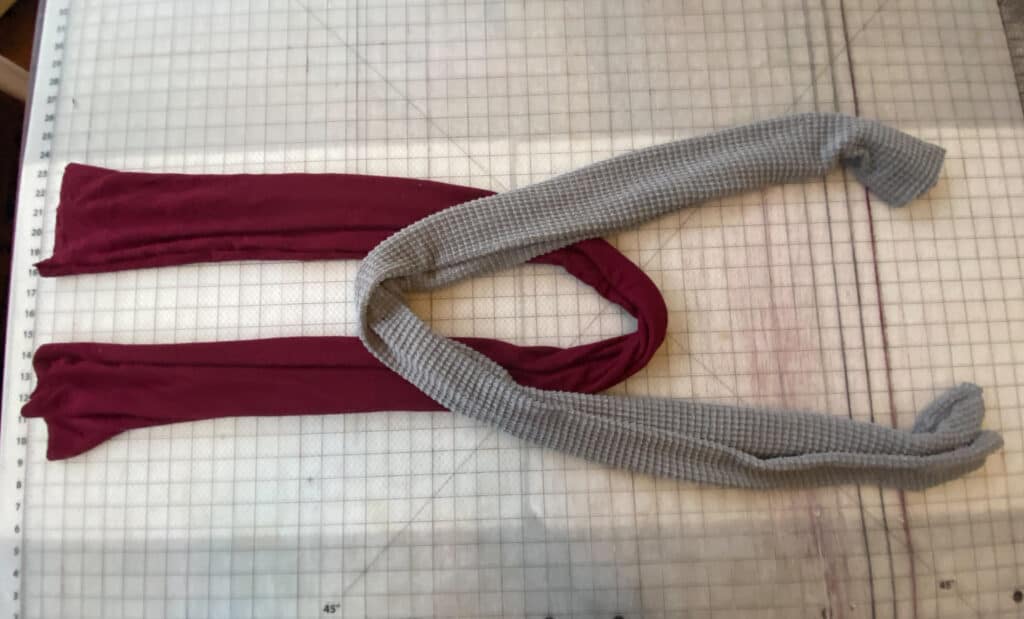
Reach your hand over the top fabric loop, and through the bottom fabric loop.
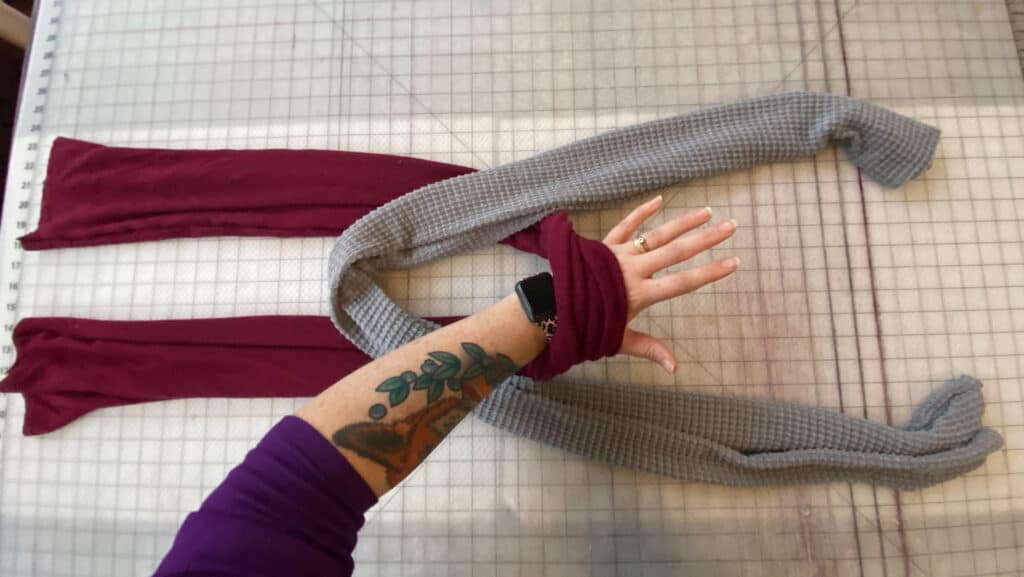
Gather both ends of the top fabric with your hand.
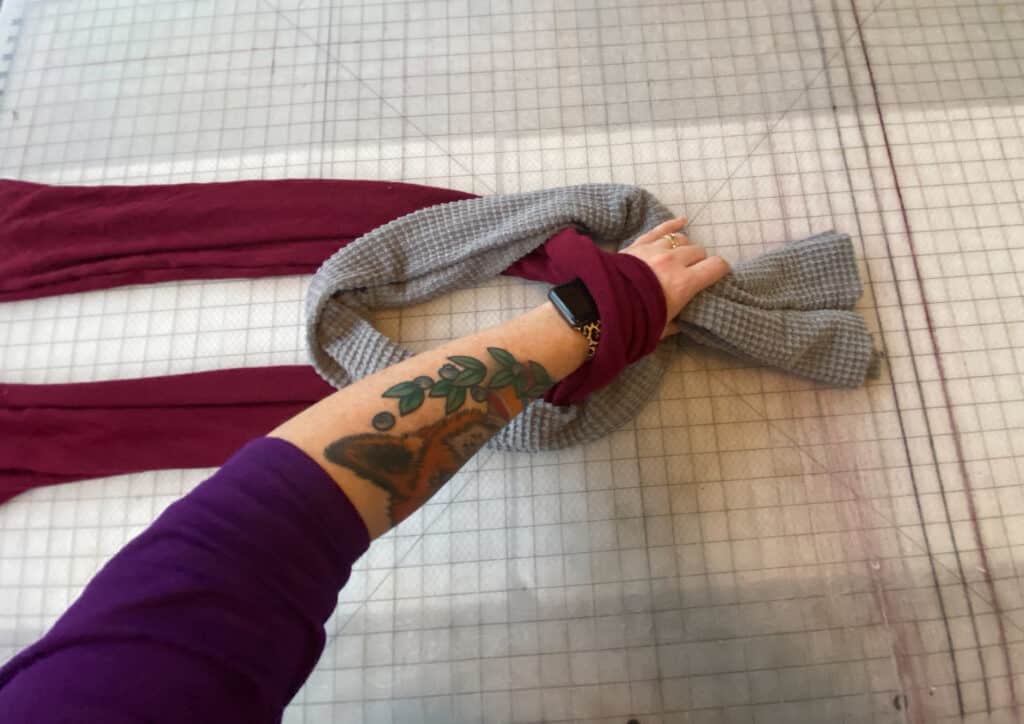
Pull the ends through the bottom loop.
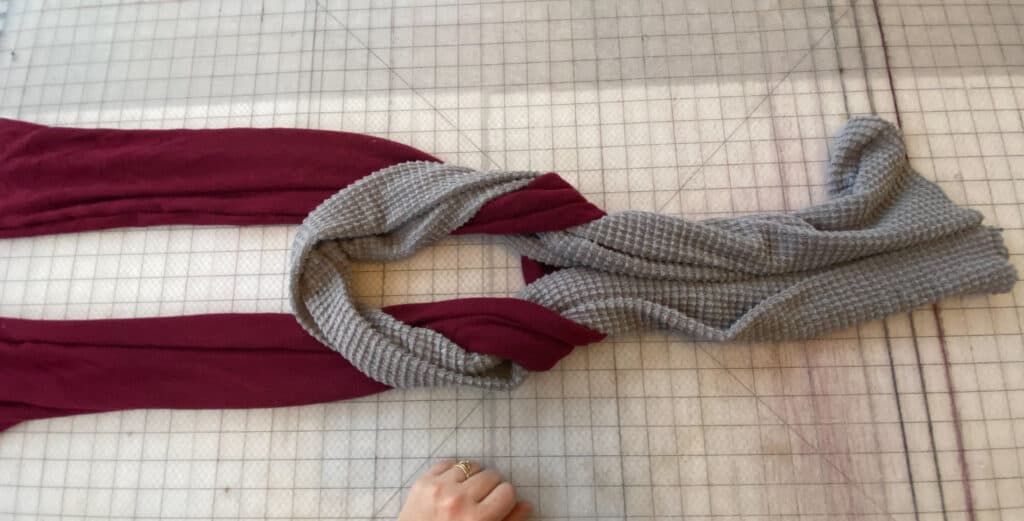
Separate the top fabric ends.
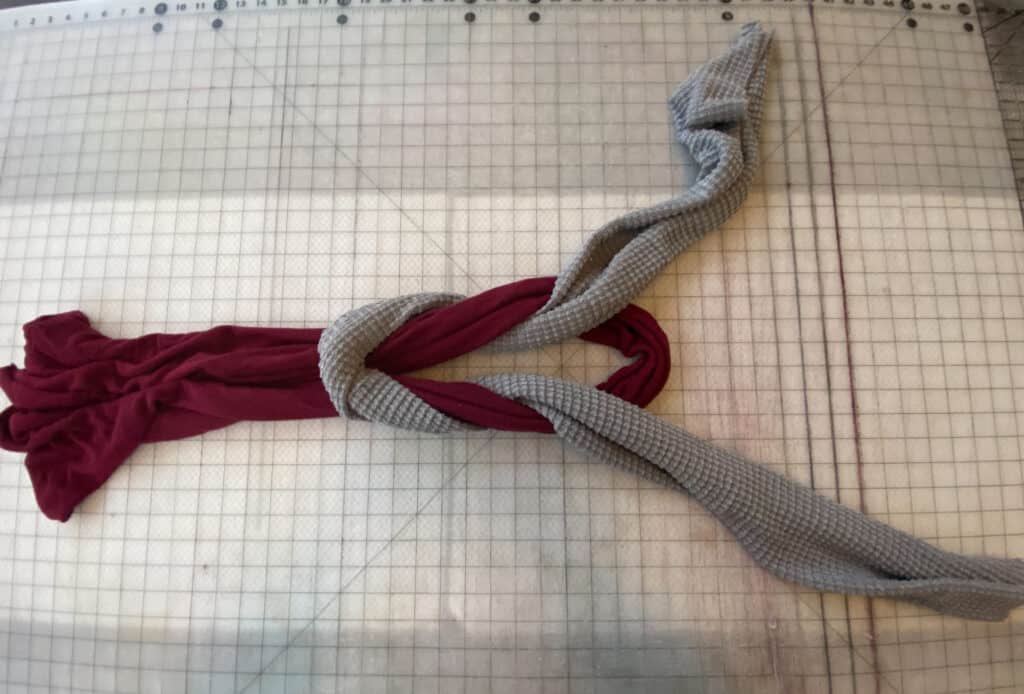
Put your hand through the bottom loop and grab the end furthest from you.
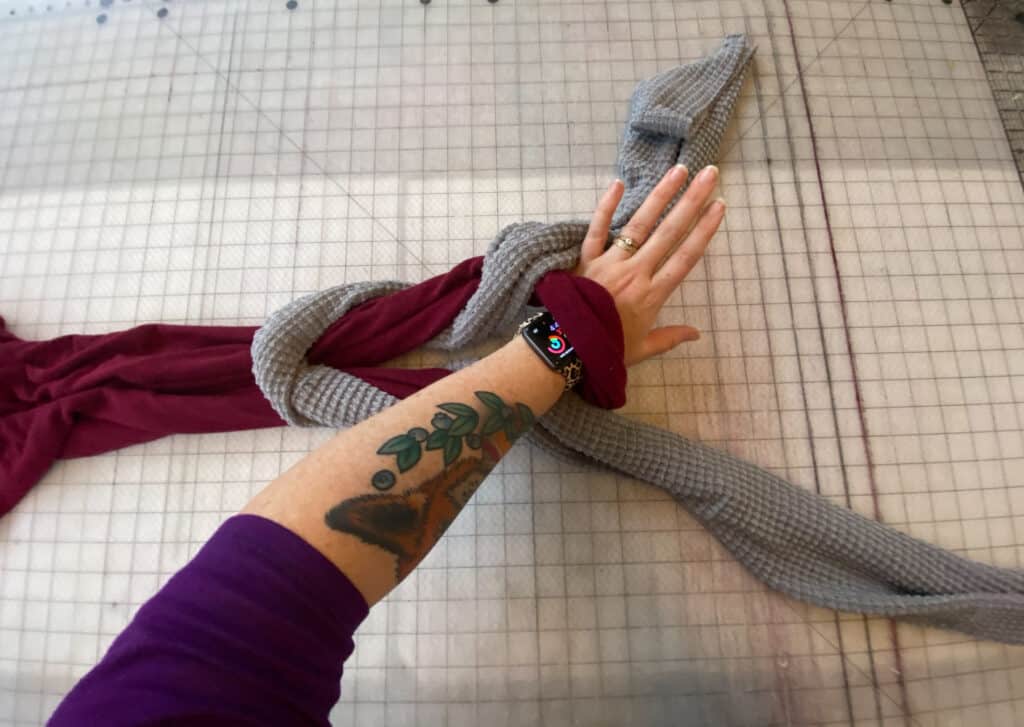
Pull end through the loop.
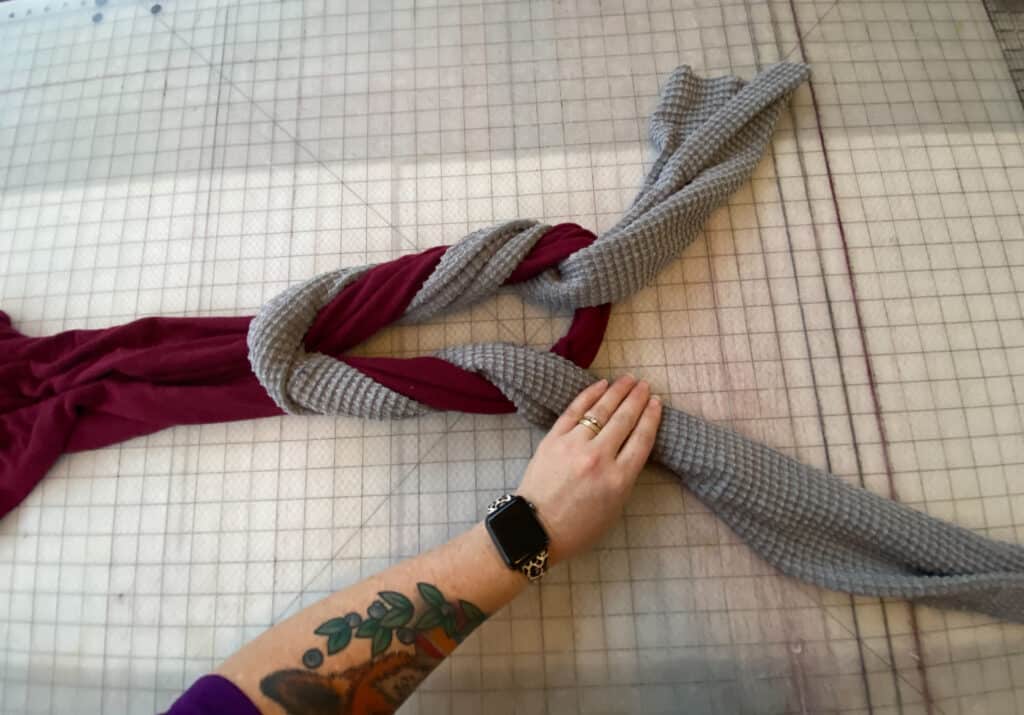
Put your hand through the bottom loop and now grab the end closest to you.
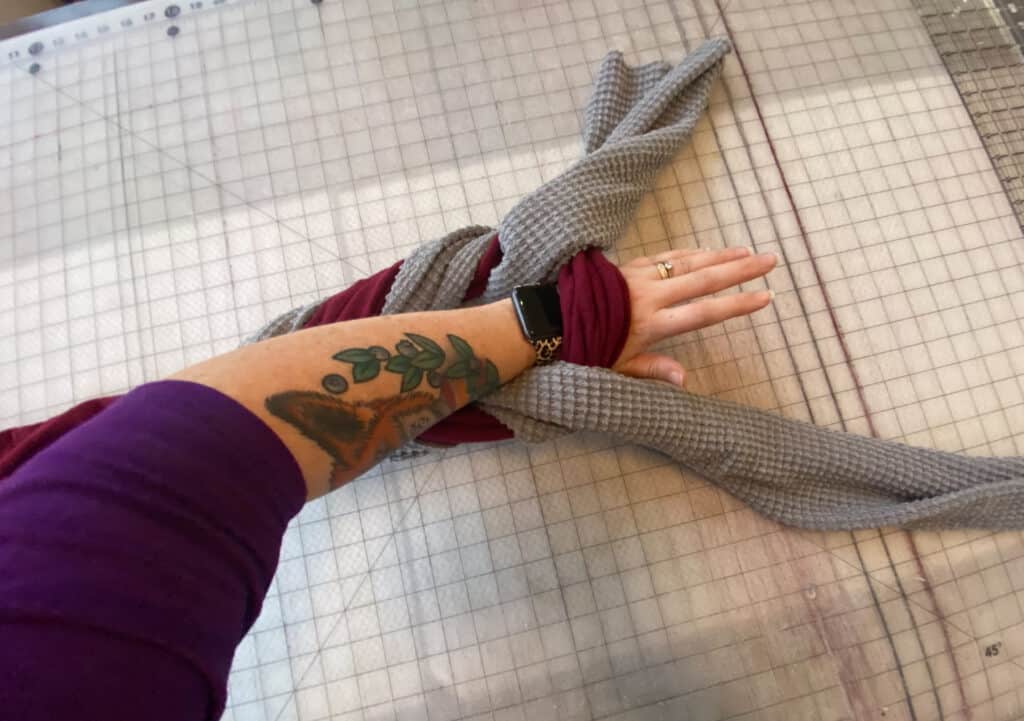
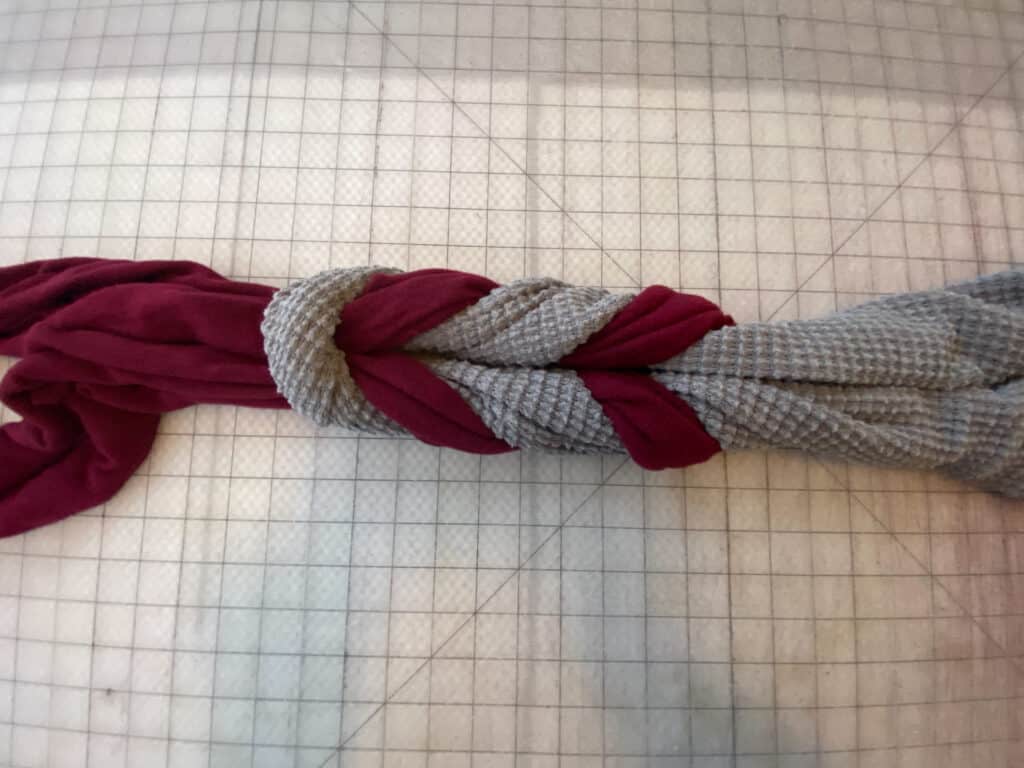
Pull end through the loop.
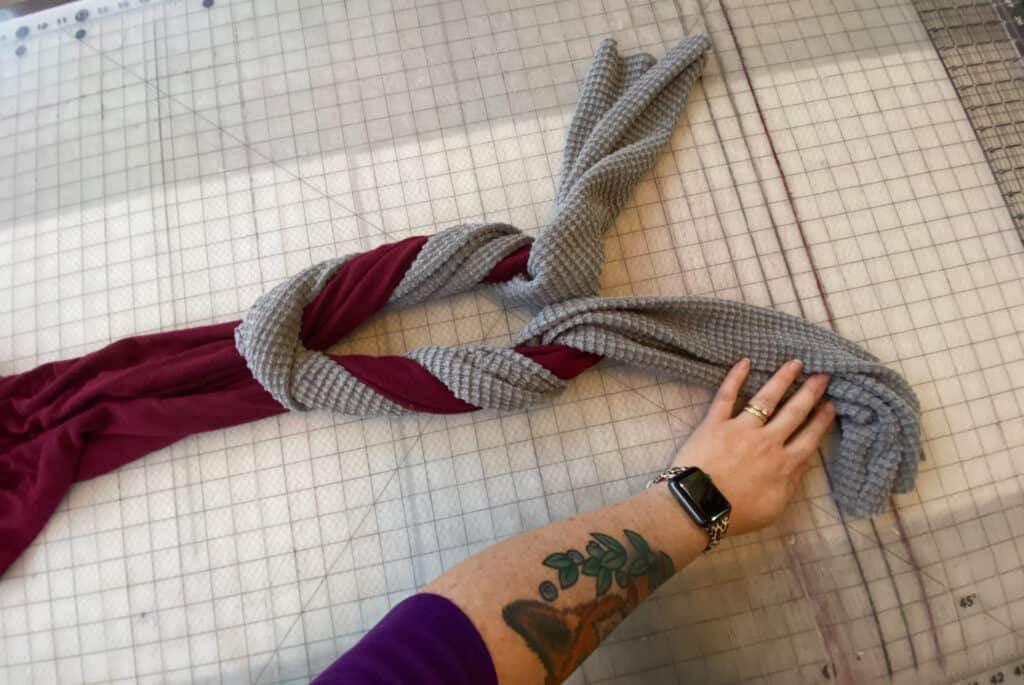
Adjust the “braids” to your liking.
Open up the ends and match the opposite sides to one another.
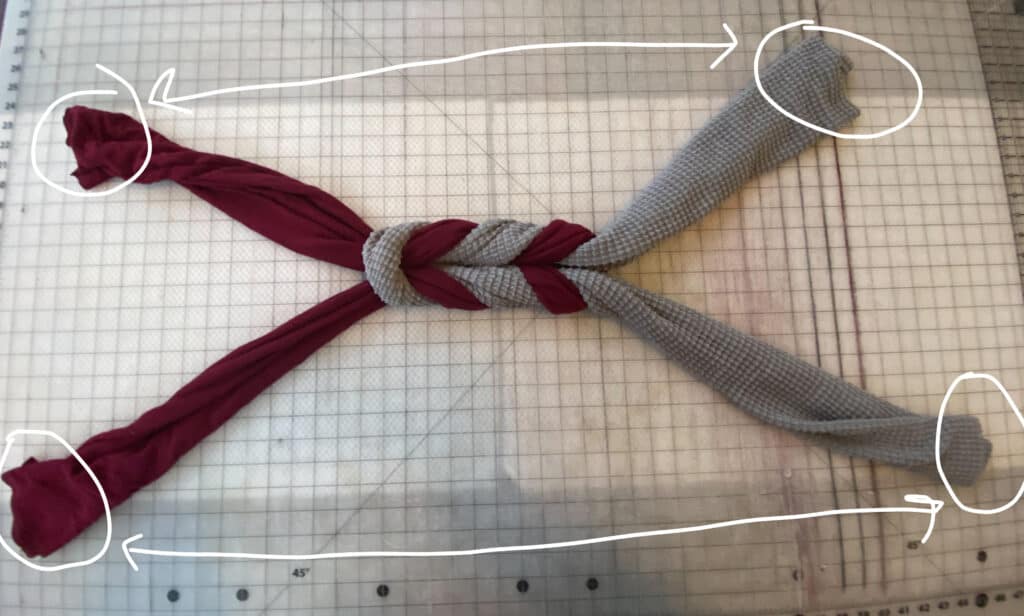
With right sides together, match up the two seams along the raw edges.
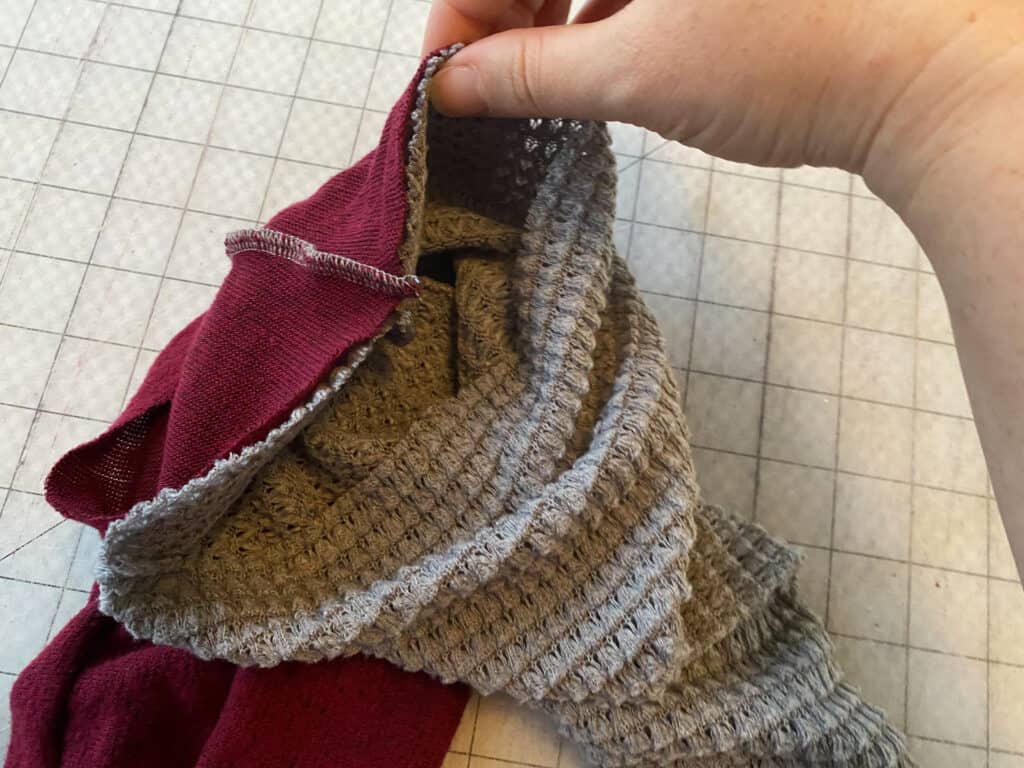
Pin / clip around the opening, matching right sides together.
**This step is a little tricky. You won’t be able to align the two pieces all the way around. Go as far as you can without stretching out your fabrics.
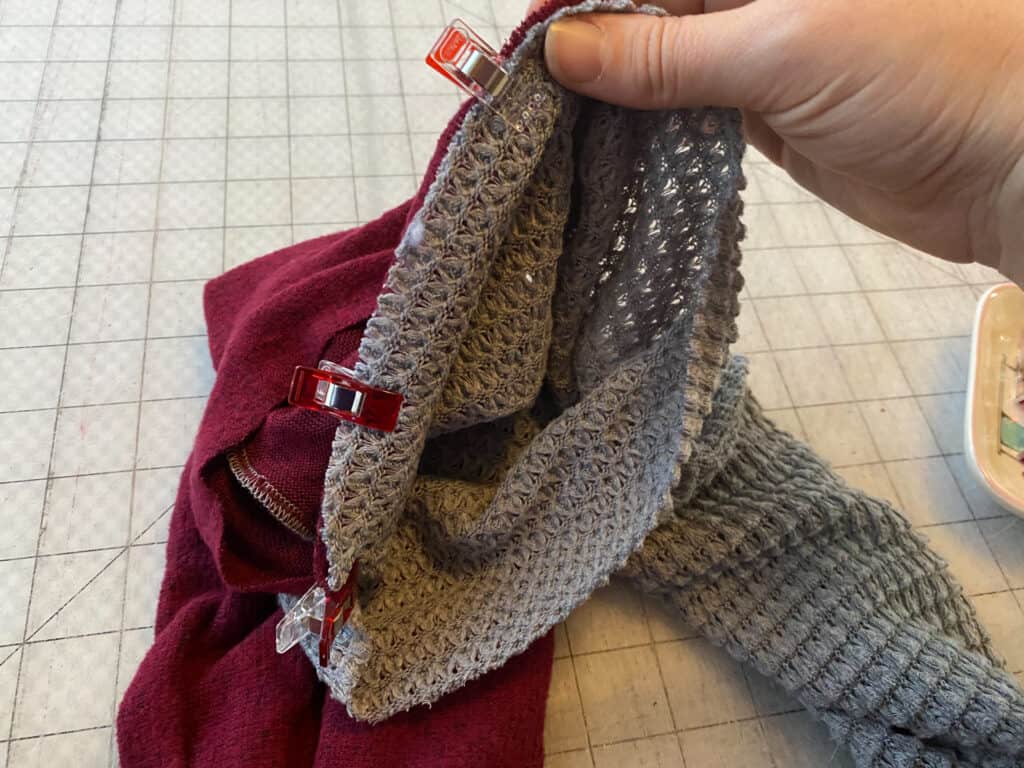
Using 1/2″ seam allowance, sew around entire raw edge. Leaving an opening for pulling/turning the fabric.
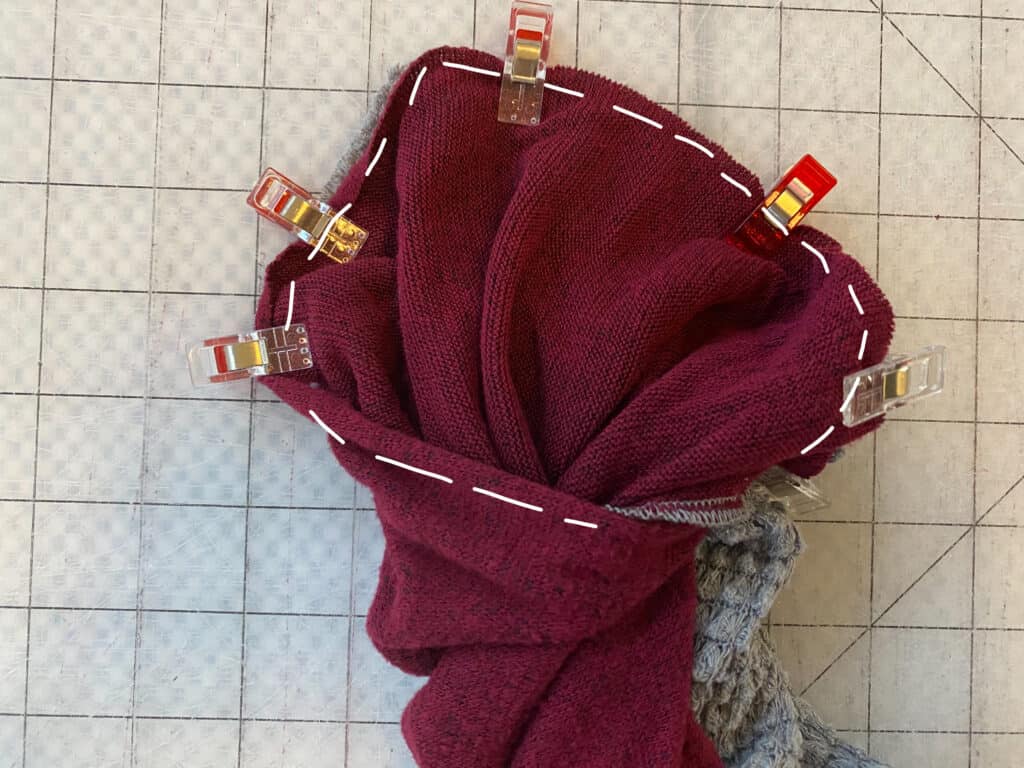
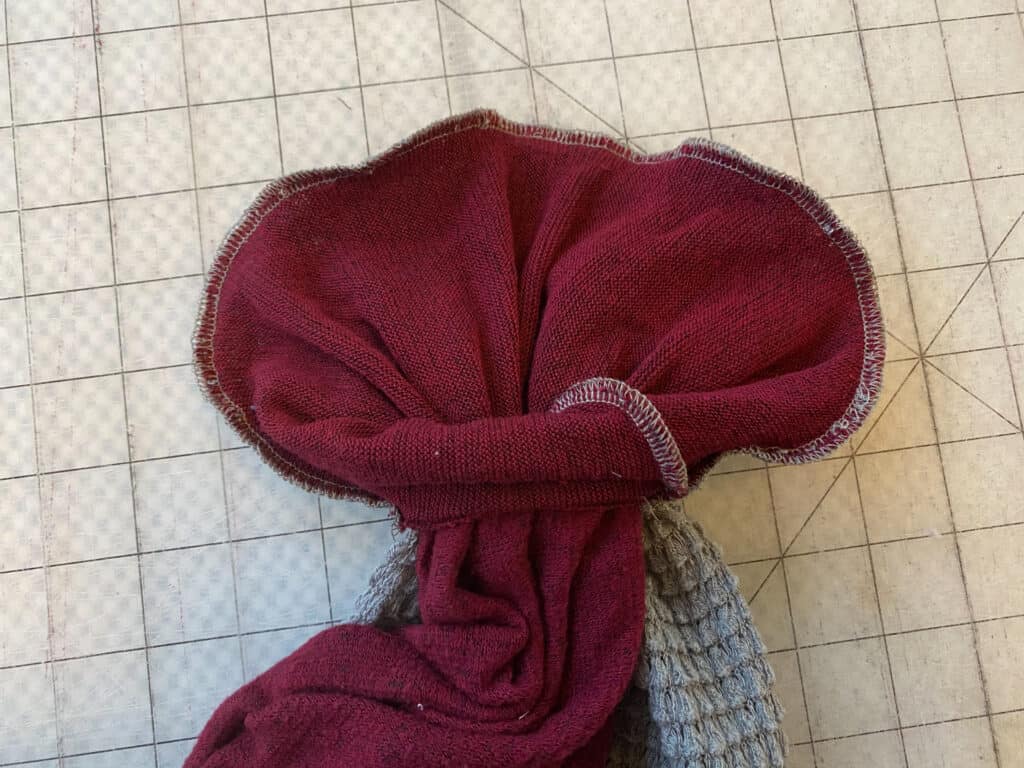
Pull the fabric through, to turn everything right sides out.
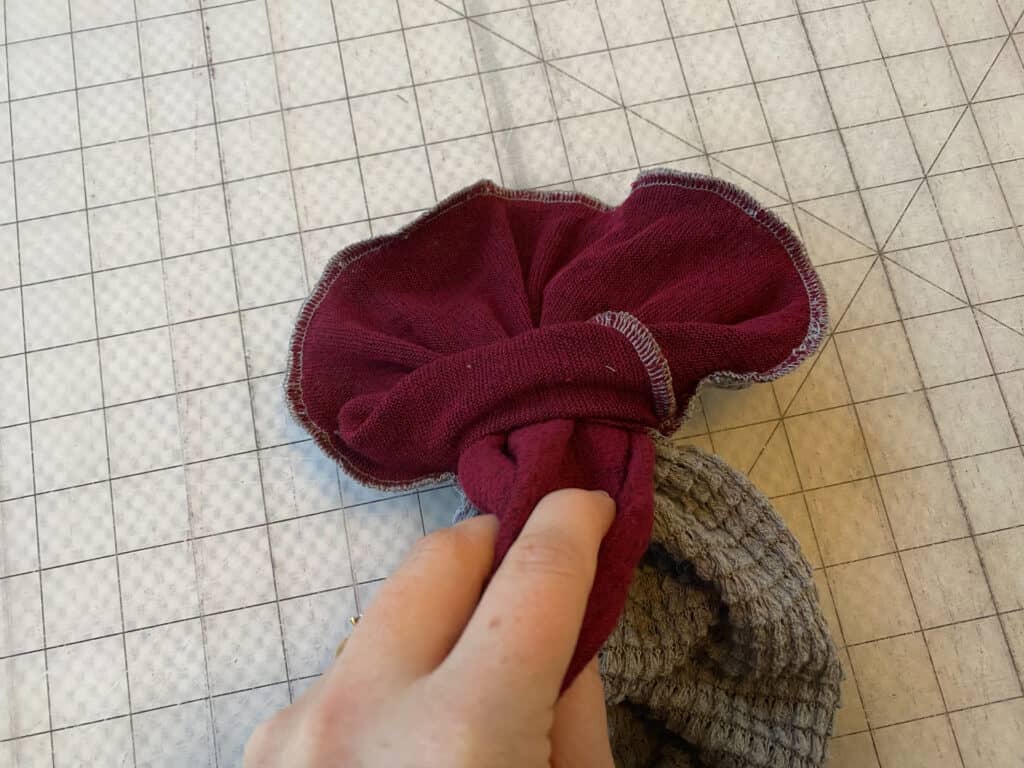
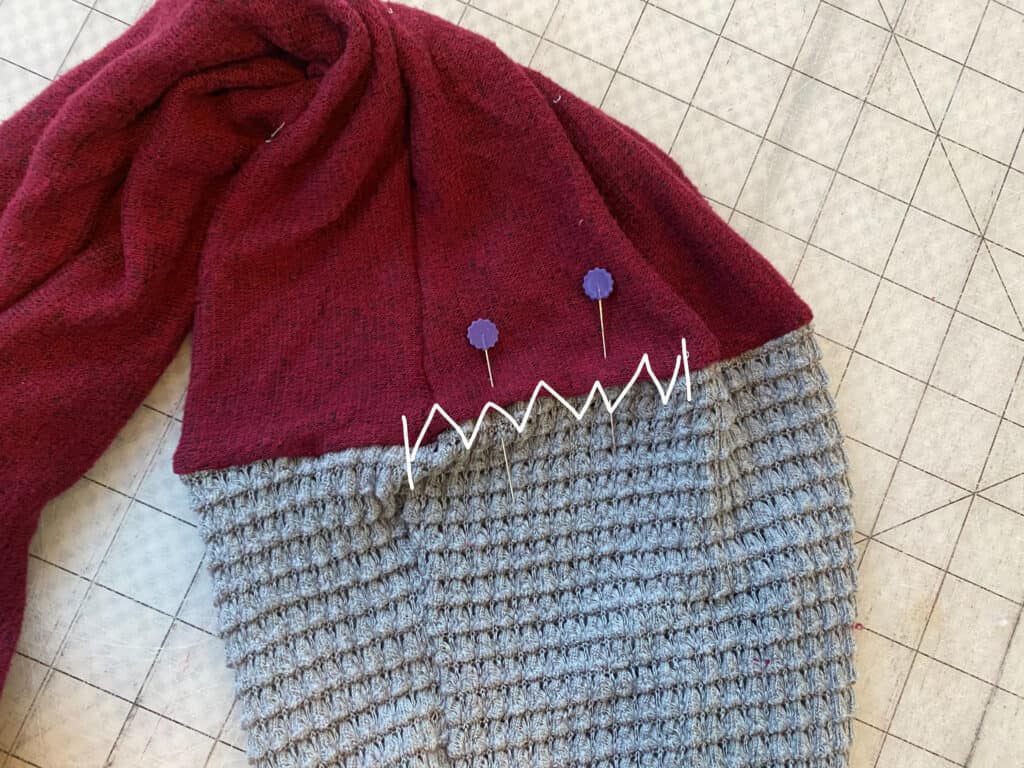
Tuck the seam allowances into the opening.
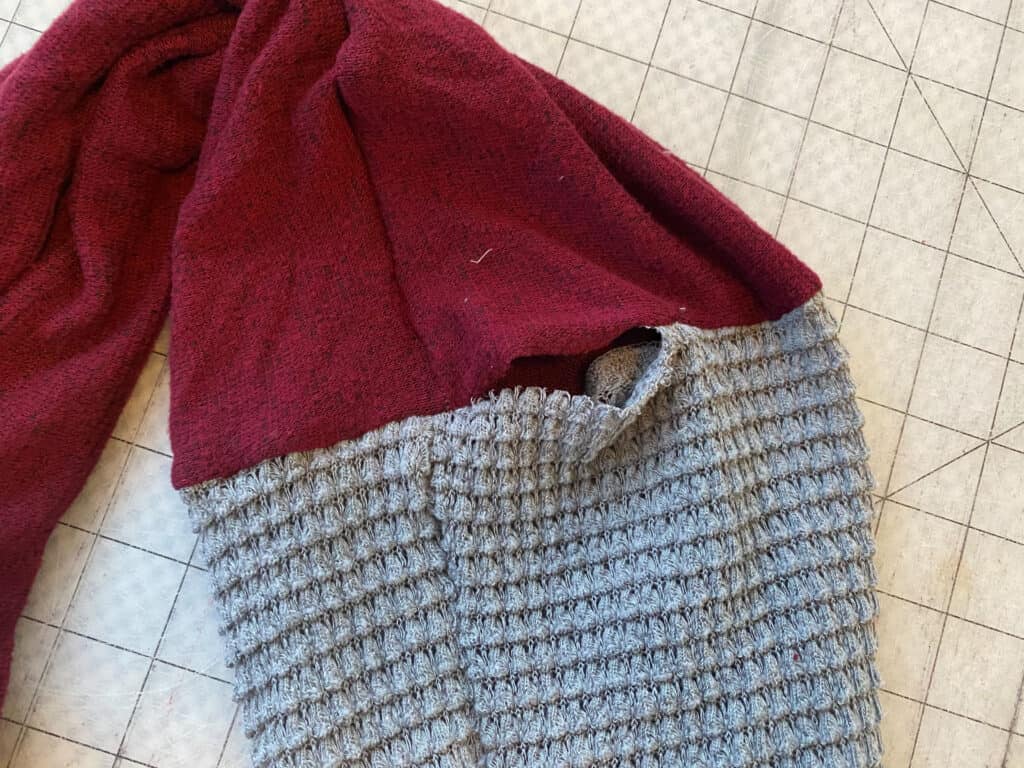
Pin and, using your favorite stitch, close the opening.
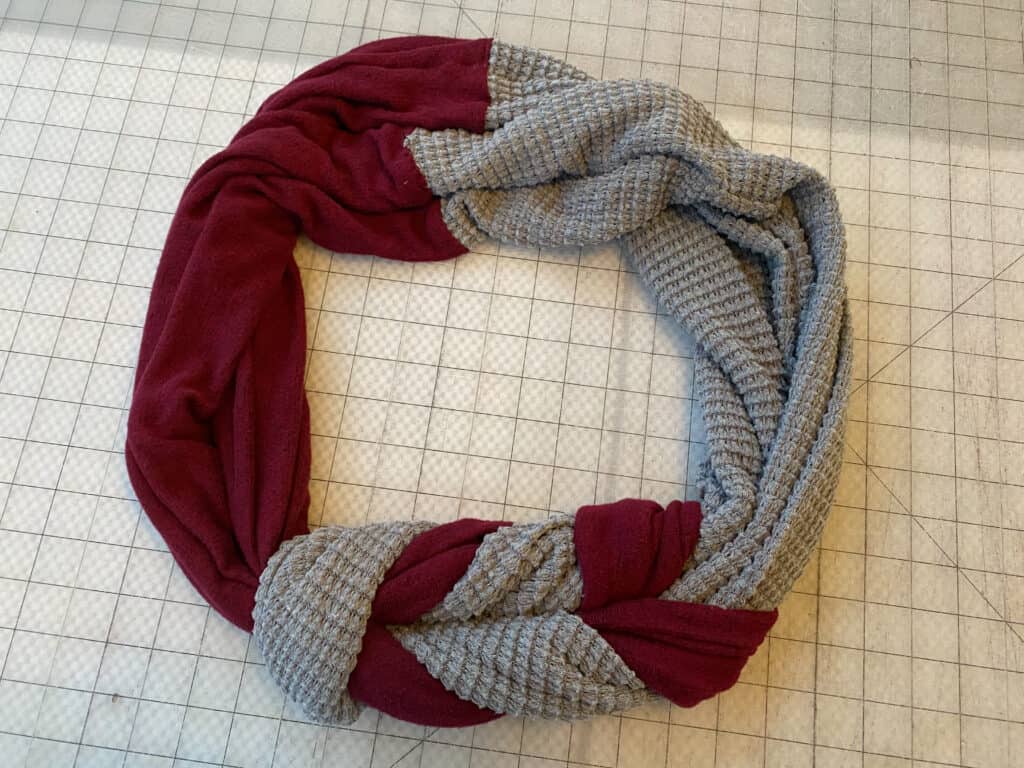
You’re finished!
In case you consider yourself a more “visual learner” here’s a video tutorial that walks you through the entire tutorial, start-to-finish.
Check out what our fabulous testers were able to create with this very same tutorial!


I la-la-love when you share your photos with me! Head over to the Patterns for Pirates Facebook Group and show us what you’ve made!
Happy Holidays, Pirates!

2020 Holiday Freebies :: Paw-Fect Stocking Tutorial
Happy Holidays, Pirate Friends! We are excitedly back for another year and another round of holiday freebies to share with you! Over the years, we’ve compiled different tutorials and patterns that we think would make *perfect* gifts for your friends and family. Curious about what we’ve already released in the way of holiday freebies? Head right here to see all of them: Holiday Freebies Roundup.
Today, we are bringing you the: Paw-fect Stocking!!
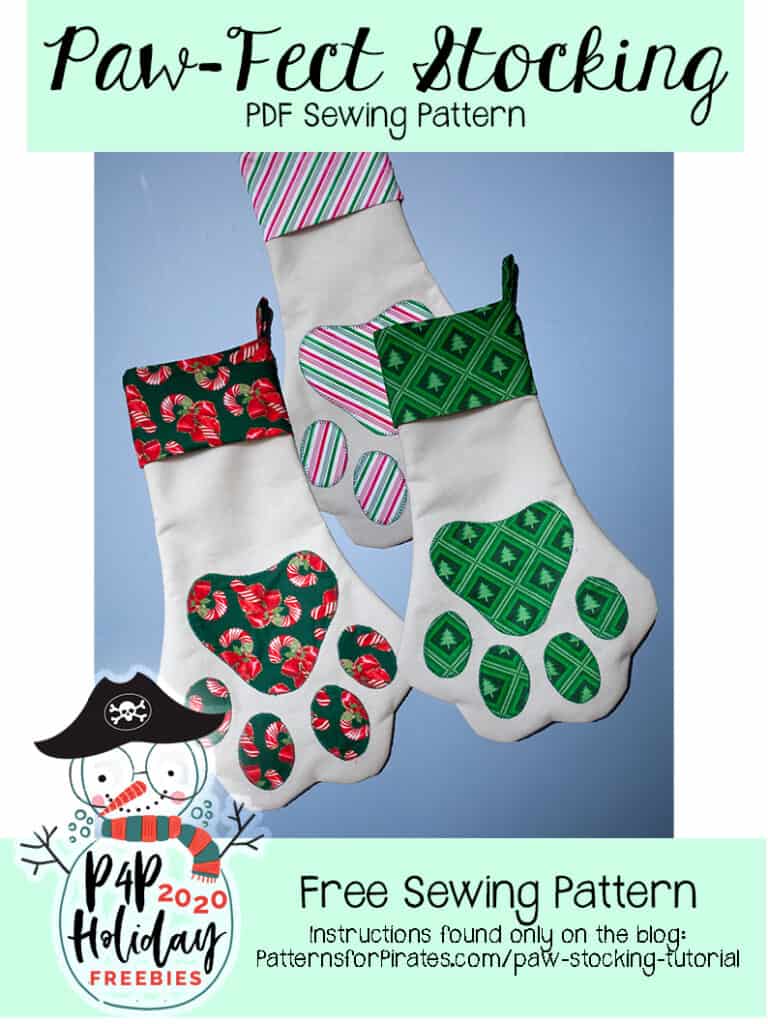
If you’re anything like me, your fur family members also get visits from Santa Claus — or maybe Santa Paws? (ba-dum-ching!) We’ve always hung stocking for our pups and filled them with toys and treats. And since we added another furry family member this year to my own household, I felt like maybe it was time to make new stockings for all three of our babies!
And I’m thinking maybe you might like this for your canine and feline family members as well!
Supplies Needed:
- Paw-fect Stocking pattern pieces
- 1/2 Yard each: Outer + Lining Fabrics and Fusible Fleece Interfacing
- 1/4 Yard Accent Fabric (for cuff and paw details)
Prepare all of your pieces.
Cut:
— 2 each: Main, Lining + Interfacing Stocking Pieces
— 2 Large “Toes” in Accent Fabric + Interfacing
— 2 Small “Toes” in Accent Fabric + Interfacing
— 1 “Pad” in Accent Fabric + Interfacing
— 1 Cuff in Accent Fabric
— 1 Hanging Tab in Accent Fabric
Apply interfacing to the main outer stocking pieces and the paw print applique pieces.
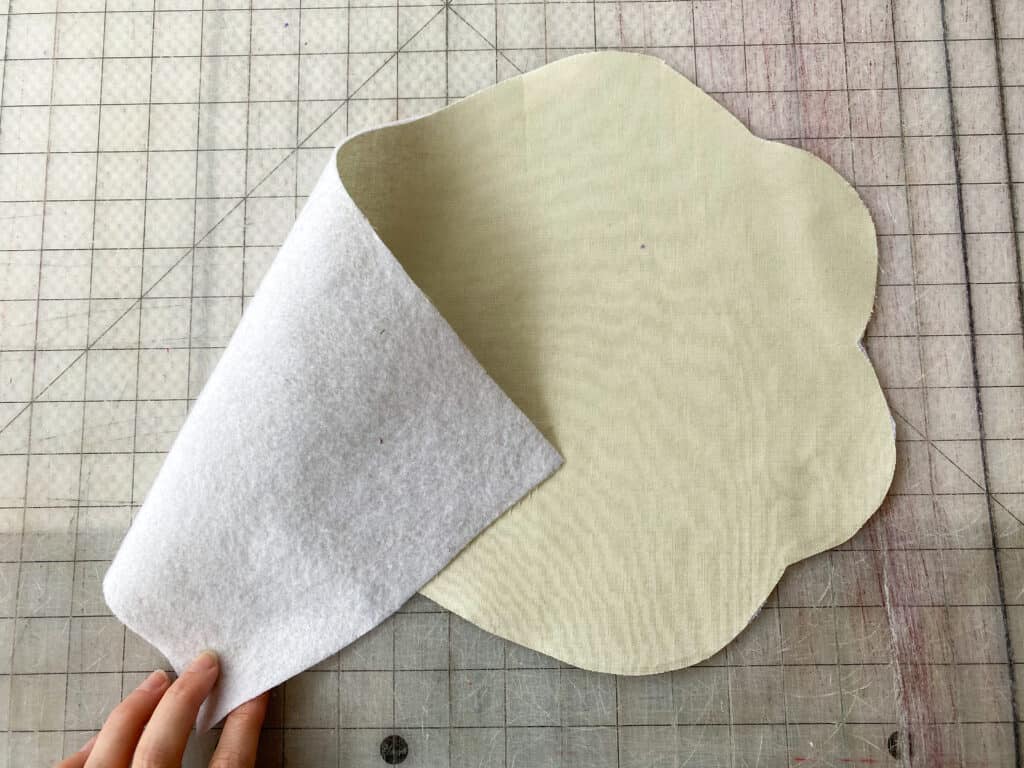
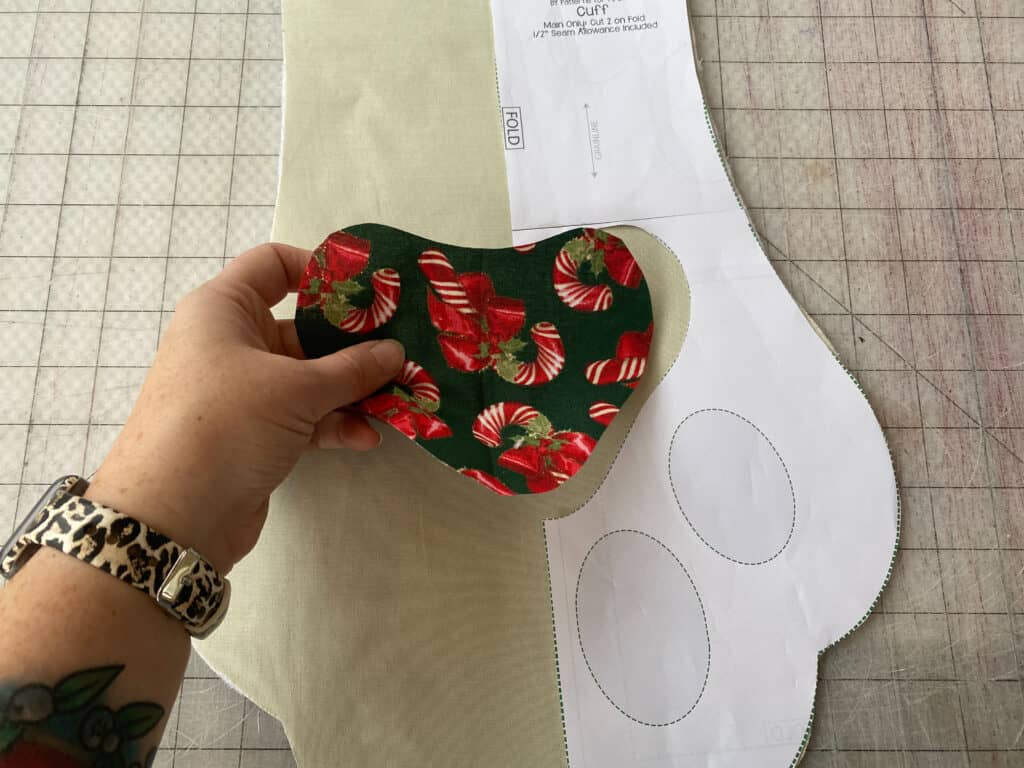
Using the stocking piece as a guide for placement, lay out the applique pieces.
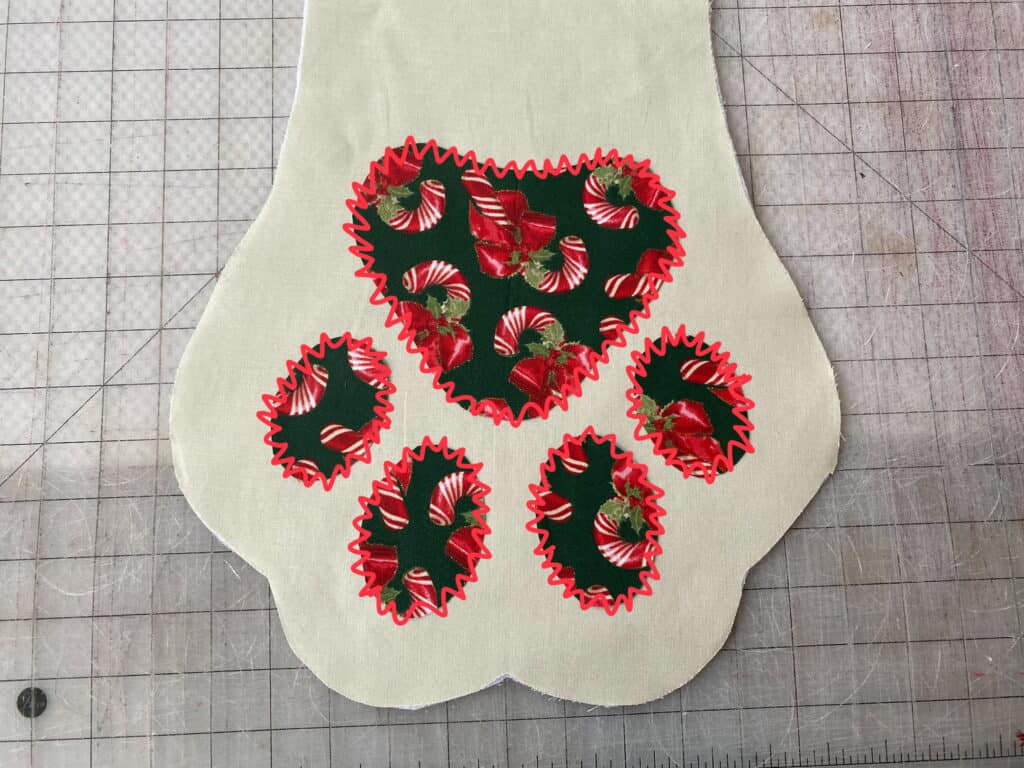
Using your favorite stitch, applique the pieces to the front stocking.
Place the back outer stocking piece on top of the front piece, right sides together.
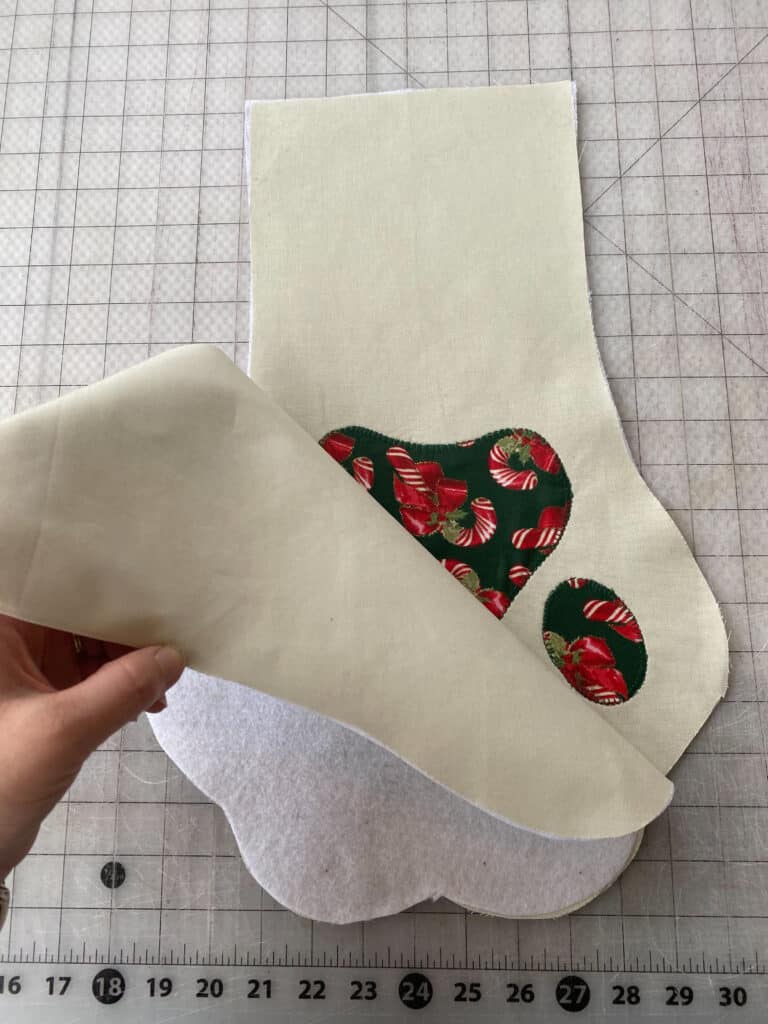
Using 1/2″ seam allowance, sew along all edges, leaving only the top, straight edge open.
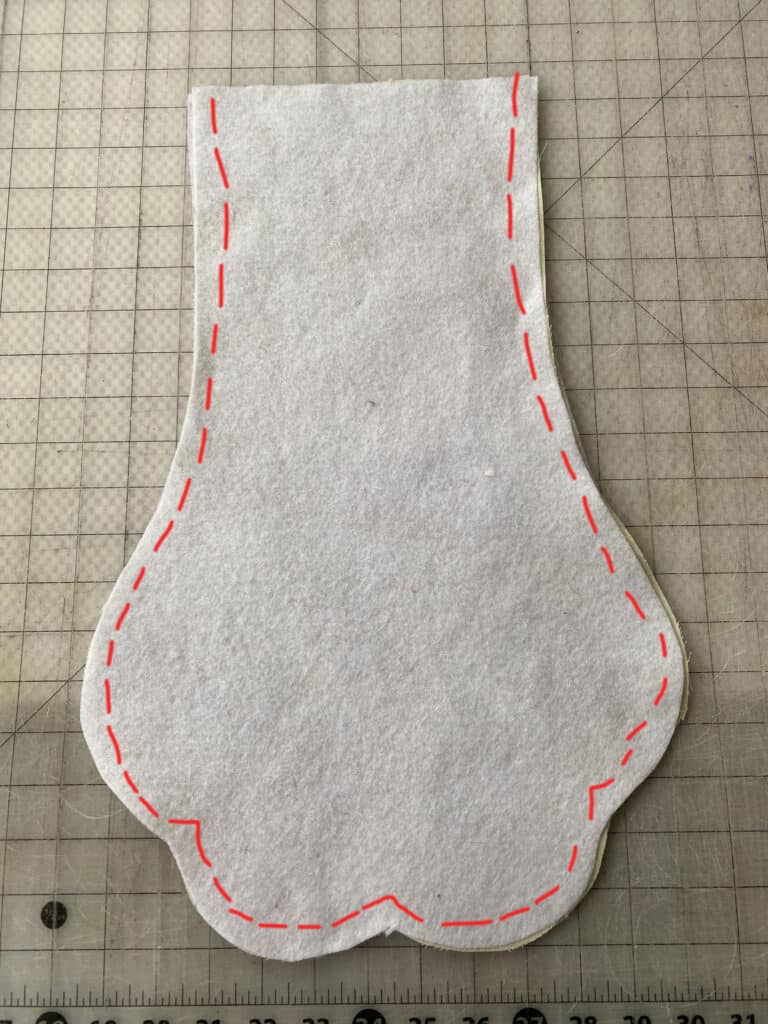
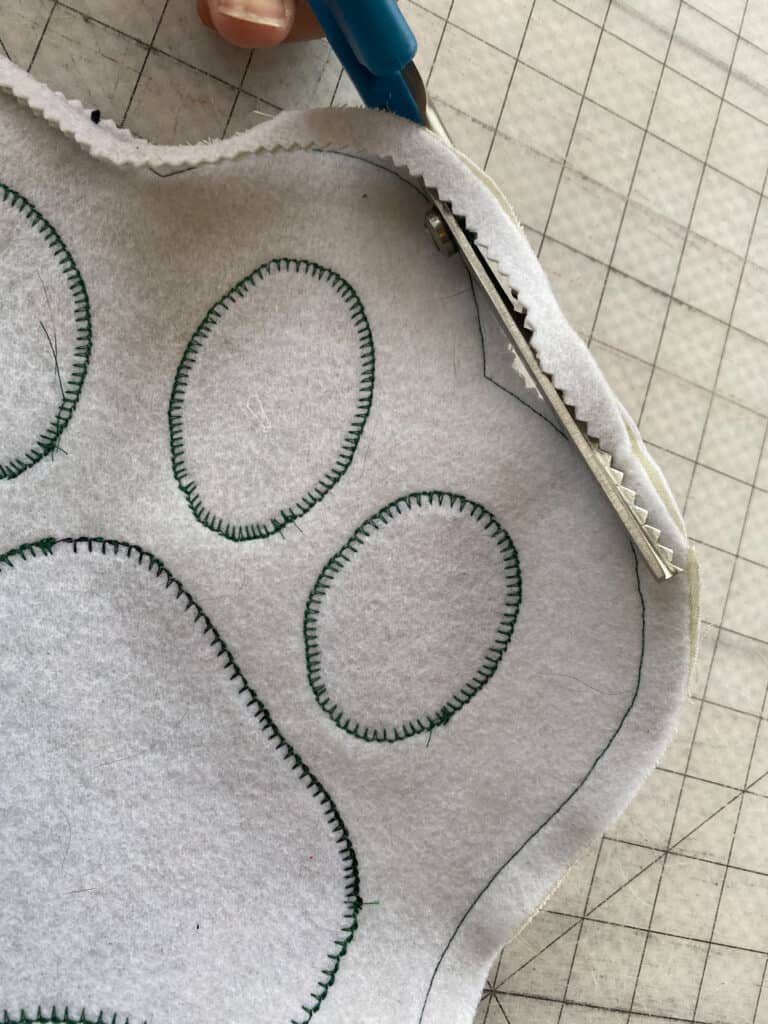
Trim down your seam allowance, and clip into the corner points of the paws, being careful not to cut your stitches.
**Repeat last three steps with stocking lining pieces.
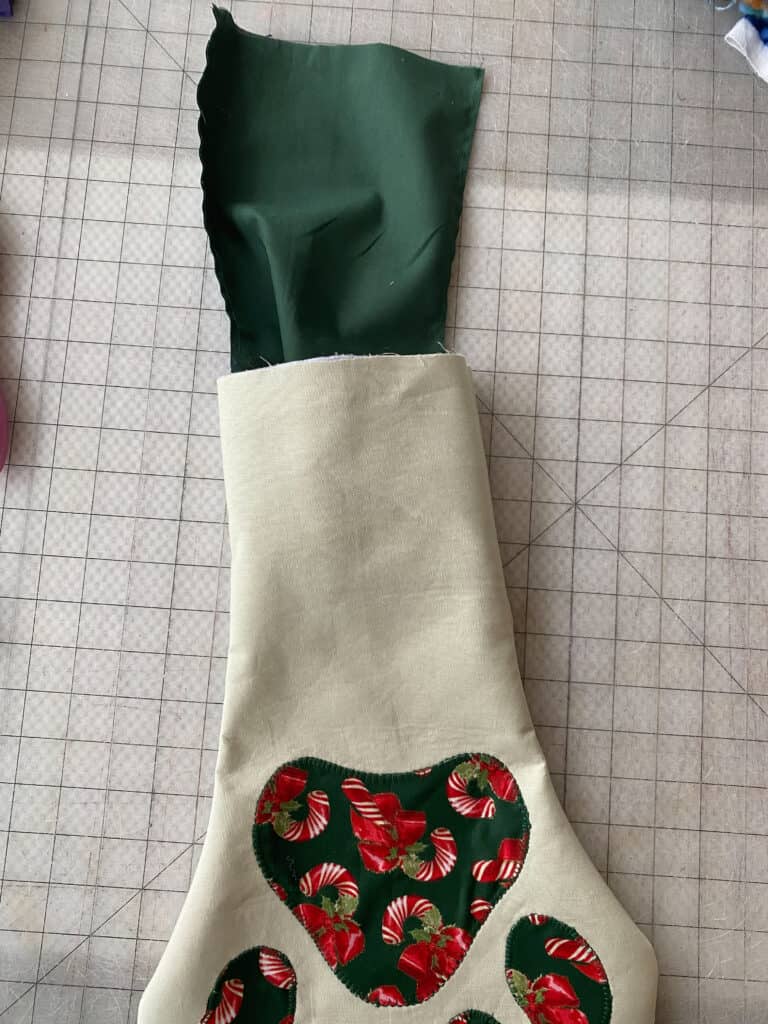
Leave your lining piece wrong sides out, and turn your main piece right sides out. Slip the lining into the main piece.
Fold hanging tab in half, wrong sides together. Iron.
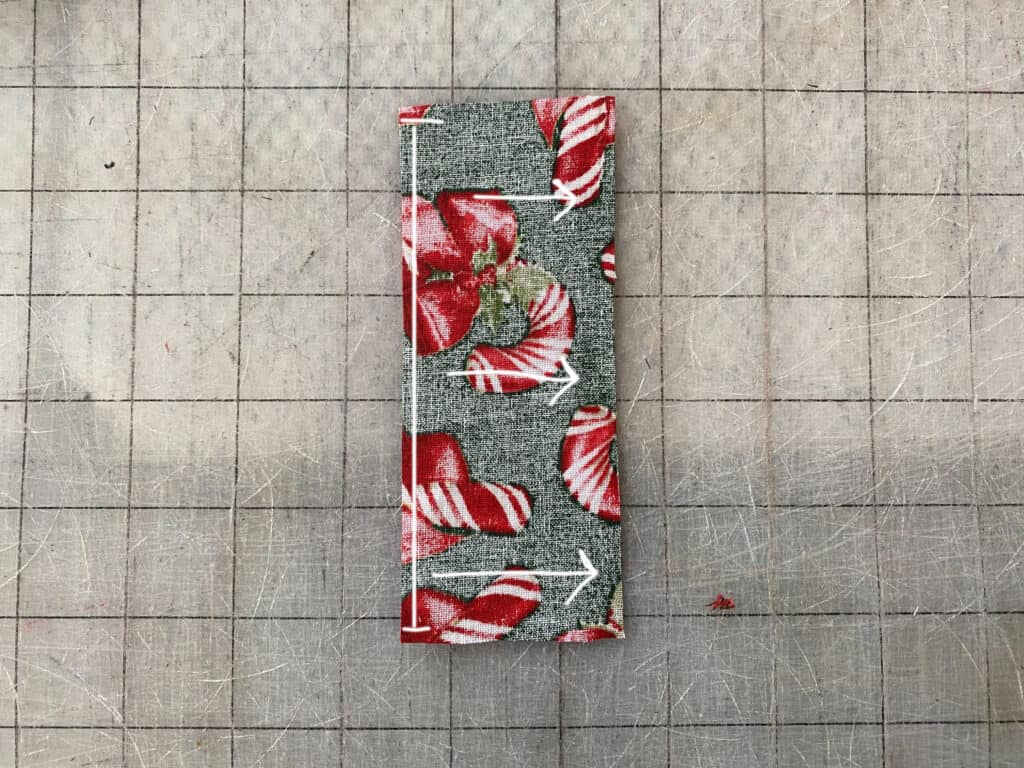
Open up hanging tab piece and fold outer long edge toward crease. Iron.
Repeat with other outer edge.
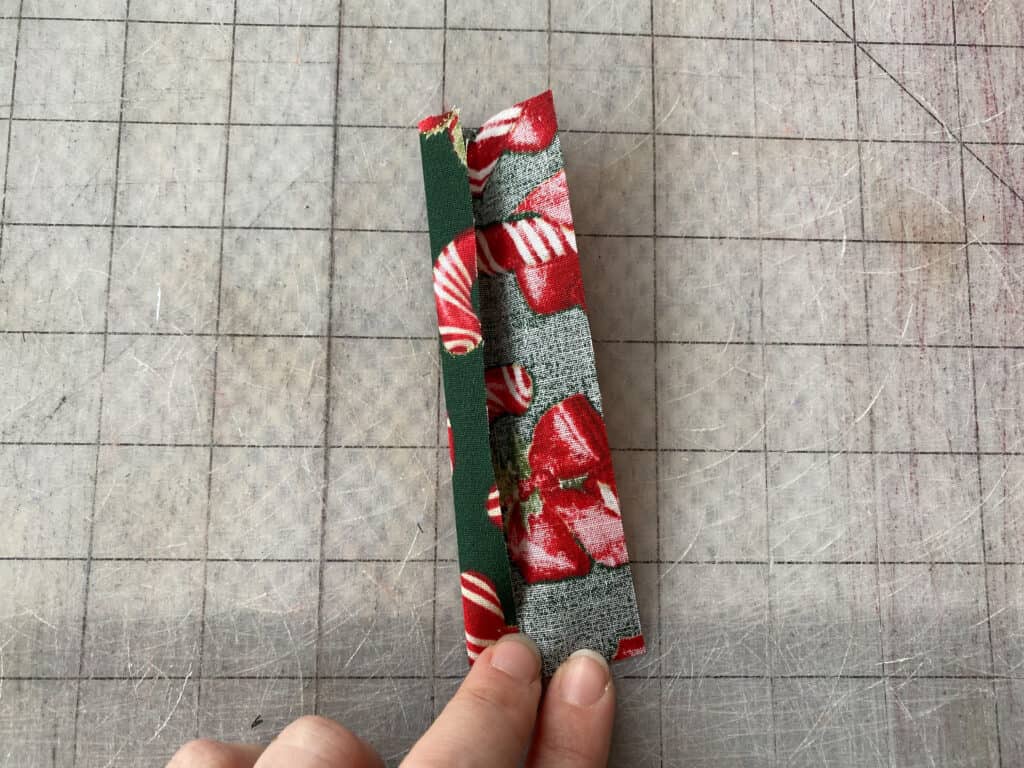
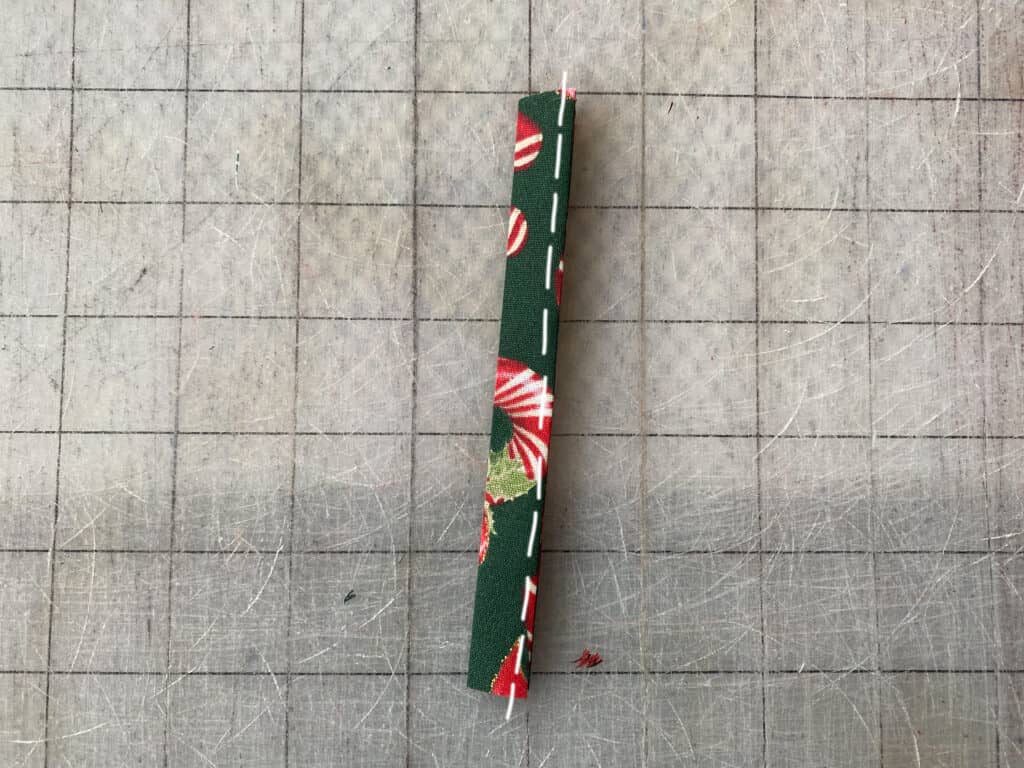
Edge stitch along double folded edge.
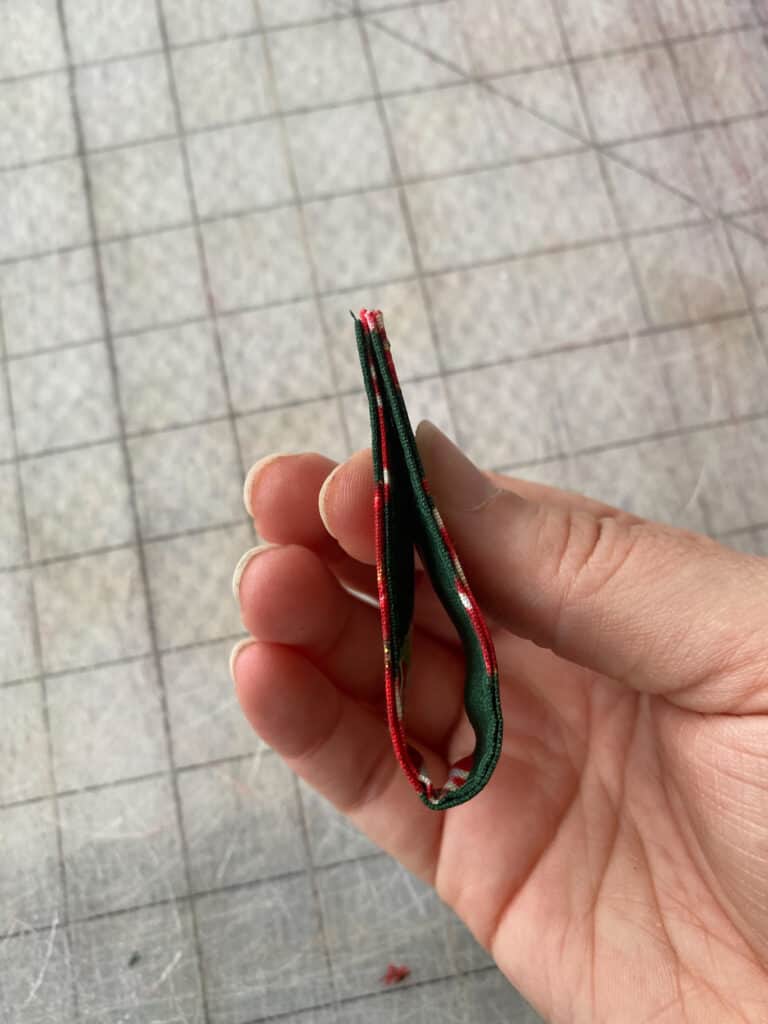
Fold hanging tab in half.
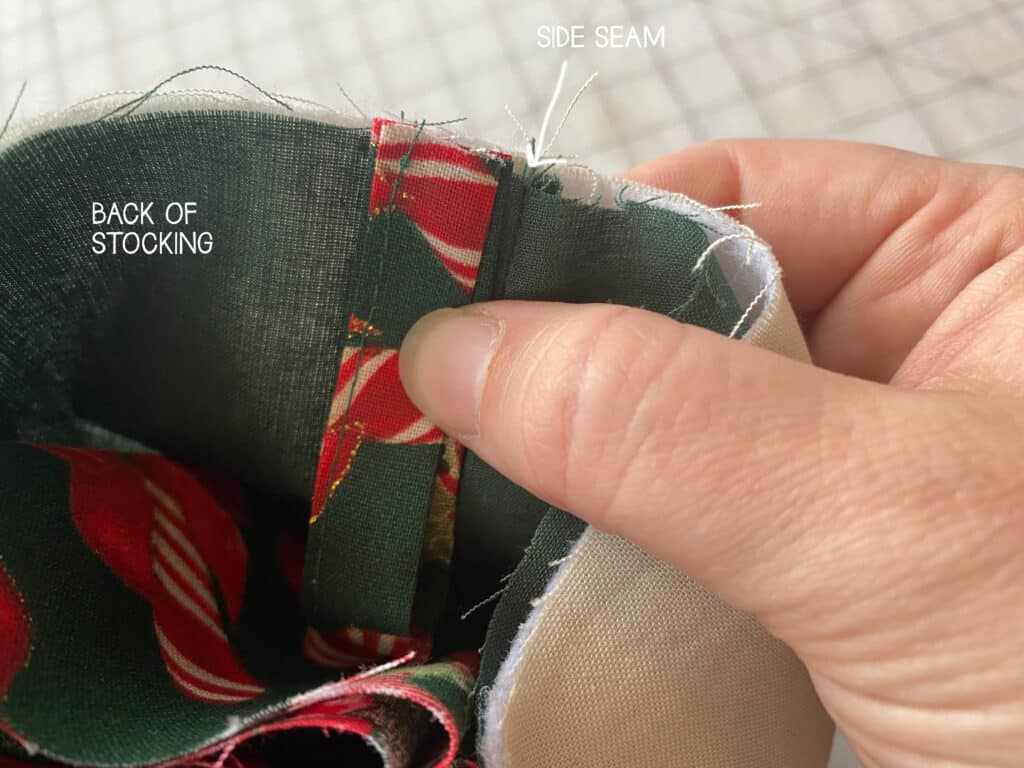
Place hanging tab inside of stocking. Align it just behind the side seam, toward the back of the stocking. Clip or pin in place.
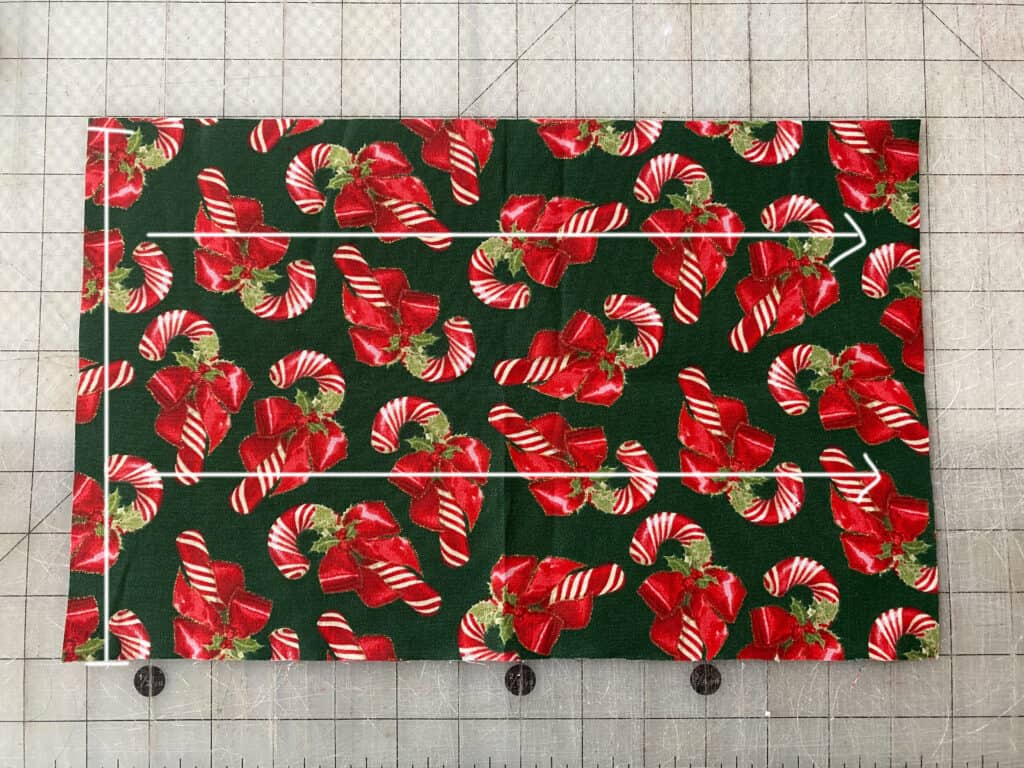
Fold cuff piece in half, along short edges. Right sides together.
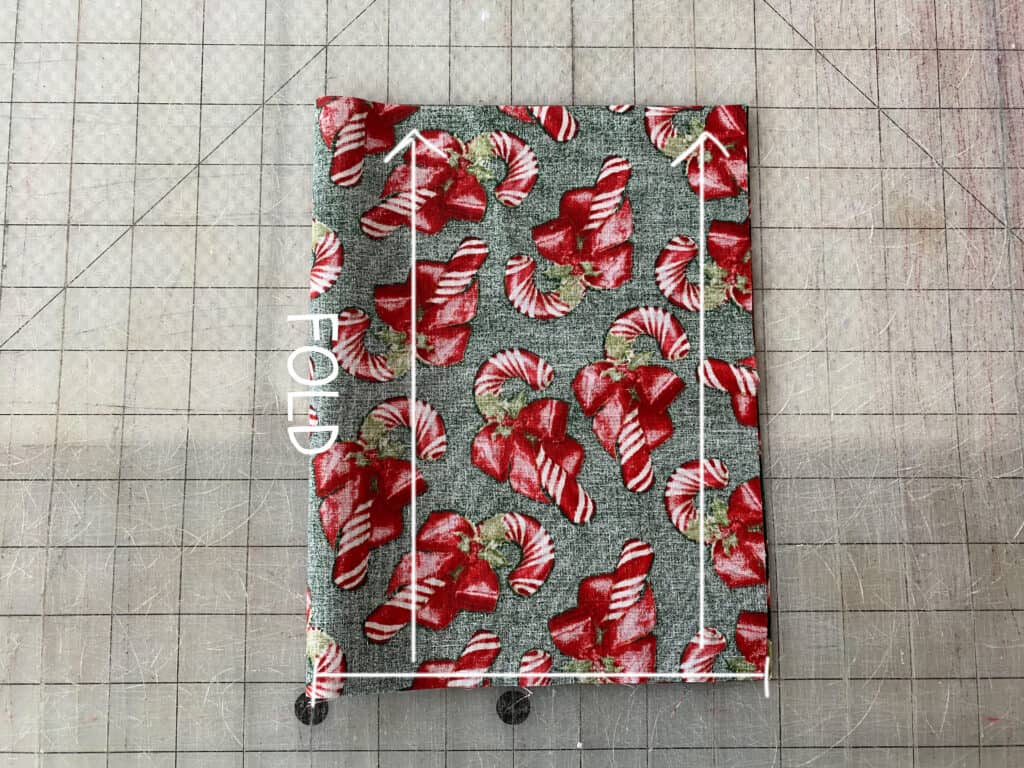
Fold in half again, this time meeting the shorter raw edges together.
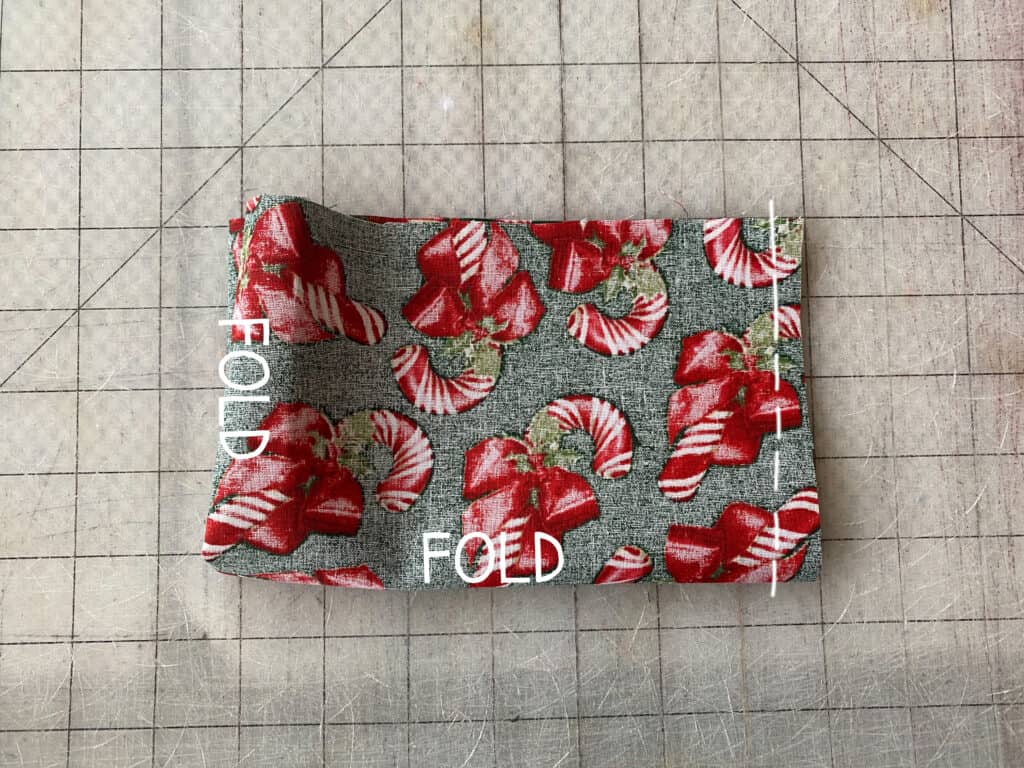
Sew along side edge, using 1/2″ seam allowance.
Flip cuff right sides out. Using pins / clips, mark half points of cuff.
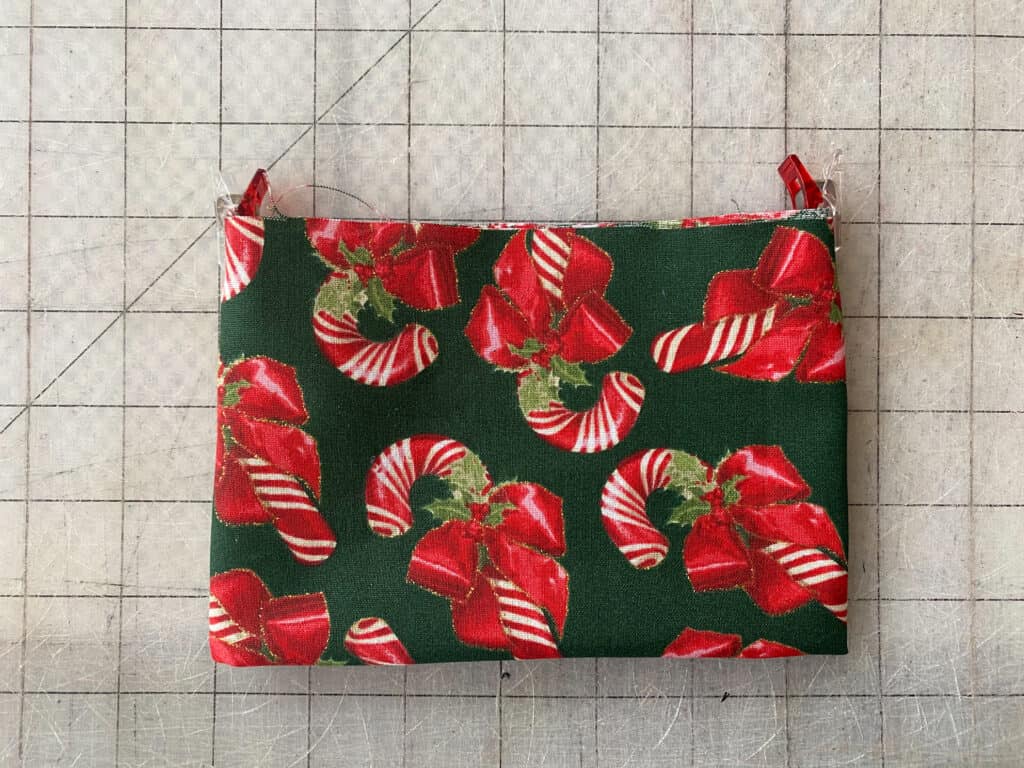
Slide cuff piece inside of the stocking, aligning the half points to the side seams.
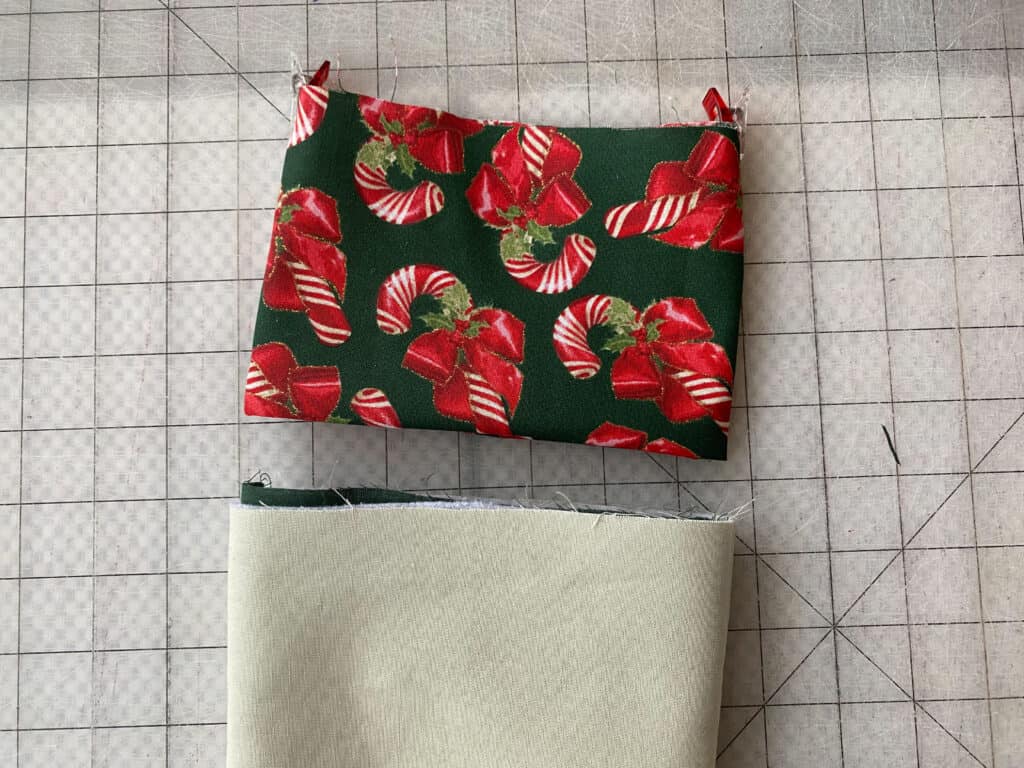
Sew along entire raw top edge, using 1/2″ seam allowance.
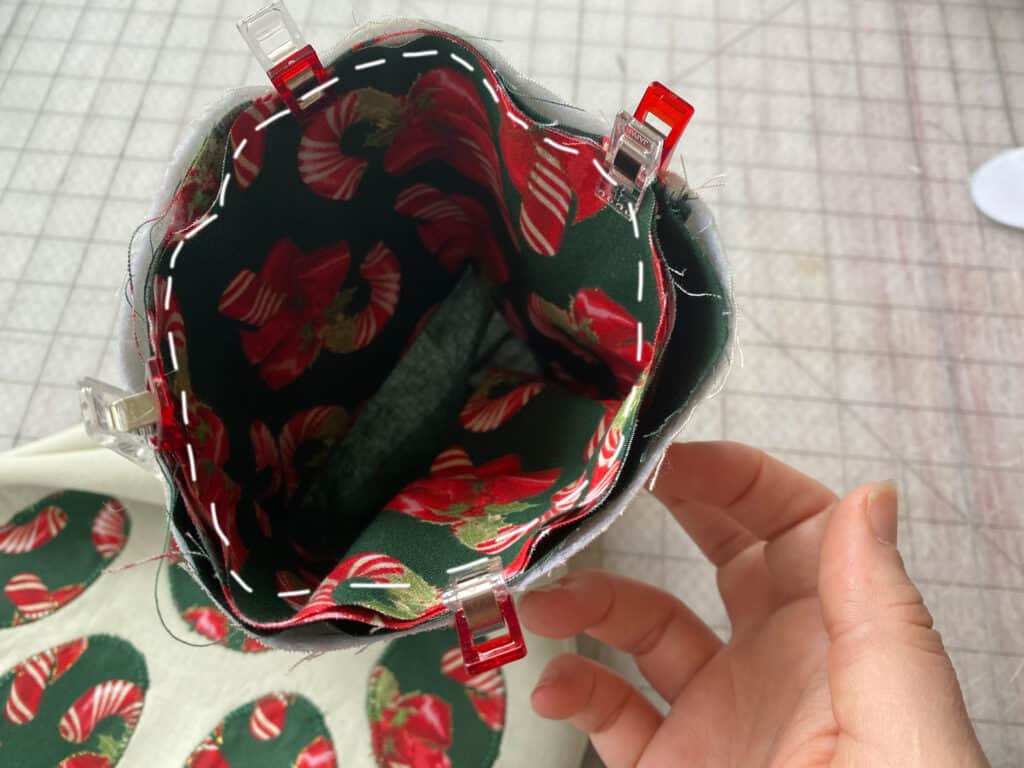
Pull cuff up and out of the stocking.
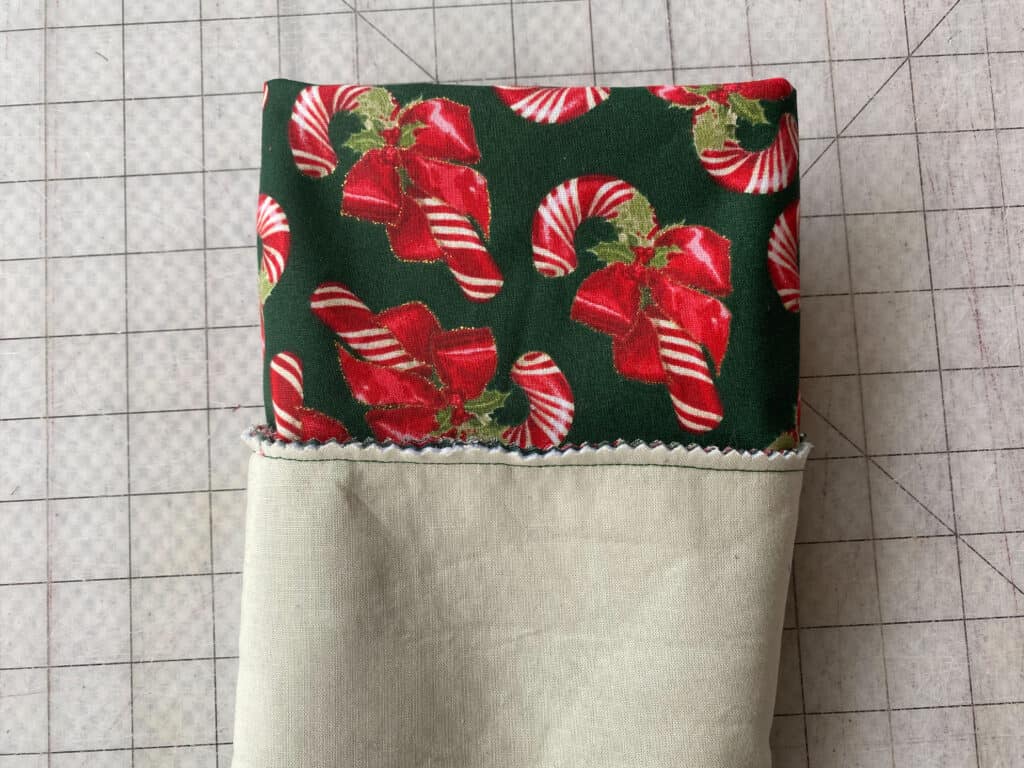
Flip cuff down toward body of stocking.
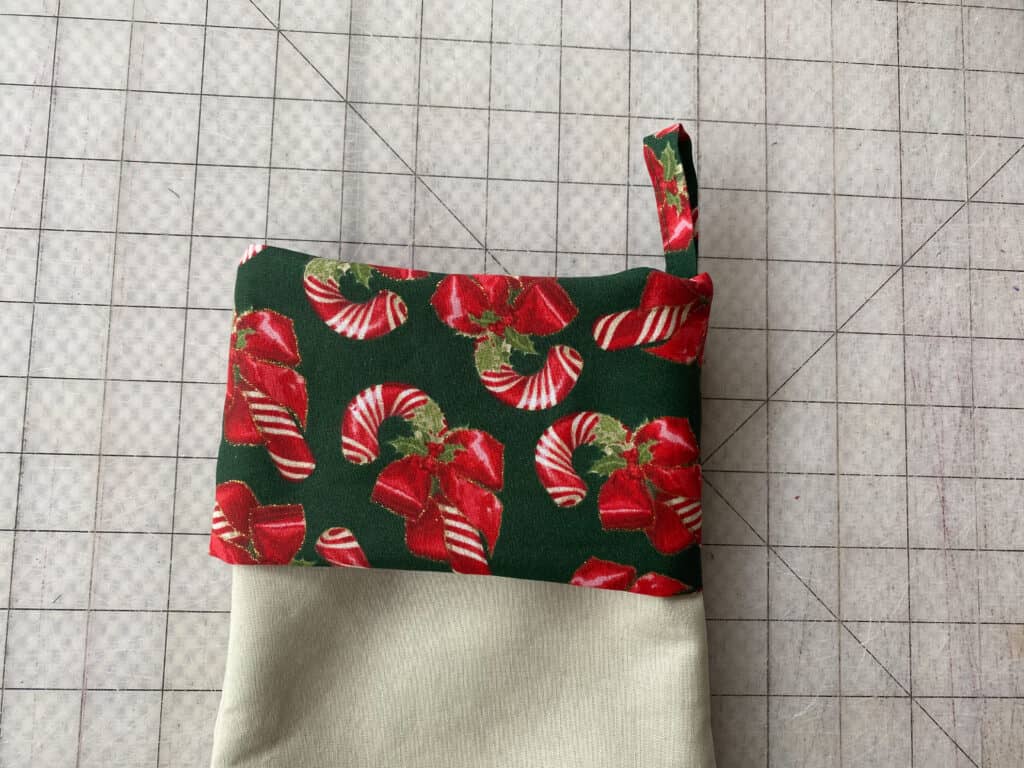
You’re finished! (Don’t forget to press your stocking before hanging it up!)
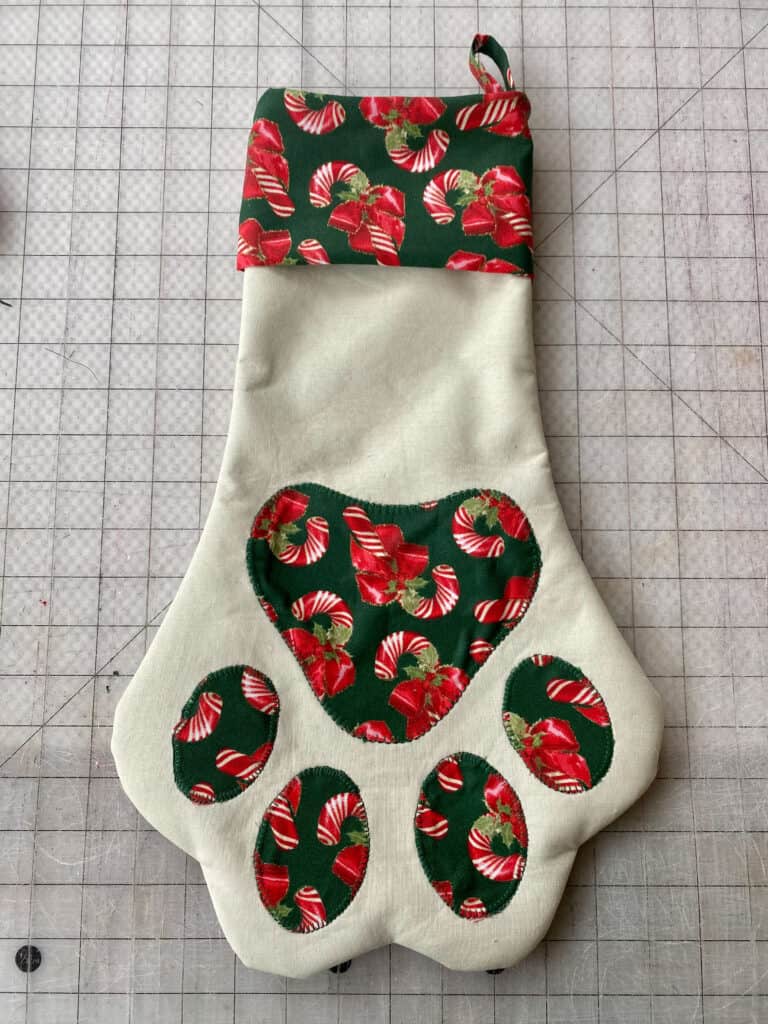
In case you consider yourself a more “visual learner” here’s a video tutorial that walks you through the entire tutorial, start-to-finish.
Check out what our fabulous testers were able to create with this very same tutorial!


I la-la-love when you share your photos with me! Head over to the Patterns for Pirates Facebook Group and show us what you’ve made!
Happy Holidays, Pirates!

2020 Holiday Freebies :: Hickory Hat Tutorial
Happy Holidays, Pirate Friends! We are excitedly back for another year and another round of holiday freebies to share with you! Over the years, we’ve compiled different tutorials and patterns that we think would make *perfect* gifts for your friends and family. Curious about what we’ve already released in the way of holiday freebies? Head right here to see all of them: Holiday Freebies Roundup.
Today, we are bringing you the: Hickory Hat!
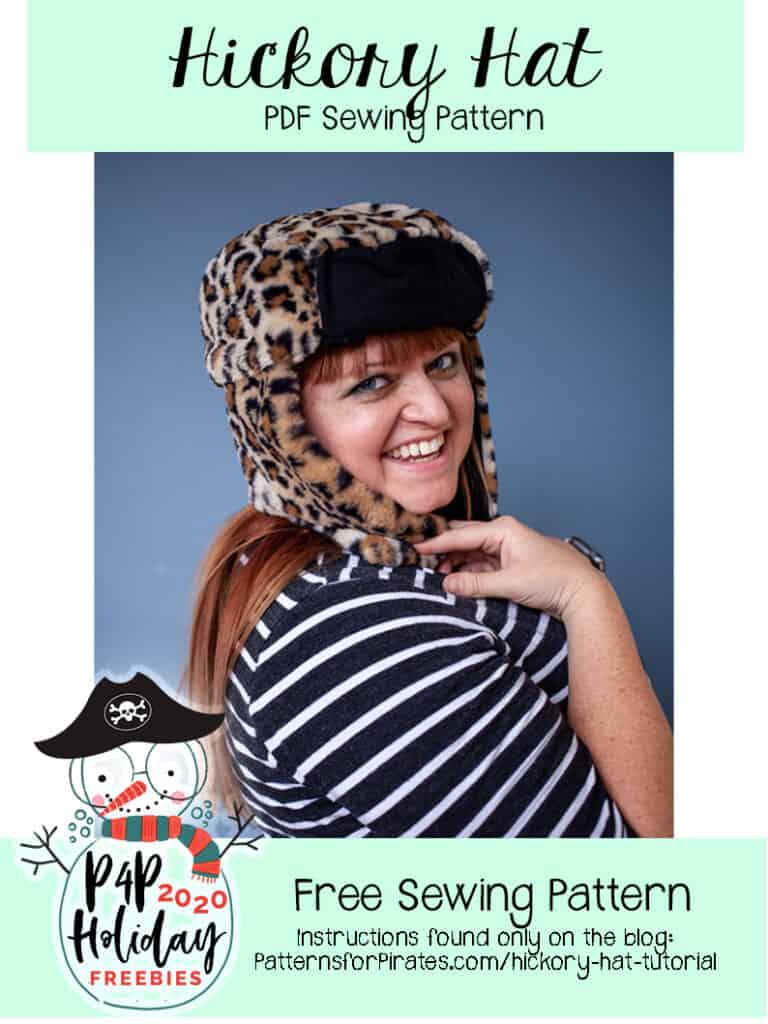
The Hickory Hat is a classic “aviator” or “lumberjack” style cap. It is available in four sizes, for head circumferences 18″ – 24″ and was drafted for non-stretch fabrics. Grab all of your favorite fun furs + fleeces, because this pattern is perfect for those!
**If using a super plush / thick fabric, you may want to size up — as those fabrics take up a bit more space and leave less room for your noggin.
Supplies Needed:
- Hickory Hat pattern pieces
- 1/3 yard fabric each (outer and lining)
- Optional Buttons
TUTORIAL
Cut all of your pieces. The assembly for the lining and outer cap will be the same for the first few steps.
With a pin or clip, mark the middle points of the curved side cap pieces, and both sides of the middle cap of your lining fabric.
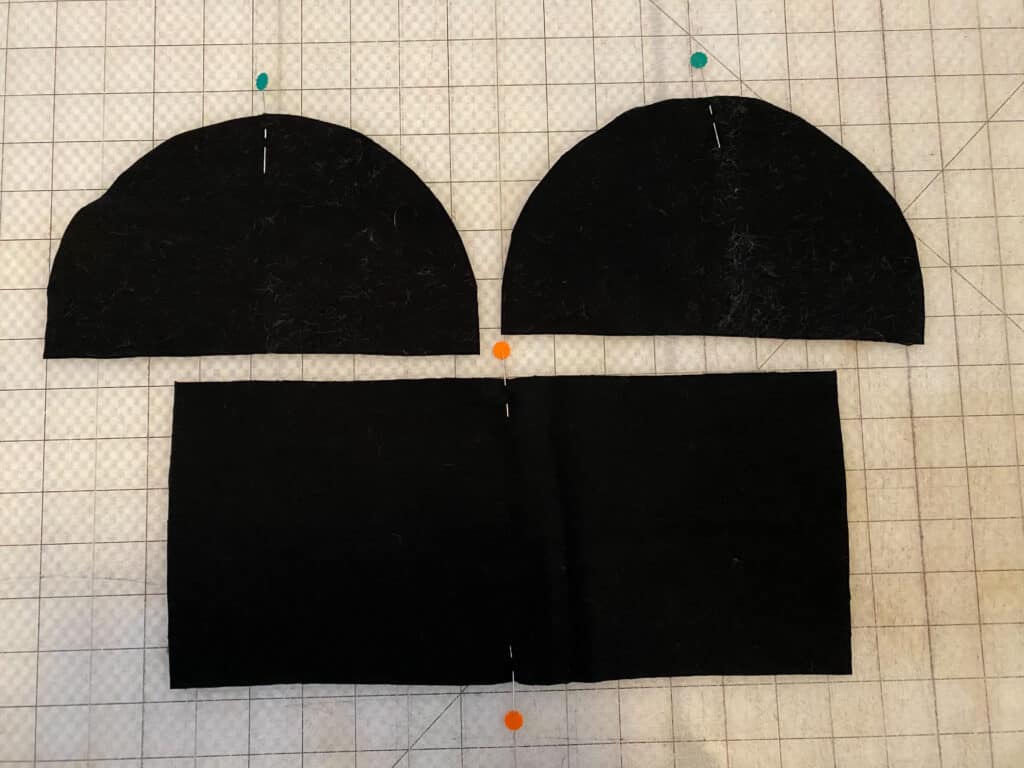
With right sides together, place the side cap piece on top of the middle cap. Aligning them at the center points.
Ease the pieces together, and sew using 1/2″ seam allowance.
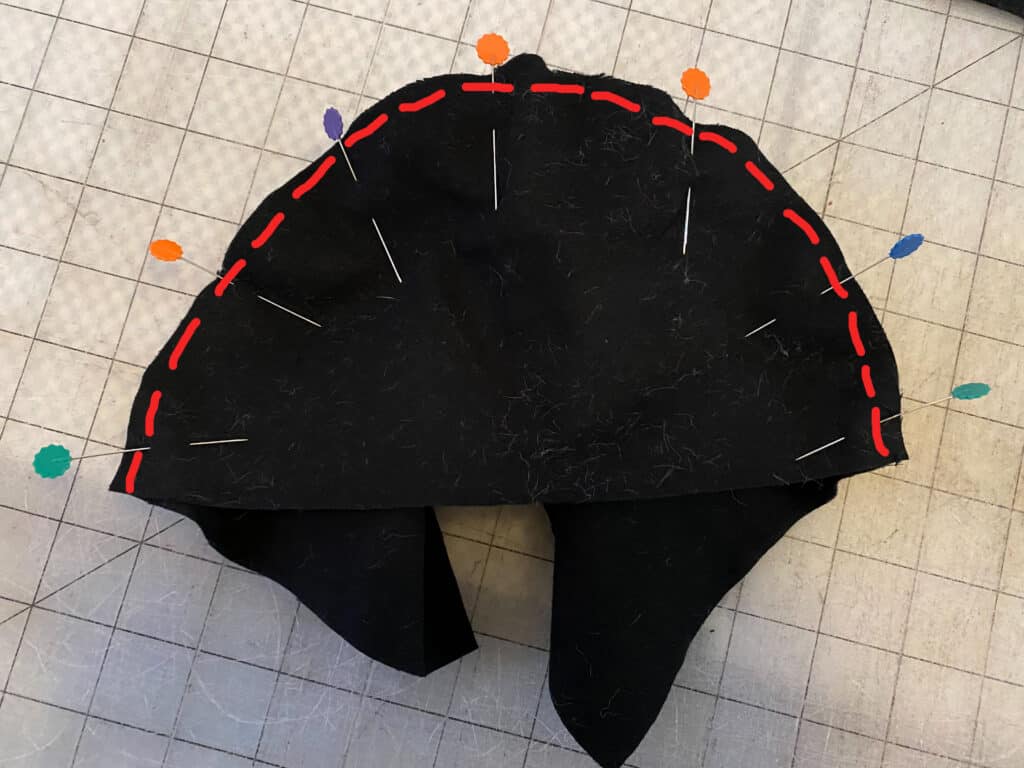
Using pinking shears, or cutting with a “v”, trim excess fabric along curved edge.
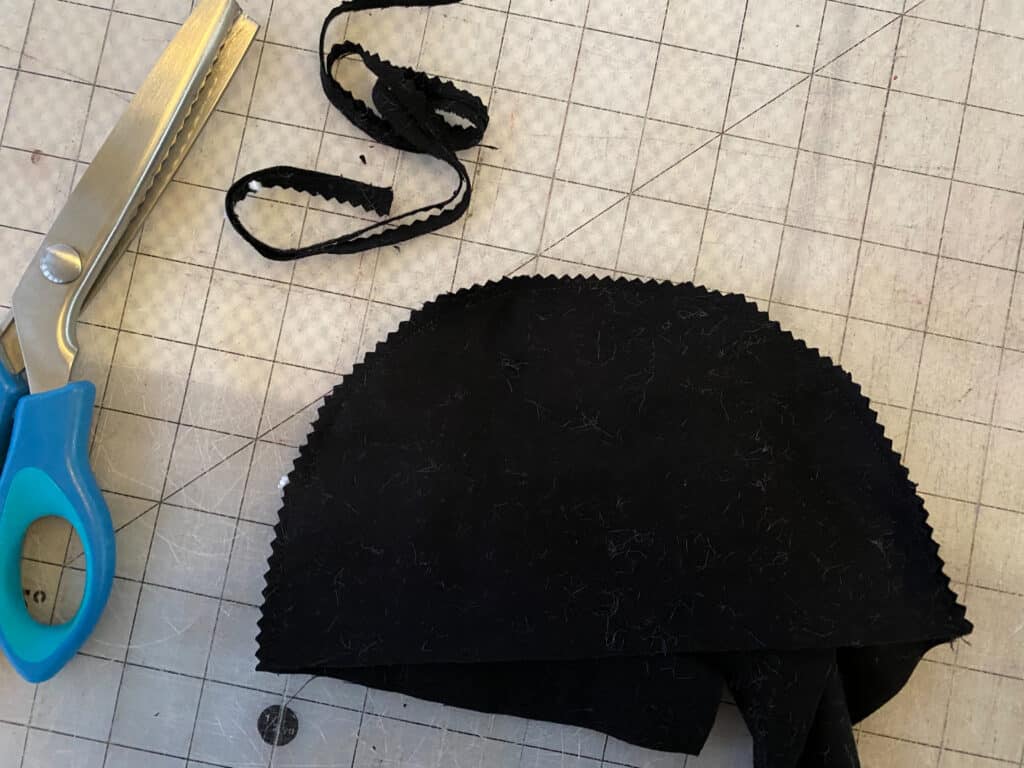
**Repeat with second side cap piece. And repeat all steps with outer fabric.
Place the ear flap pieces with right sides together.
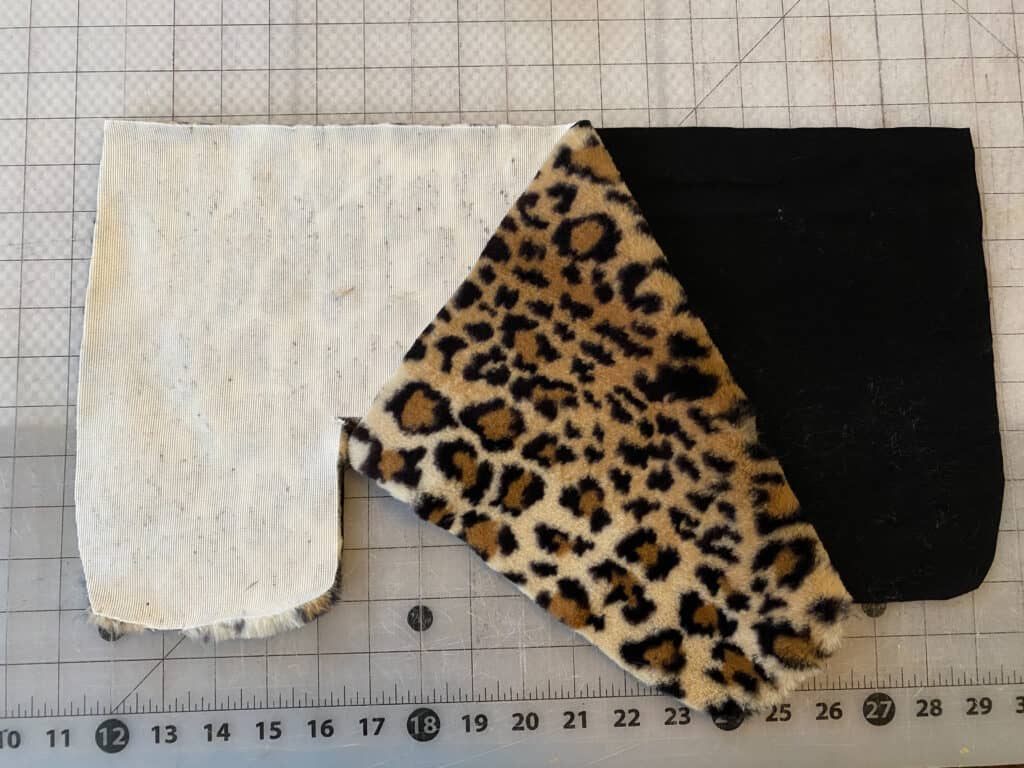
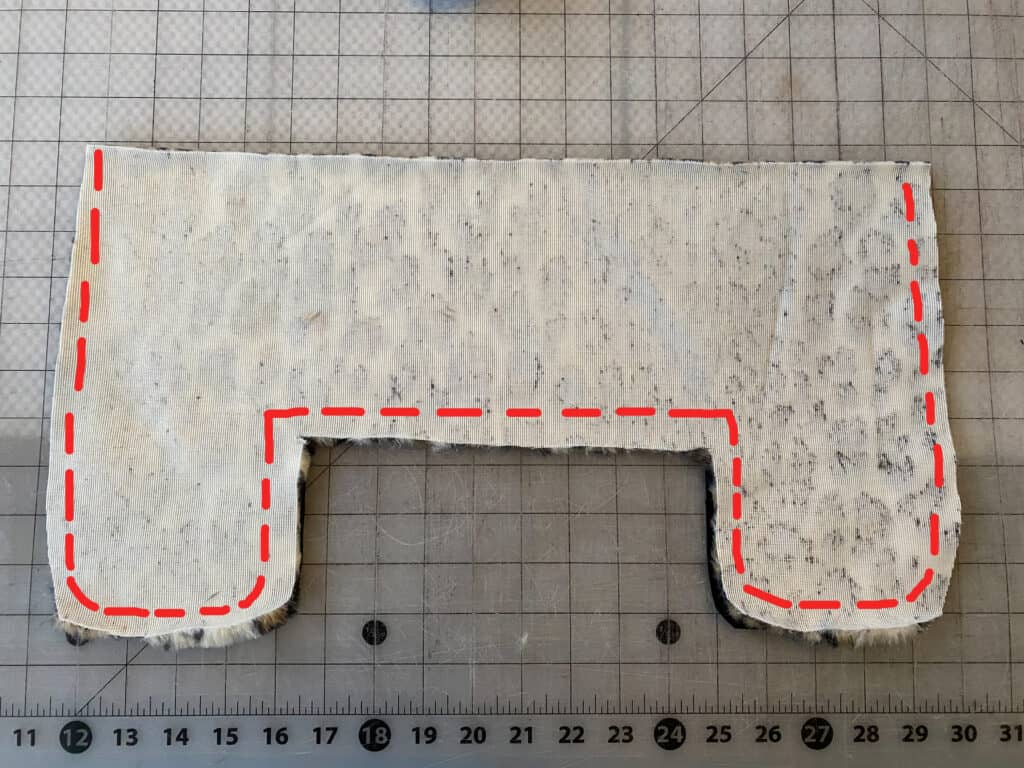
Using 1/2″ seam allowance, sew along entire side and bottom edges. Leave the top, straight edge open.
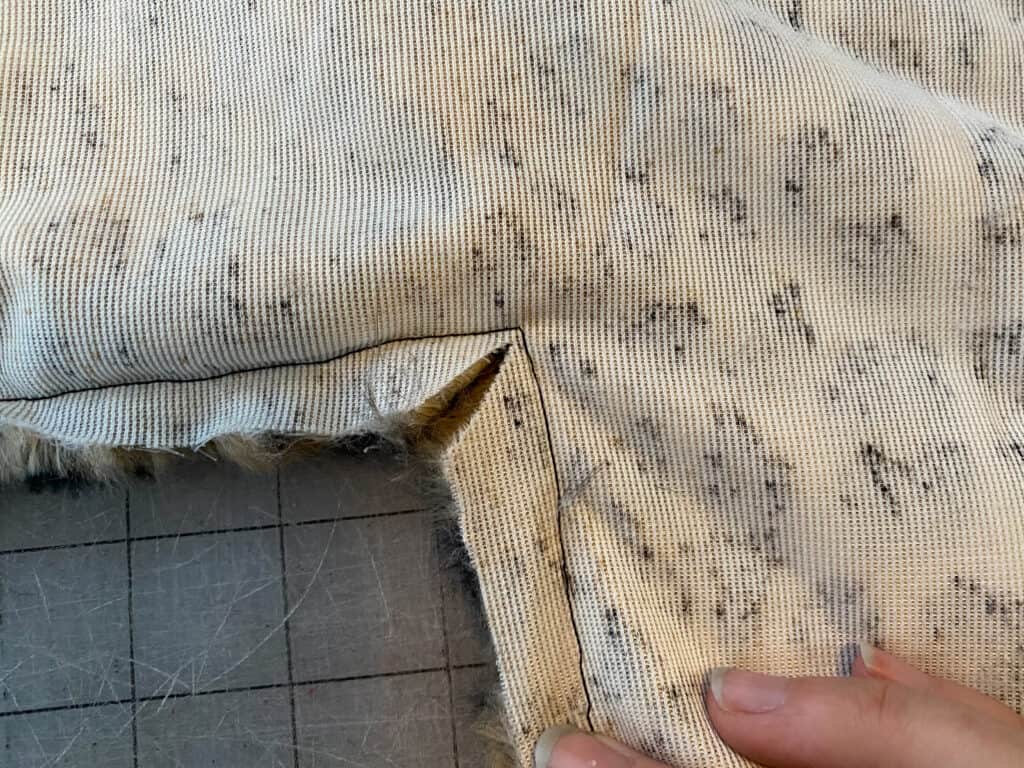
Trim all excess seam allowance, making sure to pay special attention to the corner points. Clip as close to your stitches as you can, without going through them.
Turn right sides out. With a pin or clip, mark the middle point of the top, raw edge.
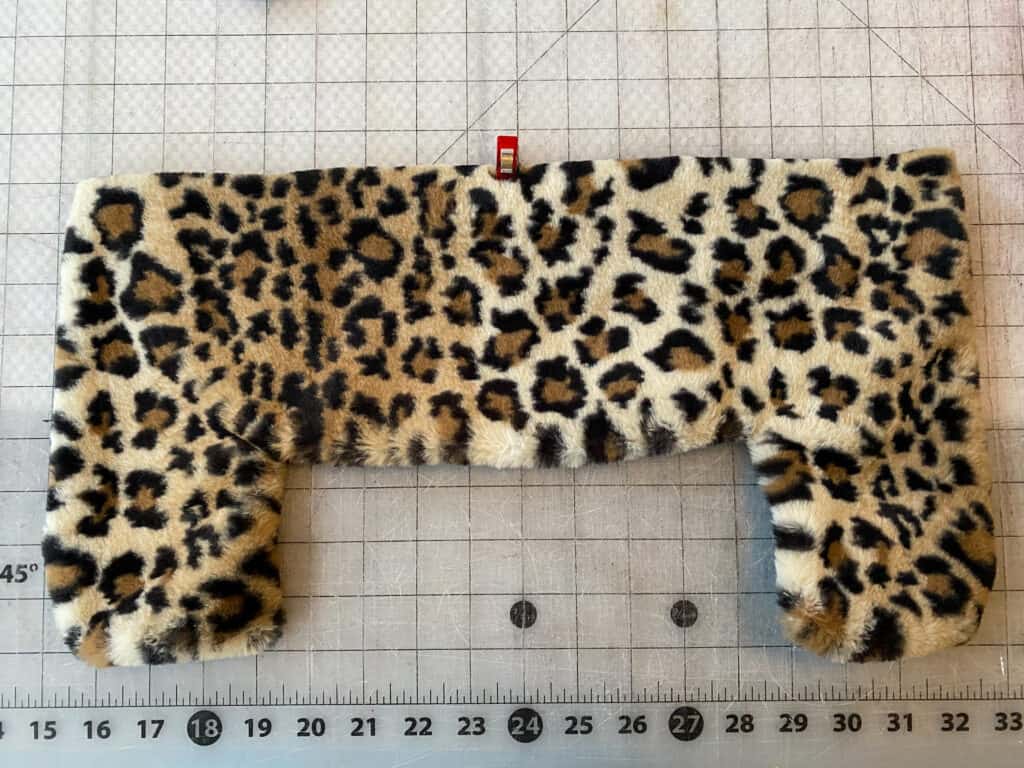
Place the brim flap pieces with right sides together.
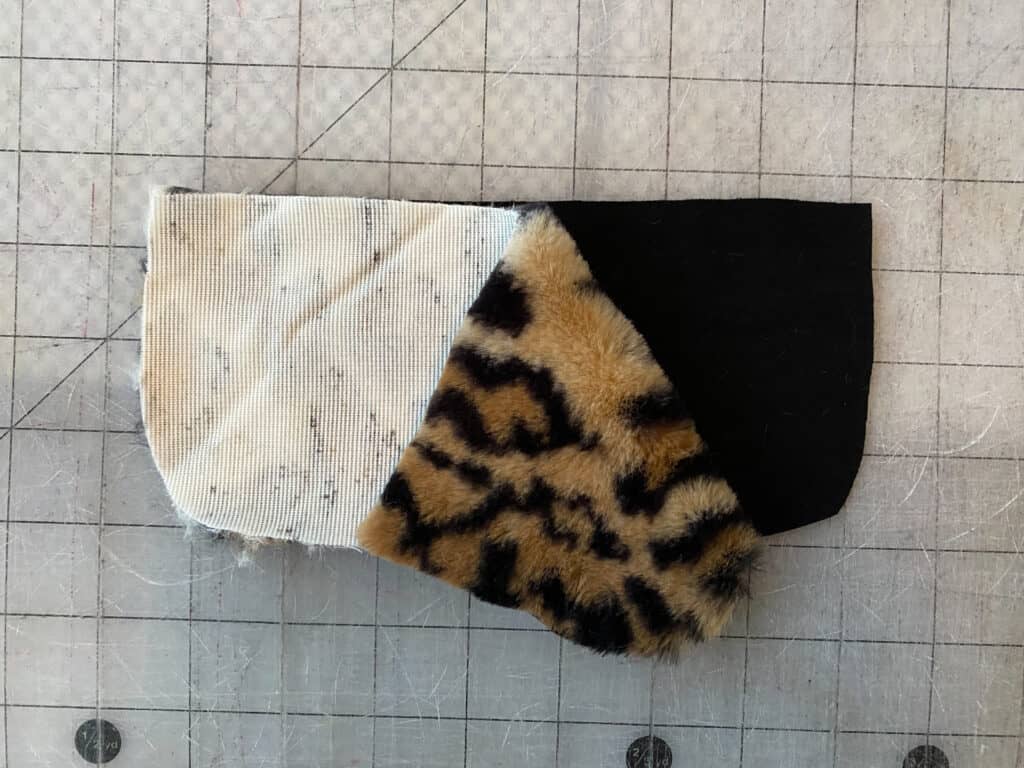
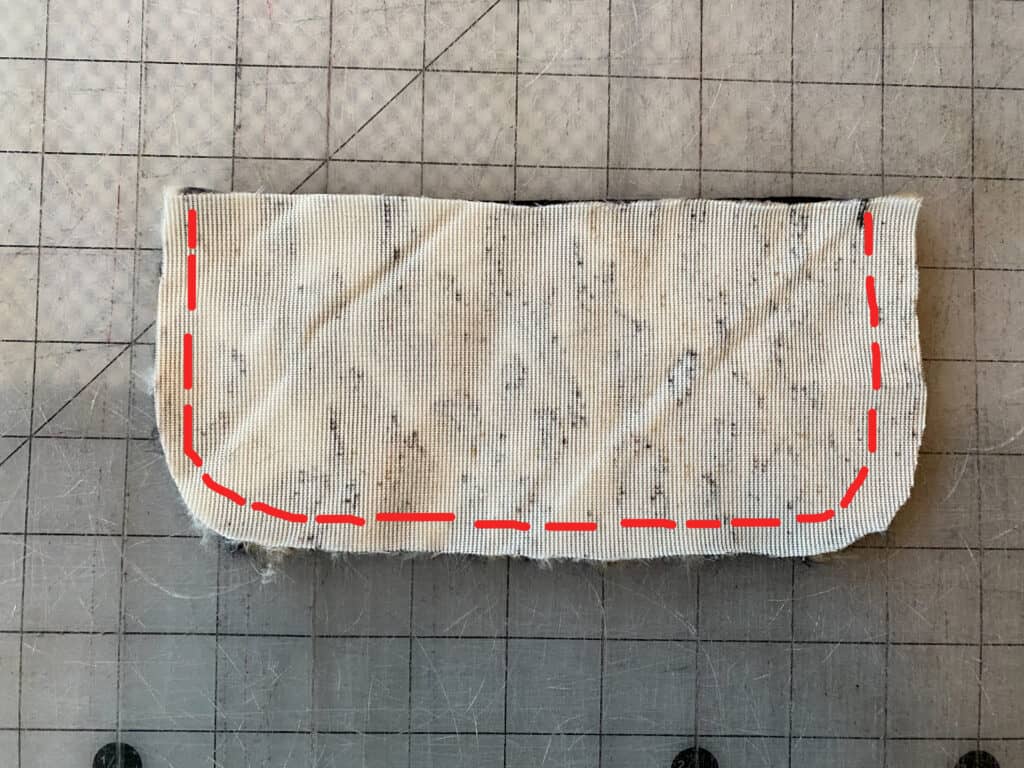
Using 1/2″ seam allowance, sew along entire outer edge, leaving the top, straight edge open.
Clip excess seam allowance. Turn right sides out.
Locate the middle front and back of the cap lining piece and mark with clips / pins.
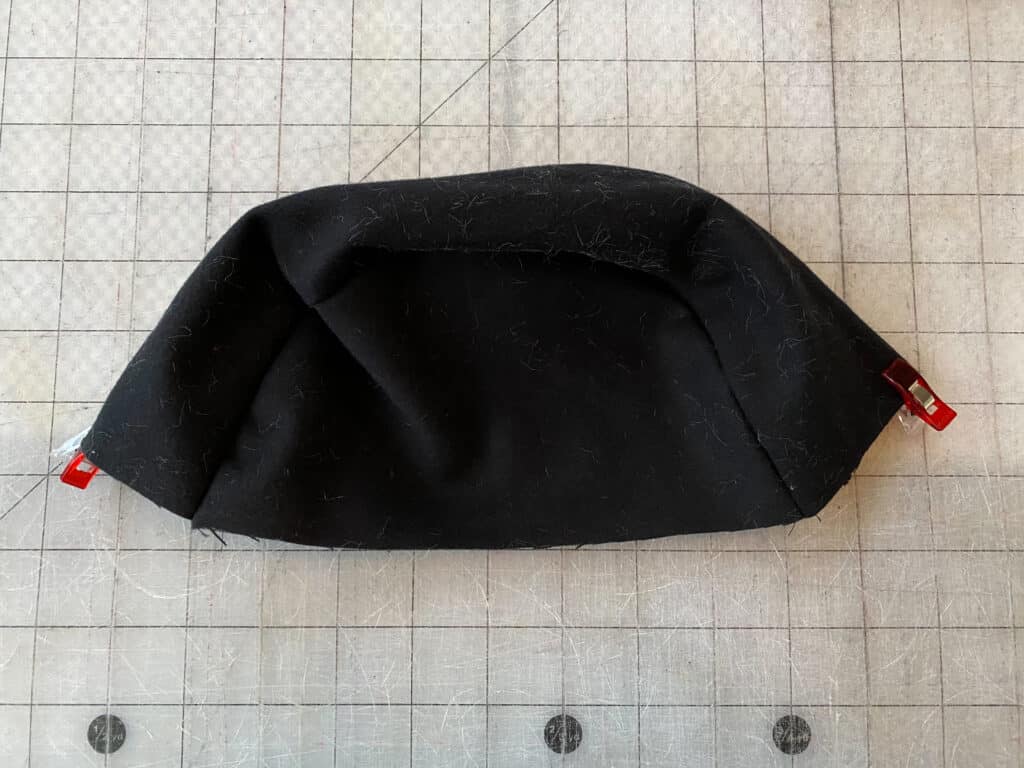
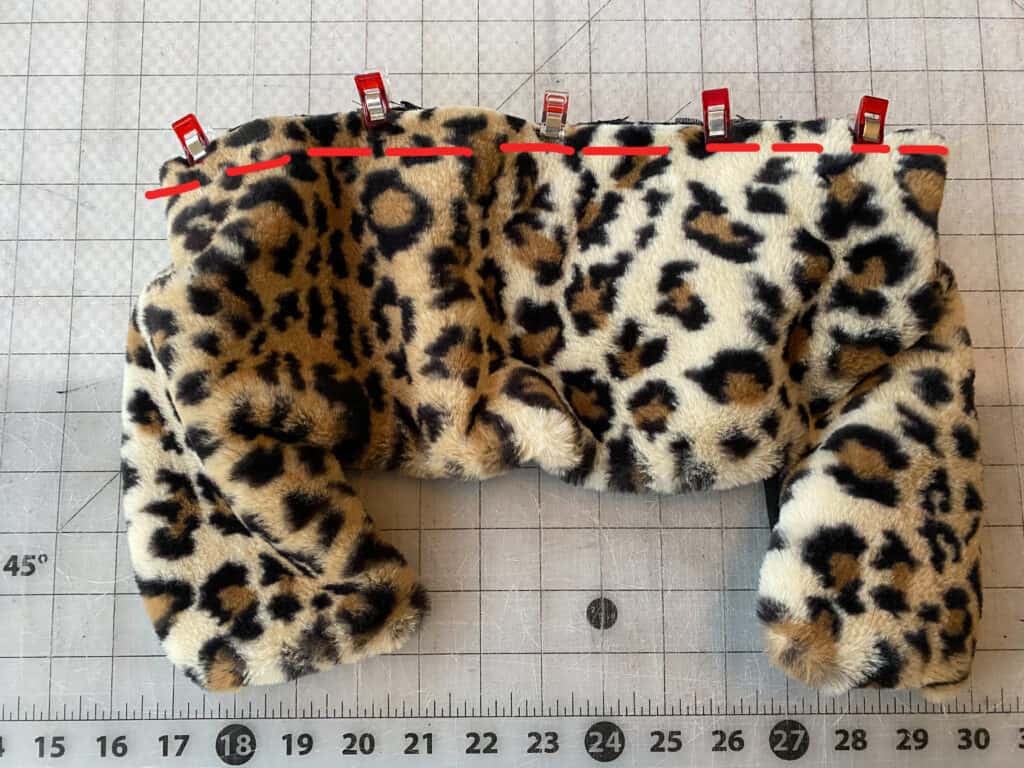
With lining fabrics right-sides-together, match the ear flap piece to the lining cap piece.
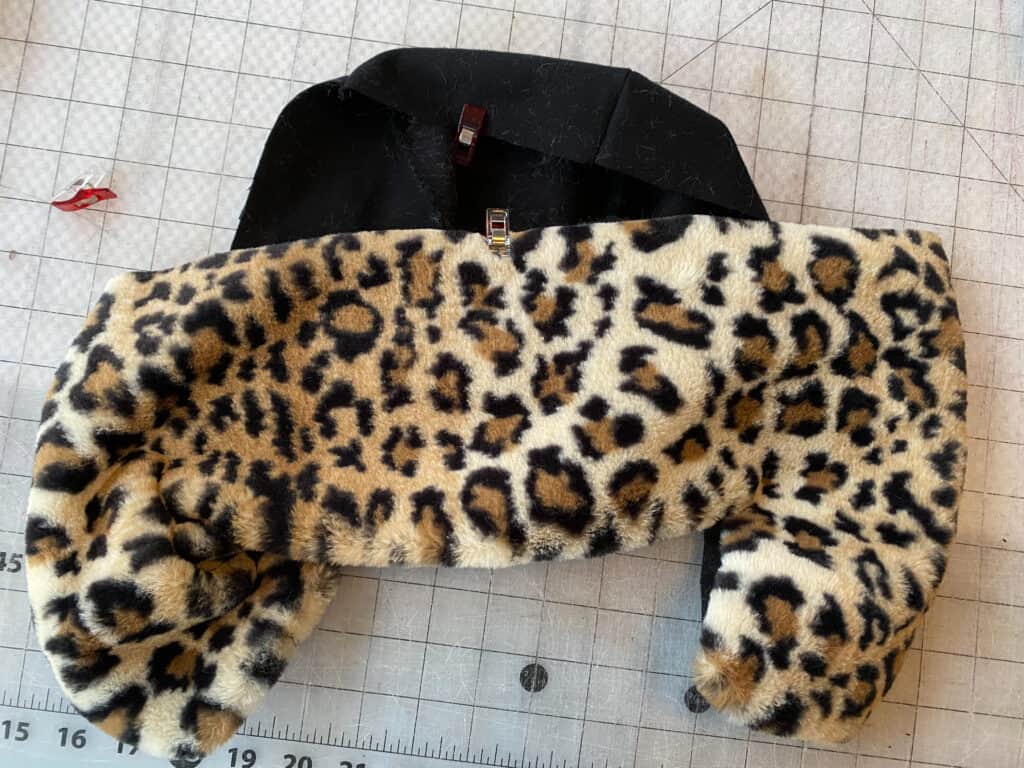
Baste in place.
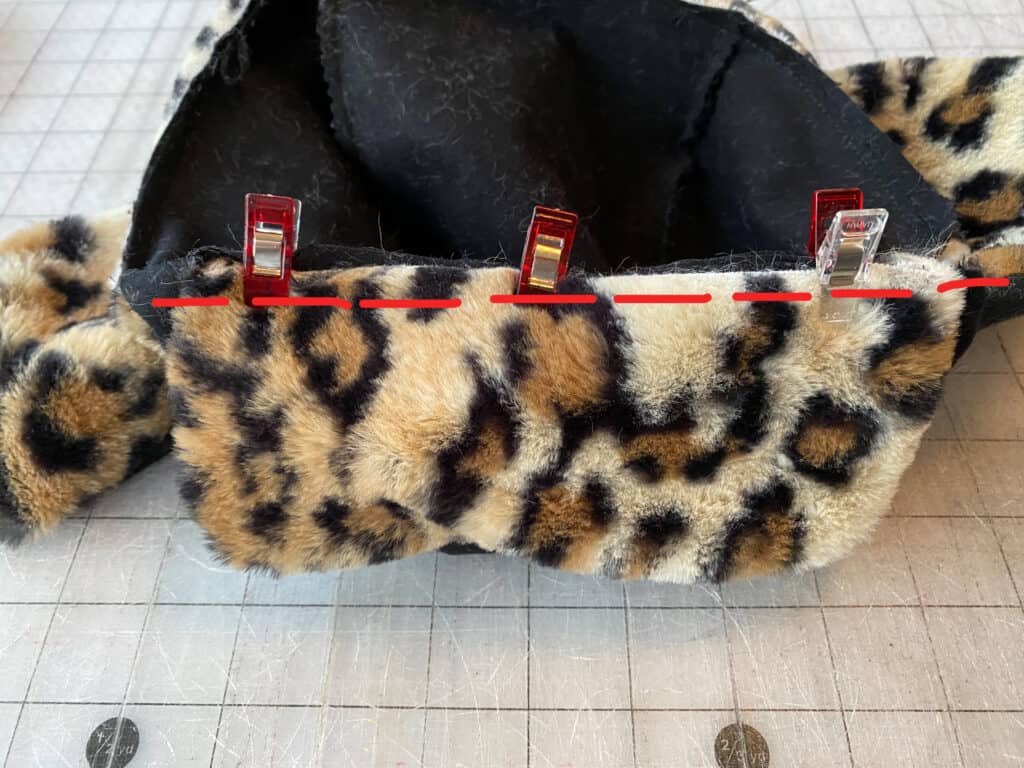
Repeat with the front flap piece. With lining fabrics right sides together, match front flap piece to the lining cap piece at the middle front point.
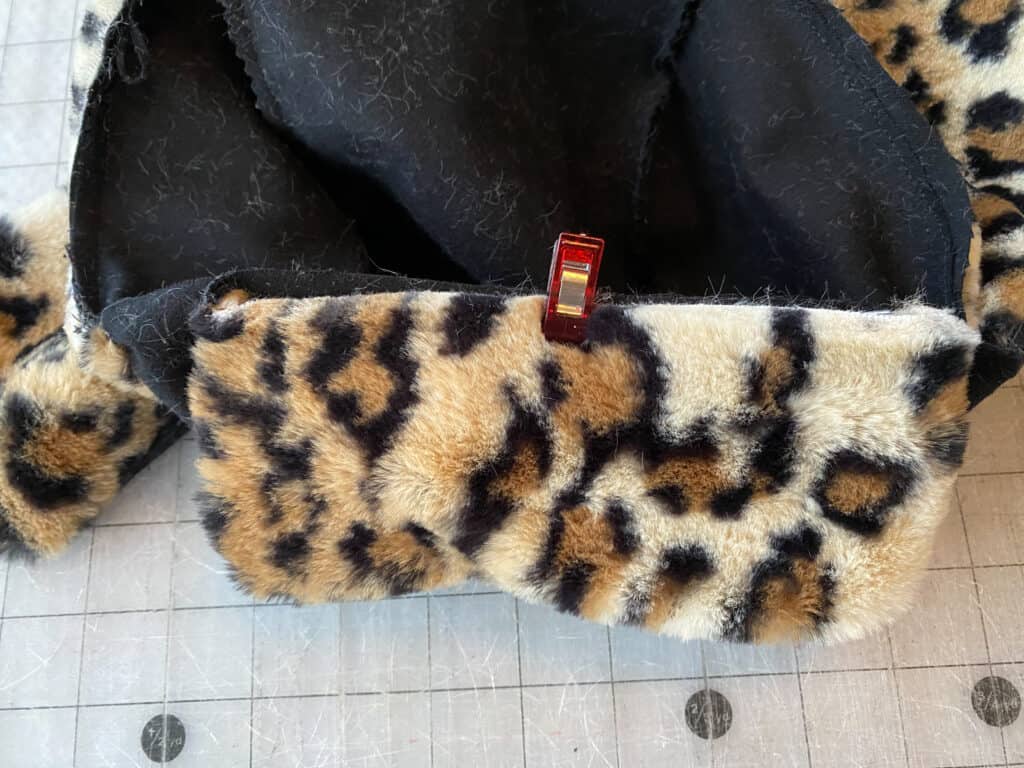
Baste in place.
Locate the outer cap piece. Place it in front of you, wrong sides facing out.
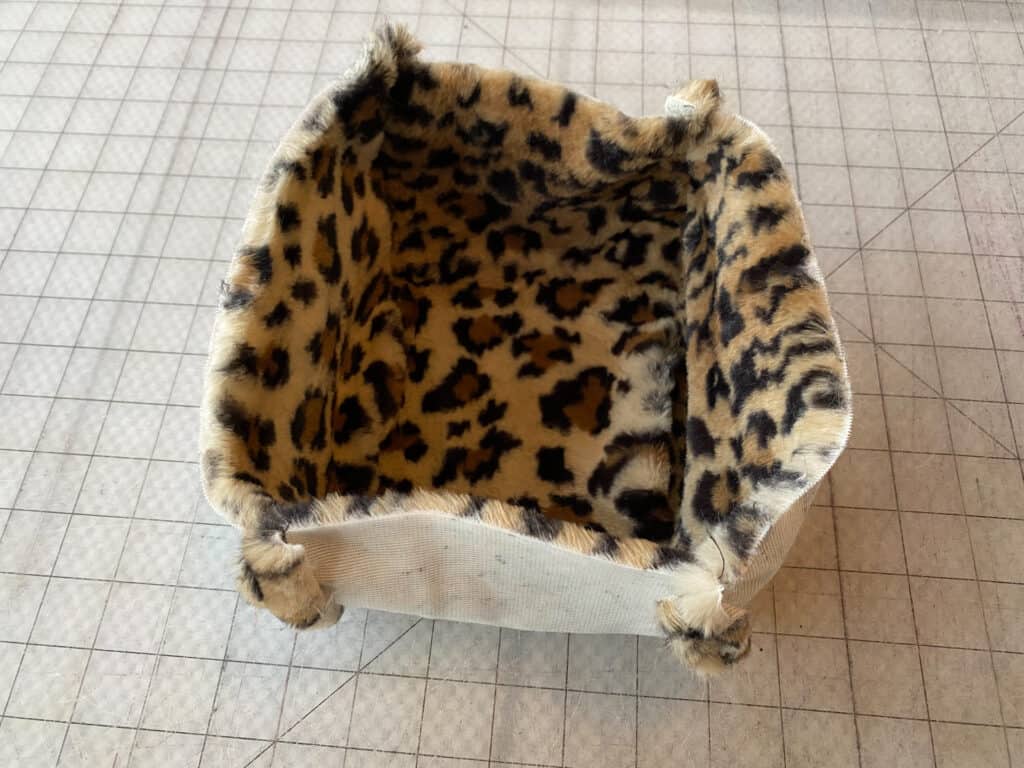
Place the lining piece (with the ear flap and front flaps basted onto it) inside of the outer cap. Tuck the flap pieces inside and align the seams against each other.
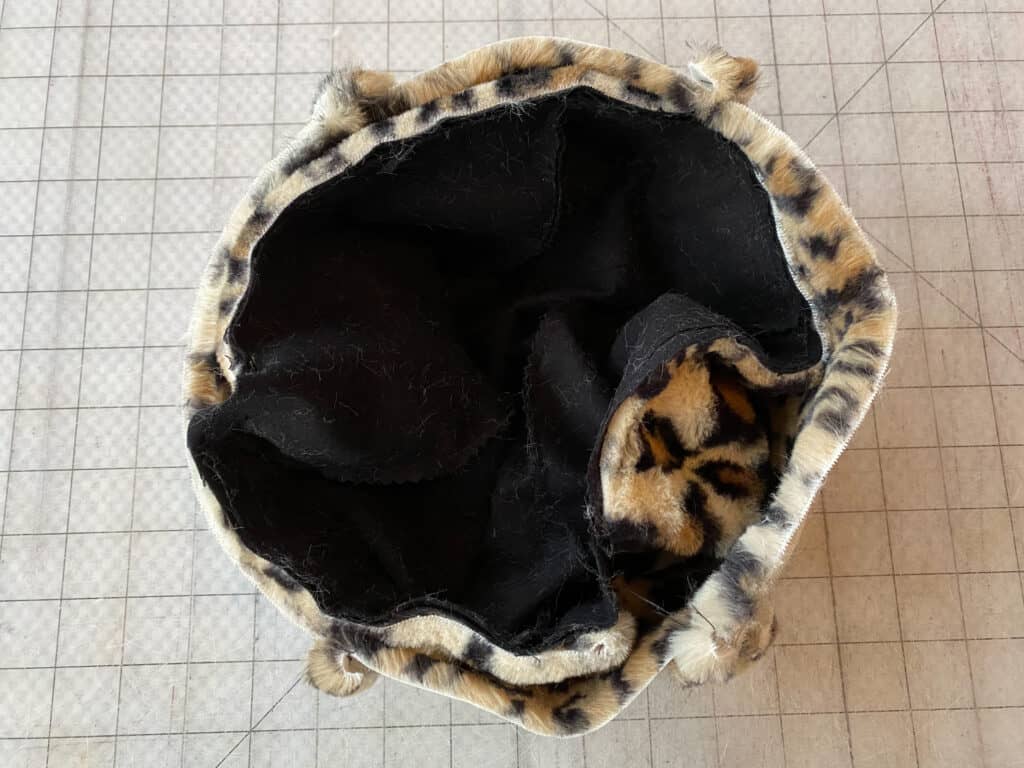
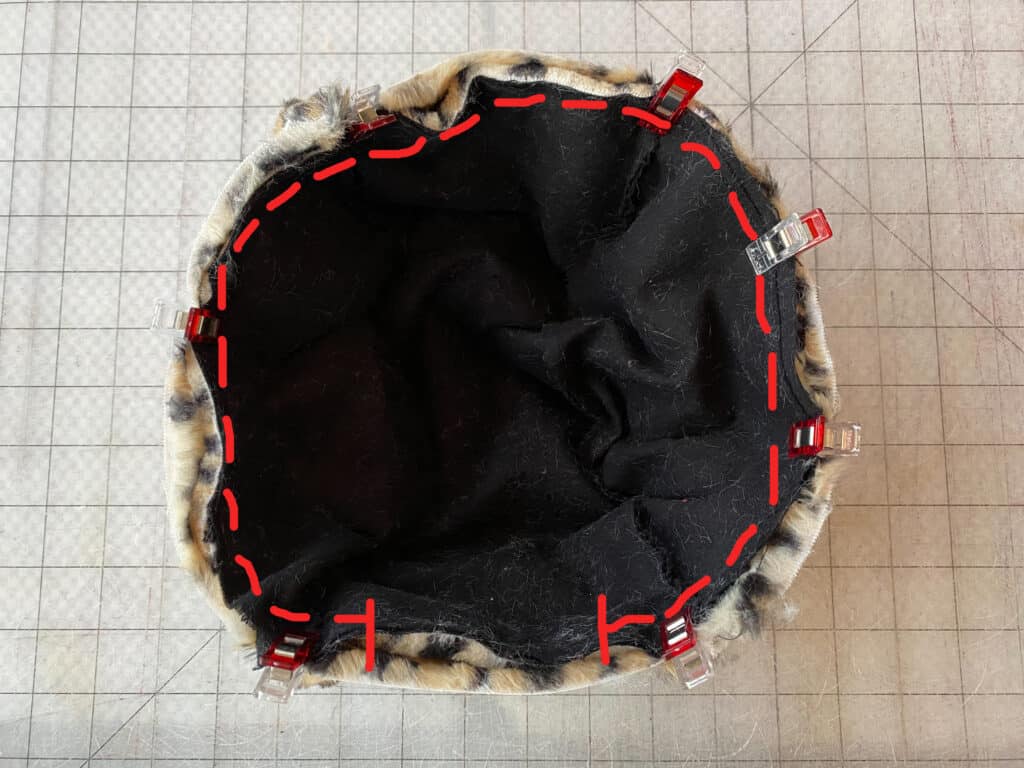
Using 1/2″ seam allowance, sew along entire circle, leaving 3″ opening for turning.
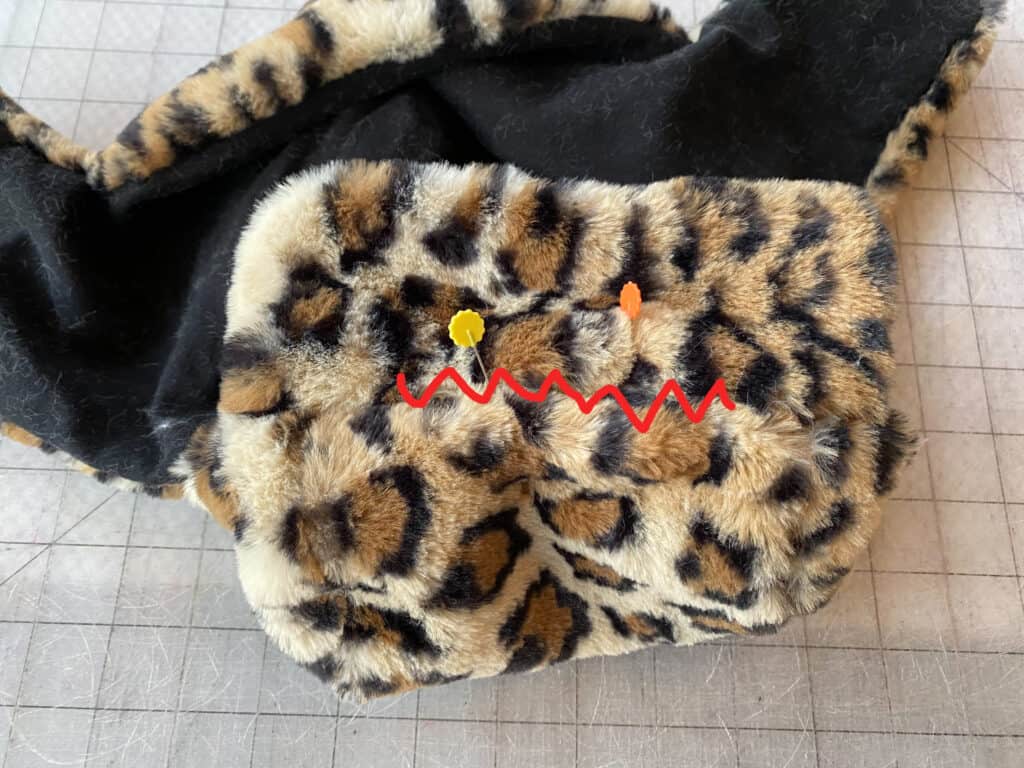
Turn right sides out. Tuck opening seam allowance in. Pin, and blind stitch the opening shut.
If desired, tack the front flap up — using buttons or a quick hand stitch.
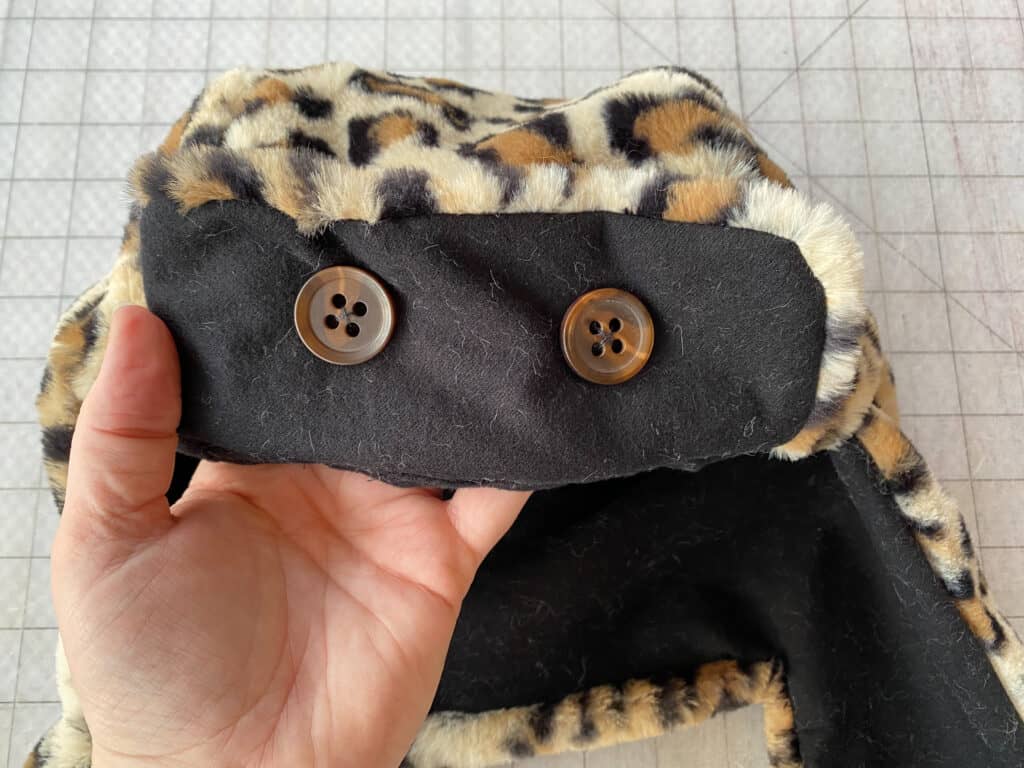
You’re finished! Go wear your new Hickory Hat and then make 10 more. You know you want to!
——–
In case you consider yourself a more “visual learner” here’s a video tutorial that walks you through the entire tutorial, start-to-finish.
Check out what our fabulous testers were able to create with this very same tutorial!


I la-la-love when you share your photos with me! Head over to the Patterns for Pirates Facebook Group and show us what you’ve made!
Happy Holidays, Pirates!

2020 Holiday Freebies :: Pirate Pillowcase Tutorial
Happy Holidays, Pirate Friends! We are excitedly back for another year and another round of holiday freebies to share with you! Over the years, we’ve compiled different tutorials and patterns that we think would make *perfect* gifts for your friends and family. Curious about what we’ve already released in the way of holiday freebies? Head right here to see all of them: Holiday Freebies Roundup.
Today, we are bringing you the: Pirate Pillowcase!!
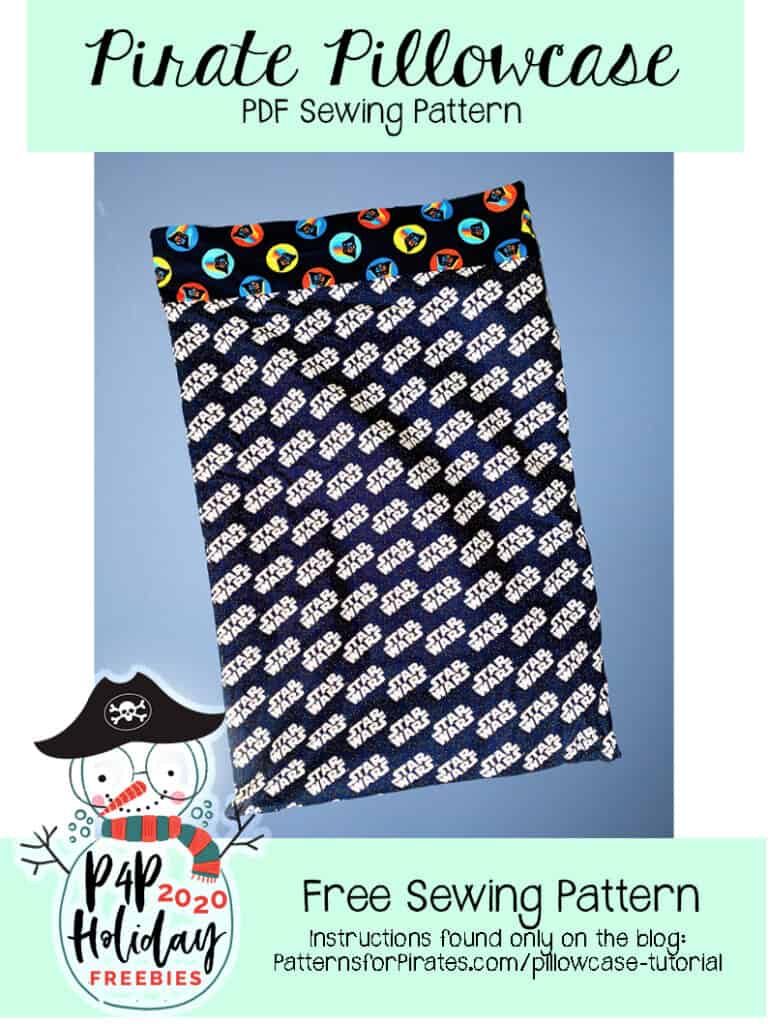
Pillowcases are such a fun, quick sew. And they make perfect gifts because they’re easy to customize to anybody’s liking. My mom used to be in a “Pillowcase of the Month Club” when I was in college and she would send me a new pillowcase each month. It was so fun to have something from home, and a fun surprise to see what fabrics she selected for me each time.
| Pillowcase Size | Cuff (L x W in inches) | Body (L x W in inches) |
|---|---|---|
| Standard | 9″ x 41″ | 23″ x 41″ |
| Queen | 9″ x 41″ | 27″ x 41″ |
| King | 9″ x 41″ | 33″ x 41″ |
You will need: 1 Cuff Piece and 1 Main Body piece.
With right sides together, align the top long edge of the main body and bottom long edge of the cuff piece.
Sew along long, raw edge, using 1/2″ seam allowance.
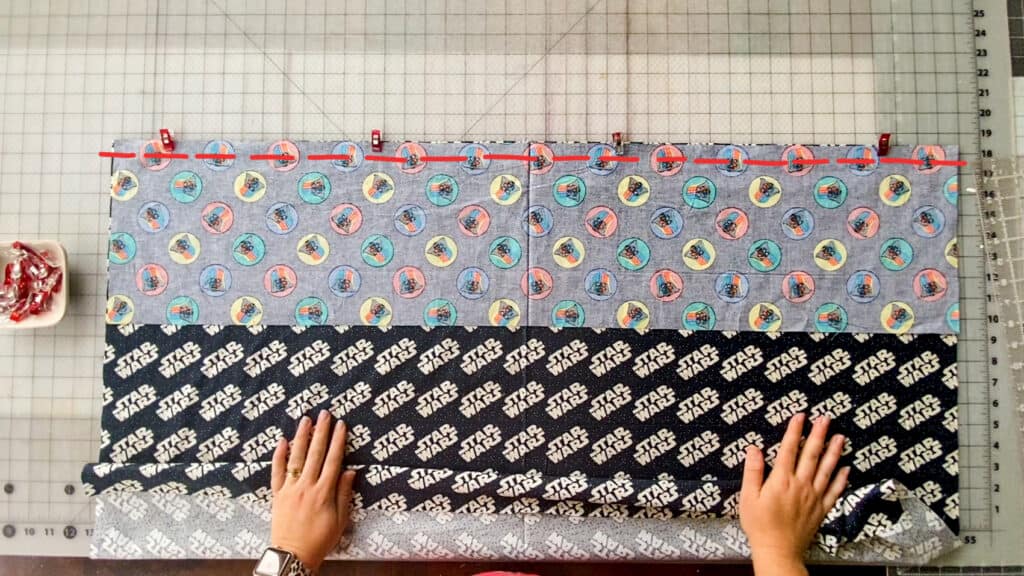
Open up the sewn pieces. Using an iron, press the seam allowance up, away from the main body.
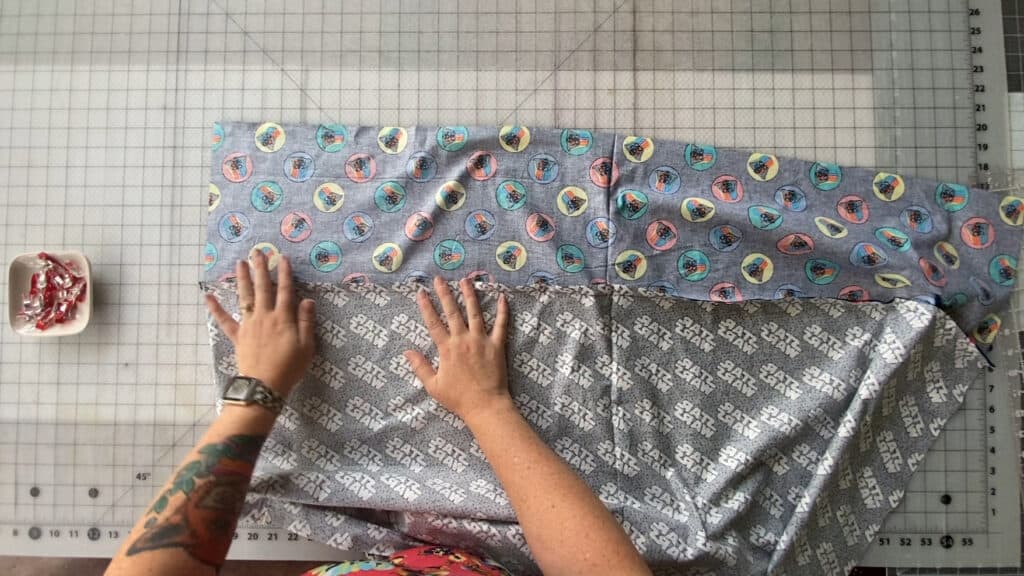
Using your iron, create a 1/2″ memory press the top raw edge of the cuff piece.
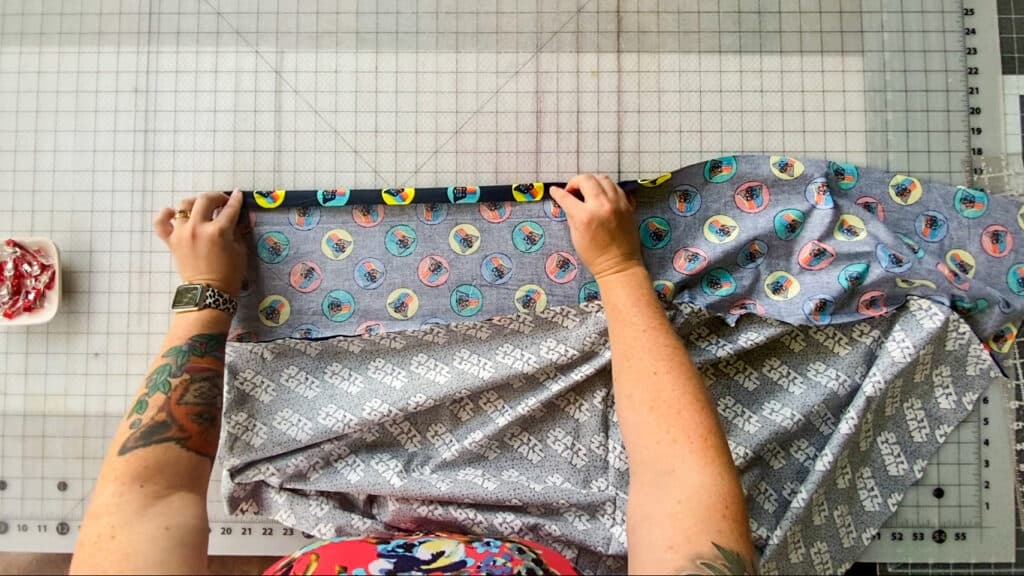
With wrong sides together, fold in half, matching the short ends together — creating your pillowcase shape.
Using 1/4″ seam allowance, sew along side and bottom seams.
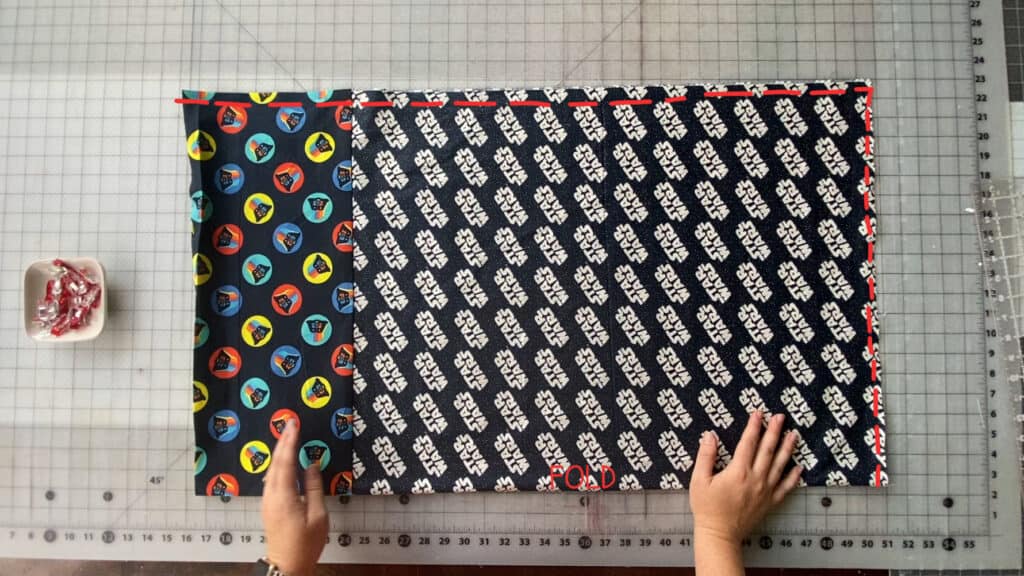
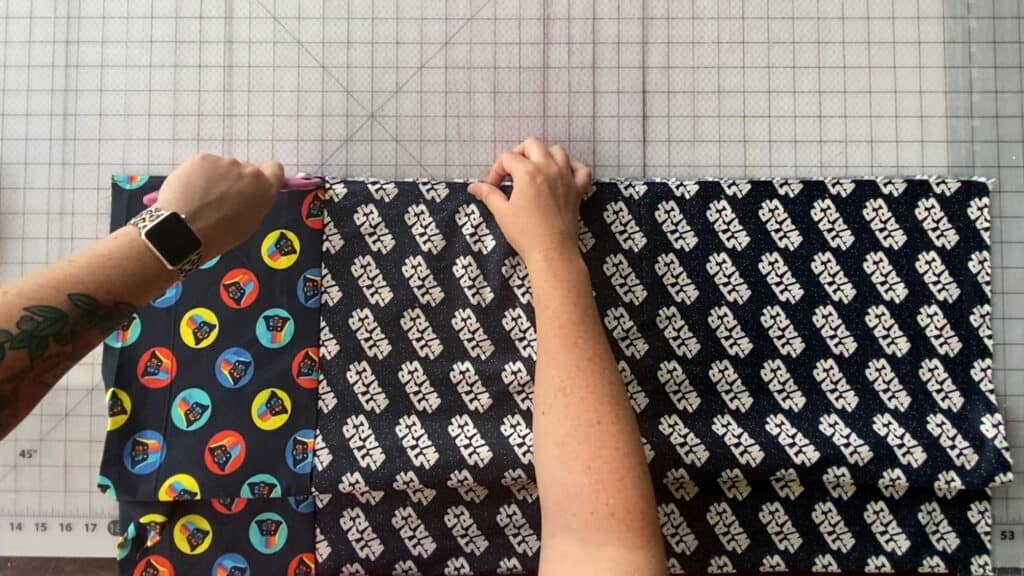
Trim seam allowance down to 1/8″. Careful not to clip through your stitches.
Turn the pillowcase inside out.
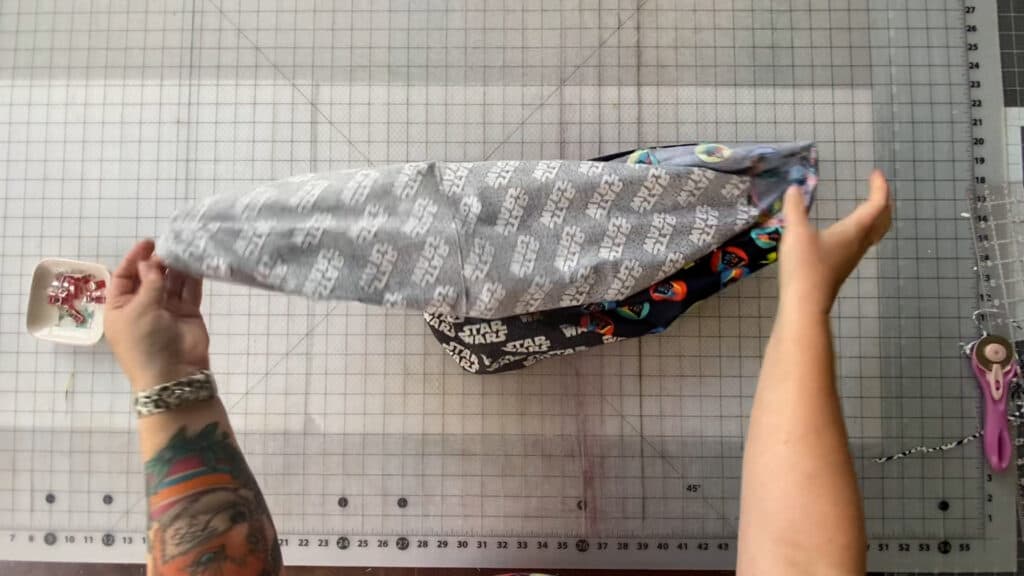
Using 1/4″ seam allowance, sew along entire bottom and side seams, enclosing all raw edges.
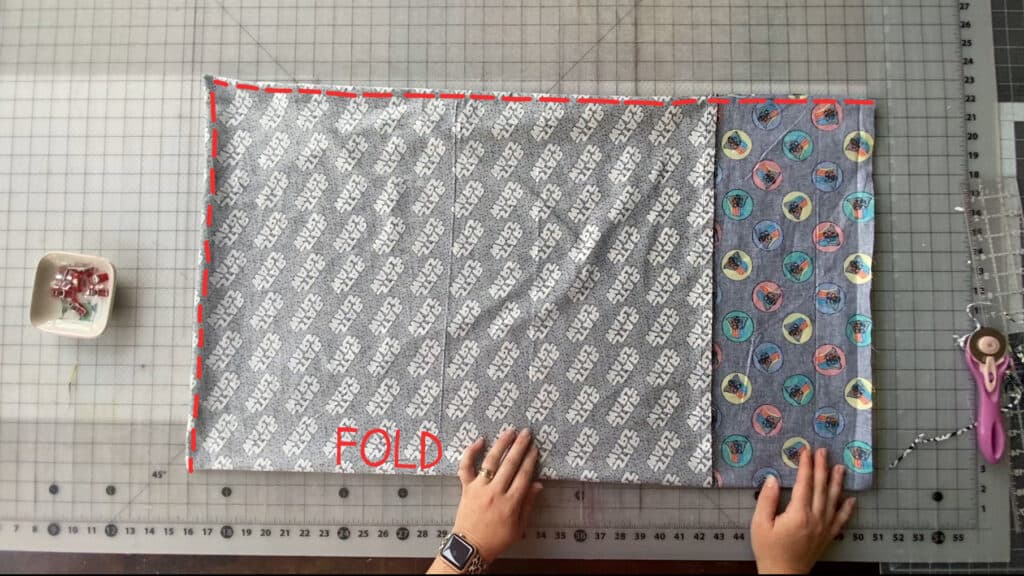
Keeping the pillowcase inside out, fold the cuff piece down toward the body.
Use the 1/2″ memory press you created earlier to fold the top raw edge under.
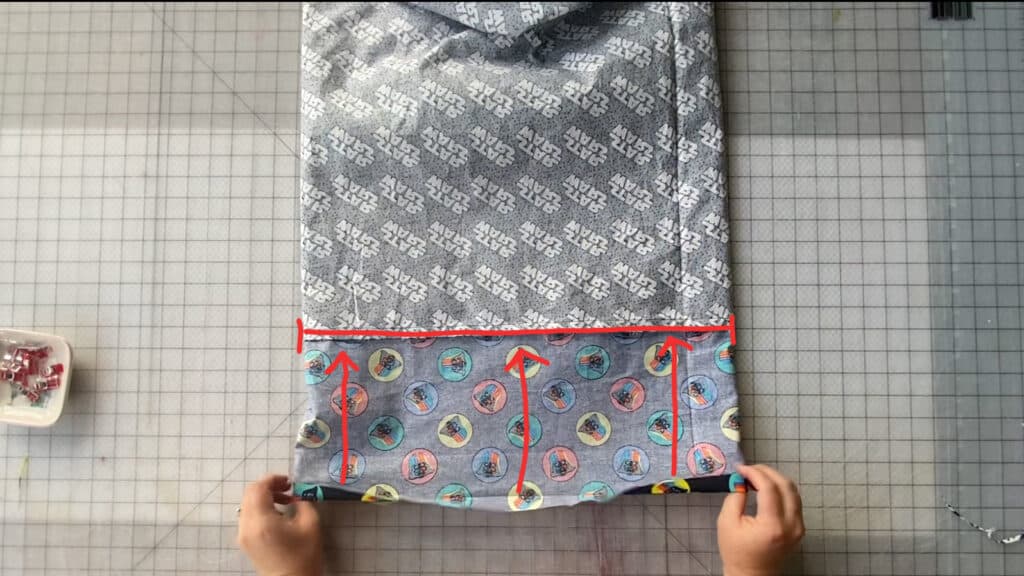
Align the folded edge along the seamline.
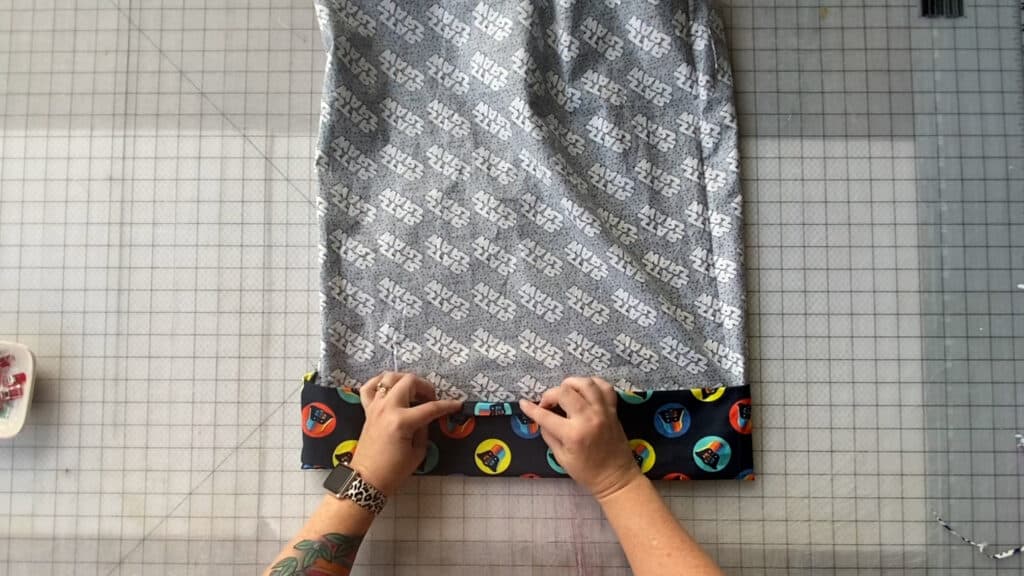
Using a scant 1/8″ stitch, topstitch around the entire cuff.
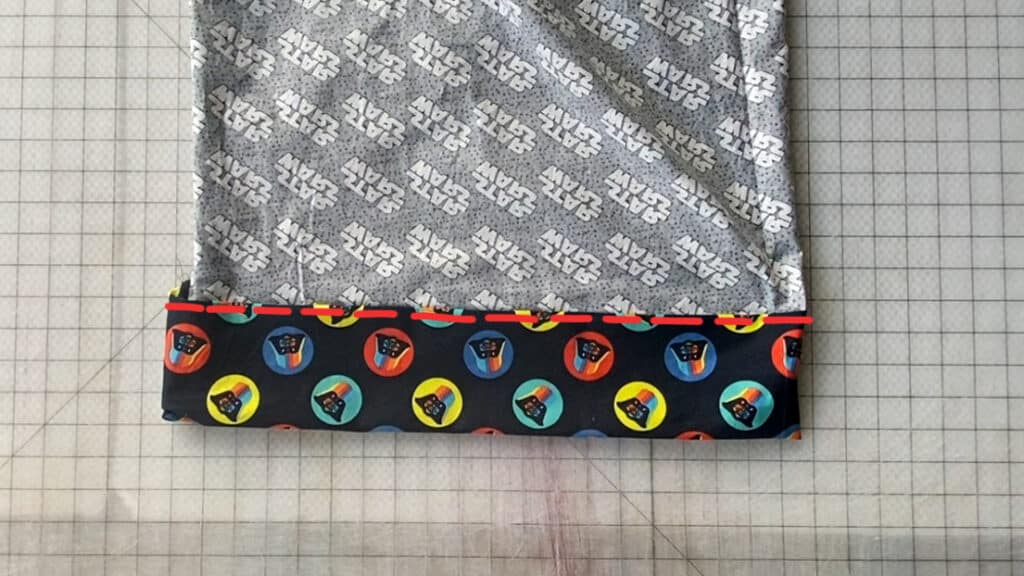
Turn the pillowcase right sides out. Press. And stuff it with a pillow! You’re done!
In case you consider yourself a more “visual learner” here’s a video tutorial that walks you through the entire tutorial, start-to-finish.
Check out what our fabulous testers were able to create with this very same tutorial!


I la-la-love when you share your photos with me! Head over to the Patterns for Pirates Facebook Group and show us what you’ve made!
Happy Holidays, Pirates!

Important Announcement :: Changes to Freebies!
Growing pains exist in so many ways, even in business. Some are easy to ignore — and some you can only ignore for so long. This is one of those “for only so long” moments. As we continue to grow, this little corner of the web continues to throw challenges our way.
Our main goal is to make every experience a great one when you visit us here. Every. Single. Visit.
After consulting with several website gurus, the best way to increase website capabilities is to adjust how our “Freebies” work. Starting January 1, 2021 (01-01-21), ALL free files will automatically expire after 30 day of purchase.
So now you’re thinking: How will this affect me?
Here are a few FAQs:
- Q: Are these patterns not free any longer?
- A: As we like to say: Freebies will always be free. They just won’t stay in your account forever. You’ve got 30 days to download them, or else you need to “purchase” them again….still for free.
- Q: What do I need to do differently?
- A: Not much. Just download your files and save them to your computer, external hard drive, tablet, cloud storage, etc. If you forget to save them somewhere, it’s not a problem. The patterns will remain in your account for 30 days before you need to “purchase” them again.
- Q: What happened to the free pattern that I “bought”? I can’t find it in my account.
- A: It’s simple….it’s been over 30 days, which means your download expired. Add it to your cart, go through the checkout process, and download it again. Easy peasy!
 If you have any questions, please feel free to email us for some extra assistance: help@patternsforpirates.com
Thank you so much for being part of our P4P family! And get ready for five full days of fun with our 2020 Holiday Freebies…starting tomorrow!
Fall Into Fashion – November 30 :: Summer Cover Up
All November long, we are looking to “Fall Into Fashion” with some sewing and style fun. As the weather cools down, fashion heats up! This time of year can provide some of the best opportunities for styling yourself.
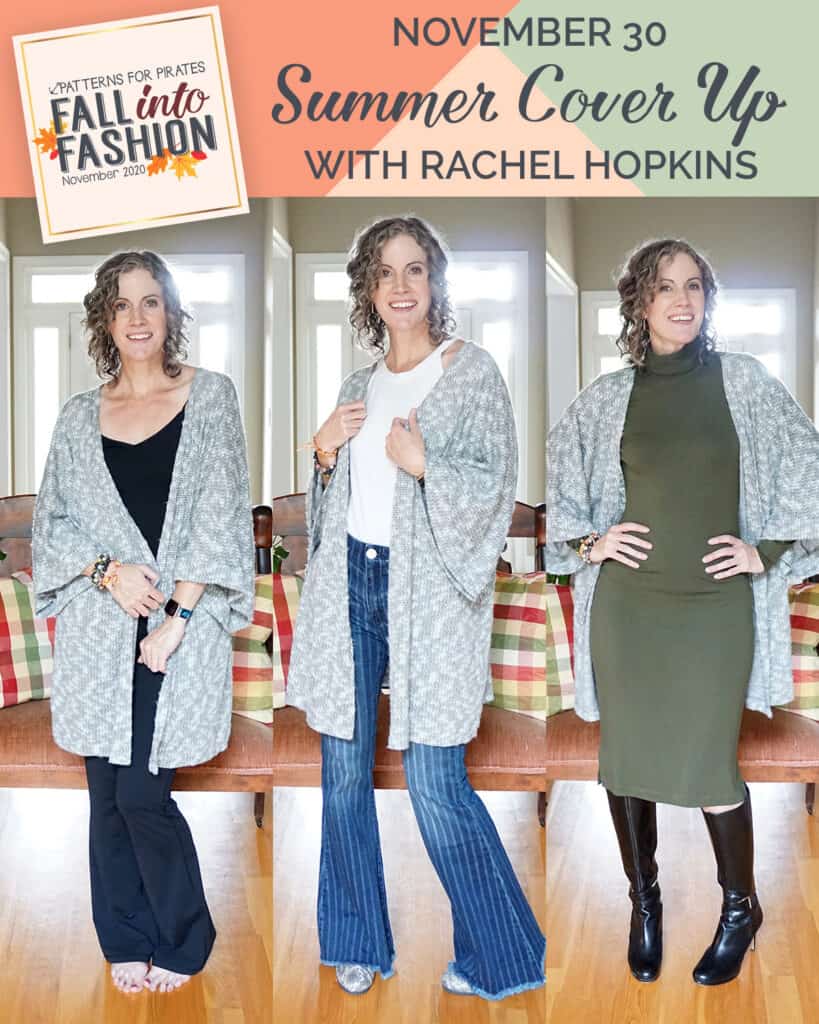
Have you ever heard the term “capsule wardrobe”? It is the practice of editing your wardrobe down to your favorite clothes (aka the items that fit your fashion sense, your body, and your lifestyle right now), remixing them regularly, and shopping/sewing less often and more intentionally.
Here at Patterns for Pirates headquarters, we thought it would be so fun to show you how to do this with your handmade wardrobe! We hired some incredible sewists from the Pirate Community and asked them to sew a pattern from our collection, and then show you how to get more wearability out of it. They are showing up each day to remix a different P4P pattern AND the pattern of the day will be on sale for that 24-hour period. So fun, right?
TODAY’S FEATURED PATTERN
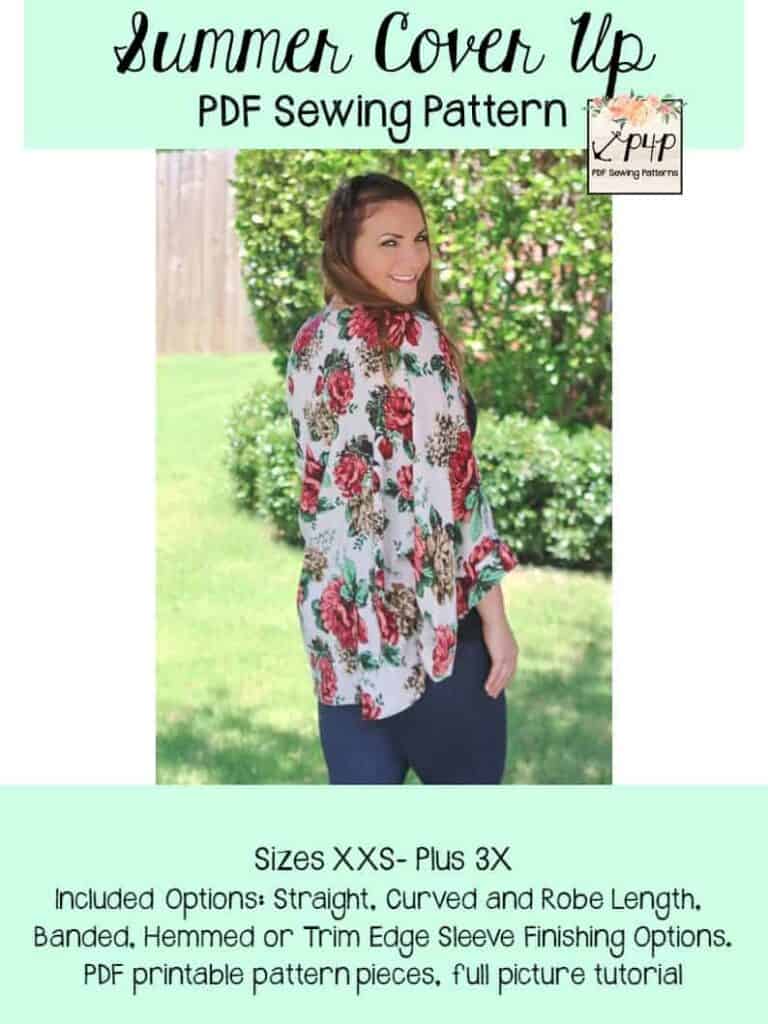
Pattern: Summer Cover Up
Quick Description: This beginner/intermediate pattern has all the style you need in a loose, flowy, comfortable cover up! The loose fit and trendy style will give you that effortless boho look with a super quick and easy sew, you will want one for everyday! Suggested fabrics are a lightweight knit, or lightweight specialty woven with a soft drape like chiffon, rayon challis, peachskin, ect. This is why I have intermediate (since these fabrics can be slightly more challenging to sew), otherwise this is a very easy, simple sew!
Includes options for straight hemline, curved hemline and robe length. Sleeves include banded, trim or hemmed options. Also includes sash option for robe/cover up.
This pattern is on sale only thru tonight, at 11:59pm CST. If you’ve had your eye on it, don’t wait to jump on the deal!
Make sure you check out Instagram and Facebook today, for more fun videos and photos from our featured sewist! But before you go, here are a few quick pics to keep you inspired!


Fall Into Fashion – November 29 :: Wiggle Dress
All November long, we are looking to “Fall Into Fashion” with some sewing and style fun. As the weather cools down, fashion heats up! This time of year can provide some of the best opportunities for styling yourself.
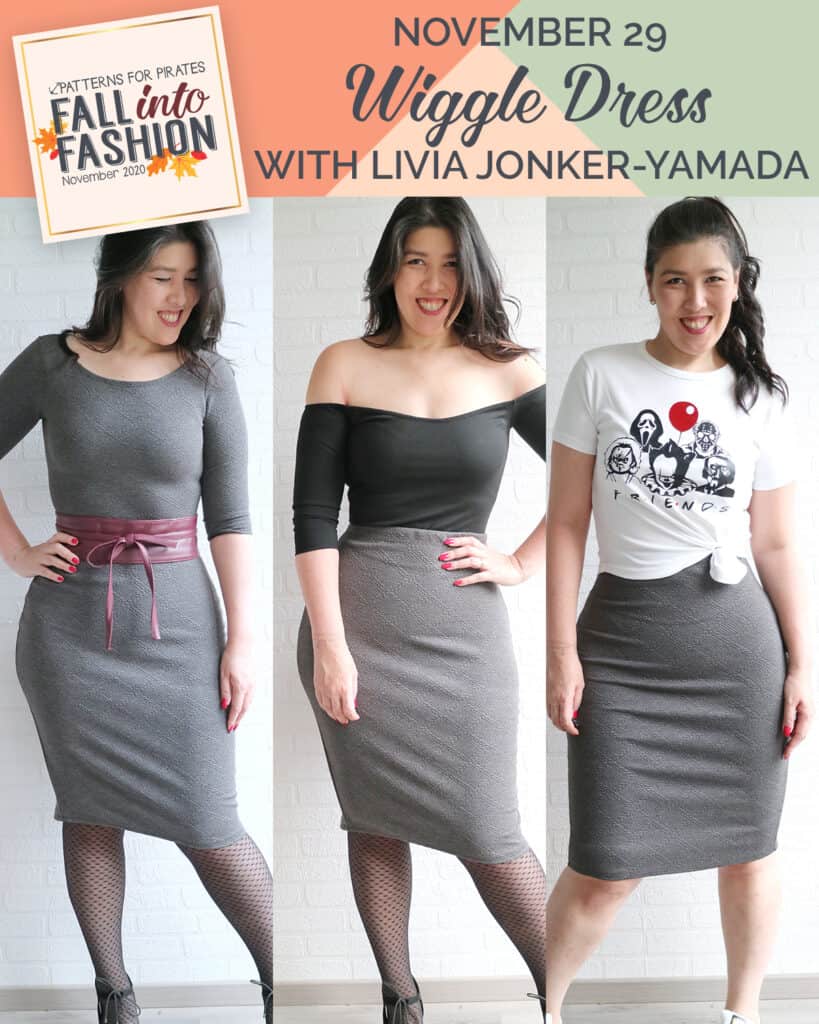
Have you ever heard the term “capsule wardrobe”? It is the practice of editing your wardrobe down to your favorite clothes (aka the items that fit your fashion sense, your body, and your lifestyle right now), remixing them regularly, and shopping/sewing less often and more intentionally.
Here at Patterns for Pirates headquarters, we thought it would be so fun to show you how to do this with your handmade wardrobe! We hired some incredible sewists from the Pirate Community and asked them to sew a pattern from our collection, and then show you how to get more wearability out of it. They are showing up each day to remix a different P4P pattern AND the pattern of the day will be on sale for that 24-hour period. So fun, right?
TODAY’S FEATURED PATTERN
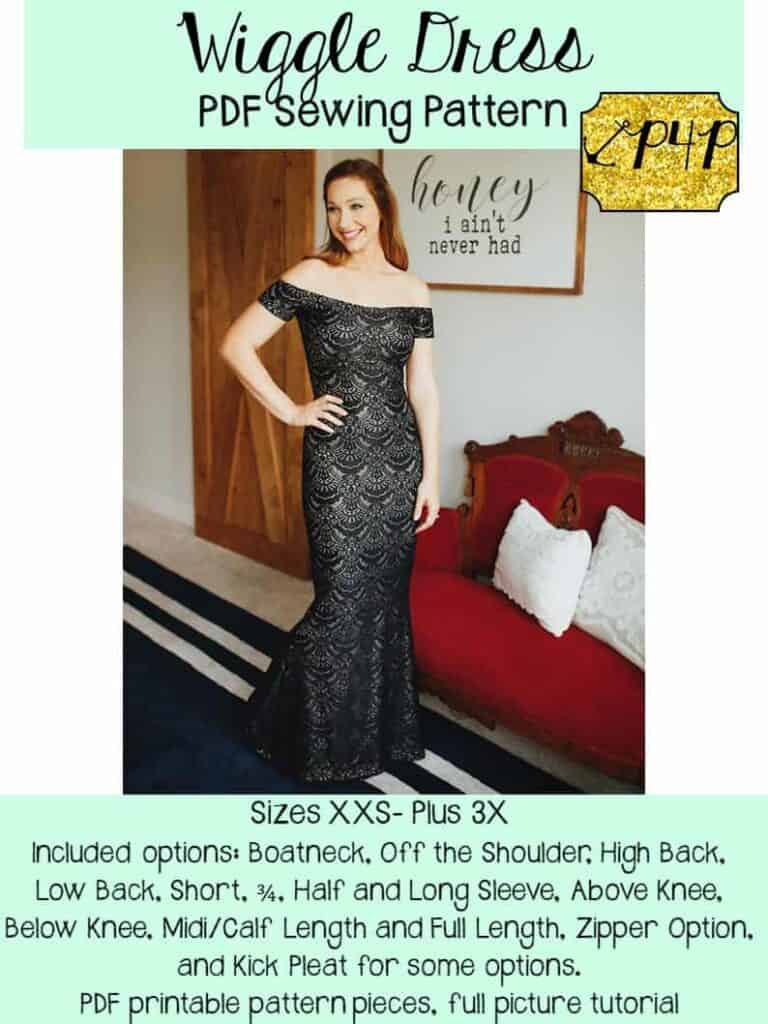
Pattern: Wiggle Dress
Quick Description: This classic, tight fit pencil dress can be an everyday dress in a more casual knit, or a real show stopper in the floor length and a structured knit! It is drafted for a more stable knit like ponte roma, stretch velvet, stretch lace, liverpool, but you can also use a more casual double brushed polyester, thicker sweater knit, or a spandex blend french terry.
It has a center seam along the back from a close fit along your curves. Some lengths include a kick pleat for walking ease. You can put in a zipper to make it easier to get on and off or leave it off and wiggle in and out of it 😉 . The traditional set in sleeves and off the shoulder both come with short sleeve, half sleeve, 3/4 sleeve and long sleeve to make sure you can sew it up for all seasons. Lengths include a crop at natural waistline, top at full hip, just above knee, just below knee, midi/calf length and the stunning floor length that has a mermaid flare at the bottom for such a flattering silhouette.
This pattern is on sale only thru tonight, at 11:59pm CST. If you’ve had your eye on it, don’t wait to jump on the deal!
Make sure you check out Instagram and Facebook today, for more fun videos and photos from our featured sewist! But before you go, here are a few quick pics to keep you inspired!


Fall Into Fashion – November 28 :: Twist Back Top
All November long, we are looking to “Fall Into Fashion” with some sewing and style fun. As the weather cools down, fashion heats up! This time of year can provide some of the best opportunities for styling yourself.

Have you ever heard the term “capsule wardrobe”? It is the practice of editing your wardrobe down to your favorite clothes (aka the items that fit your fashion sense, your body, and your lifestyle right now), remixing them regularly, and shopping/sewing less often and more intentionally.
Here at Patterns for Pirates headquarters, we thought it would be so fun to show you how to do this with your handmade wardrobe! We hired some incredible sewists from the Pirate Community and asked them to sew a pattern from our collection, and then show you how to get more wearability out of it. They are showing up each day to remix a different P4P pattern AND the pattern of the day will be on sale for that 24-hour period. So fun, right?
TODAY’S FEATURED PATTERN

Pattern: Twist Back Top
Quick Description: This pattern is a quick and simple sew that will impress! It has a dropped dolman sleeve style with a loose, slouchy fit throughout the sleeves and body. It is semi-fitted through high hip. The tank option makes for a great work out or summery top. It also includes a short sleeve dolman sleeve you can add a bit more coverage with, but still keep cool in those warmer months. You can add long sleeves and create a super fun sweater or pull over for the colder months. The extra long sleeve length will make you feel like curling up and snuggling! This pattern includes both a tank neckline that is a classic crew and a wider neckline for the sleeved options. You can choose to add a back shoulder strap to keep the shoulders where they should be, or you can leave it off and have an off the shoulder style with wider neckline on the sleeved options…hello sexy, slouchy sweater.
This pattern is on sale only thru tonight, at 11:59pm CST. If you’ve had your eye on it, don’t wait to jump on the deal!
Make sure you check out Instagram and Facebook today, for more fun videos and photos from our featured sewist! But before you go, here are a few quick pics to keep you inspired!


- « Previous Page
- 1
- …
- 20
- 21
- 22
- 23
- 24
- …
- 67
- Next Page »


