Kelli Dress Hacks
Straight Cut Skirt
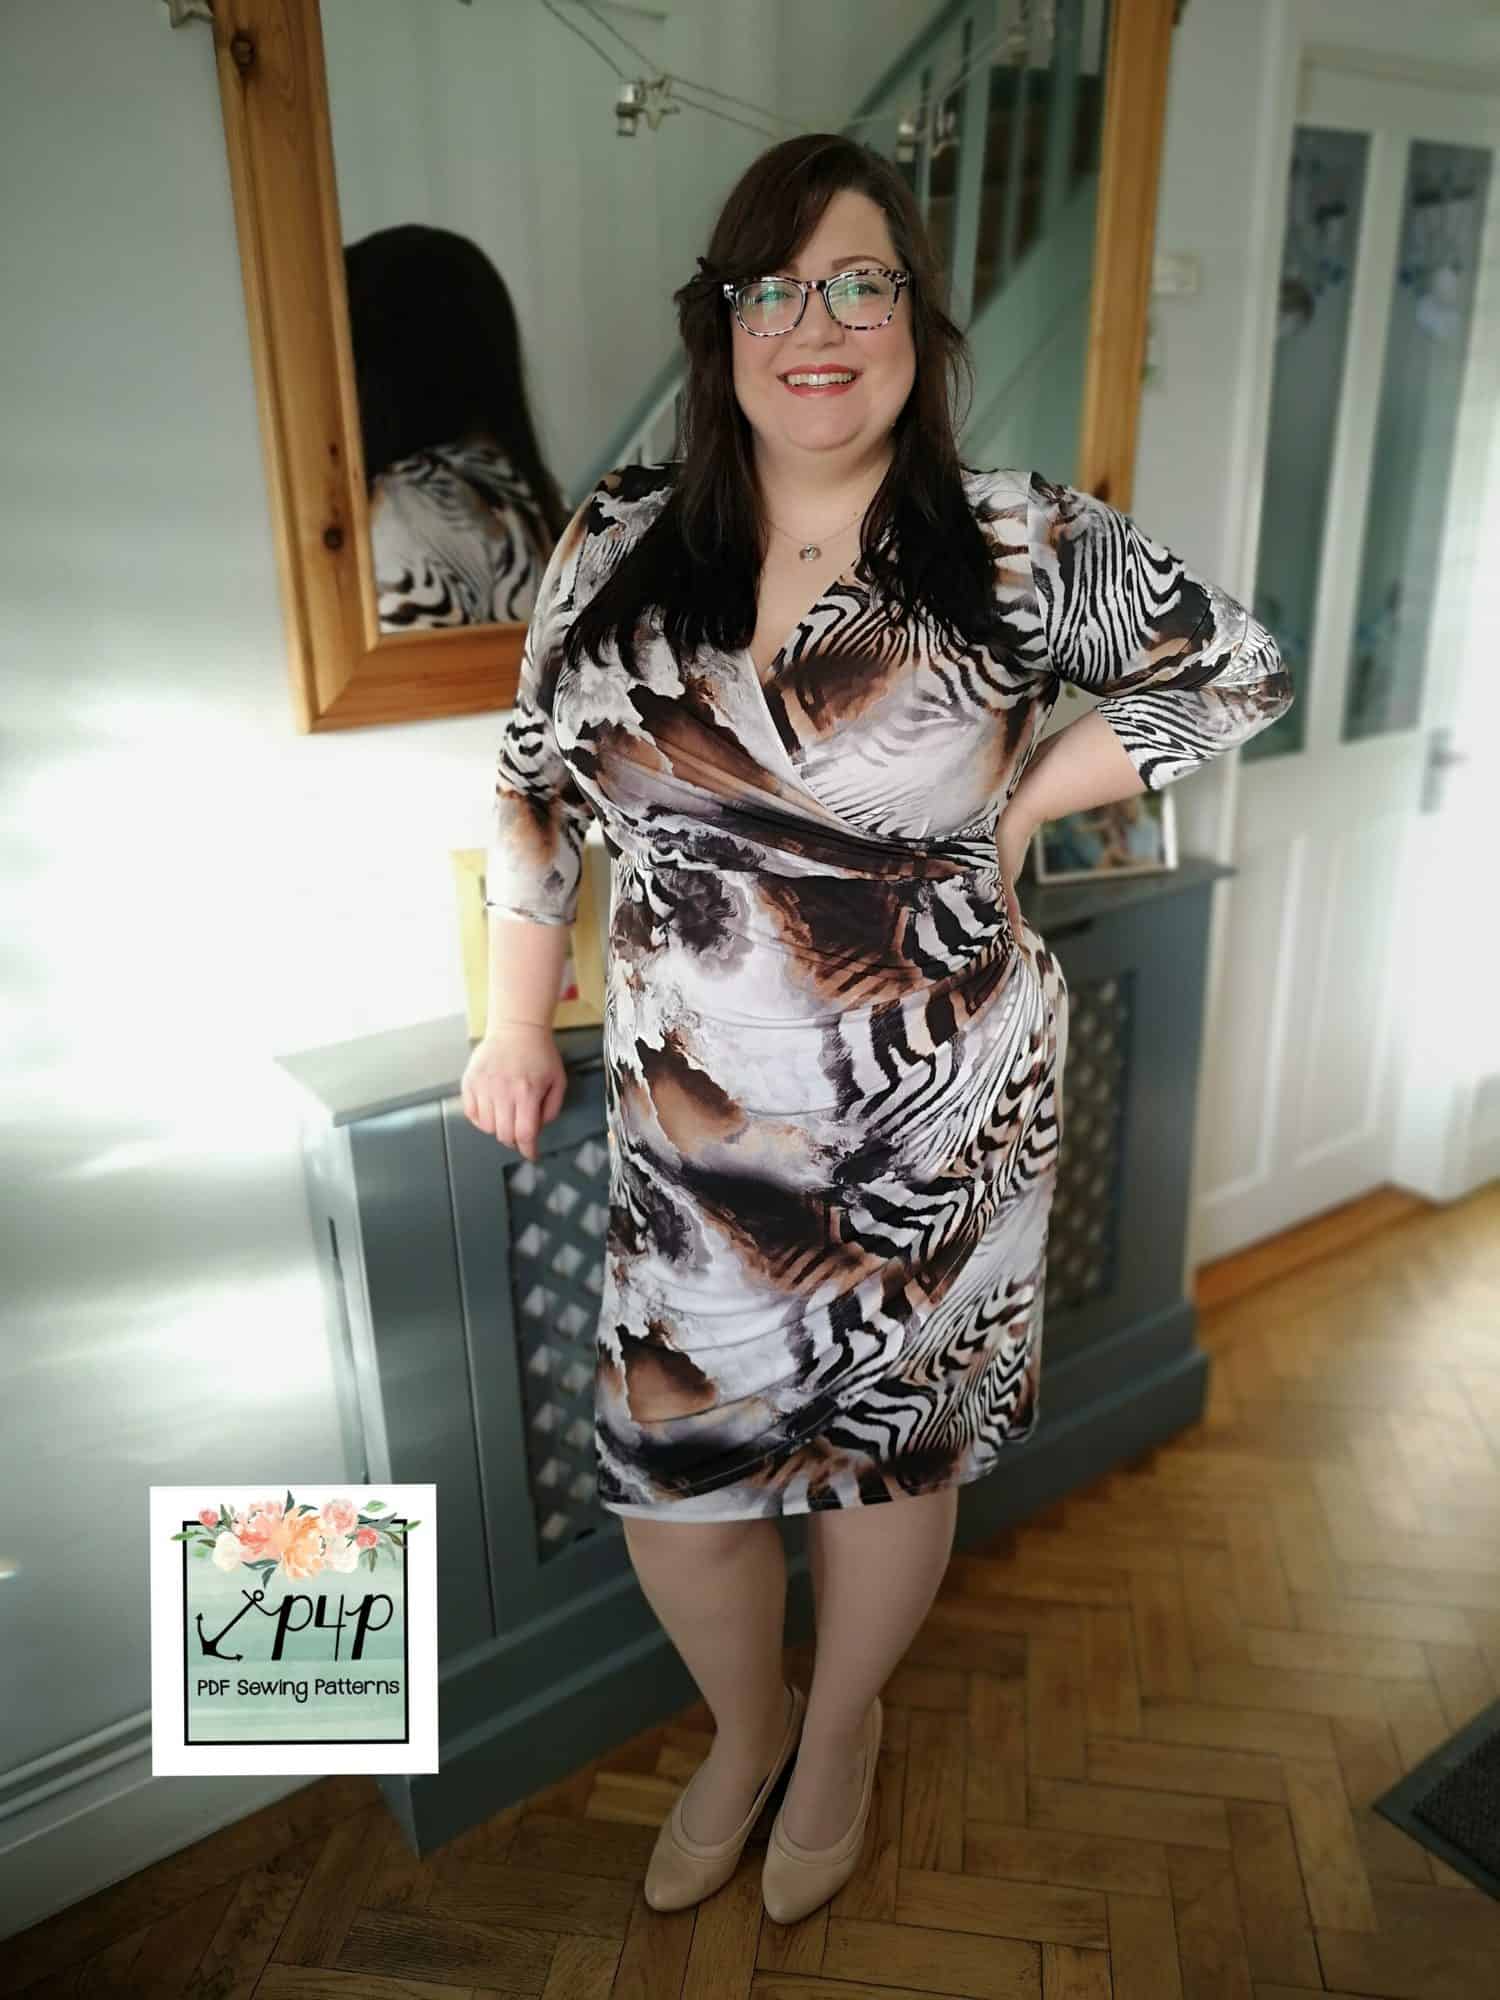
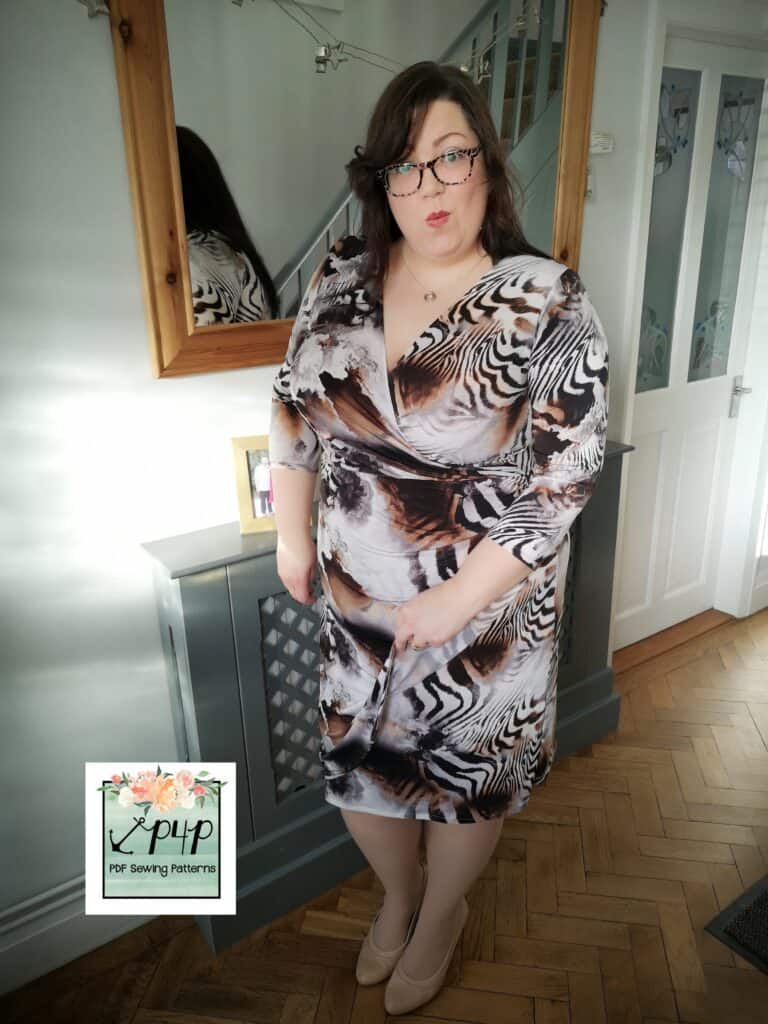
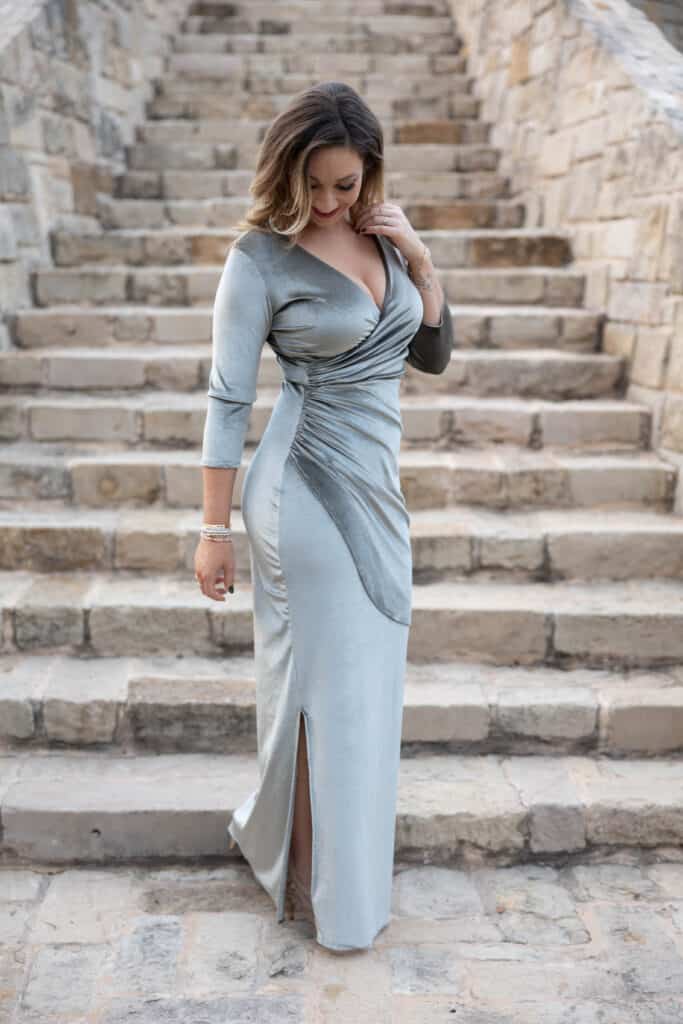
I absolutely had to make this dress as soon as I saw Judy’s first sketches for the pattern. I love the cinched in waist and wrap over top and skirt, it’s just my kind of look. Sometimes it’s nice to have a little more coverage on a skirt, though, and I knew I wanted to try a really simple little hack to straighten the bottom edge of the underskirt piece, for a faux wrapover look.
The option is included for the full length skirt pieces, so it was the easiest hack to do and got me just the look I wanted for me.
The rest of the pattern is cut out as normal, the only piece we will be adjusting is the underskirt piece (the un-ruched skirt piece).
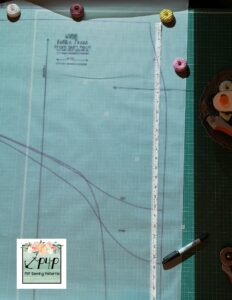
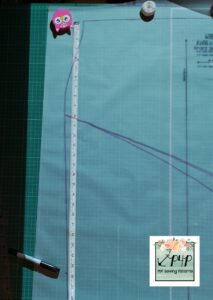
I was making the knee length, so I simply measured from the top of the skirt down to the knee length cut line on the right of the skirt pattern piece. Then I took that measurement (for me making the plus 2X size it was 25 3/4″), and used it to measure down the same length on the left side, using the full length skirt piece as a guide.
I am projecting onto tracing paper here to make it easier for you to see, as my fabric was a bit busy!
Then just draw a straight line across the bottom of the pattern piece to create your new straight hem skirt piece.
If you are using a projector, like me, you can also bring up the handy measurement grid included with the file for calibration, and use that as a guide for drawing a nice straight line across the pattern piece.
As I said, this is the only pattern piece that needs adjusting. Then just sew up your dress as per the tutorial for the pattern, until you get to the instructions for the skirt pieces.
Follow the instructions for the floor length skirt pieces and hem the bottom of the ruched skirt piece, then gather the side as per the tutorial. Next construct the back skirt and then hem both the back and un-ruched skirt pieces (the piece we adjusted) separately.
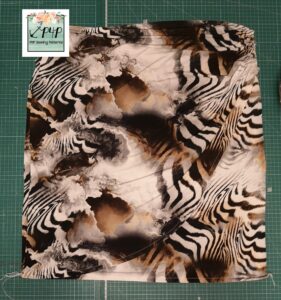
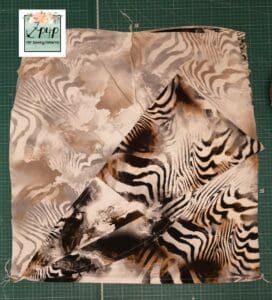
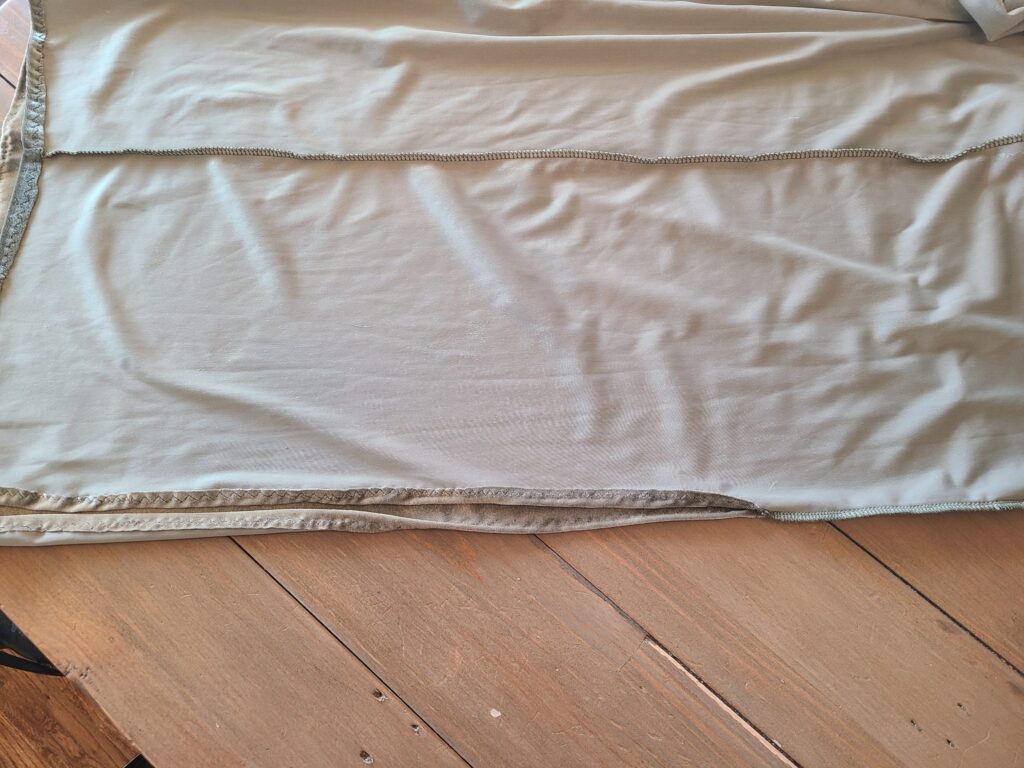
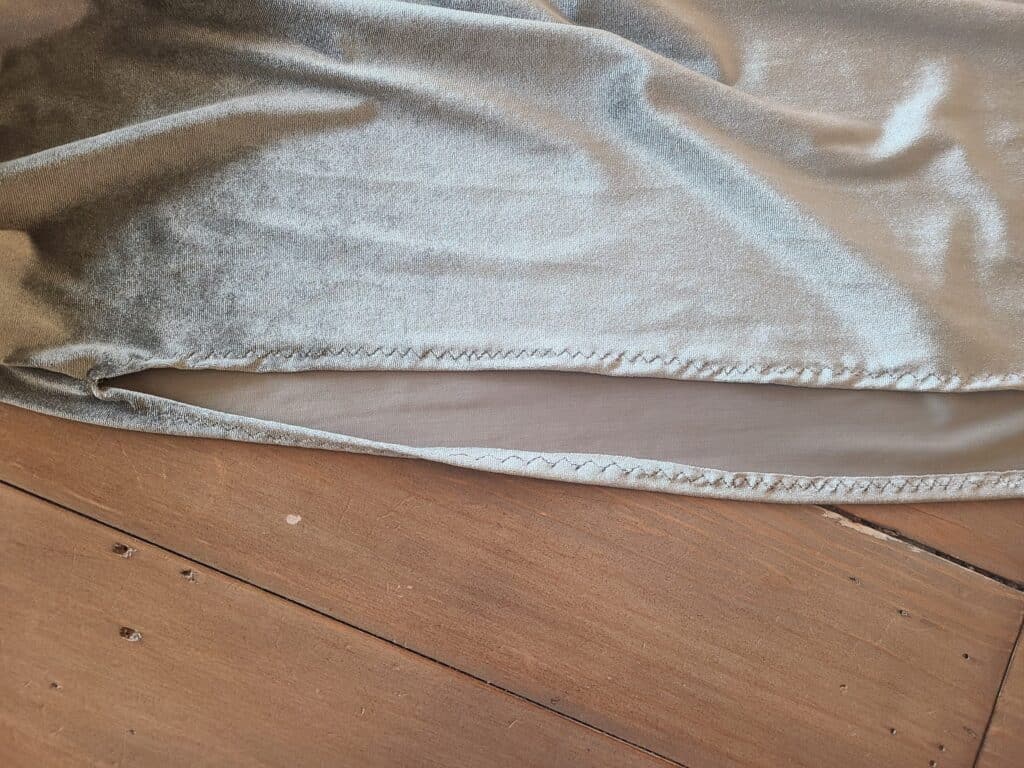
Finally, lay the un-ruched skirt piece facing up. Then lay the ruched skirt piece facing up on top of it. Baste them together along the top and sides, making sure the hems line up nicely with one another. Here is a picture of the ruched skirt piece laying on top of the un-ruched skirt piece prior to basting.
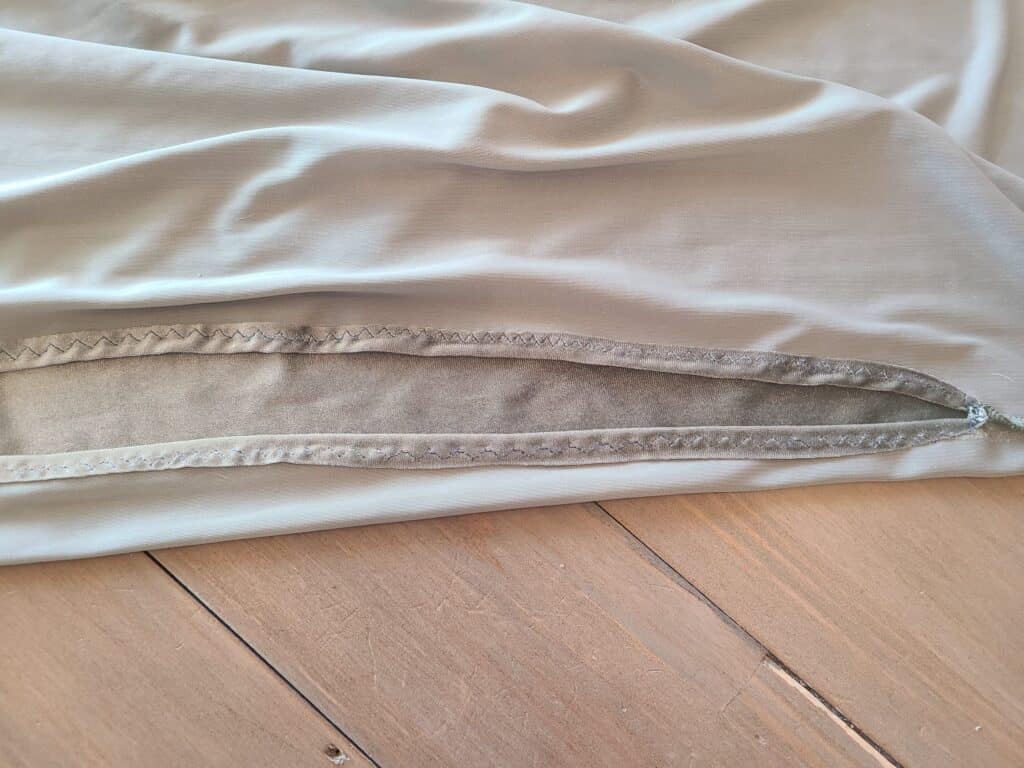
Lastly, you will want to lay your back skirt piece, right side facing down on top of the two front skirt pieces. Here pictured below with the bottom corner flipped up so you can more easily see the layers.
Sew the side seams, taking care to make sure the hems all line up together nicely. Basting the first inch of each side seam at the hemline can help with that.
Flip the skirt through right sides out, and finish the construction of the waist seam as the tutorial instructs and you’re done!
Nice and quick and easy. I hope you love your new straight hem skirt as much as I do mine (which is quite a lot!)
Happy Sewing!
Dana xxx
Side Seam Splits for Floor Length with No Slit
If you feel like you need a little more stride/walking room in the floor length with no split you can easily add a side split (or apply this same method to the back seam for a back slit).
Simply stop stitching the side seams of the skirt where you would like the slits to go to. Press remaining 1/2″ seam allowance not sewn to wrong side and hem.
It’s that’s simple! Now enjoy your extra walking room in your floor length dress!
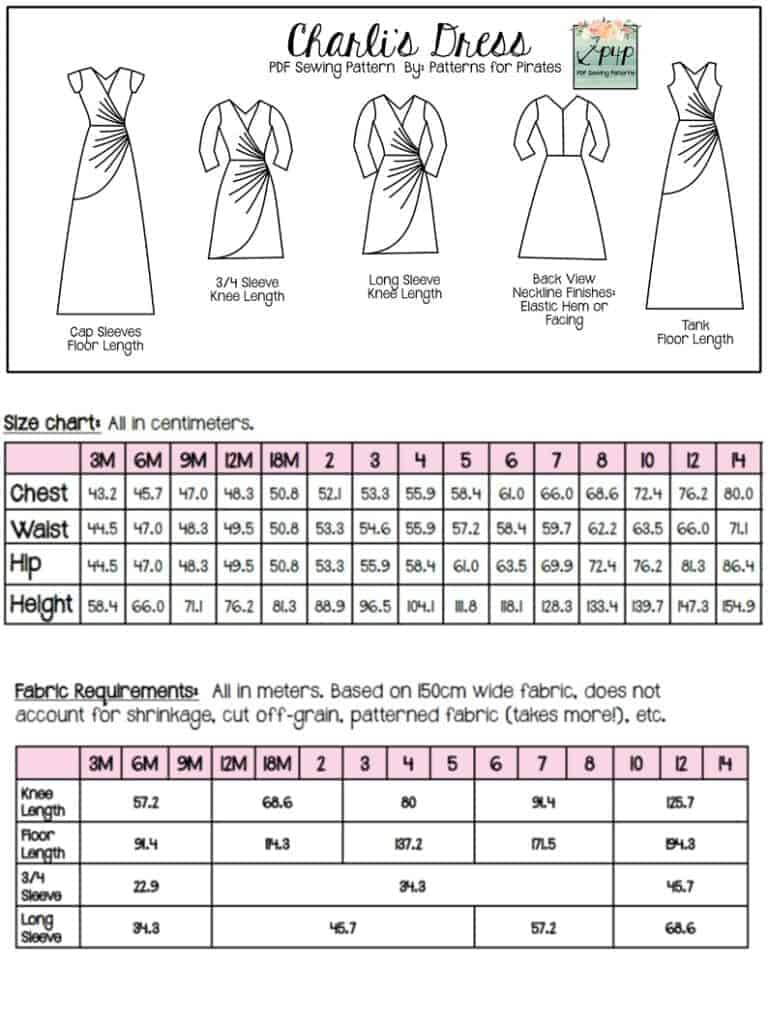
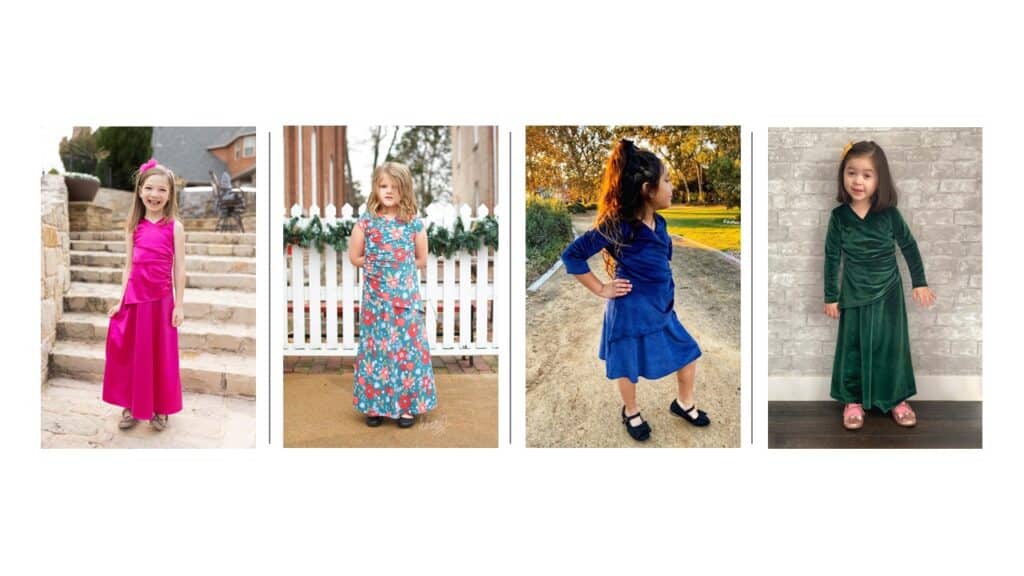
New Pattern Release :: Kelli and Charli’s Dress
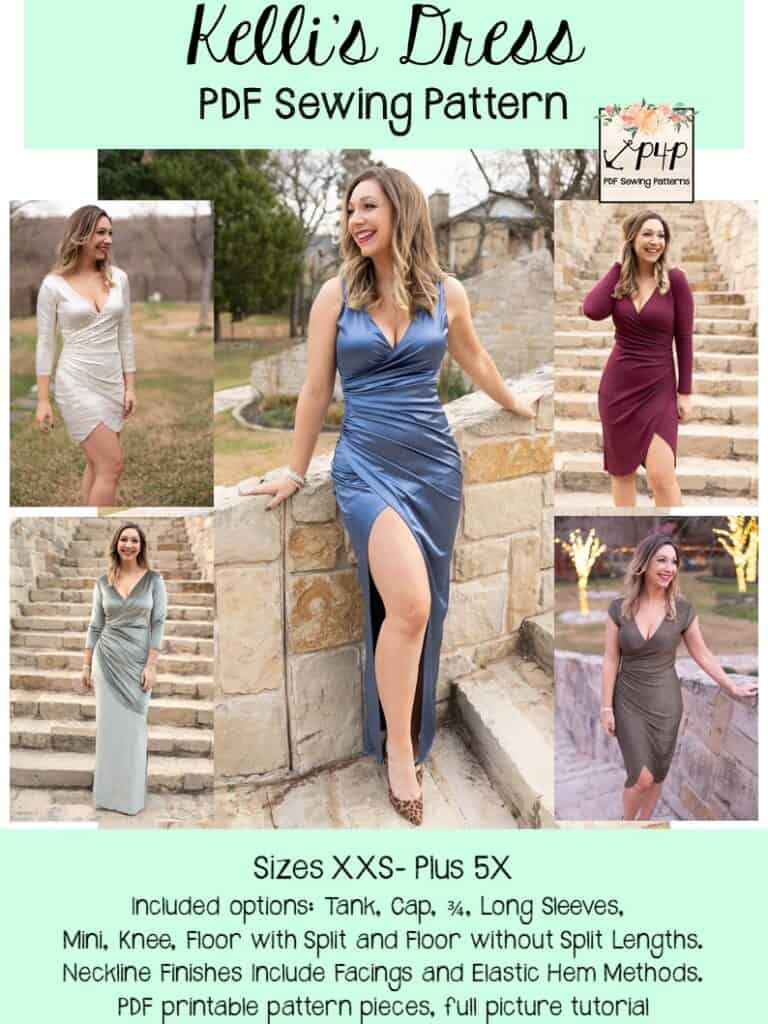
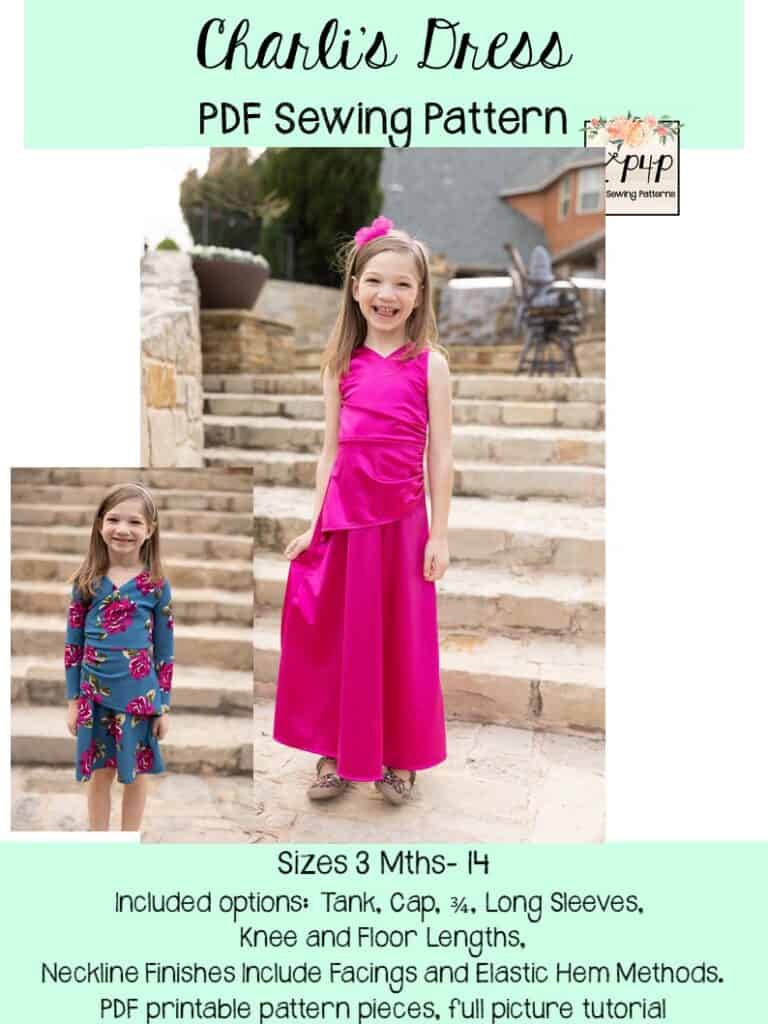
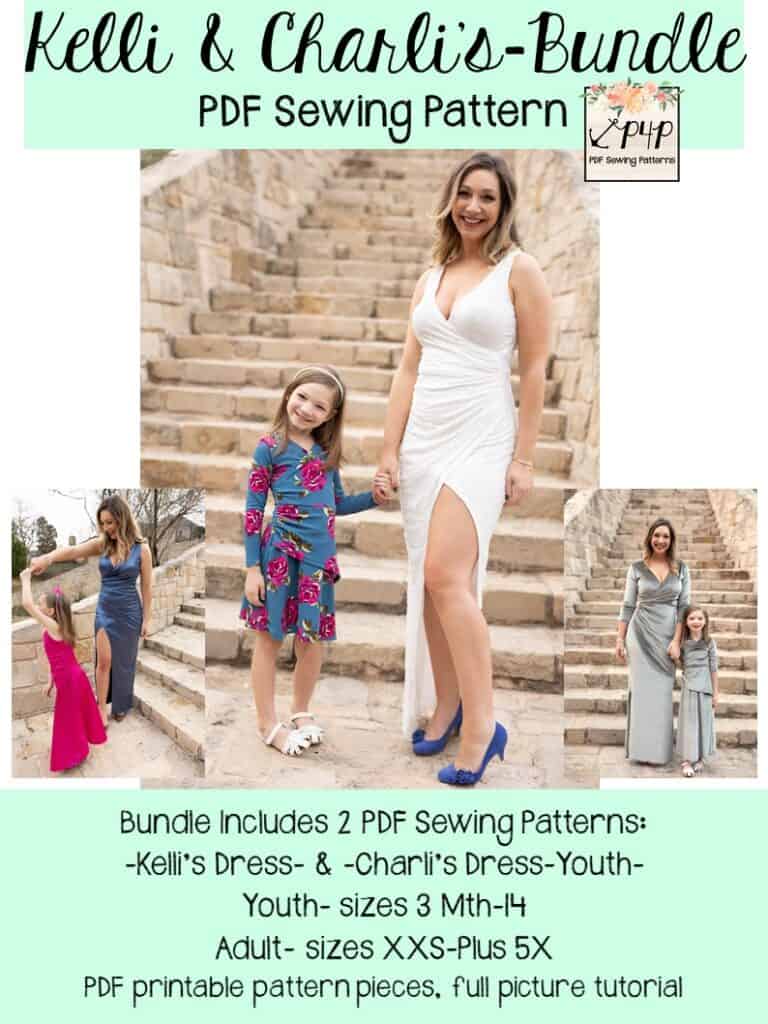
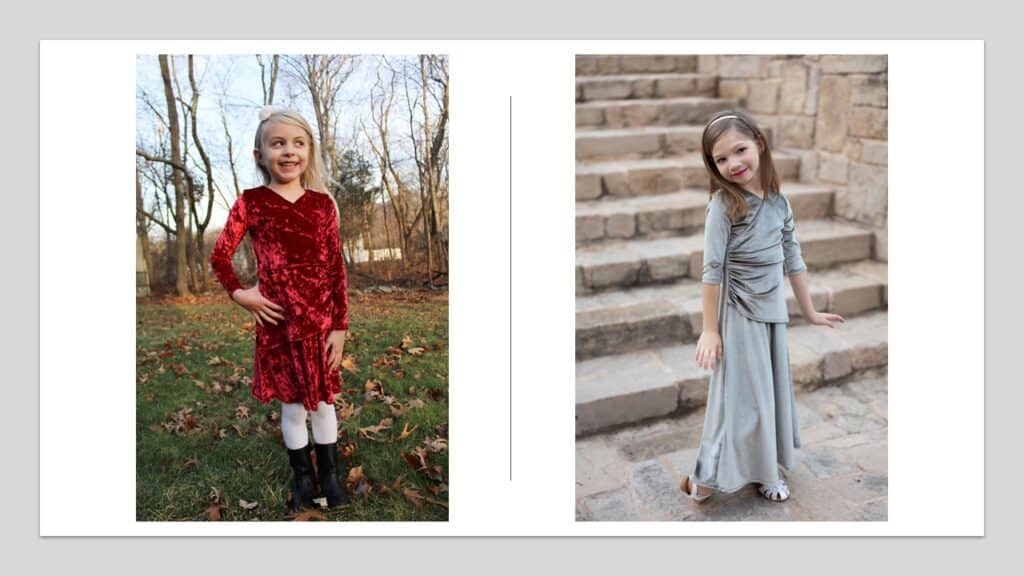
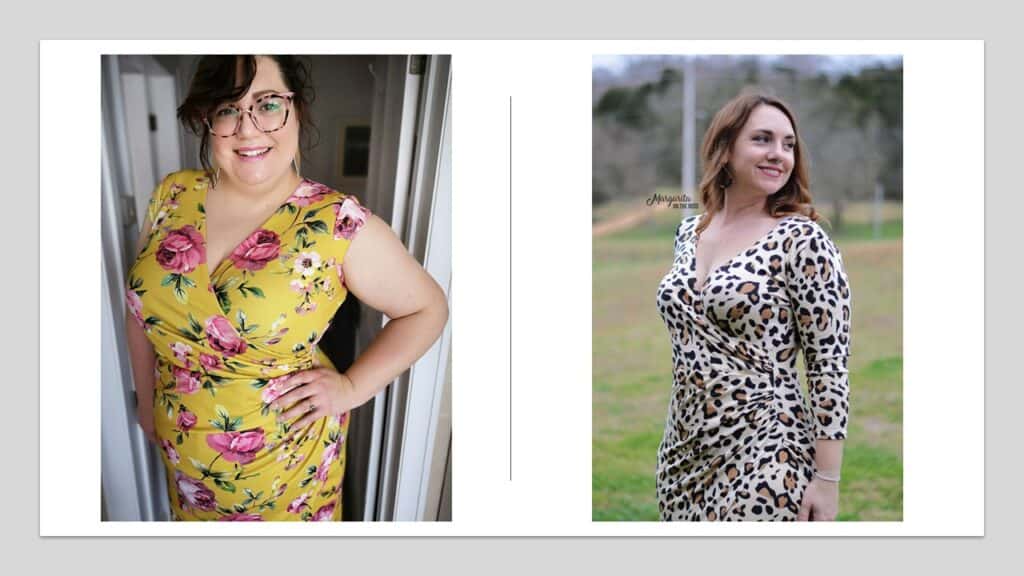
We’re starting of 2022 with a bang! The Kelli’s and Charli’s Dress pattern will have you feeling fabulous and glamorous throughout the year! When I put on the Kelli’s Dress I cannot help but strike a pose and smile… and I hope you feel the same when you put yours on! 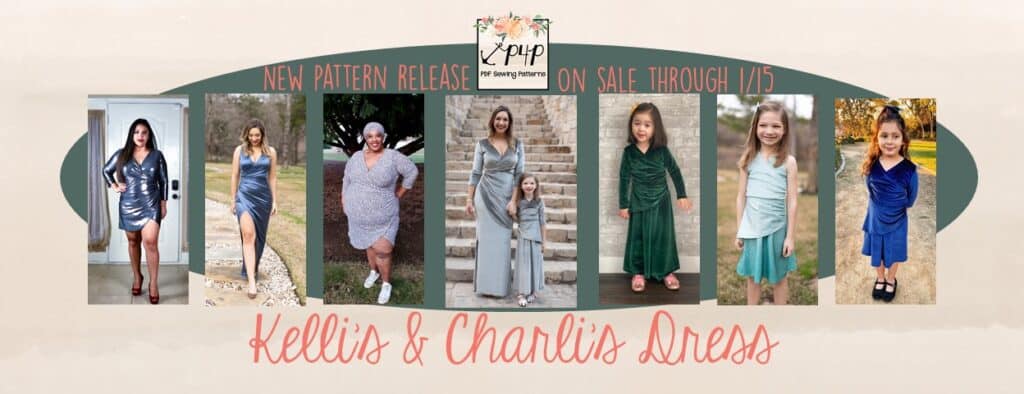 The Kelli’s and Charli’s Dresses have a beautiful gathered detail to the wasitline that gives a lovely and flattering line. You can grab those thinner, dressier knits that aren’t stable enough for wiggles and galas and now have the perfect dress to use them on!
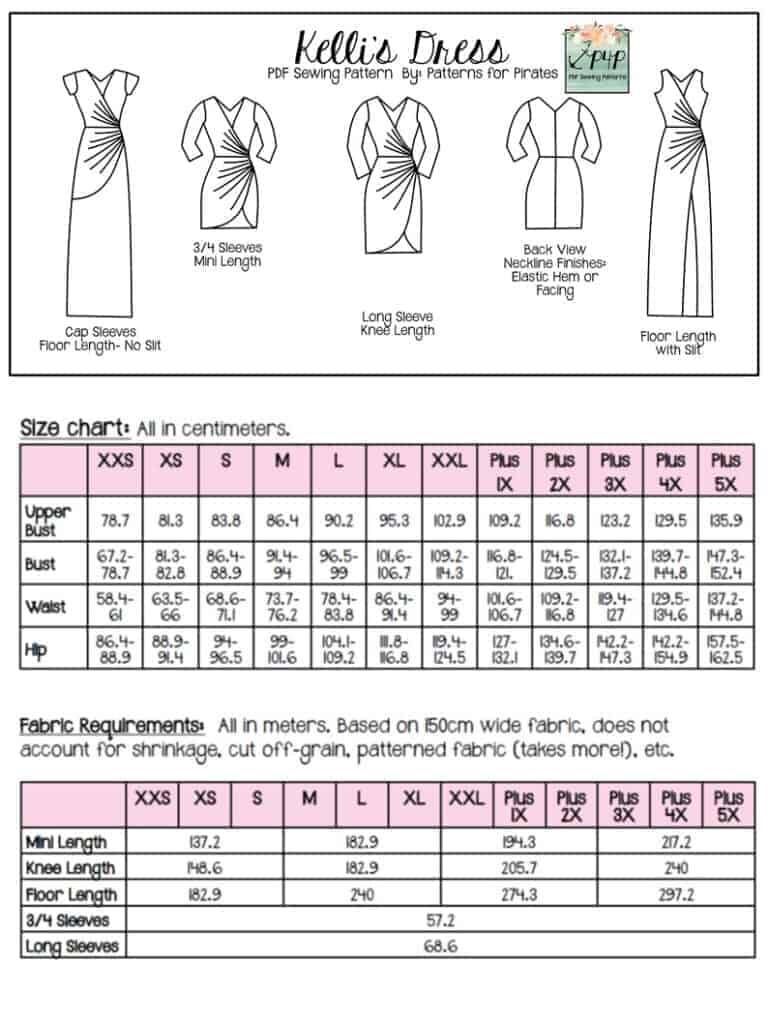
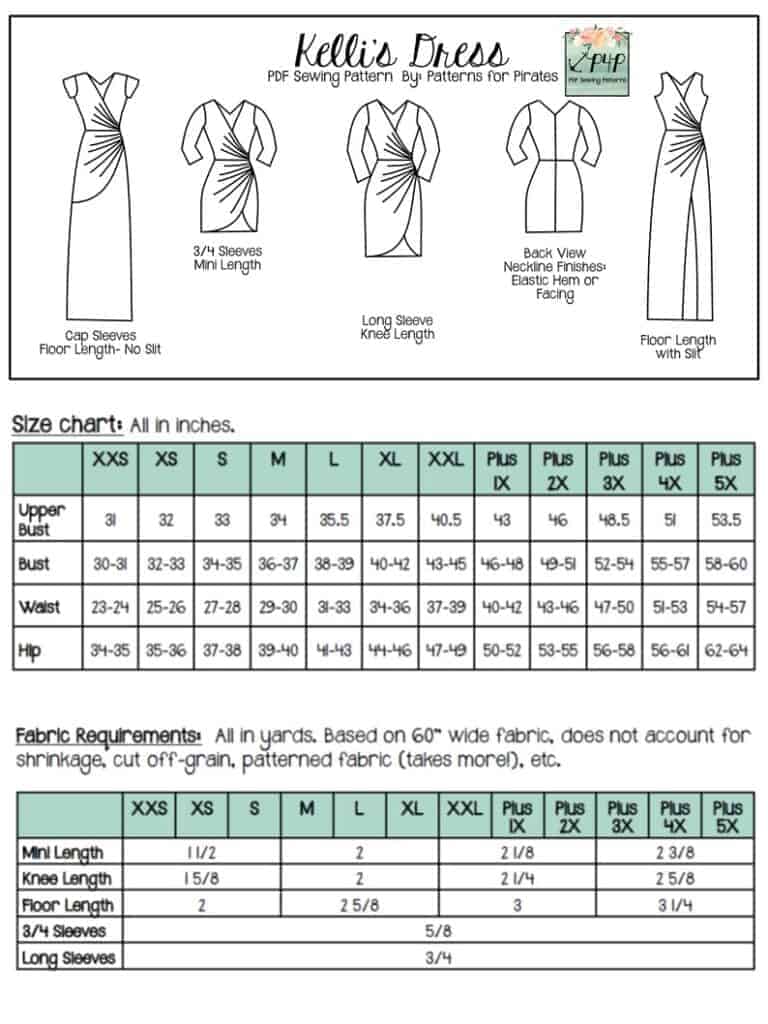
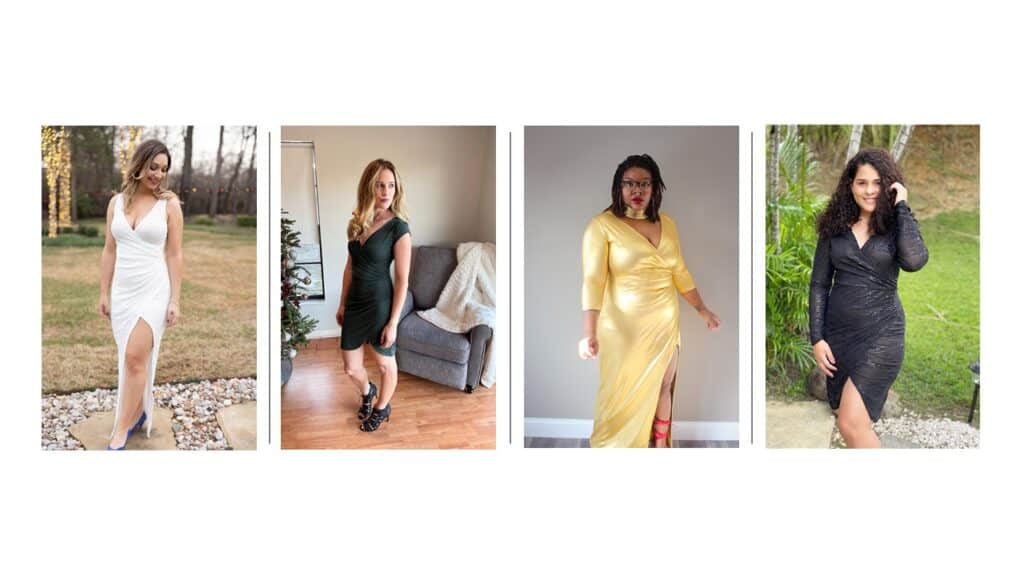
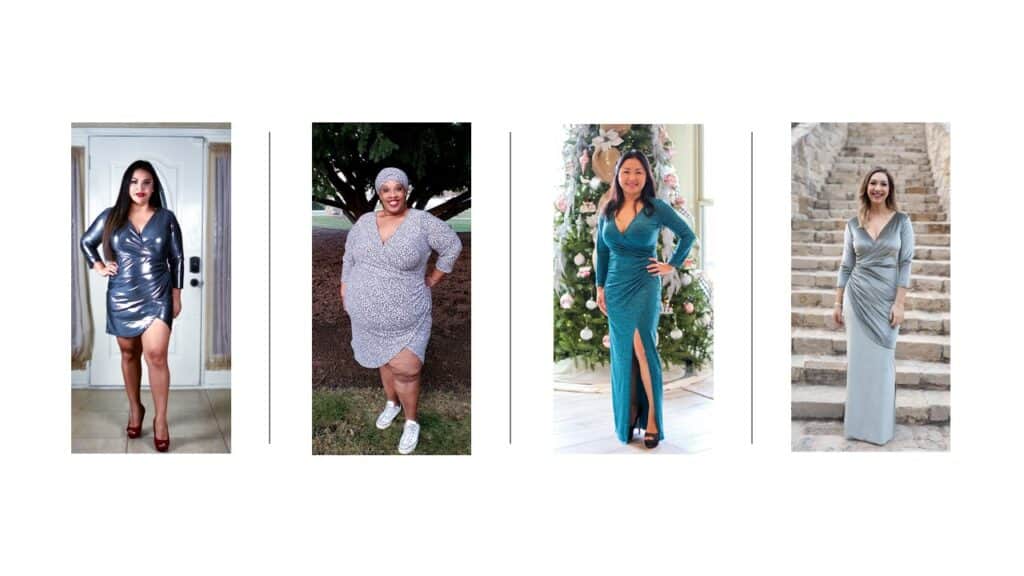
Named for one of my life long friends, Kelli’s Dress has a gorgeous gathering detail along the side seam from underbust to high hip creating a beautiful detail and flattering lines. The cross over V neck is again a flattering open neckline, but with 4 way stretch fabrics, it can give you a lot of wiggle room to play with the neckline coverage. Sleeve options will take you from summer to winter in a heart beat and the different lengths will take you from casual to a formal event easily. The dramatic floor length with split is the most fun thing you’ll wear! You cannot help but instantly feel glamourous and start striking poses. Not wanting to show off all that leg? No problem, the floor length also has a no split option that is still stunning. Shorter lengths are mini for a fun night out or knee for a perfect everyday look or cocktail in different fabrics. Kelli’s Dress is drafted for thin to medium stretch knits absolutely perfect for those stretchy glitter poly blends you find, double brushed poly, stretch lace, waffle knit, sweater knit, ribbed knits, light weight cotton spandex, and stretch velvet. The options for the Kelli’s Dress include:
- Tank, Cap Sleeve, 3/4 Sleeve, and Long Sleeve
- Mini, Knee, Floor with Slit, and Floor with No Slit (Charli’s-Youth has Knee and Floor Length only).
- Neckline Facings or Elastic Hem
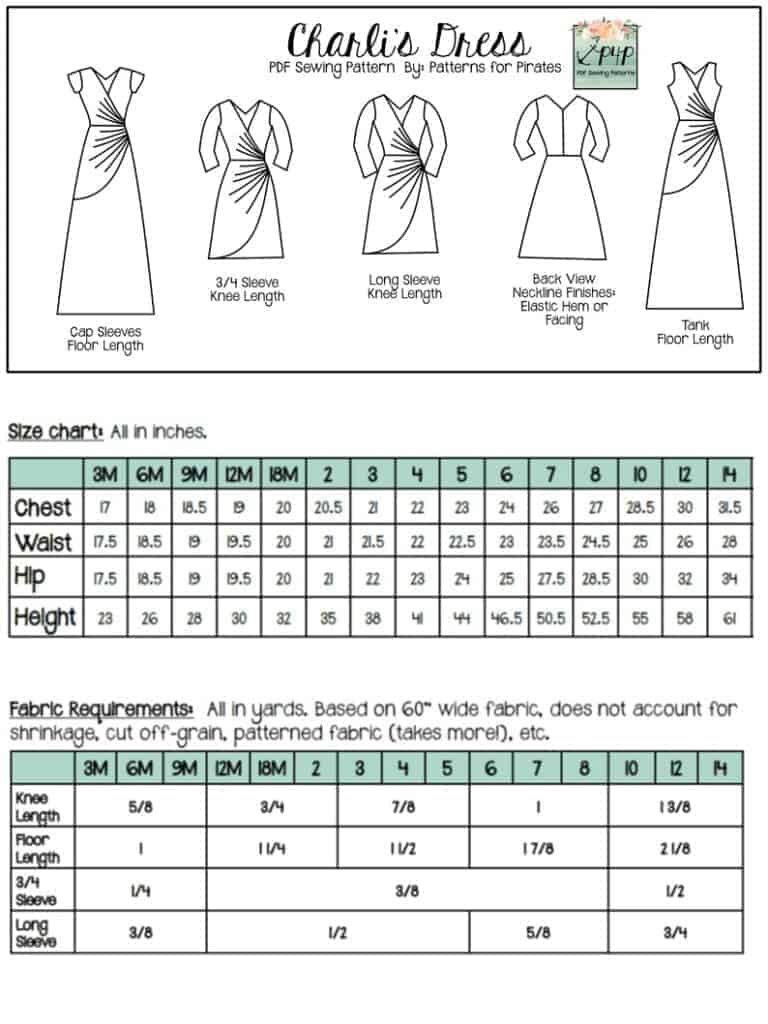
The youth sizes range from 3m – 14 and the adult sizes are for the full, newer size chart, extending from XXS – Plus 5X for the Hourglass Figure and XXS-6XL for the V Figure. *Want to learn more about how to measure yourself for these pattern? We’ve got you covered with an in-depth blog HERE. And in case you’re new to Patterns for Pirates and PDF patterns in general, we have a great blog full of new-user tips HERE to help you get started! As with all of our current releases and updates, the pdfs now include our layers feature and can be found in Letter, A4, A0 and projector sizes. And for even more helpful fun, we have a free* printable that you can use to help record your measurements as you take them.
Let’s take a look at the different ways we can sew up these patterns!
I cannot wait to see everyone feeling extra special in their Charli and Kelli Dresses! Head on over and grab yourself a copy of the new patterns! They are available on sale (no code needed) through 11:59pm CST, Saturday January 15, 2022.
KELLI’S DRESS- ADULT HOURGLASS FIGURE
Maybe hoping for a little more inspiration before you make the purchase? You can see a few little modifactions can give you even more options HERE!
Head over to our Facebook group where you can see tester albums full of amazing images!
Kelli’s Dress- Hourglass Album
 v
v2021 A Year in Review
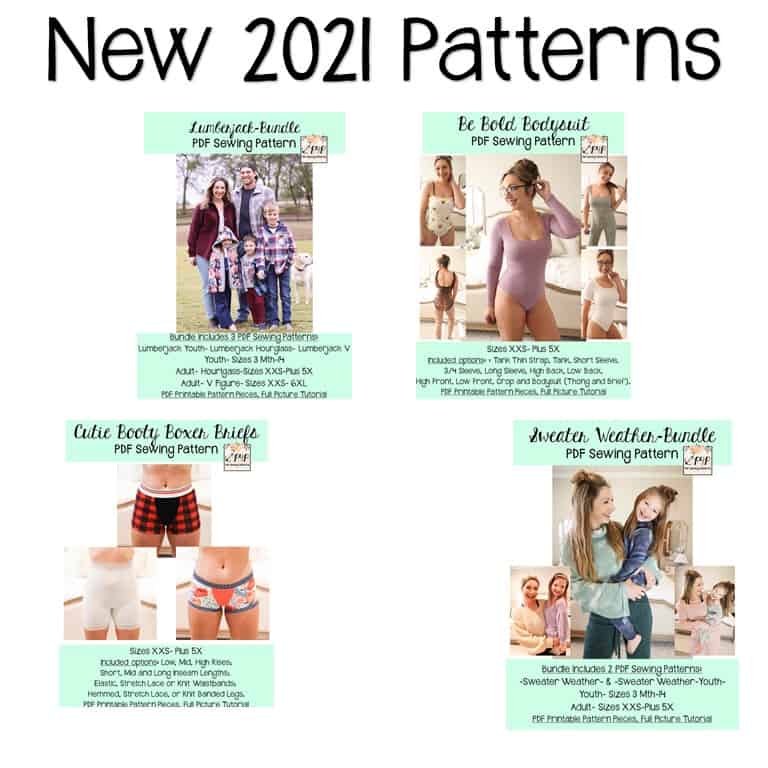
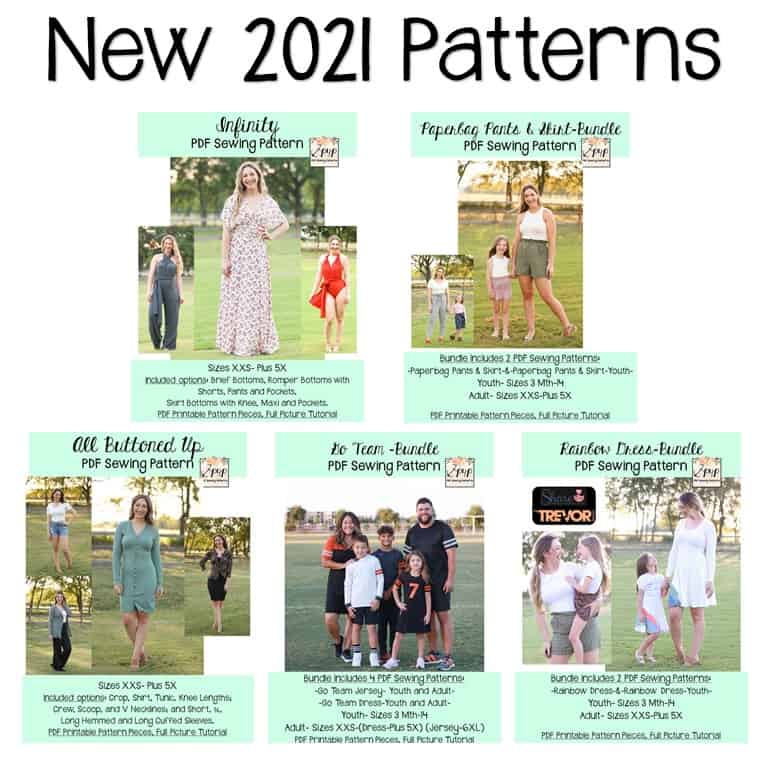
We added 9 new patterns to the shop (21 if you count the youth and adult as separate patterns!):
- Lumberjack Hourglass Figure :: Lumberjack V Figure :: Lumberjack Youth :: Lumberjack BUNDLE
- Be Bold Bodysuit Adult :: Be Bold Bodysuit Youth :: Be Bold Bodysuit BUNDLE
- Cutie Booty Briefs Adult :: Cutie Patootie Boxer Briefs Youth :: Cutie Booty BUNDLE
- Sweater Weather Adult :: Sweater Weather Youth :: Sweater Weather BUNDLE
- Infinty Adult :: Infinity Youth :: Infinity BUNDLE
- Paperbag Pants and Skirt Adult :: Paperbag and Skirt Youth :: Paperbag Pants and Skirt BUNDLE
- All Buttoned Up Adult :: All Buttoned Up Youth :: All Buttoned Up BUNDLE
- Go Team Dress Adult :: Go Team Dress Youth :: Go Team Jersey Youth :: Go Team Jersey Adult :: Go Team BUNDLE
- Rainbow Dress Adult :: Rainbow Dress Youth :: Rainbow Dress BUNDLE
I truly love each and every pattern we put out this year! Here are free patterns we gave this year as well:
The freebies will always remain free and will always be there if you don’t want to save them to your own device/cloud/etc. What else did we do this year? How about some special events we held…
Or what Sew A Longs we put on?
You can find each Sew A Long on our blog and as a playlist on our YouTube Channel!
I always love to see what the most popular, previously released patterns are through the year as well! In order of popularity:
- Gala Gown (Dec 2019),
- Cocoon Cardigan (Jan 2017),
- Naughty Nice PJS (Dec 2018)
- Sweater Weather (Jan 2021)
- Cozy Pants (Nov 2020)
- Essential Tank (June 2016)
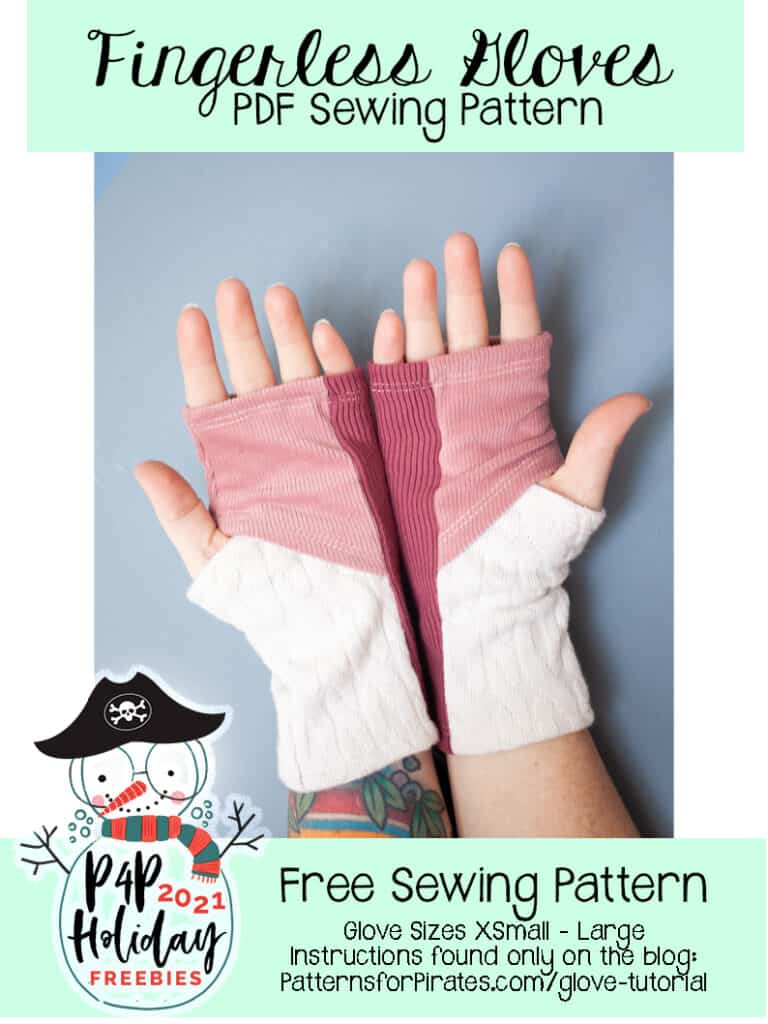
Our most popular freebies this year were: Peg Legs, Walk the Plank- Adult , and Peg Leg Add-ons. Our most loved new freebie was the Fingerless Gloves.
Our blog is run mostly by the wonderful Alex- you know her from our Sew A Longs! But we also have a team of contributors who help up write up blogs… together we managed to put out 9 more P4P University blog posts…these are great beginner blogs answering the questions we see asked the most frequently in the P4P FB group! So, if you ever have a basic sewing question hop onto the P4P blog and use that search… we are working on having the answers for you!
P4P University added this year: Using a Projector for Sewing, Tips and Tricks for Sewing Curves, Color Blocking Tips, Adjusting for Height, Facings, Understitching and Topstitching, Adding Trims to Hems, and Interfacing 101 . You can also find all the P4P University blogs rounded up in the FB Group Album!
Here are a few more highlights from the different Social Media outlets we use to keep you in the loop! If you follow me on each one you will notice I use them all slightly differently. I tend to share more selfies, in the moment/candid pictures and sneak peeks on my Instagram. I use the Facebook Group and Page to announce new patterns, sales, etc. I use the Blog to keep all details from everything from new patterns, sales, how tos, hacks, etc. The YouTube channel of course has all our videos from sew a longs, P4P universities, and tutorial videos as well. I finally caved and joined TikTok for some reels.

Thank you to all the new followers, members, etc and for everyone who was here already and stayed with us! I appreciate each and every single one of the follows, members, subscribers, etc!
I’m excited to see what 2022 will bring for Patterns for Pirates as well- I wish you all a Happy New Year!


3rd Annual Holiday Charity Week- 2021
I began an annual tradition a couple years ago of giving a large portion of profits from the week of Christmas to a charity. It makes my heart full to be able to reach out a helping hand, with the assistance of the Patterns for Pirates community. I just hope that our donations will allow a little extra support for those who need it.
We’ve opted to support the same charities that were benefactors last year. They may change in the future but for this year at least, they will remain the same.
I will be donating to both Action Against Hunger and a local North Texas Food Bank. With the hardships that the past couple years has brought upon everyone, so many more families need help getting enough food on the table and I hope this week will help get more food to more tables in need both here locally and across the world with Action Against Hunger.
You do not need to do anything special for your purchase to count toward the funds being donated during charity week. 30% of every single pattern purchase during this time frame will be donated automatically. *Note- the Fabric for Pirates Fabric Subscriptions transactions will not go through until the 1st of the month, which means even if you sign up during this week the transaction will not apply to this charity week.
If you’ve been eyeing any patterns for your stash, now is the perfect time to grab it and help make our donation amounts even bigger!
Thank you and Happy Holidays,
Judy
Protected: Fabric for Pirates :: December 2021 Reveal
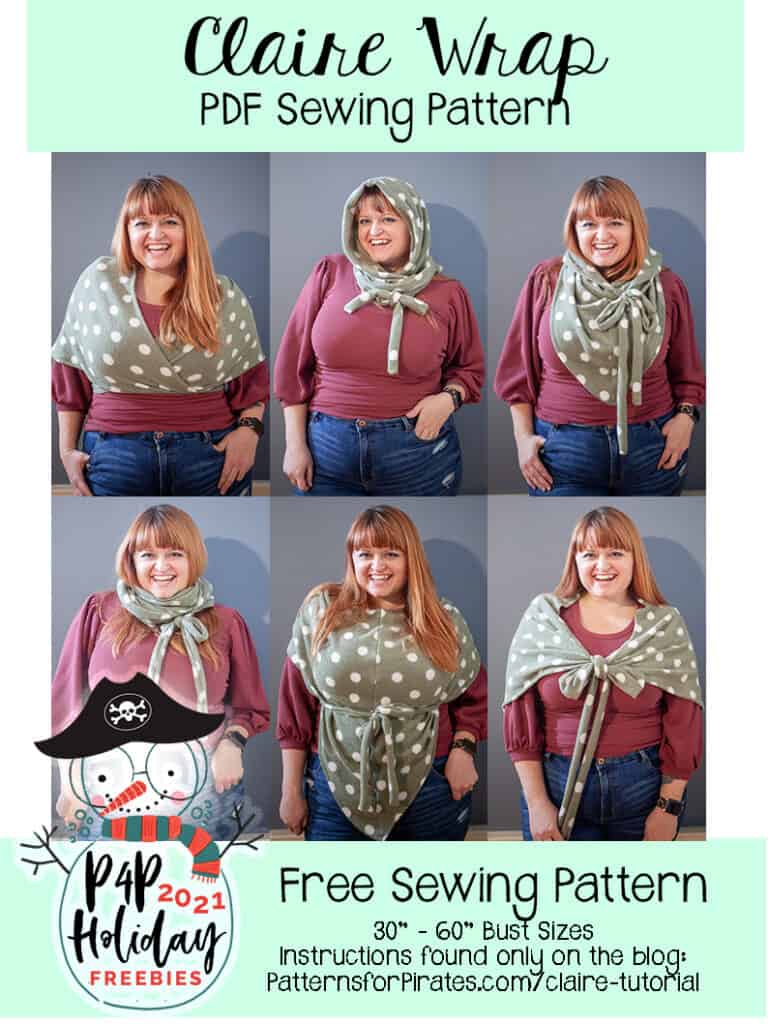
2021 Holiday Freebies :: Claire Wrap
Happy Holidays, Pirate Friends! We are excitedly back for another year and another round of holiday freebies to share with you! Over the years, we’ve compiled different tutorials and patterns that we think would make *perfect* gifts for your friends and family. Curious about what we’ve already released in the way of holiday freebies? Head right here to see all of them: Holiday Freebies Roundup.
Today, we are bringing you the: Claire Wrap!
This wrap is inspired by no other than Claire Fraser from the show Outlander. I’ve not personally seen the show, but I have plenty of people in my life that watch it religiously. I saw a wrap Claire was wearing in an image from the show and felt like it’d be such a great accessory to have for myself!
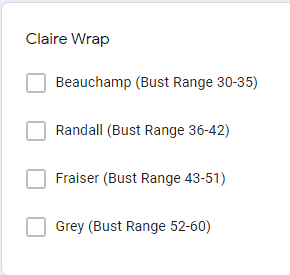
As there are four sizes, it felt right to name them like this. 😉
Supplies Needed:
- Claire Wrap pattern pieces
- 2 Yards Knit Fabric
**A wide range of knit fabrics can be used for this. I recommend something with a little bit of stretch, so when it’s being worn over the shoulder it moves more easily with you.
TUTORIAL
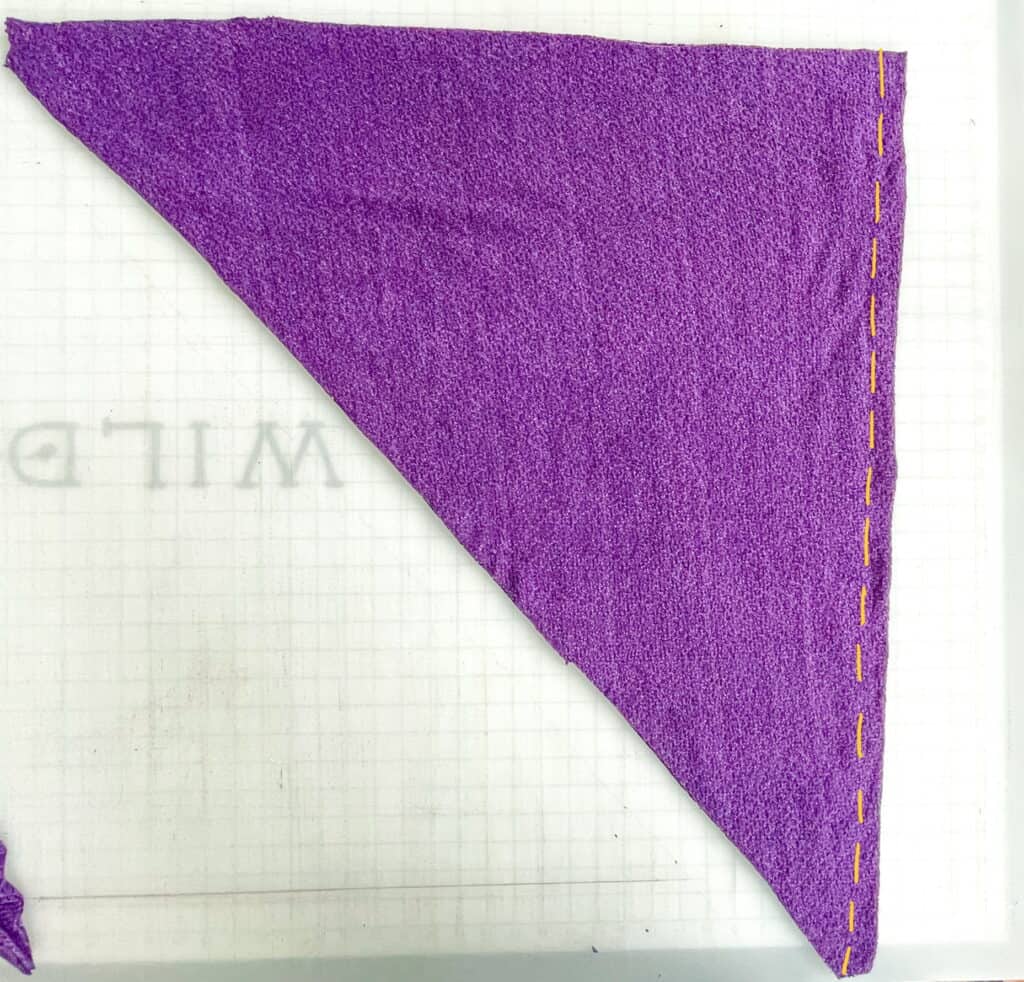
With right sides together, sew along edge of main pieces. 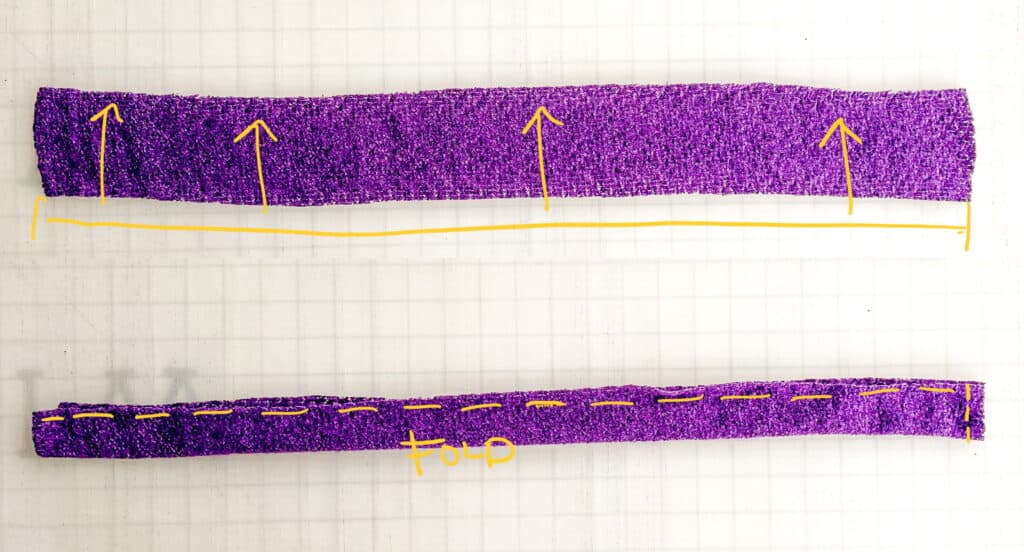
Fold strap, right sides together, matching along the long ends. Sew along one short side and raw long side. 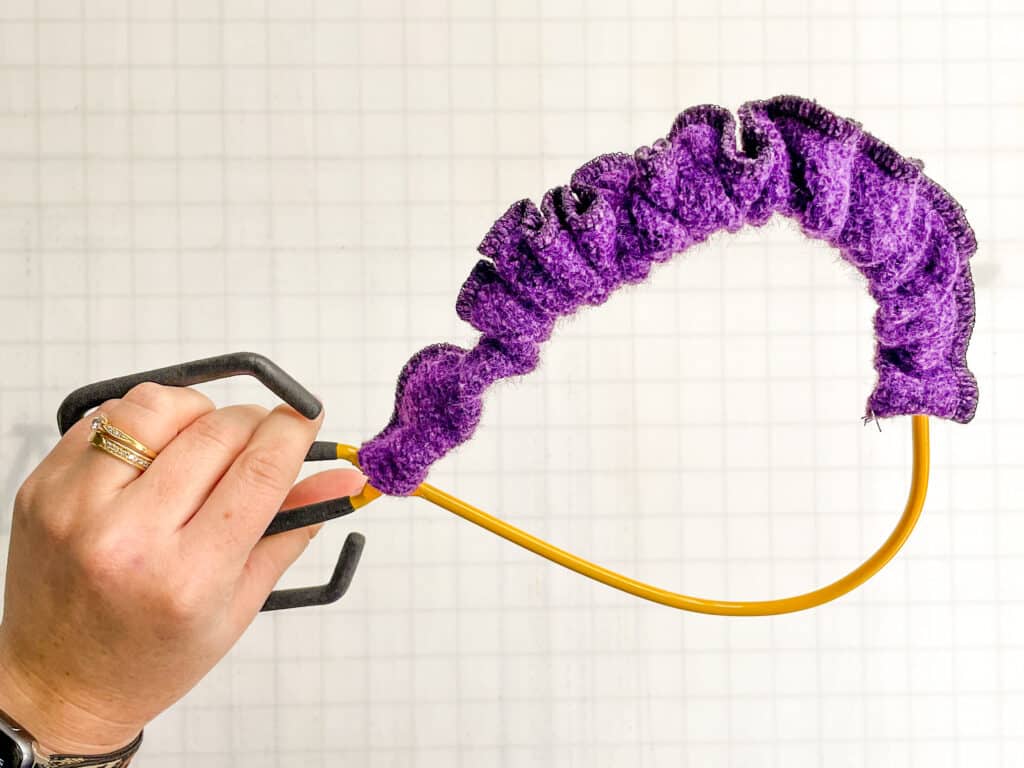
Using your favorite turning tool, turn straps right side out. 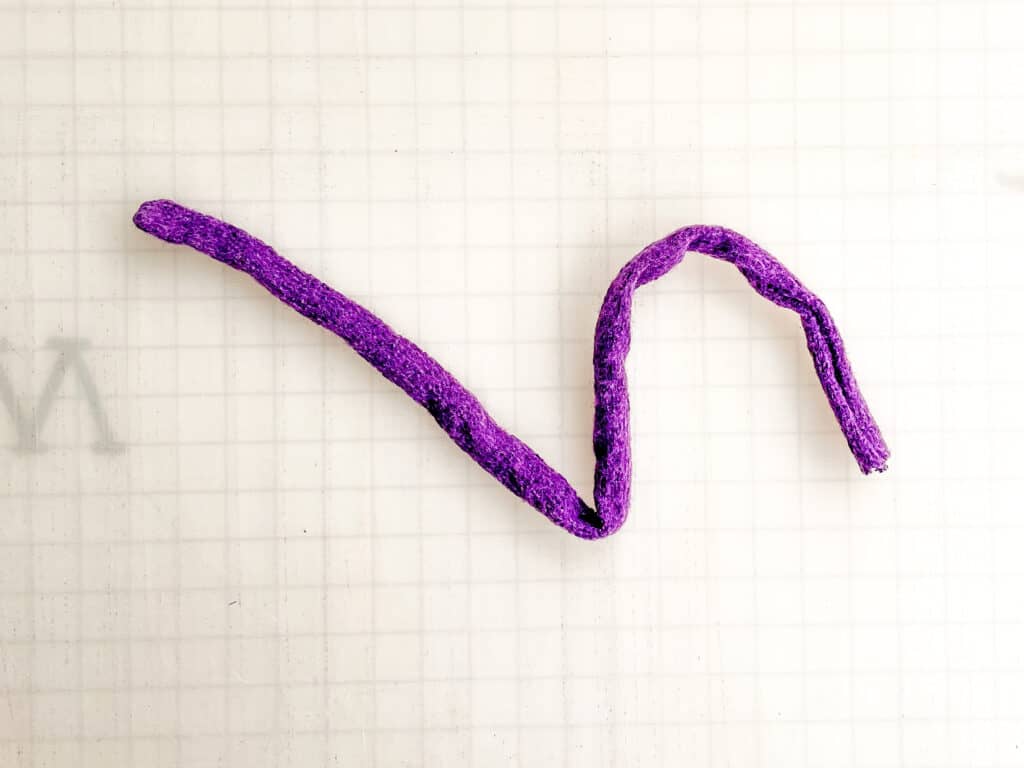
Repeat with second strap. 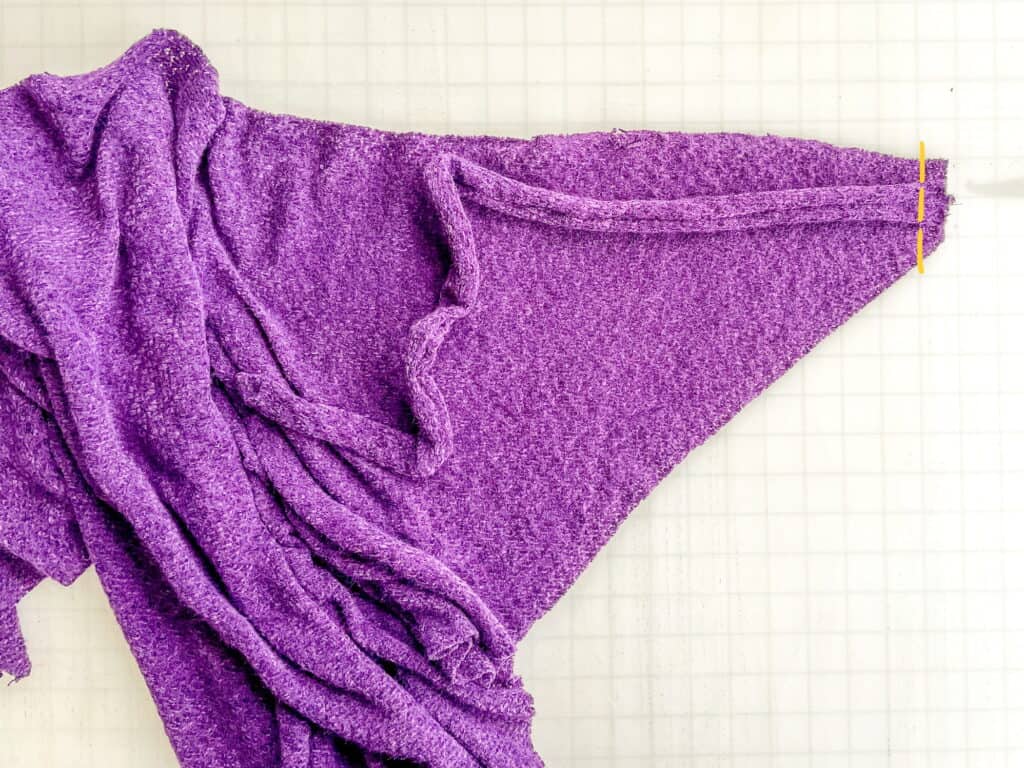
Align strap, with right sides together, in center top corner of main piece. Sew. 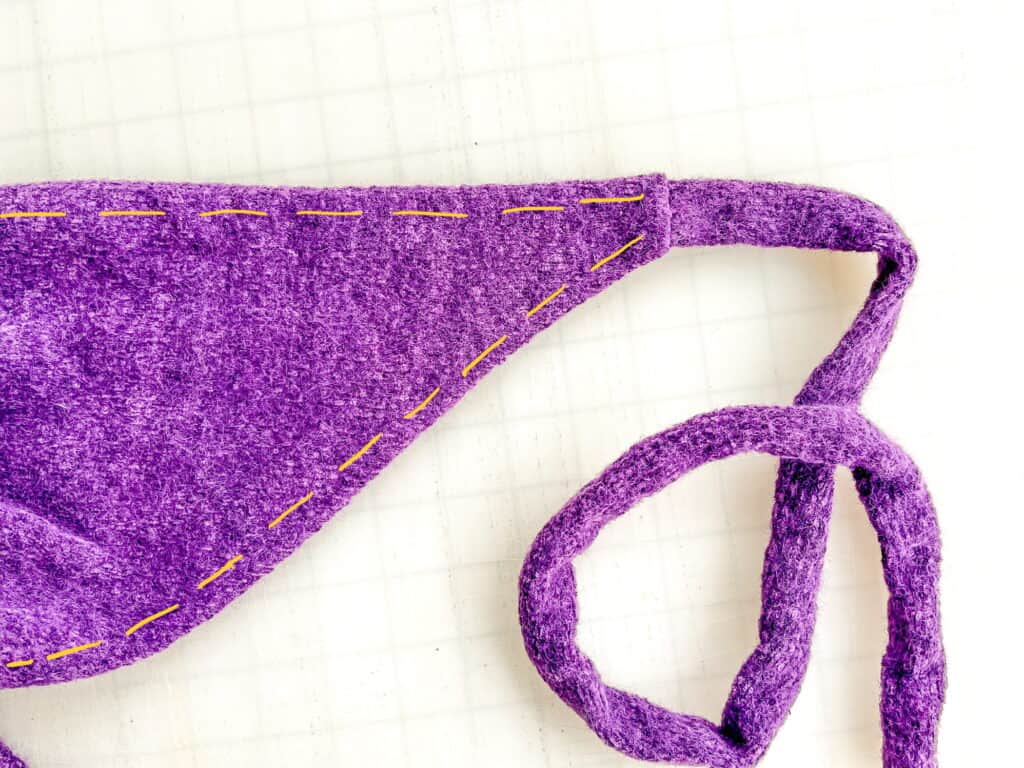
Flip strap towards wrong side of main piece. Hem top and edges of wrap, using 1/2″ hem allowance. You’re finished!
——–
In case you consider yourself a more “visual learner” here’s a video tutorial that walks you through the entire tutorial, start-to-finish.
Check out what our fabulous testers were able to create with this very same tutorial!
The best part about this wrap is that it can be worn SO MANY different ways!


I la-la-love when you share your photos with me! Head over to the Patterns for Pirates Facebook Group and show us what you’ve made!
Happy Holidays, Pirates!

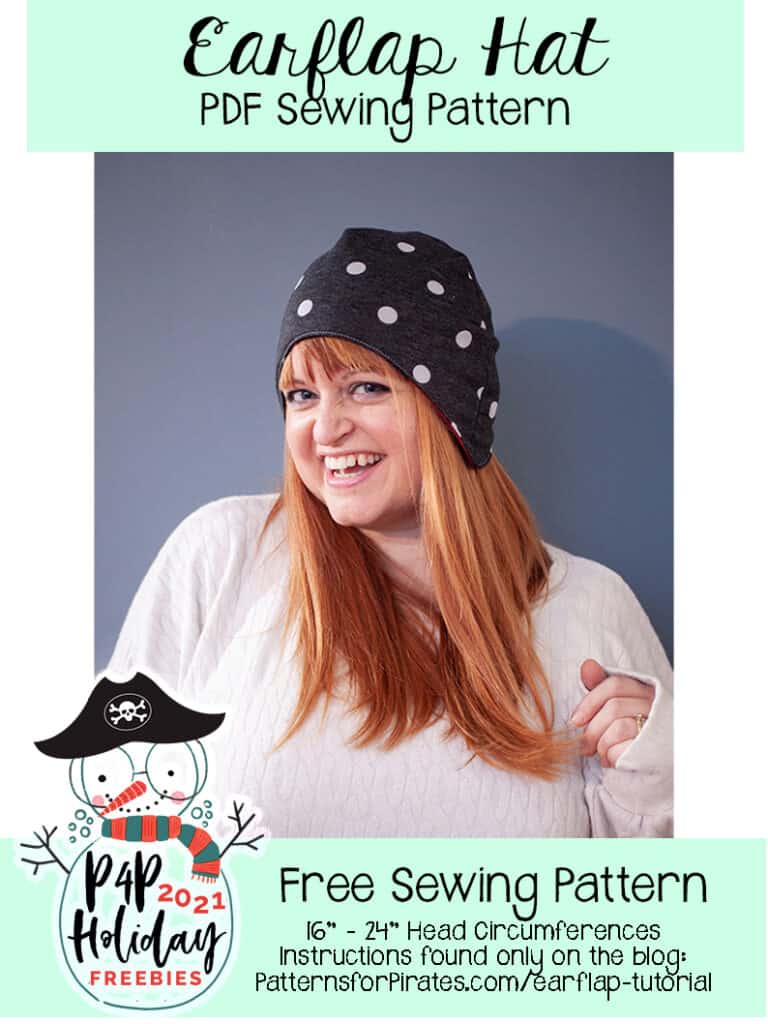
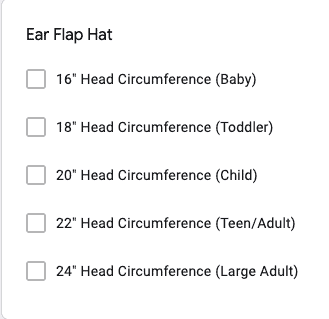
2021 Holiday Freebies :: Earflap Hat
Happy Holidays, Pirate Friends! We are excitedly back for another year and another round of holiday freebies to share with you! Over the years, we’ve compiled different tutorials and patterns that we think would make *perfect* gifts for your friends and family. Curious about what we’ve already released in the way of holiday freebies? Head right here to see all of them: Holiday Freebies Roundup.
Today, we are bringing you the: Earflap Hat!
Who doesn’t love a quick and easy (and comfy) knit hat?? It’s a perfect go-to for the cooler months, and this hat is actually an incredible basic — I have so many ideas for how to dress it up! All seams end up fully enclosed, so it’s actually reversible too! Grab your favorite combo of fabrics and you’ll get 2-in-1 hats from this sweet little pattern!
Supplies Needed:
- Earflap Hat pattern pieces
- Less than 1/3 yard knit fabric
**if using a thicker fleece / fun fur for the lining, I’d recommend sizing up!
TUTORIAL
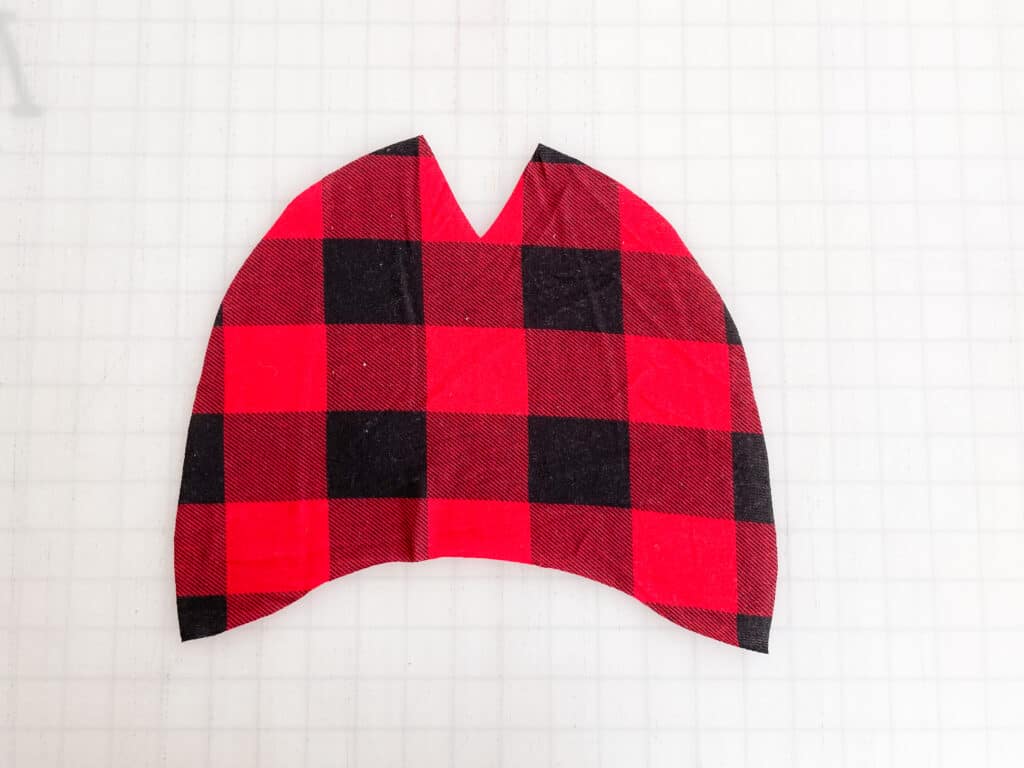
Step 1: Place back piece, right sides up. 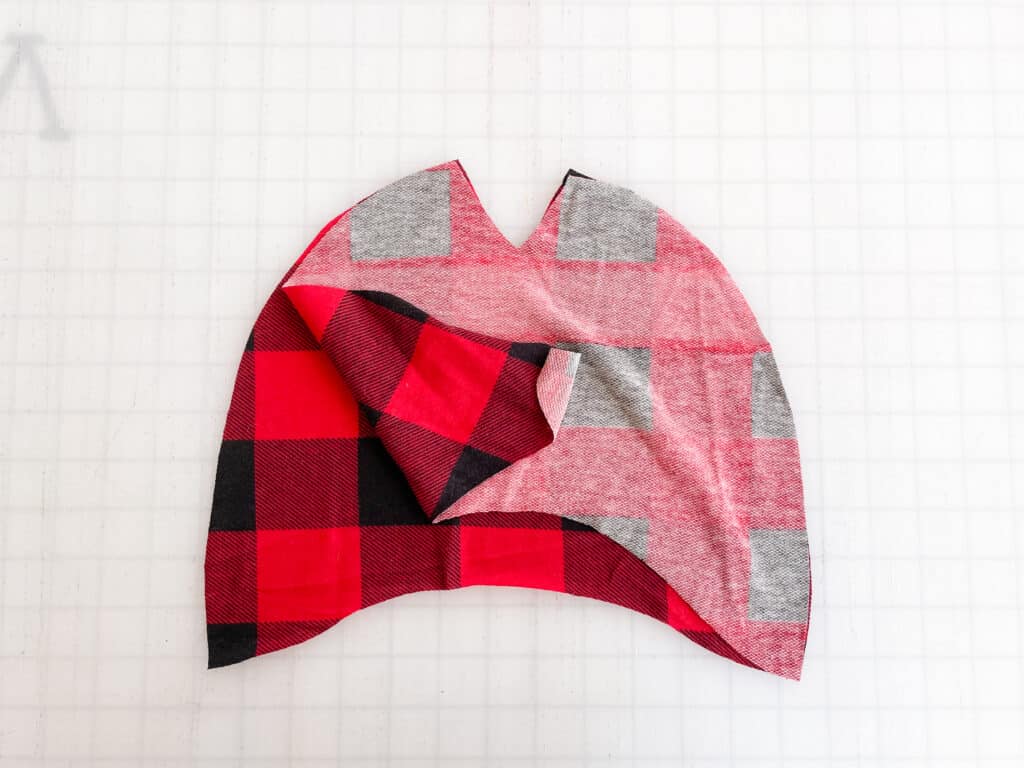
Step 2: With right sides facing each other, place the front piece on top, aligning long curved side edges. 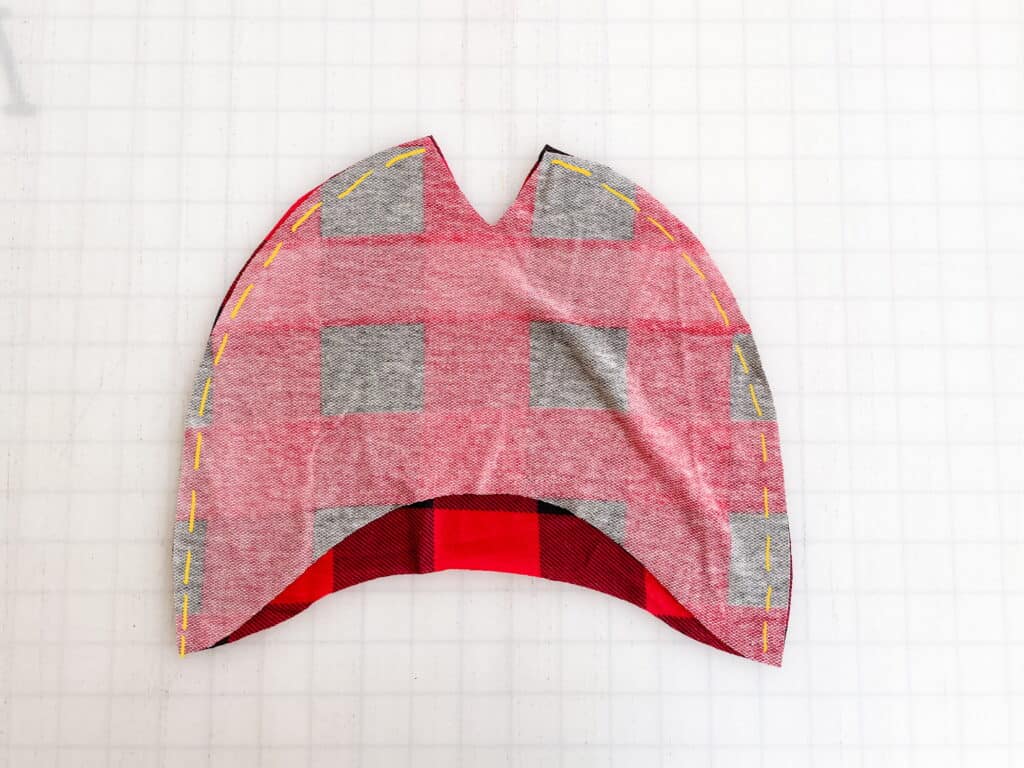
Step 3: Stitch, using 1/2″ seam allowance. 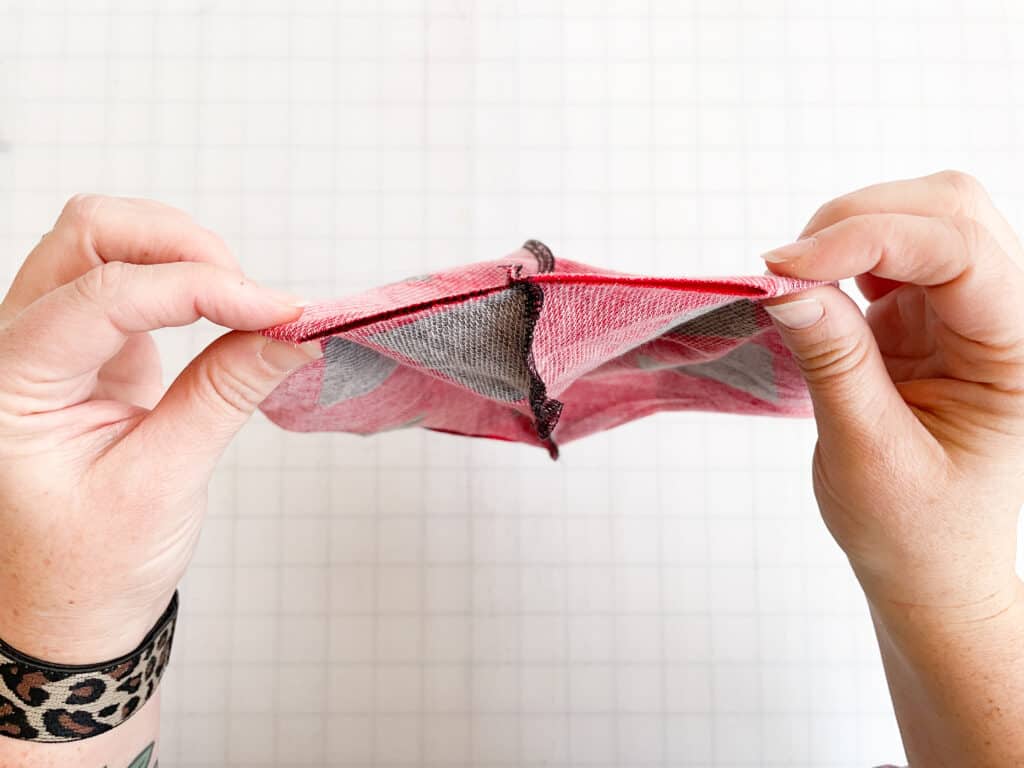
Step 4: Open hat in opposite direction, matching the seams you just created at the top. 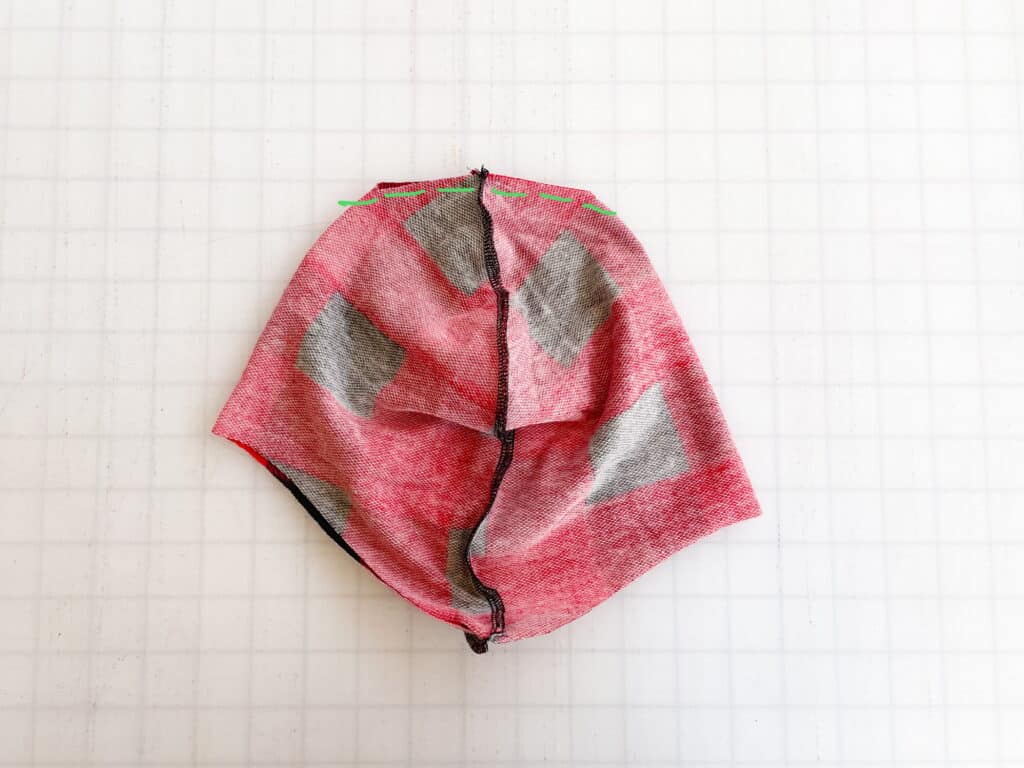
Step 5: Sew the opening shut, using 1/2″ seam allowance. 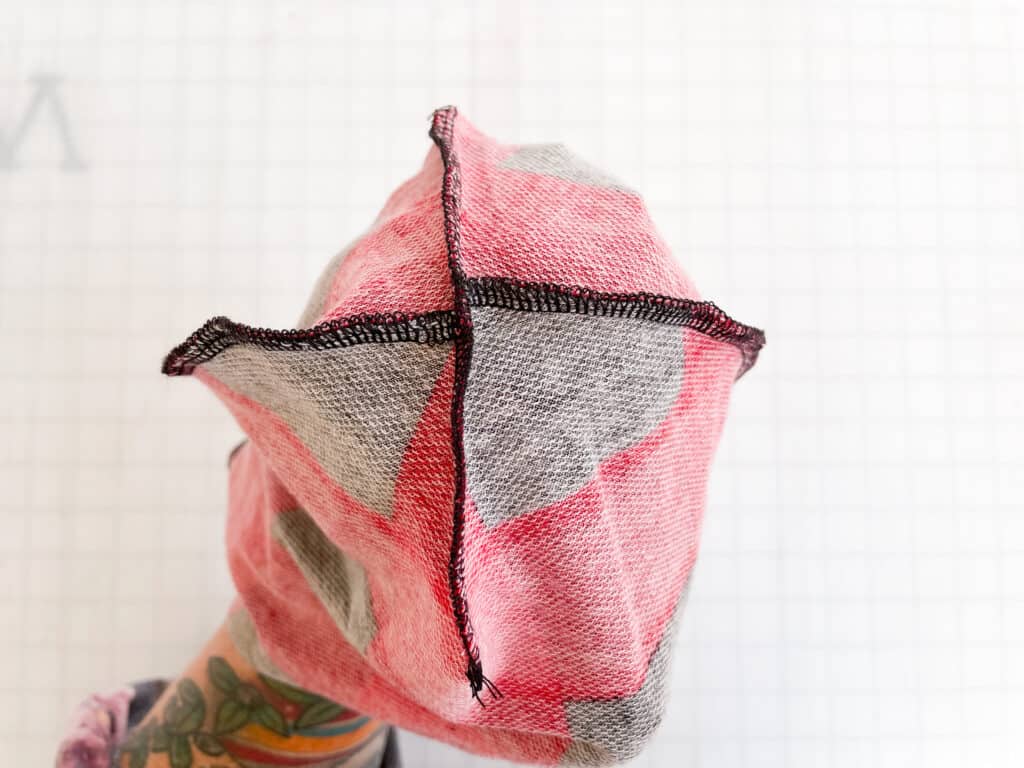
Repeat Steps 1-5 with lining fabric. 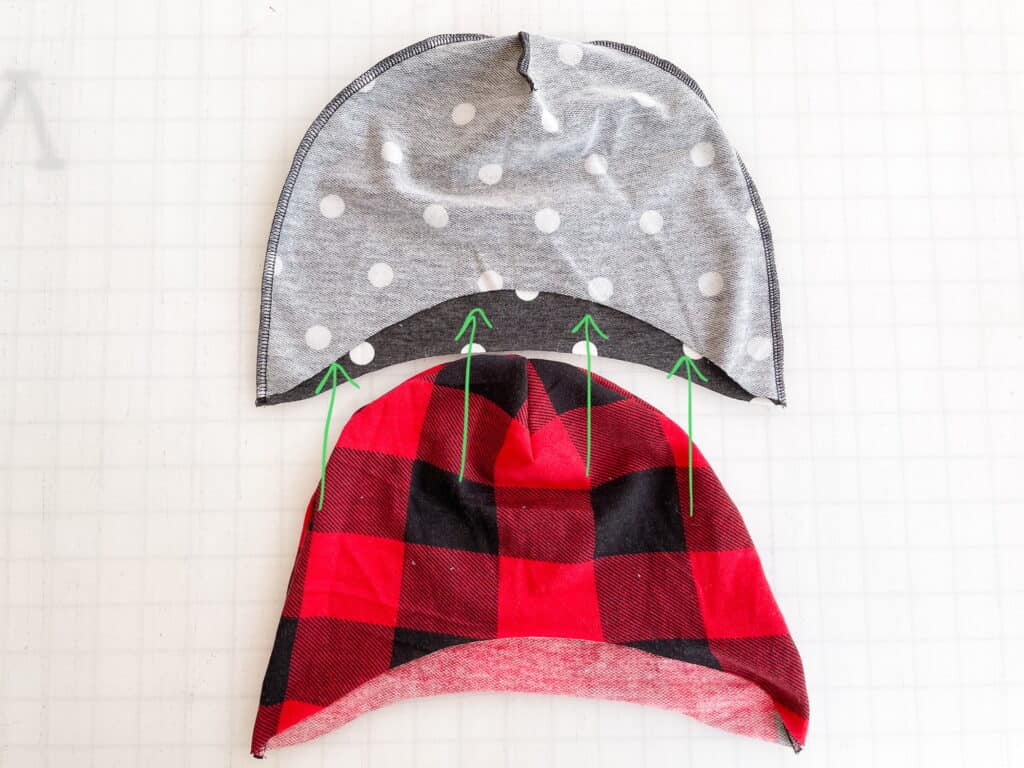
Step 6: Place hat lining wrong sides out, and with main hat right sides out, slide the main hat inside of the lining. 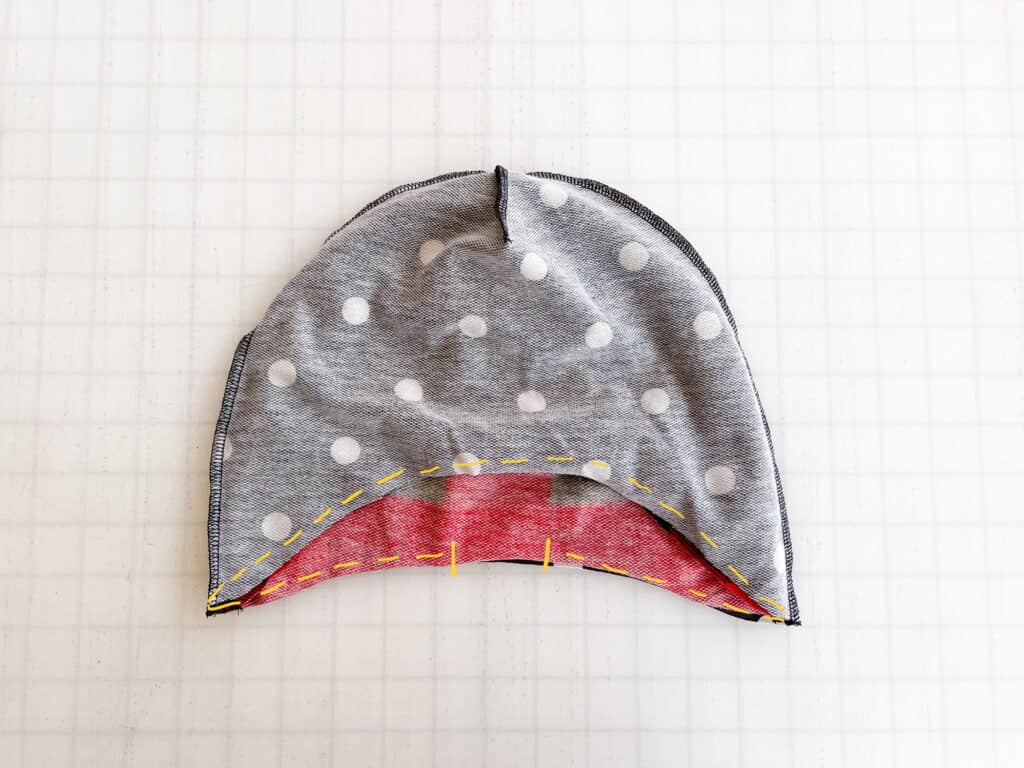
Step 7: Align all raw edges and sew using 1/2″ seam allowance. Leave 3-4″ opening for turning. 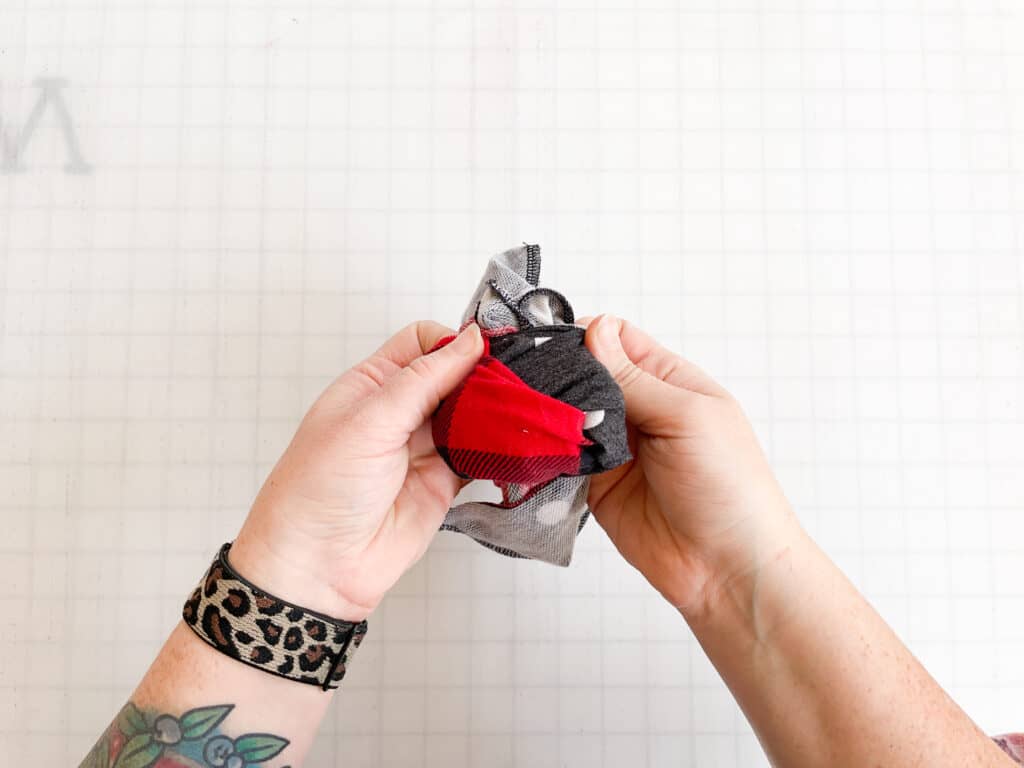
Step 8: Turn hat right sides out. 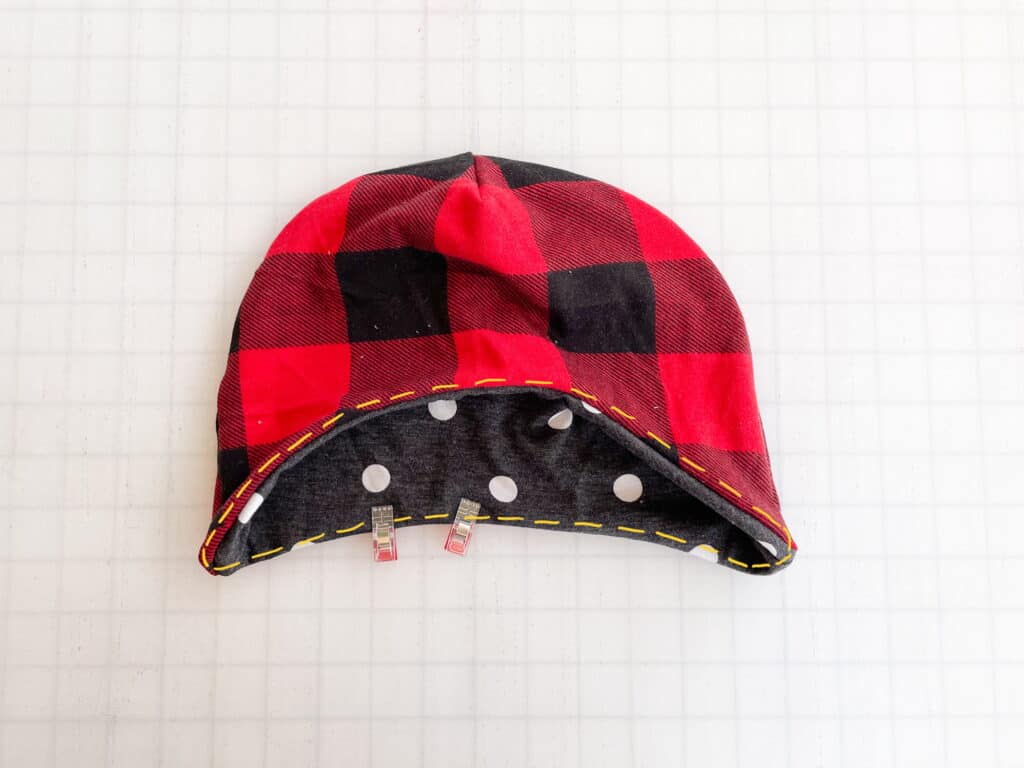
Step 9: Push lining fabric inside of main hat. Edge stitch along entire bottom of hat. 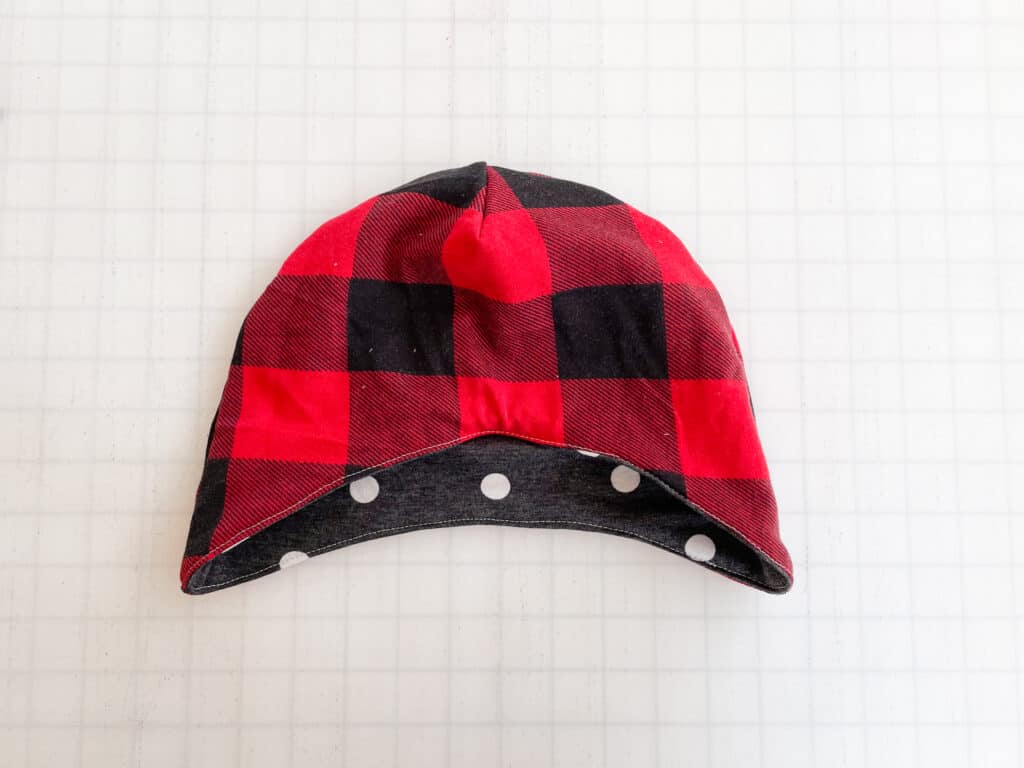
You’re finished! 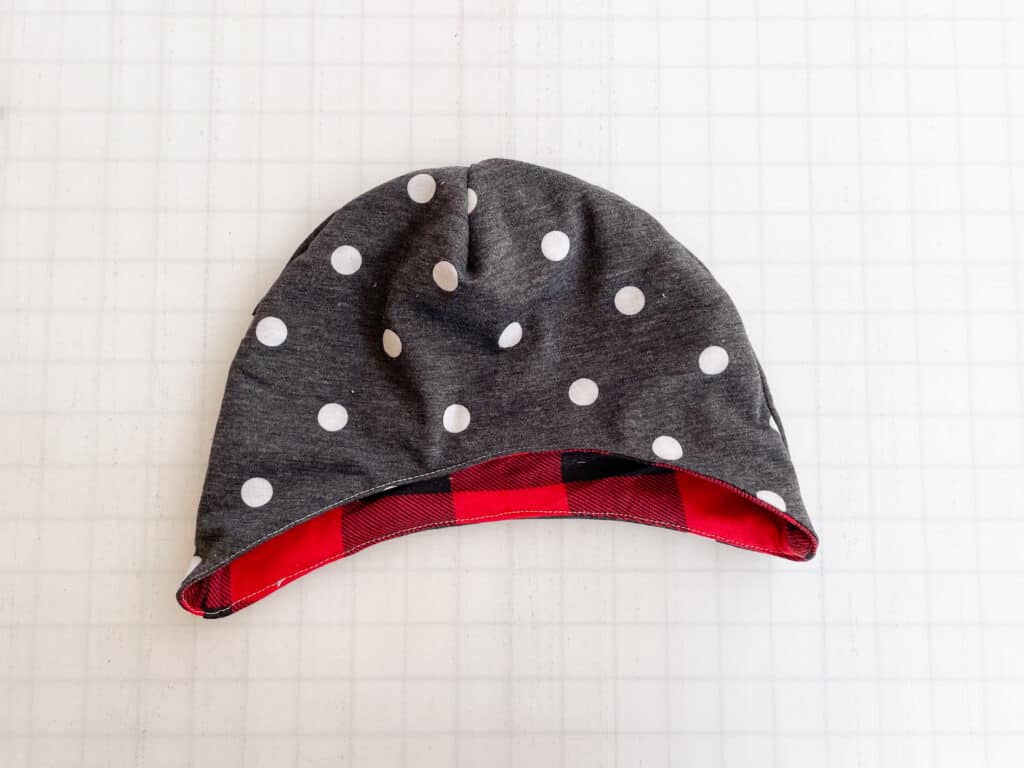
And it’s reversible!
——–
In case you consider yourself a more “visual learner” here’s a video tutorial that walks you through the entire tutorial, start-to-finish.
Check out what our fabulous testers were able to create with this very same tutorial!


I la-la-love when you share your photos with me! Head over to the Patterns for Pirates Facebook Group and show us what you’ve made!
Happy Holidays, Pirates!

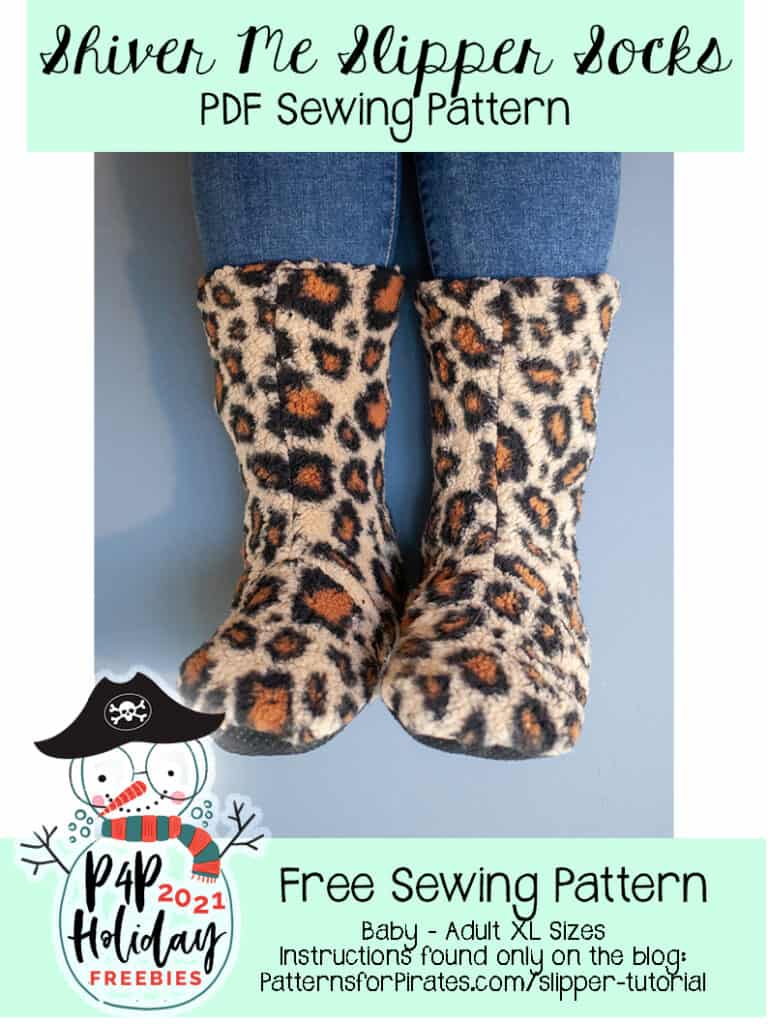
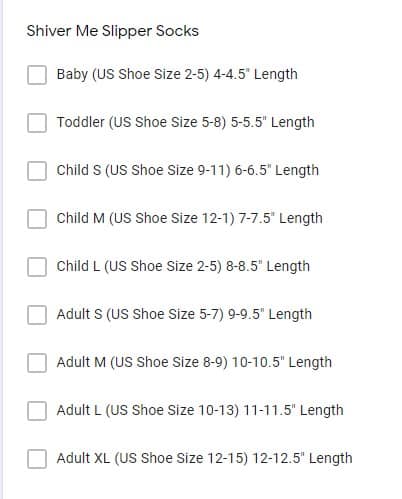
2021 Holiday Freebies :: Shiver Me Slipper Socks
Happy Holidays, Pirate Friends! We are excitedly back for another year and another round of holiday freebies to share with you! Over the years, we’ve compiled different tutorials and patterns that we think would make *perfect* gifts for your friends and family. Curious about what we’ve already released in the way of holiday freebies? Head right here to see all of them: Holiday Freebies Roundup.
Today, we are bringing you the: Shiver Me Slipper Socks!
My feet are ALWAYS cold in the winter. And big, fluffy slipper socks are pretty much my favorite thing ever to help combat the cold. It’s been on my list to make this pattern for a couple of years now and I’m super excited to be officially bringing them to y’all!
Supplies Needed:
- Shiver Me Slipper Socks pattern pieces
- less than 1/2 Yard each, Lining + Main Fleece Fabric
TUTORIAL
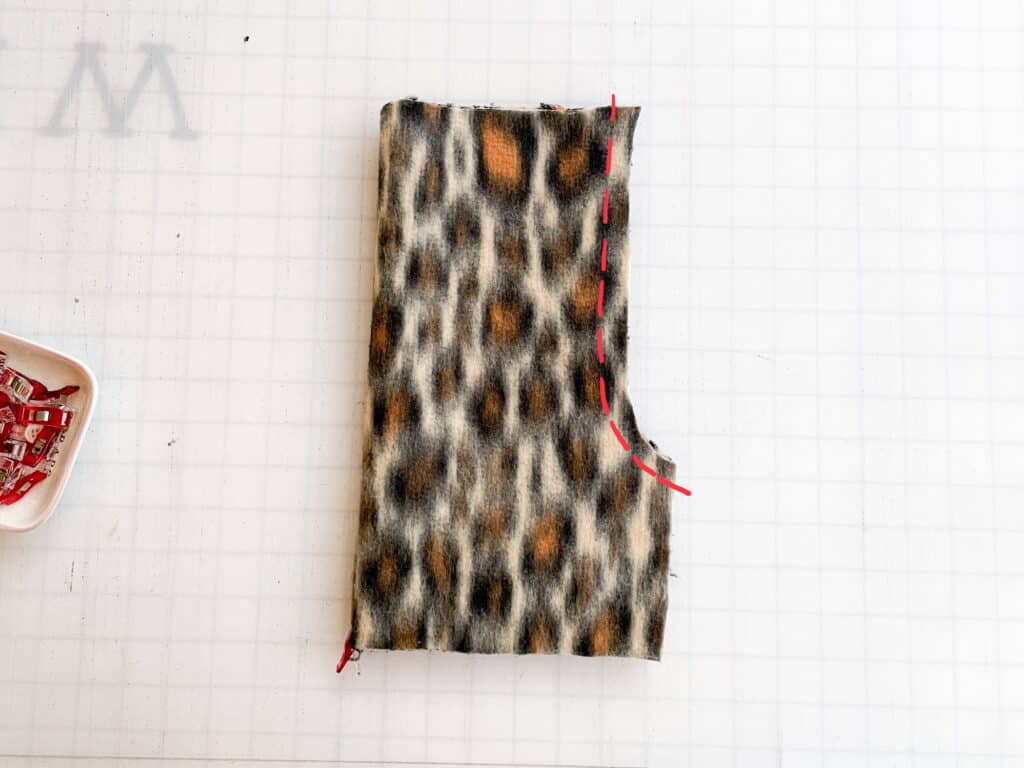
Fold one of the main Sock pieces in half, with right sides together. Using 1/2″ seam allowance, stitch along the curve. 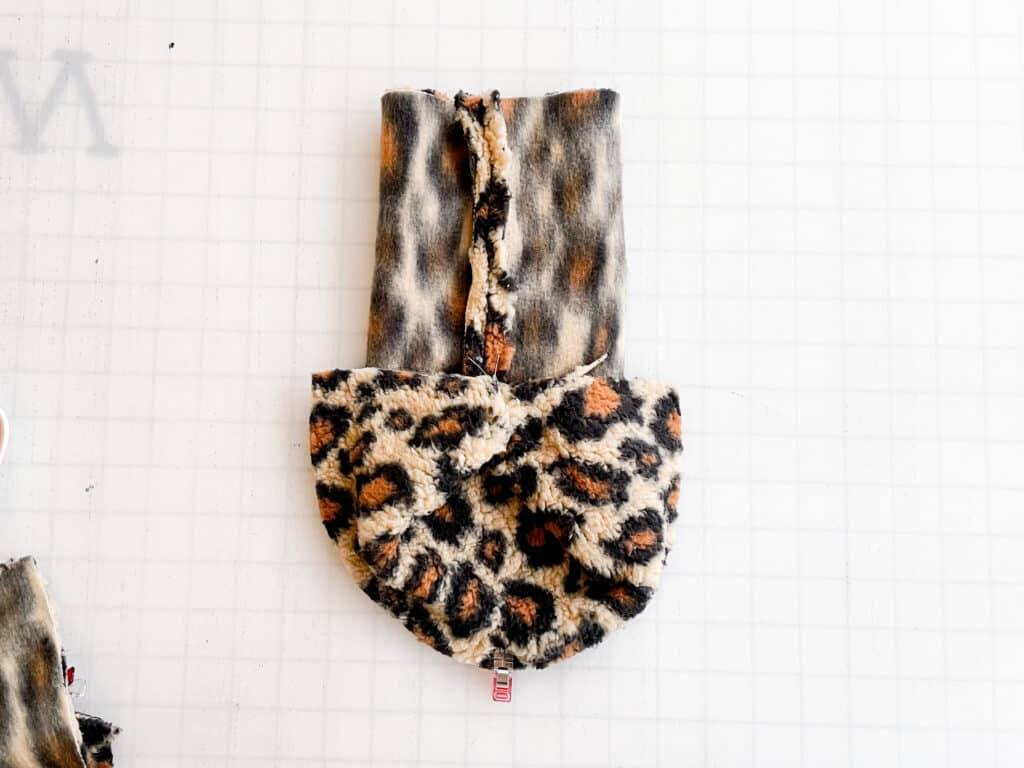
Open the sock up to create a straight line with the seam you just created in the center of that line. 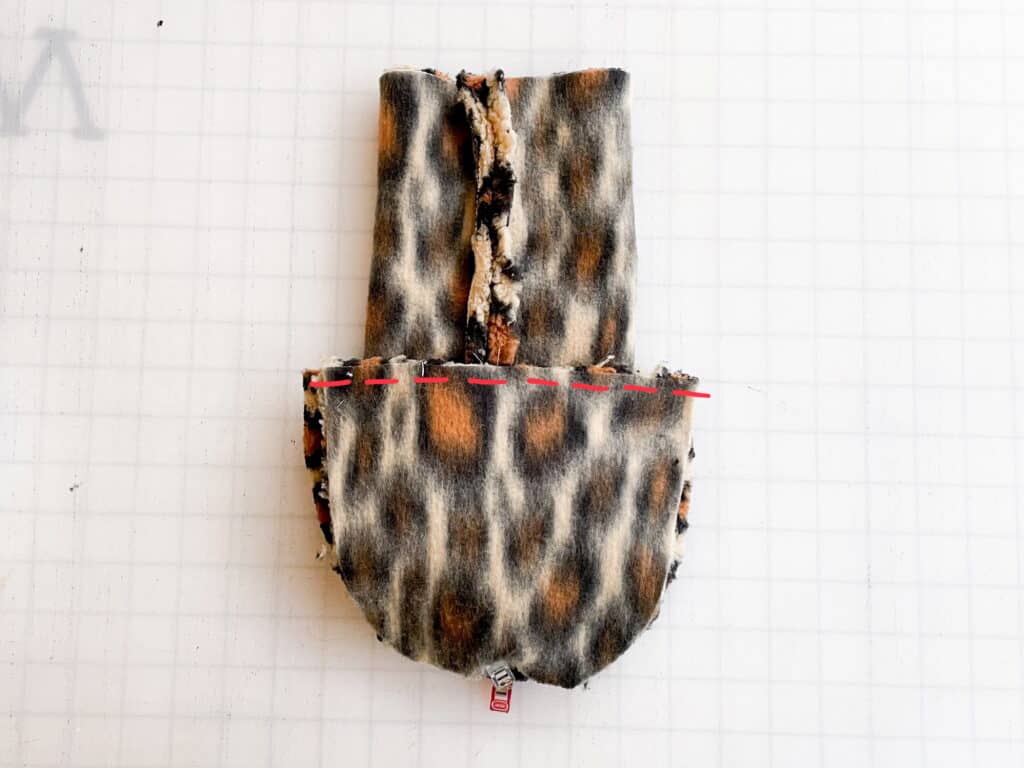
With right sides facing down, place the toe piece on top, matching along that straight edge. Sew using 1/2″ seam allowance. 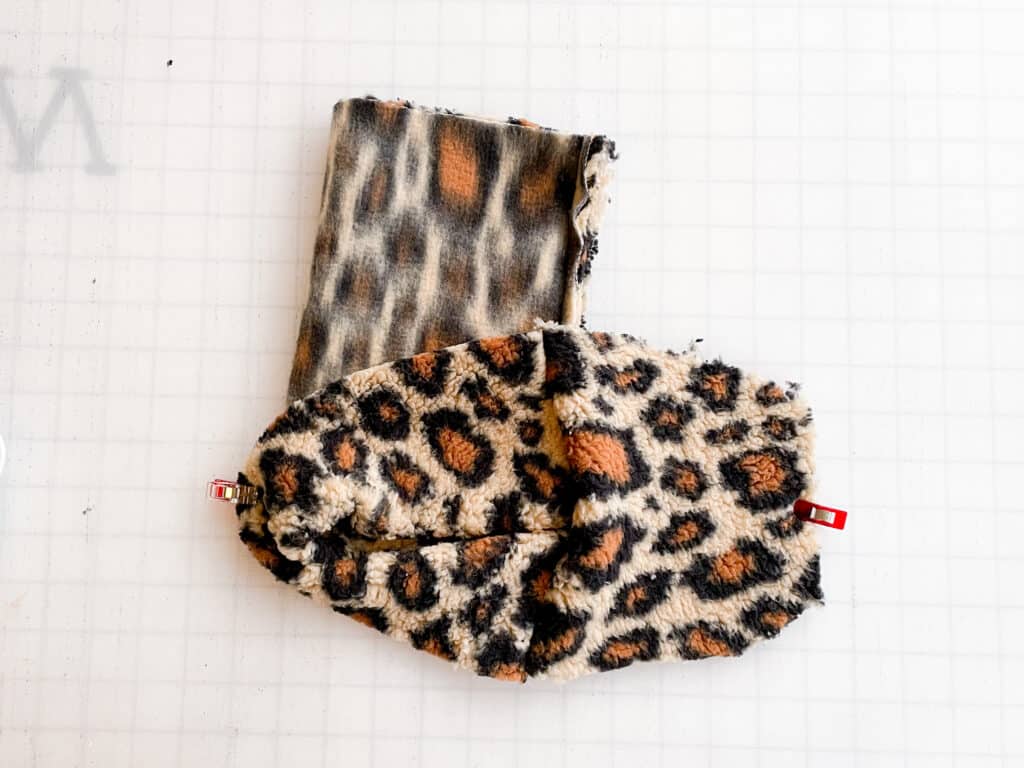
Mark toe front and heel back with pins/clips. 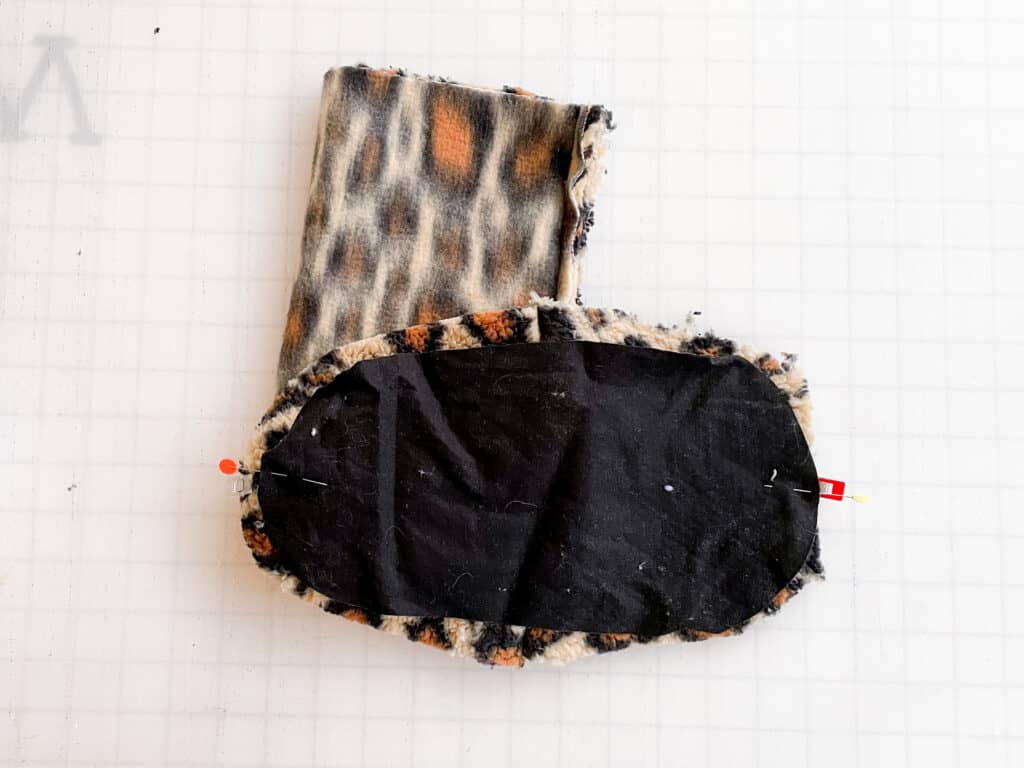
With right sides facing each other, place the sole piece on top, aligning the front and back markings. 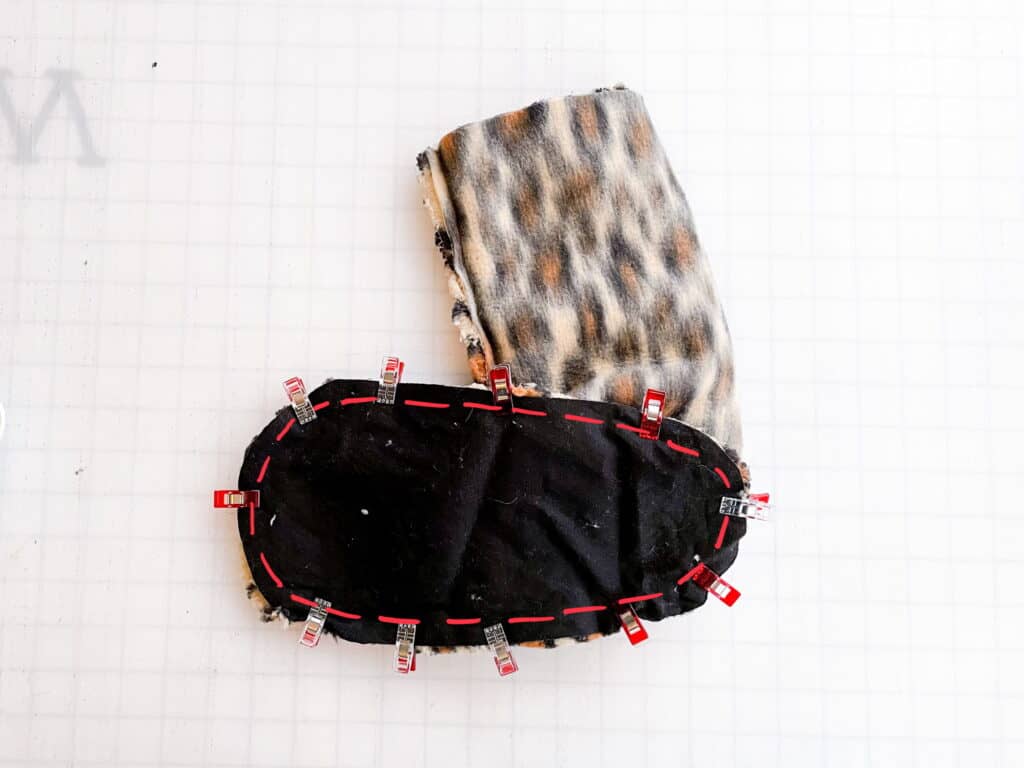
Pin/clip pieces together, carefully easing the curves into one another. Using 1/2″ seam allowance, sew around entire outer edge. 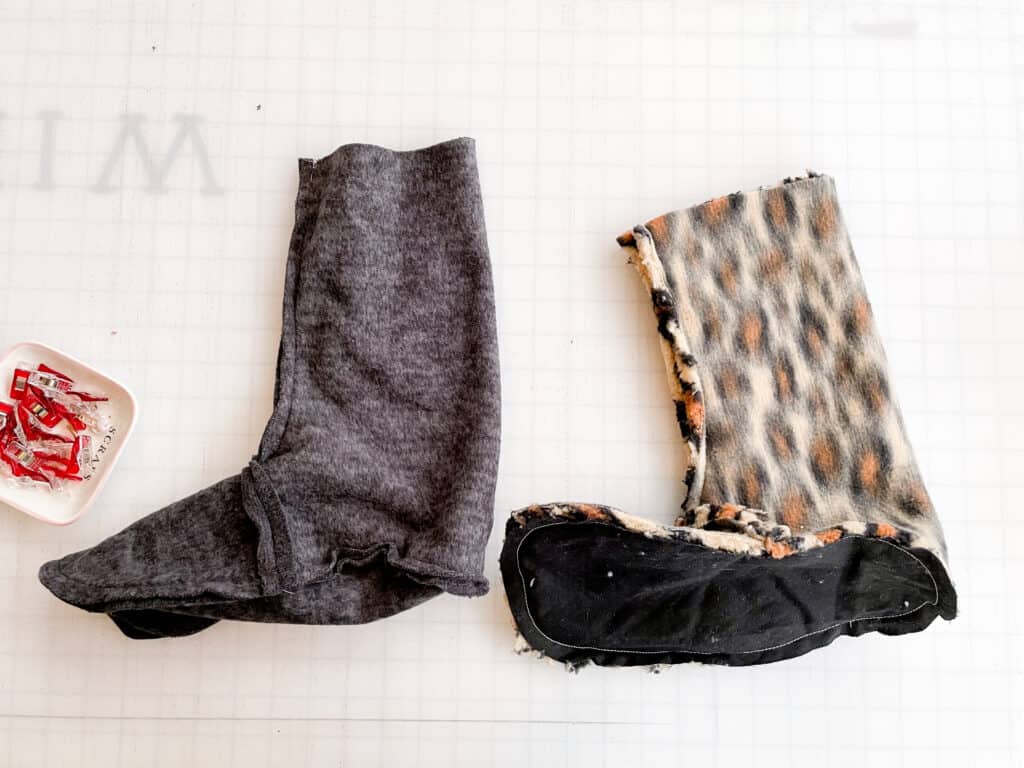
Repeat with lining fabric. 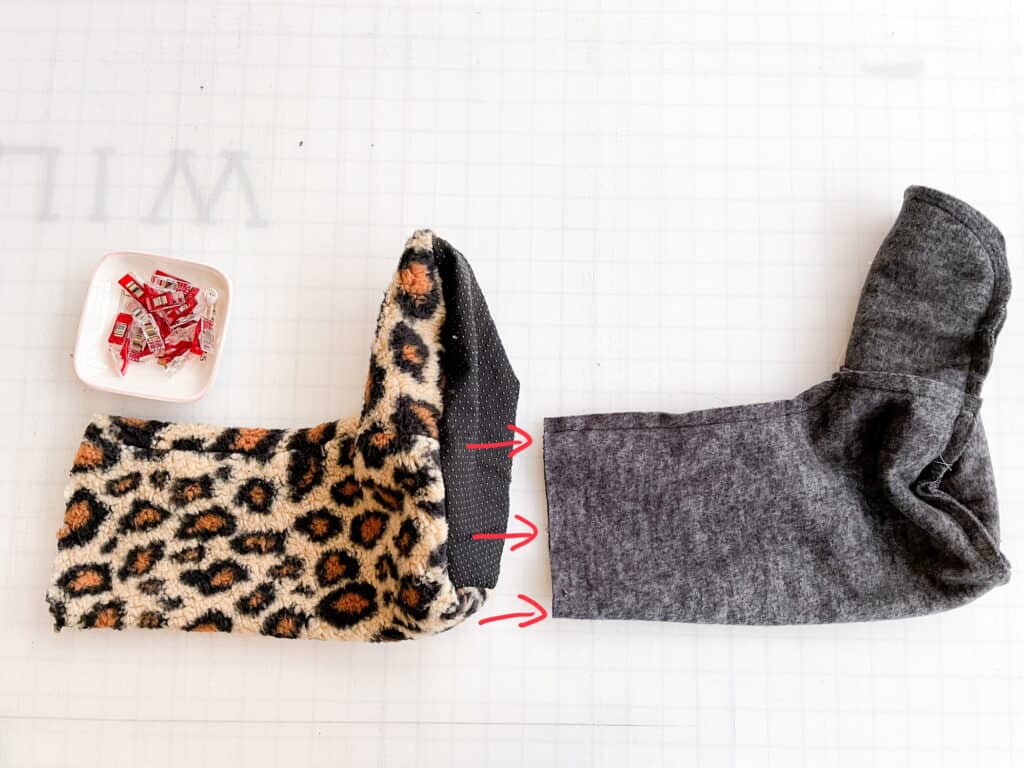
Flip the main boot right sides out, keeping the lining piece with wrong sides facing outward, then stuff the main boot inside of the lining. 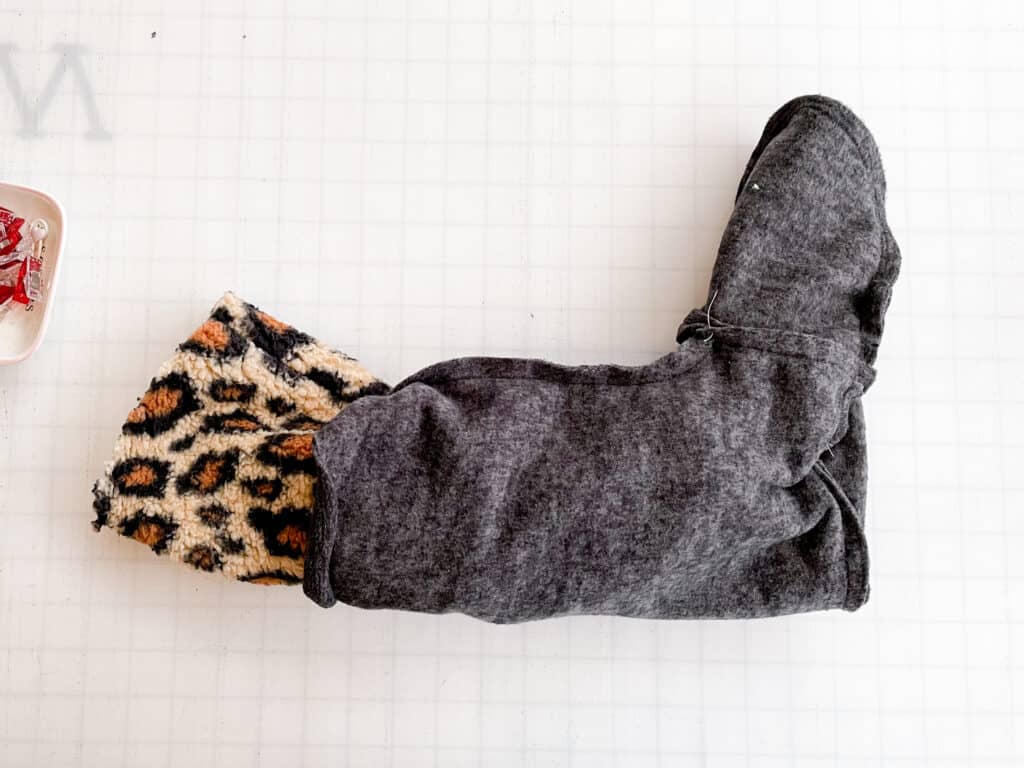
This will allow them to have right sides of the fabric facing each other. 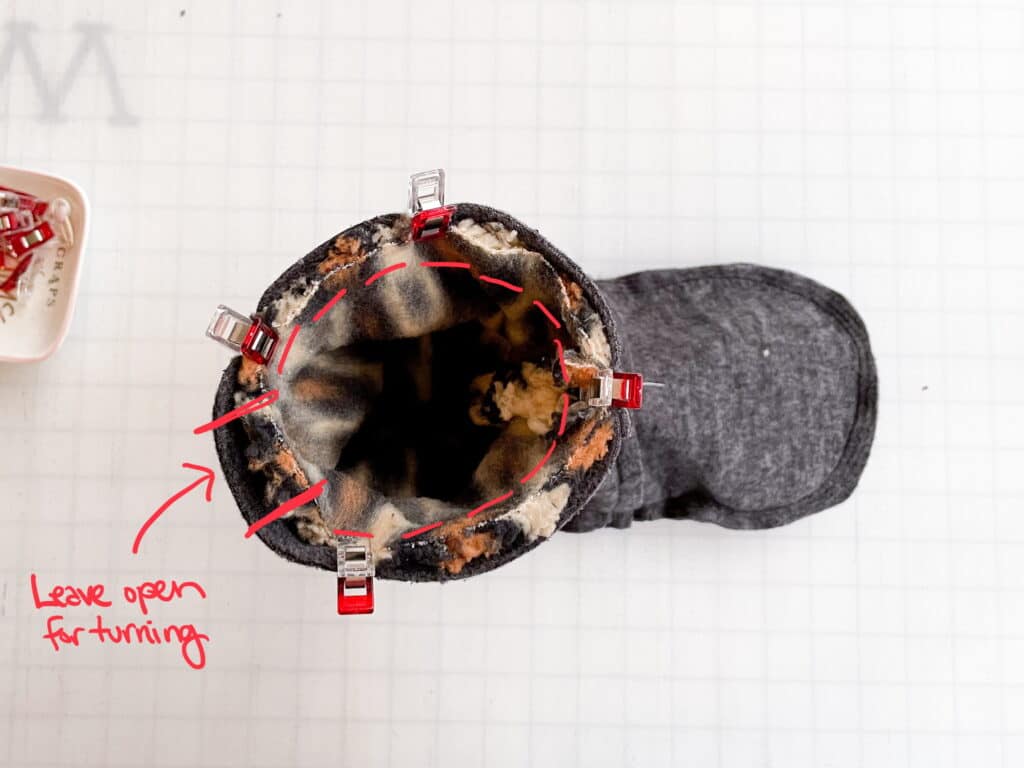
Align the raw edges along the top. Sew, using 1/2″ seam allowance, while keeping a 3-4″ opening for turning. 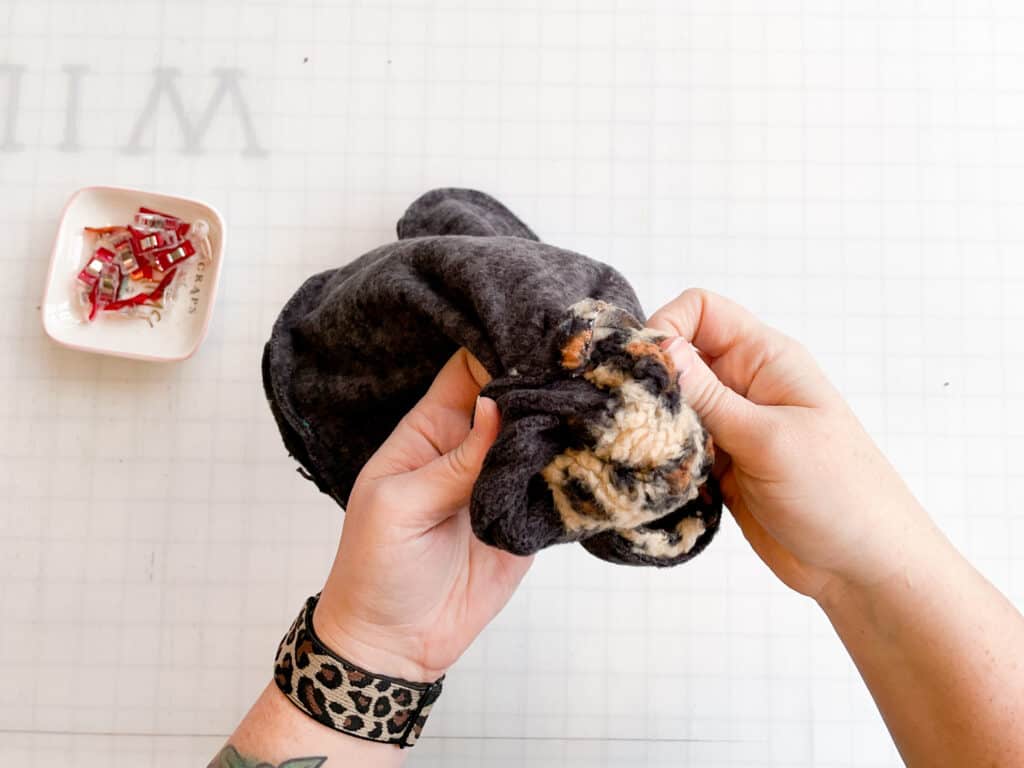
Turn fabric right sides out through the opening you left. 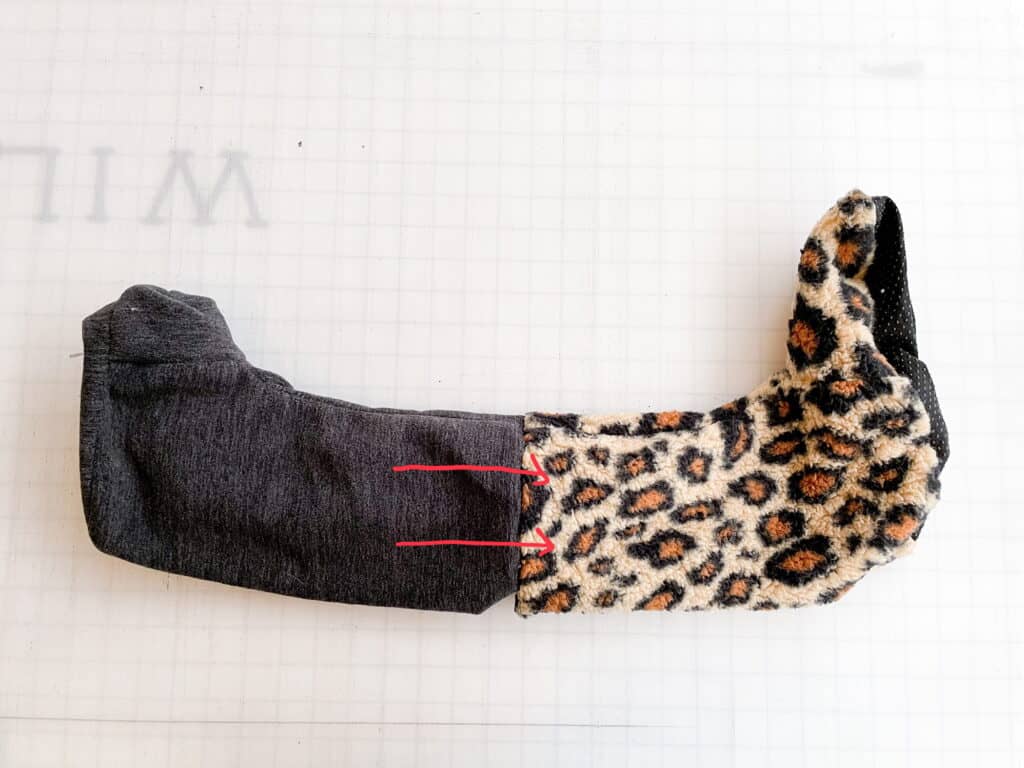
Push the lining fabric into the main fabric. 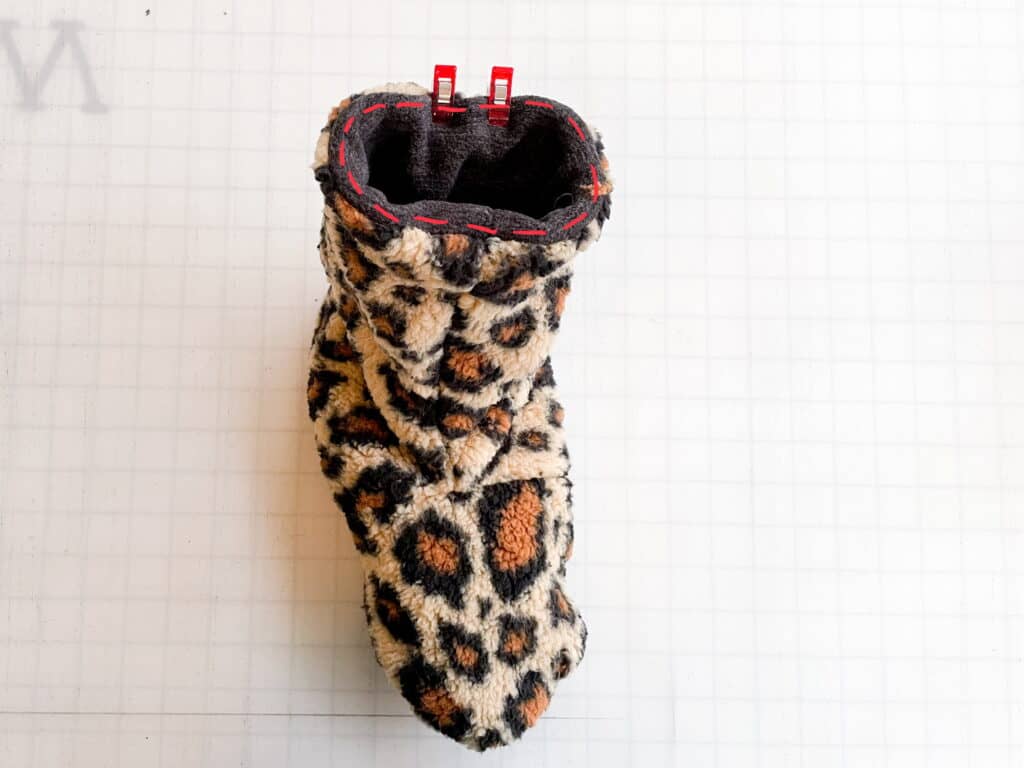
Either by using a blind stitch in the opening, or top stitching around the entire upper edge, sew the opening shut. 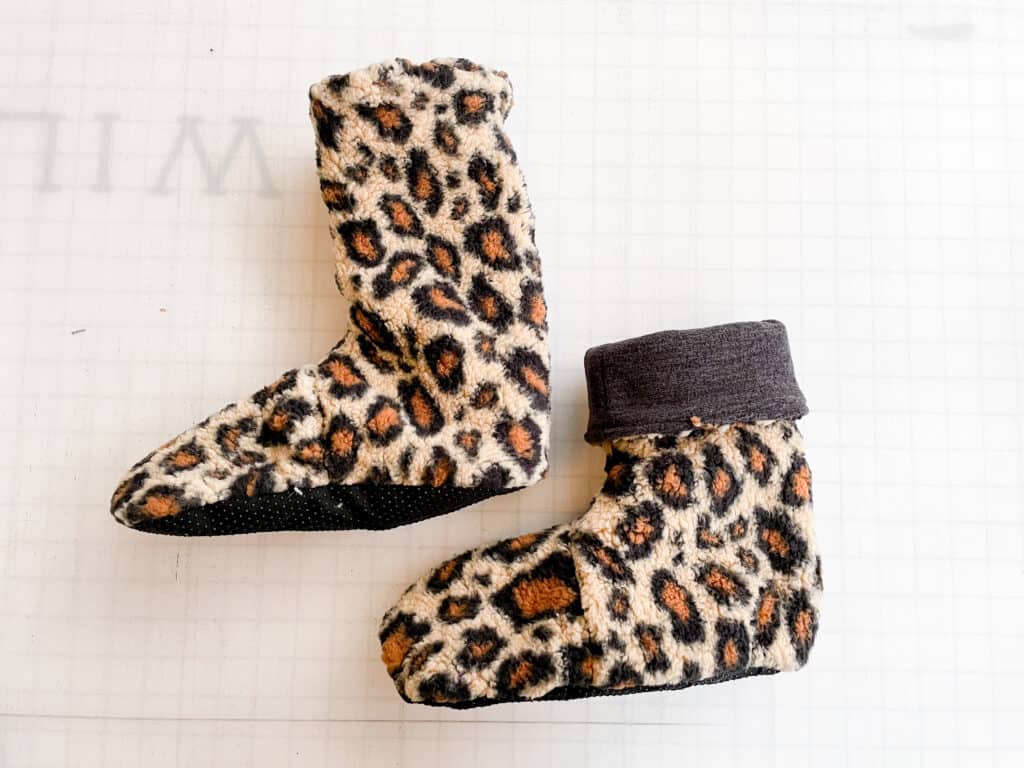
Complete all steps for second slipper. You’re finished!
I left enough height on these slippers so you can wear them folded, for a cute cuffed look, or unfolded for a taller sock. Your choice! I’m excited to see what you prefer!
In case you consider yourself a more “visual learner” here’s a video tutorial that walks you through the entire tutorial, start-to-finish.
Check out what our fabulous testers were able to create with this very same tutorial!


I la-la-love when you share your photos with me! Head over to the Patterns for Pirates Facebook Group and show us what you’ve made!
Happy Holidays, Pirates!

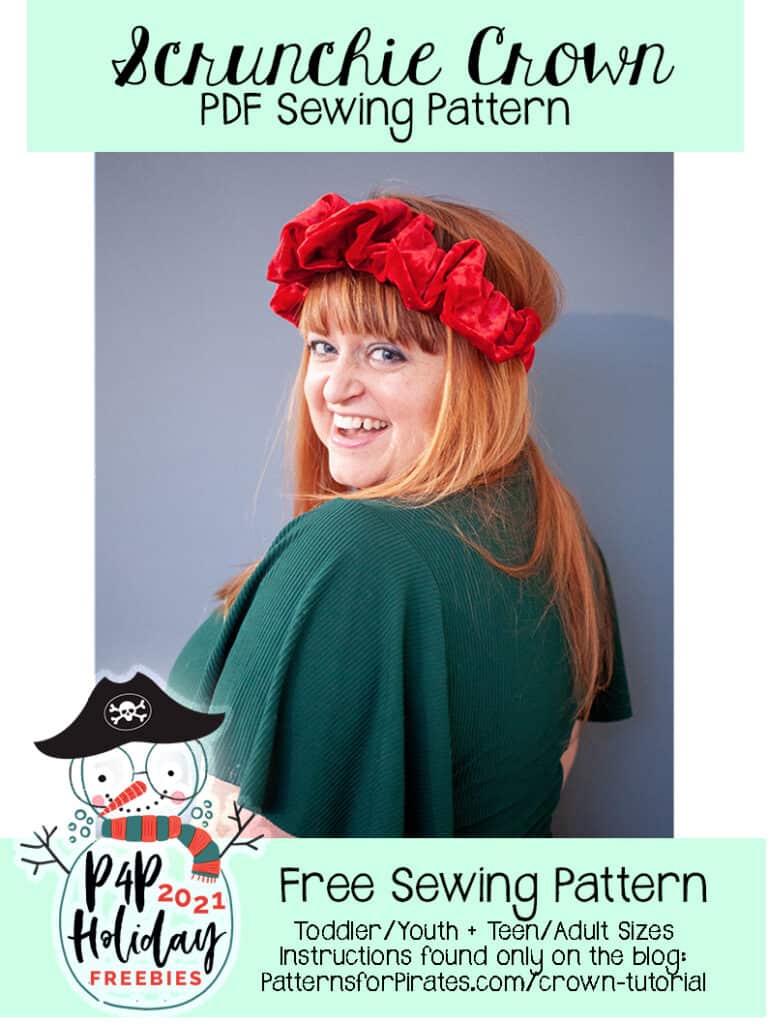
2021 Holiday Freebies :: Scrunchie Crown
Happy Holidays, Pirate Friends! We are excitedly back for another year and another round of holiday freebies to share with you! Over the years, we’ve compiled different tutorials and patterns that we think would make *perfect* gifts for your friends and family. Curious about what we’ve already released in the way of holiday freebies? Head right here to see all of them: Holiday Freebies Roundup.
Today, we are bringing you the: Scrunchie Crown!
The Scrunchie Crown will having you feel like royalty in no time at all. At it’s most basic form, it’s a headband. At it’s Pirate form, it’s a gorgeous crown-like headband that is super fun to wear (and can also double as a standard oversized scrunchie for buns).
Supplies Needed:
- Scrunchie Crown pattern pieces
- Less than 1/4 yard knit or woven fabric
- 3/4″ elastic
TUTORIAL
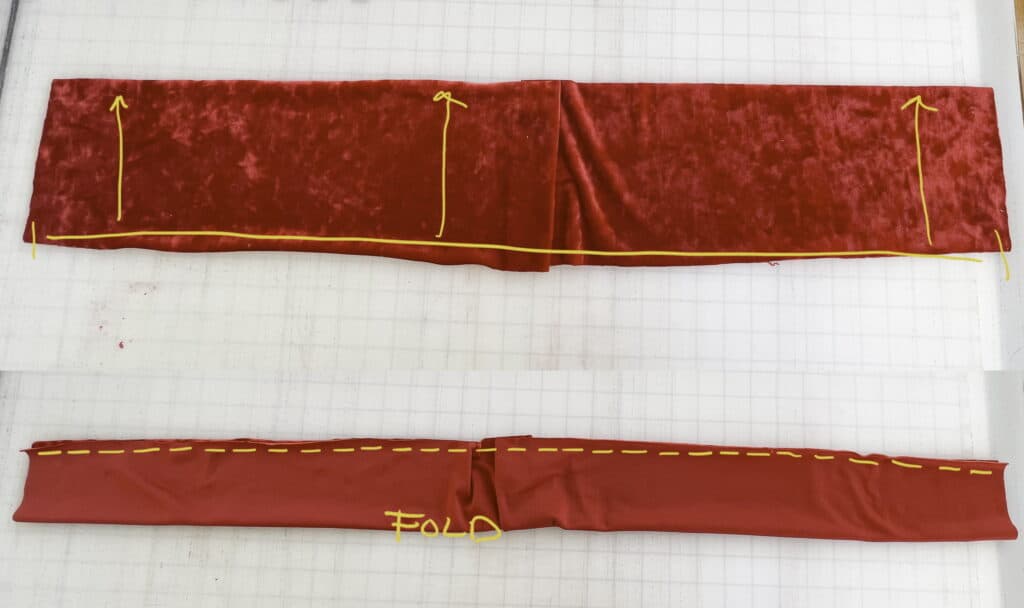
Step 1: Fold the top headband piece, with right sides together, meeting the long edge. Sew using 1/2″ seam allowance. 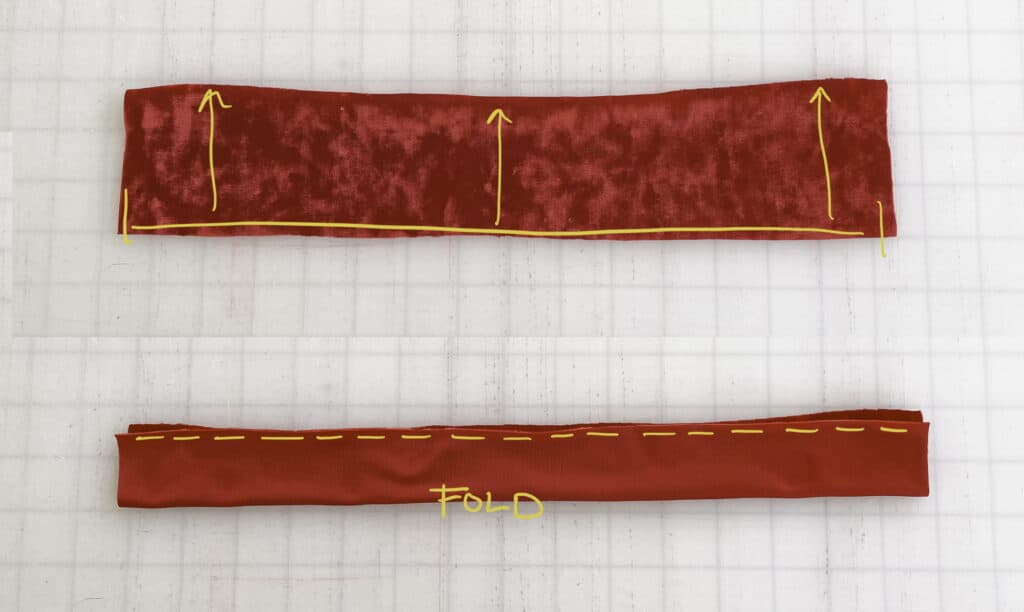
Step 2: Repeat with the bottom headband piece, folding with right sides together, meeting the long edge. Sew using 1/2″ seam allowance. 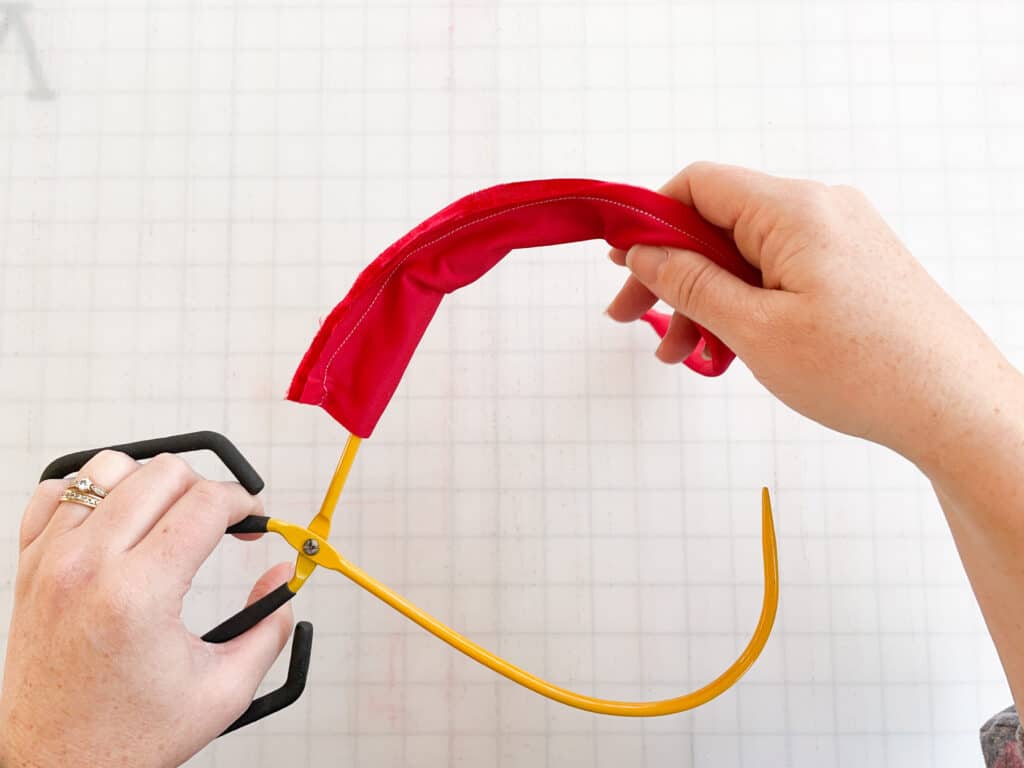
Step 3: Turn right sides out. 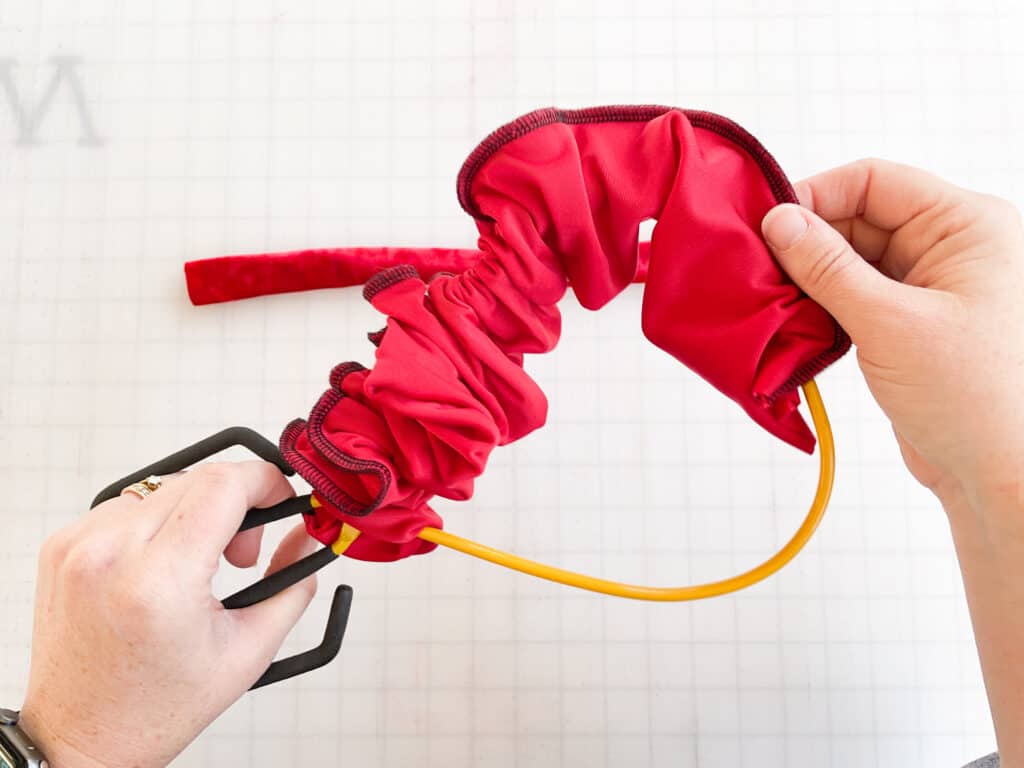
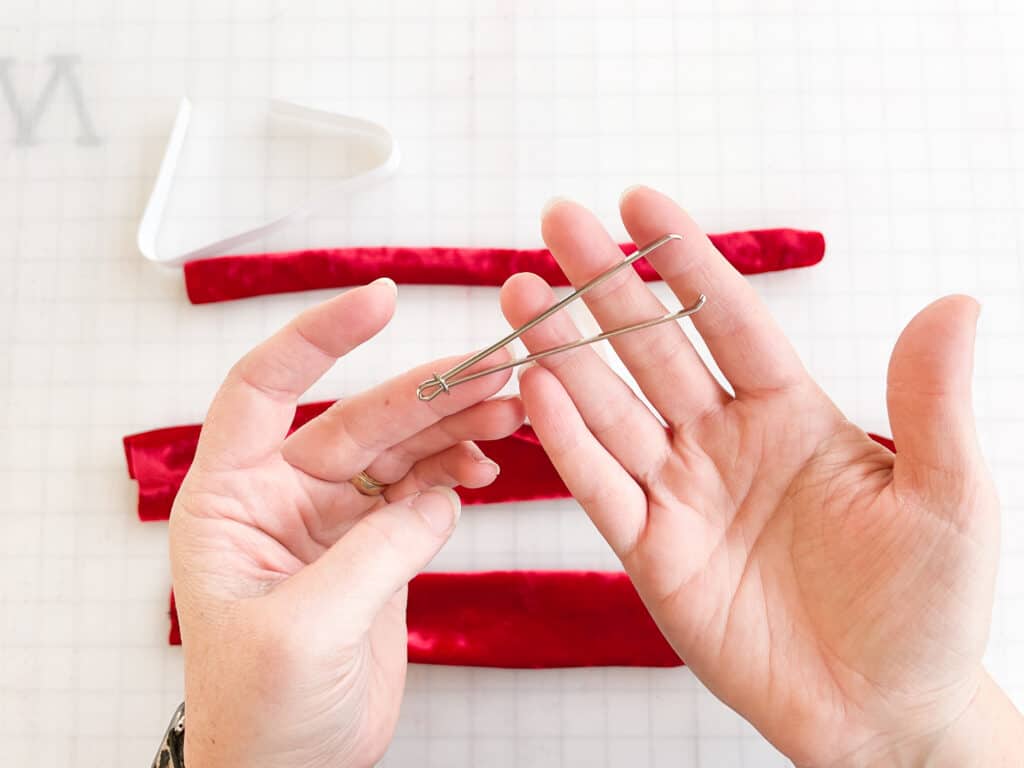
Step 4: Using your favorite elastic threading tool, add your elastic in the top and bottom headband pieces. 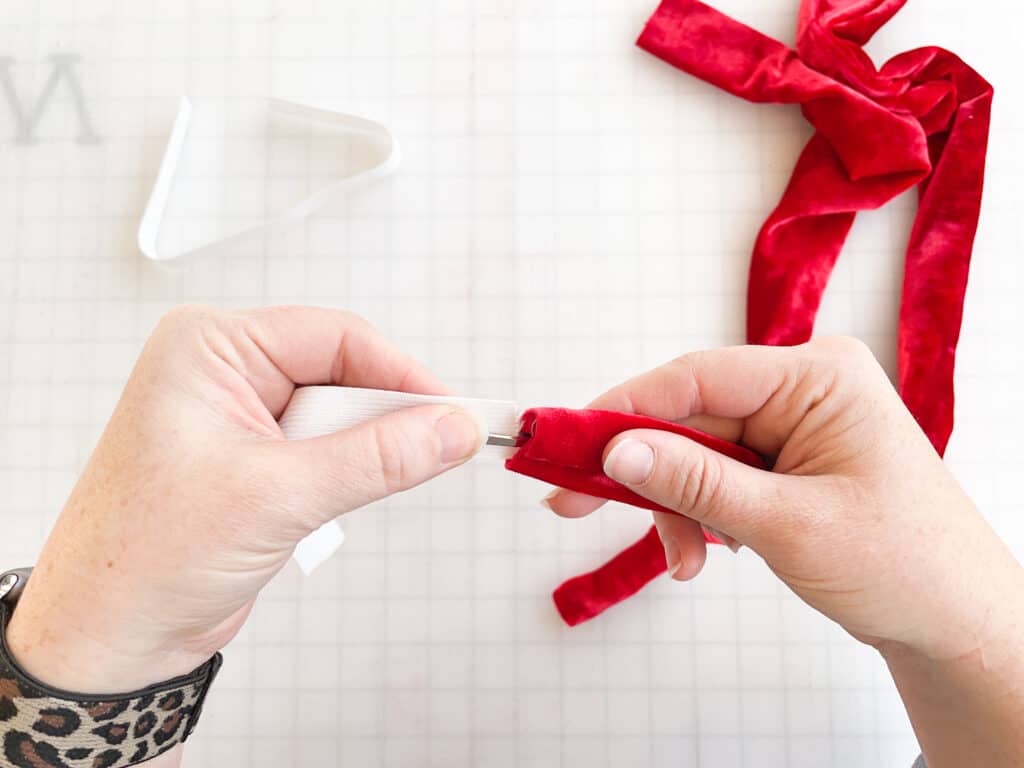
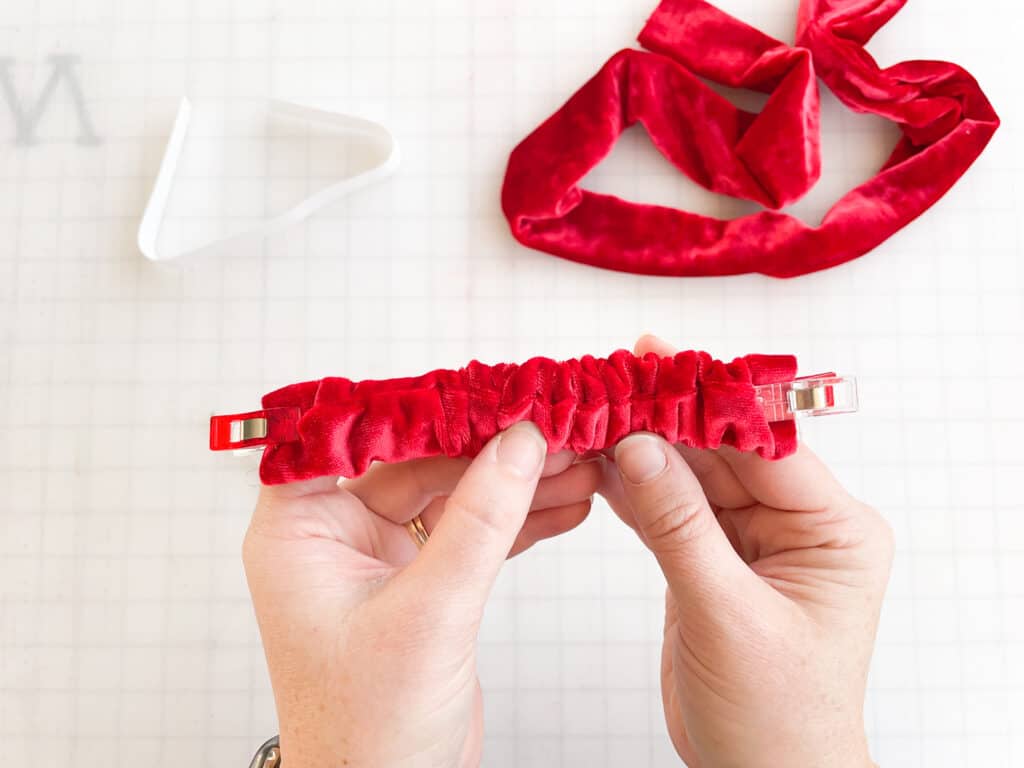
The fabric is a lot longer than the elastic. It’s easiest to first pin / clip the fabric to the elastic ends before basting. Be sure not to twist your fabric while adding the elastic in the tubes. 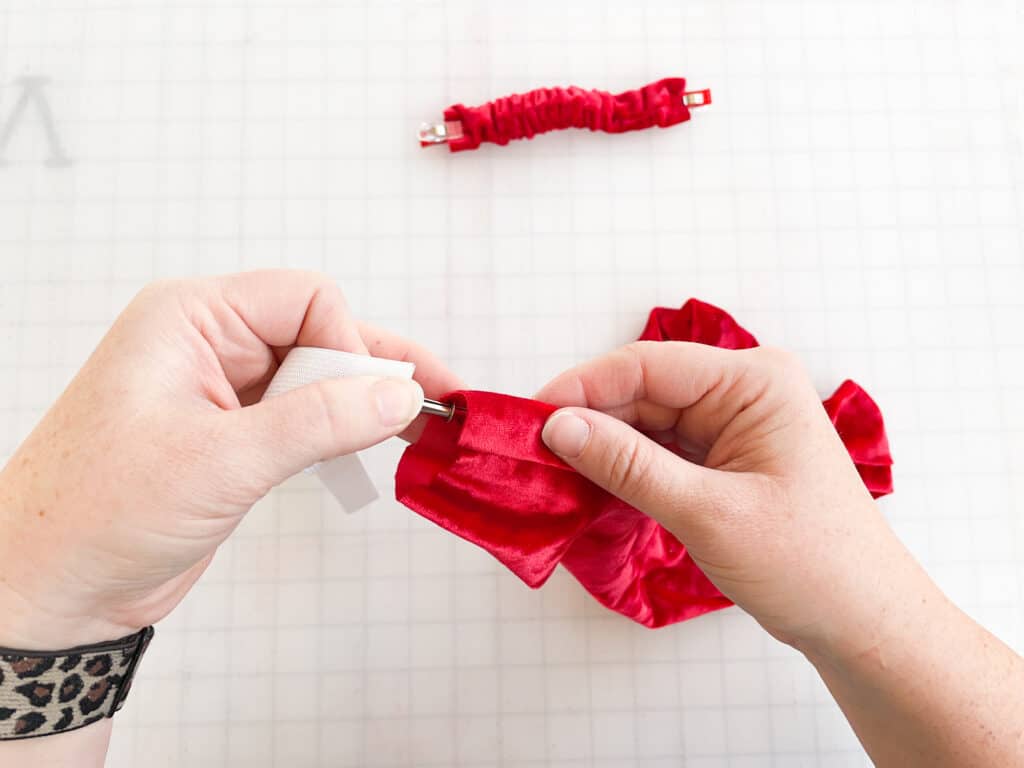
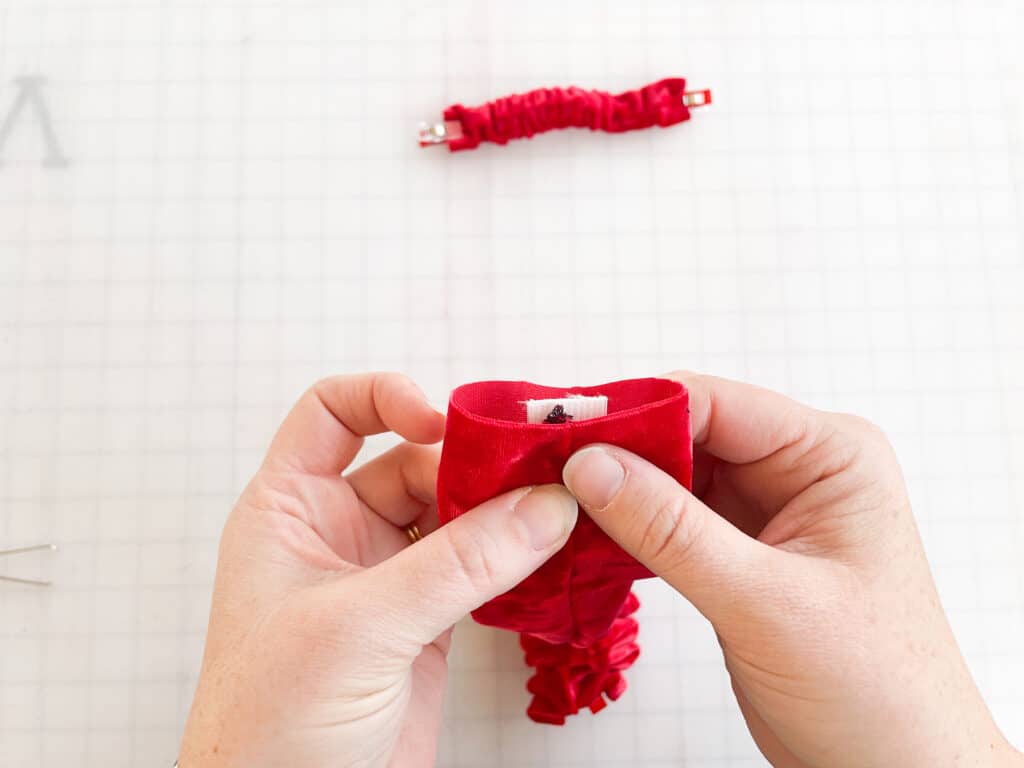
For both pieces, you’ll want to align the elastic with the seam centered on it. 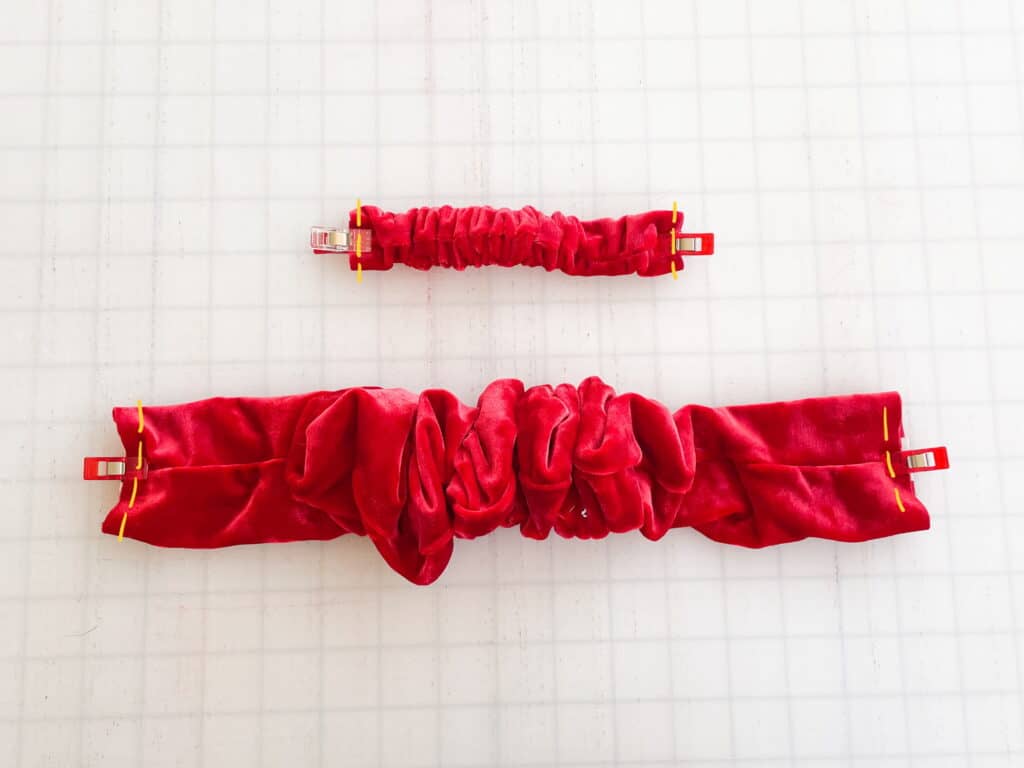
Step 5: Baste the fabric to the elastic on both pieces. 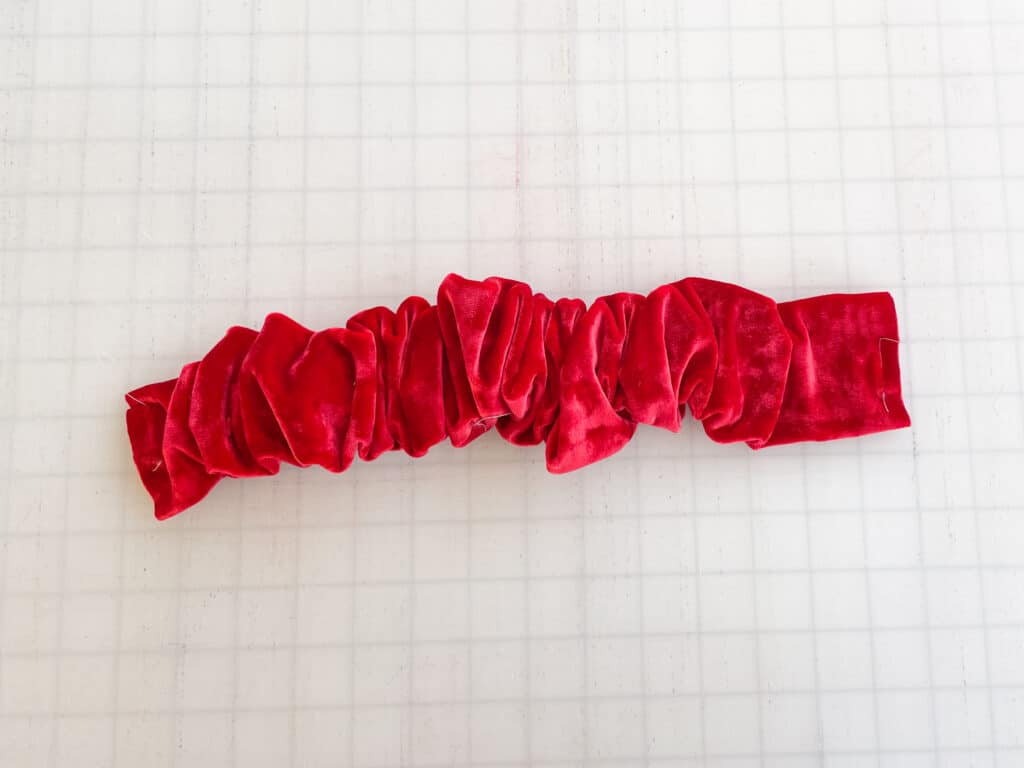
Step 6: Place your top headband piece on the table, with right sides facing you (aka, the seam should be on the table right now). 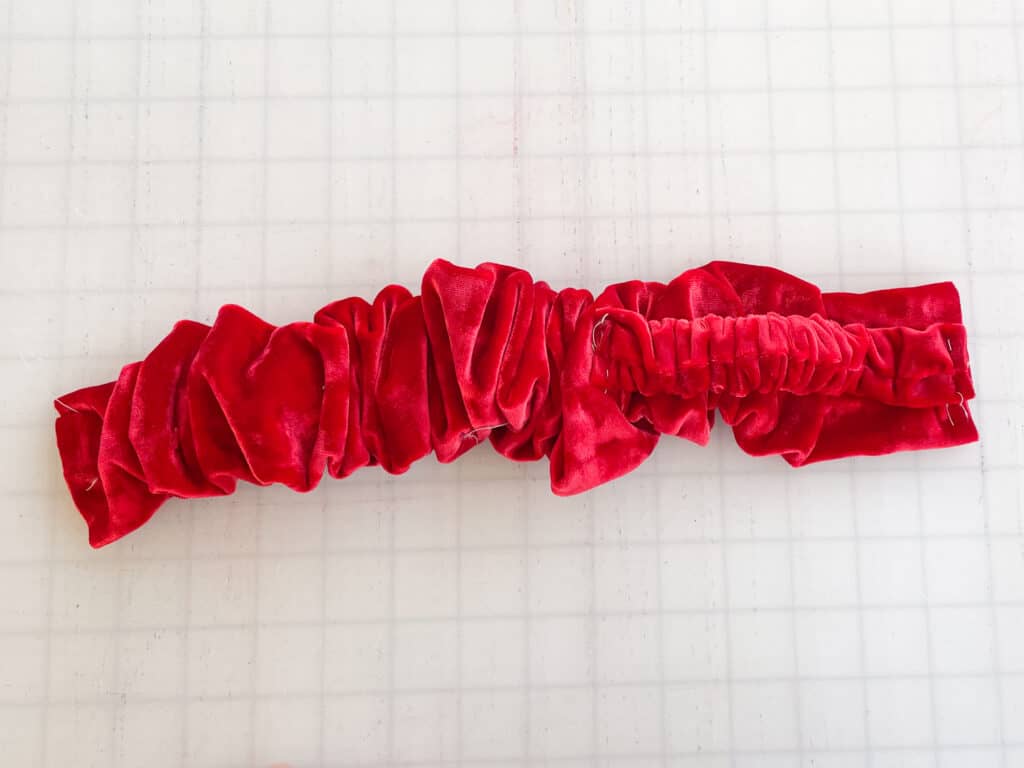
Step 7: Aligning the raw edges, place the bottom headband piece on top, with wrong sides facing you. (This will allow for both right sides of the top + bottom to be facing one another.) 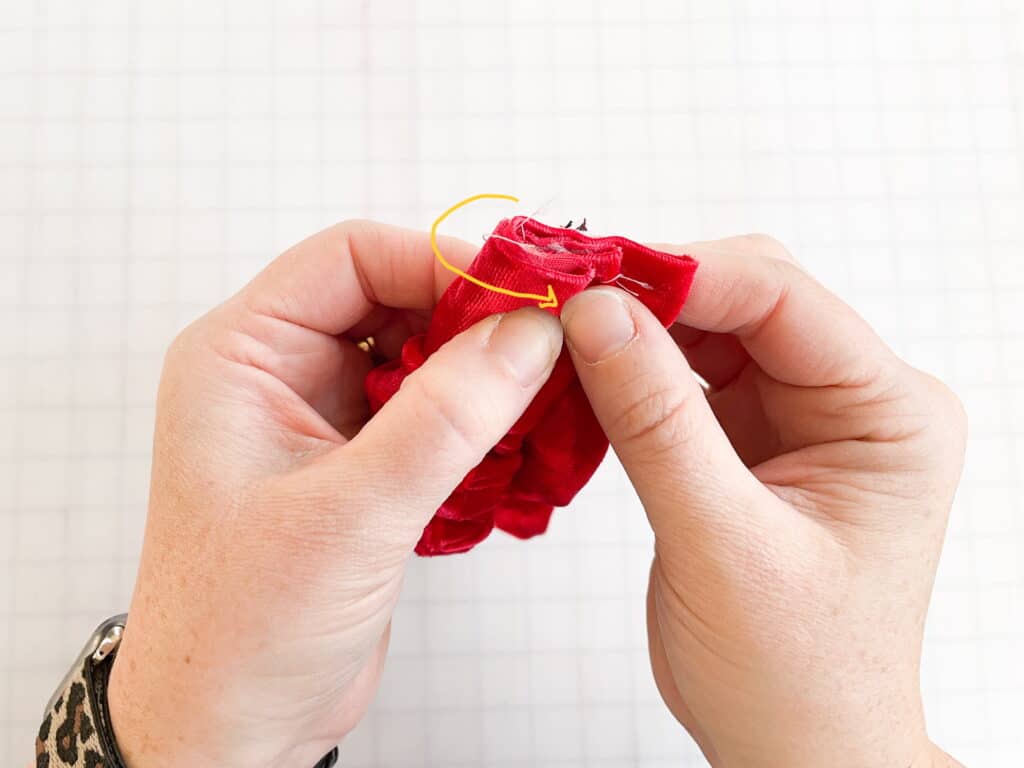
Step 8: Fold the excess fabric from the top headband piece around the bottom headband. 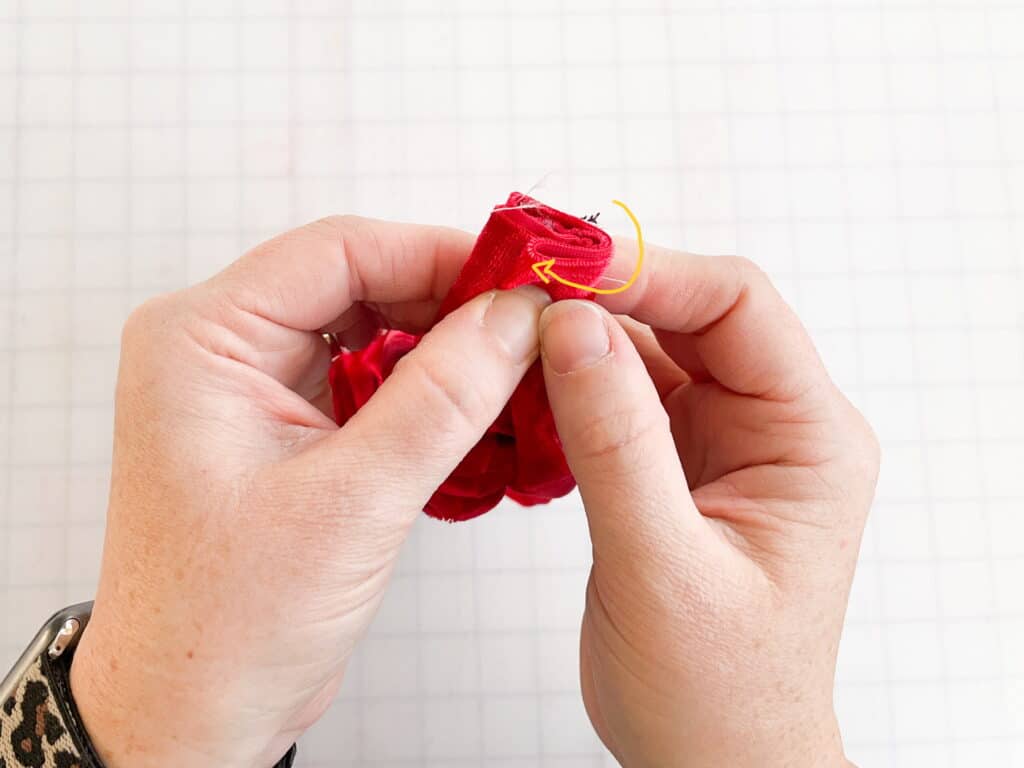
Your bottom headband will be completely encased by the top headband at this point. 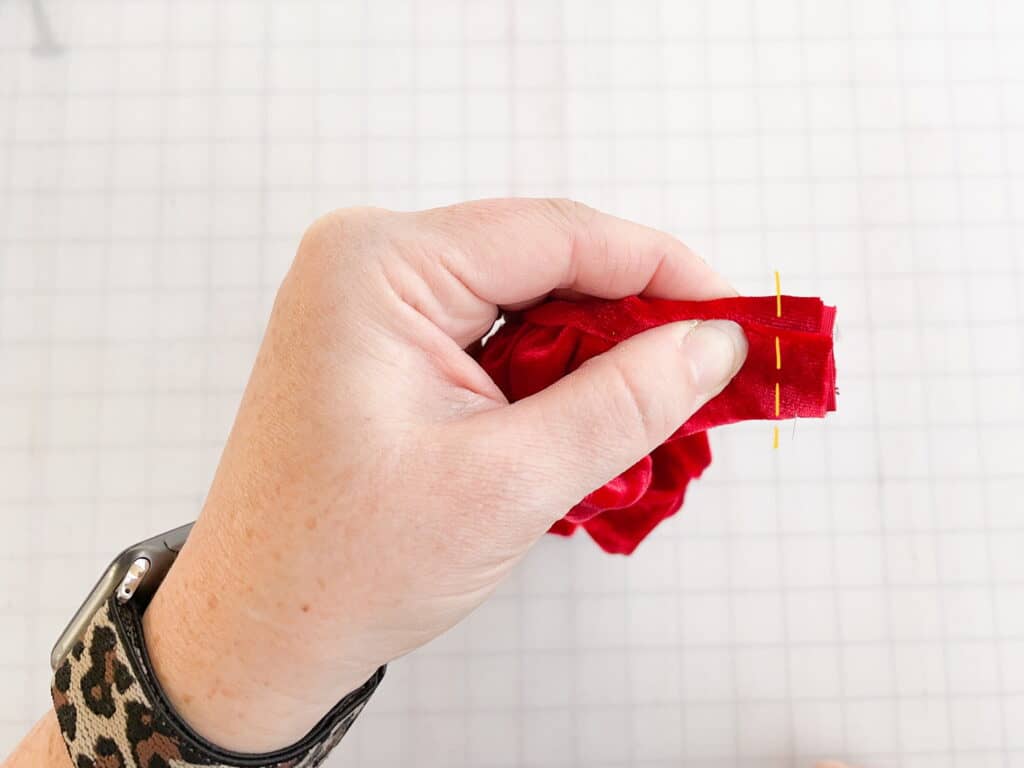
Step 9: Using 1/2″ seam allowance, sew along raw edge. 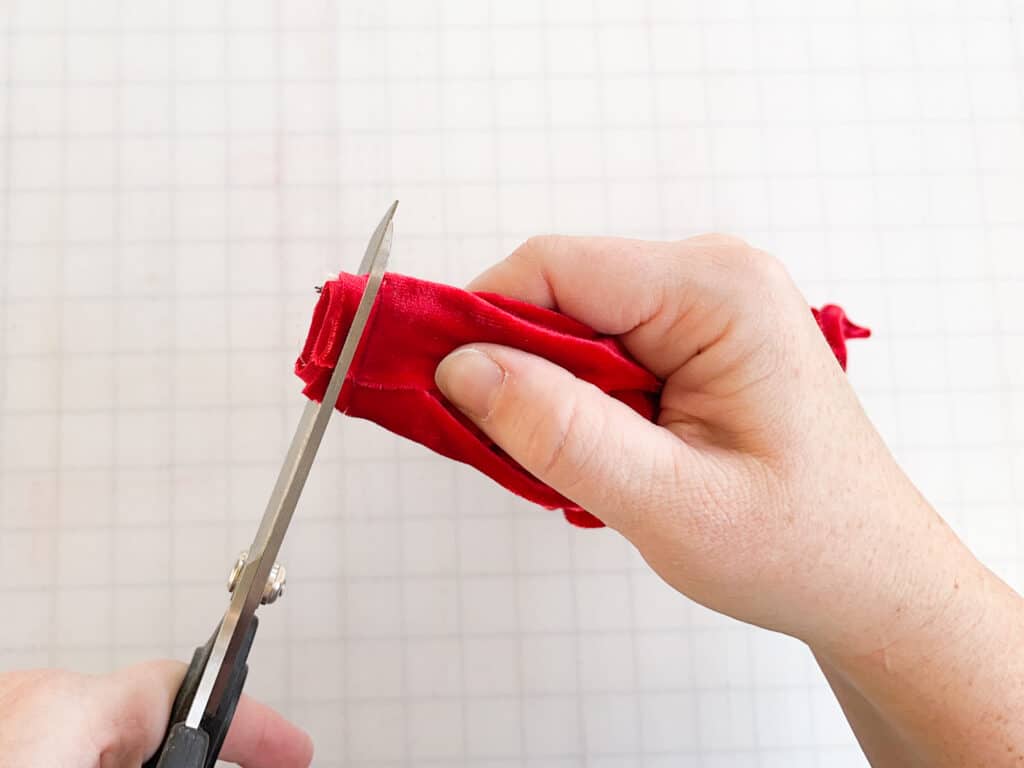
Step 10: Without cutting through your stitches, clip off excess fabric and elastic ends. 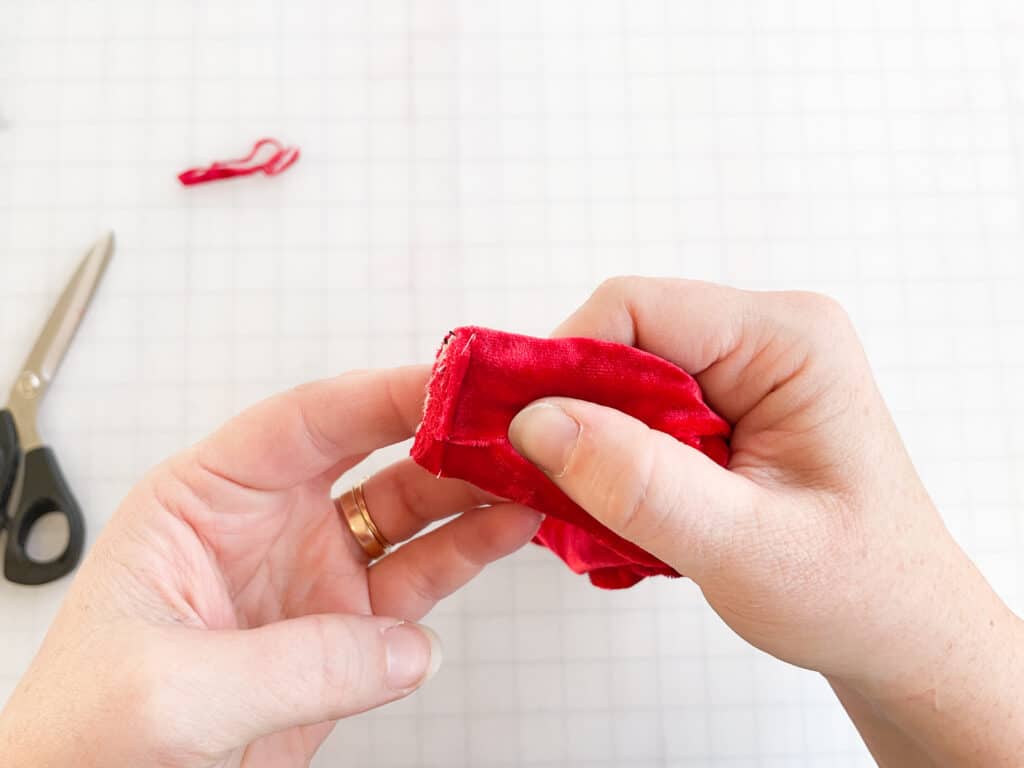
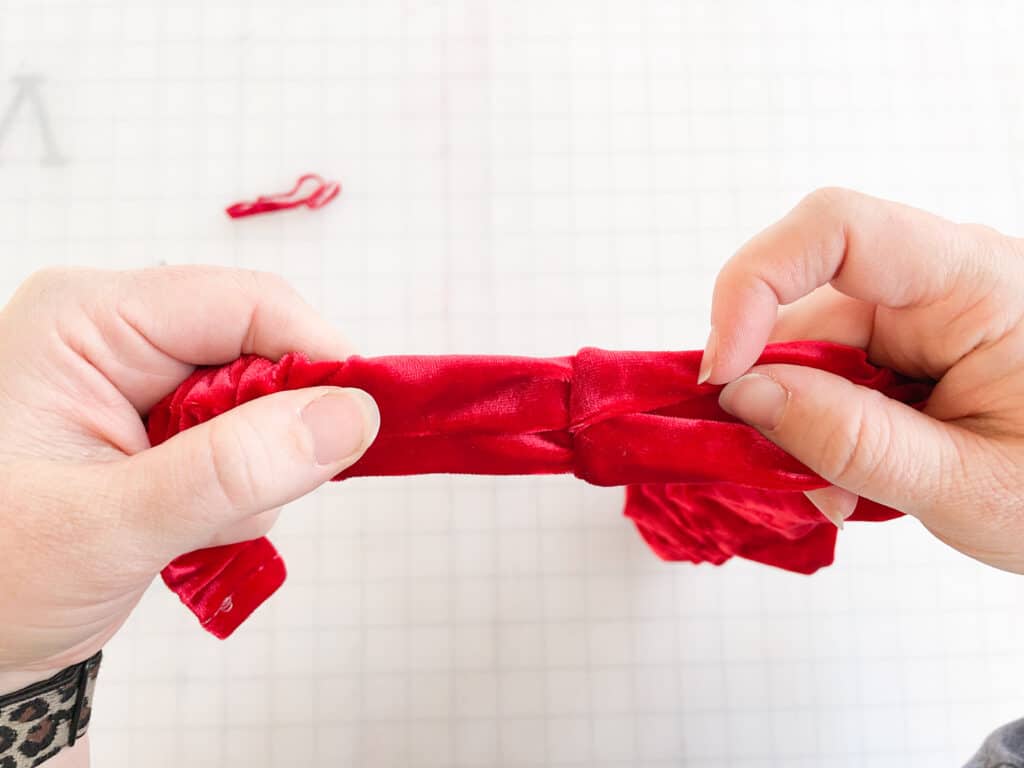
Step 11: Pull to flip fabric right sides out. The top headband piece will fold and hide your seams. Repeat Steps 6-11 on other side of headband pieces. 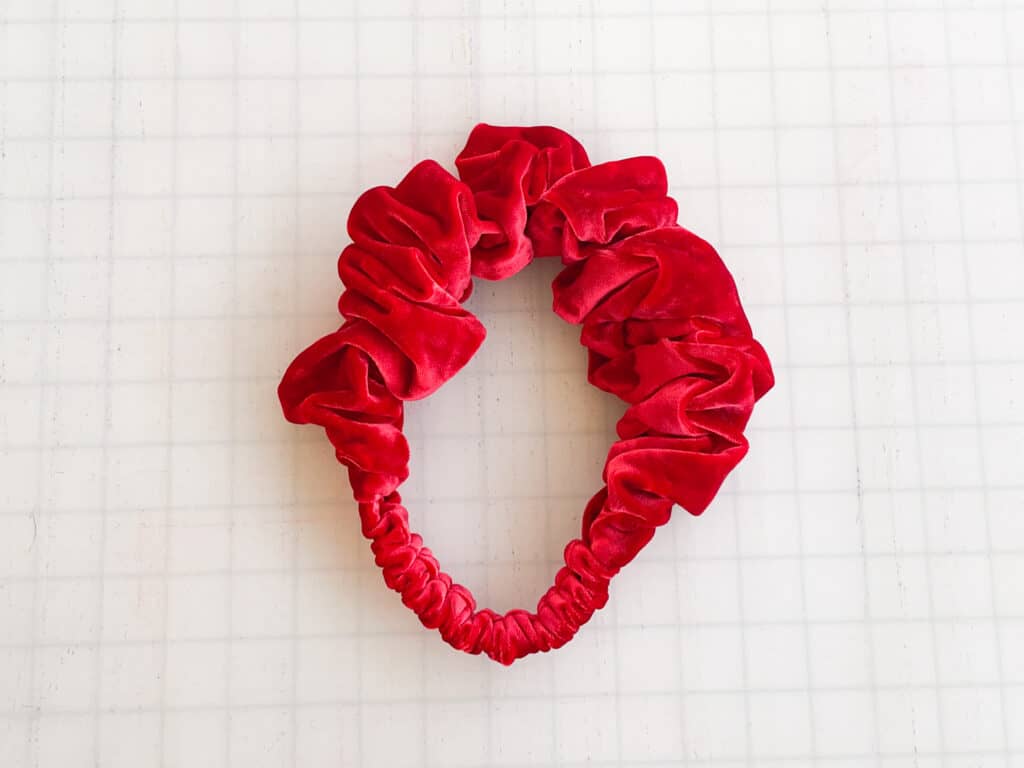
You’re finished!!
——–
In case you consider yourself a more “visual learner” here’s a video tutorial that walks you through the entire tutorial, start-to-finish.
Check out what our fabulous testers were able to create with this very same tutorial!


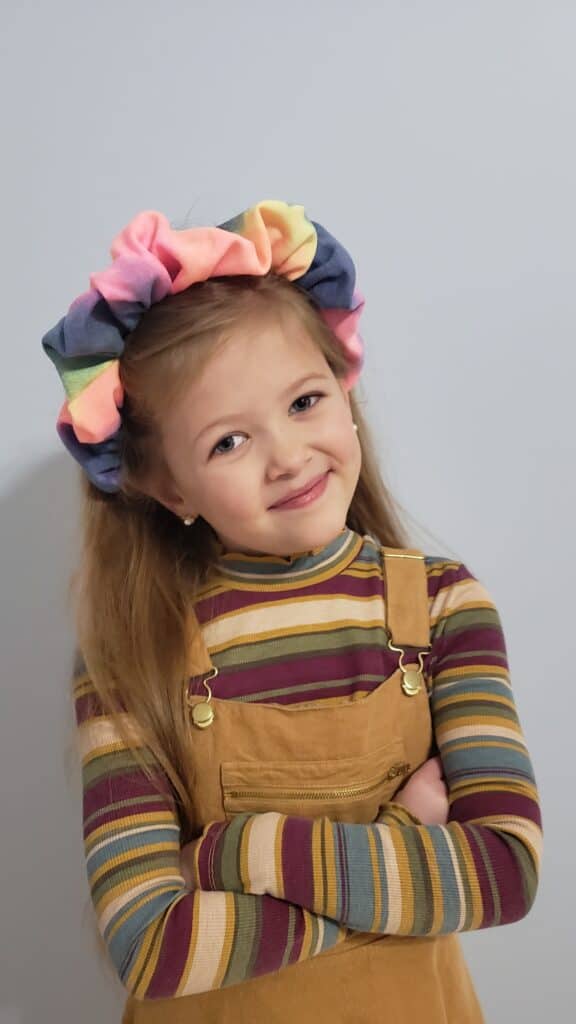


I la-la-love when you share your photos with me! Head over to the Patterns for Pirates Facebook Group and show us what you’ve made!
Happy Holidays, Pirates!

- « Previous Page
- 1
- …
- 11
- 12
- 13
- 14
- 15
- …
- 67
- Next Page »
