2021 Holiday Freebies :: Claire Wrap
Happy Holidays, Pirate Friends! We are excitedly back for another year and another round of holiday freebies to share with you! Over the years, we’ve compiled different tutorials and patterns that we think would make *perfect* gifts for your friends and family. Curious about what we’ve already released in the way of holiday freebies? Head right here to see all of them: Holiday Freebies Roundup.
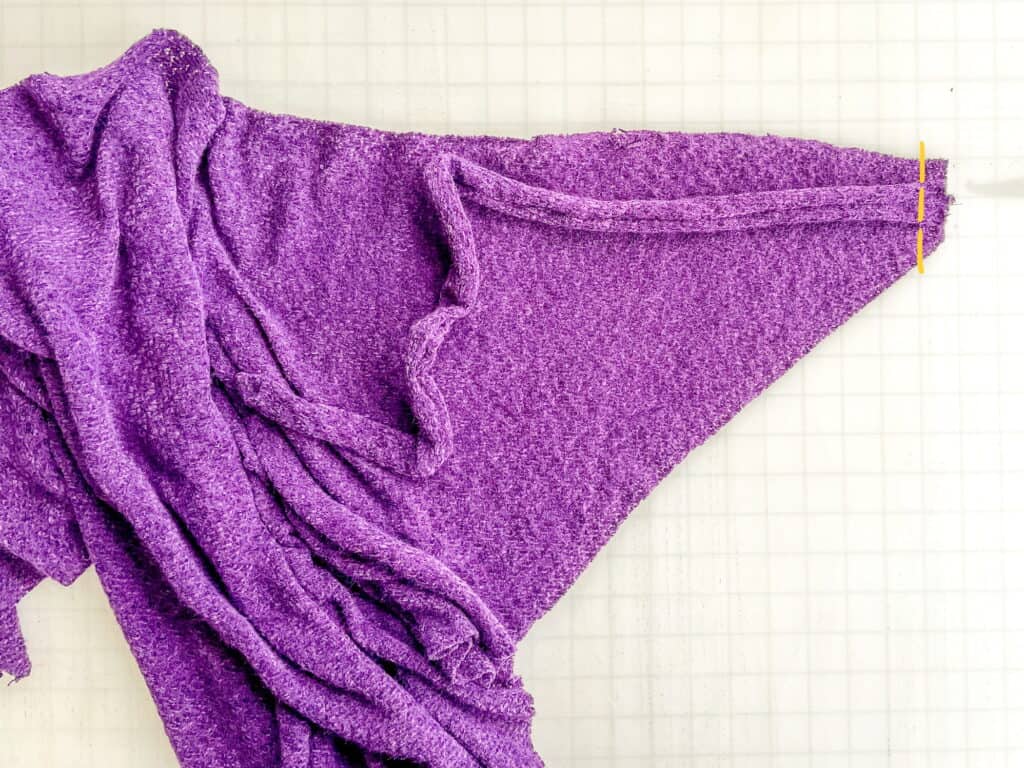
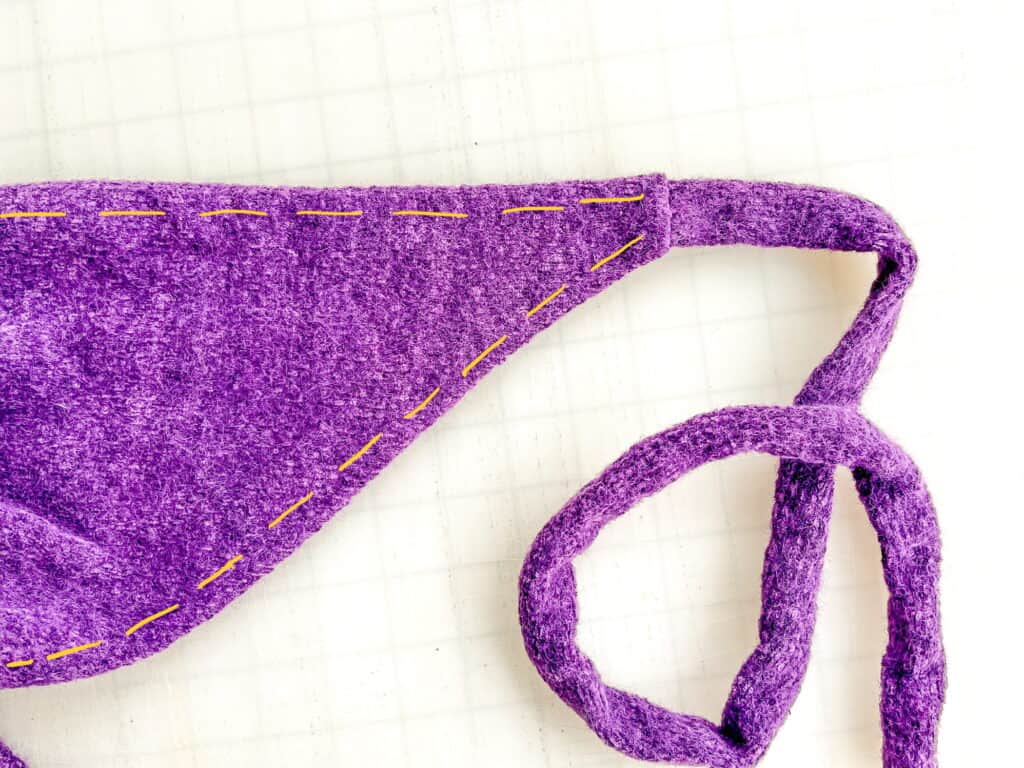
Today, we are bringing you the: Claire Wrap!
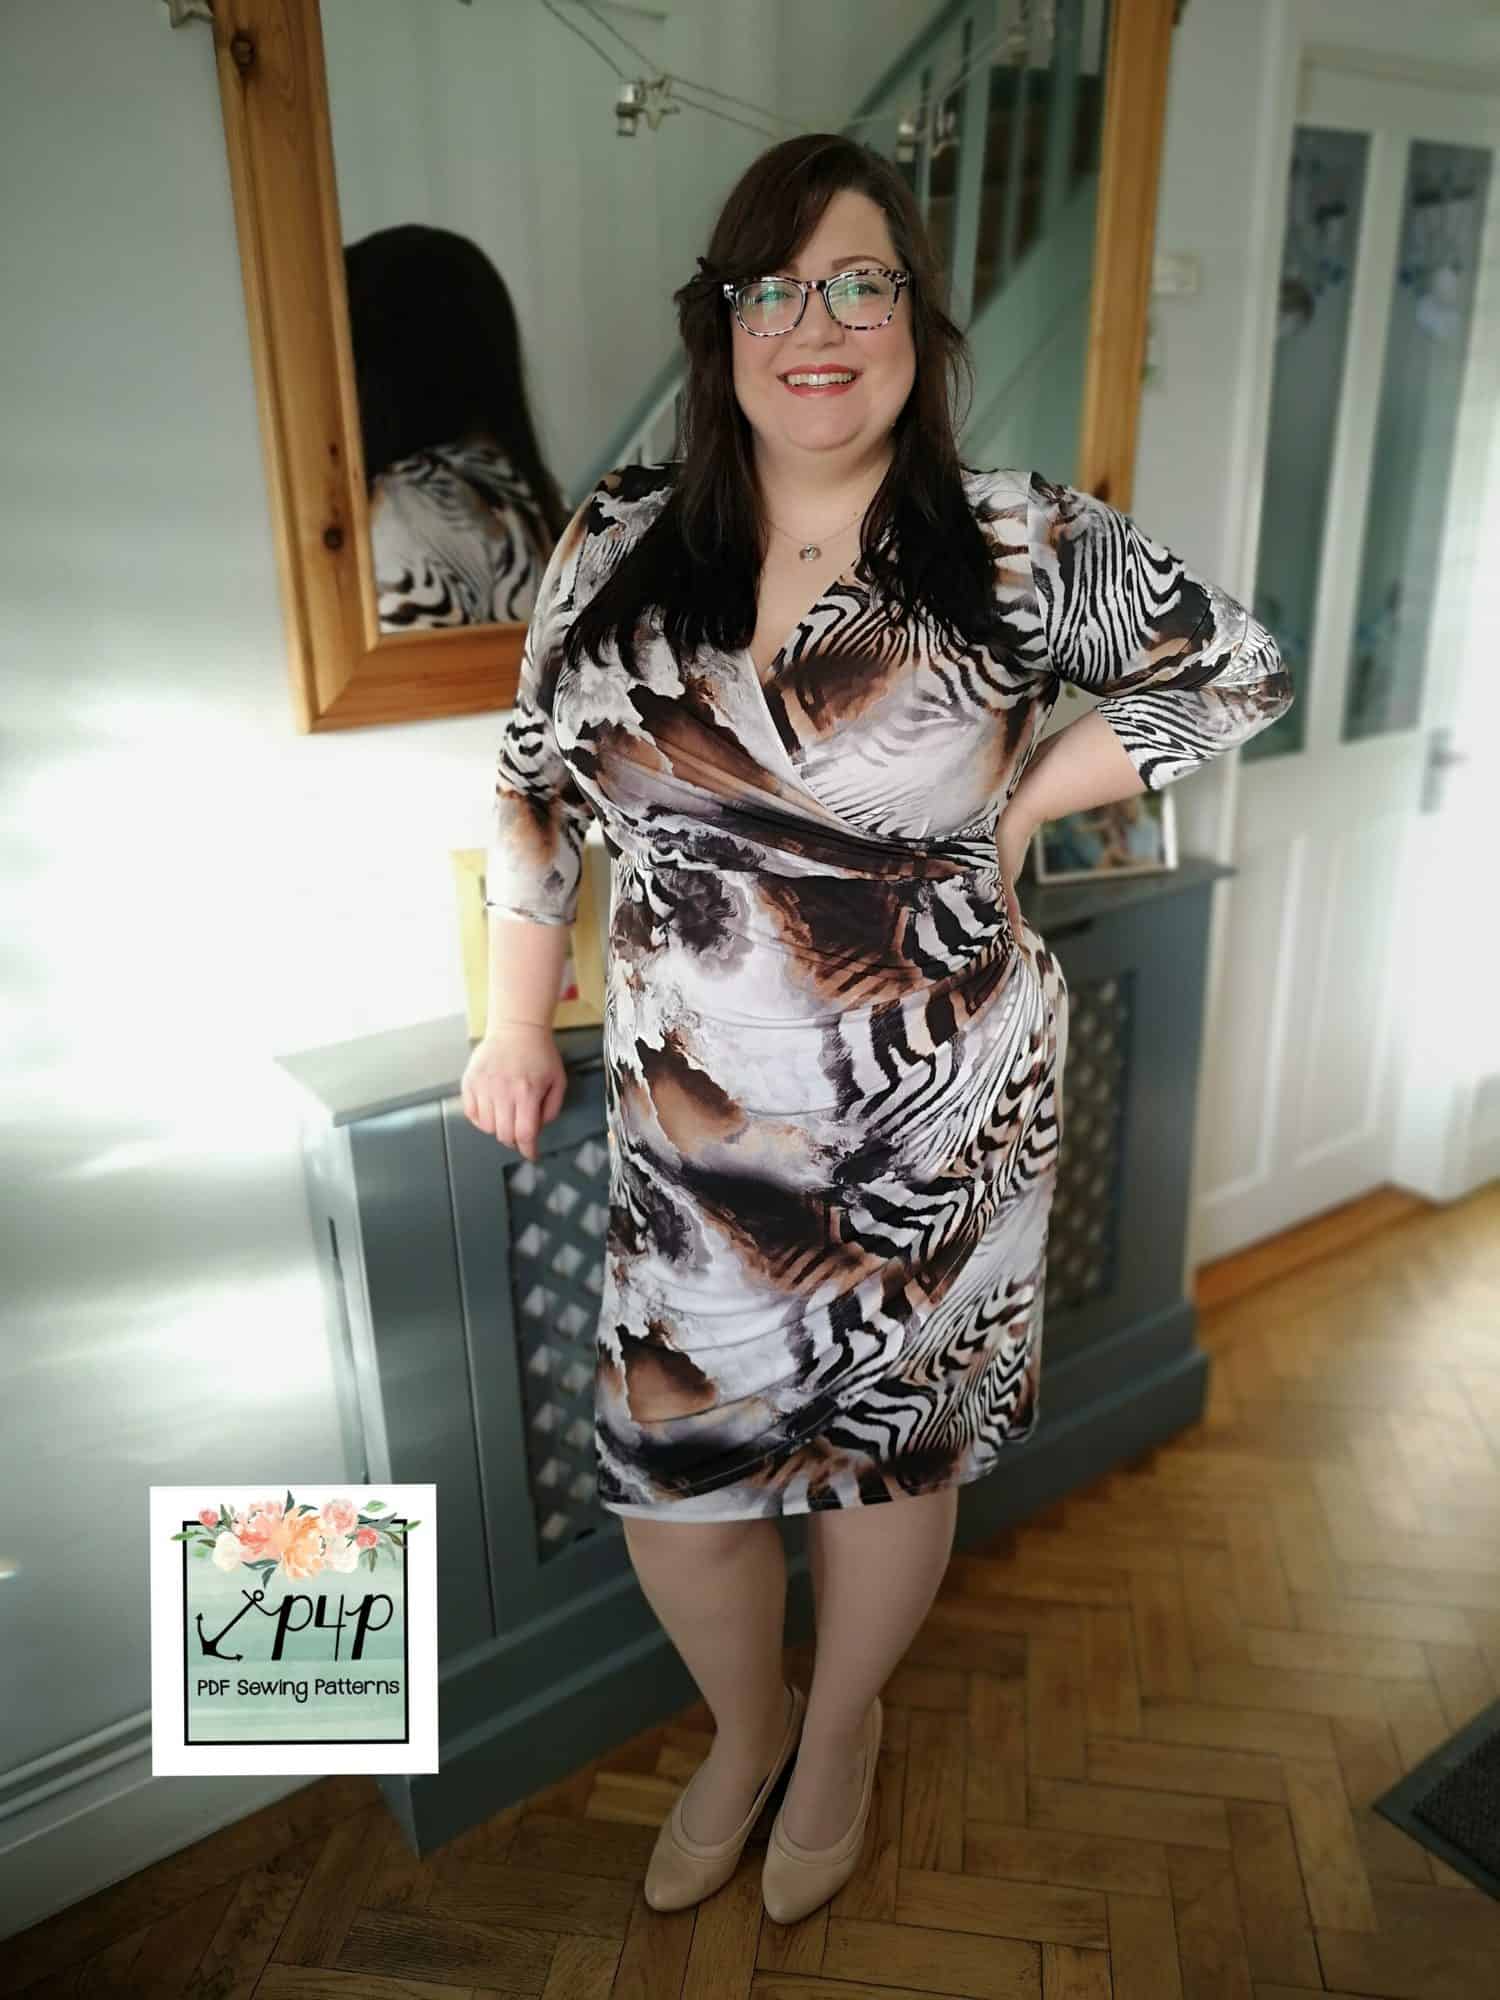
This wrap is inspired by no other than Claire Fraser from the show Outlander. I’ve not personally seen the show, but I have plenty of people in my life that watch it religiously. I saw a wrap Claire was wearing in an image from the show and felt like it’d be such a great accessory to have for myself!
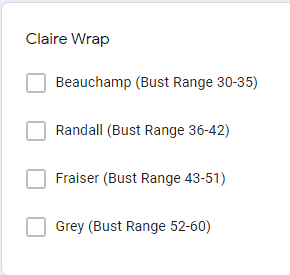
As there are four sizes, it felt right to name them like this. 😉
Supplies Needed:
- Claire Wrap pattern pieces
- 2 Yards Knit Fabric
**A wide range of knit fabrics can be used for this. I recommend something with a little bit of stretch, so when it’s being worn over the shoulder it moves more easily with you.
TUTORIAL
——–
In case you consider yourself a more “visual learner” here’s a video tutorial that walks you through the entire tutorial, start-to-finish.
Check out what our fabulous testers were able to create with this very same tutorial!
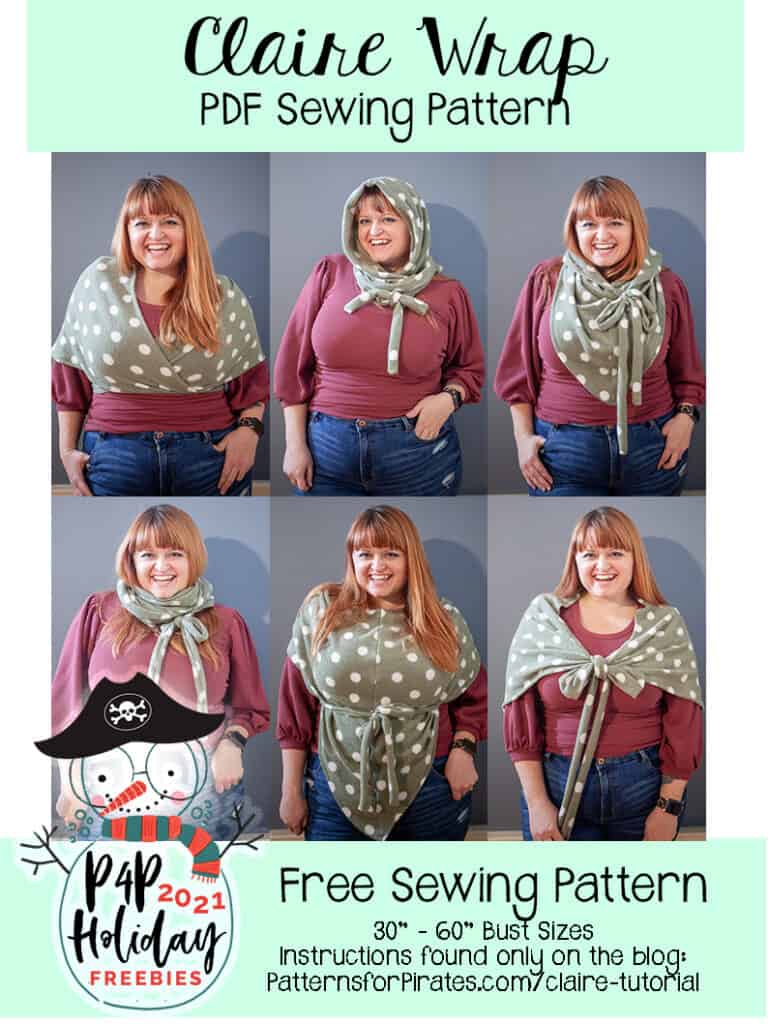
The best part about this wrap is that it can be worn SO MANY different ways!
I la-la-love when you share your photos with me! Head over to the Patterns for Pirates Facebook Group and show us what you’ve made!
Happy Holidays, Pirates!
2021 Holiday Freebies :: Earflap Hat
Happy Holidays, Pirate Friends! We are excitedly back for another year and another round of holiday freebies to share with you! Over the years, we’ve compiled different tutorials and patterns that we think would make *perfect* gifts for your friends and family. Curious about what we’ve already released in the way of holiday freebies? Head right here to see all of them: Holiday Freebies Roundup.
Today, we are bringing you the: Earflap Hat!
Who doesn’t love a quick and easy (and comfy) knit hat?? It’s a perfect go-to for the cooler months, and this hat is actually an incredible basic — I have so many ideas for how to dress it up! All seams end up fully enclosed, so it’s actually reversible too! Grab your favorite combo of fabrics and you’ll get 2-in-1 hats from this sweet little pattern!
Supplies Needed:
- Earflap Hat pattern pieces
- Less than 1/3 yard knit fabric
**if using a thicker fleece / fun fur for the lining, I’d recommend sizing up!
TUTORIAL
Step 1: Place back piece, right sides up. Step 2: With right sides facing each other, place the front piece on top, aligning long curved side edges. Step 3: Stitch, using 1/2″ seam allowance. Step 4: Open hat in opposite direction, matching the seams you just created at the top. Step 5: Sew the opening shut, using 1/2″ seam allowance. Repeat Steps 1-5 with lining fabric. Step 6: Place hat lining wrong sides out, and with main hat right sides out, slide the main hat inside of the lining. Step 7: Align all raw edges and sew using 1/2″ seam allowance. Leave 3-4″ opening for turning. Step 8: Turn hat right sides out. Step 9: Push lining fabric inside of main hat. Edge stitch along entire bottom of hat. You’re finished! And it’s reversible!
——–
In case you consider yourself a more “visual learner” here’s a video tutorial that walks you through the entire tutorial, start-to-finish.
Check out what our fabulous testers were able to create with this very same tutorial!
I la-la-love when you share your photos with me! Head over to the Patterns for Pirates Facebook Group and show us what you’ve made!
Happy Holidays, Pirates!
2021 Holiday Freebies :: Shiver Me Slipper Socks
Happy Holidays, Pirate Friends! We are excitedly back for another year and another round of holiday freebies to share with you! Over the years, we’ve compiled different tutorials and patterns that we think would make *perfect* gifts for your friends and family. Curious about what we’ve already released in the way of holiday freebies? Head right here to see all of them: Holiday Freebies Roundup.
Today, we are bringing you the: Shiver Me Slipper Socks!
My feet are ALWAYS cold in the winter. And big, fluffy slipper socks are pretty much my favorite thing ever to help combat the cold. It’s been on my list to make this pattern for a couple of years now and I’m super excited to be officially bringing them to y’all!
Supplies Needed:
- Shiver Me Slipper Socks pattern pieces
- less than 1/2 Yard each, Lining + Main Fleece Fabric
TUTORIAL
Fold one of the main Sock pieces in half, with right sides together. Using 1/2″ seam allowance, stitch along the curve. Open the sock up to create a straight line with the seam you just created in the center of that line. With right sides facing down, place the toe piece on top, matching along that straight edge. Sew using 1/2″ seam allowance. Mark toe front and heel back with pins/clips. With right sides facing each other, place the sole piece on top, aligning the front and back markings. Pin/clip pieces together, carefully easing the curves into one another. Using 1/2″ seam allowance, sew around entire outer edge. Repeat with lining fabric. Flip the main boot right sides out, keeping the lining piece with wrong sides facing outward, then stuff the main boot inside of the lining. This will allow them to have right sides of the fabric facing each other. Align the raw edges along the top. Sew, using 1/2″ seam allowance, while keeping a 3-4″ opening for turning. Turn fabric right sides out through the opening you left. Push the lining fabric into the main fabric. Either by using a blind stitch in the opening, or top stitching around the entire upper edge, sew the opening shut. Complete all steps for second slipper. You’re finished!
I left enough height on these slippers so you can wear them folded, for a cute cuffed look, or unfolded for a taller sock. Your choice! I’m excited to see what you prefer!
In case you consider yourself a more “visual learner” here’s a video tutorial that walks you through the entire tutorial, start-to-finish.
Check out what our fabulous testers were able to create with this very same tutorial!
I la-la-love when you share your photos with me! Head over to the Patterns for Pirates Facebook Group and show us what you’ve made!
Happy Holidays, Pirates!
2021 Holiday Freebies :: Scrunchie Crown
Happy Holidays, Pirate Friends! We are excitedly back for another year and another round of holiday freebies to share with you! Over the years, we’ve compiled different tutorials and patterns that we think would make *perfect* gifts for your friends and family. Curious about what we’ve already released in the way of holiday freebies? Head right here to see all of them: Holiday Freebies Roundup.
Today, we are bringing you the: Scrunchie Crown!
The Scrunchie Crown will having you feel like royalty in no time at all. At it’s most basic form, it’s a headband. At it’s Pirate form, it’s a gorgeous crown-like headband that is super fun to wear (and can also double as a standard oversized scrunchie for buns).
Supplies Needed:
- Scrunchie Crown pattern pieces
- Less than 1/4 yard knit or woven fabric
- 3/4″ elastic
TUTORIAL
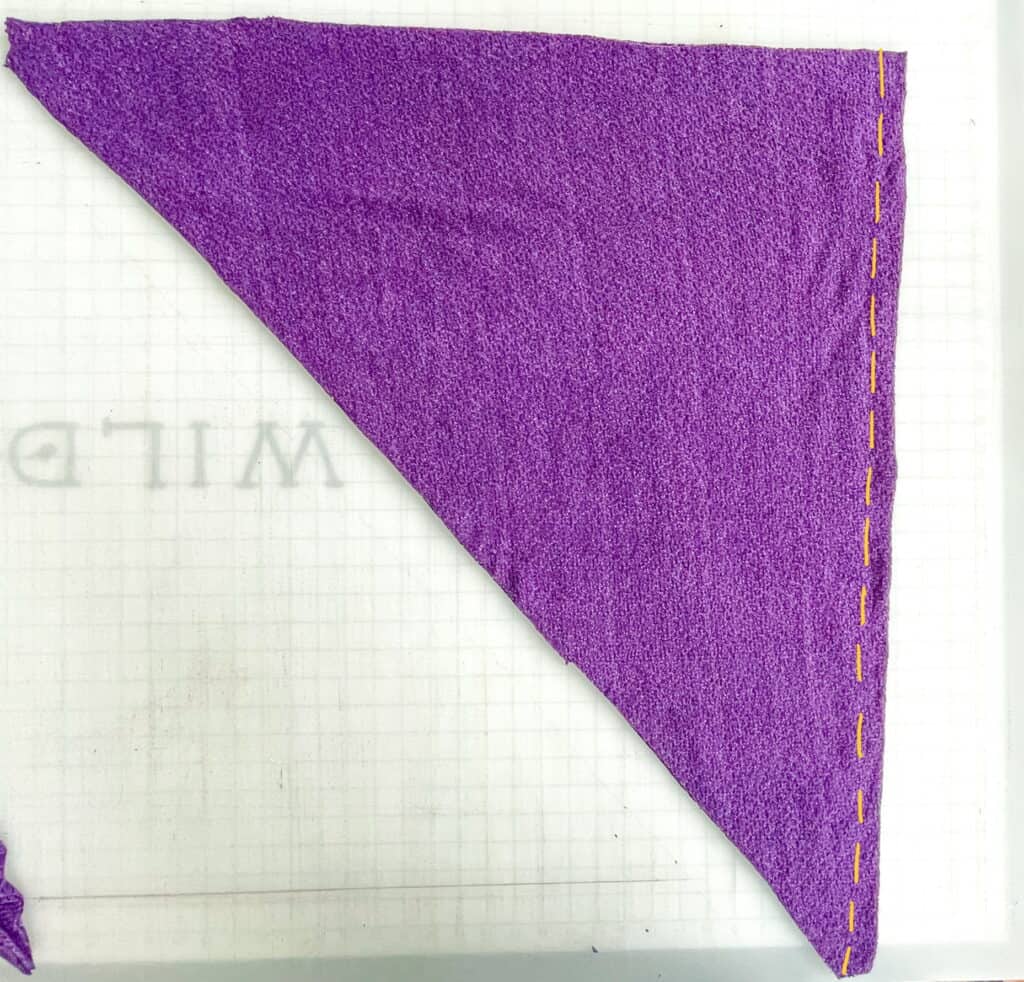
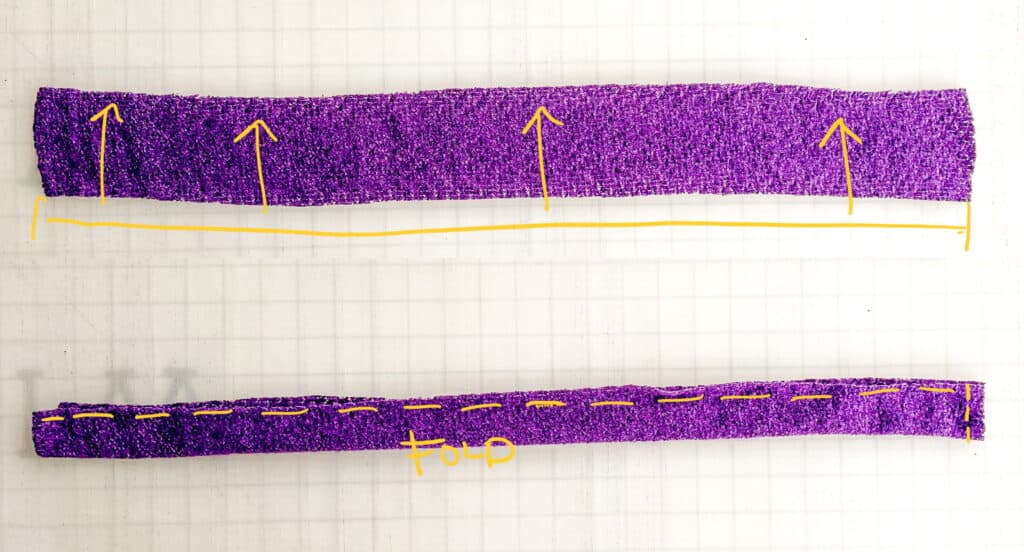
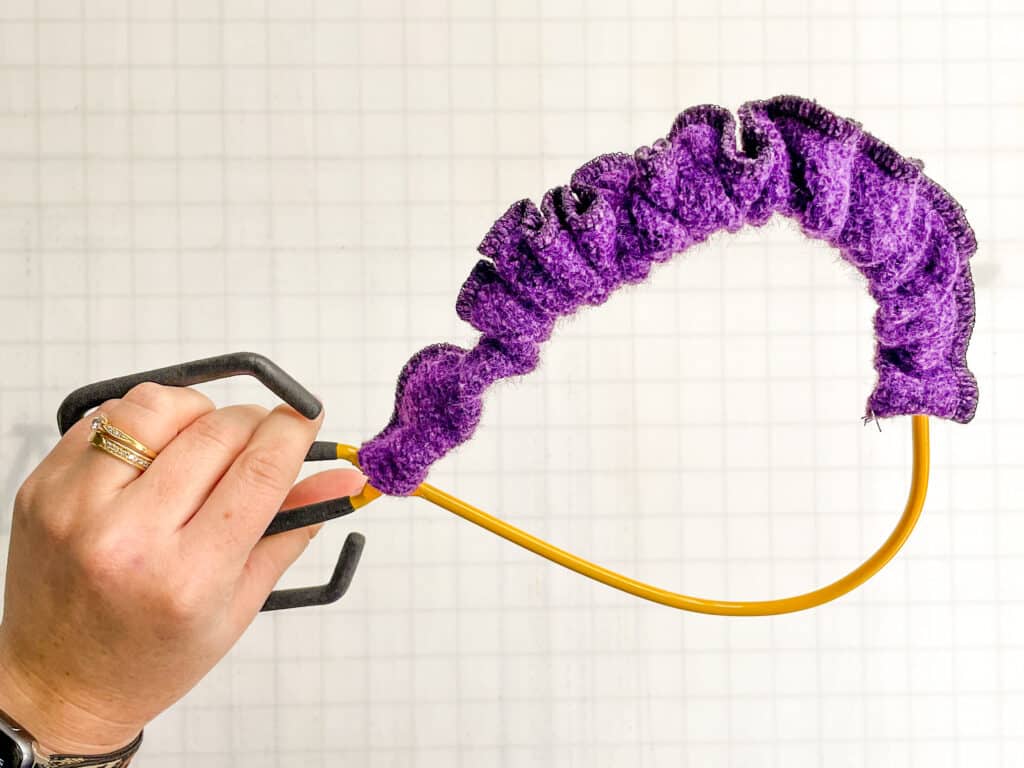
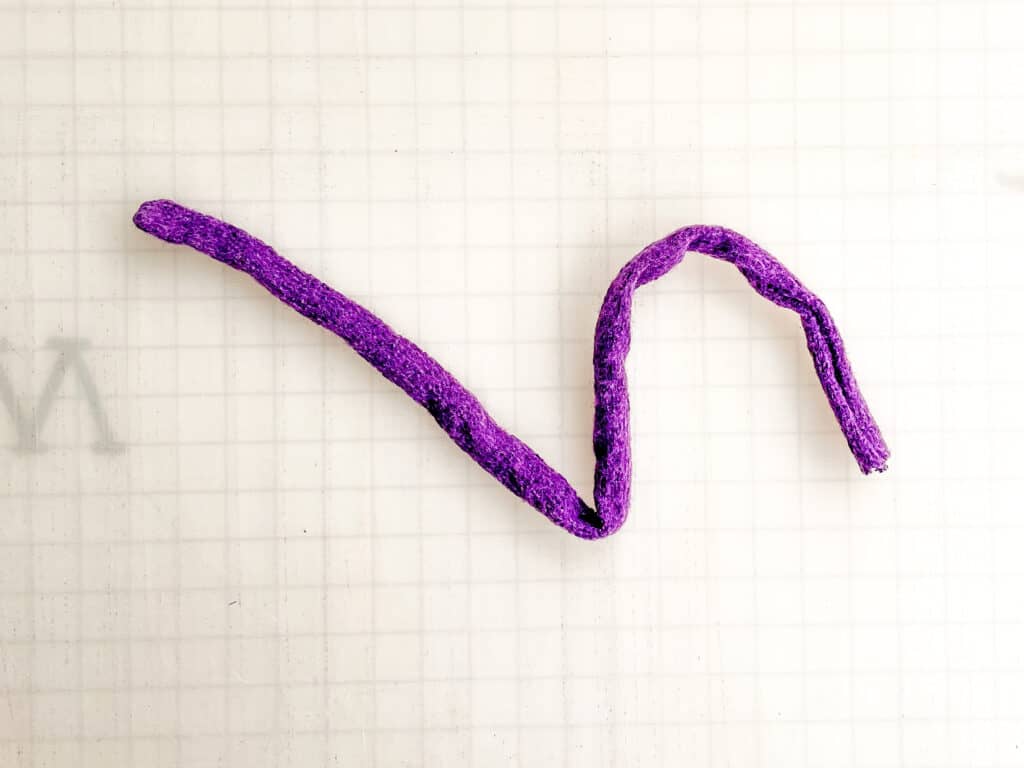
Step 1: Fold the top headband piece, with right sides together, meeting the long edge. Sew using 1/2″ seam allowance. Step 2: Repeat with the bottom headband piece, folding with right sides together, meeting the long edge. Sew using 1/2″ seam allowance. Step 3: Turn right sides out. Step 4: Using your favorite elastic threading tool, add your elastic in the top and bottom headband pieces. The fabric is a lot longer than the elastic. It’s easiest to first pin / clip the fabric to the elastic ends before basting. Be sure not to twist your fabric while adding the elastic in the tubes. For both pieces, you’ll want to align the elastic with the seam centered on it. Step 5: Baste the fabric to the elastic on both pieces. Step 6: Place your top headband piece on the table, with right sides facing you (aka, the seam should be on the table right now). Step 7: Aligning the raw edges, place the bottom headband piece on top, with wrong sides facing you. (This will allow for both right sides of the top + bottom to be facing one another.) Step 8: Fold the excess fabric from the top headband piece around the bottom headband. Your bottom headband will be completely encased by the top headband at this point. Step 9: Using 1/2″ seam allowance, sew along raw edge. Step 10: Without cutting through your stitches, clip off excess fabric and elastic ends. Step 11: Pull to flip fabric right sides out. The top headband piece will fold and hide your seams. Repeat Steps 6-11 on other side of headband pieces. You’re finished!!
——–
In case you consider yourself a more “visual learner” here’s a video tutorial that walks you through the entire tutorial, start-to-finish.
Check out what our fabulous testers were able to create with this very same tutorial!
I la-la-love when you share your photos with me! Head over to the Patterns for Pirates Facebook Group and show us what you’ve made!
Happy Holidays, Pirates!
Fall Sale and Giveaway 2021- Winners Announced!
Thank ya’ll so much for sharing your P4P makes this past week or so and using the hashtag PatternsforPiratesSew so we could see all your makes! I can’t wait to send these prizes along to the lucky winners!
And the winners are… drumroll…
For the Perfect Fit Bundle: angieco.studios from Instagram. The post that won were these fun holiday Loggers!
The Sublimination Prize: meinthemeantime on Instagram – They shared this beautiful All Buttoned Up and shared an adorable reel showing SEVEN ways to style it!
Our last prize is the Brother Serger: Melissa Stafford from our Facebook Group! They shared these adorable Basic Tees … what a sweet friend!
I hope you three are excited! Please email me at patternsforpirates@gmail.com so I can get these shipped to you!!! <3
2021 Holiday Freebies :: Fingerless Gloves
Happy Holidays, Pirate Friends! We are excitedly back for another year and another round of holiday freebies to share with you! Over the years, we’ve compiled different tutorials and patterns that we think would make *perfect* gifts for your friends and family. Curious about what we’ve already released in the way of holiday freebies? Head right here to see all of them: Holiday Freebies Roundup.
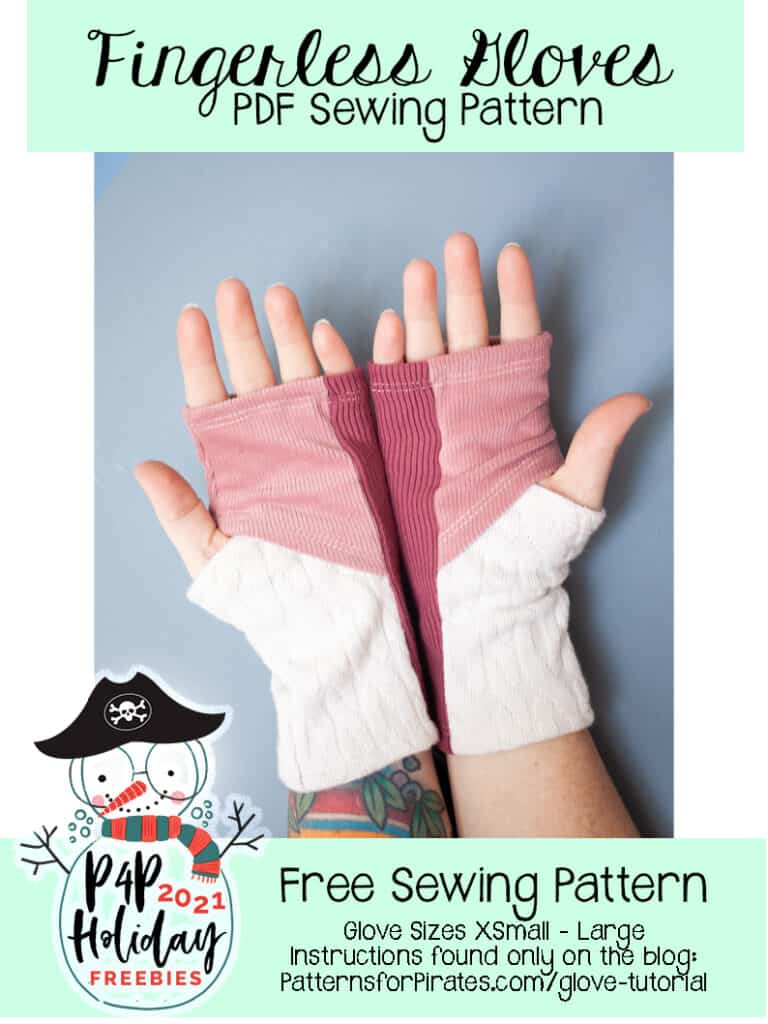
Today, we are bringing you the: Fingerless Gloves!
The Fingerless Gloves are a perfect accessory for cold and cooler weather months! They can be useful for outdoor adventures, or perfect for a little extra hand warmth while still allowing for some mobility indoors.
How to measure hand circumference: Using a flexible tape, measure around the palm of your dominant hand, just below the knuckles, excluding the thumb.
**Most knits will work for this pattern. You just really want something with good recovery, so it doesn’t stretch out while in use. No one wants a saggy glove!
Supplies Needed:
- Fingerless Gloves pattern pieces
- Less than 1/3 yard knit fabric
TUTORIAL
Step 1: Press angled edge of glove top 1/2″ toward wrong side. Top stitch. Step 2: Place glove top pieces, right sides together. Step 3: Sew along short, side edge. Step 4: Press angled edge of glove bottom 1/2″ toward wrong side. Top stitch. Step 5: Place glove bottom pieces, right sides together. Step 6: Sew along curved edge, using 1/2″ seam allowance. Step 7: Place glove side piece, with right side facing up. Step 8: With right sides facing down, place top glove piece on top, aligning the top corner points on each piece. Step 9: Now place bottom glove piece on top, aligning the bottom corner points with the rectangular side piece. Sew along edge, using 1/2″ seam allowance. Step 10: Repeat on opposite side. Step 11: Press raw bottom and top edges to wrong side and hem using 1/2″ hem allowance. Repeat steps 1-11 with second glove. Flip gloves right sides out.
You’re finished! Go wear your new Fingerless and then make 10 more. You know you want to!
**hint, hint. They’d make AMAZING gifts for teachers.
——–
In case you consider yourself a more “visual learner” here’s a video tutorial that walks you through the entire tutorial, start-to-finish.
Check out what our fabulous testers were able to create with this very same tutorial!
I la-la-love when you share your photos with me! Head over to the Patterns for Pirates Facebook Group and show us what you’ve made!
Happy Holidays, Pirates!
Sublimination Fun
What’s more fun than being able to create the exact garment you or a loved one is aching for? I’ve included a “Sublimination Bundle” as a prize in our Fall Sale and Giveaway this year, so I can gift the joy of making something even more custom to a lucky sewist. Since it’s not directly sewing related, I thought I would explain a bit more about it!
I recently got a teeny tiny bit into sublimination and I can’t help but share how fun it is with my fellow sewist! The quick run down is sublimination is the process of using special sublimination ink and sublimination paper to dye polyester. So, it is limiting to what fabrics you can use… the higher the polyester content, the better print you will get. Don’t mind a more “vintage, worn look”? Then you can get away with as low as 50% polyester. Other than that, if you want a crispt image… poly, poly, poly.
Here is a 50% poly after a wash. So you can see the difference.
If you’re a double brushed poly fan… good news 😉 Works great! So do performance fabrics, ITY, sweatshirt, sweater, waffle, french terry, that are polyester with a little bit of spandex. The lighter the fabric, the better the image will look as well. Since we’re printing with an ink jet printer, we have black, blue, yellow, and pink inks to mix. No white. So, sine we can’t print white… we can’t dye white onto the poly. Got a dark fabric and want a snowman? Sublimination ain’t going to work lol… You can get away with lighter, pastel colors as long as you’re not wanting anything white on the image. Here I’m using a white poly sweater knit knit, which is perfectly soft and cozy and will give me a nice, crisp image. Â
Lets go over what you need to do this process first. *These are affiliate links.
First and foremost, you’ll need a printer with sublimination ink… YouTube has told me that these Epson Ecotank printers are the easiest for someone just wanting to craft at home.
Don’t you put that ink that comes with it in the printer though! Don’t do it! Instead, you’ll need to fill it with sublimination ink… luckily I’ve found ink that matches the ink refills perfectly, meaning they’re super easy to use!
You’ll need sublimination paper as well. There are a lot of brands, and I haven’t used hardly any yet… so I’m no expert on which is the best! I’ve used this one and it worked great for me so far.Â
Next big item you’ll want is a heat press. Some can be pretty big, bulky and hard to store. But, I found this smaller one that will still cover a 12×10″ area and I think it would be perfect for a home crafter! Want a bigger one? Here is the one I have.
I like to use this heat tape to hold my image in place when I press as well, so I included it in the Sublimination Bundle Prize in the Fall 2021 Giveaway! Along with some teflon sheets to keep from scortching fabrics and giving a nice even heat. You’ll also want some plain paper. You can use the plain paper to put inside a shirt if it’s already sewn up so the ink doesn’t go through to the back piece and on top so it doesn’t go through to your teflon sheet or heat press.
Okay, now we have our supplies we can jump into how to do it!
First up you’ll want an image… anything you’d like on the garment. I usually create mine in my Sihlouette Studio, because it’s an easy to use software (that’s free for everyone). You can also use photoshop or Illustrator if you’re an Adobe fan. Anything you can print from.
You’ll want to set up your printing settings to mirror the image (or mirror it before you print). And to have a high quality print, with true colors… here is a screenshot of my printer settings. Some of these settings you’ll need to click through the advanced section.
Print out your image. Don’t worry if the colors look a little dull, they will brighten up when you press it… unless you’re not using an all poly content 😉 Tear around your image. You heard me… tear it instead of cutting it. The tearing helps blend that “edge” instead of a crisp line.
Place your image where you’d like on the fabric, already cut pattern piece, or finished garment. (Note… if you’re using a finished garment you’ll want to place a sheet a paper between so the ink doesn’t bleed through to the back… I’ve actually never had it bleed though to the paper yet… but you never want to cry over that and you can re-use that piece of paper over and over!) Use the heat tape to keep your printed image in place.
Set your settings as the paper instructs. Although, this paper suggests 356-374 degrees F at 25-30 seconds… and after searching the internet, asking other crafty friends, and experimenting… I suggest 400degrees at 60 seconds. It’s what has worked best for me. Now for the magic…press that sucker!
https://youtu.be/ygQAiSzwcyE
Peel off tape and image and look at your beautiful, custom design. How fun is that? My Baby Boy has REALLYÂ enjoyed being able to ask mom to make him some special shirts of characters we can’t normally find in his size! And now Baby Girl can have all the rainbow unicorns on her things that are 2 sizes down in width than height that fit her best too.
Once you have all your things set up, this is such a quick process for adding something fun, custom and unique to a garment! Now when my kids let me know about that spirit day they’d like a custom, mom-made shirt for the NIGHT BEFORE… I can do that and not stay up half the night 😉 Â
Fall Sale and Giveaway 2021
Fall time brings cooler weather and the thoughts of thankfulness! I’m forever grateful to anyone who likes, follows, commnets, purchases from my shop over the years. It has allowed me to follow a dream of mine! To say thank you we’re having a site side sale (we only ever have 2-3 a year… this will be our last one in 2021!) and a fun, simple giveaway for a few lucky winners! Of course everyone will be a winner who sews up something they love for their wardrobe or a loved ones wardrobe too!
The site wide sale- code is Fall2021, but don’t worry about memorizing or jotting it down… the code will pop up automatically for you at the cart, just click to apply!
The giveaway also begins today and is very simple to join in! Just put #PatternsforPiratesSew with any Patterns for Pirates garment you sew up during the time frame. You cannot enter old sews, but anything you start after today and finish before 11/27/21 ends you can enter!
We have 3 Grand Prizes for the giveaway. Winners will be picked at random- so all skill levels are encouraged to join in the fun! You can even let me know which prize you’re wishing for in your entries… so if your entry is randomly picked, I just might be able to give you the prize that would fit best in your sewing space!
(Note- I’m using affiliate links here if you happen to purchase any from these links.)
Perfect Fit Bundle includes a customizable dress form (these come in medium and plus size ranges) and one of my all time favorite fitting book! Great for any sewist wanting to step up their fitting expertise.
The Sublimination Bundle is the one for the sewist who seems to have all the sewing things already. With this printer, ink, paper, and heat press you can now customize your polyester makes with ease. Print whatever image you’d like using this ink and paper, press it onto the polyester with the heat press… and you’ve got the perfect, custom item. Don’t worry, we will write up a quick blog about this soon if you’ve never heard of it before! It’s a lot of fun… my kids especially love it!
Last prize is the Brother 1034D Serger. This is the serger I’ve always highly recommended to any beginners wanting a more affordable way to add a serger to their machines. It is such a popular model that it’s so easy finding helpful blogs, videos, tutorials on anything you might need help with learning to use it.
We will also be picking random winners through the giveaway to surprise with some freebies like fabric and sewist swag from past month Fabric for Pirates and free Patterns for Pirates patterns!
A few more details:
- The item sewn up and shared must be a P4P pattern that creates a piece of clothing (shirt, pants jacket, etc. This means no accessories like hats, scarfs,etc.) You can use a free pattern as long as it is clothing like the Tulip Tee or Peg Legs.
- You need to sew it up as is, with only fit changes (so no hacks or modifications).  Adding embellishments is great, just no major changes, pattern mashes, etc. Fit changes may include maternity/nursing changes. Overall we should easily recognize the pattern.
- Share your pictures on one or all of the social media networks for more chances to win with hashtag #PatternsforPiratesSew — it must be EXACT to come up in our search for the winner!
- Let us know what P4P pattern you sewed up and what you’re most looking forward to winning or tell us a bit about how you fell in love with sewing, what you love most about sewing, etc!
- You can share as many sews as you can for more chances to win–but ALL items/images shared must be sewn AFTER the giveaway starts 11/15/2021! Any older sews will be disqualified from winning either prizes. Last entries accepted will be 11/27/2021 at 11:59PM US Central Time.
- Winner will be random lottery winner! So everyone has a chance from a beginner who might be sewing their first P4P to a seasoned apparel sewist!
Since you might need to grab a new pattern to get motivated we have a SITE WIDE SALE through the end of the giveaway!
- This will be the last site wide sale this year so grab them up while you can!!
- Sale ends at the same time as giveaway entries: 11/27/2021 11:59PM at Midnight US Central Time.Â
- There is a coupon code: Fall2021 but it will automatically pop up at checkout and you just need to click to apply the discount!Â
I can’t wait to see everyone’s entries! Go plan, cut, and sew up to enter!!!Â
Protected: Fabric for Pirates :: November 2021 Reveal
- « Previous Page
- 1
- …
- 11
- 12
- 13
- 14
- 15
- …
- 66
- Next Page »