P4P UNIVERSITY – Adding Trim to Hems!
Hello pirates! Today’s topic will focus on how to add a decorative trim to any hem – this is a super easy way to add a unique and decorative touch to your garments! This post will walk you through the steps to select your trim, prepare your hem, add trim to your hem, and also to launder your garments with trim. For this example, I will be using the Cozy Pants – Youth pattern, and I have chosen to do the shorts with the plain waistband and no pockets. I love adding trim to the most basic options because I feel that it adds a fancy design element while still keeping the project quick and easy – my favorite!
Now let’s get started!
Helpful Tips in Selecting the Trim:
- STRETCH FACTOR – If your trim is not as stretchy as your garment fabric, you will want to be sure the pattern you’ve chosen will still be wearable with a non-stretchy hem. Adding a non-stretchy trim will restrict any stretching. For the shorts pattern I have chosen, the legs are wide enough that it’s okay if the hem no longer has stretch. But if it was more fitted, then I’d have to switch to a trim that has an equal or similar amount of stretch.
- TRIM WIDTH – For added convenience, I recommend selecting a trim that is either as wide or wider than the length of the finished hem. This allows for you to stitch the trim and hem in place in one step! This is optional of course, but I like to minimize the steps wherever I can! 🙂 Wideness of the trim will also depend on if the trim is placed on top or under the hem. For example, if you’d like for the trim to be on the underside of the hem, you may want to choose a thicker trim and/or a trim that you don’t mind will have a portion of it hidden behind the hem.
- PLAN AHEAD – It is a good idea to already have your pattern, fabric, and location of trim decided on before selecting your trim. This way, when you select a trim you will be able to envision how it will look. Also – be sure to have a scrap of your fabric nearby when shopping to ensure color coordination!
- TRIM CONTENT – Be sure to see if the trim is made from material that could shrink. Trim made from cotton will likely shrink, so before sewing with it I recommend washing it in a similar manner that you plan to wash the finished garment (see end of post for laundering tips).
Preparing for the Hem:
Now that we have selected our trim, we are ready to add it to our garment! Construct your garment as usual, but stop before hemming where you plan to add the decorative trim. Follow the steps below:
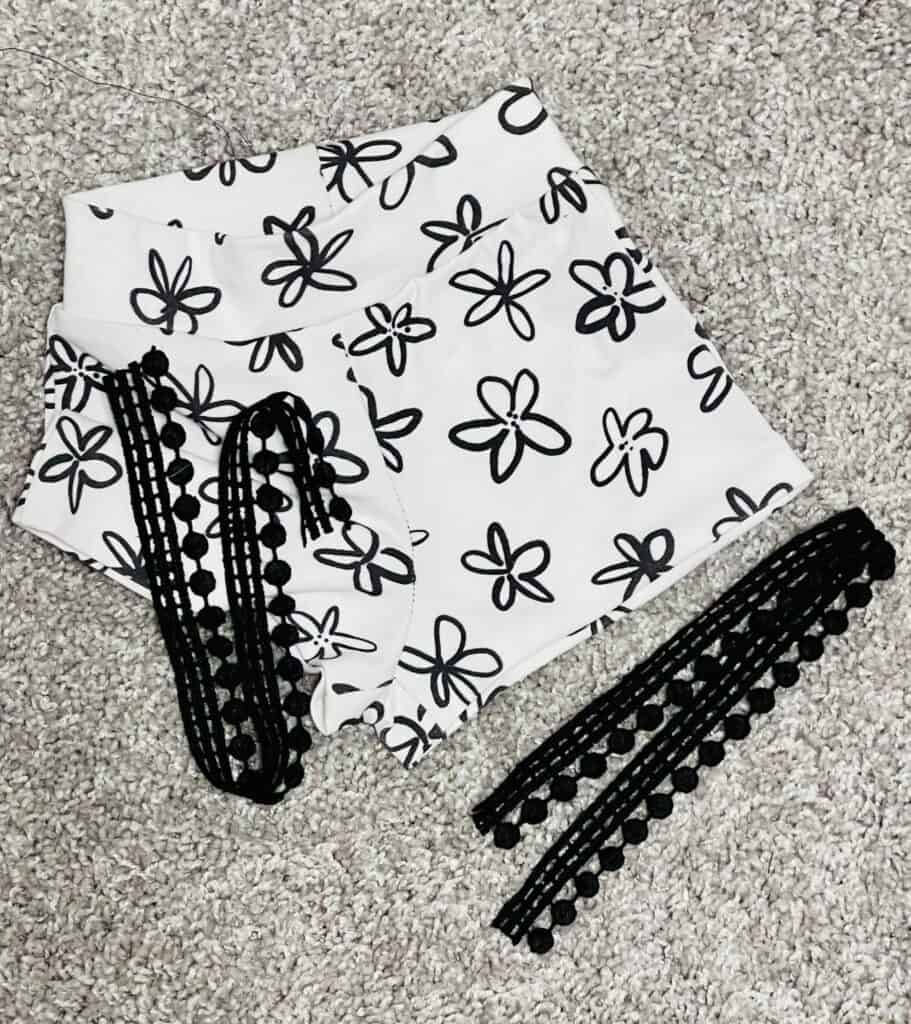
- PRESS YOUR HEM & MEASURE TO CUT TRIM, press hem as indicated by the pattern and measure the length along the edge of your hem. Cut your trim at that length plus an inch or two. I like to add a little extra length to allow some wiggle room, and I cut off the excess later (pictured first below).
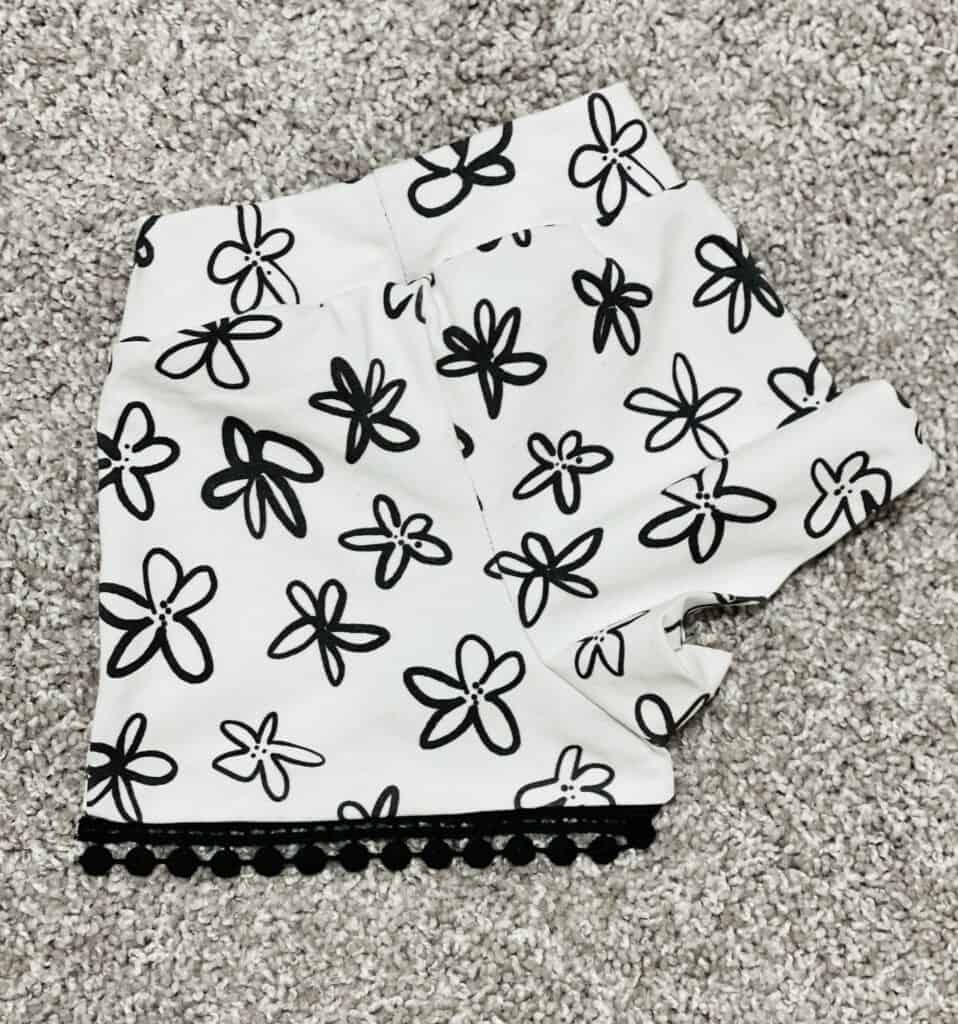
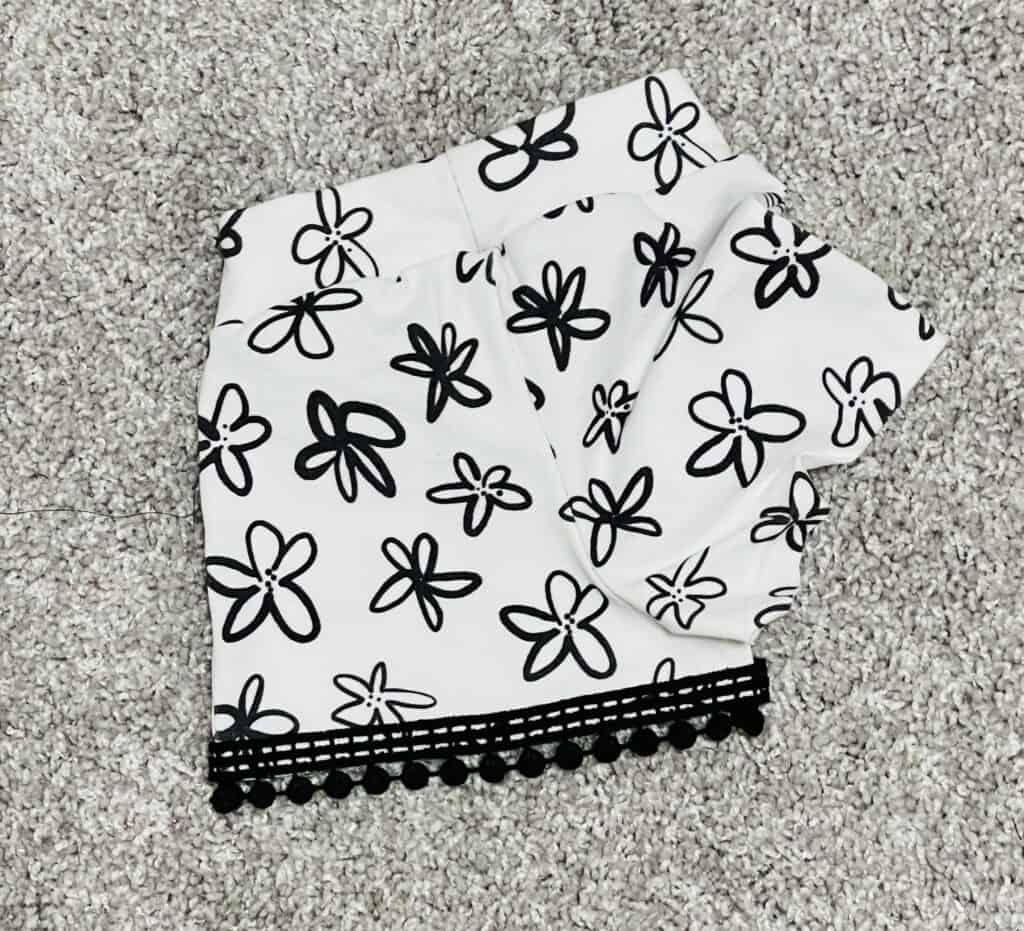
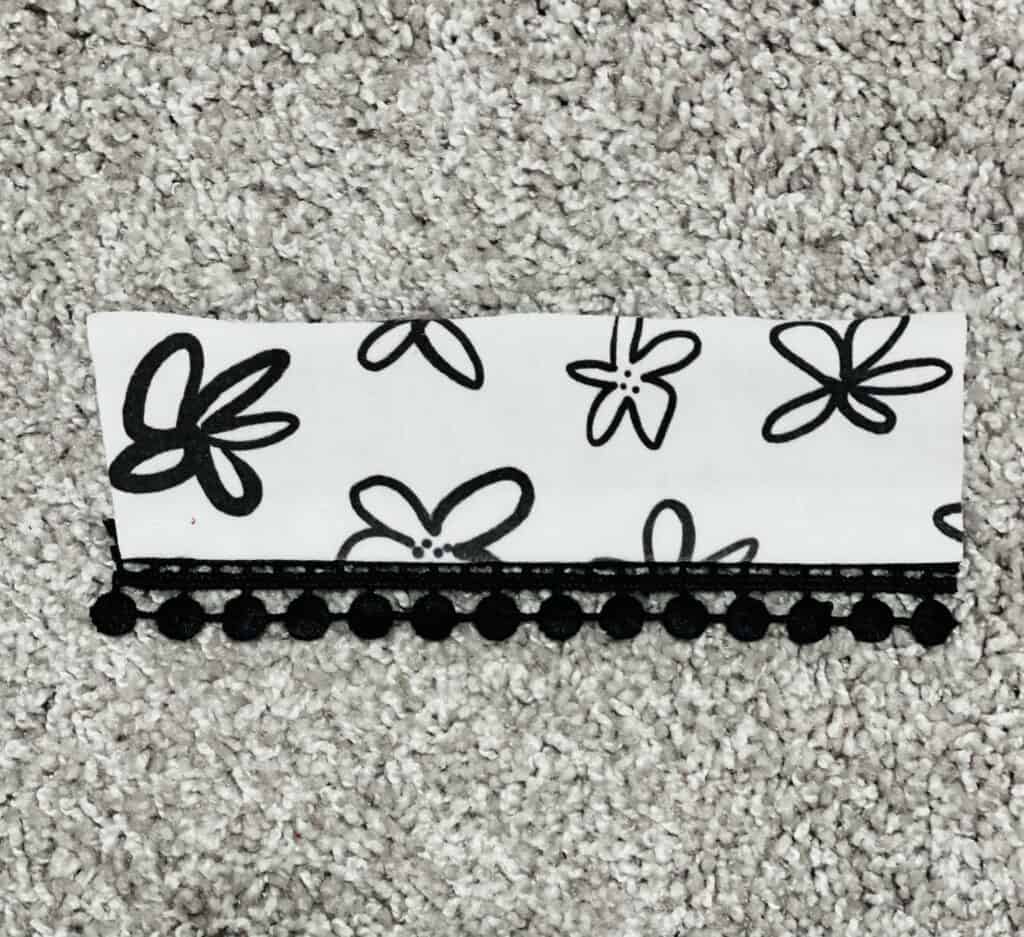
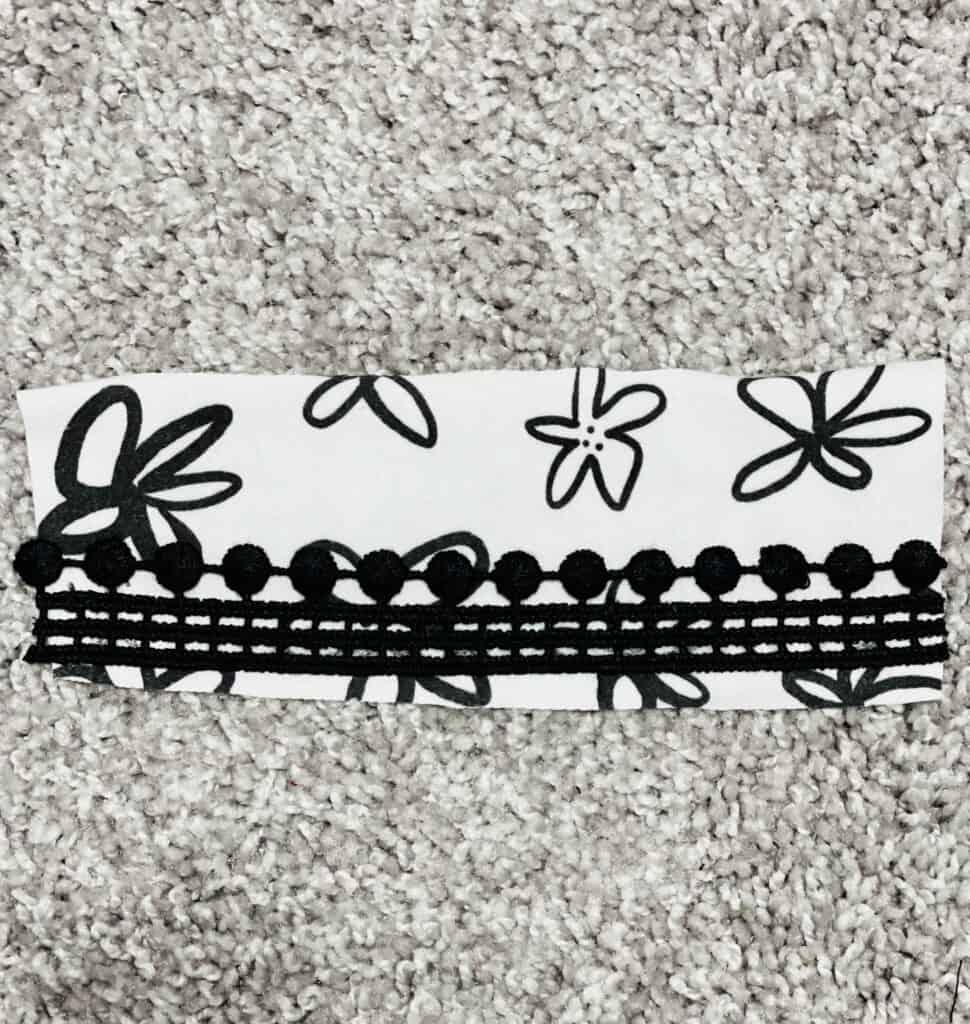
- PLACE TRIM ON OR UNDER HEM, place trim as desired to verify that the length of the trim has been cut correctly and also to visualize the end goal. Adjust the hem and/or recut trim as needed. Pictured below: trim placed under the hem, also referred to as the underside (pictured second), and trim placed on the topside of the hem (pictured third).
Add Trim on Topside of Hem:
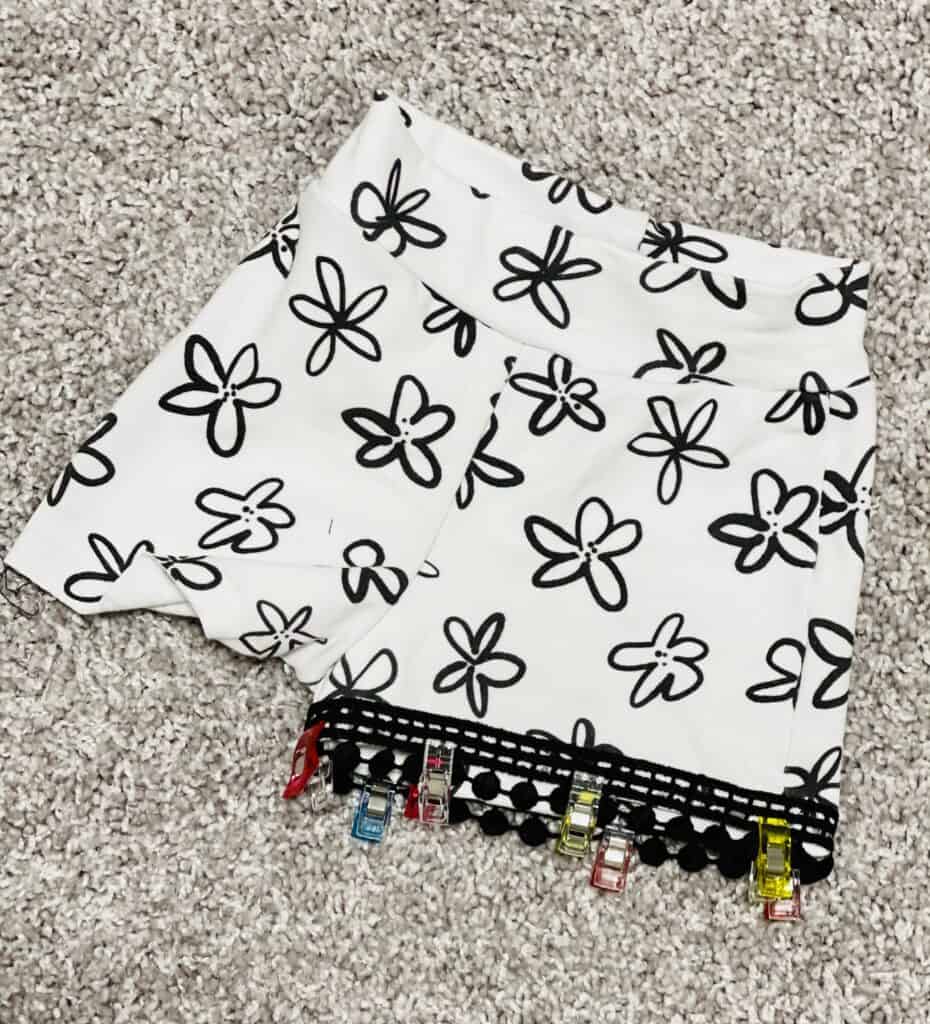
- PIN, CLIP, and/or TAPE TRIM IN PLACE, secure trim in place and leave any excess trim unpinned/not taped – I prefer to leave the excess until after I’ve sewn it to ensure I don’t end up with a gap. I use wash away wonder tape for adding trims, bindings, and difficult hems – it is my absolute favorite tool! It sticks everything in place, is clear, and washes away – perfect for this project! For these shorts, I used my tape and also a few clips for extra security (pictured first below).
- TOPSTITCH TRIM IN PLACE, finish using your favorite topstitch to secure both your trim and your hem. Be sure your stitching is catching both the hem and the trim. Once you reach the end, cut off the excess trim where needed. I like to overlap the ends of the trim just smidge and cover the edges with a little fray check. Here, I use my coverstitch – but you can also use a zig-zag stitch, triple stitch, etc. My thread is the same color as my trim – so you can’t see the stitching, but here it is stitched on (pictured second).
- Note: if you are attaching a narrow trim that is smaller than the size of your hem, you will want to first hem your item, and then sew your trim in place. You may also consider using a blind hem to minimize the appearance of stitching before adding the trim. *Tip* For very narrow trims, use a narrow zipper foot on your sewing machine to help you sew right along the edge of the trim!
OR
Add Trim on Underside of Hem:
- PIN, CLIP, and/or TAPE TRIM IN PLACE, leave excess trim unpinned/not taped. I prefer to leave the excess until after I’ve sewn it to ensure I don’t end up with a gap. I use wash away wonder tape for adding trims, bindings, and difficult hems – it is my absolute favorite tool! It sticks everything in place, is clear and washes away – perfect for this project! For this example, I am using just a small strip of fabric to show how to finish the hem since I decided to add the trim on top (previous example). Here, I have only used tape to secure the trim in place (pictured first below).
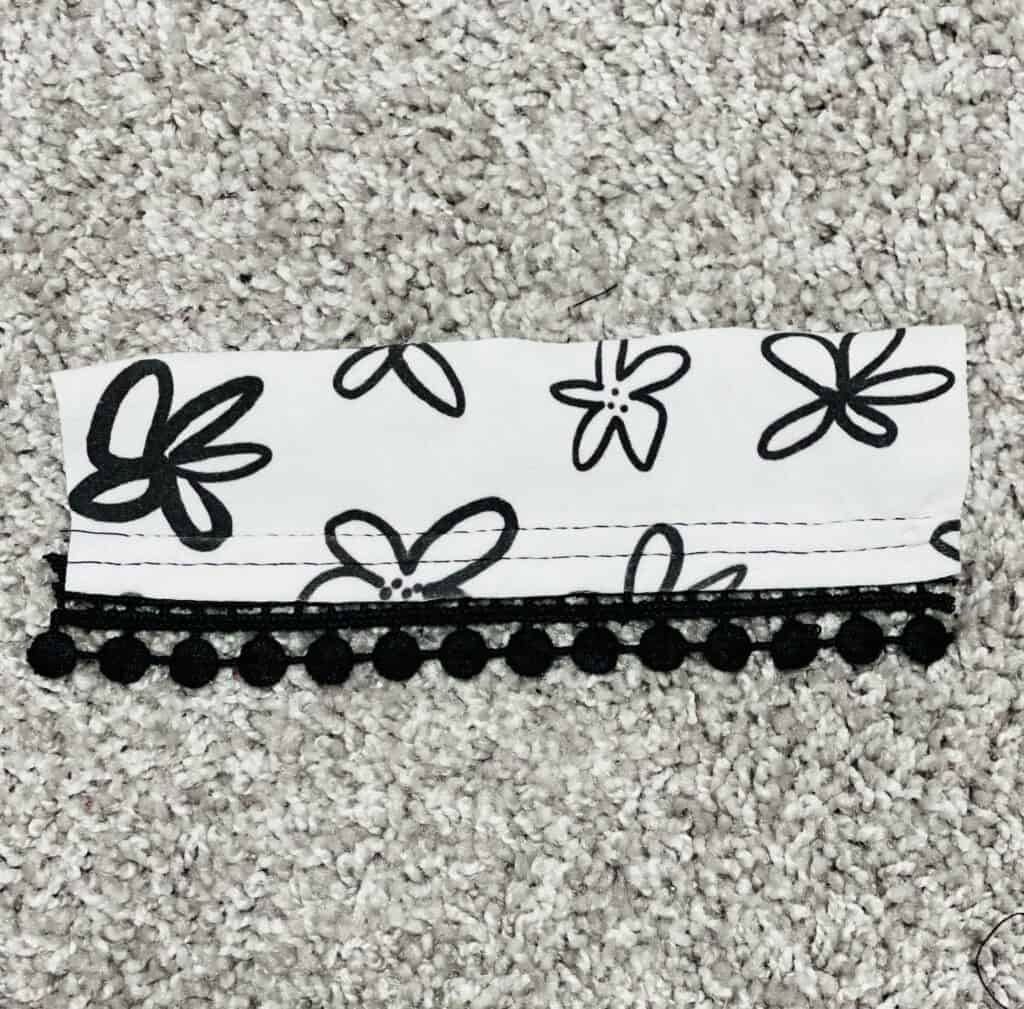
- OPTIONAL STEP FOR NARROW TRIMS, open up the hem and stitch along the edge of the trim closest to the bottom (pictured second). In the example below, we would stitch along the trim edge opposite of the pom-poms/circles. This is needed if your trim will not be secured by the final hemstitch. If you complete this step, using wonder tape would be the easiest method to ensure the trim doesn’t shift around while you open up your hem. If you don’t have tape, you could use pins, but be sure to only pin through one layer of fabric while securing the trim to the underside of the hem. Clips would not work because you wouldn’t be able to open the hem up. When stitching towards the end, cut off the excess trim where needed. After you have stitched the trim to the fabric, refold your hem.
- *Tip* For very narrow trims, use a narrow zipper foot on your sewing machine to help you sew right along the edge of the trim!
- TOPSTITCH TRIM IN PLACE, finish with your favorite topstitch (pictured third). If you did not complete the optional step, this stitch will also serve to stitch your trim in place – so be sure your stitching is catching both the hem and the trim. Once you reach the end, cut off the excess trim where needed (if you haven’t already). When the edges of the trim meet, I like to overlap the edges just smidge and cover the edges with a little fray check. Here, I use my coverstitch to finish the hem – but you can also use a zig zag stitch, triple stitch, etc.
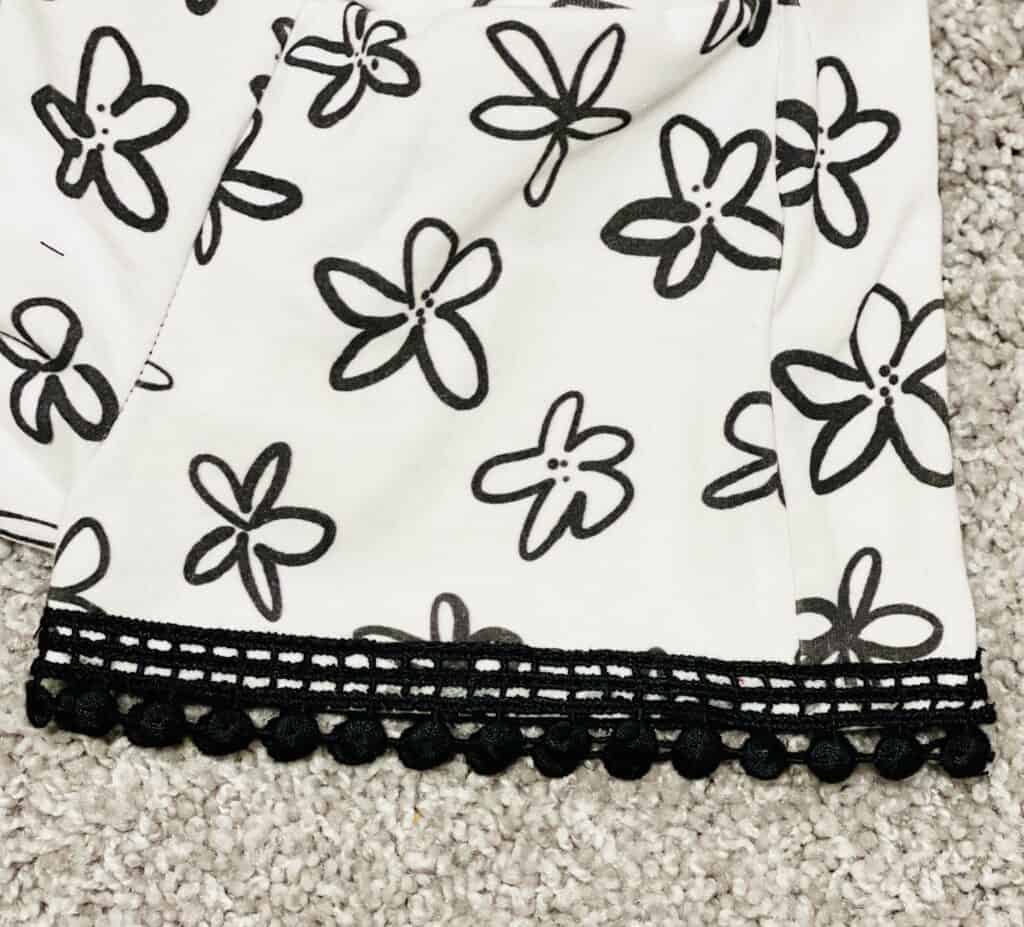
And that’s it! Here is my finished product, with the trim stitched on top of the hem. How cute is this??
Caring for Garments with Decorative Trim:
Below, I have included my recommendation for caring for your garments with trim. However, this is just my preference, so be sure to defer to your own best judgement – especially when working with delicate fabrics and trims. I tend to use pretty versatile fabric that can handle a little more activity :). Also, I would be lying if I said I ALWAYS do this for items with decorative trim because I’m known to just throw everything in the wash together without a second thought. However, this has honestly led me to some sad occasions while folding laundry and seeing that my pom poms or fringe are now a mess and they are not always salvageable!! So I recommend the following:
- WASH IN COLD WATER ON DELICATE/GENTLE CYCLE, preferably by itself so it doesn’t risk getting tangled with any straps or strings from other clothing.
- SKIP THE FABRIC SOFTENER, fabric softener can lead to build-up on fabric over time. This can cause some fabrics to actually lose softness, and it can even lead to discoloring some fabrics.
- HANG/AIR DRY, this is strongly recommended based on personal experience! But if you must, you can try drying on the lowest heat setting in the dryer and taking out the garment as soon as it is dry to avoid allowing it to continue drying and get overheated. However, air drying is the safest and most reliable option.
I hope you enjoyed this post and found it helpful! Have fun sprucing up some of your garments quickly and easily, and be sure to share your embellished P4P items in the Patterns for Pirates Facebook Group!



Leave a Reply