
The Hepburn Top & Dress has released and it will surely become a staple in your year round wardrobe. Our amazing (and growing) team of blog contributors has some easy hacks for the new pattern. Take a look and get sewing!
…..
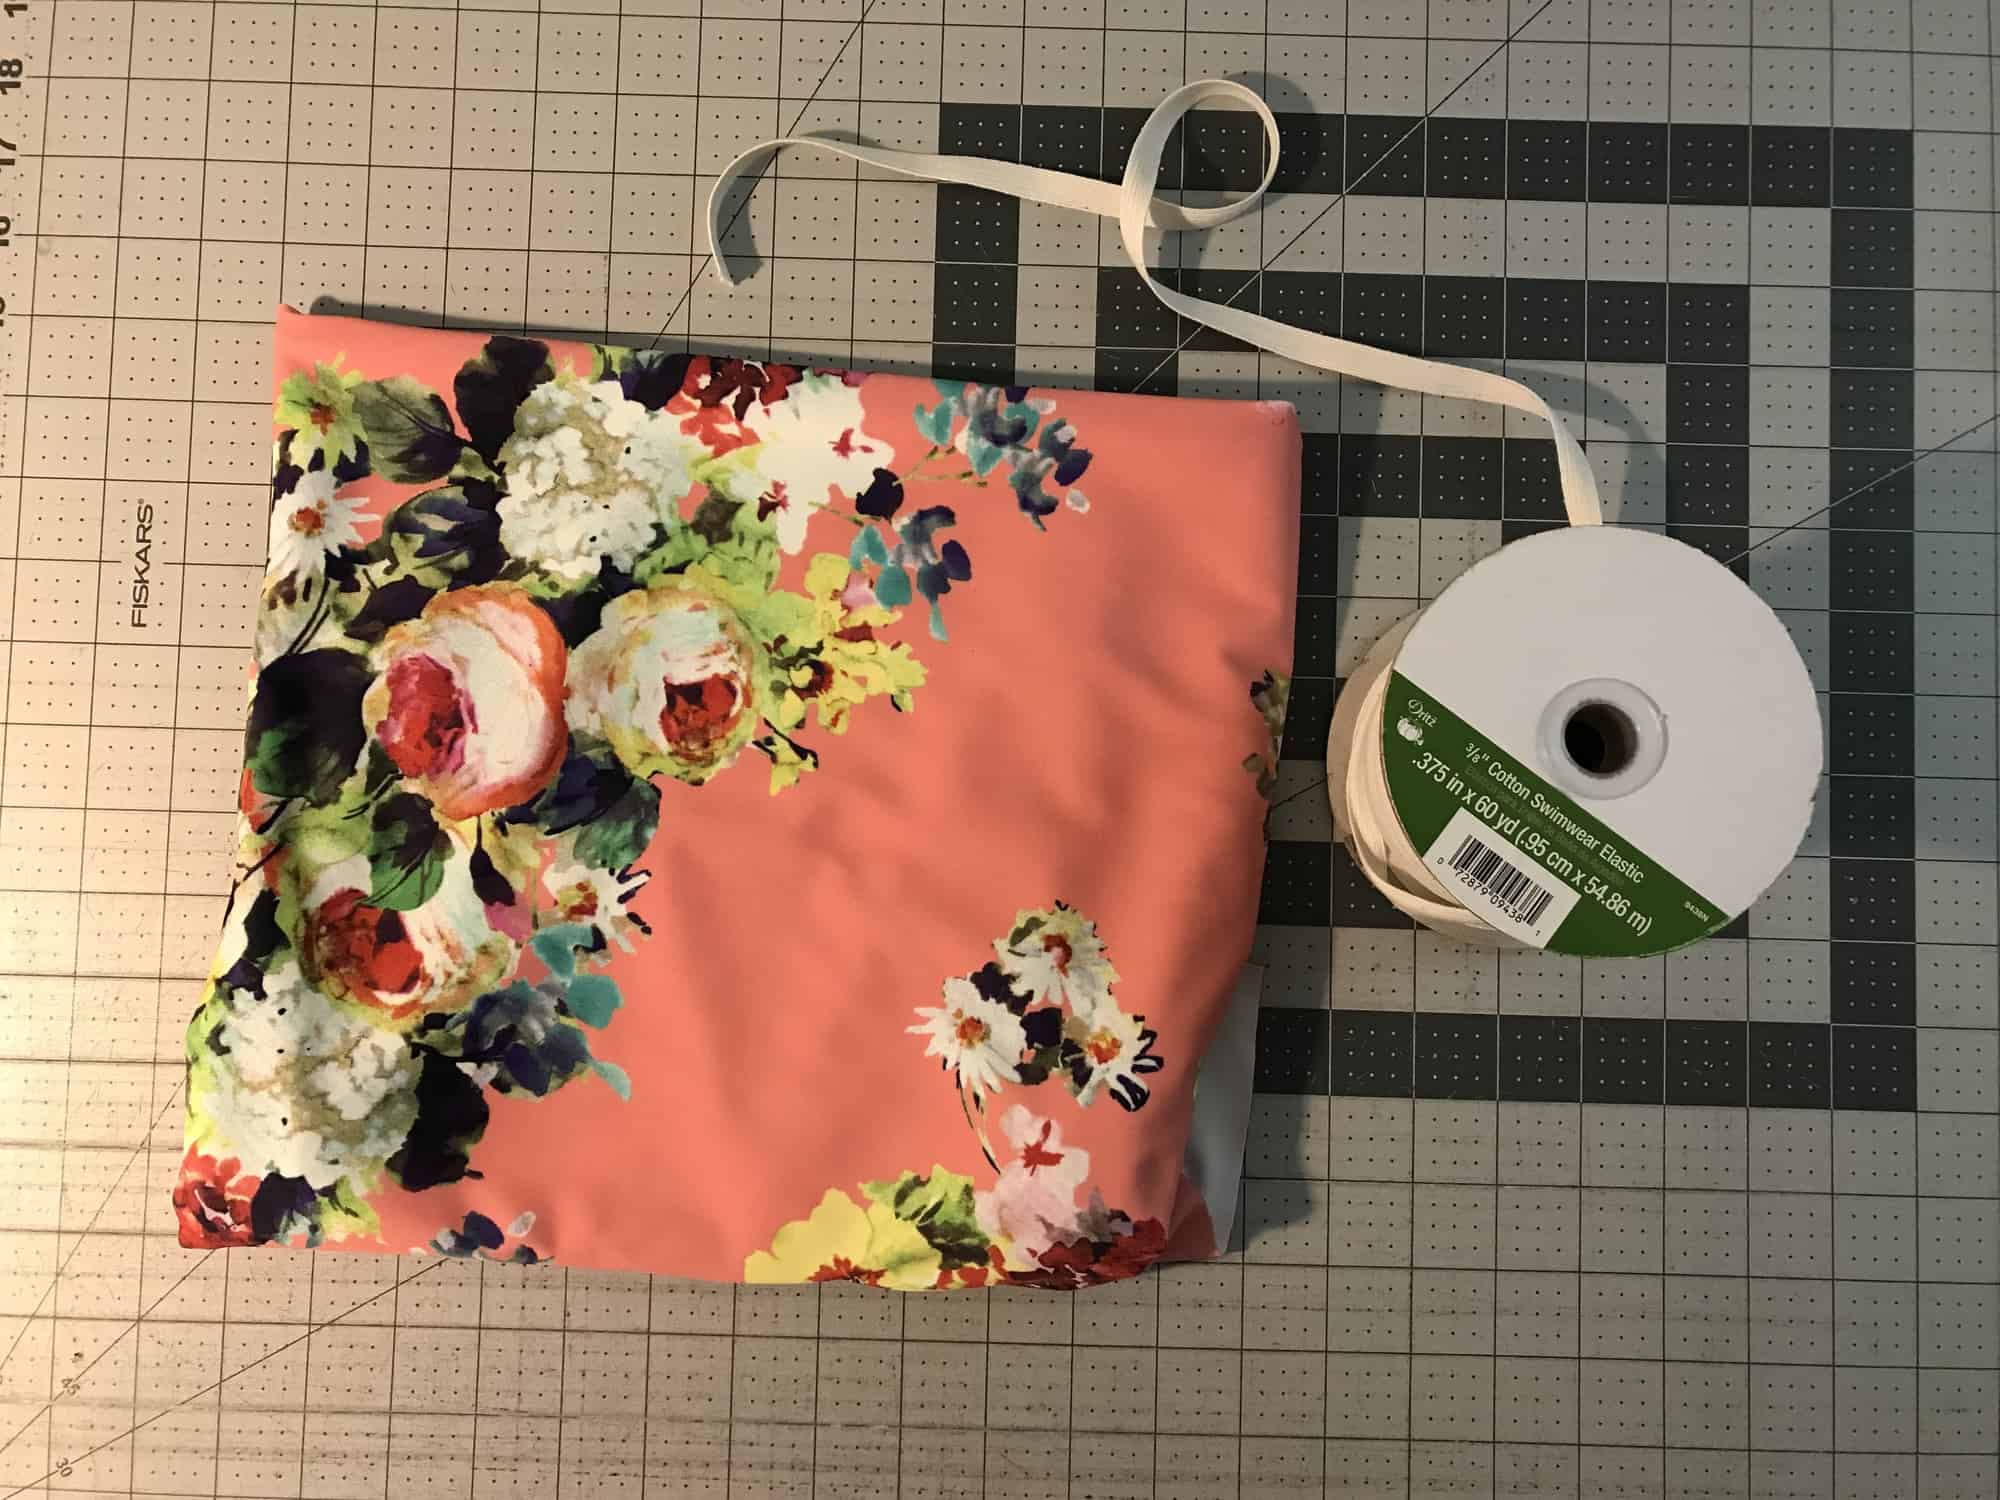
Swim top/rashguard

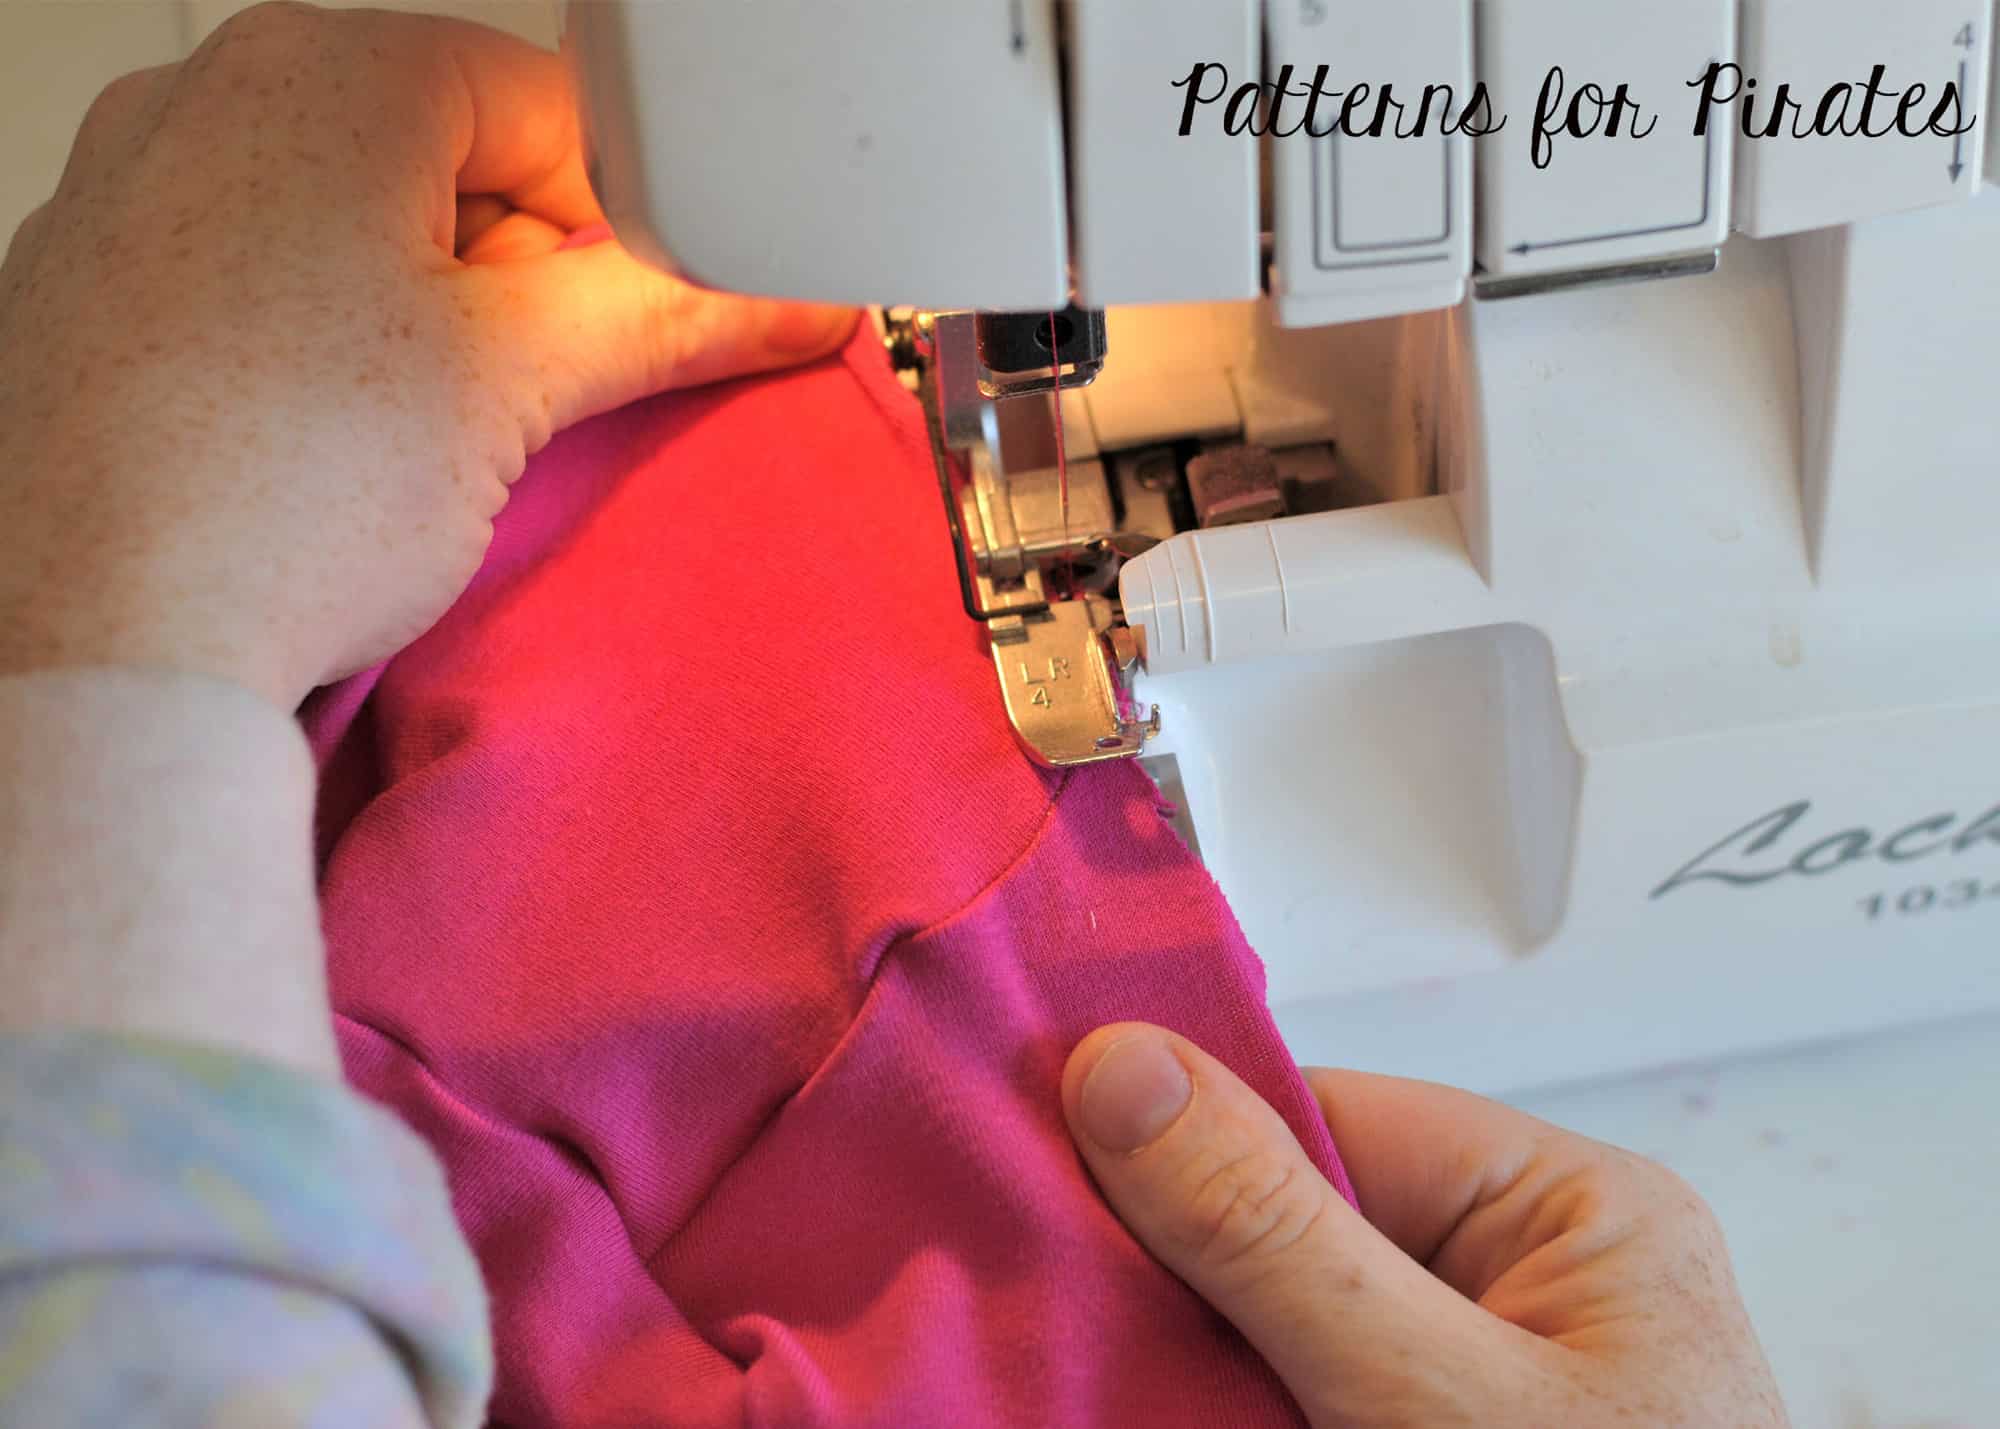
The fit of the Turtle Neck Dress is so fantastic that modifying it to be a a rashguard is very simple!
The first thing you need to do is decide which pattern options you would like to use and gather your supplies. Swap out your sweater knit for some swim knit, and your clear elastic for swim elastic.
Cut out your pattern pieces and neckline elastic according to the tutorial. For all options, you will continue on following the tutorial until it is time to hem.
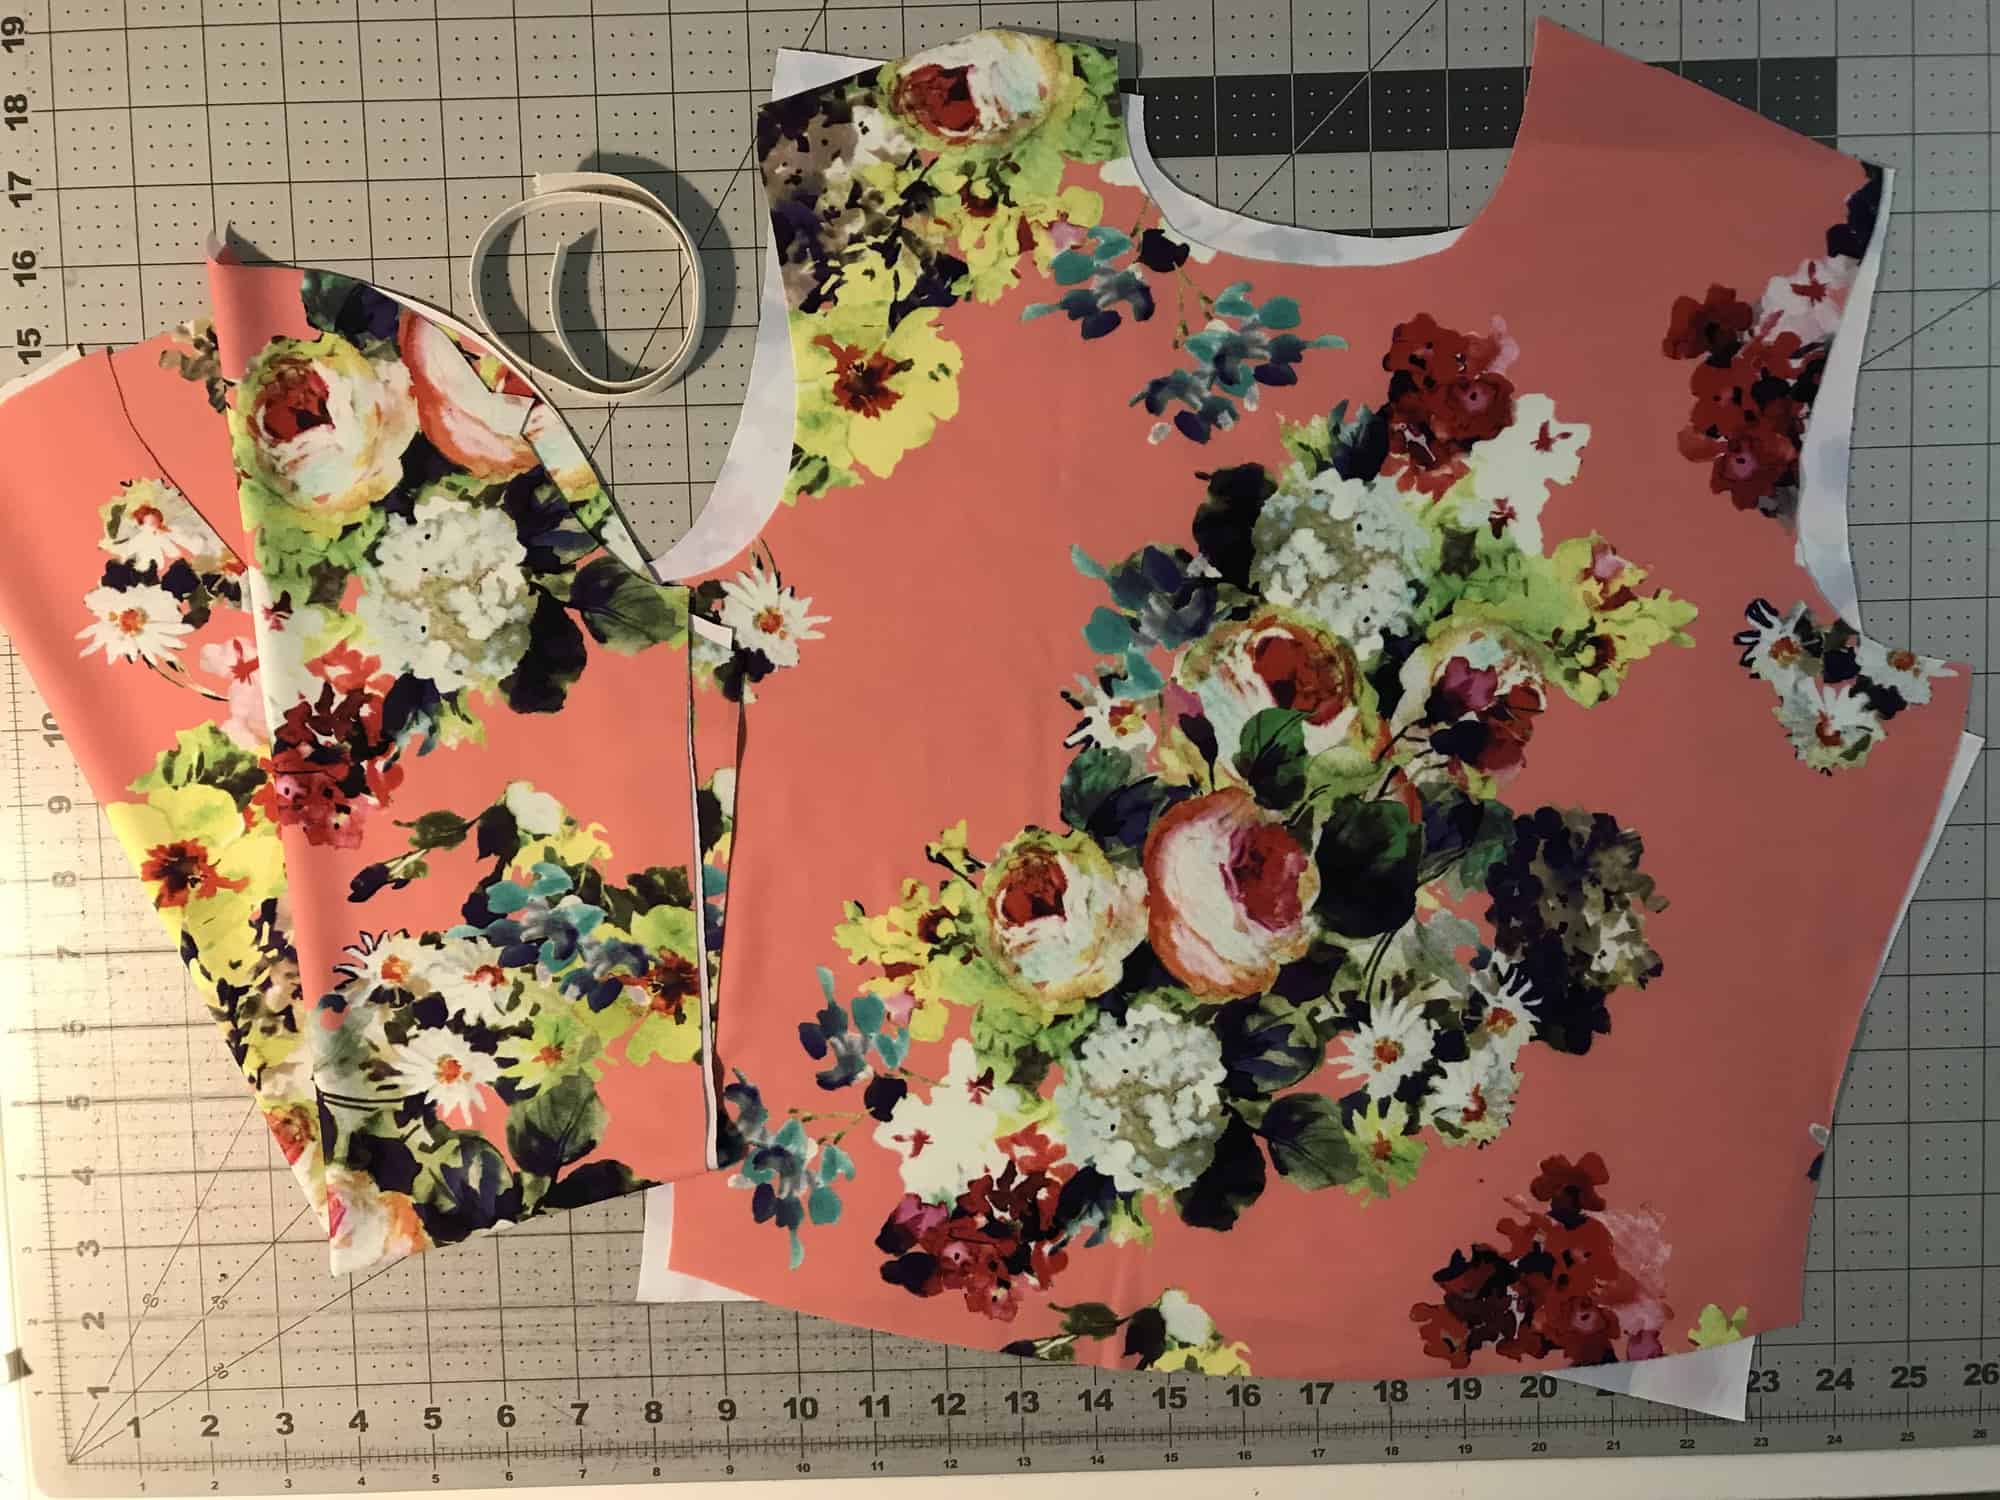
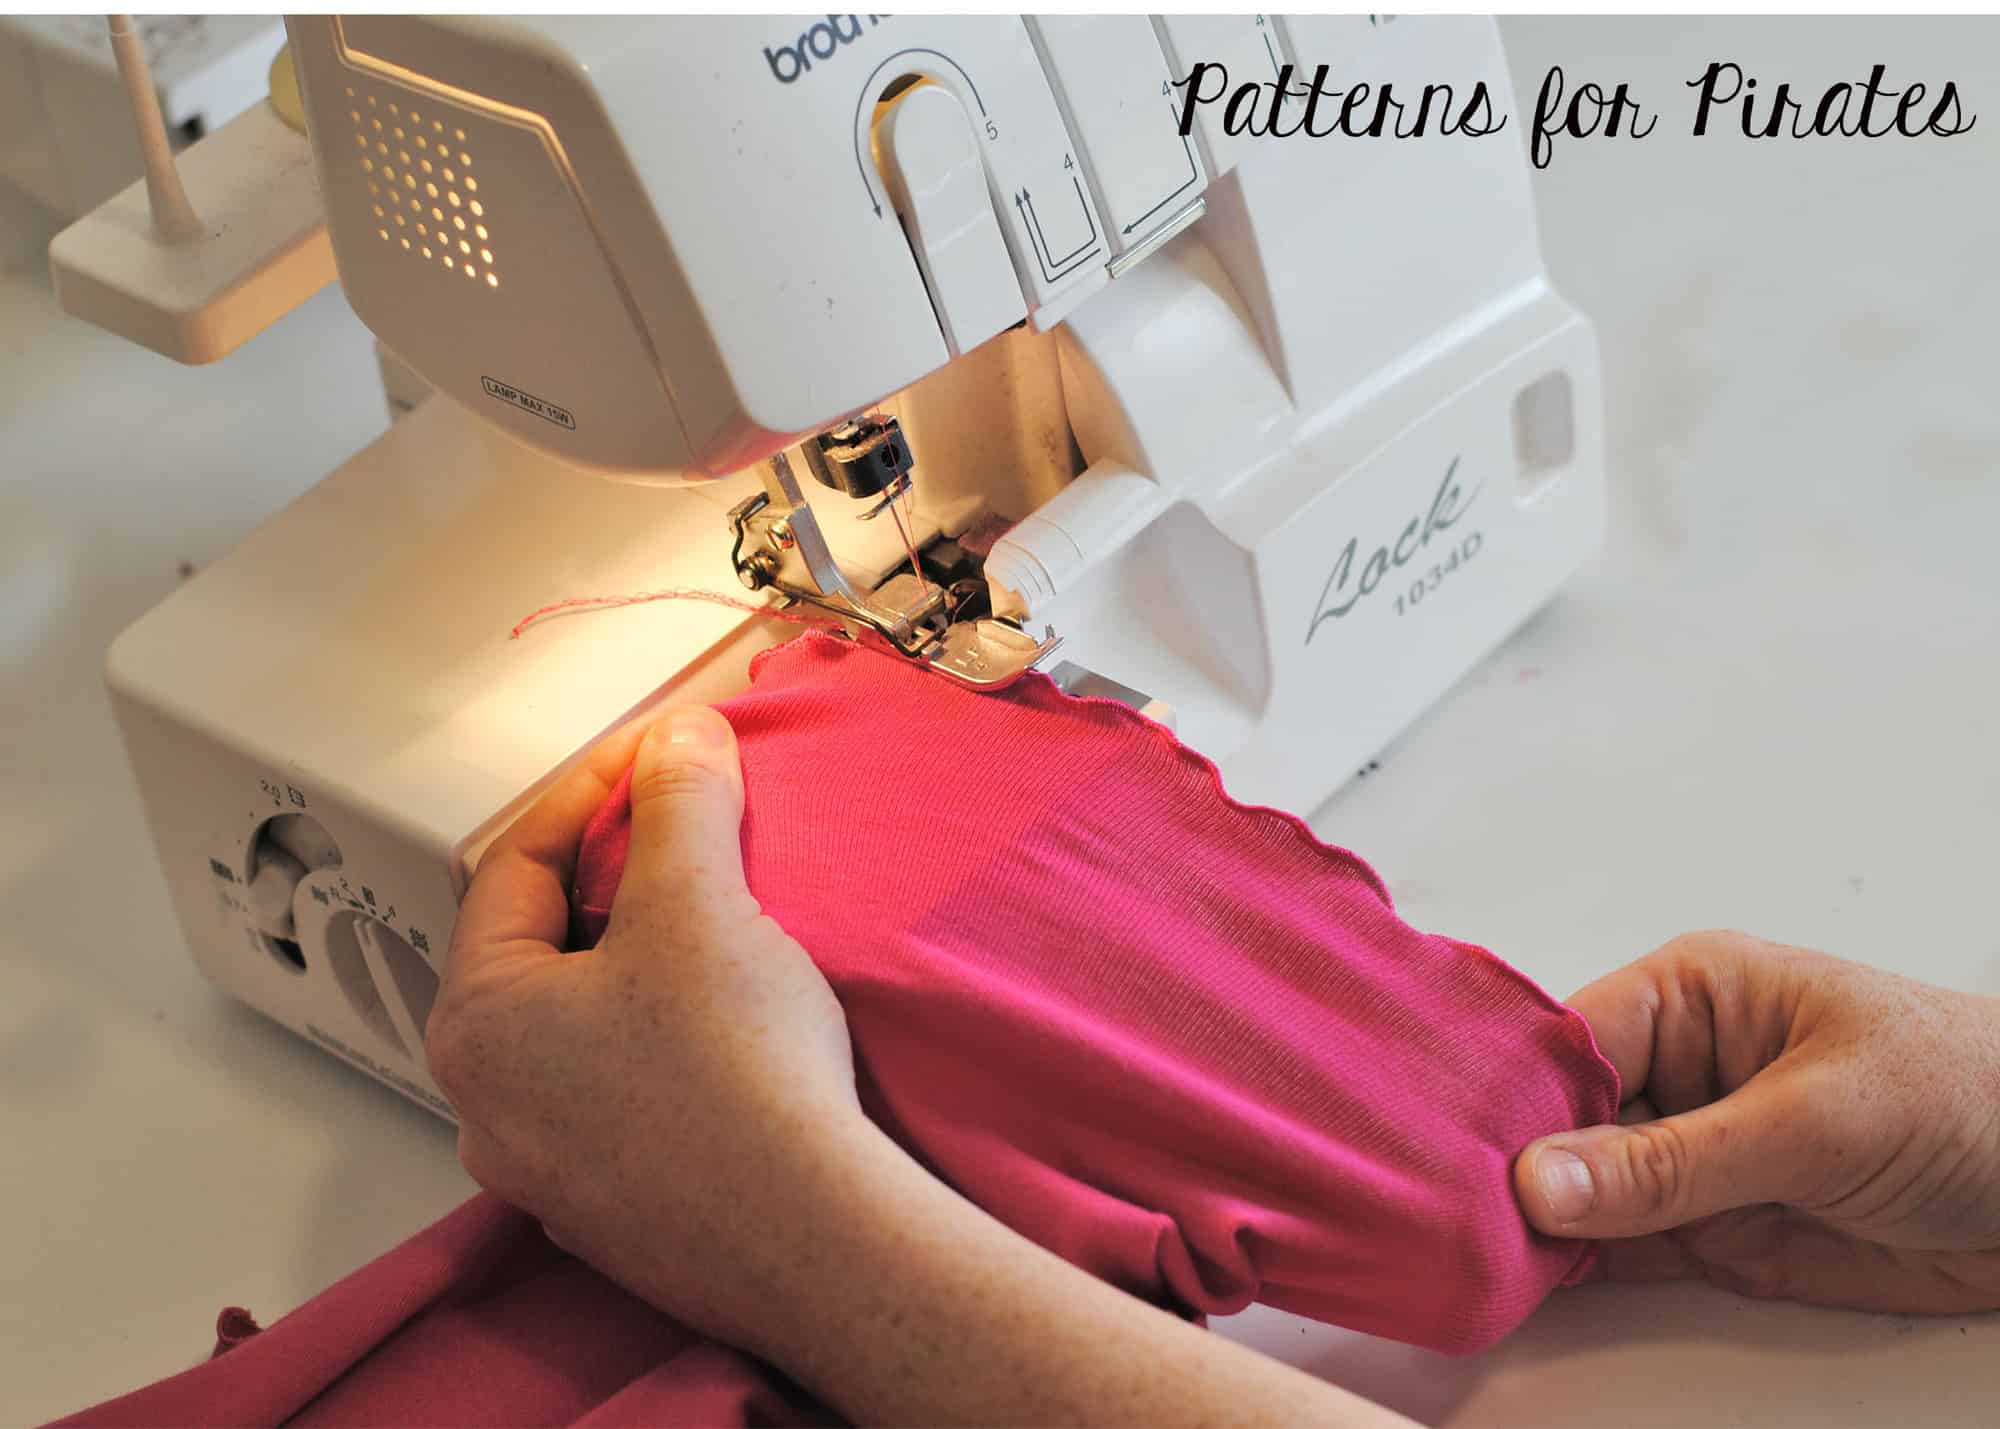
If you choose to make a cropped swim top, like I am, you may want additional swim elastic for the bottom hem. This will help keep the hem from rising up while swimming. For this option, you will want to trim half an inch from the bottom of the front and back bodice pieces.
I simply wrapped the elastic around my waist and cut at a comfortable length. The elastic will be attached in the same way you attach the neckline elastic for the crew neck. 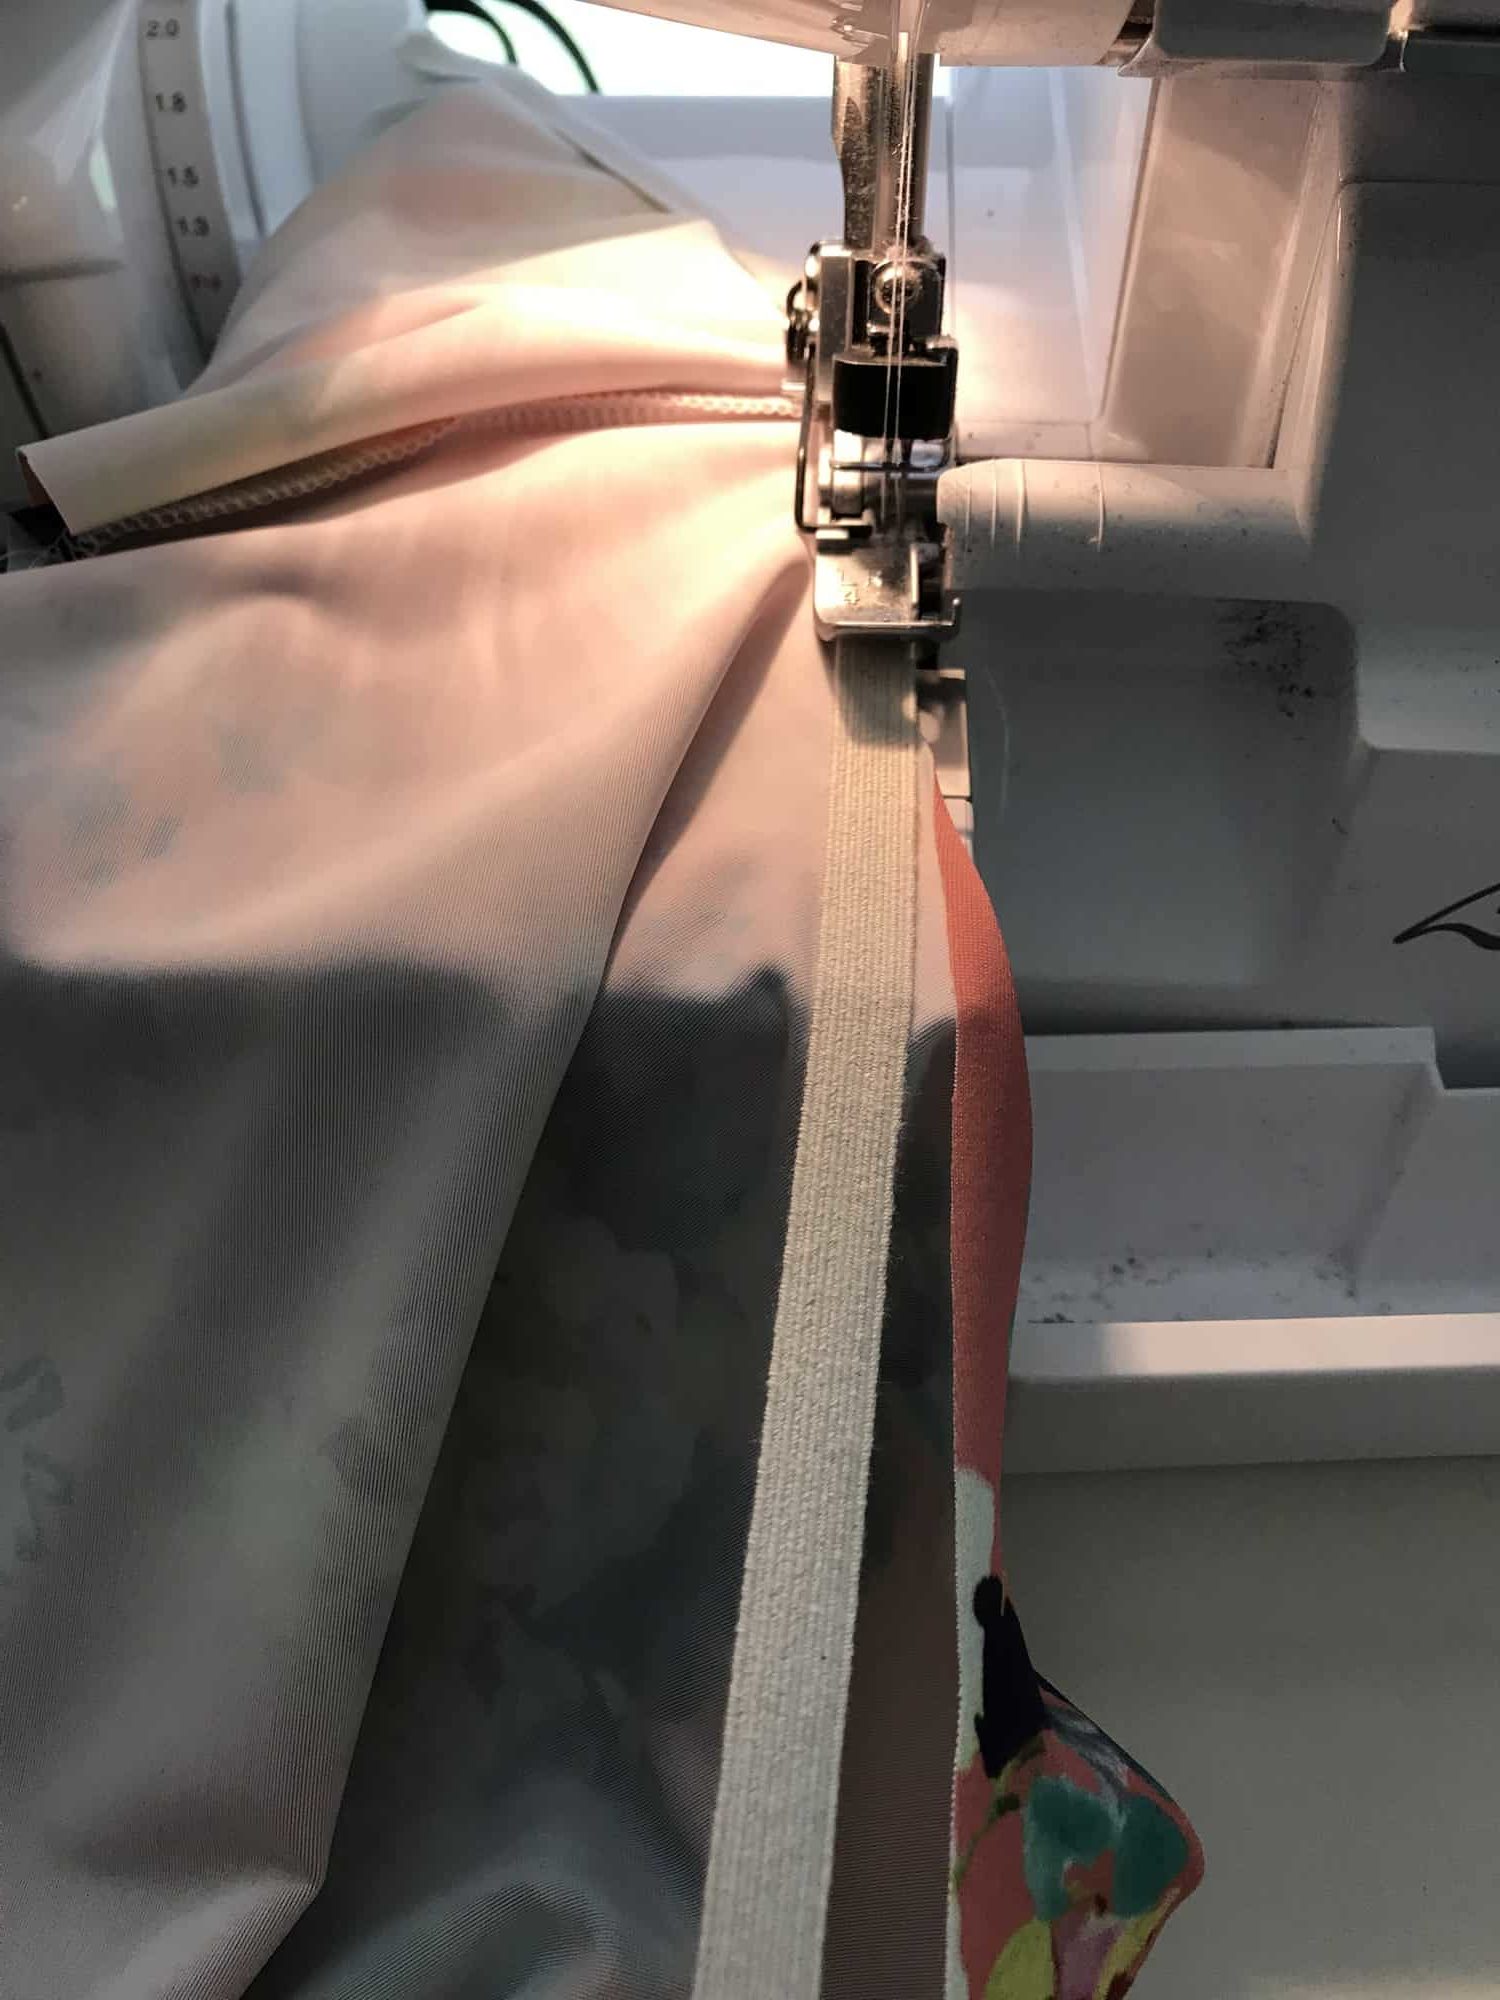
All other hemming options can follow the tutorial. Now you can enjoy your new swim top!


…..
Zipper Workout Bra

For this hack, we will be working with the crew neck, crop, tank option. In addition to the materials listed in the pattern, you will also need:
- Fabric for the lining
- Zipper that is slightly longer than the shortened crop bodice (detailed below)
- Wash away wonder-tape (our new BFF!)
- FOE/knit binding
- 1” elastic
- Soft bra cups
- (Optional Hook & Eye Closure)
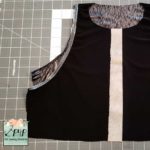
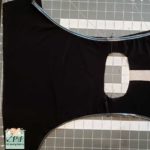
1. Assemble Bodice and Lining
-

- Remove about 3.5 inches of length from bodice pattern pieces (adjust as needed). Then cut bodice pieces from main fabric and from lining fabric.

-
- Add a strip of interfacing down the center of the wrong side of the front lining piece. Sew together bodice at shoulders, add elastic to armscyes as instructed in the pattern.
-
- Sew together your lining pieces at shoulder seams and baste side seams. Slip lining on yourself and mark cup placement with chalk. Lay out your lining & use a ruler to align and adjust as needed.

-
- Pin cups in place, sew on cups with a long zigzag stitch to wrong side of lining. After trying on the lining again to ensure proper cup placement, carefully remove basting stitches at the side seams.

-
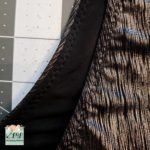
- Match armscyes right sides together, stitch armscyes with ⅜” seam allowance (pull bodice layer taut while stitching).
-
- Flip right side out, press seam so elastic is flat and you cannot see lining. Topstitch while pulling slightly so elastic and fabric are taut.
-
- Trim the extra lining that is now left over around the neckline.

-
- Lay bodice with bottom edges together, hold together the two lining pieces at the bottom corner, and lift up bottom corners of outer bodice pieces to meet.

-
- You should now be holding side seams with right sides together. Match corners and seams, stitch. Repeat with other side.

2. Attach Zipper with Wonder Tape!
Find the center of the front neckline, cut straight down from top to bottom.
Place a strip of wonder tape from top to bottom along the edge of one half of the bodice. Do the same for the coordinating lining piece, peel off the paper strip.
With right sides together, place zipper along the edge of bodice.
Next, peel off paper strip on lining and place wrong side of zipper along right side of lining.
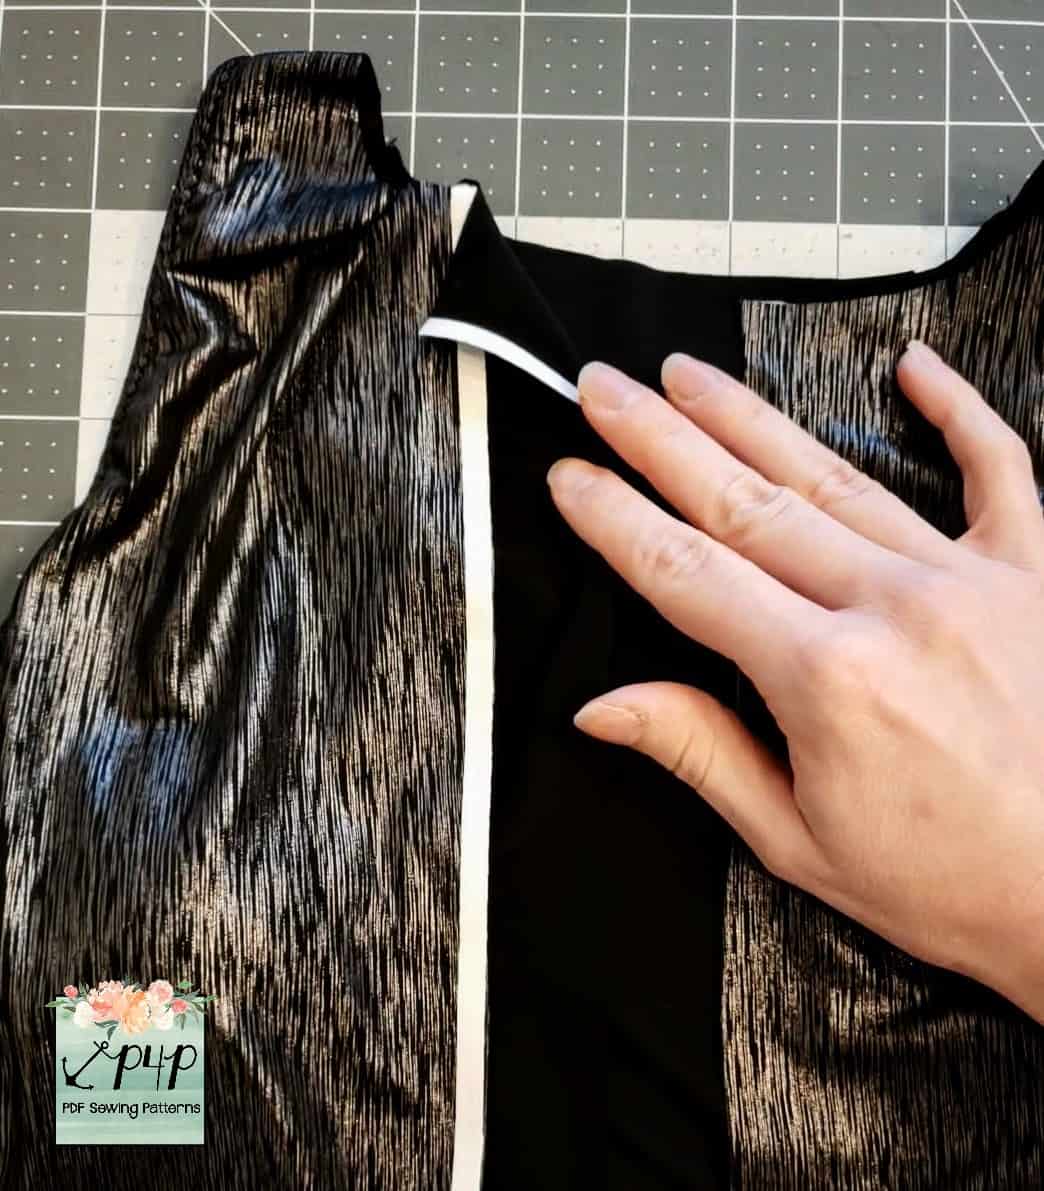
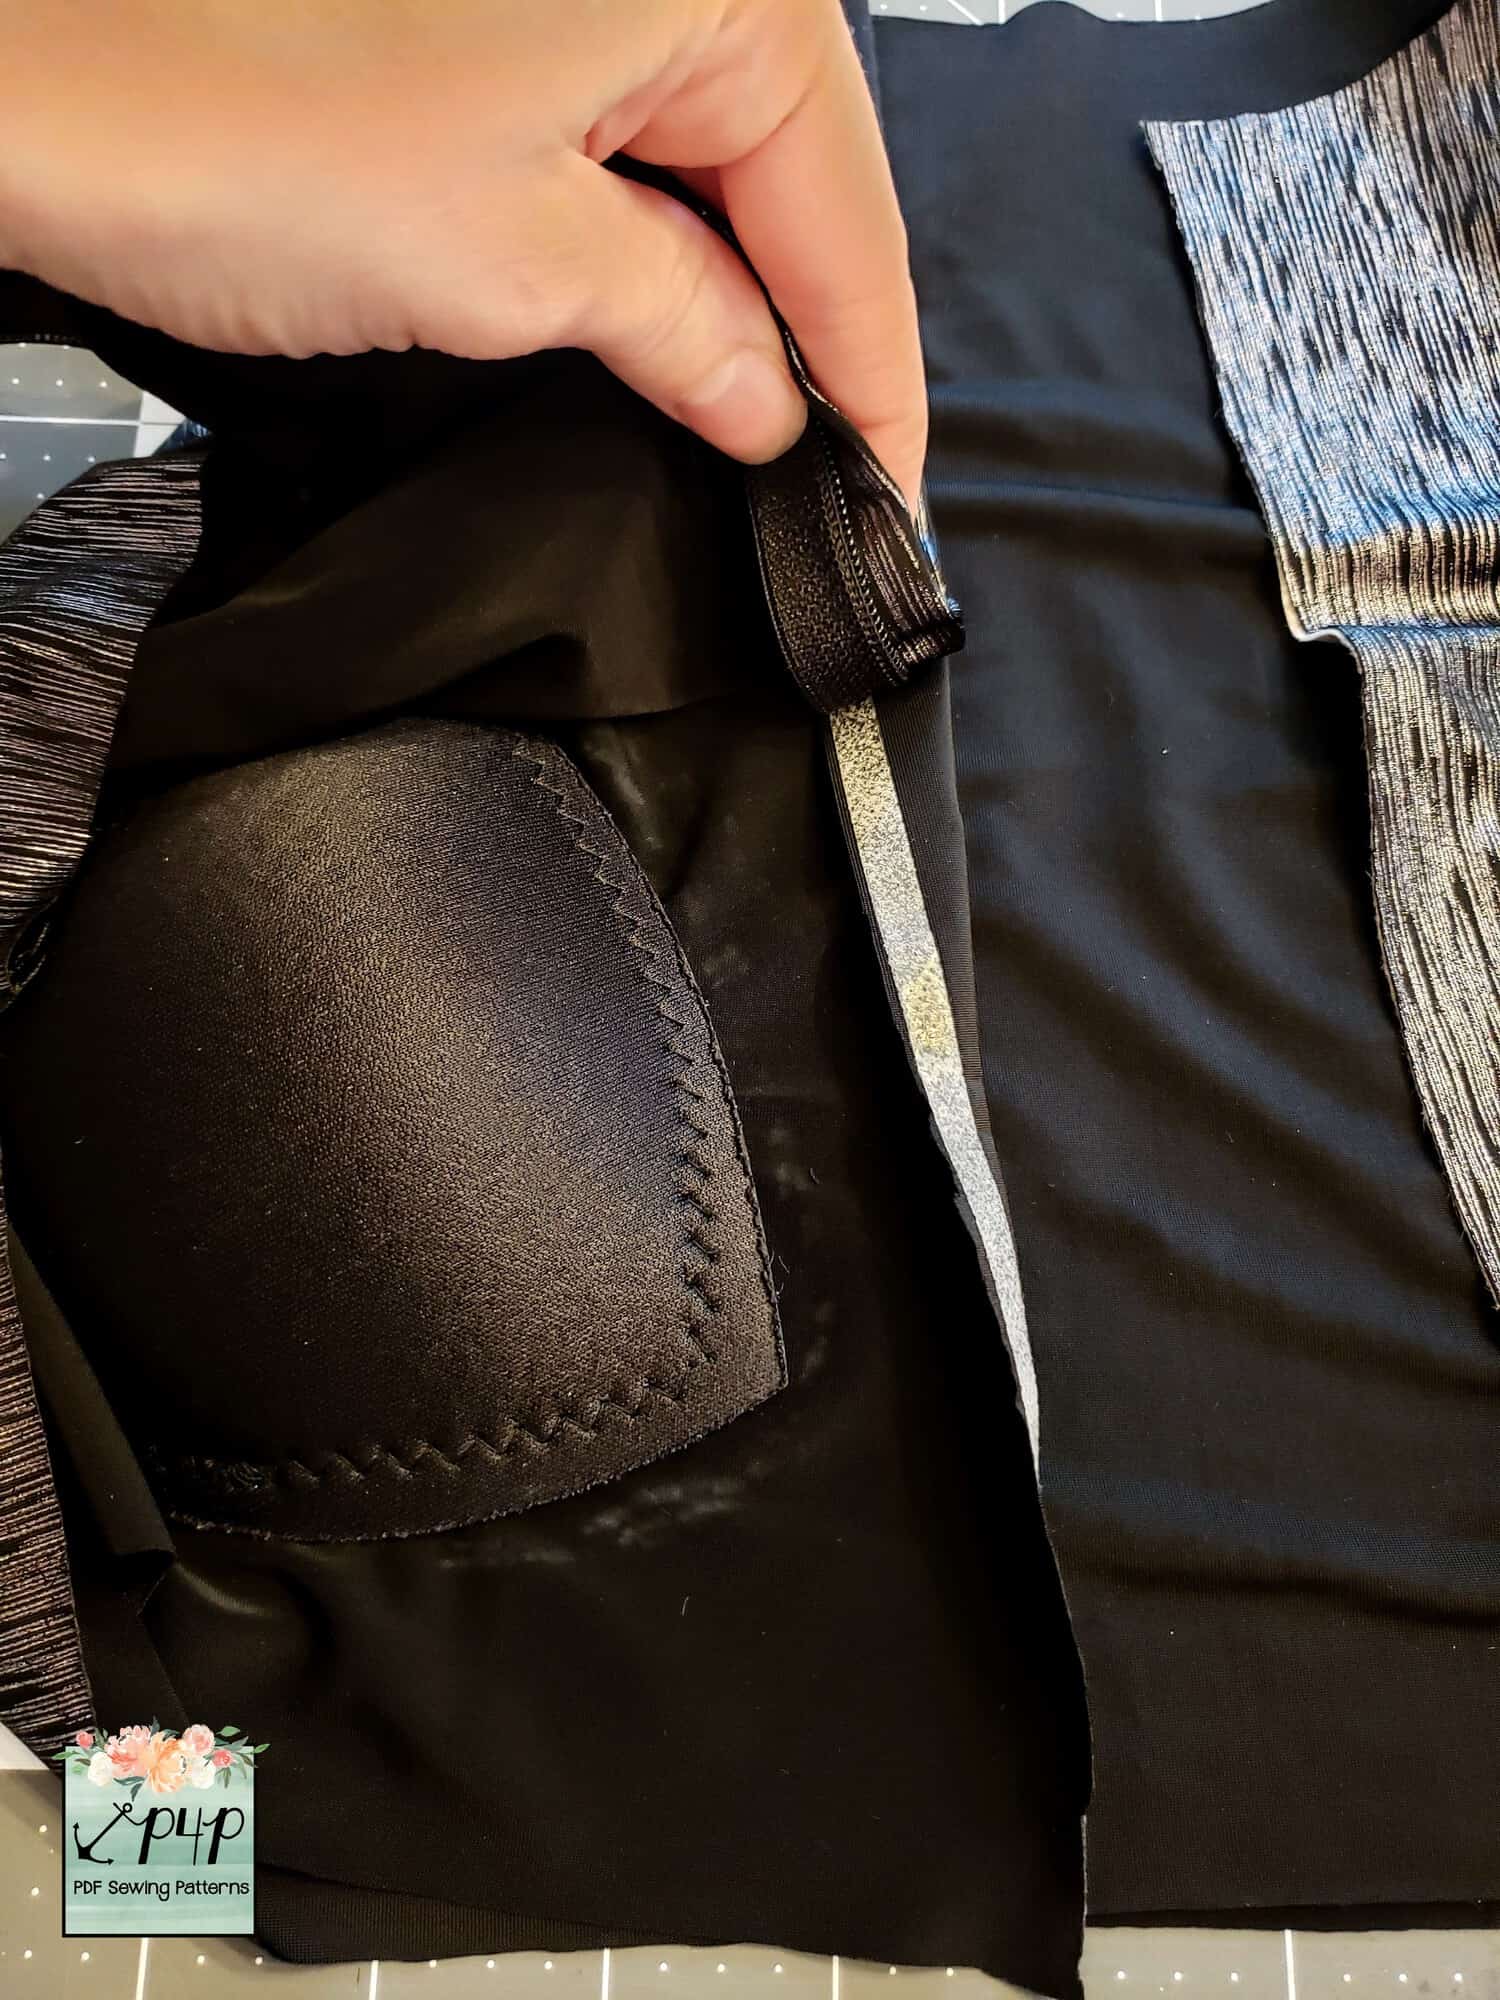
Check to be sure zipper is placed correctly, gently finger press in place. (Clip in place if needed).
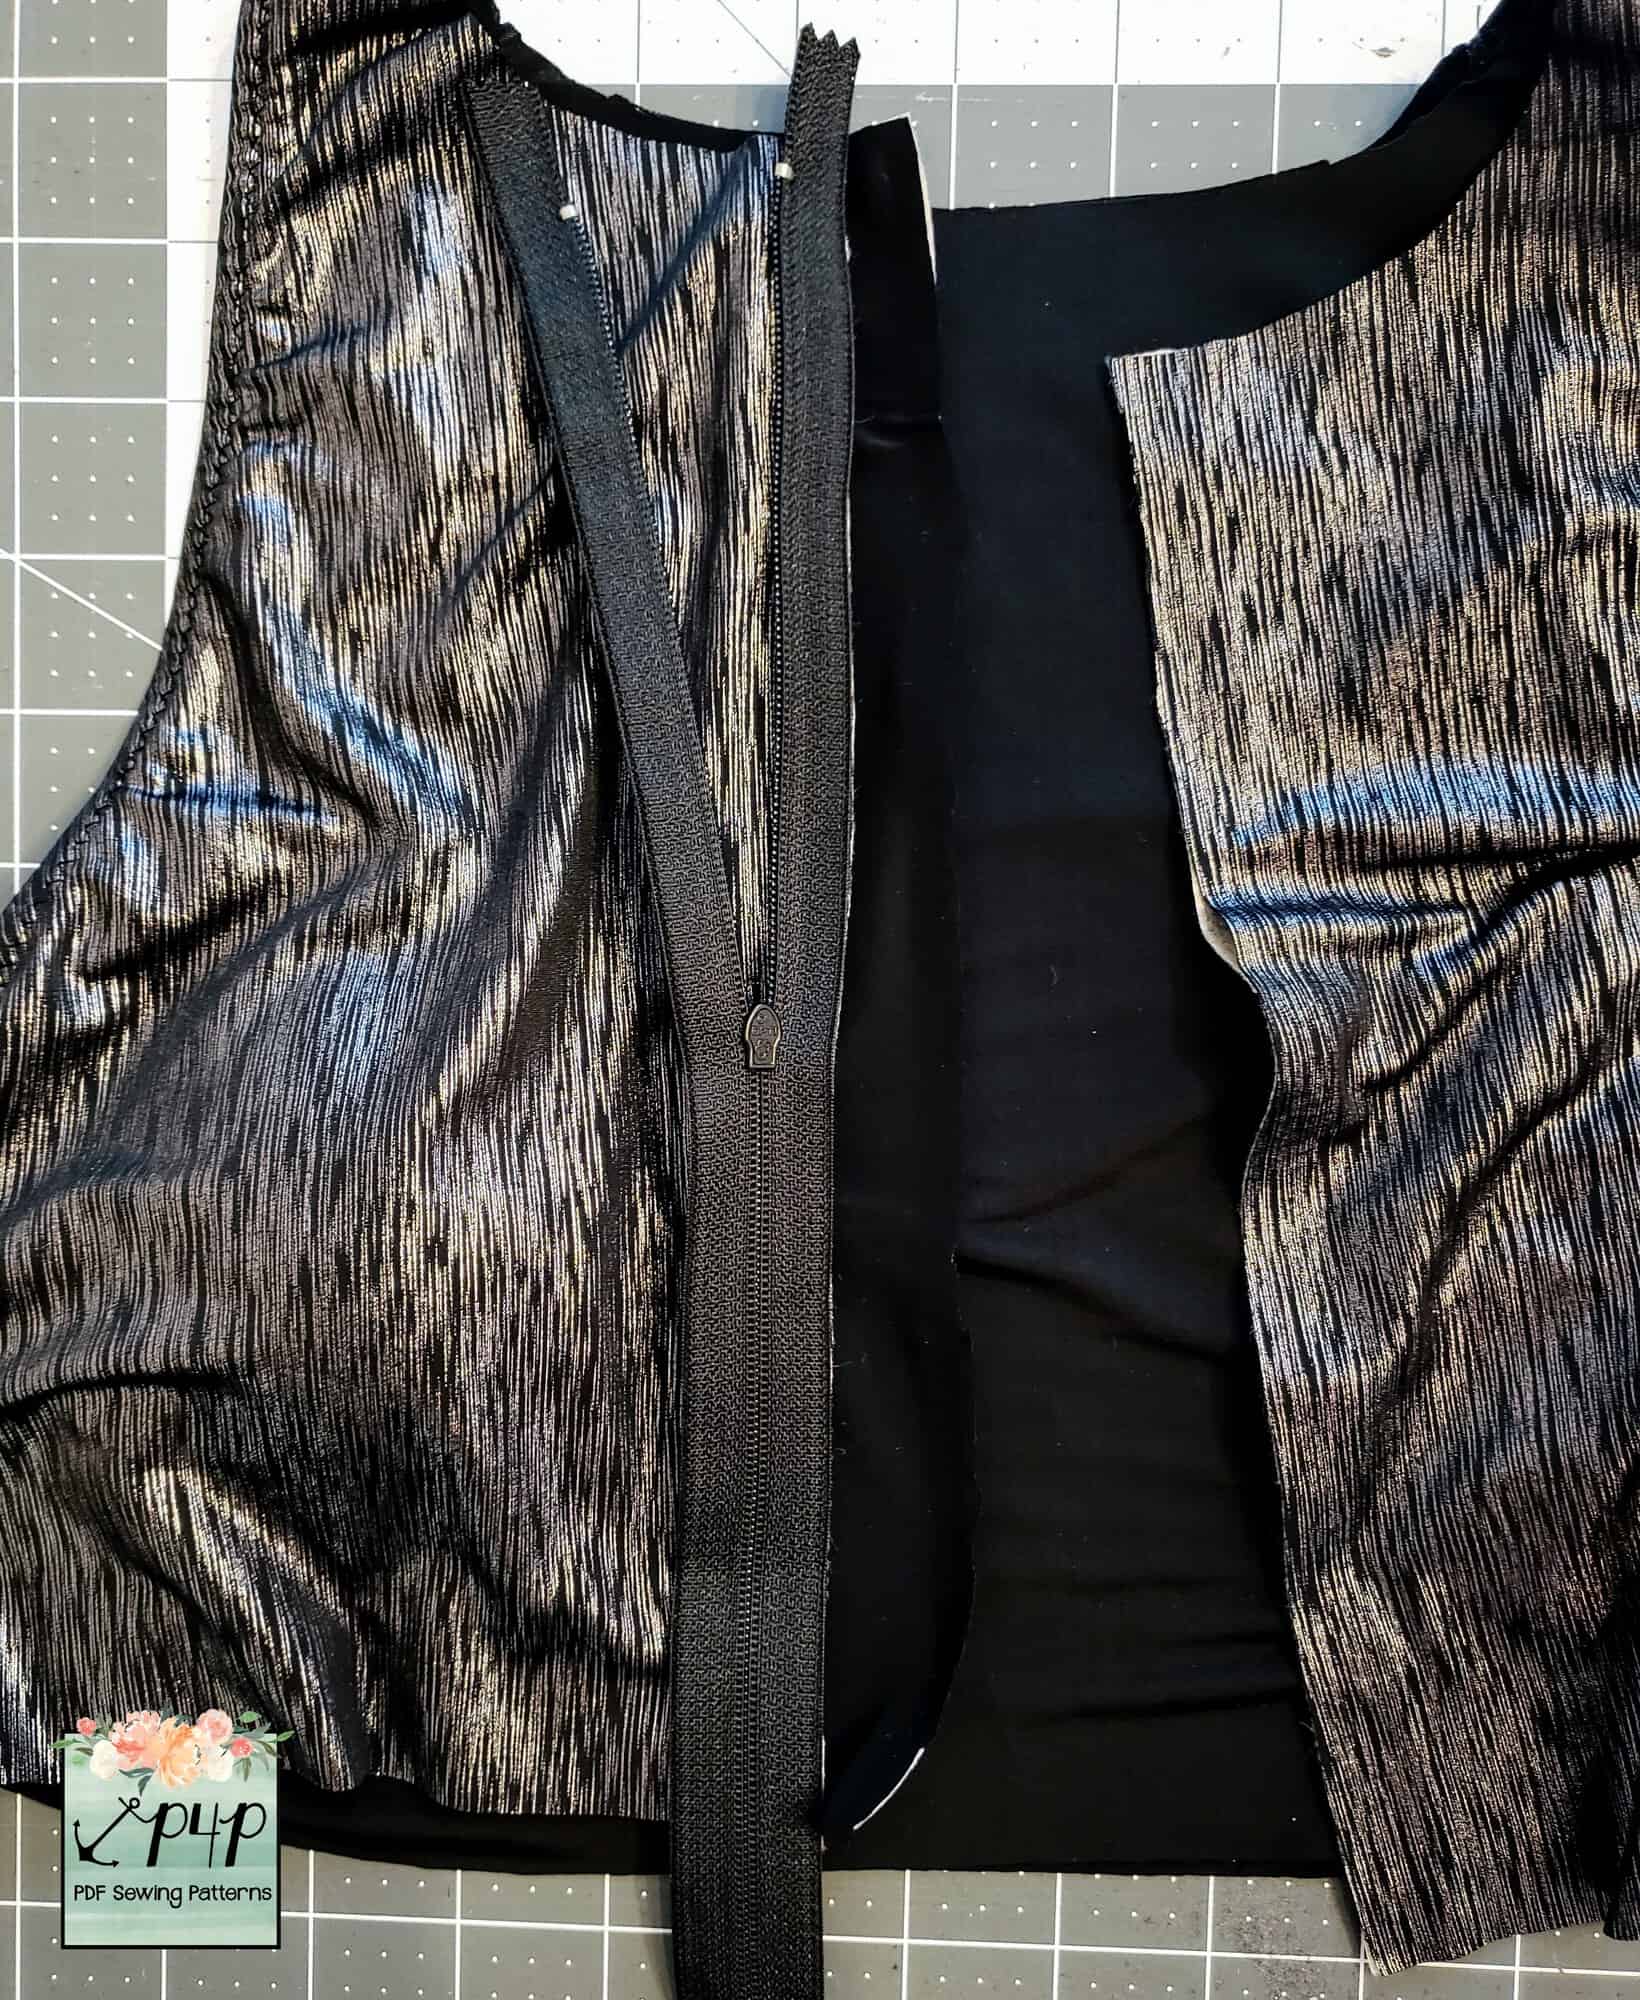
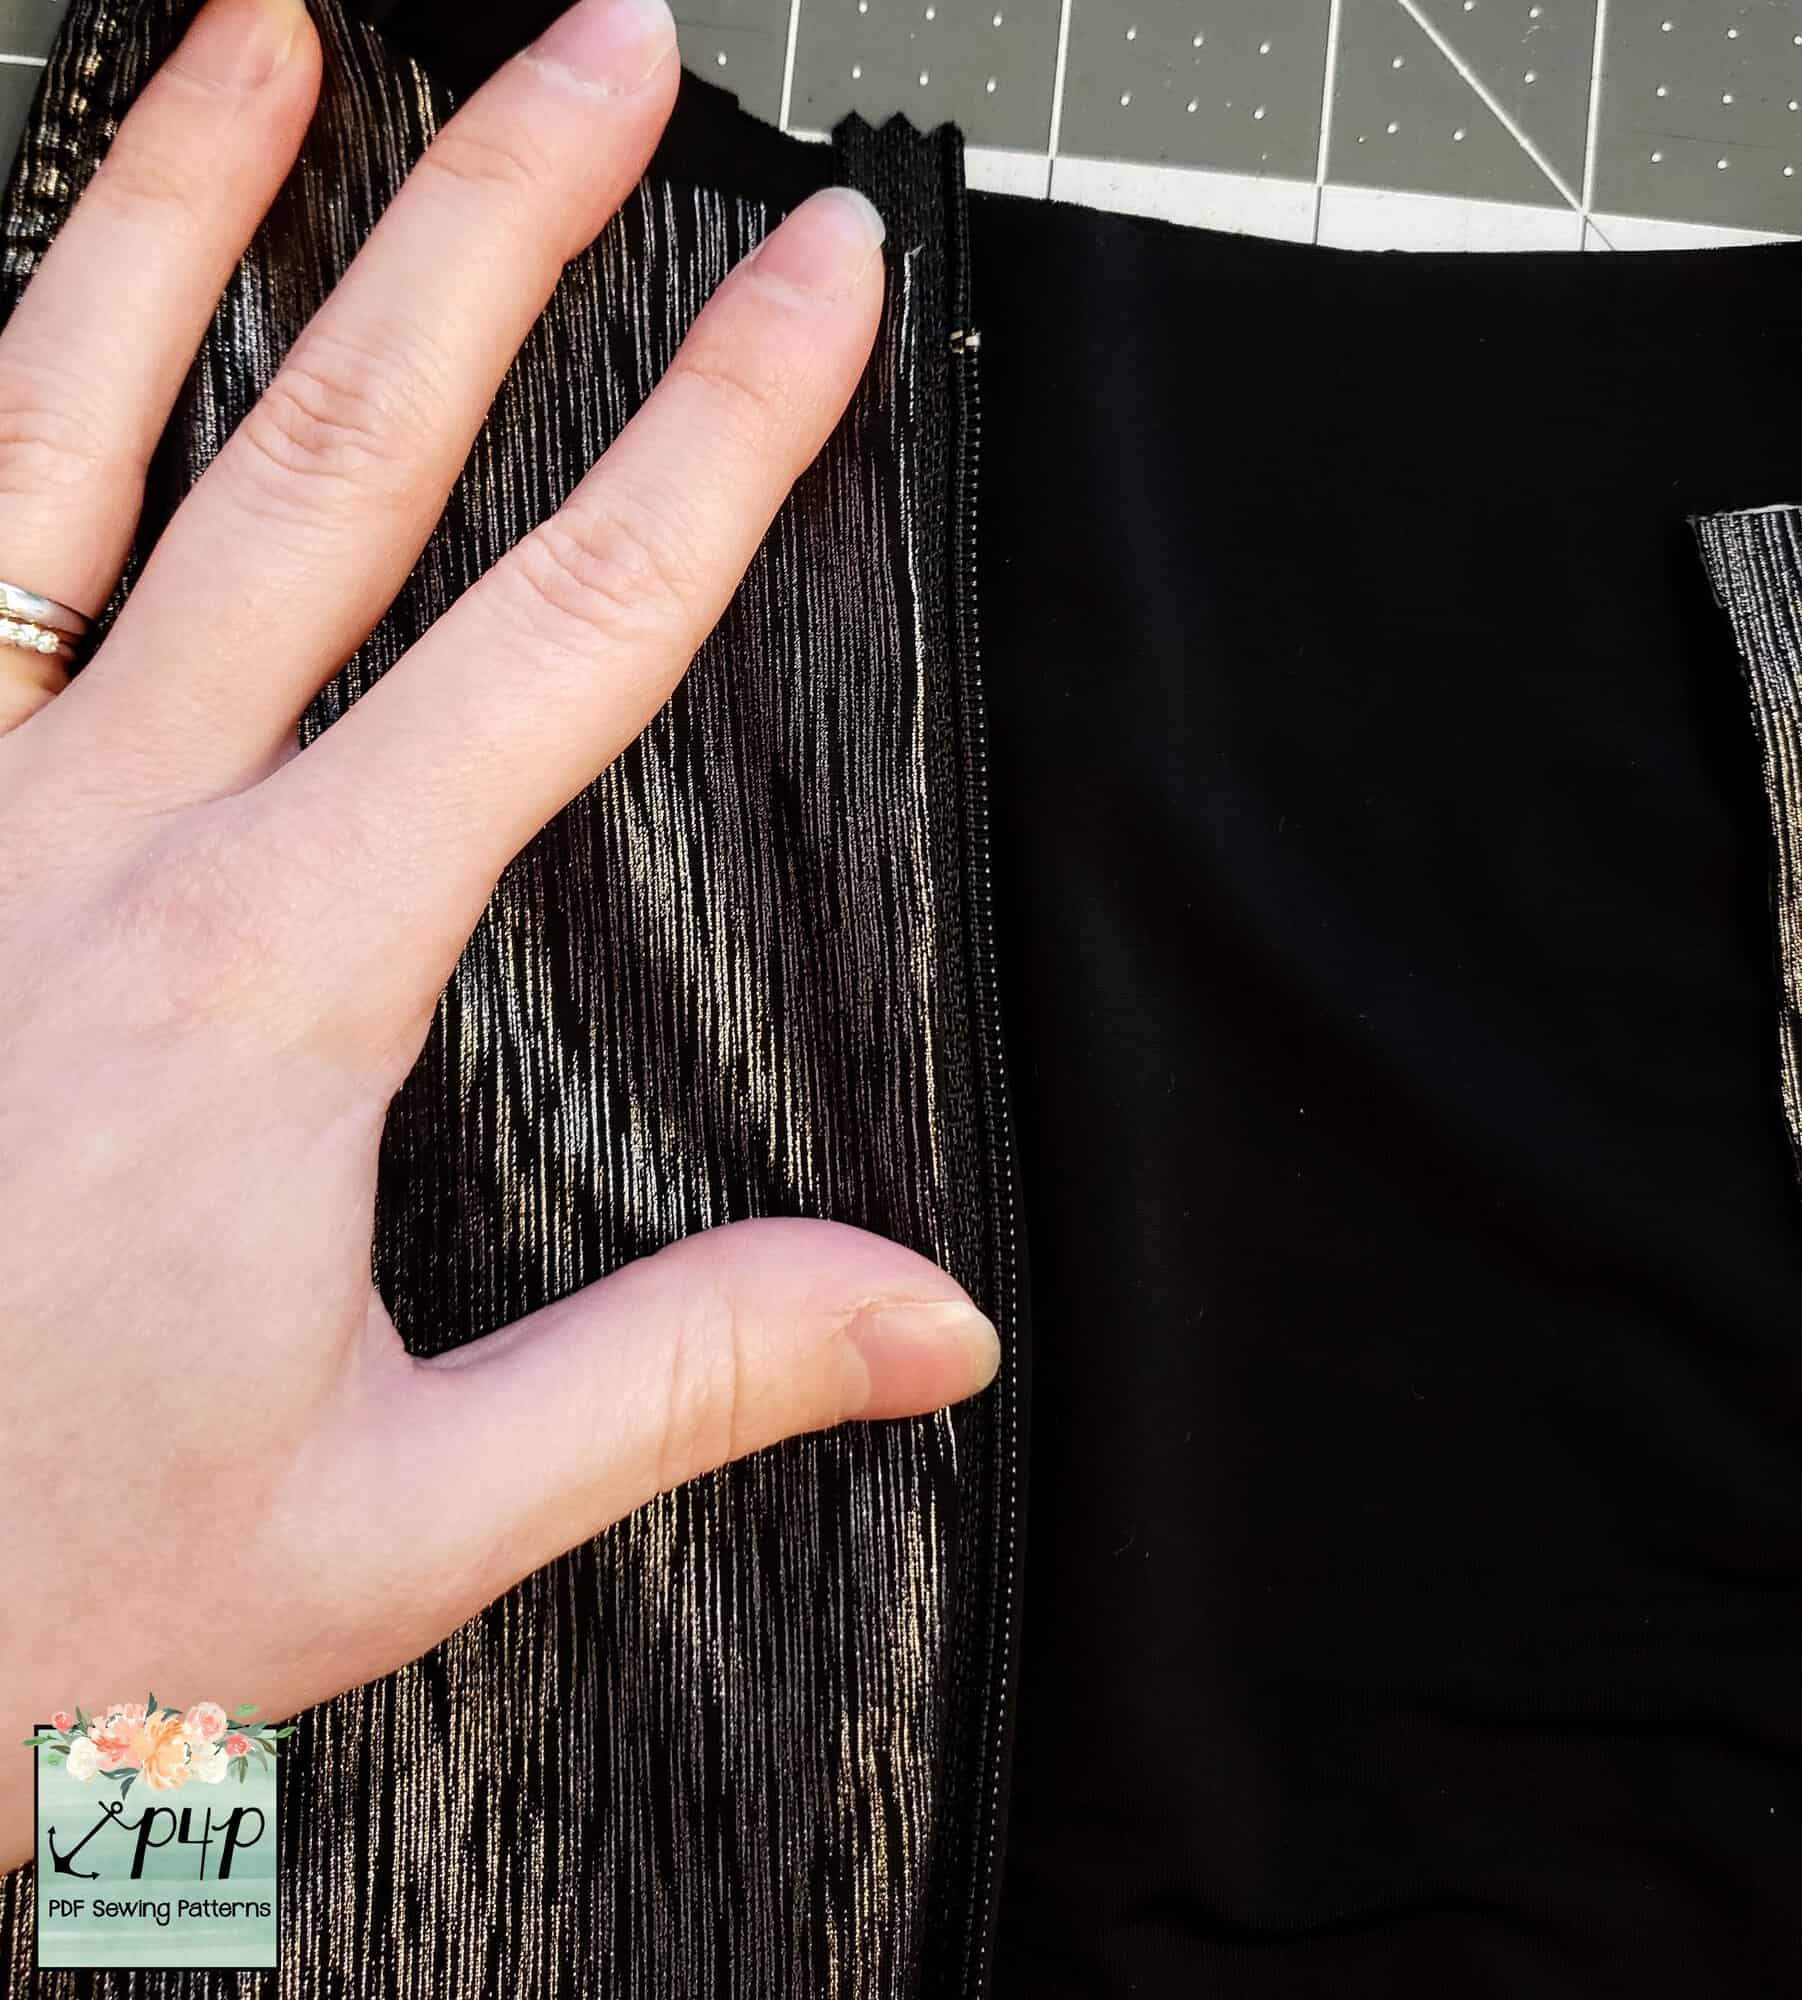
Stitch 1/4’’ away from the zipper from top to bottom.
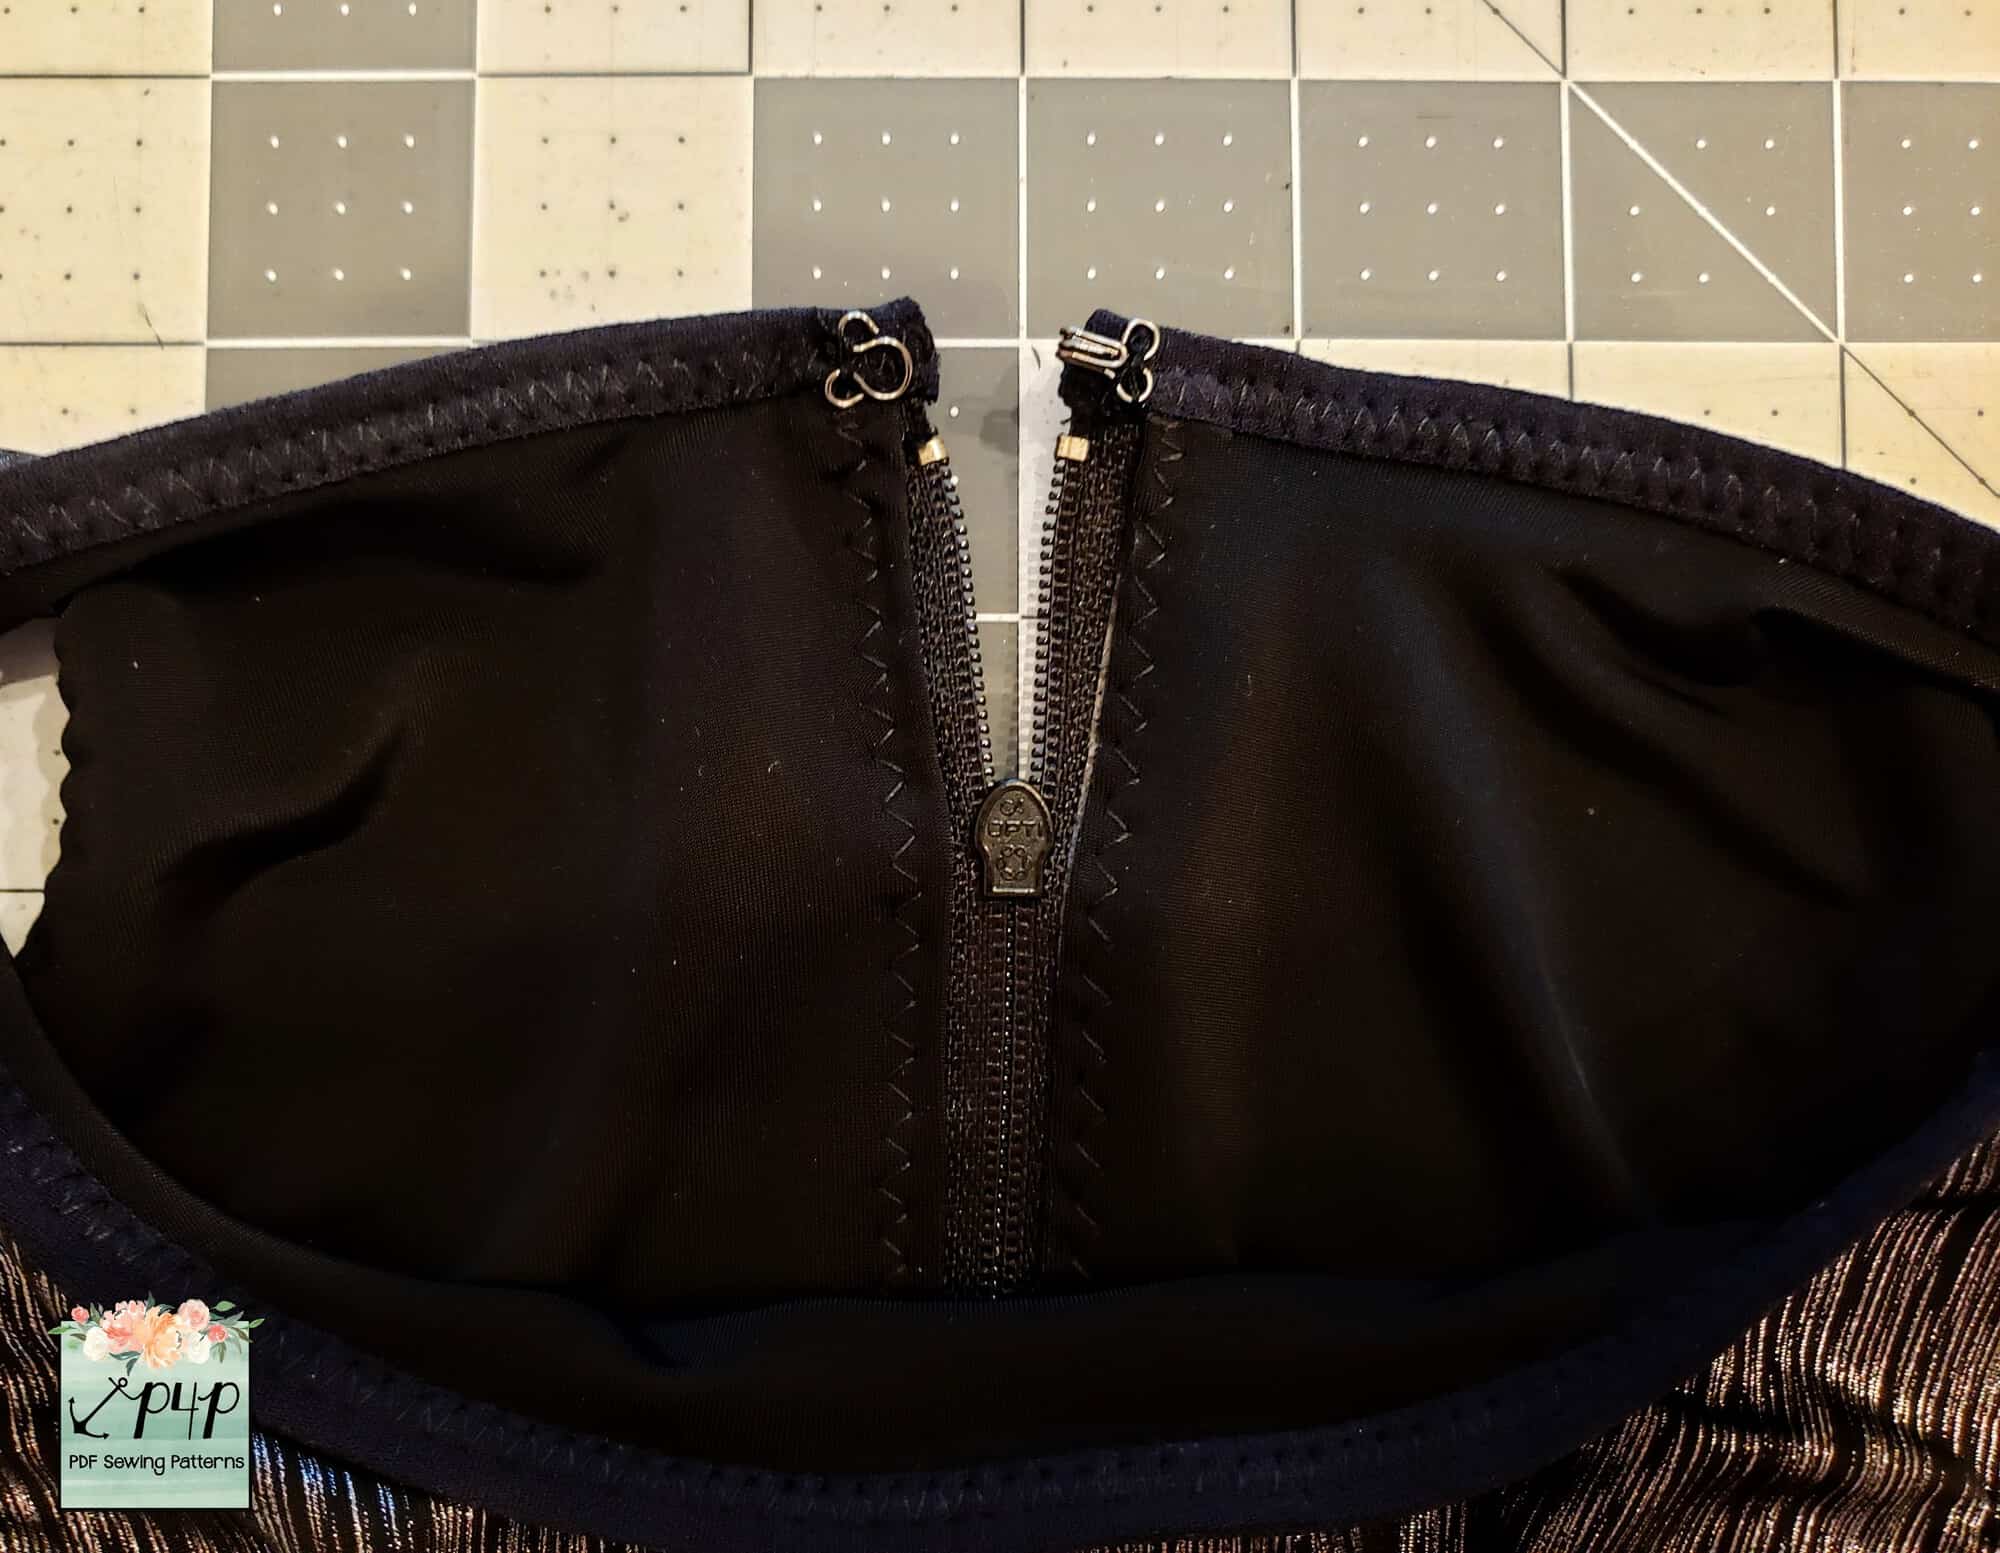
Repeat with other side. Your fully lined zipper is now attached with just two lines of stitching!! Zip up zipper, add reinforcement stitches across the bottom of the zipper, and trim the extra zipper fabric from off the top and bottom.
Finish neckline with your favorite finish. I used FOE, but you could also do a knit binding. Just be sure to fold the ends under so the edges are finished.


3. Add Bottom Band
Cut a band with the following formula (adjust length as needed): Length = 3.5” by Width = (75% of Underbust Measurement) + 1”
-
- Fold width wise right sides together and stitch along short side.

-
- Fold band lengthwise with wrong sides together. Cut strip of 1” elastic using the same length measurement as the band, sew together at short ends and slip into folded band.
-
- Mark quarter points on band and on bodice. Match quartered points and stitch!

*Optional* Hand sew hook and eye closure at top of zipper.
And you are done!!!


…..
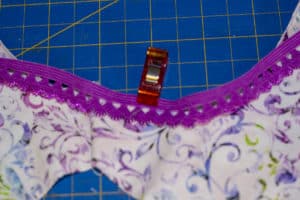
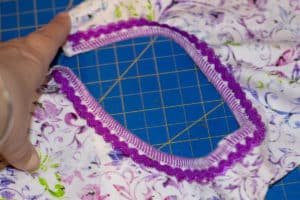
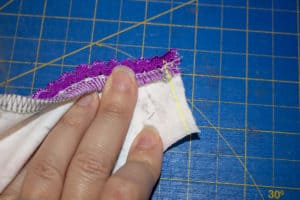
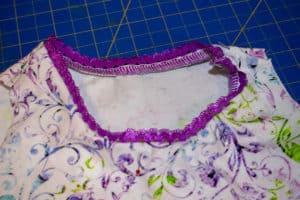
Picot trim

Anyone else buy tons of picot elastic thinking you are going to make all the bras and underwear? Well picot elastic can easily be used for other items and is a great finish for a necklines as well! This is a quick easy hack and all you need that is different from the original requirements is picot elastic!
We are only going to make very minimal changes. My picot elastic was 1/4 inch so I did not bother trimming the neckline down at all. We are going to cut the picot the same length as what the pattern calls for for the clear elastic.
-

- Pin or clip the center of the picot right sides together to the middle of the shirt. You can also mark quarter points if you choose but as the elastic is very close to the same length of the neckline I choose not too.
-
- Sew or serge with a 1/2 inch seam allowance. If using a serger make sure to disable the knife so you don’t risk cutting your elastic.
-
- Flip your picot out with your seam allowance down towards the shirt and sew your shoulder seam with 1/2 inch seam allowance.
-
- Flip your picot up, seam allowance down and pin in place.
-
- Top stitch in place, make sure that you are stitching a close to the edge of the seam allowance as you can, this prevents the picot from flipping out and showing your seam. I used my coverstitch but you can easily use your sewing machine with a zig zag or double needle as well.
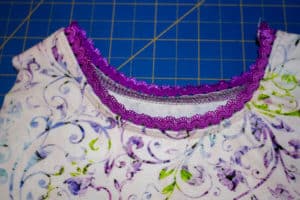
Now press that top stitch cause pressing is the key to a really great finished product and finish the rest of your top as instructed. You can also use this method for the armholes if you choose but sometimes picot can be scratchy, mine was super soft but I choose to just use it for the neckline.


…..
Lettuce hem

Next up we have the lettuce hem hack. This is an easy and fast way to finish your edges with a little added style!
First off, we need to trim the hem allowances at the neckline, sleeve edges, and bottoms of both front and back pieces of the pattern to account for not using a traditional hem on these edges.
Trim 3/8″ off of the neckline.
Trim 1/2″ from the sleeve edges.
And trim 1″ from the bottoms of both the front and back bodice pieces.
Now that we’ve got our pattern pieces properly modified, cut and sew up your top as usual, using the new trimmed pattern pieces.
Next, set up your serger for a rolled hemline. Consult your serger’s manual for exactly how to do this on your machine, but in a nutshell, you will use only one needle, narrow the stitch width, decrease the length and increase the lower looper tension.
Begin with the neckline of the shirt. Sew the neckline as if you were finishing with a rolled hem, but stretch the fabric firmly before and after the presser foot. The tighter you pull, the more waves your lettuce hem will have!
Repeat on the raw edges of both sleeves and bottom hemline.
And that’s it! Now you have a beautifully finished tee with cute lettuce hems.


Caitlin
…..
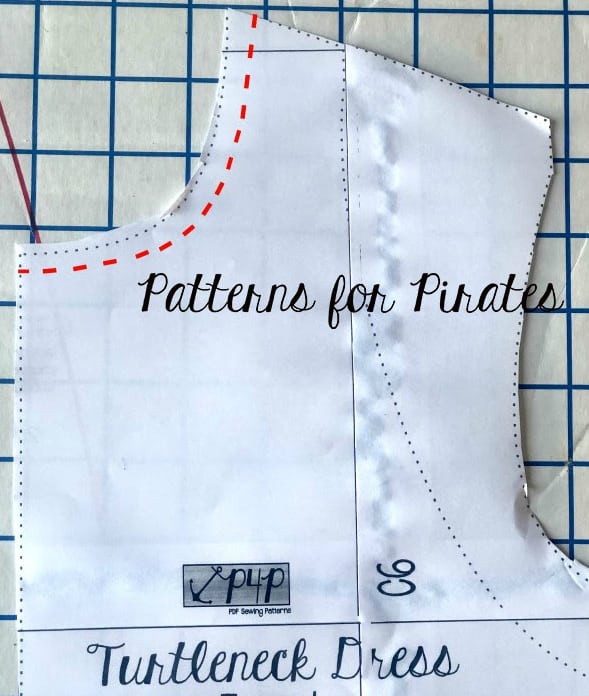
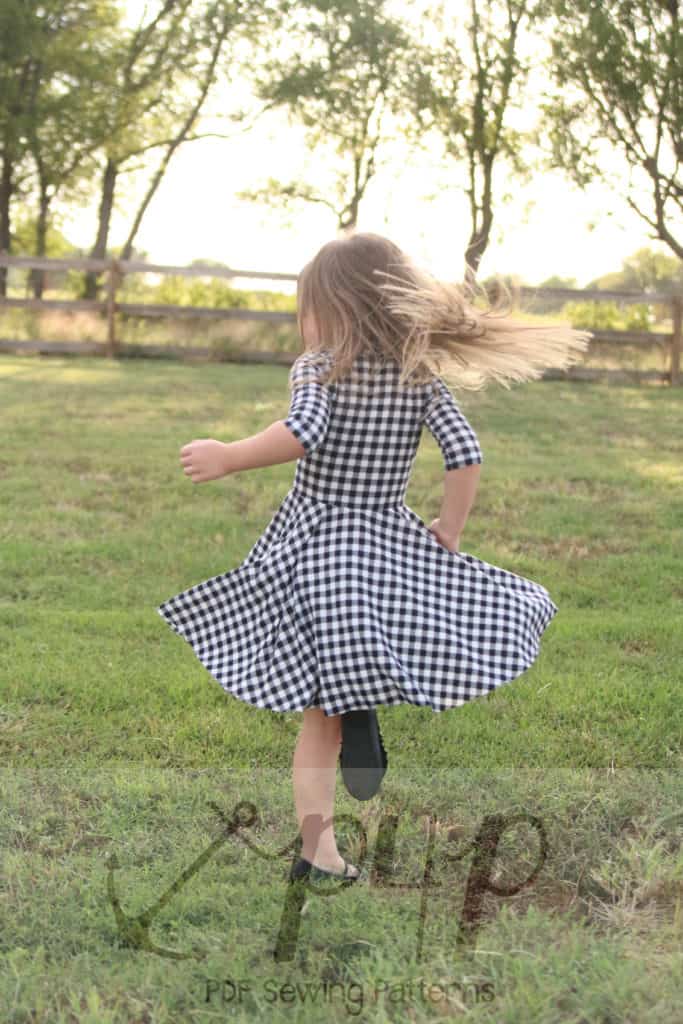
Higher side vents

Let give this dress a nice higher vent to add extra sexy to it!
Here’s how I made this little hack.
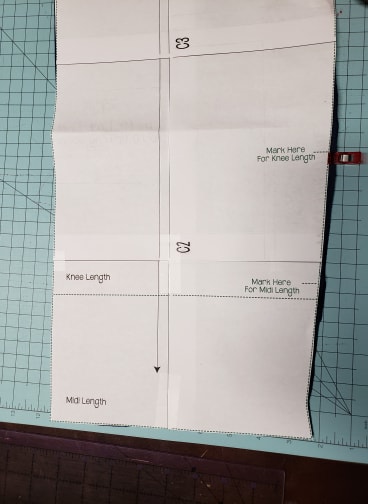
I started with cutting the mid-length version and marking the vent line for the knee length.
I continue sewing up the dress according to the instructions.
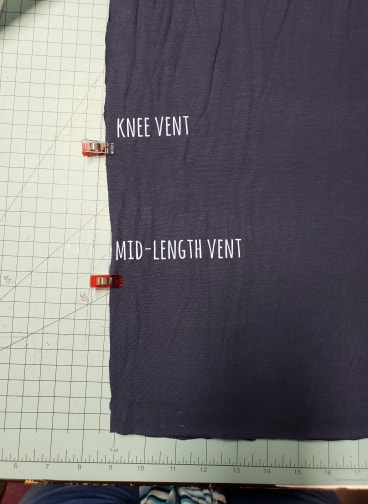
Here is a picture to show the different vent lines. I followed the directions for the vent except I used the knee length instead of the mid length marking.
Hope you all love this hack!!
Andrea
….
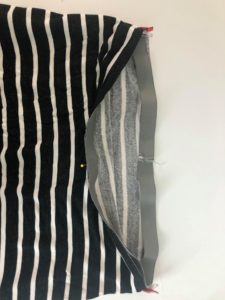
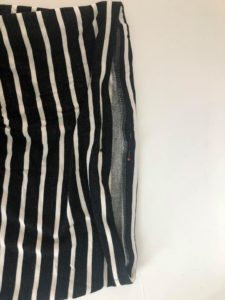
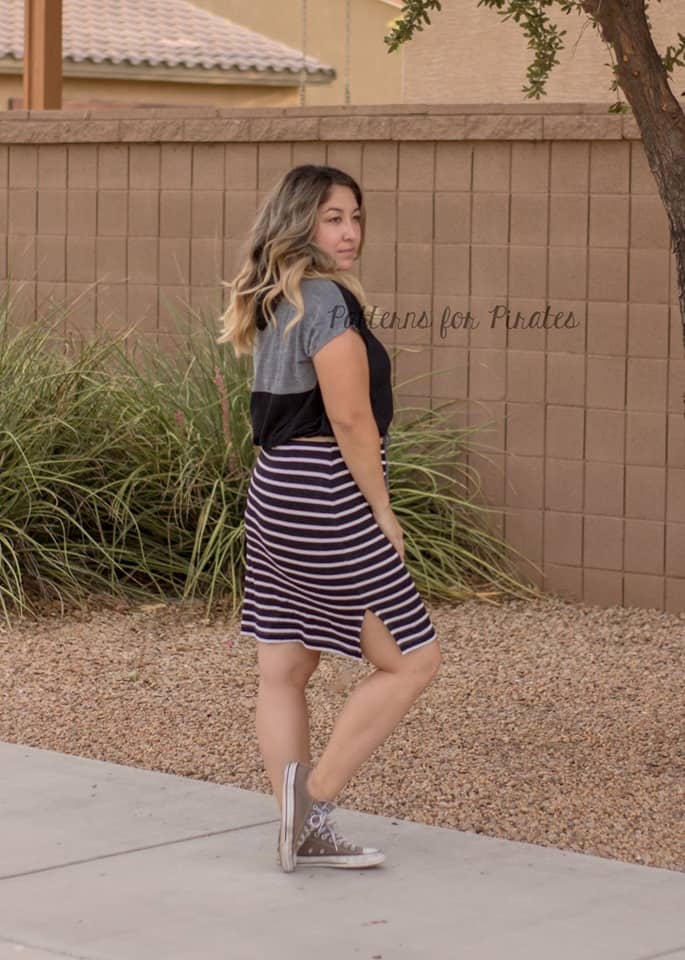
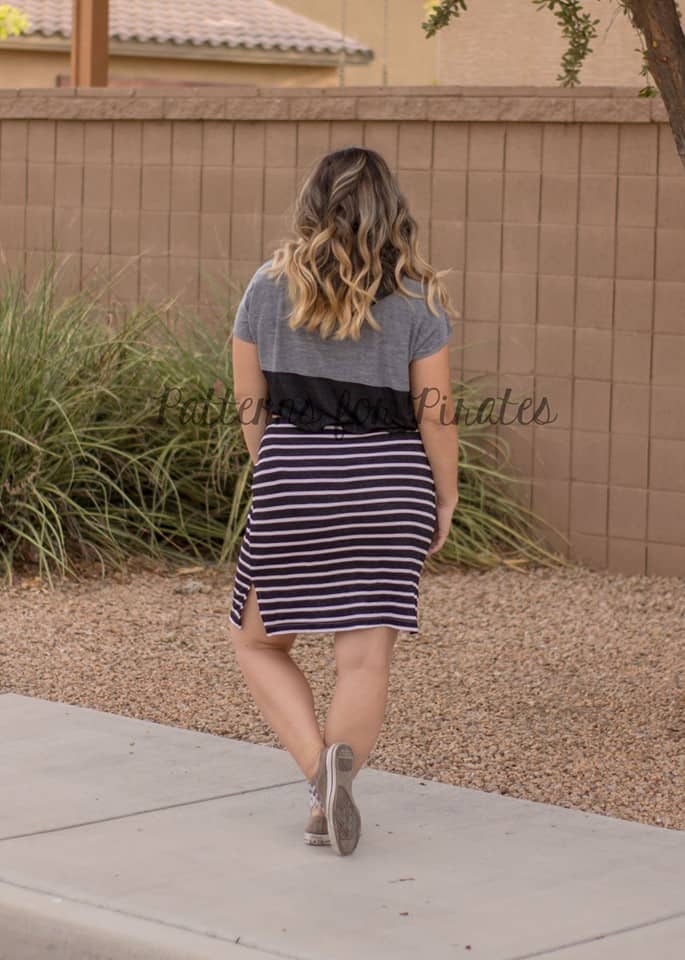
Skirt

Next up we have a super easy, fun skirt hack. Nicole paired her skirt with the Sporty Piko crop but you can certainly wear it withe the cropped Hepburn top. Start by deciding where you would like the skirt to hit. Nicole is wearing a high waist style so she cut the pattern 1″ front and back pieces above the waist line. Now grab a 1″ knit elastic piece and stretch it around your waist (or high hip, depending on your skirt preference). Cut the elastic based on your waist and comfort. Sew the side seams and hem the bottom of the skirt following the tutorial instruction.
-

- Sew the elastic in a loop.

-
- Find the quarter point of both the elastic and skirt waist opening and match them.
Using your serger or a zig zag stitch attach the elastic to the waist.
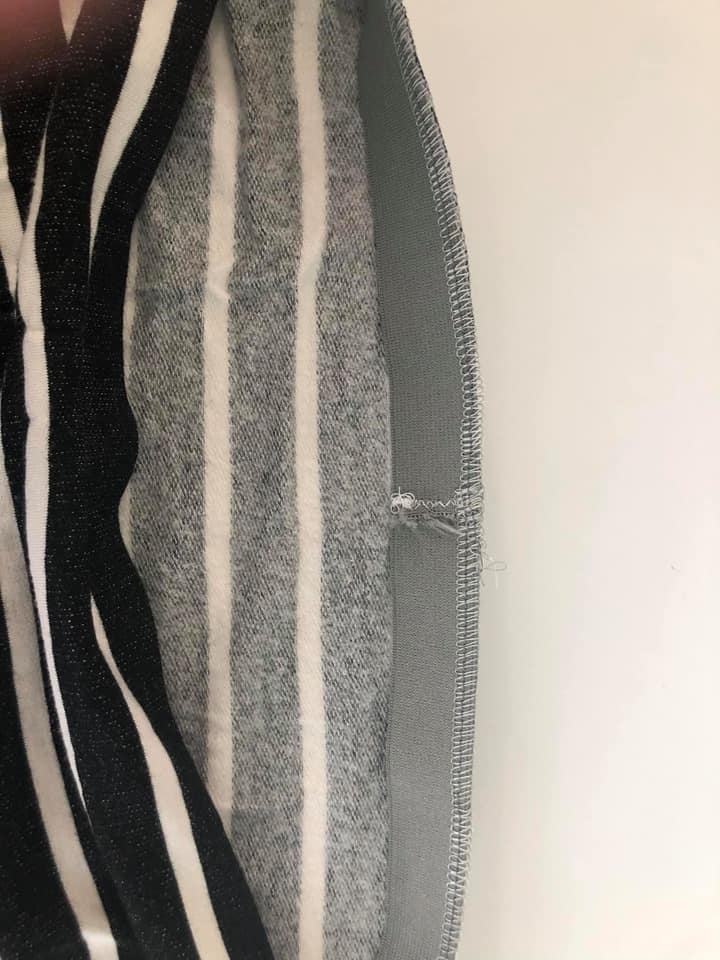
-
- Fold the elastic over and pin in place.
-

- Use a zig sag stitch or a coverstitch to stitch in place.
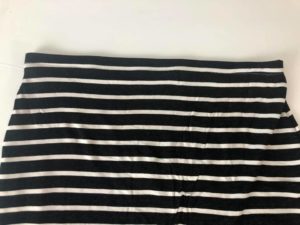
That’s it! All you have left to do now is enjoy your new skirt.

…..
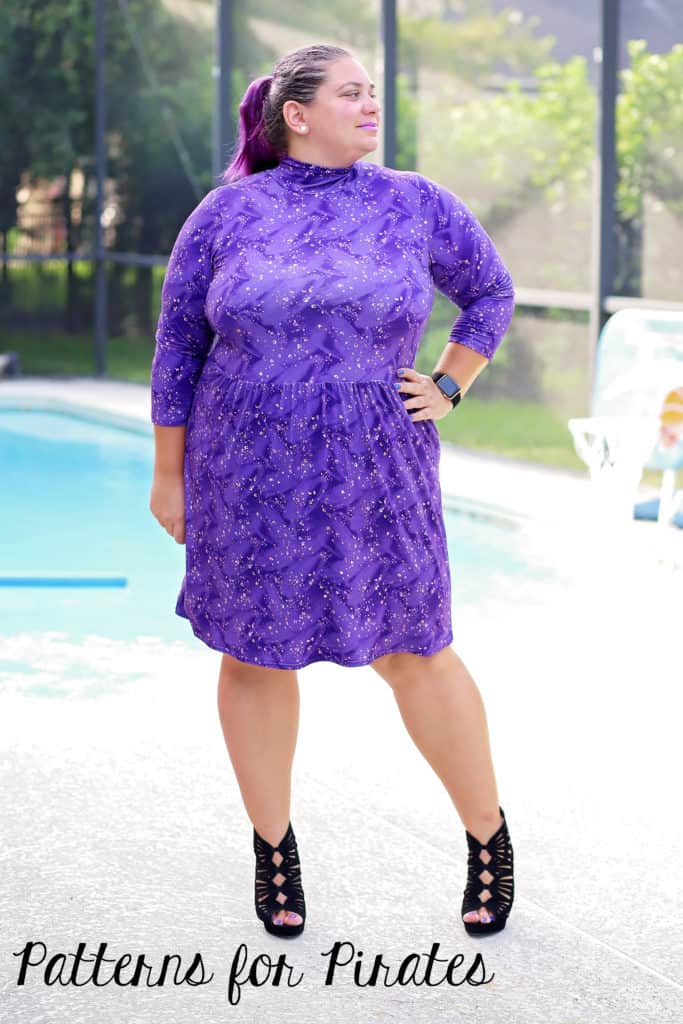
Hepburn / Boundless mash

My turn!! You know there’s nothing I like more than a good dress! So once I have sewn the dress included in the pattern I just had to try mashing it with the Boundless skirt. Here is what I did:
Cut the preferred Hepburn style (tank, sleeves, etc) CROP top. Now grab the Boundless pattern (or even the Sunshine) and cut the waist skirt (not the empire one).

Sew the Hepburn crop top as instructed in the tutorial. Now grab some 1/4″ elastic and measure the opening of the bottom hem. Cut the elastic the same size as the measurement you just took and sew it in a loop.

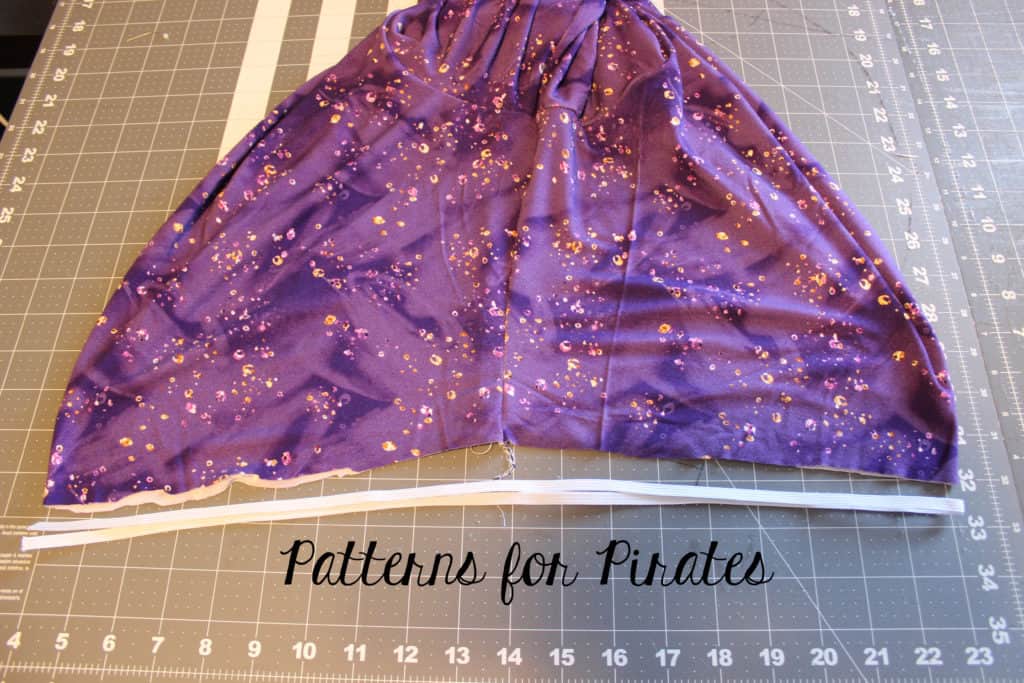
All you have to do now is attach the skirt to the Hepburn top following the Boundless (or Sunshine) tutorial. Boom! One top…so many new possibilities!


…..
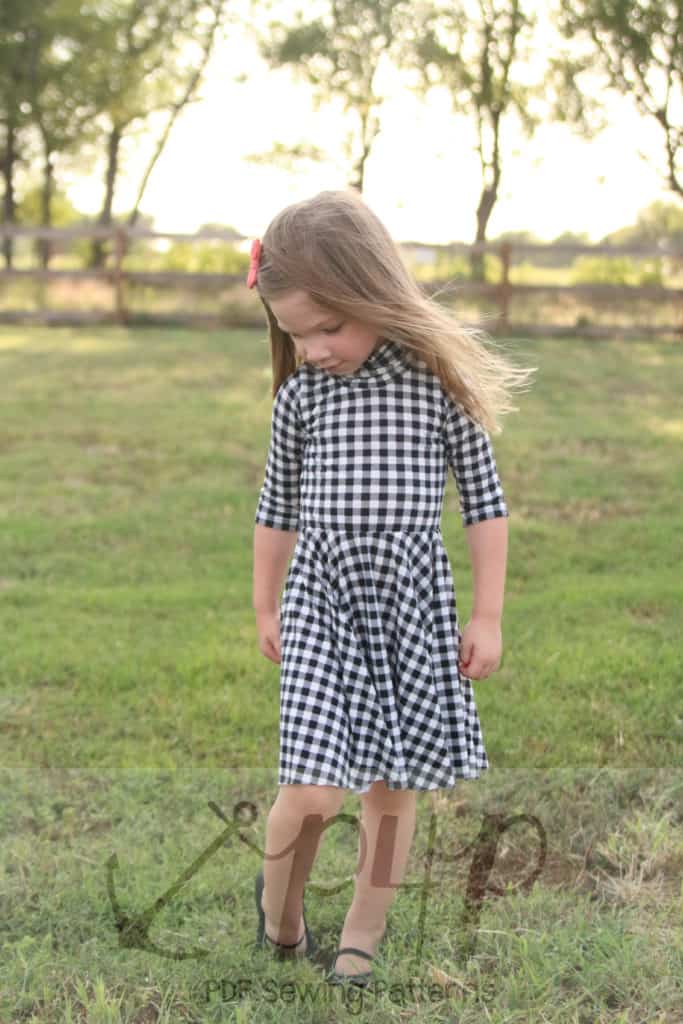
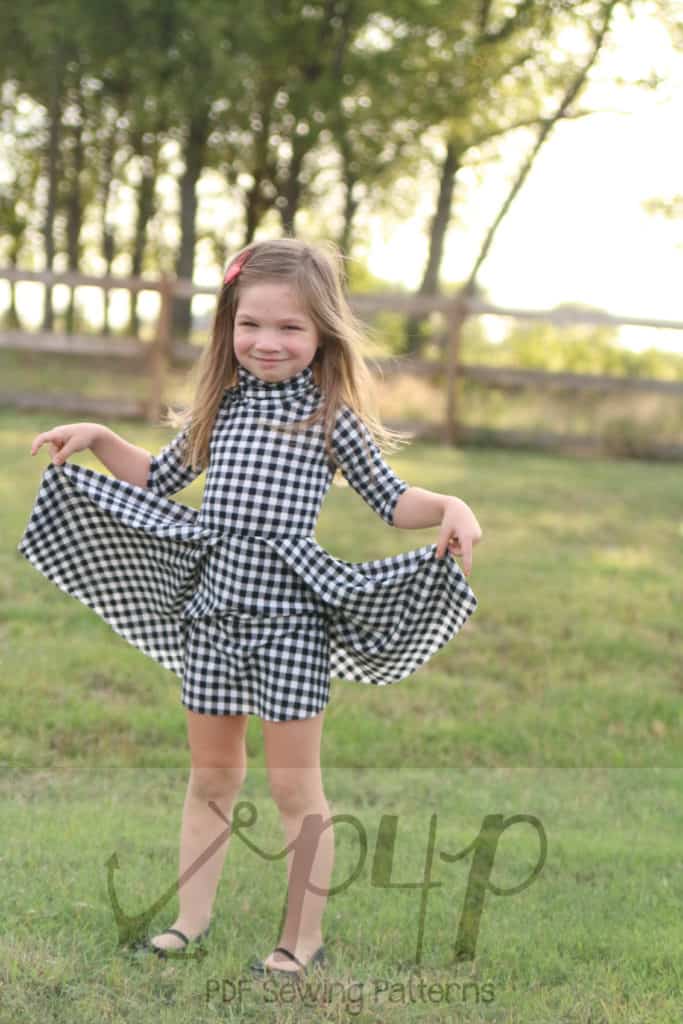
Hepburn / Sweetheart or Me Hearties mash

We could not end this hacks series without showing you how beautiful a Hepburn / Me Hearties (or Sweetheart) mash can be. Here is what how to get the look.
Judy has made he little star a 3/4″ sleeves, turtleneck crop top Hepburn and omitted hemming the bottom. Of course, you can choose any of the crop top styles included in the Hepburn pattern. Then she simply cut a Me Hearties circle skirt, sewed the side seams and hemmed the bottom.
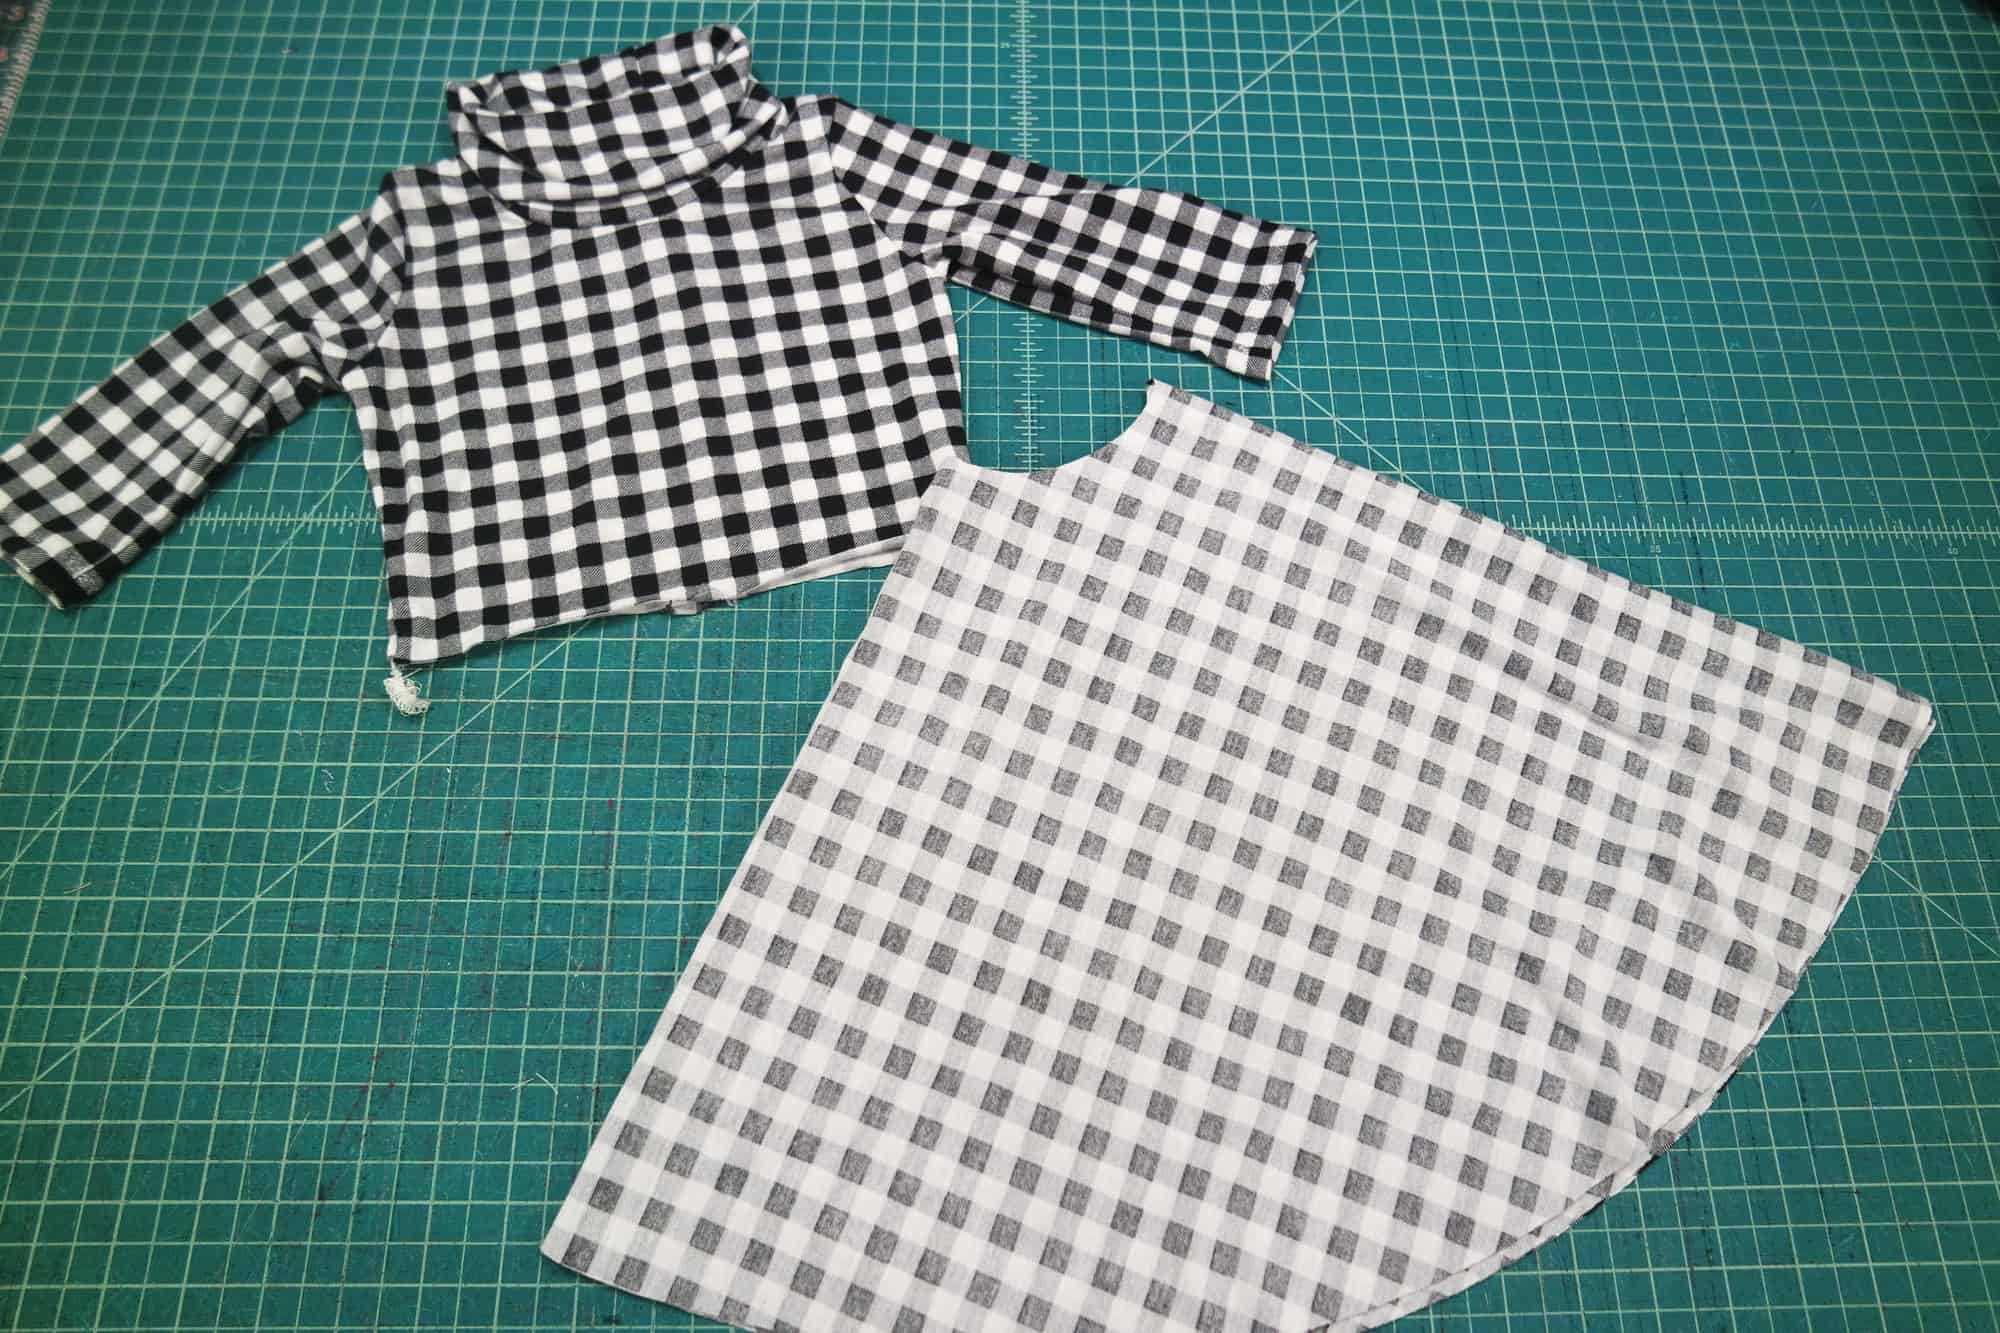
All that left to do it attach the skirt to the top, following the Me Hearties instructions. Don’t forget the seam allowance is 1/2″.
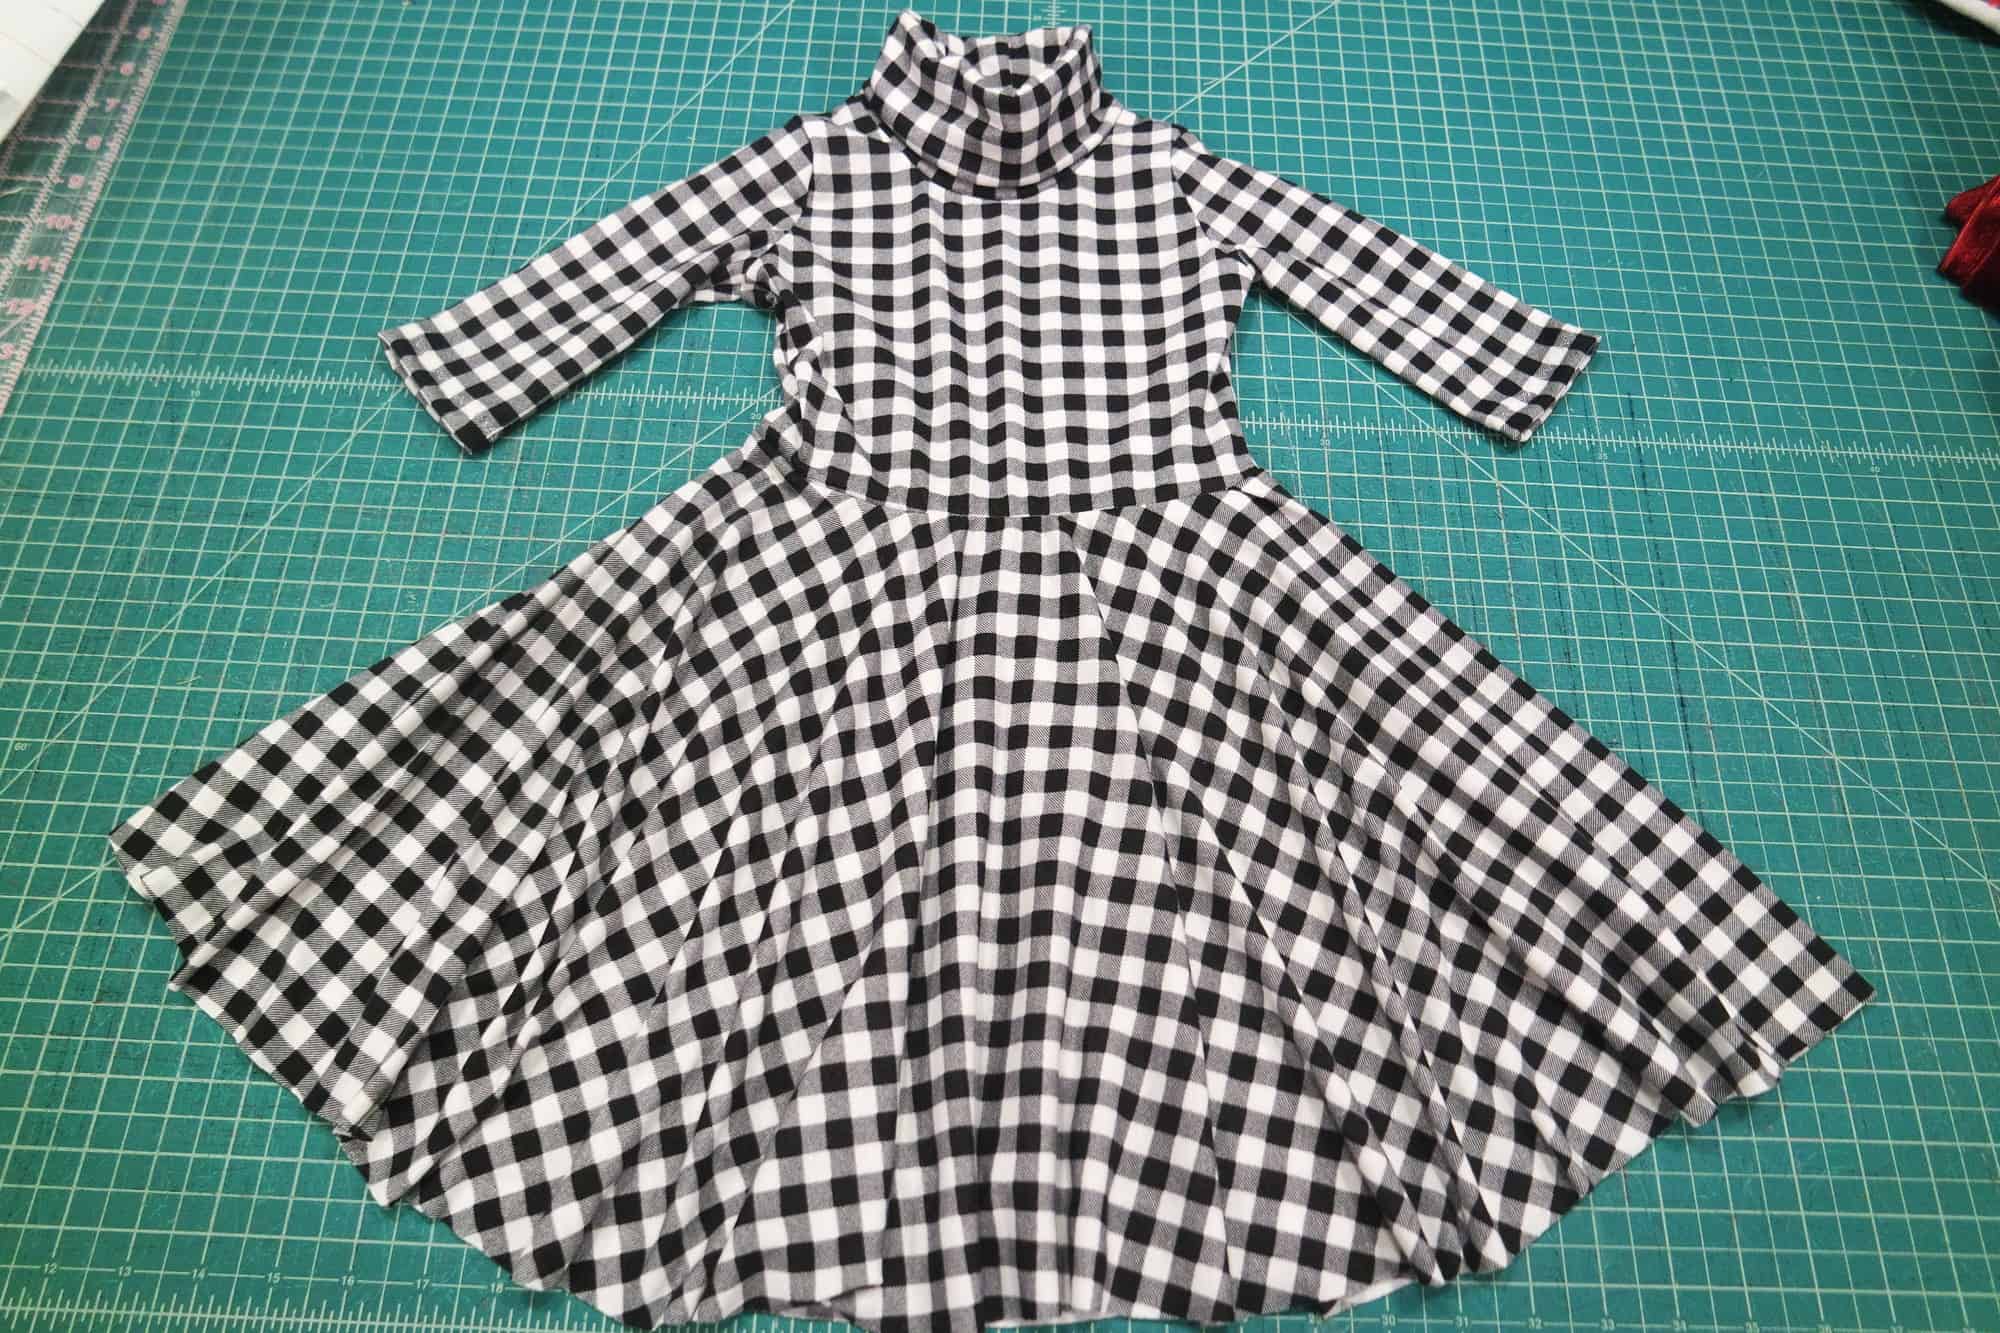
Now tell me this cutie is not making you want to sew a Hepburn/Sweetheart mash for you too. I know that’s my next project!
Hope you enjoyed these easy hack as much as we enjoyed making them for you! Time to get sewing and remember to post your creations in the Patterns for Pirates Facebook group so we can all admire them.


Leave a Reply